Lathe work
| John Baron | 16/05/2020 15:51:40 |
520 forum posts 194 photos | Hi Guys, I have a question ! If I set up a test bar in the four jaw chuck, in this case a known true 20 mm diameter bar 200 mm in length, so that I cannot measure any deviation when clocked at the chuck, but find that it is several thou out at the tailstock end 150 mm away. A micrometer tells me that the bar is exactly the same diameter along its length. Why ! |
| Pete Rimmer | 16/05/2020 15:57:09 |
| 1486 forum posts 105 photos | The bar might be 20mm round all the way along but it might not be straight. Apart from that the chuck might not be running true or the jaws might be worn or bell-mouthed. Try again with a different piece of stock (larger diameter the better), or flip it end for end. |
| Martin Connelly | 16/05/2020 16:13:02 |
2549 forum posts 235 photos | Tightening the jaws of a chuck on a bar rarely pulls it straight if it is not already straight. Set it true near the chuck and then tap the end away from the chuck with a soft faced mallet to get it to run true. Tighten the jaws fully and recheck. Martin C |
| Nigel McBurney 1 | 16/05/2020 17:16:56 |
1101 forum posts 3 photos | If it is essential to hold the bar the four jaw and the jaws are worn ,then either put some shim between the jaw and the work,on all four jaws try various thickness of shim until the the jaw grips at both ends. or hold in the four jaw chuck and support the outer end in the fixed steady,with the end of the bar running true ,centre drill the end, Then hold the work in the four jaw backed up with a rotating centre in the tailstock. Should you at some time aquire a new four jaw chuck,then use the new chuck for bar work which is gripped over the whole length of the jaw and other decent work,retain the old chuck and use it for gripping rough castings,bits of plate which have to be held a the very front of the jaws and where some abuse may be necessary. |
| John Baron | 16/05/2020 17:40:49 |
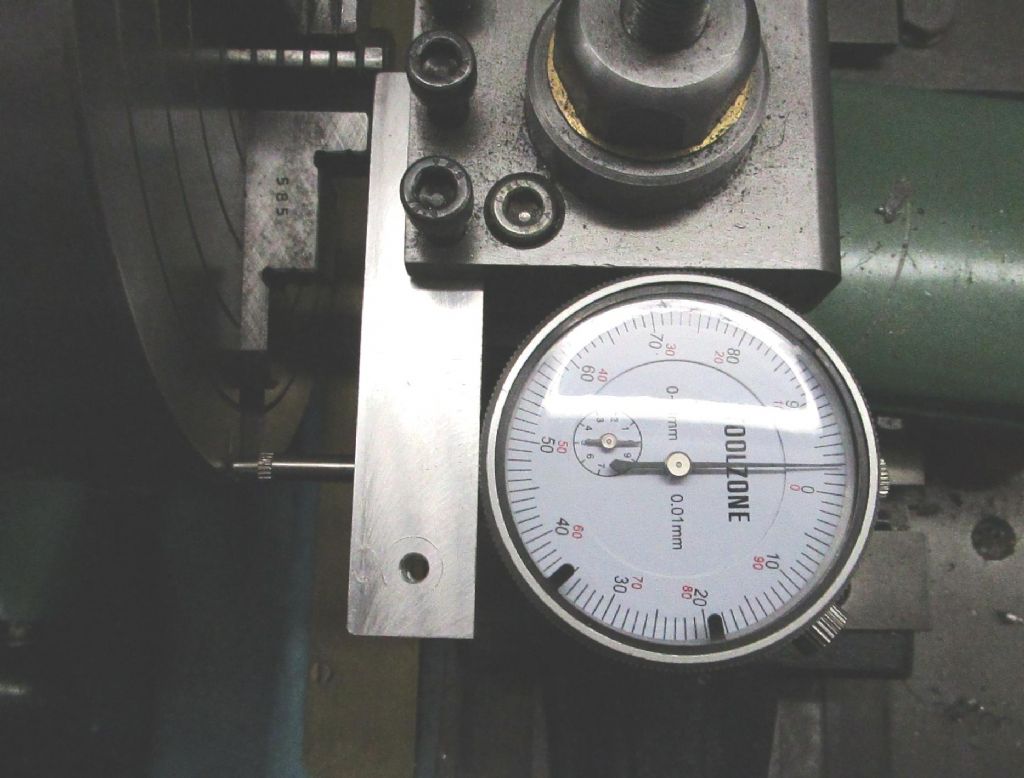
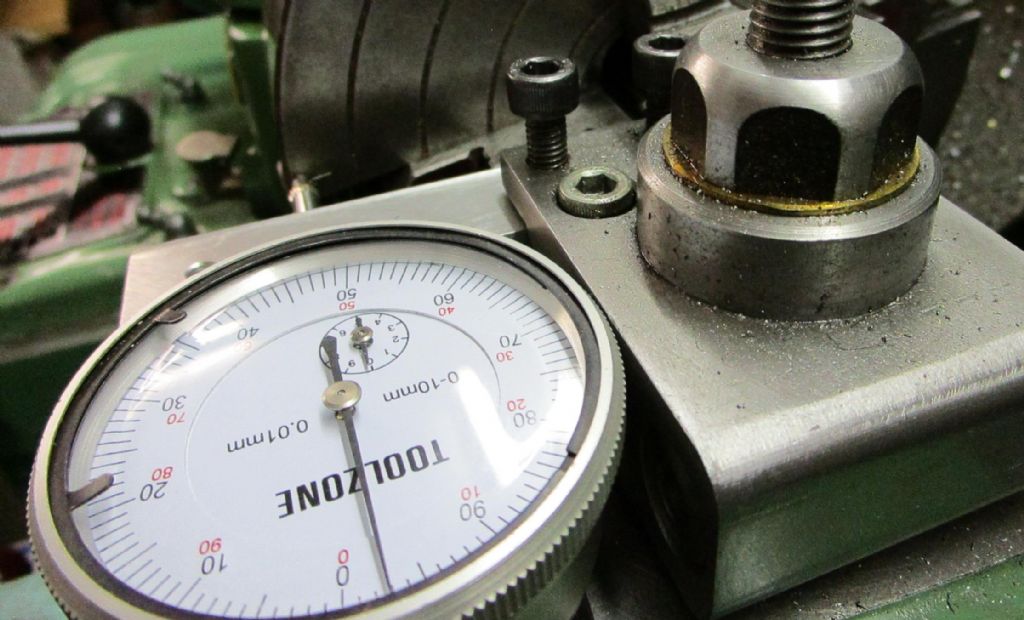
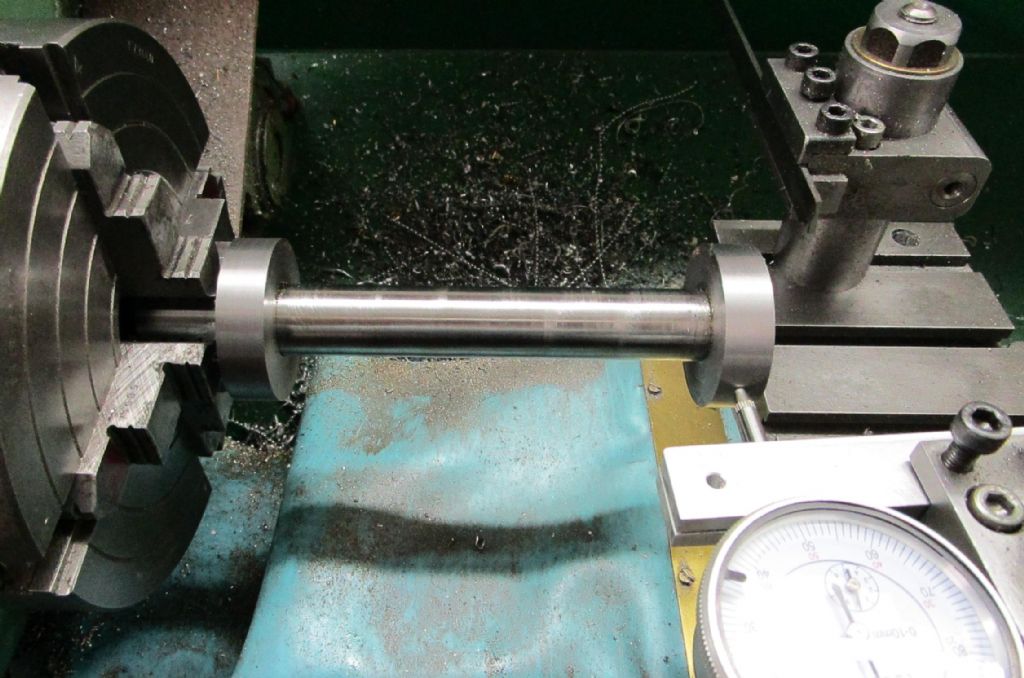
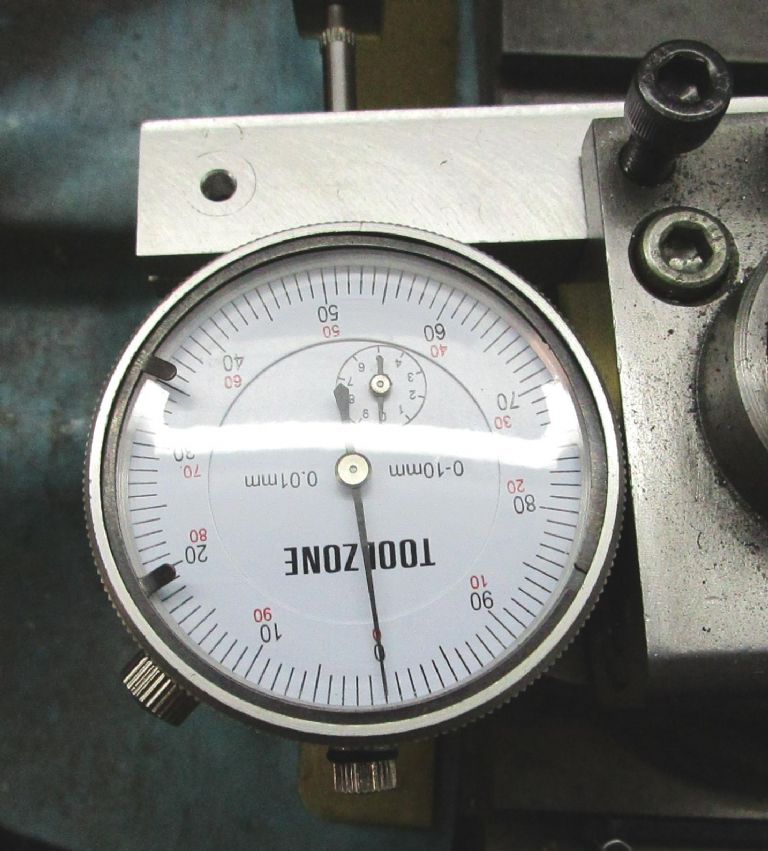
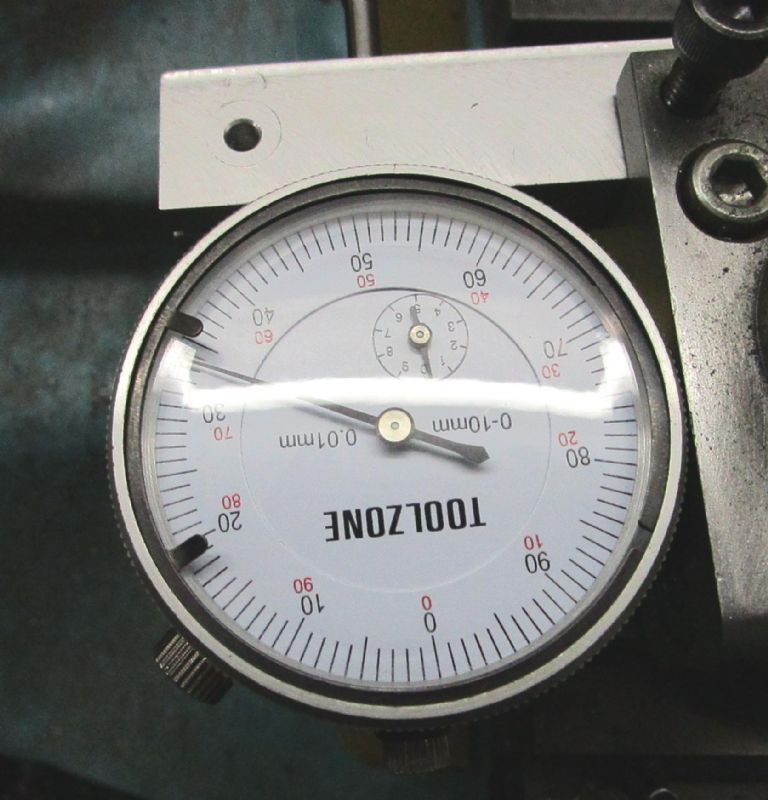
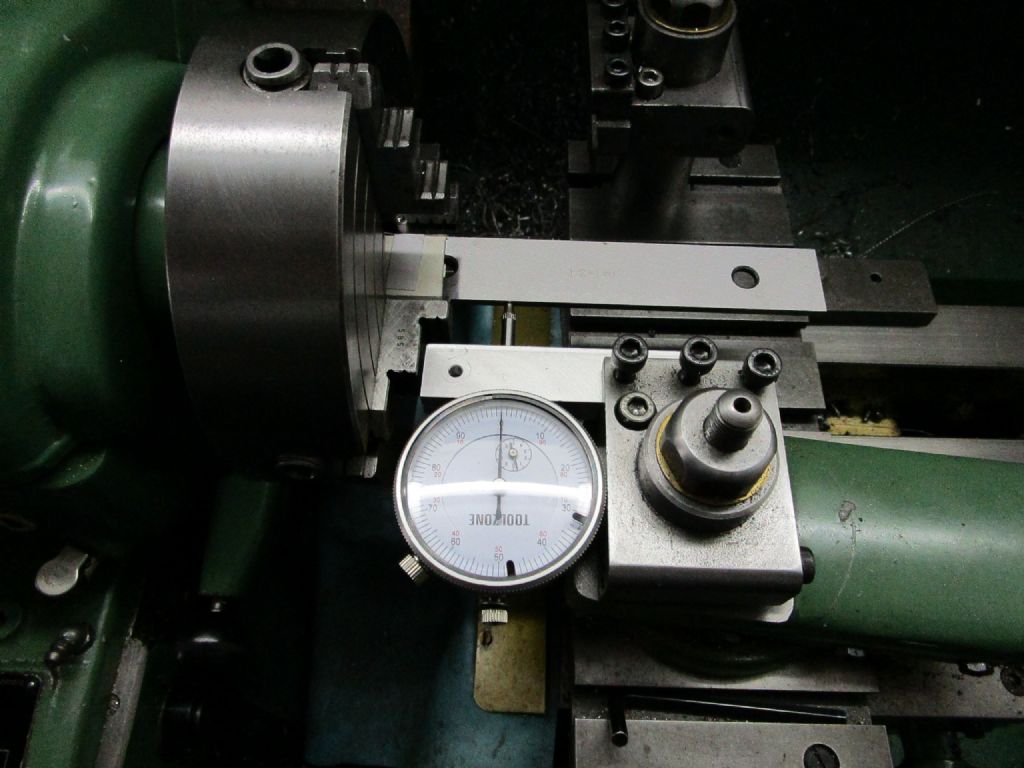
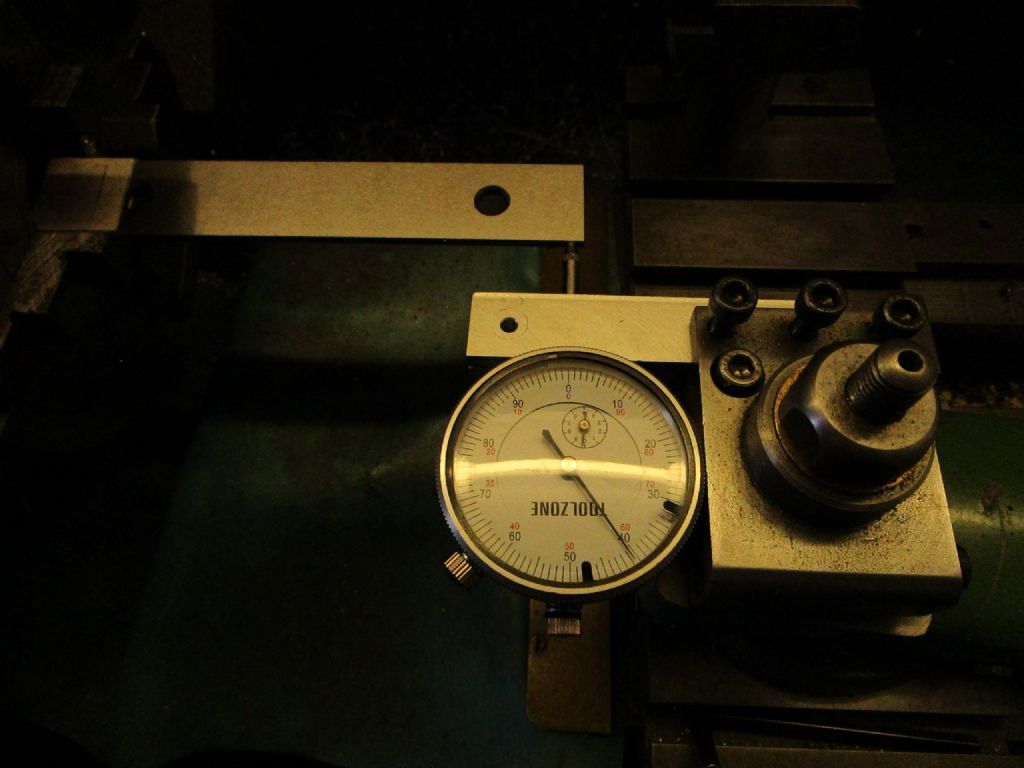
520 forum posts 194 photos | Hi Guys, Thanks for the replies. After I posted I thought I would go into the workshop and take some pictures. I've added notes under the pictures. This was the setup that I used to verify that the chuck was running true. The gauge isn't reading zero because I haven't started at this point. Same setup from another angle. There is less than a needle thickness variation when rotating the chuck. This chuck is the original Myford one that has not been used from new until recently even though its 40 years old. This is the two collar setup that I used. Those collars are 44.0 mm diameter within a couple of tenths of a thou. The shaft they are on is a piece of 20 mm hydraulic piston rod. This is the collar nearest to the chuck with the lathe rotating. This is the maximum deviation on the collar nearest the tailstock with the gauge zeroed. I did rotate the bar 90 degrees and remeasured. Oddly the amount of deviation barely changed. I can't get my head around why I see this behaviour. I only noticed this because I wanted to check that the lathe was still turning true.
Edited By John Baron on 16/05/2020 17:41:34 |
| old mart | 16/05/2020 17:56:28 |
| 4655 forum posts 304 photos | So both ends of the bar run true when the chuck is rotated, but the axis in plan view shows the headstock in not in line with the bed. I hope my understanding is correct. While you are set up, try the height of the bar from end to end also. |
| Martin Kyte | 16/05/2020 18:18:56 |
3445 forum posts 62 photos | Looks like the beds twisted. I bet if you took a skim off those collars they would end up different diameters. You need to adjust the lathe mounting. regards Martin |
| Pete Rimmer | 16/05/2020 18:28:41 |
| 1486 forum posts 105 photos | Ok for that setup to return a reliable result you need to have turned both collars AND the piece of bar that's held in the chuck whilst holding the bar between centres, and verified that the collars are both exactly the same diameter after turning. Otherwise you do not know that the two collars are perfectly co-axial to the bar centreline. Otherwise, if you're 100% sure that the bar is not bent try the dial gauge directly on the bar. Edited By Pete Rimmer on 16/05/2020 18:29:52 |
| old mart | 16/05/2020 18:31:23 |
| 4655 forum posts 304 photos | Yes, twisted is a distinct possibility, and easier to correct than moving the head. |
| John Baron | 16/05/2020 19:28:26 |
520 forum posts 194 photos | Posted by old mart on 16/05/2020 17:56:28:
So both ends of the bar run true when the chuck is rotated, but the axis in plan view shows the headstock in not in line with the bed. I hope my understanding is correct. While you are set up, try the height of the bar from end to end also.
Not quite. If I choose the closest point to the tool holder on the tail end collar and rotate the chuck the dial gauge reading moves to just over 30 divisions at the furtherest point. Now I did rotate the test bar 90 degrees and the reading stayed the same, so the test bar is straight. Actually I tried rolling the two collar bar down a flat surface to see if it followed a curve. For all intents an purposes it doesn't. Answering some other comments. The lathe bed is not twisted ! That two collar test bar was skimmed in the soft jaws of the three jaw chuck and the collars are within a couple of tenths of a thou of each other. One thing that does bother me though, is that I can true the end collar to read dead true, but when I come back to the chuck end, I'm back to it not being true, though its not as great a deviation, only about half that. I'm about ready to bang my head against the wall...
|
| old mart | 16/05/2020 20:57:50 |
| 4655 forum posts 304 photos | Have you bored the soft jaws to take the test bar? |
| Hopper | 16/05/2020 22:54:26 |
7881 forum posts 397 photos | Posted by John Baron on 16/05/2020 19:28:26:
... I can true the end collar to read dead true, but when I come back to the chuck end, I'm back to it not being true, though its not as great a deviation, only about half that. Sounds like your chuck jaws are bellmouthed and the job is able to move about a bit. |
| Perko7 | 16/05/2020 23:14:52 |
| 452 forum posts 35 photos | IMO either the headstock is not exactly aligned with the bed, or the bed is not straight, or the carriage is not running true on the bed. Is there some movement in the carriage at either end of it's travel? Did you take up any slack in the carriage before measuring? Do you use the leadscrew or the carriage handle to move the carriage? Either of these can introduce very small variations in carriage alignment. Does the test bar line up with a centre in the tailstock? If you run the test bar between centres do you get the same result? A few more tests like these will eventually direct you to the source of the error. |
| Hopper | 17/05/2020 02:37:45 |
7881 forum posts 397 photos | Lathe aligment seems ok as he says a skim cut across both collars shows no taper. |
| John Baron | 17/05/2020 04:35:58 |
520 forum posts 194 photos | Posted by old mart on 16/05/2020 20:57:50:
Have you bored the soft jaws to take the test bar? Thanks for the comments Guys. Yes ! I have also checked the original piece of hydraulic piston rod in the soft jaws. It measures the same at both ends, so its not bent. Hopper: I'm coming to a similar conclusion ! However the chuck is essentially new and unused. I need to do some further checks on the chuck. I'm happy that the face is flat and true, but I want to check the slots on the chuck and the jaws themselves. I've a suspicion that the problem is something to do with the jaws. Though at the moment I'm not sure how I would do that.
|
| Michael Gilligan | 17/05/2020 06:27:32 |
23121 forum posts 1360 photos | Posted by John Baron on 16/05/2020 17:40:49:
Hi Guys, […] This chuck is the original Myford one that has not been used from new until recently even though its 40 years old. . So that’s presumably the 6” lightweight chuck that Burnerd made specially for Myford. They are usually excellent ... but the defining word is lightweight Hopper’s suggestion of bell-mouthed jaw[s] is certainly worth checking thorougly Some ground stock and a pack of Plastigauge would seem to be a very good start. MichaelG. . Edit: ___ ‘ere we go: https://plastigauge.co.uk/about/how-plastigauge-works/ Edit: ___ The genuine product does seem “reassuringly expensive” ... so it might be worth searching for a clone. Edited By Michael Gilligan on 17/05/2020 06:30:36 Edited By Michael Gilligan on 17/05/2020 06:36:01 |
| Hopper | 17/05/2020 08:09:22 |
7881 forum posts 397 photos | Or just grip the bar lightly in the chuck and see if you can wobble the far end about or see if there is daylight visible at the front ends of the jaws. Also check chuck is firmly seated on the collar on the spindle and the face there. And check headstock bearings, again by grasping end of bar and measureing with dial indicator up and down movement of the spindle. Or try wrapping a piece of paper or even a strip of emery cloth around the job where the jaws grab and tighten up the jaws and see if the wobble is reduced or eliminated. You can also check the jaws with an engineer's try square to see the gripping surface is square to the dovetail surface that runs in the chuck.
Edited By Hopper on 17/05/2020 08:14:15 |
| Pete Rimmer | 17/05/2020 09:45:57 |
| 1486 forum posts 105 photos | Ok, there are a couple of things to point out here from the various comments.
Given that the bar is turning true at the chuck jaws but not turning true further out I see several possibilities.
Can't think of anything else that could be the cause, but someone else might. |
| John Baron | 17/05/2020 10:45:57 |
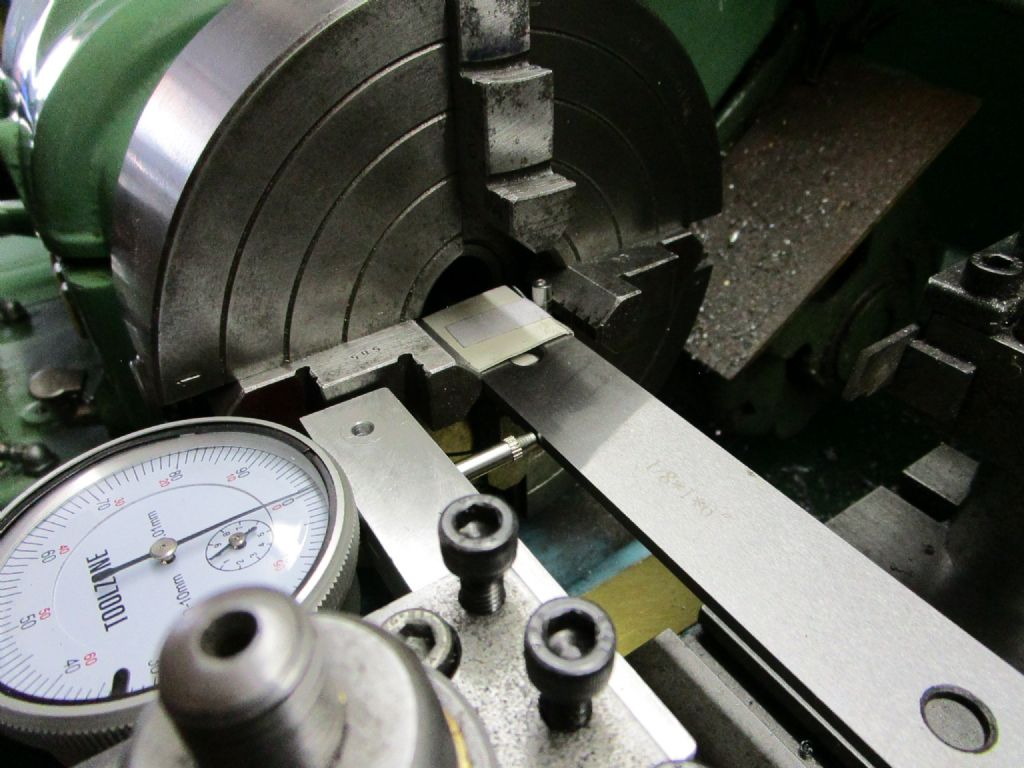
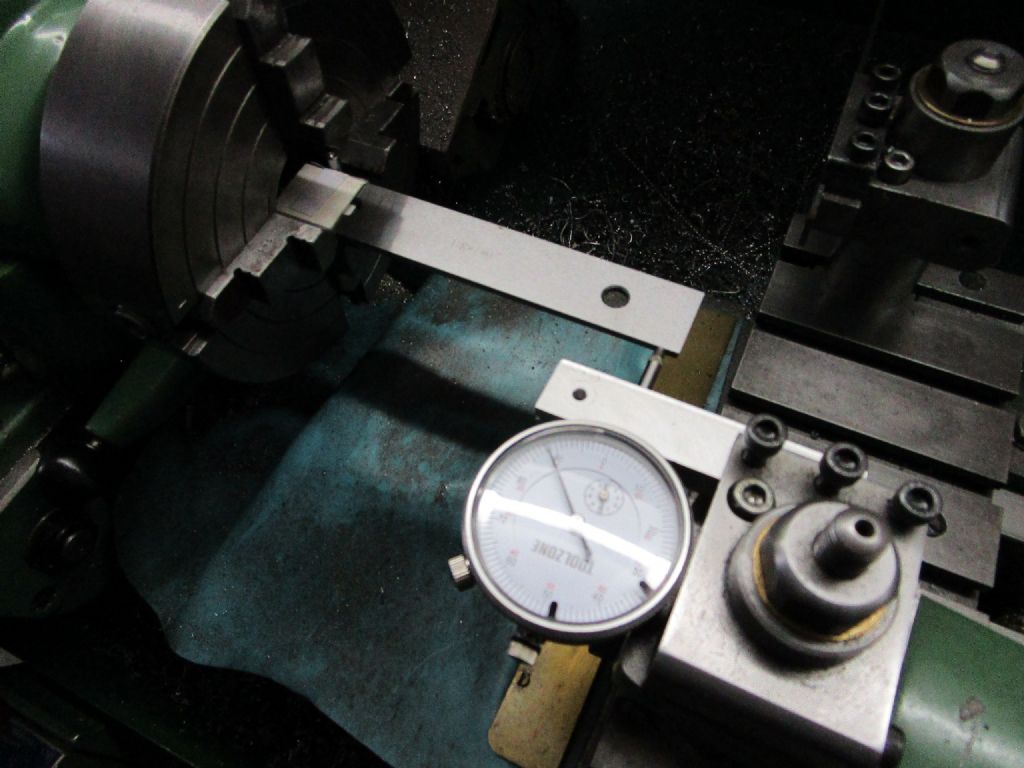
520 forum posts 194 photos | Hi Guys, Pete is the winner I think. [quote] The chuck body runs true but the jaws do not hold the part straight. If all of the above check out OK, this is the last option.[/quote] Comments below the pictures. By the way I somehow managed to take a video but the forum won't let me upload it. I used a 1" inch parallel to check how straight the jaw was. I used a piece of postcard and a small dowel to hold the parallel tight up against the jaw face. I set the dial gauge so that it was level with the edge of the parallel. In this picture you can see the arrangement. This is jaw No:4. I used the lower jaw to support the parallel. In this picture I've run the dial gauge down to the end of the parallel. It shows that its moved away by about 0.6 mm. Sorry about the colour, fluorescent lighting. This jaw No1 was the worst one. I stopped taking pictures at this point. All the jaws have some runout when measured in this way ! I'm not sure why but they all seem to run away from the tool holder. The worst ones were jaws 1 and 2. When I gripped the parallel by the flat sides you could see that the indentations in the cardboard were deeper on one side.
It also explains why I can set the work piece true at either end and its out at the other.
So it seems that I've got the source of the problem... badly or wrongly ground jaws. After all this time I doubt that there is any point in having a word with Pratt Burnard.
To answer some questions: Yes the chuck is the original slim body one that was supplied with the lathe when I bought it directly from Myford. They arranged with Denford to deliver and set the lathe up. At the time Denford made bridgeport mini mills that were badged and sold by Myford. Its had three homes since I bought it.
Thanks for all the comments and suggestions. Now to think about what I'm going to do about it.
Edited By John Baron on 17/05/2020 10:48:16 |
| Bazyle | 17/05/2020 10:55:37 |
6956 forum posts 229 photos | Just because a chuck is new it doesn't mean it will be perfectly aligned to the spindle nor that it's jaws will hold something true to the body without adjustment as mentioned in an early post. Even a collet doesn't do that. |
Please login to post a reply.
Want the latest issue of Model Engineer or Model Engineers' Workshop? Use our magazine locator links to find your nearest stockist!
Sign up to our newsletter and get a free digital issue.
You can unsubscribe at anytime. View our privacy policy at www.mortons.co.uk/privacy
- hemingway ball turner
04/07/2025 14:40:26 - *Oct 2023: FORUM MIGRATION TIMELINE*
05/10/2023 07:57:11 - Making ER11 collet chuck
05/10/2023 07:56:24 - What did you do today? 2023
05/10/2023 07:25:01 - Orrery
05/10/2023 06:00:41 - Wera hand-tools
05/10/2023 05:47:07 - New member
05/10/2023 04:40:11 - Problems with external pot on at1 vfd
05/10/2023 00:06:32 - Drain plug
04/10/2023 23:36:17 - digi phase converter for 10 machines.....
04/10/2023 23:13:48 - More Latest Posts...
- View All Topics
- Reeves** - Rebuilt Royal Scot by Martin Evans
by John Broughton
£300.00 - BRITANNIA 5" GAUGE James Perrier
by Jon Seabright 1
£2,500.00 - Drill Grinder - for restoration
by Nigel Graham 2
£0.00 - WARCO WM18 MILLING MACHINE
by Alex Chudley
£1,200.00 - MYFORD SUPER 7 LATHE
by Alex Chudley
£2,000.00 - More "For Sale" Ads...
- D1-3 backplate
by Michael Horley
Price Not Specified - fixed steady for a Colchester bantam mark1 800
by George Jervis
Price Not Specified - lbsc pansy
by JACK SIDEBOTHAM
Price Not Specified - Pratt Burnerd multifit chuck key.
by Tim Riome
Price Not Specified - BANDSAW BLADE WELDER
by HUGH
Price Not Specified - More "Wanted" Ads...
Do you want to contact the Model Engineer and Model Engineers' Workshop team?
You can contact us by phone, mail or email about the magazines including becoming a contributor, submitting reader's letters or making queries about articles. You can also get in touch about this website, advertising or other general issues.
Click THIS LINK for full contact details.
For subscription issues please see THIS LINK.
Model Engineer Magazine
- Percival Marshall
- M.E. History
- LittleLEC
- M.E. Clock
ME Workshop
- An Adcock
- & Shipley
- Horizontal
- Mill
Subscribe Now
- Great savings
- Delivered to your door
Pre-order your copy!
- Delivered to your doorstep!
- Free UK delivery!



 Register
 Log-in


