lathe spindle runout
| gerry madden | 01/03/2020 12:34:13 |
| 331 forum posts 156 photos | Hi All, Here's a question I haven't seen asked before. Today I was just trueing up both sides of a faceplate and marking it so I can mount it in the same rotational orientation next time I fit it. But would it not be a little more sensible to skim the spindle flange face before trueing the faceplate ? The lathe came with a certificate indicating its spindle flange face runout. (I cant recall the figure now but it was probably in the order of 5um or so.) This figure will be an accumulation of several things: basic machining errors on the spindle, runouts in the bearings and runouts from assembly error. These are maintained unless the spindle is dismantled and rebuilt slightly differently. So providing I don't dismantle the spindle, by skimming the spindle's face I can remove all of these errors and reduce the measurable face runout to nominally zero. This can only improve the runout and wobble on any subsequently fitted part such as a chuck, and remove the need to orientate the fitments, cant it ? And if so, why wouldn't a manufacturer do it ? Perhaps I'm missing something ? Gerry. |
| not done it yet | 01/03/2020 12:41:33 |
| 7517 forum posts 20 photos | 5 micro metres? Could you ‘skim’ it any better? If it is a chinese certificate, it may not be worth the paper it is written on. Edited By not done it yet on 01/03/2020 12:42:56 |
| not done it yet | 01/03/2020 12:41:34 |
| 7517 forum posts 20 photos | deleted. Edited By not done it yet on 01/03/2020 12:41:57 |
| gerry madden | 01/03/2020 12:53:35 |
| 331 forum posts 156 photos | NDIY - it isn't Chinese, but if it were, and 'not worth the paper', all the more reason to skim ? |
| JasonB | 01/03/2020 13:05:19 |
25215 forum posts 3105 photos 1 articles | It may well have had some sort of hardening treatment so watch that any skim you take does not push the tool off and possibly give you a worse finish than you started with. Also and spigot or short taper that locates the backplates may also need to be trued to the skimmed flange making it smaller which would mean all new backplates, etc. |
| Andrew Johnston | 01/03/2020 13:23:17 |
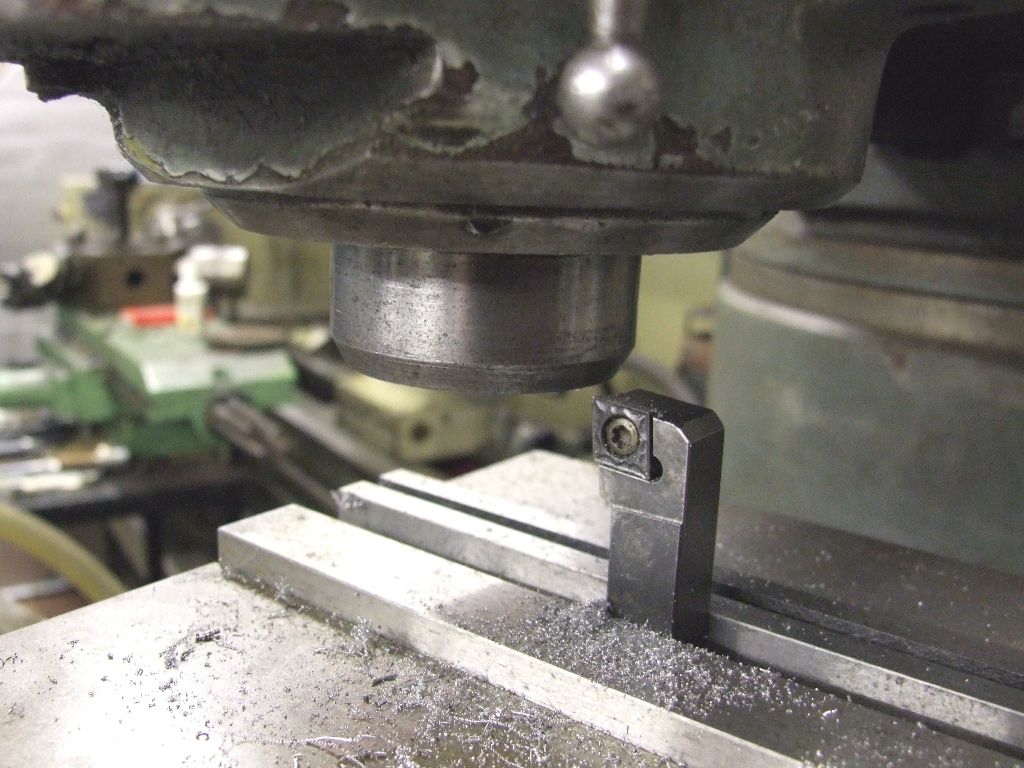
7061 forum posts 719 photos | Two issues; first how do you know that a skim will produce a "zero" result? And second cost, it would be time consuming, and hence expensive, to do. As Jason says the spindle should be hardened, which makes it more difficult to turn. Will the cross slide travel in a straight line perpendicular to the spindle axis to considerably better than 5um? Probably not, and the cross slide should turn from parallel to slightly concave. So it may not even be aligned. Manufacturers aim to make parts to fit together to achieve an acceptable level of accuracy without the need for fitting on the job. Didn't the original Myford do a lot of fitting, with it's attendent costs? I wonder what happened to them? Having said all that I have skimmed the nose of my Bridgeport spindle: But it was out by a lot more than 5um. Of course in normal use the run out on the nose doesn't matter. But I make extensive use of the Tormach TTS tool system which relies upon the spindle nose to provide consistent positioning for tool length calculations. If the spindle nose isn't true then the tool wobbles. Andrew |
| HOWARDT | 01/03/2020 13:37:43 |
| 1081 forum posts 39 photos | Each part in the tool mount train will be manufactured to a tolerance. While the tolerances are tight there will always be some degree of geometric variation introduced at the tool point or workpiece, even bar material is not truely round or square. Achieving near zero is done by tuning the final mount, so both the tool and the workpiece are true to each other. There has been discussions on this forum last year on machine tolerance. |
| Michael Gilligan | 01/03/2020 14:39:12 |
23121 forum posts 1360 photos | Gerry, I believe the test you mention is what Dr Schlesinger describes as: Work spindle for axial slip, measured at 2 points, displaced by 180° ... if so, five microns would be acceptable for a Toolroom grade lathe. You may want [or even need] better ; but I think that would likely require that the face be ground, or lapped, in situ. MichaelG |
| old mart | 01/03/2020 17:22:19 |
| 4655 forum posts 304 photos | It would be worth actually checking the spindle runout, but if it is 5 microns, then leave it well alone. I was lucky to get hold of a 9" faceplate cheap on ebay which I was 90% sure was a genuine Smart & Brown one. It was, and when fitted, it ran 0.0005" tir at the periphery which saved me the trouble of skimming it. |
| gerry madden | 01/03/2020 20:25:28 |
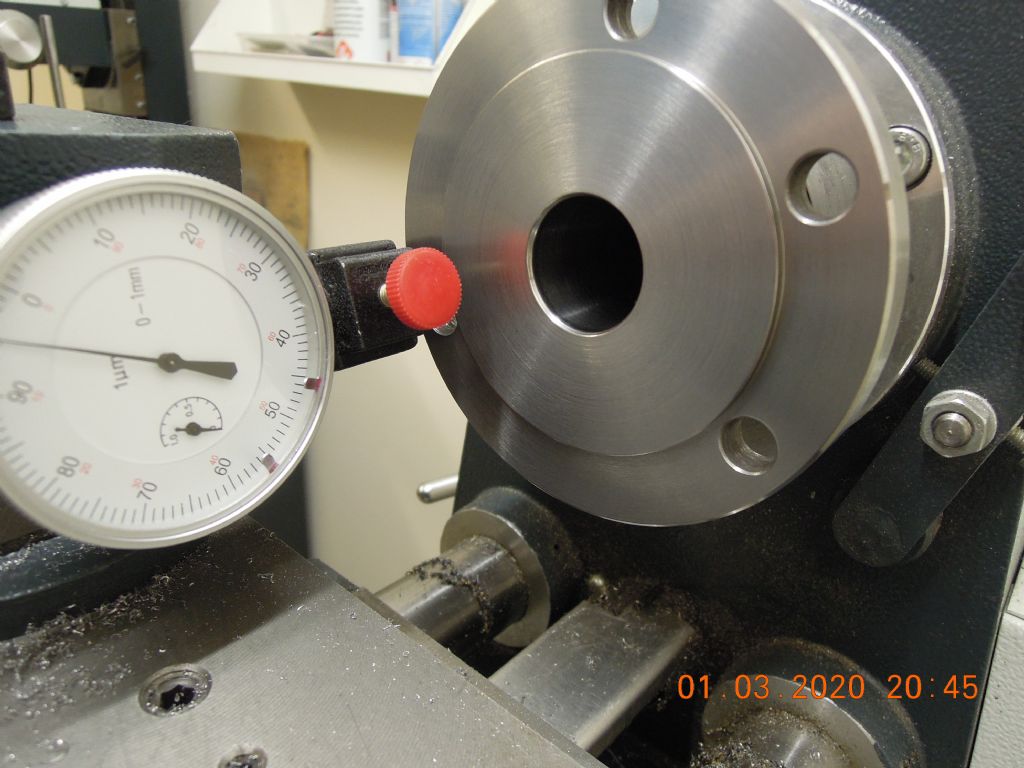
| 331 forum posts 156 photos | Thanks all for your comments. I have to admit to having a bit of a thing about precision so I would have probably given it a go anyway The intermittent cut from the bolt holes wasn't detectable at all and I was careful not to touch the spigot diameter. The 0.2 rad on the tip appeared to match the existing one quite well too. I then tried to remeasure the flange runout like this:- ...and guess what.... it wasn't much better than it was before despite the significantly improved surface finish. What I could see though was that the runout was absolutely not synchronised with the rotation of the spindle. So there are literally other forces at play here - possibly variations in drive belts or drive train making the spindle do strange things. Well no harm done and a few things leaned. A good way to finish a wet Sunday. Gerry.
|
| Hopper | 01/03/2020 23:46:49 |
7881 forum posts 397 photos | Posted by gerry madden on 01/03/2020 20:25:28: .. it wasn't much better than it was before despite the significantly improved surface finish. What I could see though was that the runout was absolutely not synchronised with the rotation of the spindle. So there are literally other forces at play here - possibly variations in drive belts or drive train making the spindle do strange things. Well no harm done and a few things leaned. A good way to finish a wet Sunday. Gerry.
One of the reasons 1um dial gauges and not guns should require licenses. You can spend your whole life chasing your tail with them in the home workshop. You probably should have adjusted your headstock bearings first. If they are tapered roller etc and the end float/preload is not set right, your spindle will be all over the place. Also you should run the lathe for half an hour to warm up the spindle and bearings to operating temps before taking a reading. An elephant foot probe on the dial gauge would help it being influenced quite so much by surface finish. I reckon I would use a HSS tool bit for such fine cuts too. The carbide can skate a bit on light cuts, which might be giving you your 5um variation. Possibly. But if you've got it within 5um and Mr Schlessinger is happy with that, best leave it well alone and call it job well done. |
| Martin Kyte | 02/03/2020 09:25:15 |
3445 forum posts 62 photos | If I were you I would leave the spindle well alone and skim your face plate as you suggest. If you find you really must have a faceplate as true as you can get it for a special job you can always reskim as neccessary before you mount your work. the only time I have every felt the need to do this was when monting 2 faceplates face to face to give a female myford nose mounting to turn a spindle for a dividing head. regards Martin |
| not done it yet | 02/03/2020 10:14:46 |
| 7517 forum posts 20 photos | Posted by gerry madden on 01/03/2020 12:53:35:
NDIY - it isn't Chinese, but if it were, and 'not worth the paper', all the more reason to skim ? Not for ~5 microns it ain’t - and that is likely the maximum. Not for me, anyway - I don’t even have the kit to measure much better than that, let alone try to do much better by adjustment of an ‘unknown’ quantity. |
| gerry madden | 02/03/2020 10:36:00 |
| 331 forum posts 156 photos | Hi Hopper, thanks for your comment. The spindle bearings are fine. They are taper rollers and positively preloaded. With the spindle stationary, using the micron DI its easy to see the elastic deflection as one pushes and pulls the spindle axially. Rough estimate was that the deflections are about 2um/Kgf in both directions and it returns exactly to the centre position when unloaded which confirms no clearance in the assembly. That's deflection figure is probably a bit too compliant for TRs so I suspect that a good part of that elastic deflection is deflection in the aluminium structure walls in which they are mounted. Absolutely agree on the elephants foot. I didn't think of that ! Will give it a try later. Gerry |
| Hopper | 02/03/2020 11:36:42 |
7881 forum posts 397 photos | Interesting. Let us know how it goes. |
| Martin Connelly | 02/03/2020 12:51:16 |
2549 forum posts 235 photos | Quote attributed to Voltaire. Quote Martin C |
| Hopper | 02/03/2020 13:01:52 |
7881 forum posts 397 photos | Assuming too that tests are done with spindle rotated by hand, no belts or power on the spindle. And what kind of lathe is that? I had thought it was something larger and heavier for some reason, but looking at your posted pics, seems unusual with the round bars for bed ways. Is it a little Unimat or some such? In which case, not sure how relevant industrial Schlessinger limits etc might be. No wonder you can measure some movement in the spindle axially even with bearings nipped up. I see what you mean about possible flex in the alloy bearing housing now. |
| JasonB | 02/03/2020 13:23:12 |
25215 forum posts 3105 photos 1 articles | It's a Wabeco You mention that the runout is not even, has the lathe been sitting for a long time and the belt taken a "set" which could give that sort of reading and again all the more reason to run it for a good half hour or so before taking readings more so if your workshop is not that warm. |
| mgnbuk | 02/03/2020 13:34:32 |
| 1394 forum posts 103 photos | What I could see though was that the runout was absolutely not synchronised with the rotation of the spindle. I have seen this once before on a Timken crossed roller bearing, and it was the bearing that was the cause. Application was a vertical borer table bearing and, when checked, the axial runout was within limits (0.04mm at 1500mm diameter). The machine had been rebuilt & the table bearing had been refurbished by a bearing specialist - inner & outer races reground & new rollers made - as a replacement bearing was on 2 years delivery. The machine had been accepted after machining trials on the customer's own components (quite thin disc hub forgings in titanium & nimonics) & I was having a leisurely breakfast before flying home when there was a call from the customer with a surface finish problem on a much higher job they had taken in & run overnight. After much checking I found that while the axial runout at the table outer edge was always within limits, the actual reading at each point varied if multiple turns were made - easily seen as I marked the DTI reading in marker pen at each measuring point. Turned out that the bearing refurb company had not made the replacement rollers accurately enough (discussions with Timken revealed they used rollers matched to within 1 micron) and, as the rollers move around when the bearing rotates, the individual rollers under the measuring points were different each time. Not enough to show a surface finish problem on low parts, but visible on the tall part. The bearing was swapped out for one from another machine being rebuilt & this one gave consistent results over multiple rotations - surface finish on the component was then OK. The "dodgy" bearing got a set of more consistent rollers & that also performed OK when mounted. Do you know what the spindle bearings are that are fitted (part number & precision class) ? Axial runout is one of the variables that is tightened up with higher precision bearings & the allowed values vary with bore diameter. Nigel B. |
| Martin Kyte | 02/03/2020 13:54:46 |
3445 forum posts 62 photos | I've never really been convinced that anything like all of the run out in many cases is actually the spindle rather than the mounting point of the dial gauge wandering around, particularly when the gauge is mounted in the toolpost. Removing belts should help as has been mentioned above, but a gauge mounted on the headstock casting would be more convincing. Resting your arm on the tailstock of most Myfords will shift the toolpost out of line by a few 10's of a thou. regards Martin |
Please login to post a reply.
Want the latest issue of Model Engineer or Model Engineers' Workshop? Use our magazine locator links to find your nearest stockist!
Sign up to our newsletter and get a free digital issue.
You can unsubscribe at anytime. View our privacy policy at www.mortons.co.uk/privacy
- *Oct 2023: FORUM MIGRATION TIMELINE*
05/10/2023 07:57:11 - Making ER11 collet chuck
05/10/2023 07:56:24 - What did you do today? 2023
05/10/2023 07:25:01 - Orrery
05/10/2023 06:00:41 - Wera hand-tools
05/10/2023 05:47:07 - New member
05/10/2023 04:40:11 - Problems with external pot on at1 vfd
05/10/2023 00:06:32 - Drain plug
04/10/2023 23:36:17 - digi phase converter for 10 machines.....
04/10/2023 23:13:48 - Winter Storage Of Locomotives
04/10/2023 21:02:11 - More Latest Posts...
- View All Topics
- Reeves** - Rebuilt Royal Scot by Martin Evans
by John Broughton
£300.00 - BRITANNIA 5" GAUGE James Perrier
by Jon Seabright 1
£2,500.00 - Drill Grinder - for restoration
by Nigel Graham 2
£0.00 - WARCO WM18 MILLING MACHINE
by Alex Chudley
£1,200.00 - MYFORD SUPER 7 LATHE
by Alex Chudley
£2,000.00 - More "For Sale" Ads...
- D1-3 backplate
by Michael Horley
Price Not Specified - fixed steady for a Colchester bantam mark1 800
by George Jervis
Price Not Specified - lbsc pansy
by JACK SIDEBOTHAM
Price Not Specified - Pratt Burnerd multifit chuck key.
by Tim Riome
Price Not Specified - BANDSAW BLADE WELDER
by HUGH
Price Not Specified - More "Wanted" Ads...
Do you want to contact the Model Engineer and Model Engineers' Workshop team?
You can contact us by phone, mail or email about the magazines including becoming a contributor, submitting reader's letters or making queries about articles. You can also get in touch about this website, advertising or other general issues.
Click THIS LINK for full contact details.
For subscription issues please see THIS LINK.
Model Engineer Magazine
- Percival Marshall
- M.E. History
- LittleLEC
- M.E. Clock
ME Workshop
- An Adcock
- & Shipley
- Horizontal
- Mill
Subscribe Now
- Great savings
- Delivered to your door
Pre-order your copy!
- Delivered to your doorstep!
- Free UK delivery!


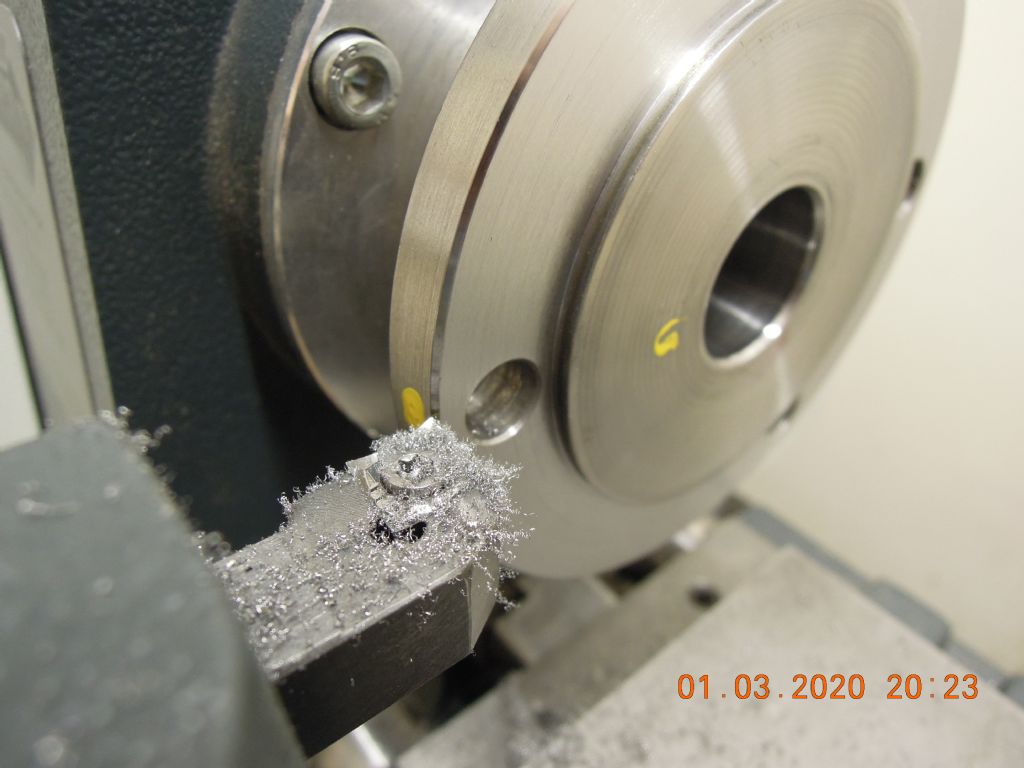
 . I did however try to measure the actual runout first but that wasn't that particularly successful due to pretty poor surface finish on the flange. But overall it looked to be about 5um including the chatter. So I proceeded to make a very light cut starting on the bolt pcd then moving in and out to cover the whole flange. Considering the lightness of the cut I expected to see areas appearing that were not cleaned up. But there weren't any, which suggested that either the depth of my 'fine' cut was of the same order as the runout (or far bigger of course!). Anyway here was the result:-


 Register
 Log-in


