Forum sponsored by:

The Workshop Progress Thread (2017)
Report your modeling and workshop progress here
| Gordon W | 06/03/2017 11:17:57 |
| 2011 forum posts | I am surprised by Jasons method of crankshaft straitening, has he not heard of scaffold tube ? |
| JasonB | 06/03/2017 11:36:50 |
 25215 forum posts 3105 photos 1 articles | Seemed a pity to cut the length of scaffold tube that I have as there would not have been room to swing it and even if cut down I don't have room for much more than the 18" stilsons provided. Did have a hunt around for some other tube but nothing to hand. |
| Allan B | 07/03/2017 20:35:00 |
 133 forum posts 23 photos | so I am glad to say I am finally making some progress on my horizontal mill engine
have got the cylinder and the valve block all done, I just need to get some M2 stud and nuts to finish the bits on the valve block, and even managed to get it bolted to the base, at least it is a start :D |
| David Robinson | 08/03/2017 18:14:45 |
| 10 forum posts 5 photos | Finally finished my new machine bench The photo shows the bench and cupboards installed along one side of my small upstairs workroom (2.7 x 2.1m). I had to stitch a panorama to get everything into the picture! |
| David Robinson | 08/03/2017 18:15:03 |
| 10 forum posts 5 photos | ... The cabinets were made to my dimensions by CJ Kitchens (cjkitchens.net) and the vinyl wrapped doors likewise by The Cutting Room (doors2size.co.uk), all for less than I was quoted for standard units by a local DIY shed. The top is 950mm off the floor and is 40mm beech worktop, incredible value at £130 delivered for a massive slab of superb quality hardwood. I finished it with 3 coats of Danish oil topped off with one coat of polyurethane varnish for a hardwearing surface.
|
| mechman48 | 08/03/2017 18:47:11 |
 2947 forum posts 468 photos | Niiiiice, it won't be long before you can't see the worktop for tools bit 'n' pieces, swarf, etc. then when the workshop gremlins start relocating your tools from where you last laid them down... |
| JasonB | 12/03/2017 17:11:23 |
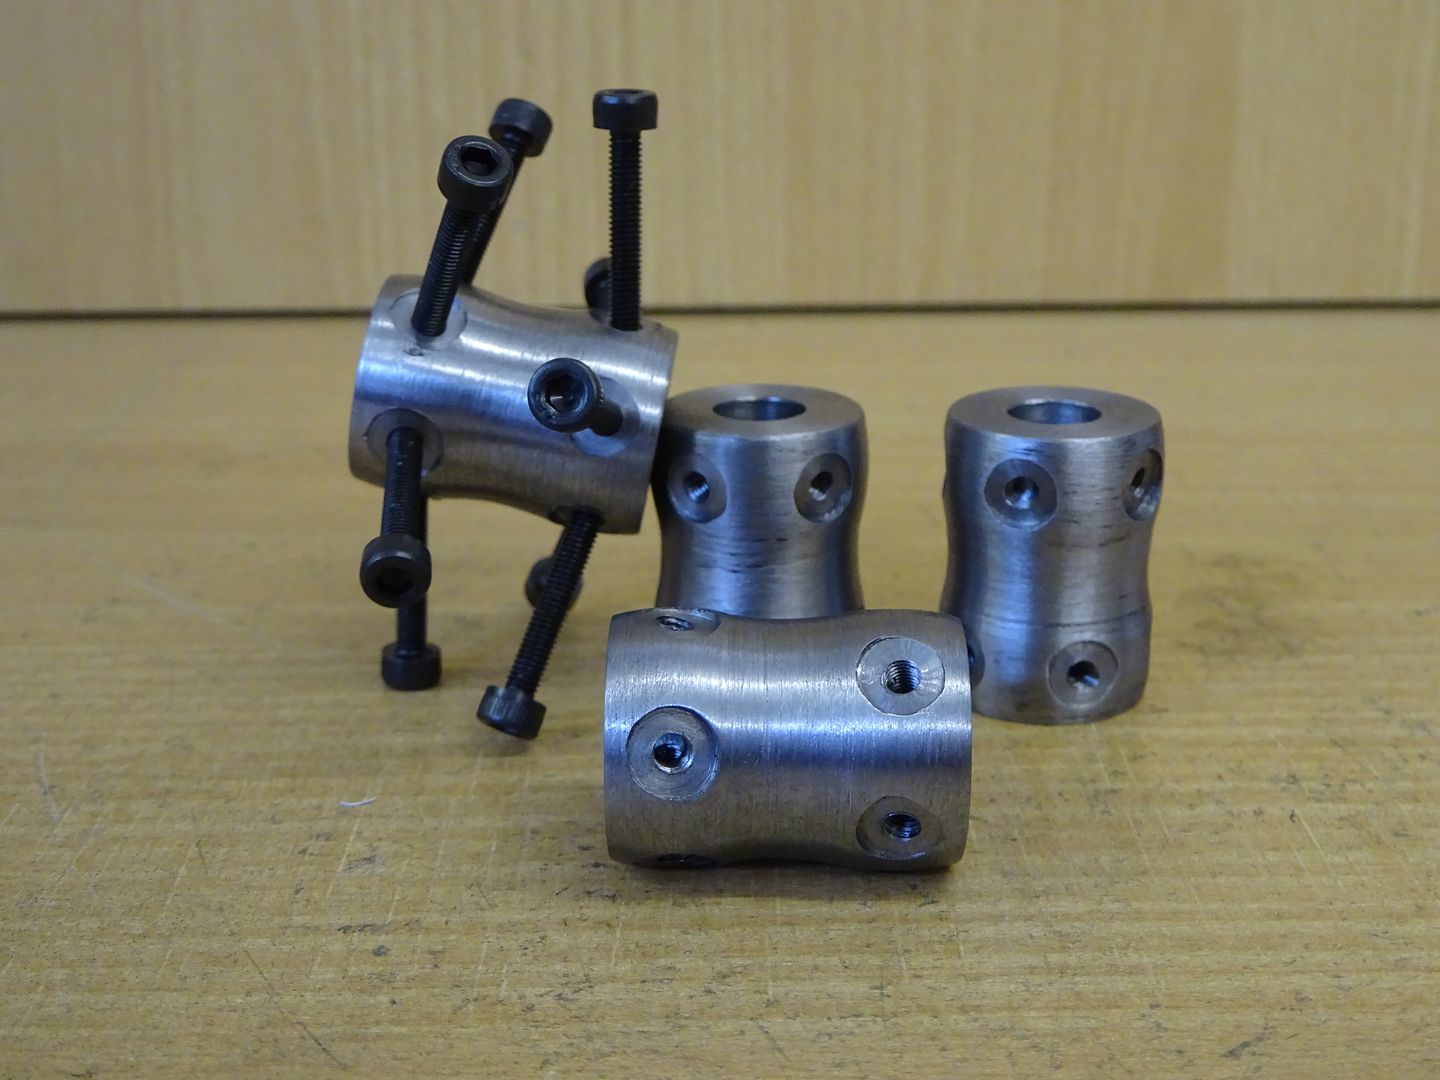
25215 forum posts 3105 photos 1 articles | Rocky's Models e-mailed me on Wednesday with the couple of drawings for the R&V cooling pump that had been lost by the previous owner so I got on and made that.
I also made a start on the cartwheels by machining the hubs, I have poped a few screws into one of them so you can get an idea of where I'm aiming.
J |
| Rainbows | 12/03/2017 20:33:05 |
| 658 forum posts 236 photos |
Now own 3 lathes, will make a thread about it later
|
| duncan webster | 14/03/2017 21:43:54 |
| 5307 forum posts 83 photos | Posted by duncan webster on 05/03/2017 19:51:59:
Progress report, here's the main steel chassis, all it needs now is skirts, paint brake levers and final assembly. I'm hoping anothert club member will step up to the plate!
|
| mechman48 | 15/03/2017 08:21:11 |
2947 forum posts 468 photos | Yesterday... Machined the cylinder of my S50 stationary engine...
Edited By JasonB on 15/03/2017 08:40:27 |
| mechman48 | 15/03/2017 09:22:18 |
2947 forum posts 468 photos | Thanks JasonB.
|
| mechman48 | 17/03/2017 23:01:26 |
2947 forum posts 468 photos | Update on my S50 progress, drilled & tapped cylinder fastening holes, drilling steam ports, or in my case air passages, plus a concocted home made tapping stand... |
| JasonB | 19/03/2017 17:44:52 |
25215 forum posts 3105 photos 1 articles | One of the challenges of taking on a part made model is finding the unique features that the previous builder managed to incorporate into the build. After spending over an hour scraping the big end bearing to fit the crank which had a pin that was not only concave but also tapered across its width I thought I would see how the engine turned over with the piston in place. Try as I might I could not get the cylinder to sit down on the flange at the top of the crankcase. A bit of work on a flat surface with the height gauge and all became clear.
God knows how he did it but the flange slopes 0.067" over its 2.5" width
Edited By JasonB on 19/03/2017 17:45:47 |
| Muzzer | 23/03/2017 20:29:48 |
 2904 forum posts 448 photos |
It seems to have been fairly quiet in the MEW workshop judging by the lack of postings recently. I've been pretty busy myself since I got back from China a week ago. The jet lag actually assisted by ensuring I was up and about before 7am most days. Over the weekend and during the evenings I've been unpacking my tools and tooling, moving benches, machines, shelves, cupboards etc to where I think they need to be, recommissioning my machines (after long 2 years in storage), finishing off the 2nd fix work etc. I've also been doing more work on the Shizuoka CNC milling machine. Having overhauled and replaced the X and Y axis leadscrew bearings before my travels, I moved on to the spindle and quill. It didn't sound or feel right to me and was actually quite difficult to turn when I first got the machine. It had been in storage (industrial unit) for 10 years but there were no signs of water damage on any of the exposed metal. I may never know what the problem was. I dropped the quill, using a trolley jack to control its descent(!), then dissassembled the spindle and bearings. I was relieved to find that the 3 bearings are fairly standard sizes and I was able to get good quality replacements from The Bearing Boys - a pair of matched Nachi angular thrust (main) bearings and an SKF radial (top) bearing. Some change from £200, so could have been worse. Now feels and sounds a lot happier.
On the good news front, I also recommissioned the Bridgeport clone milling machine (VFD, DRO, power feed, quick change drawbar etc). On the not so good front, the ancient controller on the CNC mill has just died. I'd hoped to reverse engineer the existing servo drives while they still worked but that would be pretty tough to do on a dead system. I reckon the CNC gods are telling me something. So I will need to rip all of the 1980s electronics from the control cabinet and set about installing the Chinese controller I brought back in the luggage last week from scratch. Murray |
| MW | 23/03/2017 20:39:16 |
 2052 forum posts 56 photos | Posted by JasonB on 19/03/2017 17:44:52:
One of the challenges of taking on a part made model is finding the unique features that the previous builder managed to incorporate into the build. God knows how he did it but the flange slopes 0.067" over its 2.5" width Whoa, that must've been a hair raising experience turning with the runout that big! Michael W |
| JasonB | 26/03/2017 16:37:11 |
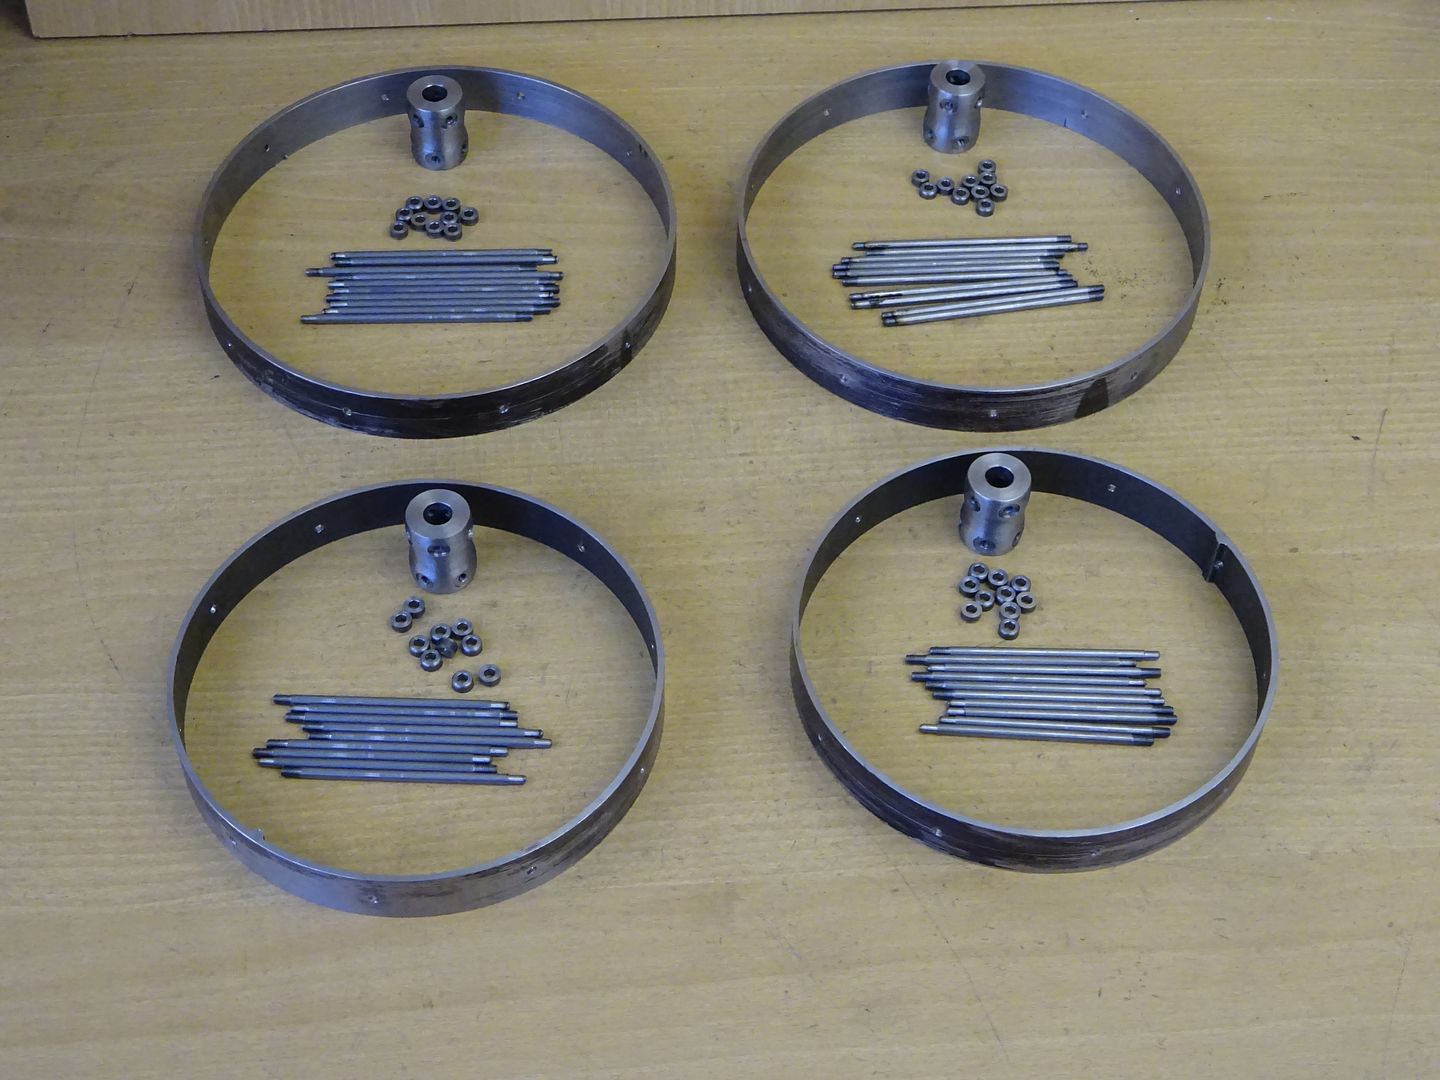
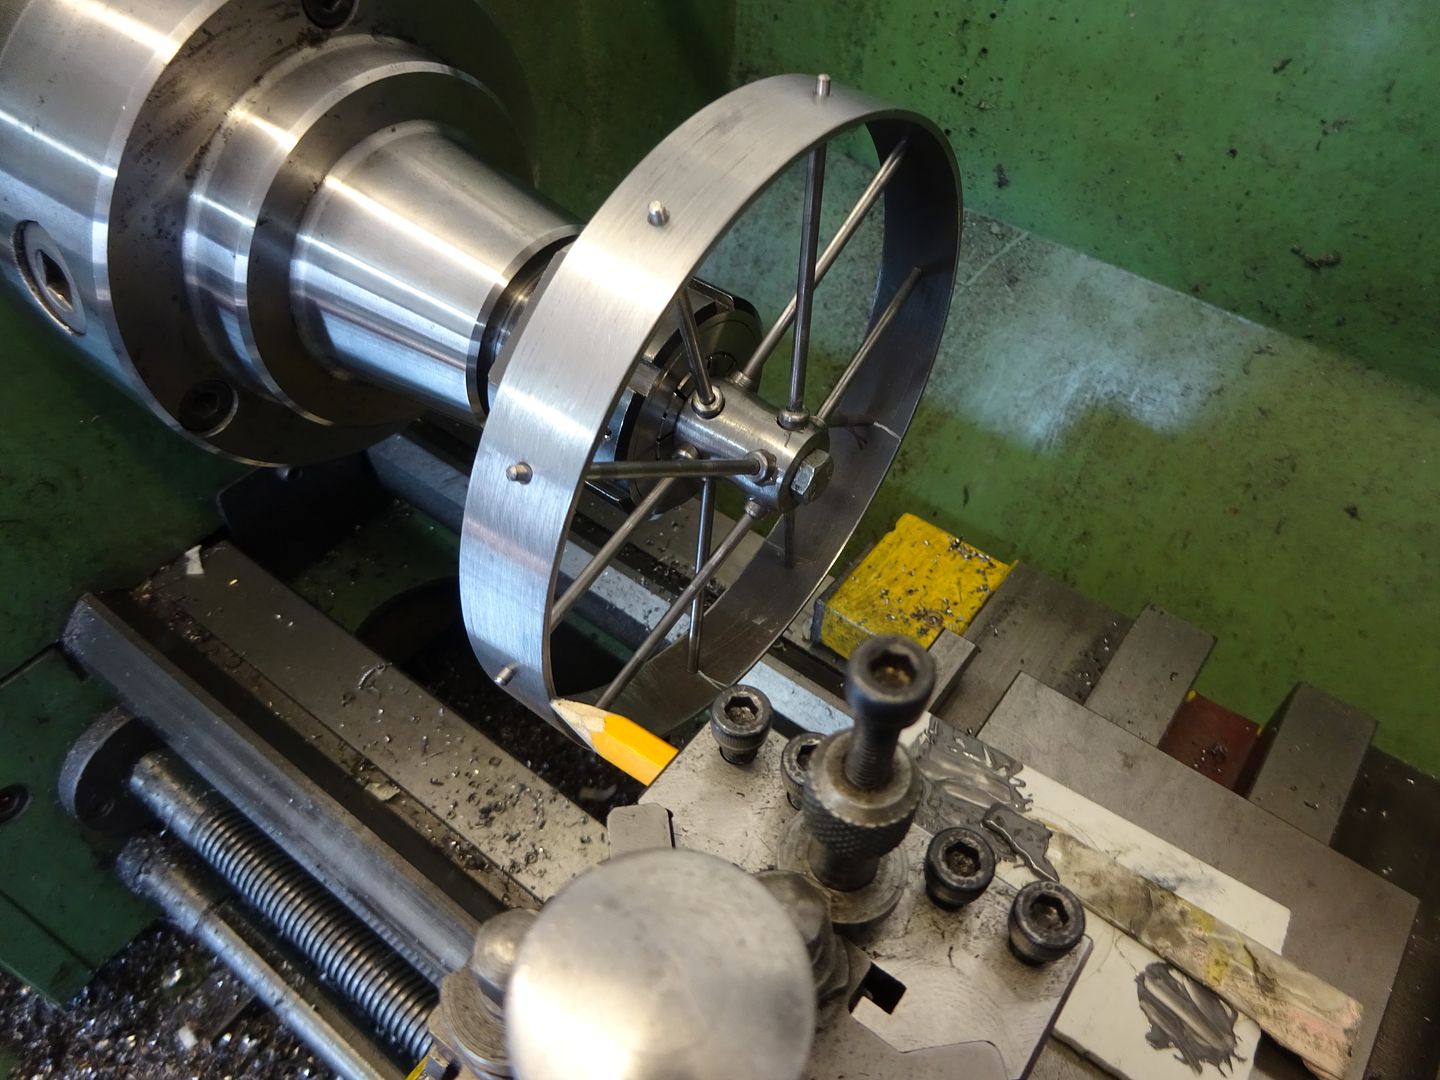
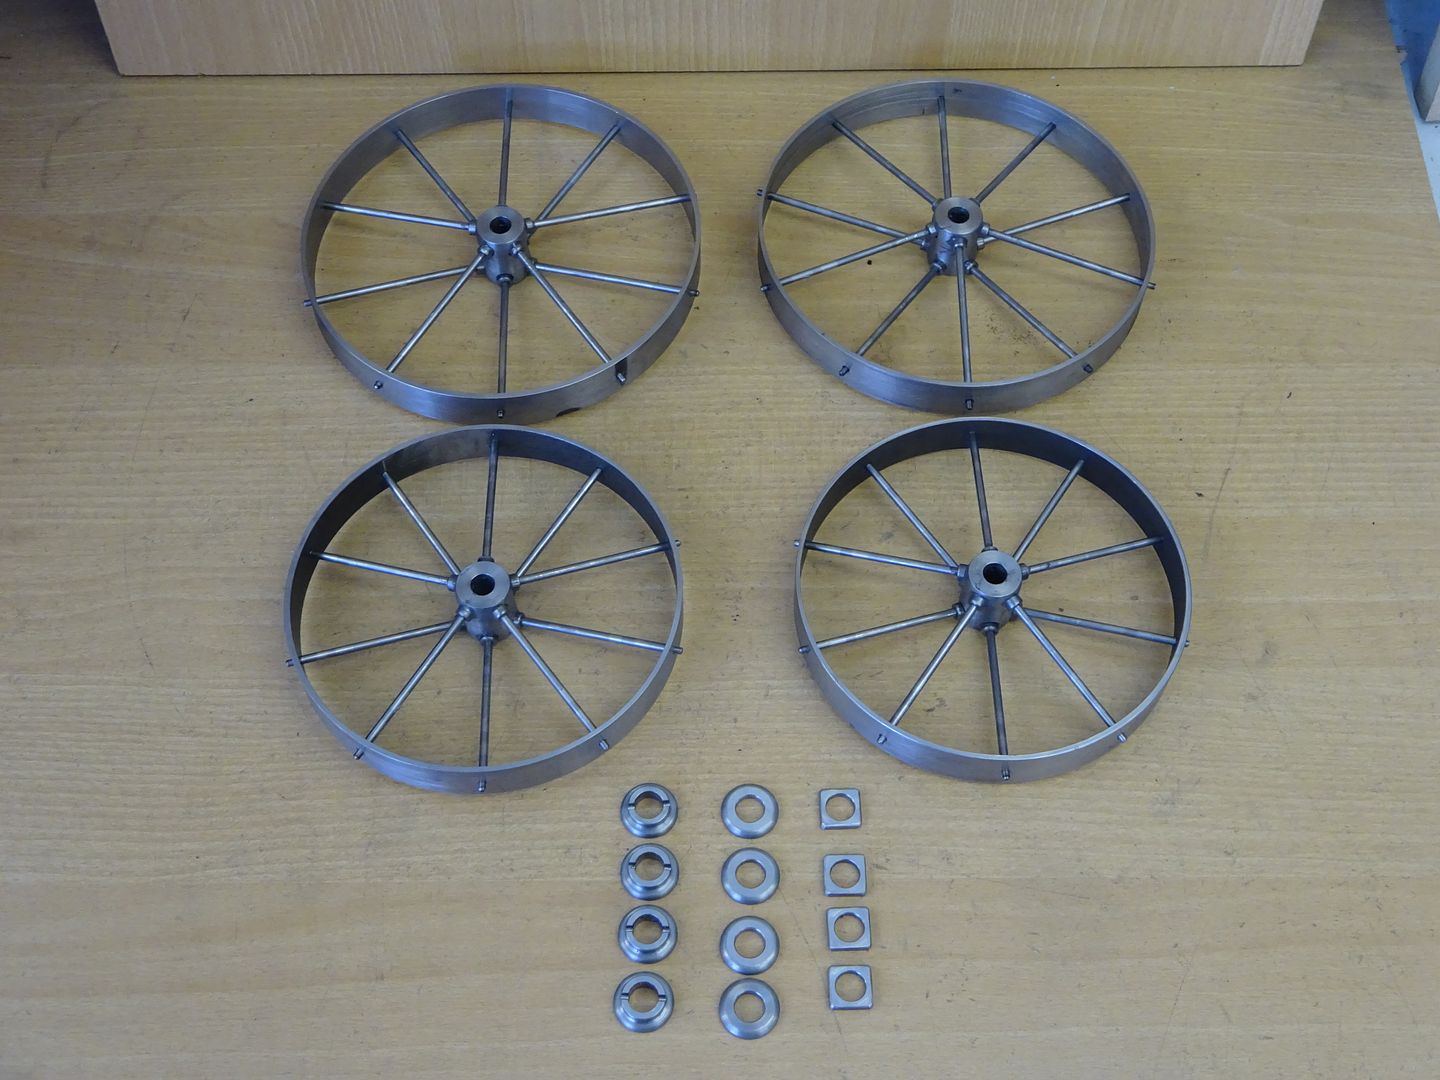
25215 forum posts 3105 photos 1 articles | I've mostly been doing cart wheels this weekend Started by thinning down some rings cut from ERW tube
Added 40 spokes and 40 nipples
Trued them up with some JBWeld on the spoke threads.
Will give the JBWeld a couple of days to harden up then rivit over the spoke ends
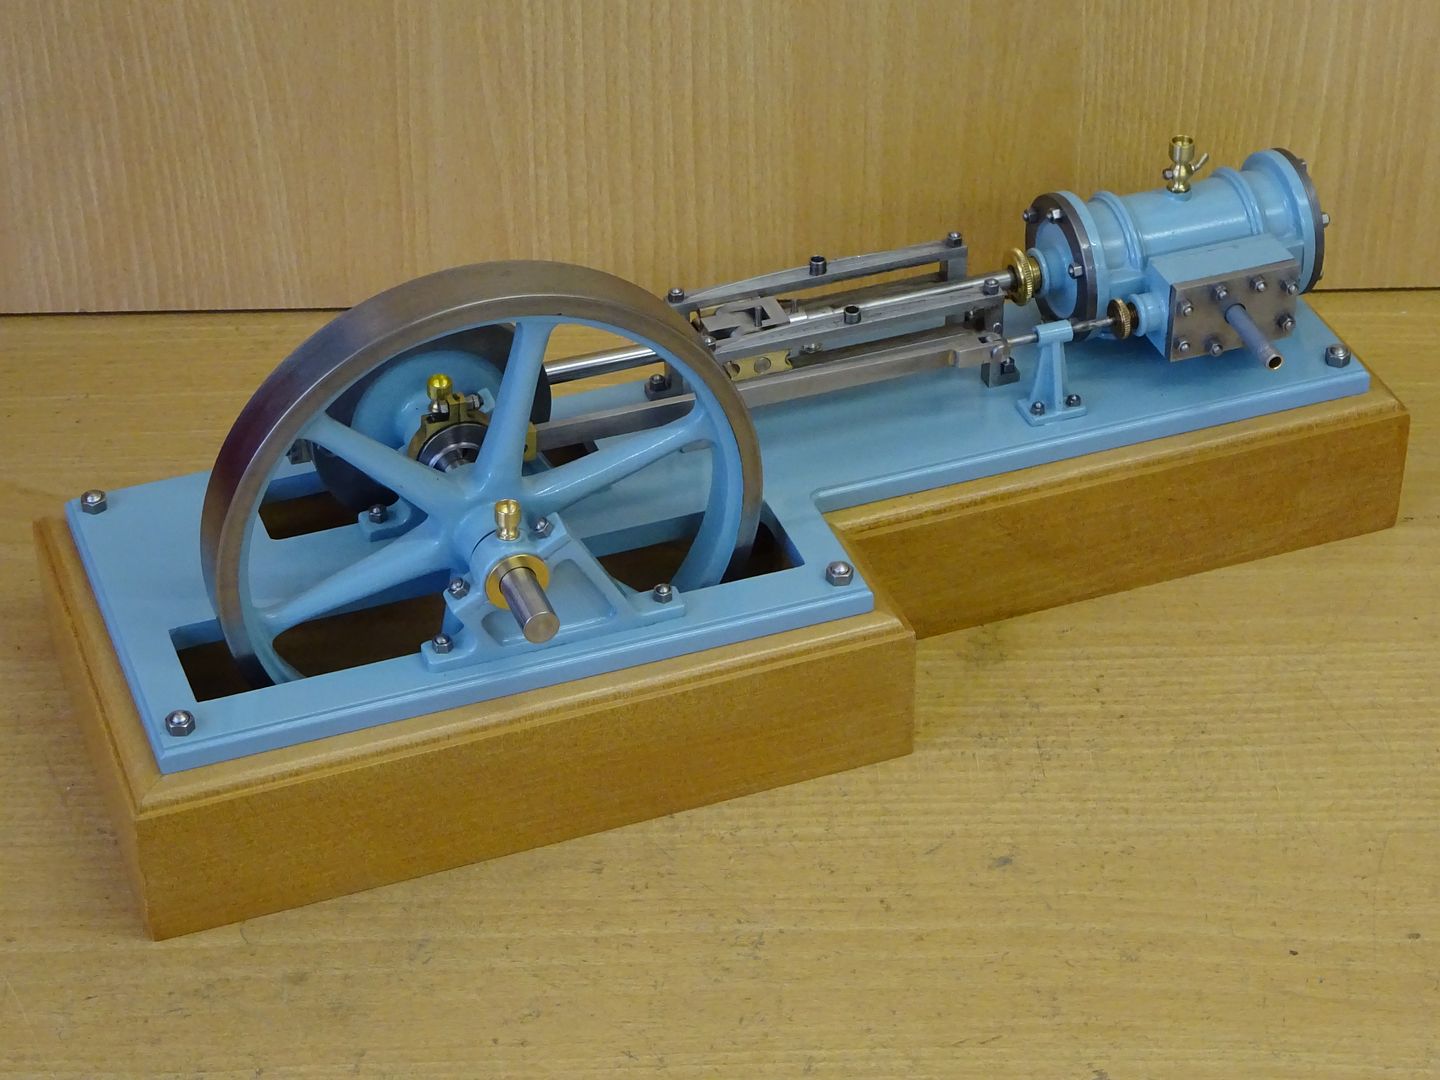
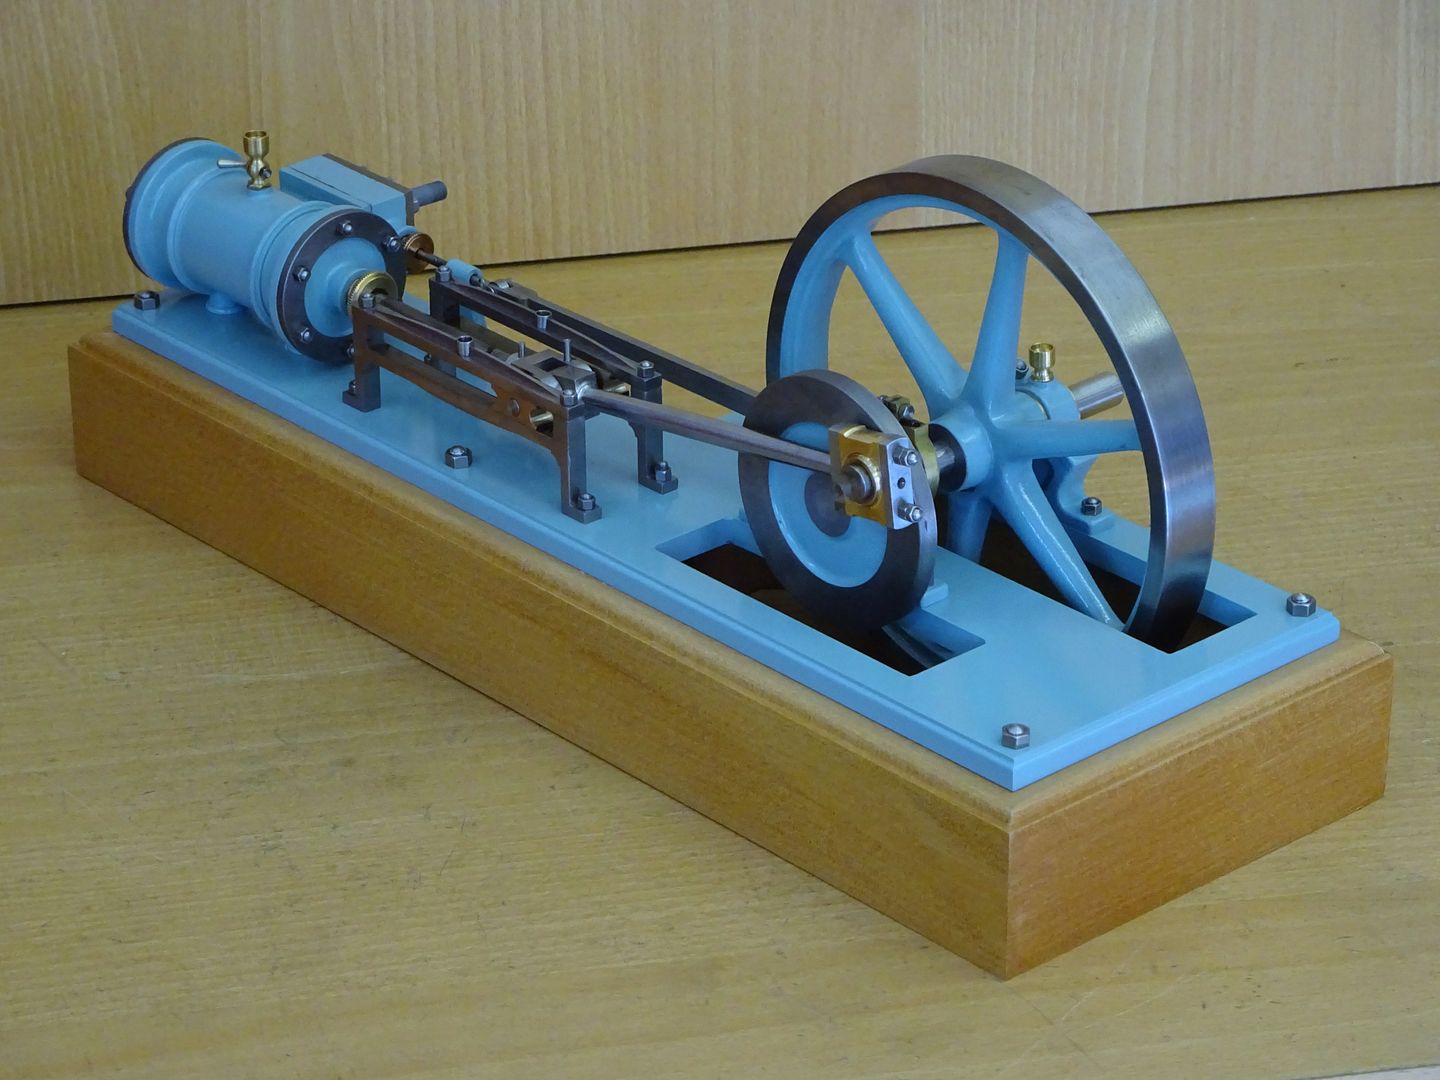
Also got the Thompstone Workshop Engine onto its base
Then had a play J |
| Jim Nic | 26/03/2017 17:13:23 |
 406 forum posts 235 photos | I like the Thompstone Engine, beautifully done. Your engines always run a lot quieter than mine Jason, I must have further to go than I thought to get to your standard of building. Did you fabricate the flywheel? Jim |
| JasonB | 26/03/2017 17:27:56 |
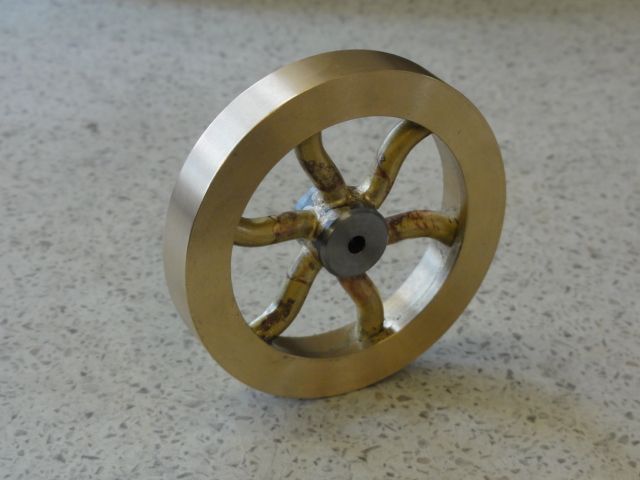
25215 forum posts 3105 photos 1 articles | Flywheel was the only bought in item, it's a 125mm one from TS in Germany but worked out a bit pricy so I'll probably suggest the slightly larger Unicorn one from Reeves when I draw it up. Would suit your spare 24mm O ring
Edited By JasonB on 26/03/2017 17:55:38 |
| Jeff Dayman | 26/03/2017 18:16:21 |
| 2356 forum posts 47 photos | Beautiful work Jason. Well done! JD |
| Jim Nic | 28/03/2017 17:01:08 |
406 forum posts 235 photos | My latest project is the Popcorn Engine designed by Stew Hart. One of the reasons I was attracted to it was that it lends itself to a bit of "bling" and part of that is the curly spokes in the flywheel. They looked a bit tricky, so that was where I started. After a couple of failed attempts I devised a way of making the spokes to a consistent shape and the result is:
Just remains to add a bit of filler round the spoke ends at the rim, a coat of bright red paint and polish a shiny finish on the rim and it's onto the next bit, the cylinder block. Jim Edited By Jim Nic on 28/03/2017 17:02:04 |


.jpg")
.jpg")
.jpg")
.jpg")
.jpg")
.jpg")
.jpg")
.jpg")
.jpg")
.jpg")


This thread is closed.
Magazine Locator
Want the latest issue of Model Engineer or Model Engineers' Workshop? Use our magazine locator links to find your nearest stockist!
Sign up to our Newsletter
Sign up to our newsletter and get a free digital issue.
You can unsubscribe at anytime. View our privacy policy at www.mortons.co.uk/privacy
Latest Forum Posts
- hemingway ball turner
04/07/2025 14:40:26 - *Oct 2023: FORUM MIGRATION TIMELINE*
05/10/2023 07:57:11 - Making ER11 collet chuck
05/10/2023 07:56:24 - What did you do today? 2023
05/10/2023 07:25:01 - Orrery
05/10/2023 06:00:41 - Wera hand-tools
05/10/2023 05:47:07 - New member
05/10/2023 04:40:11 - Problems with external pot on at1 vfd
05/10/2023 00:06:32 - Drain plug
04/10/2023 23:36:17 - digi phase converter for 10 machines.....
04/10/2023 23:13:48 - More Latest Posts...
- View All Topics
Support Our Partners


Shopping Partners
Subscription Offer

Latest "For Sale" Ads
- Reeves** - Rebuilt Royal Scot by Martin Evans
by John Broughton
£300.00 - BRITANNIA 5" GAUGE James Perrier
by Jon Seabright 1
£2,500.00 - Drill Grinder - for restoration
by Nigel Graham 2
£0.00 - WARCO WM18 MILLING MACHINE
by Alex Chudley
£1,200.00 - MYFORD SUPER 7 LATHE
by Alex Chudley
£2,000.00 - More "For Sale" Ads...
Latest "Wanted" Ads
- D1-3 backplate
by Michael Horley
Price Not Specified - fixed steady for a Colchester bantam mark1 800
by George Jervis
Price Not Specified - lbsc pansy
by JACK SIDEBOTHAM
Price Not Specified - Pratt Burnerd multifit chuck key.
by Tim Riome
Price Not Specified - BANDSAW BLADE WELDER
by HUGH
Price Not Specified - More "Wanted" Ads...
Get In Touch!
Do you want to contact the Model Engineer and Model Engineers' Workshop team?
You can contact us by phone, mail or email about the magazines including becoming a contributor, submitting reader's letters or making queries about articles. You can also get in touch about this website, advertising or other general issues.
Click THIS LINK for full contact details.
For subscription issues please see THIS LINK.
Digital Back Issues


Donate

 Register
 Log-in
Model Engineer Magazine
- Percival Marshall
- M.E. History
- LittleLEC
- M.E. Clock

ME Workshop
- An Adcock
- & Shipley
- Horizontal
- Mill

Subscribe Now
- Great savings
- Delivered to your door

Pre-order your copy!
- Delivered to your doorstep!
- Free UK delivery!
All Forum Topics > Work In Progress and completed items > The Workshop Progress Thread (2017)