Forum sponsored by:

What Did You Do Today 2021
| Nigel Graham 2 | 28/01/2021 23:15:42 |
| 3293 forum posts 112 photos | I've seen a lot or praise here and elsewhere for the efficiency of the Covid vaccinating. When I had my flu jab last Autumn, that too was very well run, precautions and all, though you don't need to rest before leaving the surgery. I did wonder if the health-centre was using it as something of a Covid vaccination planning exercise. |
| John Dean 2 | 29/01/2021 12:59:42 |
| 20 forum posts 5 photos | Spent today using the rotary table, thanks to Jason for his very clear instructions. |
| Dullnote | 04/02/2021 15:59:47 |
 94 forum posts 29 photos | Okay not today but last weekend, completed ball turning device, first ball the one on the handle, think that is standard |
| Peter Seymour-Howell | 04/02/2021 17:29:57 |
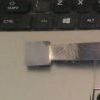
 125 forum posts 25 photos | Not today, 4 weeks in fact of making 4472's crossheads, mostly from a solid lump of black steel, the slipper is a removable item for servicing. Next up will be the gudgeon pins, oil reservoirs and associated pipework to the pins and lastly (I hope) the drop links, 1934 pattern. Crossheads won't be mated to the piston rods until the connecting rods have been made.
Pete |
| Roderick Jenkins | 05/02/2021 10:08:53 |
 2376 forum posts 800 photos | This is a tale of turning a bug into a feature. I wanted to replace the fluorescent tubes in the workshop with LED tubes to give a brighter light. I ordered 2 tubes through Amazon. Somehow I managed to tick the 5ft box rather than the 4ft I required. No problem from the supplier, they were happy to swap but I could not find a carrier for return that would handle a 5ft package for less than £25 - almost the whole cost of the 2 tubes! So, to the 3D printer:
The tubes have conventional pins on 1/2" spacing at each end. One end has no electrical connection and is just there to fit into a normal fluorescent light fitting. The other end have Live and Neutral for power. Half inch spacing chocolate block fits nicely:
So now I have extra lighting: One over the lathe and the other over the work bench:
Stay well, Rod |
| John Dean 2 | 05/02/2021 16:28:31 |
| 20 forum posts 5 photos | Made a couple of boring bars with the ends turned down to 12mm to fit my ARC qr tool holder. |
| Gerhard Novak | 06/02/2021 21:50:18 |
 109 forum posts 114 photos | Got myself a new blowtorch, I am quite impressed, you can turn it in every position and it doesn't make any flares. Came with 3 burners, one of them has a really tiny flame, but well concentrated in one spot. Also I do not look for the lighter any more as it has piezo ignition. Was on offer at Toolstation, had to drive a few miles as around my place all were sold out.
Went on with the restoration/finishing of my late fathers 10V. Excenter for the valve and crosshead were todays parts.
I put all together for a test fit, there is some friction here and there but nothing which is a show stopper. Hat off to my father - he made all of it on an Emco unimat 3. Well a few parts I have to re-do, for instance the excenter and the crosshead. I cheated a bit as I used some M3 screws, as I prefer inbus hex against a cut slot in the screw. Also the bolt in the cross head will be 4mm, first I have the matching silver steel and second I have the 4mm reamer. Tha'ts todays work. Will see what tomorrow brings. Edited By Gerhard Novak on 06/02/2021 21:51:51 |
| John Hinkley | 08/02/2021 15:04:09 |
 1545 forum posts 484 photos | Braved the snow showers and distinct chill in the workshop and finally got around to rebuilding the boring and facing head which I made about four years ago. The design is inspired by Graham Meek's in his book "Projects for your workshop - Vol 1", but incorporates changes by me to reflect my lack of experience and expertise so that I had a fighting chance of it working. I also increased its size by 50% or so, in order to be able to see and hold the smaller parts! Here's a picture of the finished head, taken from my album:
I had valuable assistance and "peer review" of my version by the late John Stevenson, whose contributions I gratefully acknowledge. I've also published a short video about it on my youtube channel: Link to Workshop tooling video John
|
| Nigel Graham 2 | 08/02/2021 15:59:07 |
| 3293 forum posts 112 photos | John D - My, your lathe tools like their luxury! I like that design principle in their holders. The QC holders for my Myford and Harrison lathes are all of the open-jaw type. Gerhard - I can vouch for those blow-torches, having bought one myself. A friend in the building trade says they are all piezo-ignition and automatic off valves, now, for safety. Good to see progress on the engine! John H- A worthwhile addition to your workshop. I'd say that increasing the size by half again has given you a greater advantage than easier construction, by increasing its range while still within the capacity of a milling-machine large enough to have an R8 spindle. I'm judging it of similar size to a commercially-made (and French) boring and facing head I own. |
| Pete White | 08/02/2021 16:29:46 |
| 223 forum posts 16 photos |
|
| Colin Heseltine | 12/02/2021 15:11:48 |
| 744 forum posts 375 photos | Tripped over in the workshop. Last night I had moved my 3 phase heater around as I was doing some spraying. This morning car indicated low tyre pressure so went in garage to pen door and switch the compressor on. As was moving towards garage door caught my foot in the armoured cable to the heater. and went headfirst. Right hand landed on the front wing of Caterham 7, It was already slightly damaged and the force of my hand cracked the front corner off it. Now have swollen hand and useless finger. Tried to use a rattle can to spray base of Stuart 10V but could not even depress the button. Spraying left handed does not work so well. Hopefully tomorrow it will have recovered. Write note to self. Move heater cable before walking through garage in semi darkness. Colin |
| Frances IoM | 12/02/2021 16:10:42 |
| 1395 forum posts 30 photos | it may well be worth a trip to A&E if still operating - some years ago I trapped the end of a finger rather badly, cursed and waited for it to heal - a couple of weeks later it still felt wrong, the GP sent me onto the specialist section at the hospital, quick xray indicated I broken the tip of a bone on the 1st joint and it had started to heal in the wrong position - was told "you should have come earlier before healing started" but wearing a splint forced it back into a more normal but still wrong position. |
| Colin Heseltine | 12/02/2021 16:17:29 |
| 744 forum posts 375 photos | Frances, My wife is a nurse and is keeping an eye on it. Must admit it is getting easier as the day goes on. Have managed to use spray can right handed which I certainly could not do a few hours ago. I tore a ligament in my left hand about 4 years ago, x-rayed and all sorts no one could see any damage, eventually managed to persuade doctor to send me to a hand specialist, who re x-rayed and also mri-scanned and they finally spotted the damaged bone the ligament had torn off. It was splinted for 4 months and finally after about 9 months had got the full use back of the finger. Colin |
| Nigel Graham 2 | 12/02/2021 17:18:06 |
| 3293 forum posts 112 photos | Too cold for the workshop - even if I managed to raise the air temperature to vaguely keep milk fresh, there is not pleasure in handling cold machine-tools, and that's not conducive to decent work... SO... A little design-work on the steam-wagon engine. Then Tried cold-blueing various steel parts for my Worden T&C grinder, using "gun blue" bought on-line from a country-sports stockist. I'd had to turn off the filters I'd set on my computer so it would accept the word for that which is fired, though I noticed the catalogue did not even mention "bang-sticks". The chemical is applied to the degreased steel by swab (I used cotton buds) and left for a short while to work. Then you rinse the parts in cold water, dry them and according to the instructions, gently polish them with fine wire-wool. I obtained rather mixed results that one would not want alongside one's polished Hunter wellies and neatly-ironed waxed-cotton. Not sure why the patchiness, but I now wonder if my mistake was degreasing the components in methylated spirits, and perhaps not sufficiently. I will have to experiment before treating the remaining parts, e.g. using a final wipe with xylene paint thinner, or rinsing in hot washing-soda solution then boiling water. I was careful to wear rubber gloves, both for my protection and to avoid contaminating the cleaned steel. The gun-blue makers recommend you then protect the blued surface with a special oil (which of course, they also make, along with the special degreaser that's probably only alcohol or acetone). Well, I was trying to avoid oily surfaces on a grinder, and thought that since shooting is an outdoor activity, gun-blue would be a more protective finish than the only chemical blacking I could find listed by "our" suppliers. Its sellers, Chronos, does warn that the coloured layer still needs oiling or lacquering to protect from rusting. I have used spray-on furniture polish, which does not last forever but seems quite effective for a reasonably long time. Edited By Nigel Graham 2 on 12/02/2021 17:20:40 |
| SillyOldDuffer | 12/02/2021 18:23:27 |
| 10668 forum posts 2415 photos | Posted by Nigel Graham 2 on 12/02/2021 17:18:06: ... Not sure why the patchiness, but I now wonder if my mistake was degreasing the components in methylated spirits, and perhaps not sufficiently. ... I think you're right, like glue, Chemical Blue needs extreme cleanliness for reliable results. I've used White Spirit to remove grease, then hot-water and detergent to remove the White Spirit, followed by Meths to dry the object thoroughly. Grease and oil can be very difficult to remove entirely. One of my books recommends degreasing microscope slides by boiling them in concentrated Sulphuric Acid for an hour! Only then are they guaranteed fat free. Dave |
| Roderick Jenkins | 12/02/2021 18:42:20 |
2376 forum posts 800 photos | The 4 part blacking kits favour a caustic degreaser. Rod |
| bernard towers | 12/02/2021 22:44:36 |
| 1221 forum posts 161 photos | gun black is very fussy about cleanliness, I got better results with a hot soda bath first ( do not touch the parts with your hands). But nothing beats the black it kit. |
| Martin Dowing | 12/02/2021 23:17:19 |
 356 forum posts 8 photos | Posted by SillyOldDuffer on 12/02/2021 18:23:27:
Posted by Nigel Graham 2 on 12/02/2021 17:18:06: ... Not sure why the patchiness, but I now wonder if my mistake was degreasing the components in methylated spirits, and perhaps not sufficiently. ... I think you're right, like glue, Chemical Blue needs extreme cleanliness for reliable results. I've used White Spirit to remove grease, then hot-water and detergent to remove the White Spirit, followed by Meths to dry the object thoroughly. Grease and oil can be very difficult to remove entirely. One of my books recommends degreasing microscope slides by boiling them in concentrated Sulphuric Acid for an hour! Only then are they guaranteed fat free. Dave I will tend to suspend an item in vapors of boiling organic solvent like acetone or butyl acetate (used as paint thinner) if good degreasing is required. Some solvent on bottom of pot, item suspended on net, pot covered with stainless bowel filled wih water - ir works as reflux condenser. You may use water - ice slush for better efficiency. But boiling with concentrated sulfuric acid - no way. Concentrated sulfuric acid boils over 300*C while giving off obnoxious, corrosive white fumes and accidental spill on your body of larger than minute quantity will leave you disabled if not dead. You can slightly warm (50-70*C) your slide with conc. sulfuric acid containing some chromium oxide or chromate followed by soaking in distilled water and finaly in glass distilled solvent like methyl or ethyl alcohol - much safer, but I doubt that many alloys would take initial step without corrosion. Trouble is that chromates are not easy to secure for private use these days and need proper disposal. |
| Martin Dowing | 12/02/2021 23:23:16 |
356 forum posts 8 photos | @Gerhard Novak, Don't tell me hat you made all of that in a single day...I feel intimidated. I have managed to make a dieholder for M10 die as an addition to my usual set used on ML7 tailstock. |
| Nigel Graham 2 | 13/02/2021 00:51:28 |
| 3293 forum posts 112 photos | Thank you - what I thought about meths is the colour and " flavouring " additives may be contaminants themselves. Some parts have M5 and smaller tapped holes and I realise these can trap tiny traces of oil. I had already tried one small part, wiping it with kitchen paper towel alone, then with white spirit, then a clean towel with xylene; and it came out a quite uniform, dark grey. I have an idea I do have a 2-part blacking-kit I probably bought at an exhibition quite a time ago. Somewhere. If so, I may try that on one of the grinder's attachments. I had searched the model-engineering suppliers quite thoroughly recently, and only Chronos appears to sell these materials. ' Glass slides and boiling sulphuric acid... I don't think I'll take up amateur microbiology.... |


.jpg")
.jpg")
.jpg")


This thread is closed.
Magazine Locator
Want the latest issue of Model Engineer or Model Engineers' Workshop? Use our magazine locator links to find your nearest stockist!
Sign up to our Newsletter
Sign up to our newsletter and get a free digital issue.
You can unsubscribe at anytime. View our privacy policy at www.mortons.co.uk/privacy
Latest Forum Posts
- *Oct 2023: FORUM MIGRATION TIMELINE*
05/10/2023 07:57:11 - Making ER11 collet chuck
05/10/2023 07:56:24 - What did you do today? 2023
05/10/2023 07:25:01 - Orrery
05/10/2023 06:00:41 - Wera hand-tools
05/10/2023 05:47:07 - New member
05/10/2023 04:40:11 - Problems with external pot on at1 vfd
05/10/2023 00:06:32 - Drain plug
04/10/2023 23:36:17 - digi phase converter for 10 machines.....
04/10/2023 23:13:48 - Winter Storage Of Locomotives
04/10/2023 21:02:11 - More Latest Posts...
- View All Topics
Support Our Partners


Shopping Partners
Subscription Offer

Latest "For Sale" Ads
- Reeves** - Rebuilt Royal Scot by Martin Evans
by John Broughton
£300.00 - BRITANNIA 5" GAUGE James Perrier
by Jon Seabright 1
£2,500.00 - Drill Grinder - for restoration
by Nigel Graham 2
£0.00 - WARCO WM18 MILLING MACHINE
by Alex Chudley
£1,200.00 - MYFORD SUPER 7 LATHE
by Alex Chudley
£2,000.00 - More "For Sale" Ads...
Latest "Wanted" Ads
- D1-3 backplate
by Michael Horley
Price Not Specified - fixed steady for a Colchester bantam mark1 800
by George Jervis
Price Not Specified - lbsc pansy
by JACK SIDEBOTHAM
Price Not Specified - Pratt Burnerd multifit chuck key.
by Tim Riome
Price Not Specified - BANDSAW BLADE WELDER
by HUGH
Price Not Specified - More "Wanted" Ads...
Get In Touch!
Do you want to contact the Model Engineer and Model Engineers' Workshop team?
You can contact us by phone, mail or email about the magazines including becoming a contributor, submitting reader's letters or making queries about articles. You can also get in touch about this website, advertising or other general issues.
Click THIS LINK for full contact details.
For subscription issues please see THIS LINK.
Digital Back Issues


Donate

 Register
 Log-in
Model Engineer Magazine
- Percival Marshall
- M.E. History
- LittleLEC
- M.E. Clock

ME Workshop
- An Adcock
- & Shipley
- Horizontal
- Mill

Subscribe Now
- Great savings
- Delivered to your door

Pre-order your copy!
- Delivered to your doorstep!
- Free UK delivery!
All Forum Topics > The Tea Room > What Did You Do Today 2021