Member postings for Steve355
Here is a list of all the postings Steve355 has made in our forums. Click on a thread name to jump to the thread.
| Thread: Surface Grinder refurb |
| 26/09/2022 11:53:35 |
Kiwi bloke thanks for the effort you have put into responding, I’ve come to the conclusion that you are right. I managed to get the column and square but only by adding a 0.004” at the other end. That’s a lot of scraping. And in fact, if I did want to get the end surface of the column flat, the amount of metal there is pretty minimal, and as you say it will only need to lose a thou. So I’ve started the spotting and scraping process. Add the spotting is basically mirroring the measurements that I took. my next question I will need to address some dovetails before long, and I’m guessing for that I need a straight edge. Here are the lengths of the dovetails: column 21” table 25” knee 16” and 15” i’ve already been in conversations with Mr Lamb about getting a straight edge. What’s the best size to get? obviously something Long enough for the table, but won’t that be unwieldy for the shorter dovetails, and possibly other small dovetails I want to do in the future? on my lathe etc? I can barely afford one straight edge, let alone too! Cheers Steve |
| 26/09/2022 08:23:24 |
Posted by Pete Rimmer on 26/09/2022 06:47:40:
Steve, You're approaching this problem backwards. Scrape the long ways straight and flat then put the square on the long ways and use it to measure the short ways' perpendicularity with the scraped long ways. For that surface it only needs to be pretty close because you will dress the wheel from the moving cross-slide. What is most imporatant is that the knee and cross table ways are nicely scraped in. That joint barely matters at all. Hi Pete Last night, I got fed up with it and started doing precisely that. I had a good look in Connelly on scraping perpendicular, and frankly he says “use a protractor” or make up a square template (how?!) I’ve Googled around the topic too, and there is a lot of BS about it, but no clear examples of how it’s done There must be a standard approach to it - basically these machine tools are big squares. Steve
|
| 25/09/2022 13:08:27 |
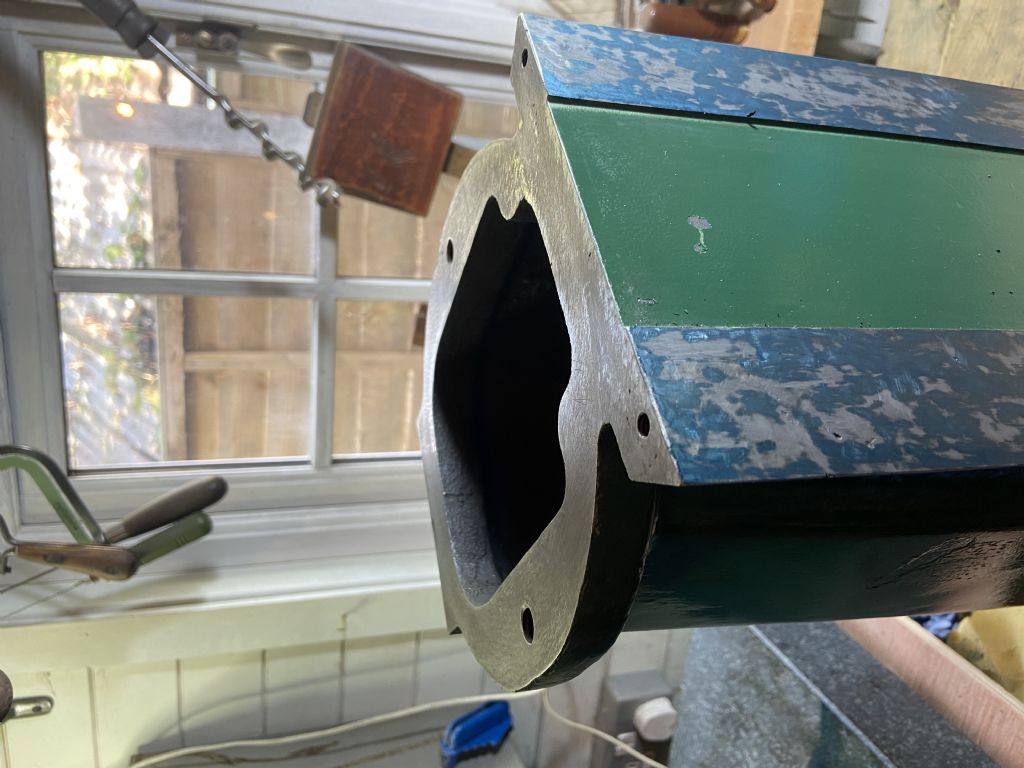
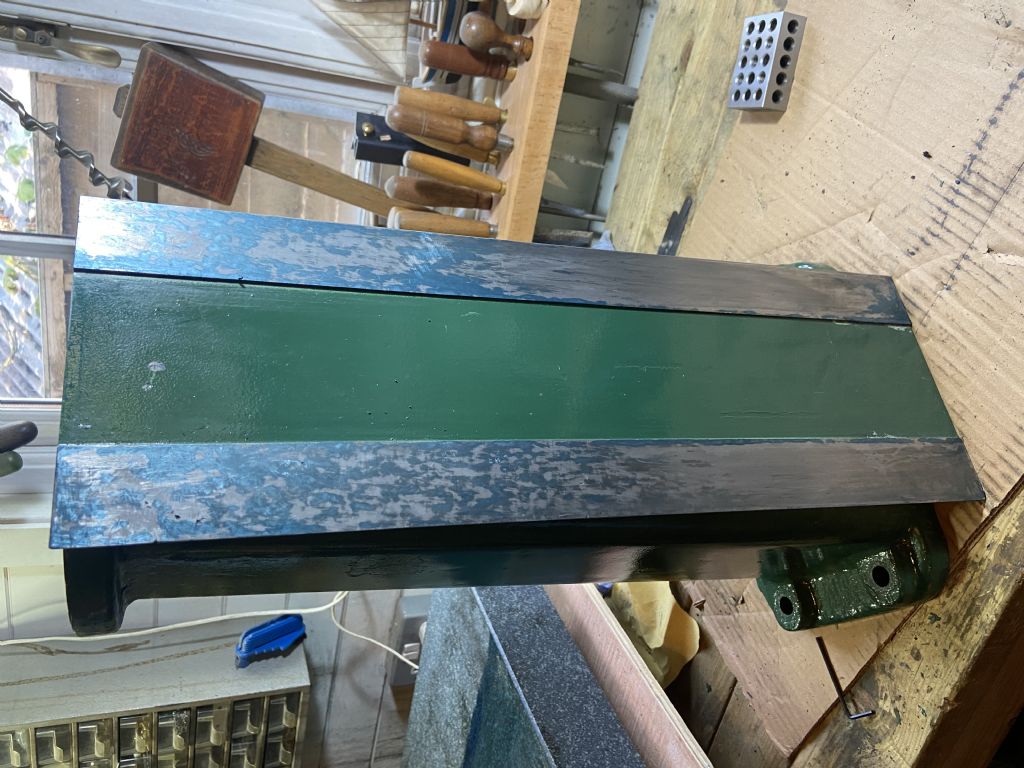
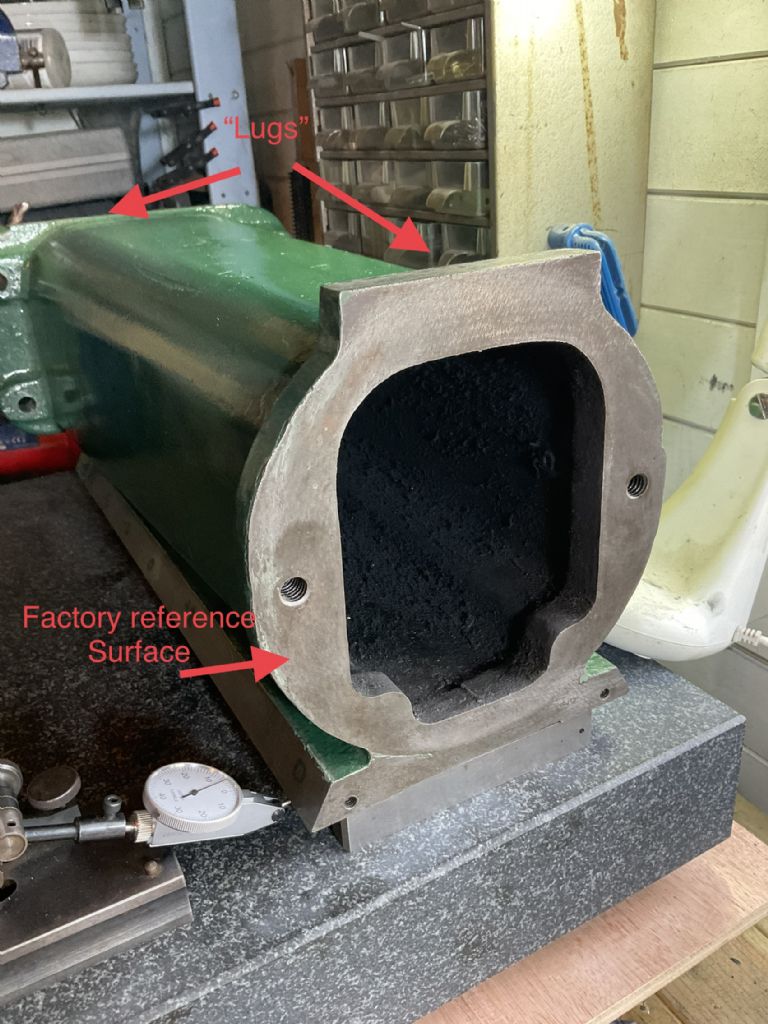
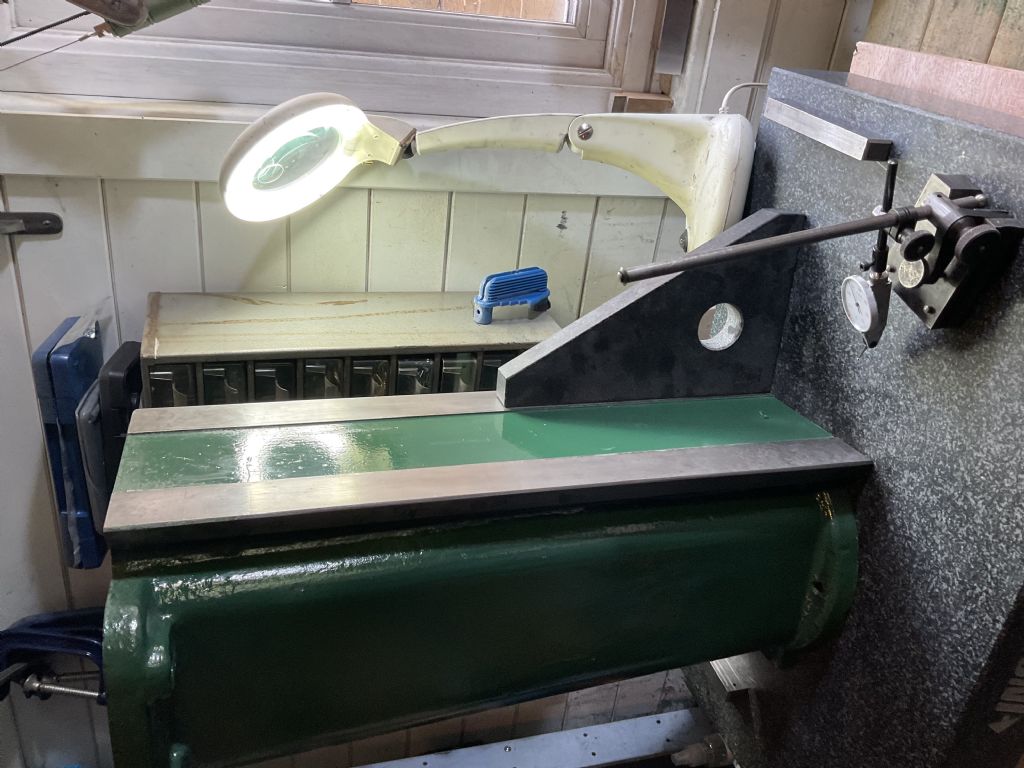
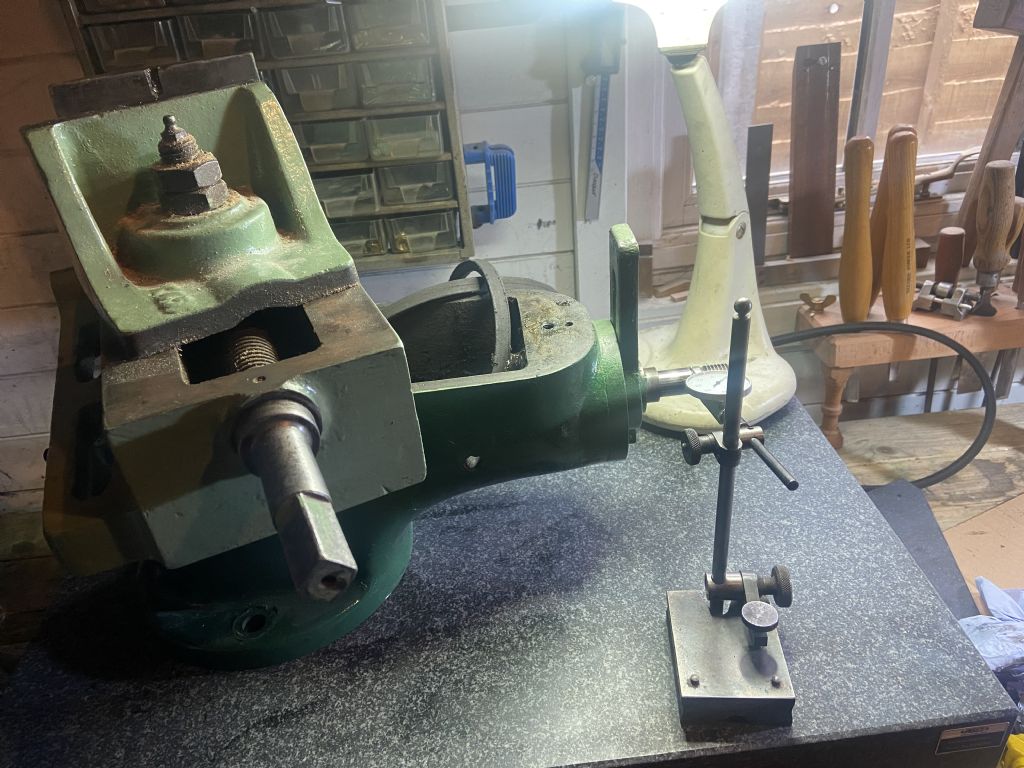
Kiwi Bloke Sorry, I’m not explaining myself well. See pic…. So the factory reference surface is the surface the headstock sits on. It is not a wear surface and shouldn’t need scraping. The ways need to be perpendicular to this surface and co-planar. If I just start scraping the ways, I can get them flat, but they will not necessarily be perpendicular to the factory surface. They will likely be in a skewed plane. I was hoping to use the “lugs” to sit the column on the surface plate, making the plane of the ways perpendicular to the reference surface, and parallel to the surface plate. However, when I do that, the reference surface isn’t quite perpendicular to the surface plate, by about a thou. Which makes it tricky. Ideally I’d put the reference surface on the plate directly, and take measurements: but, clearly my reference square and surface gauge are nothing like tall enough for that. The reason for taking the measurements is (having watched videos by Keith Rucker et al doing this) to get the ways perpendicular to the reference surface and co-planar, they split them into areas of similar height and scrape and measure, scrape and measure etc. to bring it gradually in to a perpendicular and co-planar surface. Then, once pretty close, spot and scrape it dead flat. Problem is, I can’t quite seem to work out a way to get those measurements accurately and reliably. Steve Edited By Steve355 on 25/09/2022 13:09:14 Edited By Steve355 on 25/09/2022 13:10:00 |
| 24/09/2022 22:05:42 |
Column… stuck already, help!
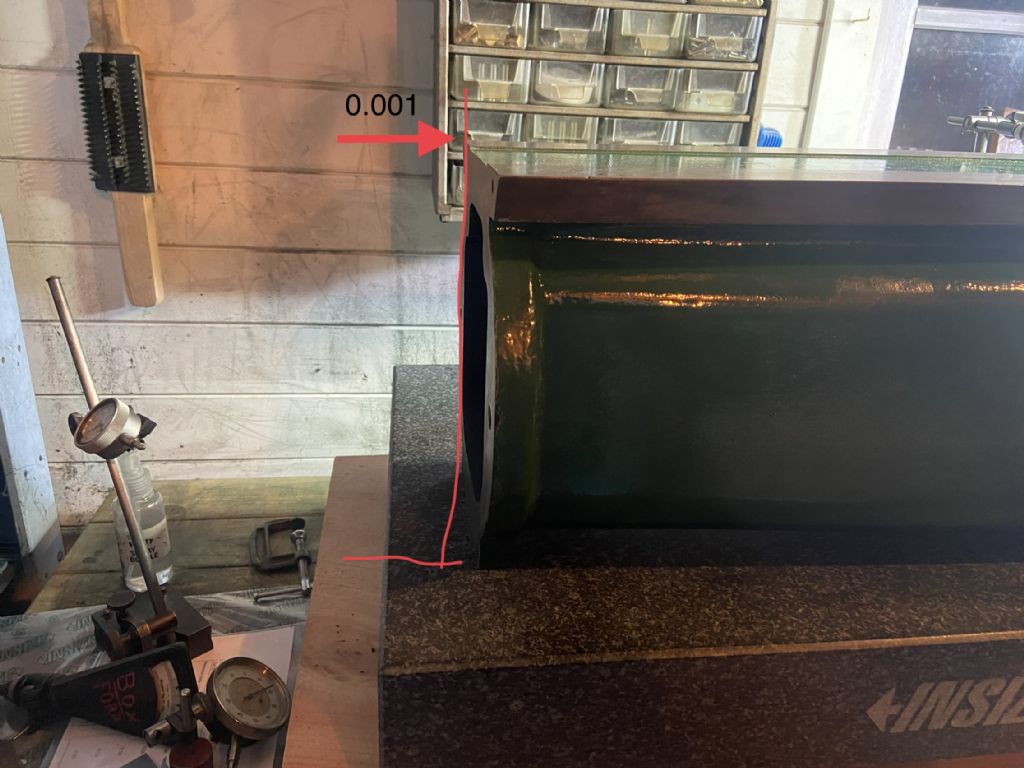
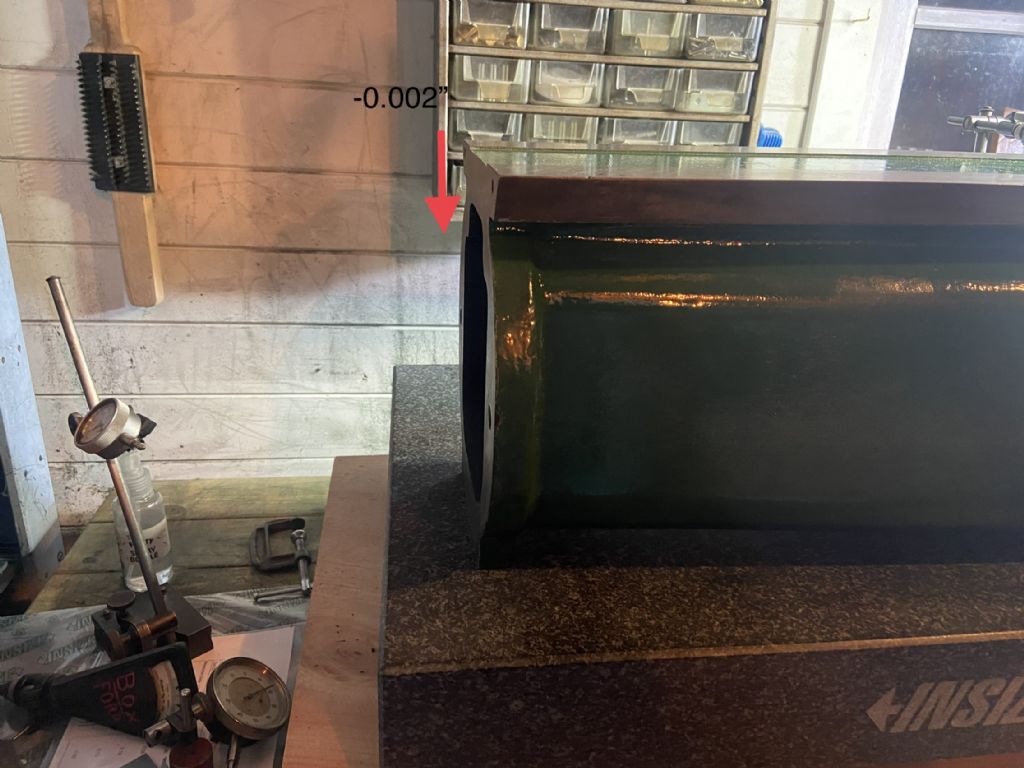
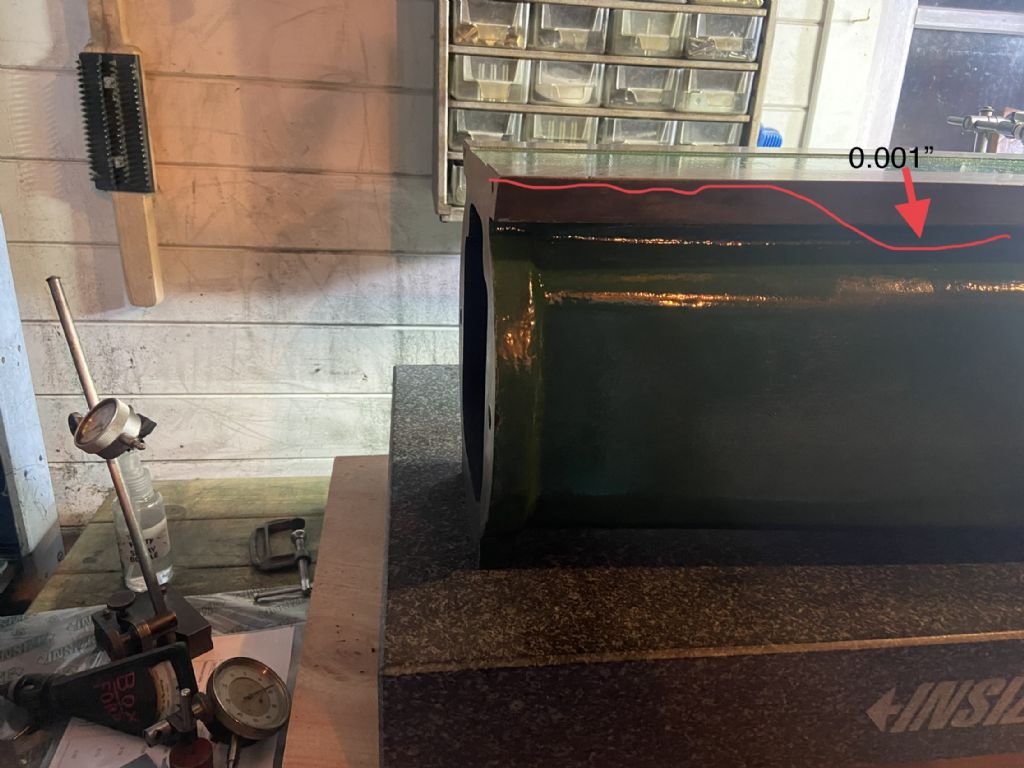
On my column there are some ground “lugs” on the back of the column, which I was hoping were for the purpose of supporting the column square on a surface plate for inspection purposes. I am sure I was right, but they seem to have been knocked about over the years and it seems to be not quite accurate using these as reference surfaces. I am trying to 1) check that the ways are perpendicular to the surface that mates with the headstock and 2) indicate the ways to check for “co-flatness” (I read that word somewhere) so I can make a plan for scraping. 1) with the column on the surface plate the headstock surface is about 0.001” out of square with the surface plate (if I place a 0.002” feeler gauge under the other end of the column. That’s the closest I could get it. 2) the far way surface is about 0.002” lower than the near way. I am certain that this is because of the position of the shim rather than a genuine error 3) about 2/3 of the way along the ways I get a roughly 0.001” dip, looking like some wear on the ways, in the area where the knee usually operates. Not too bad. but I can’t get really reliable, repeatable measurements like this. Possible solutions 1) shim like crazy and try to get the column aligned with the surface plate better - hard and not easily repeatable 2) mess around with a precision level 3) get a pair of meaty parallels, turn the column ways-down and take measurements from the bottom Any thoughts or advice appreciated
Steve
|
| 24/09/2022 21:45:09 |
Posted by Robin on 24/09/2022 15:55:09:
Am I missing something? How does the spindle alignment with the table matter on a surface grinder? Surely all you need is rigid to the vertical slide, alignment coming when you dress the wheel? I have just replaced the vertical slide on mine with linear rails and a stepper. Precision was not high on my agenda, have I gone terribly wrong? (As usual) Robin Intuitively, I’d think you are right, but See P485 of Connelly, apparently it’s about surface finish. In fact, I got the procedure for the spindle from the horizontal mill section of the book, because it reflects better the architecture of my machine, Whatever, it does no harm to make sure that all the components of the machine are reasonably accurate. |
| 23/09/2022 22:28:38 |
Posted by John P on 23/09/2022 22:02:16:
Seeing your photo with your new surface plate mounted on https://www.starrett.com/precision-granite/precision-granite-faq
John I have no doubt you are right, the problem is I can’t handle it. The plywood base is actually part of the box it came in. I had to use a block and tackle to get it on the bench. I need to find a permanent place for it, when I do I will buy/make a stand and get the correct jacks for it. Once I’m done with it on the bench I will put the lid of the box back on and use the block and tackle again to get it off the bench. It seems like that’s the best way to avoid damaging it at the moment. |
| 23/09/2022 20:30:17 |
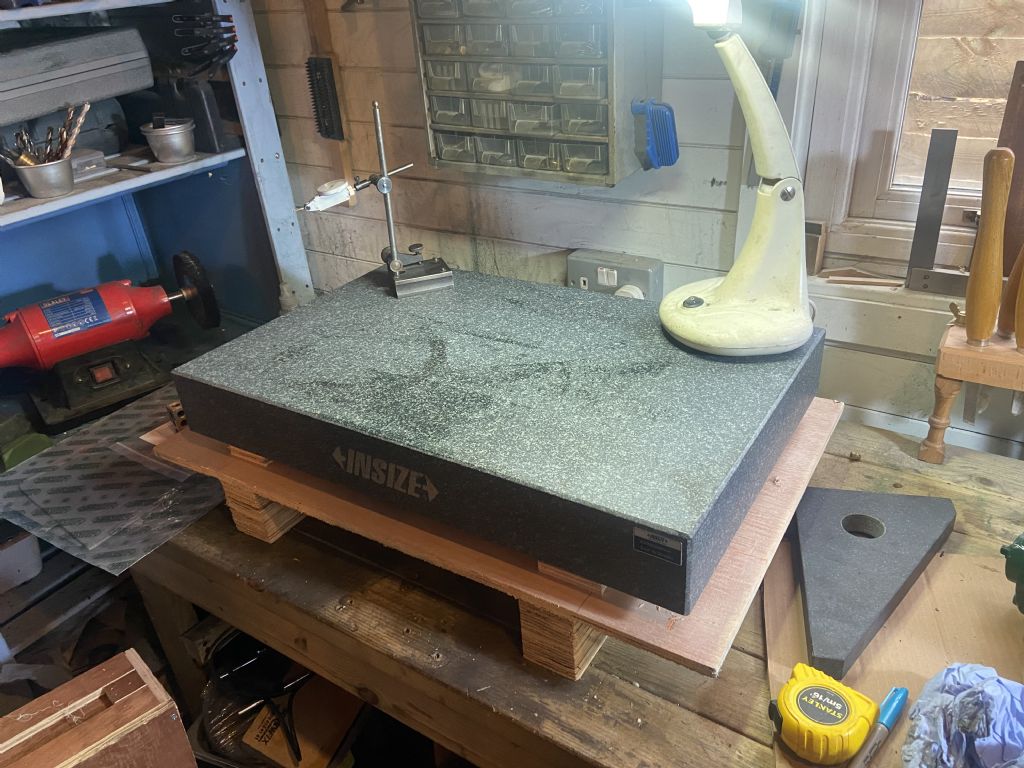
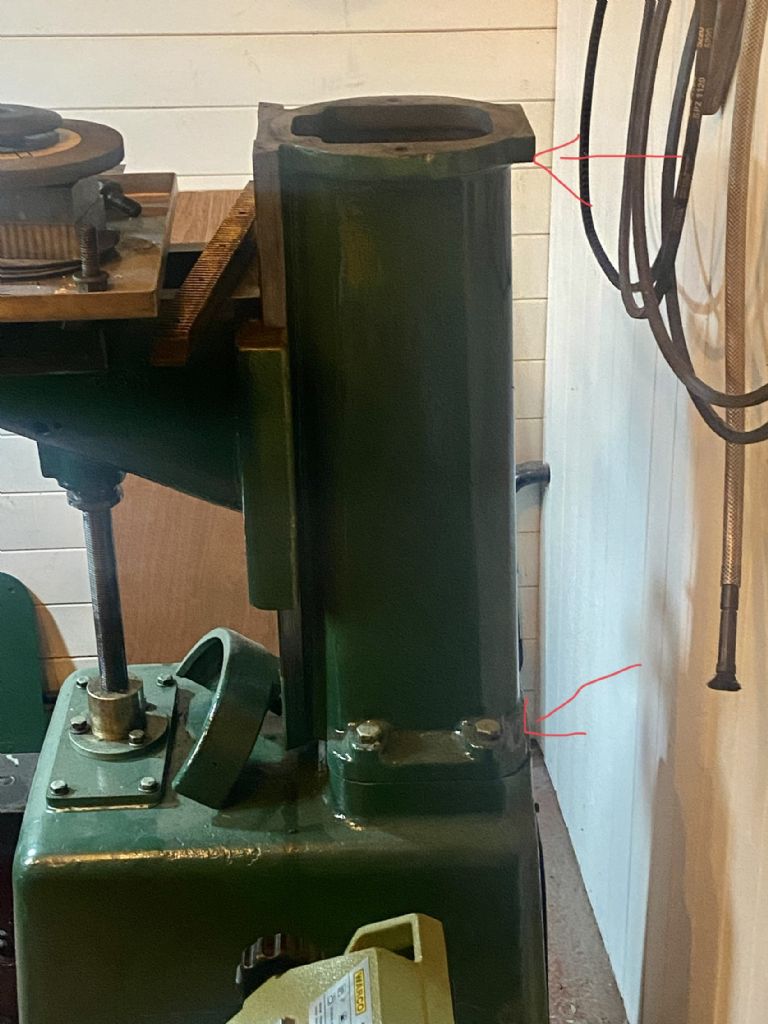
Hi all My new surface plate turned up yesterday at last, so I can get on with my surface grinder refurb project. It’s 25 inches long, and already I can see what a tremendous benefit it will be. Unbelievably heavy though. I will post progress on this thread for advice and moral support Looking at the Connelly machine tool reconditioning book, he is clear that one should start with the headstock and spindle, and work around the machine to the table. If one starts at the table, it’s possible to get everything square in relation to the table, only to find the spindle is pointing off around the room somewhere, with not much that can be done about it. So that’s what I did. Connelly gives the following tolerances for the spindle: Perpendicularity to the vertical axis of the machine - 0.0004” (I got 0.0001) Runout at the spindle - 0.0004” (surprising high I thought) - I measured 0.0004 So I am on the tolerance, and the headstock and spindle is acceptable. Does that sound right? I put my pillar drill vise on the headstock to keep it steady. It didn’t seem to wobble, but I was getting inconsistent readings until I did that. Also there was paint on the bottom reference surface of the headstock, which I had to remove. But I think as long as I can accept 0.0004 runout, the spindle assembly is good. Next it’s the column. I noticed the column seems to have some reference surfaces on the back, painted over, but look like the they were put there for measuring purposes (red arrows). So checking the flatness of the column is next. Any thoughts welcome.
Steve |
| Thread: 3/8”/M10 |
| 17/09/2022 16:02:01 |
Hi Very simple and quick question… The engineering suppliers in the UK do not realise that home machining is about as imperial as Jacob Rees-Mogg. I want to buy a shell mill. ALL of the MT2 arbors I can find for sale have an M10 thread. My DW mill has a 3/8” drawbar and will not accept a M10 drawbar. I have read that they are so close as to be interchangeable. Is this correct, or is it a no-no for some reason? (i.e. can I screw an M10 arbor onto a 3/8” drawbar?) thanks Steve Edited By Steve355 on 17/09/2022 16:05:38 |
| Thread: Mill spindle runout |
| 14/09/2022 09:48:00 |
Thanks to everybody who has taken the time to post and try to help me solve my problem. Yesterday I acquired a new 0.0001 DTI gauge, and I thought I would redo the measurements with that. So I cleaned up everything, got rid of the mag chuck, and used a proper M&W surface gauge. Most frustratingly, I got completely different results. Luckily, in the right direction. What I learned was: According to the new set up, the bearings on the spindle are within a reasonable tolerance Lessons: 1) Tenths are really, really small, and the slightest knock or piece of dirt, or burr, will make a significant difference to the readings, as it should. 2) It’s incredibly important to turn the spindle in the V blocks very gently and carefully 3) When a large, rapid jump occurs on the DTI dial, it is probably not due to a wear situation, more likely due to some manual or physical anomaly with the set up 4) just because a measurement shows up in a particular area of the test piece, does not mean that that area is the source of the measurement anomaly. The source of the anomaly may well be elsewhere (for example at the other end of the spindle) 5) in my case, the shoulder between the spindle shaft and the nose was not machined to a completely sharp right angle. I believe that this pressing up against the V block was causing a lot of the anomalous measurement. So with everything clean and carefully deburred with emery paper, and the shoulder of the nose of the spindle away from the V block, I am getting much better results. Here is a New Video showing the new measurements.
After everybody coming up with sage advice on remaking the spindle, I am hoping that in fact it is acceptable. Opinions on the video would be welcome. To be honest I’m feeling pretty stupid at the moment! But I guess that’s why I posted it in the beginners forum, working at tenths is not easy, and obviously requires a lot of experience, and I am definitely a beginner at it. I also mentioned before that once any preload is put on the bearings with the preload nut, the bearing will not turn easily. What I have discovered, is that that is in the horizontal position only. When I hold the quill in a vertical position, the bearings all run freely. However, in the video I have tried to illustrate a tiny amount of play that seems to exist, I am not sure whether this is play in the upper race bearing, or whether it is between the race bearing and the quill. The lower race bearing is a very firm fit in the quote and requires quite a lot of effort to get it out. The upper bearing on the other hand, is an easy push fit, and there may well be a tiny amount of play there. Thanks again for all the help everybody. Any further comments on what I should do next would be very welcome. It’s a journey! Steve
Edited By Steve355 on 14/09/2022 09:51:35 |
| 13/09/2022 09:59:50 |
|
See latest video….. Calibration of clock gauge Runout on spindle Runout on nose Runout on test bar and drill adapter Binding of spindle in bearings. So it looks like 2 problems: 1) Not very well made spindle, more runout than would usually be acceptable 2) Bearing issue, binding up when only finger tightness is applied to the preload nut. ”Change the bearings” everyone will say… but, is that the cause? One bearing is fairly loose and the other is very difficult to get in or out. Could the quill not be straight? The bearing seats misaligned? how could I tell? They run smoothly with no preload. New bearings = another £80! Any advice appreciated. Steve
Edited By Steve355 on 13/09/2022 10:00:35 |
| 12/09/2022 22:07:39 |
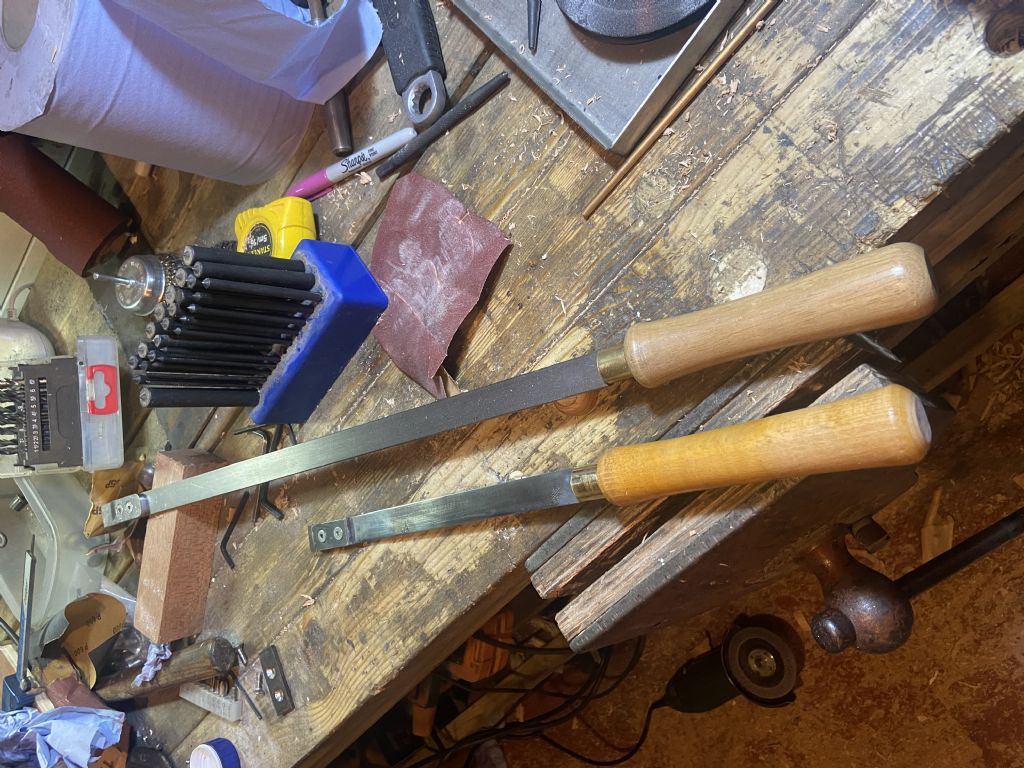
Gosh, a lot of posts since I last looked. I put some time into it at the weekend, including refurbing a tenths dial gauge I have to put the cosine error issue to bed. But alas, every time I measured I got different results. I will post a bunch of videos in the morning to illustrate. after a very frustrating few hours I got fed up and decided to make myself a smaller scraper to go with the big one I bought from eBay. Big one, 60 quid. Small one, nothing. |
| 09/09/2022 10:43:54 |
Posted by Michael Gilligan on 09/09/2022 10:26:05:
. Nice convincing demonstrations, Steve The ‘obvious but not trivially simple’ thing to do would be to re-finish the register and the socket in situ … use the spindle assembly as the headstock. MichaelG. Michael, I can see how to do that…. But it has an MT2 taper (constantly used) and a myford thread (less used). Those are the bits that look tricky to me. I have an Mt2 reamer. It could be possible that if held rigidly enough it would “centre itself” and ream the taper centrally if advanced a little further than it currently is. But it feels like a bit of a long shot. |
| 09/09/2022 09:36:15 |
Posted by not done it yet on 09/09/2022 09:27:55:
You should measure the runout at the inside of the spindle taper. If that is not possible, then on the outside of the chuck taper. As per Huub, above, measure the taper runout. A commercial blank 2MT arbor would suffice, for this. That’s the first thing I did, with a MT2 test bar and also a MT2 jacobs taper adapter, and it’s the same. 0.003.
Edited By Steve355 on 09/09/2022 09:46:57 |
| 09/09/2022 09:00:43 |
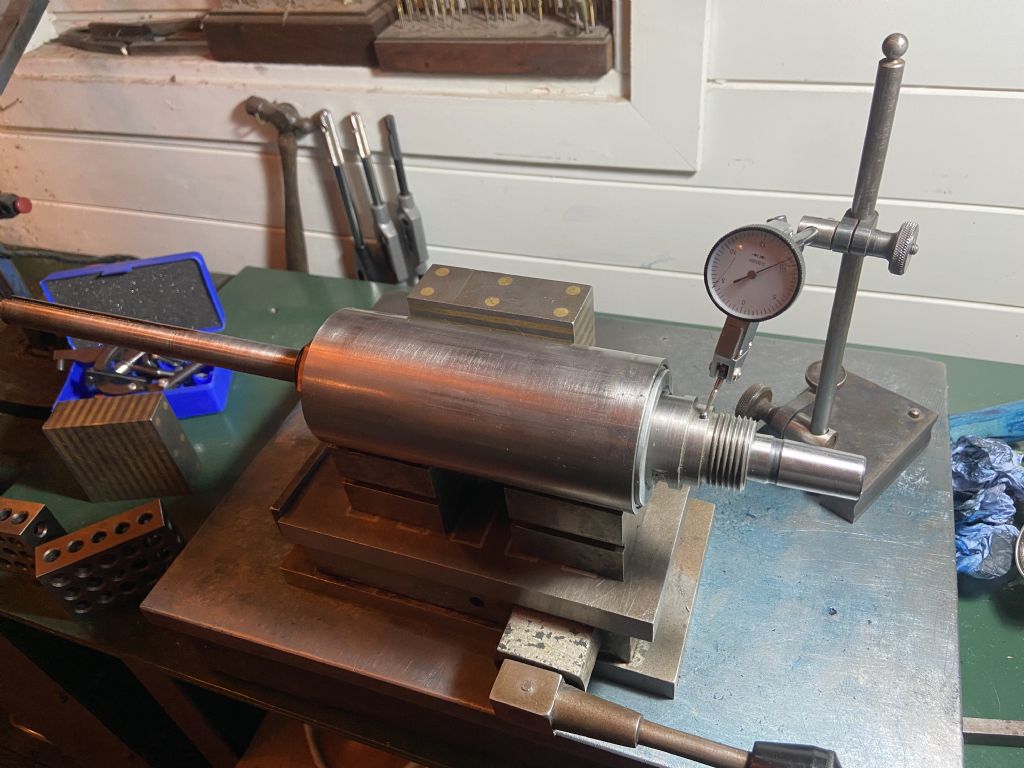
(of course it’s imperial, the Queen only died yesterday Well, eliminating the thust bearings altogether I stuck the spindle on some V blocks on a mag chuck, aligned with a parallel. On the nose, I again see the 0.003 runout…. On the bearing surface (which has a much better finish than other surfaces, Both bearing areas are exactly 0.999 diameter.) <0.0005 runout. Within expected tolerance. Unfortunately I think I have to conclude that when it was made, it was turned around, either in a chuck or between centres or something and wasn’t perfectly realigned. So I’m not sure there’s anything that can be done, the Morse taper is simply not aligned with the axis of the spindle. Spindle itself is running true. Any brilliant ideas very welcome.
Steve
|
| 09/09/2022 00:07:33 |
Hi I noticed the other day that my Dore Westbury mk 1 spindle was loose vertically, so I took it to bits to investigate and tighten it up. While doing this I thought I’d check the runout before I put it back in. I have some 0.0001 clocks these days, which I didn’t have when I got it. I found that it was about 0.0025 which obviously far too much. I’ve tried with various amounts of tightening of the preload (?) nuts and it doesn’t seem to make much difference. I’ve tried measuring it at the (point where the spindle exits the quill?) and also with a test bar in the mt2 socket, same results. The spindle doesn’t have a very good finish (home made obviously). But I’m not in a position to remake it as it’s too long for my lathe. The bearings look ok but there is some unevenness and roughness when turned manually! Which seems to correlate with the runout, How do I tell if it’s the spindle or bearings at fault? The bearings are expensive and I don’t want to get new ones if that isn’t the cause, im getting a nice new surface plate next week, it would be good to know what measurements to take to check out the spindle, if anyone has any ideas. pic below thanks Steve |
| Thread: Precision Level |
| 29/08/2022 22:04:27 |
I have to admit the Connelly book is pretty good. The procedures he provides for the different machine types are superb and very detailed. Admittedly my surface grinder is more like his horizontal mill (knee type) but it’s a question of picking the right bits from the different machine procedures to match your machine. Yes, it’s long winded and tedious but it’s an old book and they all were, It’s a treatise on the subject intended to be a guide but also to document it thoroughly for posterity. in a similar vein, Cassel’s Carpentry is an amazing book if you have a Victorian house, and you want to make an authentic door or sash window, or if you want to know how the fancy moulding work in palaces and stately homes was actually done. but I digress…. Looks like I need to start with the spindle. It all works from there, it needs to run with a tolerance of 0.0004. Then the column is trued to that, and on it goes. I was going to start with the table, I can see now why that would have been wrong, |
| 27/08/2022 13:37:31 |
Posted by Kiwi Bloke on 27/08/2022 05:57:36:
Well, it all depends on exactly what you're trying to do, and how you propose to do it. I think I understand what . Have you seen the book 'Machine Tool Reconditioning' by Edward F Connelly? It's a bit long in the tooth, and tediously repetitive, but covers the basics in considerable detail. no, it sounds good but it’s £300! I tried to find a pdf but couldn’t get it to download. |
| 27/08/2022 09:39:35 |
Posted by Pete Cordell on 27/08/2022 03:10:11:
Could just replace the vial in your Rabone level? Great idea. Why didn’t I think of that. |
| 26/08/2022 23:52:16 |
Hi I am about to embark on a surface grinder restoration project and I’m trying to get the right tools for it. So I can scrape the ways coplanar I reckon I need a precision level. It would also be useful for my other machines, but particularly the surface grinder as I really want to get it as accurate as I can. Some time ago I bought a little Rabone level, which looks like a precision level but isn’t. There are loads of similar “engineers” levels on eBay but very few of them have any info about the sensitivity. I guess I need 0.02mm/m or 0.05 mm/m or ideally the imperial equivalent. There are some Starrett master levels available but they are too expensive. I could get a new one from RDG but I am a sucker for vintage stuff if I can get it. thanks Steve |
| Thread: MEW 319 - Roofing A Shed?????? |
| 22/08/2022 08:26:38 |
Posted by lee webster on 21/08/2022 20:17:44:
I spent some time recently repairing my garage roof. It is a timber garage the length of two cars. I re-felted the roof several years ago, and it needs doing again. My repairs will last until next year. I really must get the issue with the shed roof article.
|
Want the latest issue of Model Engineer or Model Engineers' Workshop? Use our magazine locator links to find your nearest stockist!
Sign up to our newsletter and get a free digital issue.
You can unsubscribe at anytime. View our privacy policy at www.mortons.co.uk/privacy
- *Oct 2023: FORUM MIGRATION TIMELINE*
05/10/2023 07:57:11 - Making ER11 collet chuck
05/10/2023 07:56:24 - What did you do today? 2023
05/10/2023 07:25:01 - Orrery
05/10/2023 06:00:41 - Wera hand-tools
05/10/2023 05:47:07 - New member
05/10/2023 04:40:11 - Problems with external pot on at1 vfd
05/10/2023 00:06:32 - Drain plug
04/10/2023 23:36:17 - digi phase converter for 10 machines.....
04/10/2023 23:13:48 - Winter Storage Of Locomotives
04/10/2023 21:02:11 - More Latest Posts...
- View All Topics
- Reeves** - Rebuilt Royal Scot by Martin Evans
by John Broughton
£300.00 - BRITANNIA 5" GAUGE James Perrier
by Jon Seabright 1
£2,500.00 - Drill Grinder - for restoration
by Nigel Graham 2
£0.00 - WARCO WM18 MILLING MACHINE
by Alex Chudley
£1,200.00 - MYFORD SUPER 7 LATHE
by Alex Chudley
£2,000.00 - More "For Sale" Ads...
- D1-3 backplate
by Michael Horley
Price Not Specified - fixed steady for a Colchester bantam mark1 800
by George Jervis
Price Not Specified - lbsc pansy
by JACK SIDEBOTHAM
Price Not Specified - Pratt Burnerd multifit chuck key.
by Tim Riome
Price Not Specified - BANDSAW BLADE WELDER
by HUGH
Price Not Specified - More "Wanted" Ads...
Do you want to contact the Model Engineer and Model Engineers' Workshop team?
You can contact us by phone, mail or email about the magazines including becoming a contributor, submitting reader's letters or making queries about articles. You can also get in touch about this website, advertising or other general issues.
Click THIS LINK for full contact details.
For subscription issues please see THIS LINK.
Model Engineer Magazine
- Percival Marshall
- M.E. History
- LittleLEC
- M.E. Clock
ME Workshop
- An Adcock
- & Shipley
- Horizontal
- Mill
Subscribe Now
- Great savings
- Delivered to your door
Pre-order your copy!
- Delivered to your doorstep!
- Free UK delivery!
 and also it may be useful,to others attempting a similar project.
 )
)


 Register
 Log-in


