Member postings for Andy_G
Here is a list of all the postings Andy_G has made in our forums. Click on a thread name to jump to the thread.
| Thread: Best aluminium grade for con rods |
| 30/03/2022 12:21:13 |
Wow, I didn't realise that 2014 was so strong - especially in T651 condition. Question answered. |
| 30/03/2022 10:58:16 |
Is there any problem using 6082 / HE30 for conrods? (In T6 condition) Edited By Andy_G on 30/03/2022 11:00:01 |
| Thread: Help with Excel |
| 21/03/2022 18:25:04 |
Posted by Nealeb on 21/03/2022 17:46:55:
No argument, Andy - I was thinking "general case" Absolutely! A general solution is much more complicated.than my description
FWIW I've sent Dave the spreadsheet I used. It remains to be seen whether anyone other than the author can make head or tail of it! Andy |
| 21/03/2022 17:29:20 |
Posted by Nealeb on 21/03/2022 16:58:58:
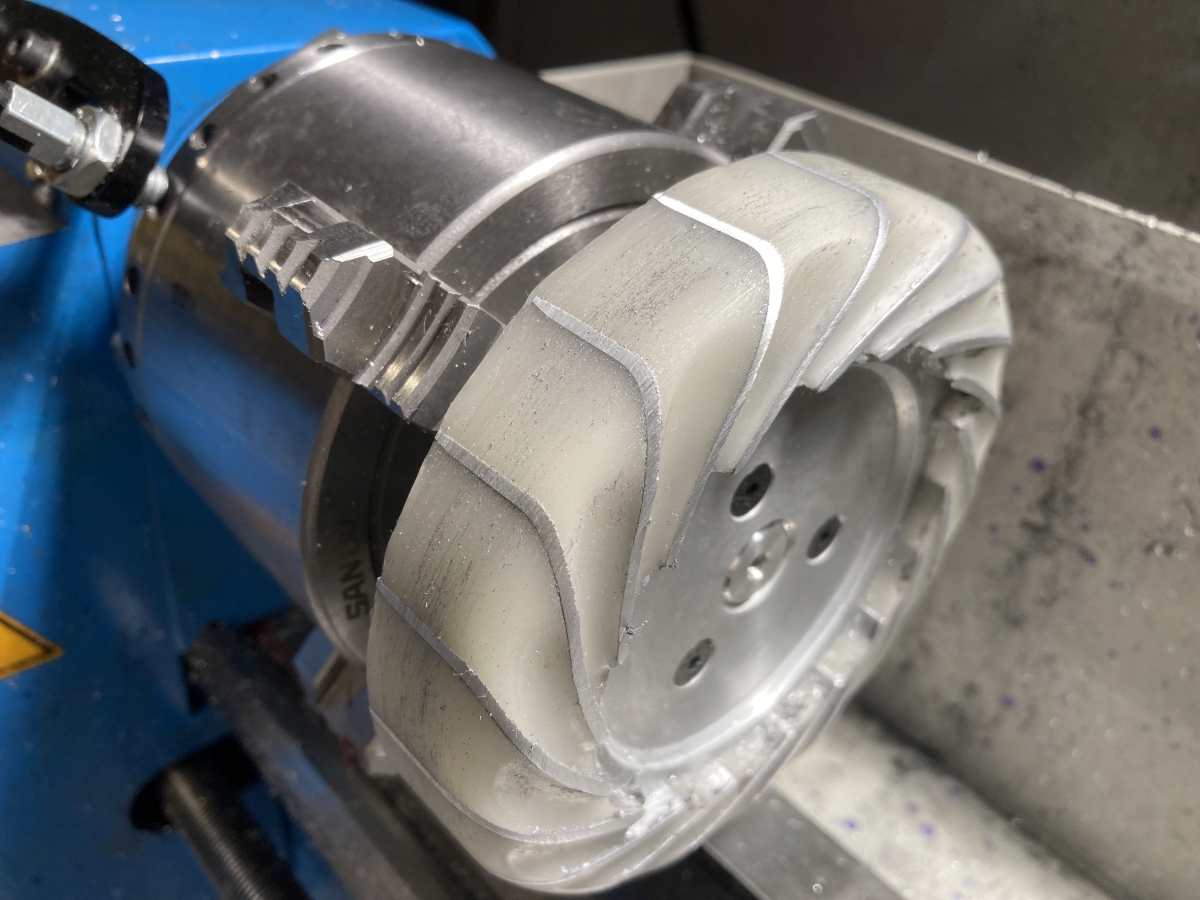
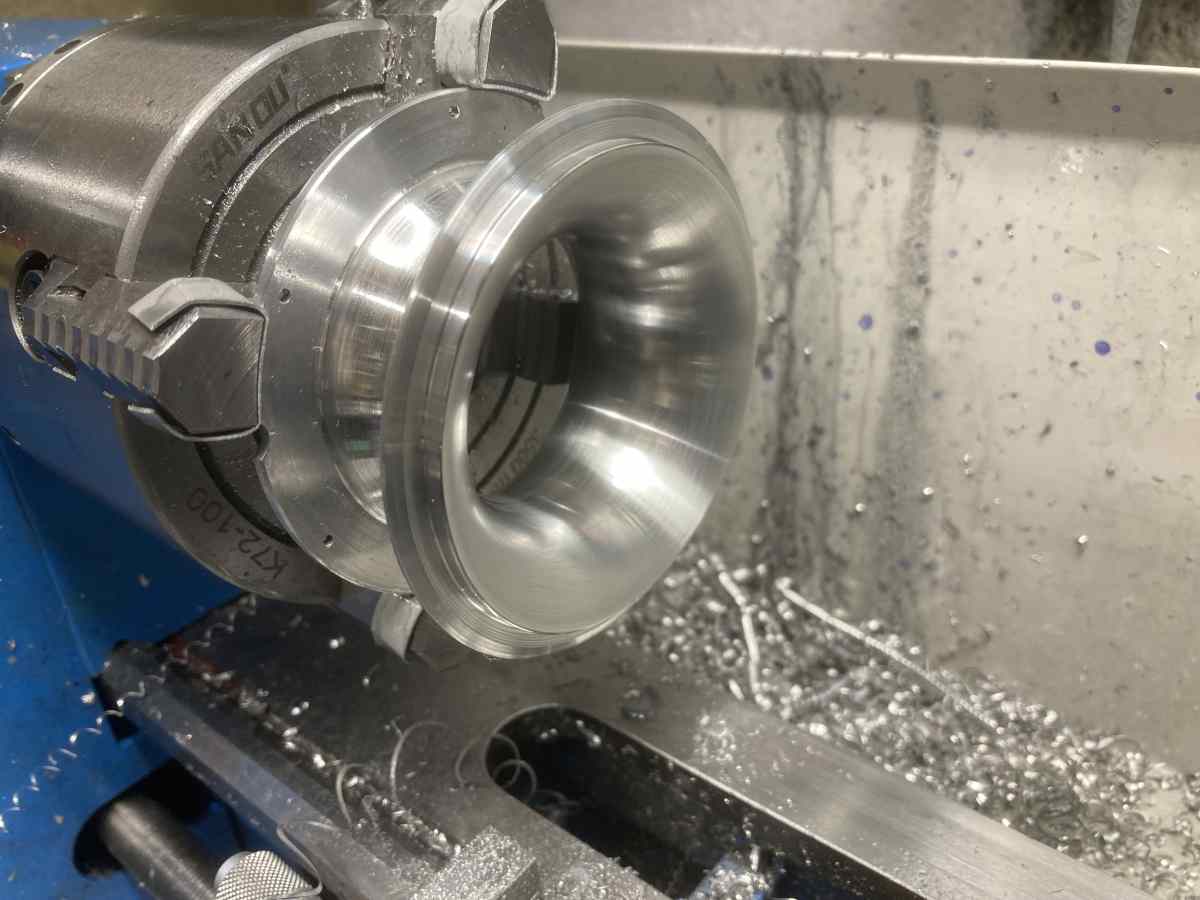
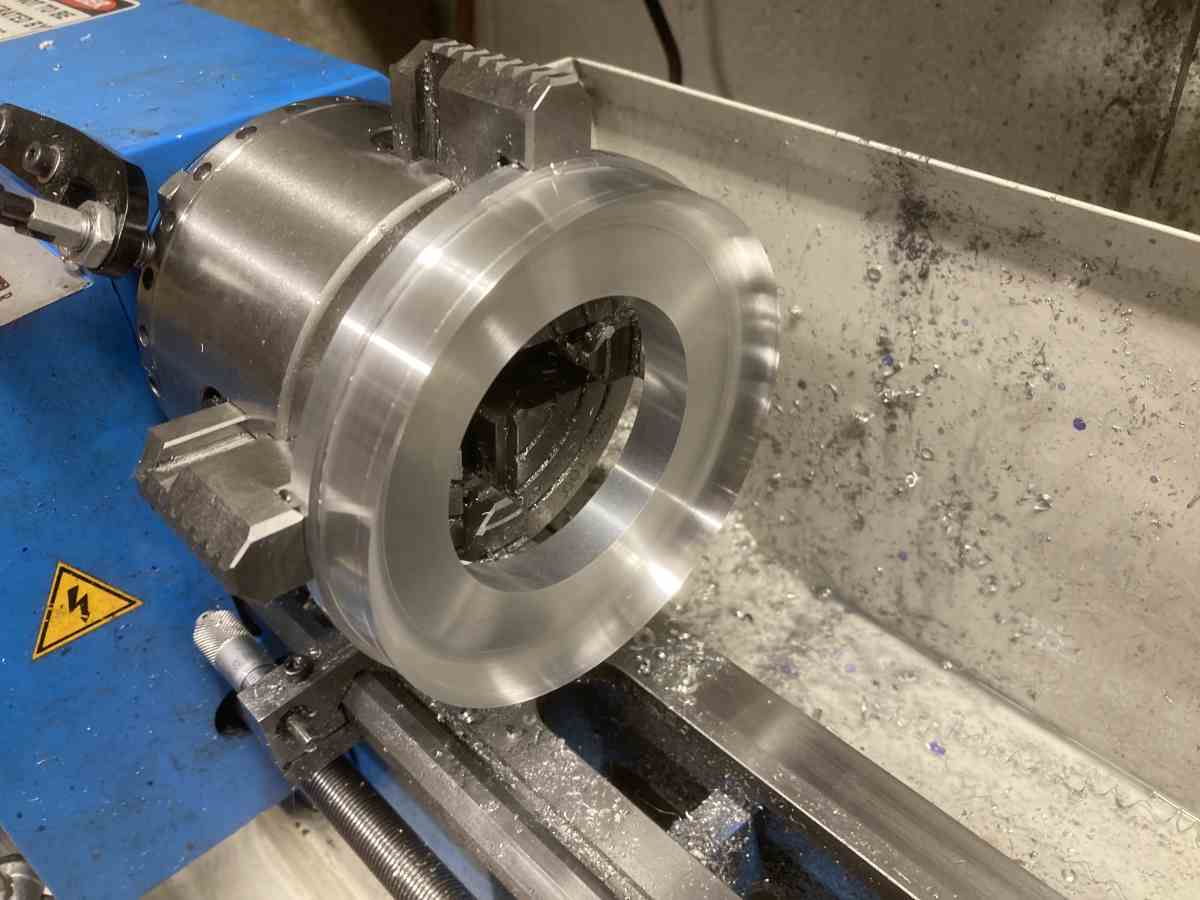
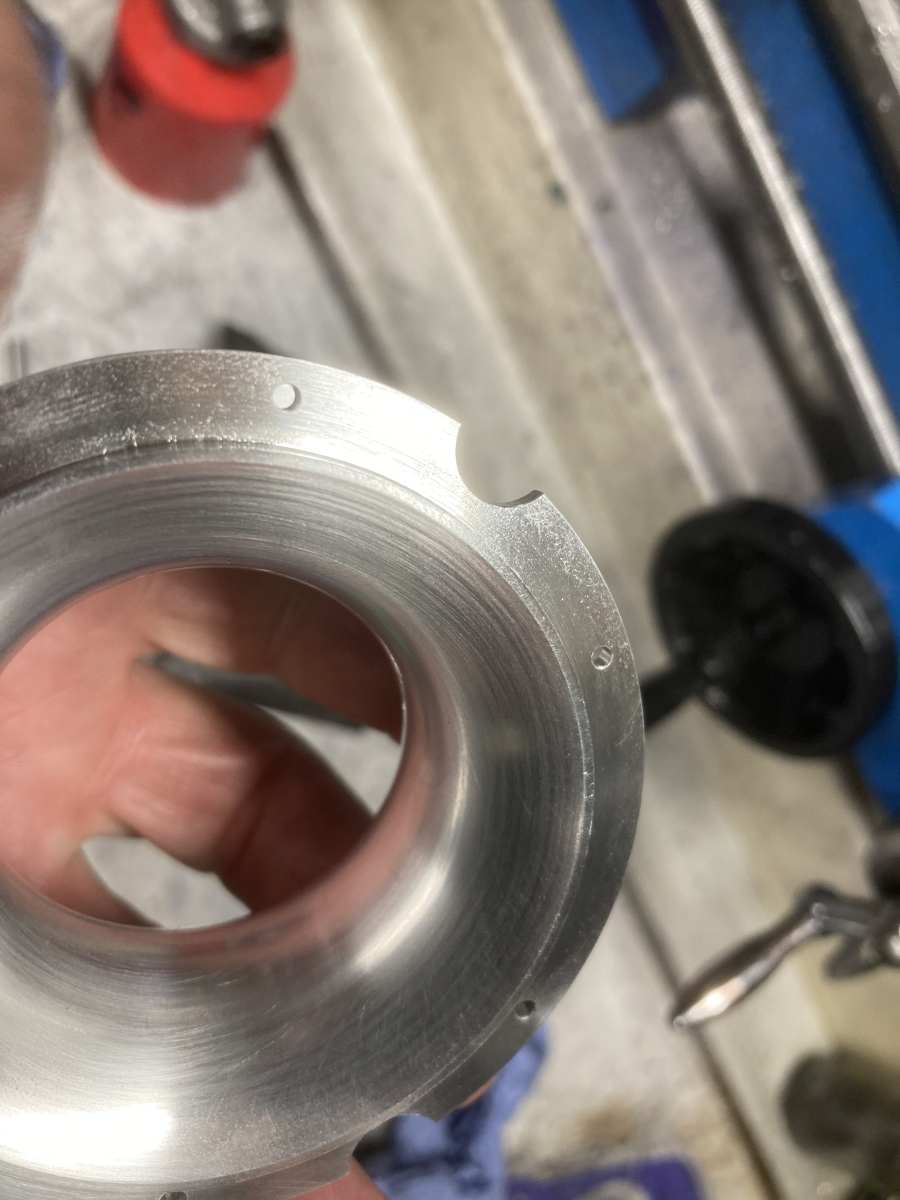
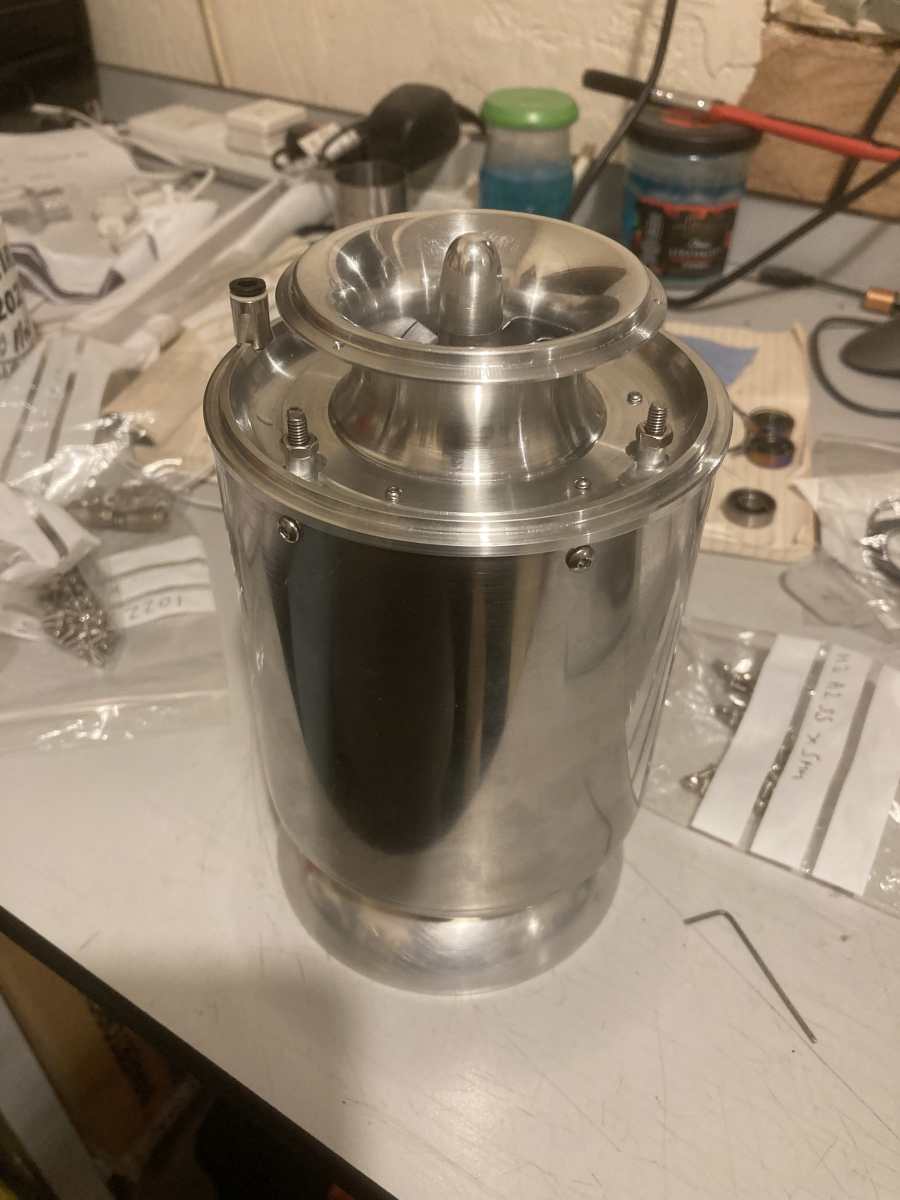
The reason is that in order to position the tool, assuming that you are using a circular button tool, you need the coords of the centre point of the tool. The actual contact point - where the cutting takes place - is a bit more difficult to calculate than just the curve itself as there is an offset of tool position from the curve that depends on the curvature of that curve at a given point. With a circular arc and a circular tool, the XY coordinates of the tool centre point wrt the arc centre point are honestly just the XY coordinates of the arc multiplied or divided* by [arc radius] / ([Tool radius] + [arc radius]) The proof / derivation is via similar triangles. These coordinates (relative to the arc centre) then need to be translated into X,Y (or X,Z) tool movements relative to a datum position. *Depending on whether the cut surface is concave or convex All the following were cut this way with 0.2mm step in X and a 6mm diameter button tool
8mm external convex radius:
20mm internal convex radius
External concave radius
8mm internal concave radius
17.85 mm internal convex radius
etc...
Edited By Andy_G on 21/03/2022 17:34:14 |
| 21/03/2022 13:54:21 |
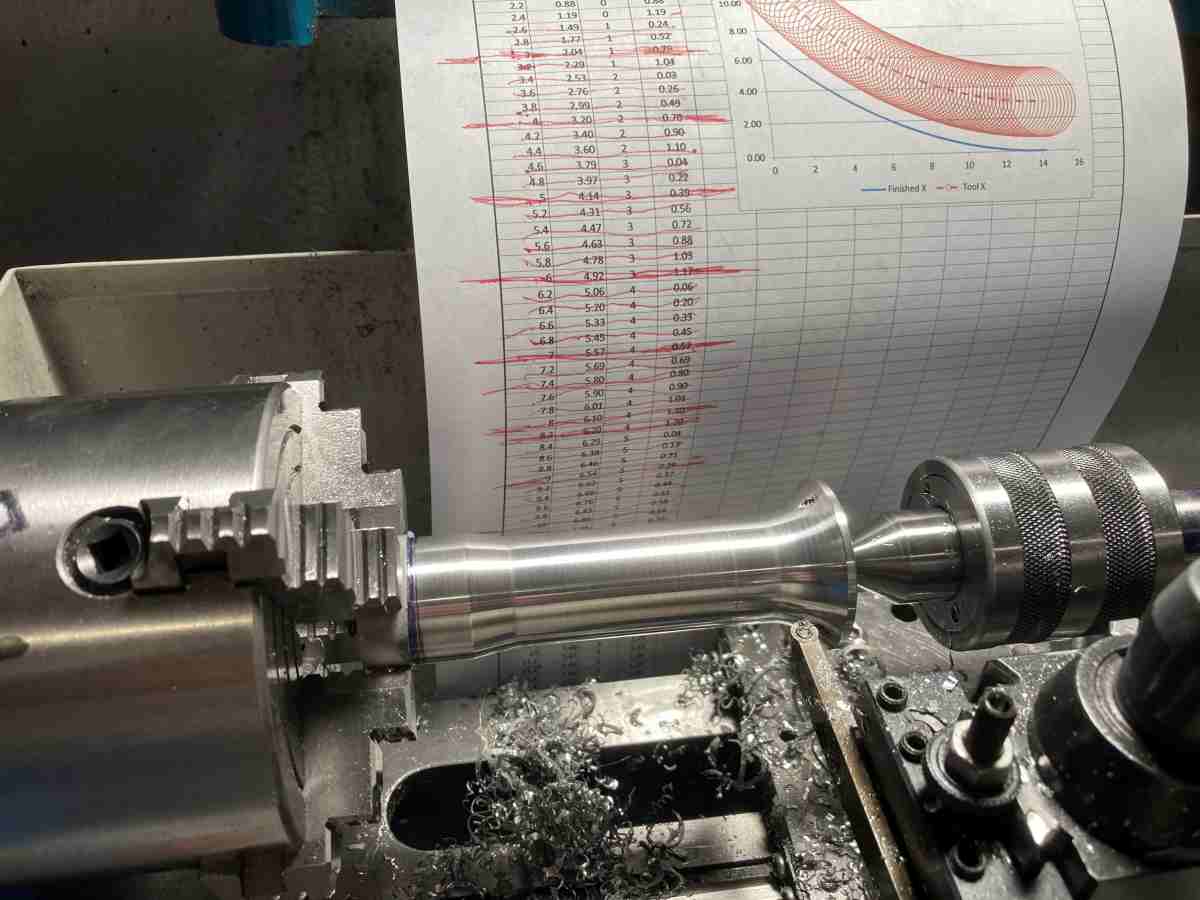
You can work out the X-Y coordinates of the surface from the formula for a circle (X^2 + Y^2 = R^2) where the origin is the centre of the arc. It's easiest to work with a round tool (e.g. a pattern following tool or a carbide button). Translating the surface coordinates of a concave surface to the centre point of a tool of radius r then boils down to scaling the X & Y coordinates by R/(R+r). You can then choose a known reference position and offset the coordinates wrt this to get your cross slide and feed readings. The devil is in the detail in getting the sign conventions correct! I used this method to turn some accurate curves in my model jet engine - there's a fairly detailed description part way down this page https://misterg.org.uk/turbine-html-16/ I find it easiest to set the top slide parallel to the bed and use this for the Z feed, rather than the carriage. I set a stop on the lathe bed where the tool just touches the face of the part and zero the top slide dial. Cross slide dial is zeroed by touching off on the OD. I can then wind the carriage back, increment the cross slide and set the desired Z travel on the top slide without cutting any metal whilst making the adjustment. I have also sent you a PM
Andy Edited By Andy_G on 21/03/2022 13:57:13 |
| Thread: Drilling 38 x 1.5mm 316 polished stainless tube. |
| 15/03/2022 10:03:34 |
Posted by Steve Skelton 1 on 14/03/2022 10:19:01:
maybe flooding with cooling water...
I would highly recommend using a decent cutting oil instead. It doesn't need much, so shouldn't make additional mess. There are many, many available, but I tend to use CT-90 as it is cheaper than most. I would also lightly centre punch the hole location. If you're drilling polished stainless tube, the drill point will want to skate off it until it gets going which could result in the drill bit chewing away at the side of your jig. Otherwise, as above: Decent HSS drill bit; slow speed & apply as much pressure as you need to keep it cutting - it doesn't need huge pressure, but you need enough pressure to get it cutting right from the start. Be bold and keep going! (Bear in mind that you will need to ease off the pressure as the drill breaks through). FWIW, I would go straight for 6mm. |
| Thread: Songs about Engineering |
| 23/02/2022 10:50:02 |
Maybe not for headbangers: Dire Straits "Industrial Disease"
[Verse 2] [Verse 3]
[Verse 5] [Verse 6] Oh no... I'm sick!
|
| Thread: Acceptable run-out on Axminster SX1 milling machine? |
| 21/02/2022 08:56:17 |
Posted by David Hogg on 20/02/2022 20:26:34:
Maybe I should first ask Axminster for a replacement to see if it’s any better? Maybe I’m being a bit pedantic given that I’m so new to all this ... I don't think you're being pedantic, and I would ask Axminster to replace the holder. The ER system is very versatile, and worth persevering with to get a set-up you have confidence in. This sort of thing does happen, as I found with an ER11 collet holder. (Both the original and the replacement were direct from China, though, not via one of the UK agents.) |
| Thread: FOR THE EXPERTS ! |
| 14/02/2022 10:32:11 |
Did you check / compare the heights of each piston at TDC? |
| Thread: Proxxon PD 250/E losing power |
| 07/02/2022 13:05:46 |
I don't know the detail of how its put together, but it looks / sounds very much like the pulley/sprocket/whatever is slipping on the motor shaft. (Looks like part #46 on page 16 of the manual - try tightening #45) |
| Thread: Steam Engine Number One |
| 07/02/2022 12:58:21 |
Posted by Iain Downs on 06/02/2022 17:24:36:
Sorry about the long delay - no doubt you were all gagging to find out if it worked or not... Absolutely! Congratulations and very well done! |
| Thread: FOR THE EXPERTS ! |
| 07/02/2022 08:01:46 |
Adiabatic calculator: The theoretical pressure for adiabatic volume reduction of 16.7:1 is in the region of 800 PSI.
|
| Thread: Standard paint codes on steel bars? |
| 24/01/2022 12:01:11 |
Not sure how standard it is, but could be EN1A (or 304 stainless):
https://www.parkersteel.co.uk/Pages/Engineering-Steel-Colour-Chart
|
| Thread: Electro etching |
| 22/01/2022 22:09:12 |
I don't think there'd be a problem cutting a long strip (one would need to produce the artwork somehow though). It might be a bit tricky to get the scaling right to exactly match the table circumference. Maybe not so much of an issue if you were only proposing to etch the numerals, but (I think) quite challenging for the graduations.
|
| 22/01/2022 18:19:17 |
Posted by Peter Ellis 5 on 21/01/2022 13:26:09:
I have been thinking of Electro etching the 360deg scale around my Pillar Tool Table. Does anyone know of a supplier for the masks ? Cheers Peter The guy in the video below uses a vinyl stencil (7:28 if it doesn't go there on its own). I see that there are plenty of places offering a cutting service, but haven't done it myself, so can't make any personal recommendations. |
| Thread: Tangential tool sharpening |
| 21/01/2022 11:55:31 |
Actually, the stuff I have could well be engraving brass - if so, it machines very differently to "normal" brass. |
| 20/01/2022 10:39:55 |
Posted by Andy_C on 18/01/2022 18:29:56:
I have just resharpened my tangential tool and achieved a good finish on brass but with spiral swarf. Is my sharpening not quite right?
What grade of brass is it? I acquired a sheet of what I thought was brass (it looked like it), but I believe it’s actually aluminium bronze. It produced similar curly chips.
Edited By Andy_G on 20/01/2022 10:41:05 |
| Thread: Can you recommend a "medium-speed" epoxy adhesive? (e.g. "30 minute" or "60 minute") |
| 19/01/2022 10:01:22 |
On the topic of epoxy adhesives: I recently found UHU Endfest 300 which has worked very well for me so far (on aluminium). It has a reasonable datasheet at: Several things are of interest to me: 1) It retains some strength to 140°C 2) It allows the mixing ratio to be varied to optimise its properties (between brittle and flexible). 3) Although a relatively slow curing adhesive, the datasheet gives information on heat curing which dramatically reduces the full cure time (to as little as 5 minutes if the work can withstand 180°C). 4) It is fairly cheap! - Especially compared to other "high temperature" epoxies (whose performance appears similar). If the OP is prepared / able to heat the parts, it may be an option. For others, it may be a useful 'high temperature' epoxy (I haven't looked at the Zap products - there may be something similar in their range). |
| Thread: Lathe drilling attachment |
| 12/01/2022 11:42:45 |
Posted by ega on 12/01/2022 11:10:49:
With that point in mind, I made this spindle lock for my Willson lathe:
The cam action clamp will be familiar to cyclists. That looks *much* more workmanlike. (I may steal the idea!) |
| 12/01/2022 11:10:23 |
Posted by Henry Brown on 12/01/2022 10:42:29:
Just curious, what stops the chuck from rotating when milling/drilling other than putting it in a low gear which presumably still allows some movement due to backlash? I have added a plunger mechanism to the headstock that engages in indexing holes drilled the chuck backplate:
24 holes works OK for the common 2,3,4,6,8, etc... patterns. For anything else, I get all agricultural:
(Model jet engine that needed 15, 17 & 19 positions!) Edited By Andy_G on 12/01/2022 11:10:42 |


Magazine Locator
Want the latest issue of Model Engineer or Model Engineers' Workshop? Use our magazine locator links to find your nearest stockist!
Sign up to our Newsletter
Sign up to our newsletter and get a free digital issue.
You can unsubscribe at anytime. View our privacy policy at www.mortons.co.uk/privacy
Latest Forum Posts
- *Oct 2023: FORUM MIGRATION TIMELINE*
05/10/2023 07:57:11 - Making ER11 collet chuck
05/10/2023 07:56:24 - What did you do today? 2023
05/10/2023 07:25:01 - Orrery
05/10/2023 06:00:41 - Wera hand-tools
05/10/2023 05:47:07 - New member
05/10/2023 04:40:11 - Problems with external pot on at1 vfd
05/10/2023 00:06:32 - Drain plug
04/10/2023 23:36:17 - digi phase converter for 10 machines.....
04/10/2023 23:13:48 - Winter Storage Of Locomotives
04/10/2023 21:02:11 - More Latest Posts...
- View All Topics
Support Our Partners


Shopping Partners
Subscription Offer

Latest "For Sale" Ads
- Reeves** - Rebuilt Royal Scot by Martin Evans
by John Broughton
£300.00 - BRITANNIA 5" GAUGE James Perrier
by Jon Seabright 1
£2,500.00 - Drill Grinder - for restoration
by Nigel Graham 2
£0.00 - WARCO WM18 MILLING MACHINE
by Alex Chudley
£1,200.00 - MYFORD SUPER 7 LATHE
by Alex Chudley
£2,000.00 - More "For Sale" Ads...
Latest "Wanted" Ads
- D1-3 backplate
by Michael Horley
Price Not Specified - fixed steady for a Colchester bantam mark1 800
by George Jervis
Price Not Specified - lbsc pansy
by JACK SIDEBOTHAM
Price Not Specified - Pratt Burnerd multifit chuck key.
by Tim Riome
Price Not Specified - BANDSAW BLADE WELDER
by HUGH
Price Not Specified - More "Wanted" Ads...
Get In Touch!
Do you want to contact the Model Engineer and Model Engineers' Workshop team?
You can contact us by phone, mail or email about the magazines including becoming a contributor, submitting reader's letters or making queries about articles. You can also get in touch about this website, advertising or other general issues.
Click THIS LINK for full contact details.
For subscription issues please see THIS LINK.
Digital Back Issues


Donate

 Register
 Log-in
Model Engineer Magazine
- Percival Marshall
- M.E. History
- LittleLEC
- M.E. Clock

ME Workshop
- An Adcock
- & Shipley
- Horizontal
- Mill

Subscribe Now
- Great savings
- Delivered to your door

Pre-order your copy!
- Delivered to your doorstep!
- Free UK delivery!