Mounting DRO scale on rough cast iron surface
| Y C Lui | 17/06/2022 05:23:26 |
| 84 forum posts 35 photos | Just wondering how to prevent the scale from tilting after tightening the mounting bolt ..... would like to hear some thoughts. |
| DC31k | 17/06/2022 06:18:40 |
| 1186 forum posts 11 photos | Set it up as three points of contact with a gap behind. Clingfilm on the scale and fill the gap with JB Weld. Once set, remove the clingfilm. |
| DiogenesII | 17/06/2022 06:24:19 |
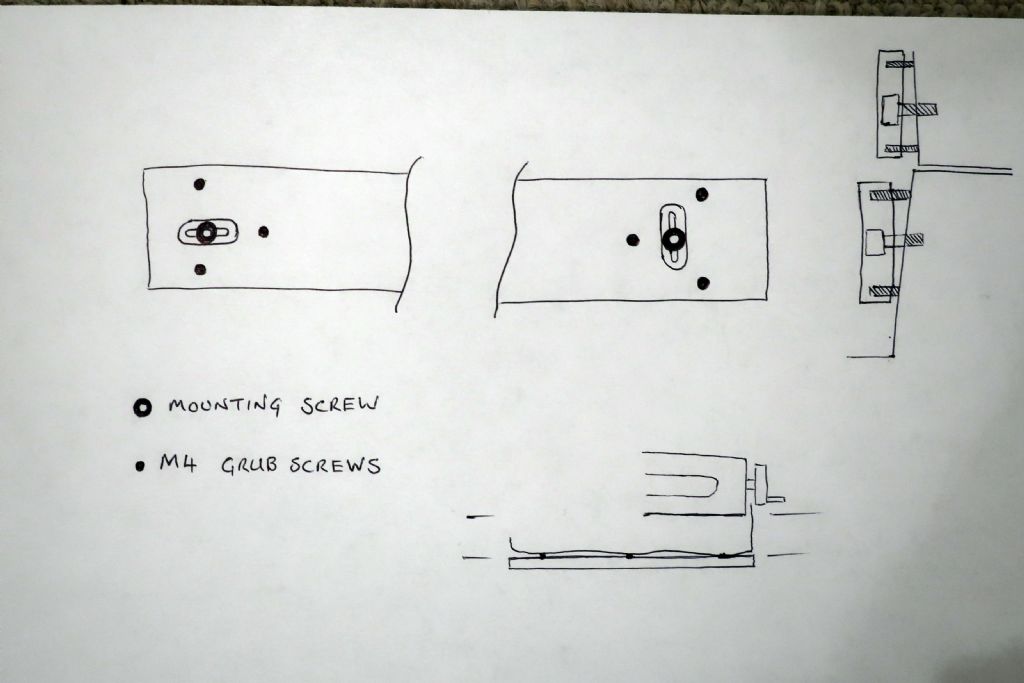
| 859 forum posts 268 photos | Here's an old sketch of how I mounted the bracket for the Y-axis on the base of my mill; |
| Pete Rimmer | 17/06/2022 07:09:56 |
| 1486 forum posts 105 photos | Posted by DC31k on 17/06/2022 06:18:40:
Set it up as three points of contact with a gap behind. Clingfilm on the scale and fill the gap with JB Weld. Once set, remove the clingfilm. Yep, JB weld or body filler. Snug the screws up just enough to hold the scale in place.
Or, what I have done, drill and tap to fit 3 or 4 jacking screws in a sub plate with the fixing bolts between. Yuo can then adjust the sub plate into truth and then fix the scale to that. |
| Clive Foster | 17/06/2022 10:05:01 |
| 3630 forum posts 128 photos | +1 for the sub plate suggestion from Pete. Takes a bit of thought and preparation to clamp the plate down onto to its bed of filler so the surface that the DRO scale will mount to it true to the head movement but its all simple stuff and when done it just works. Jacking screws can work loose over years and shimming is even more tedious than getting a sub plate on. Thing I really don't like about those ideas is that you are working directly with a moderately expensive and not particularly strong component. Pushing 50 years of butting heads with lawyer Murphy and the gremlin squad has convinced me that the first thing to consider when dealing with a non routine job is "what happens if it goes wrong". The more money you have in the game the more important that gets. Clean-up and sort out assistance for the rush headed can be salutary. When I put the knee scale on my Bridgeport I bedded the one of the aluminium L sections out of the universal mount kit on body filler, with the aid of rather more brackets, clamps and shimmy bits than I'd expected to get it all true. To simplify clean up I lubricated the mating face of the L section so it could be lifted off after "moulding" the mating surface. I was unpleasantly surprised by just how uneven and out of line with the movements the finished surface was. Adcock Shipley did a good job of filling and smoothing their castings but the nice finish hid a surface that was, in my view, ultimately too uneven to risk direct mounting of a scale. Clive |
| ega | 17/06/2022 11:08:56 |
| 2805 forum posts 219 photos | If a true hole can be drilled in the casting then a piloted spot face cutter can be used to produce a true surface. Three of these plus fine tuning via shim washers should then suffice in many cases. |
| Pete Rimmer | 17/06/2022 16:20:35 |
| 1486 forum posts 105 photos | Here is how I did it to mount a DRO scale reader head. Four grub screws for Jacking and two bolts for fixing. Dry-fit it up then add threadlock to the jacks.
|
| Macolm | 17/06/2022 21:26:41 |
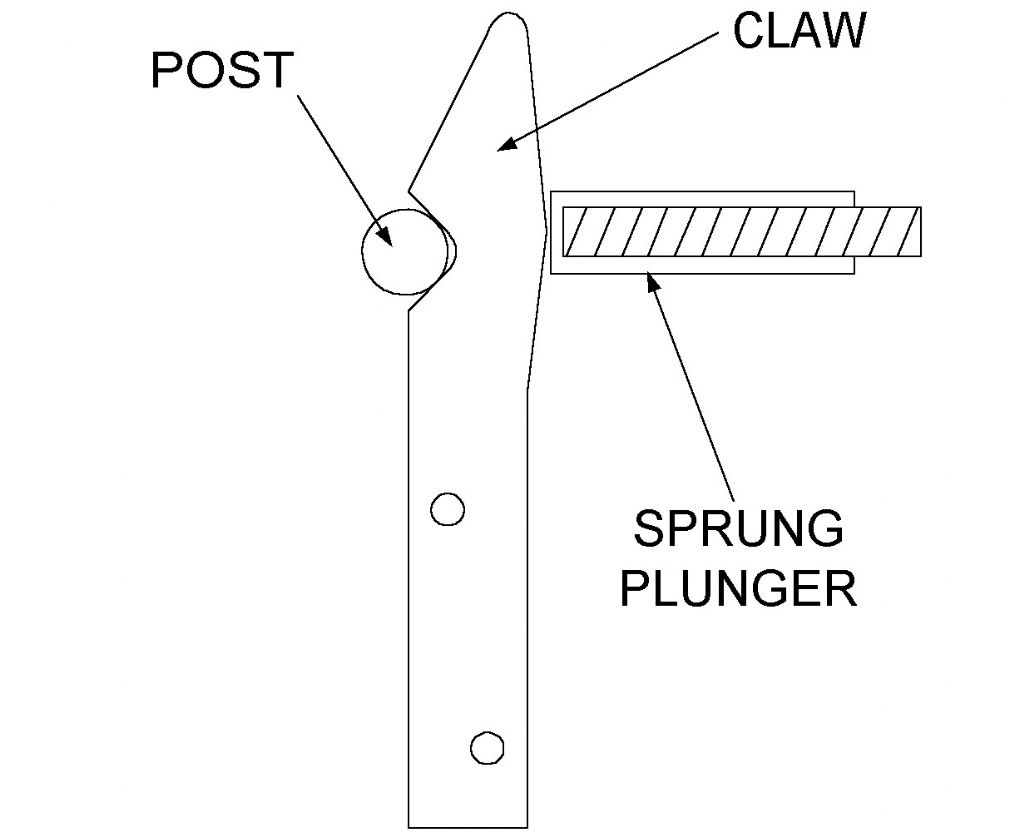
185 forum posts 33 photos | I have taken a different approach, using self-aligning mountings with zero backlash to avoid the risk of distortion and high operating forces. Here is diagram showing an example. It also allows the scale unit to be detached by snapping out the fixing. You can see how it would work in this case, needing a simple tapped hole for the post.
Edited By Macolm on 17/06/2022 21:28:55 |
| Y C Lui | 20/06/2022 02:44:22 |
| 84 forum posts 35 photos | Posted by Macolm on 17/06/2022 21:26:41:
I have taken a different approach, using self-aligning mountings with zero backlash to avoid the risk of distortion and high operating forces. Here is diagram showing an example ...
Um.... I am afraid I cannot understand. |
| DMB | 20/06/2022 08:41:18 |
| 1585 forum posts 1 photos | Nor can I. John
|
| Macolm | 20/06/2022 14:20:25 |
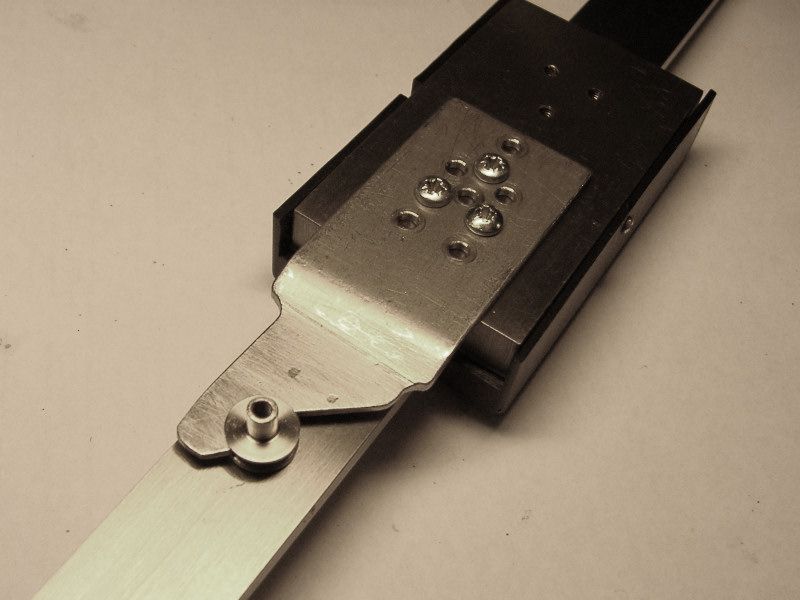
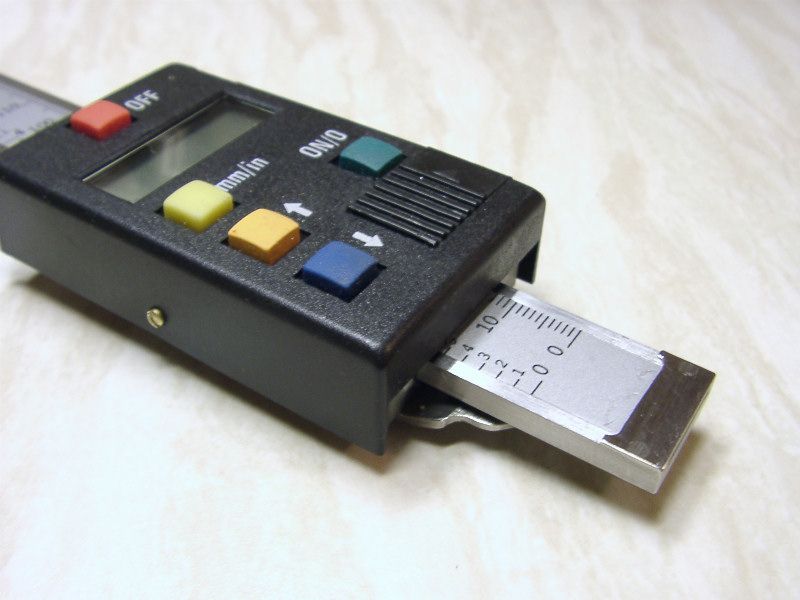
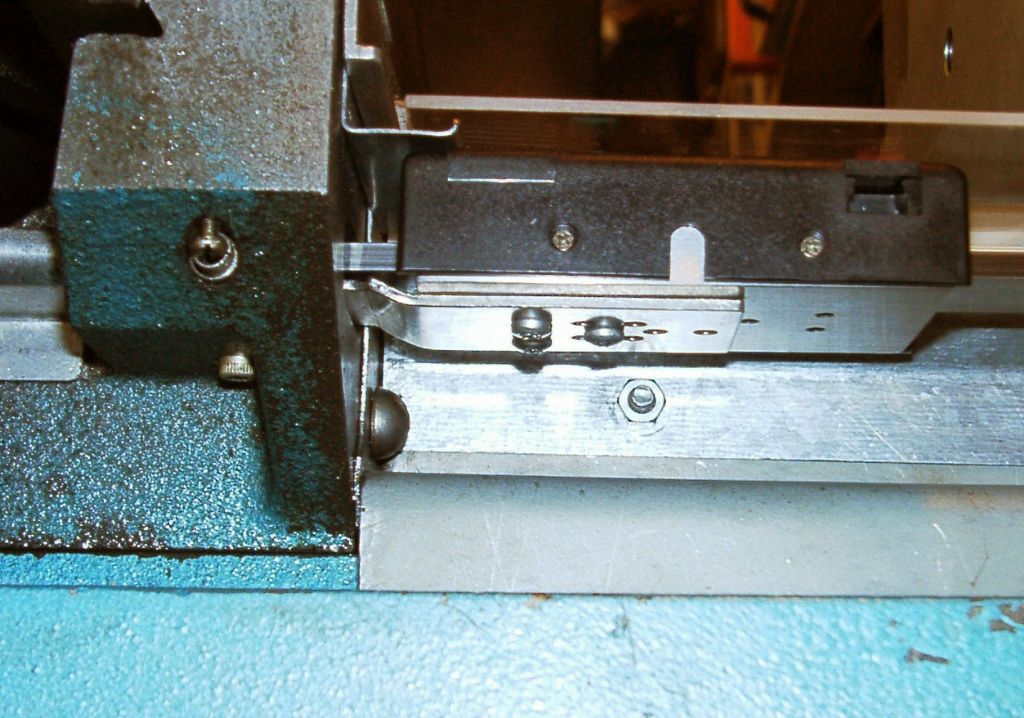
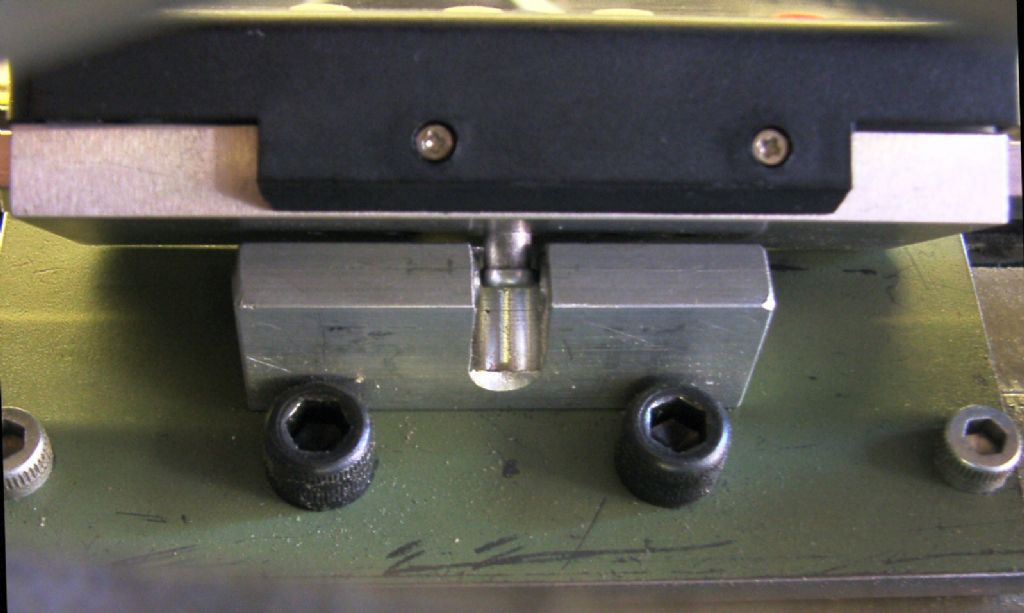
185 forum posts 33 photos | I chose a bad example, sorry about that, and will try to clarify. The claw and post image above shows the claw fitted to the underside of a display readout head with the post lying in its working position. The post only needs a single hole to fit to the machine, and it allows some freedom of movement in the other two axes, but locates the readout head rigidly along the measurement axis. The scale readout image above shows how this looks from the front of the readout head.
Unfortunately it is not possible to see this when it is assembled on the mill, because the post is intentionally fitted inside a tunnel through the mill Y axis casting. The spring plunger similarly fits in a hole so as to push the claw against the post.
The scale fitted image above shows how this looks from the outside, and you should be able to deduce how it is laid out. It was done like this to get it out of the way and provide some protection. It has been used successfully for more than ten years.
Another (perhaps easier to understand) example is the X axis readout head. The floating ref image above shows a spherical headed post (made from a hardened thread forming screw), fitted to the underside of the readout head. It is nipped between a fixed “anvil” and a sprung plunger, again not impeding alignment in the Y and Z axes, but having no backlash in X.
I hope this helps understanding the concept. Edited By Macolm on 20/06/2022 14:21:19 |
Please login to post a reply.
Want the latest issue of Model Engineer or Model Engineers' Workshop? Use our magazine locator links to find your nearest stockist!
Sign up to our newsletter and get a free digital issue.
You can unsubscribe at anytime. View our privacy policy at www.mortons.co.uk/privacy
- *Oct 2023: FORUM MIGRATION TIMELINE*
05/10/2023 07:57:11 - Making ER11 collet chuck
05/10/2023 07:56:24 - What did you do today? 2023
05/10/2023 07:25:01 - Orrery
05/10/2023 06:00:41 - Wera hand-tools
05/10/2023 05:47:07 - New member
05/10/2023 04:40:11 - Problems with external pot on at1 vfd
05/10/2023 00:06:32 - Drain plug
04/10/2023 23:36:17 - digi phase converter for 10 machines.....
04/10/2023 23:13:48 - Winter Storage Of Locomotives
04/10/2023 21:02:11 - More Latest Posts...
- View All Topics
- Reeves** - Rebuilt Royal Scot by Martin Evans
by John Broughton
£300.00 - BRITANNIA 5" GAUGE James Perrier
by Jon Seabright 1
£2,500.00 - Drill Grinder - for restoration
by Nigel Graham 2
£0.00 - WARCO WM18 MILLING MACHINE
by Alex Chudley
£1,200.00 - MYFORD SUPER 7 LATHE
by Alex Chudley
£2,000.00 - More "For Sale" Ads...
- D1-3 backplate
by Michael Horley
Price Not Specified - fixed steady for a Colchester bantam mark1 800
by George Jervis
Price Not Specified - lbsc pansy
by JACK SIDEBOTHAM
Price Not Specified - Pratt Burnerd multifit chuck key.
by Tim Riome
Price Not Specified - BANDSAW BLADE WELDER
by HUGH
Price Not Specified - More "Wanted" Ads...
Do you want to contact the Model Engineer and Model Engineers' Workshop team?
You can contact us by phone, mail or email about the magazines including becoming a contributor, submitting reader's letters or making queries about articles. You can also get in touch about this website, advertising or other general issues.
Click THIS LINK for full contact details.
For subscription issues please see THIS LINK.
Model Engineer Magazine
- Percival Marshall
- M.E. History
- LittleLEC
- M.E. Clock
ME Workshop
- An Adcock
- & Shipley
- Horizontal
- Mill
Subscribe Now
- Great savings
- Delivered to your door
Pre-order your copy!
- Delivered to your doorstep!
- Free UK delivery!





 Register
 Log-in


