Unwanted Taper
| Steve355 | 02/10/2021 20:08:54 |
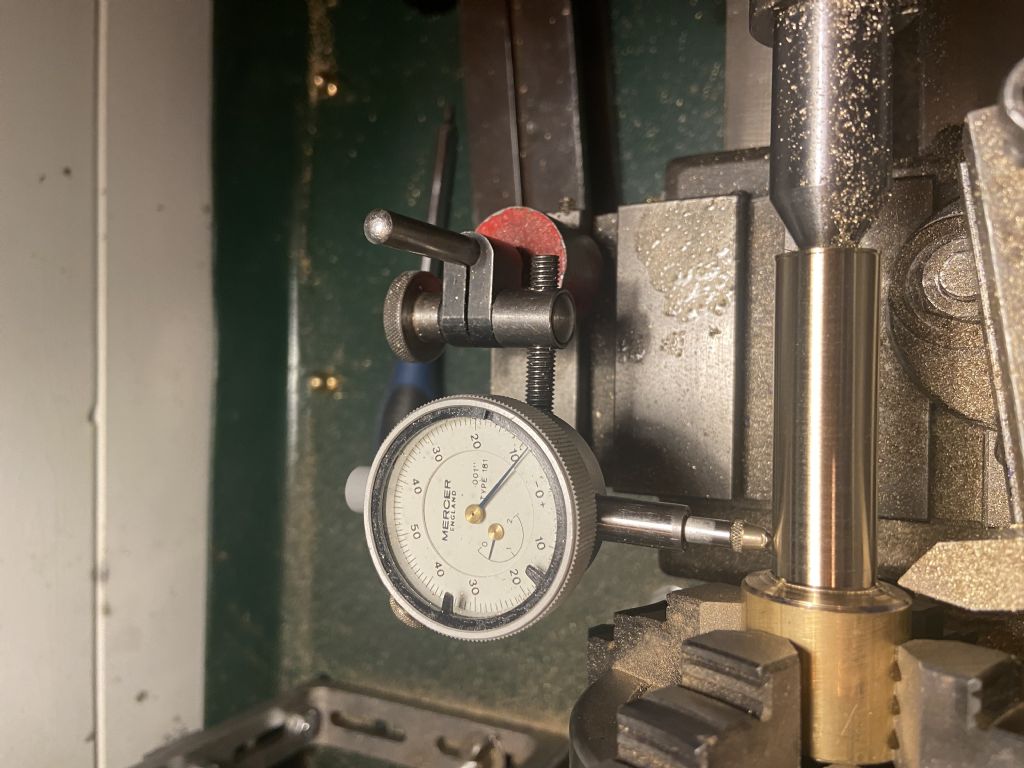
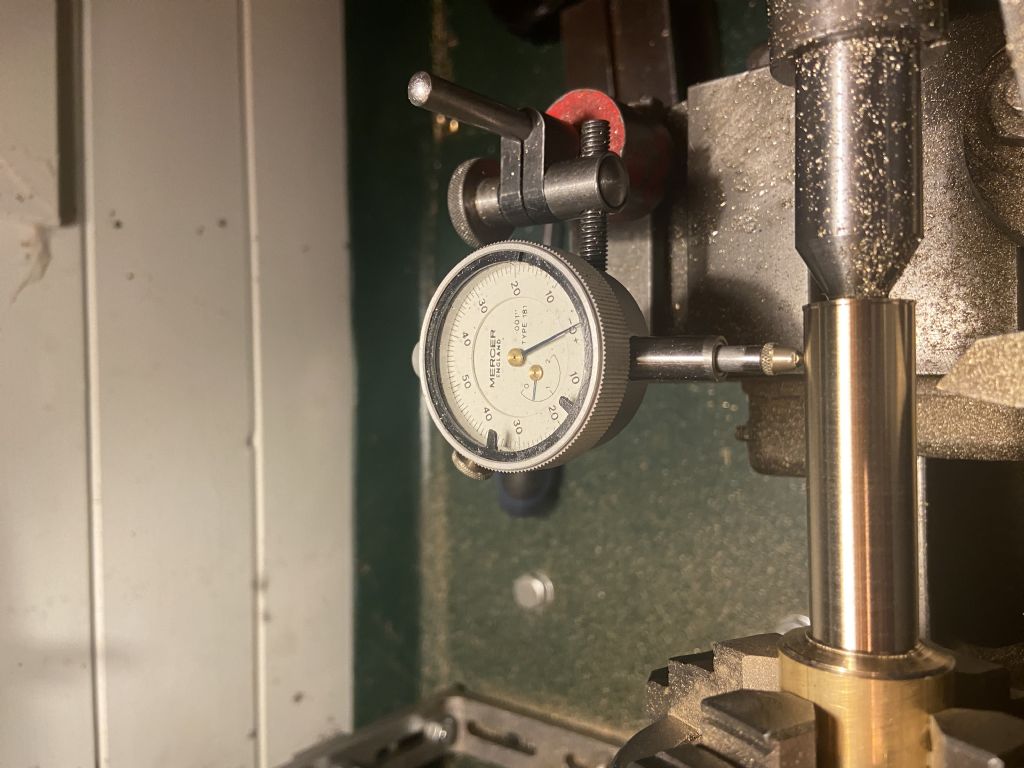
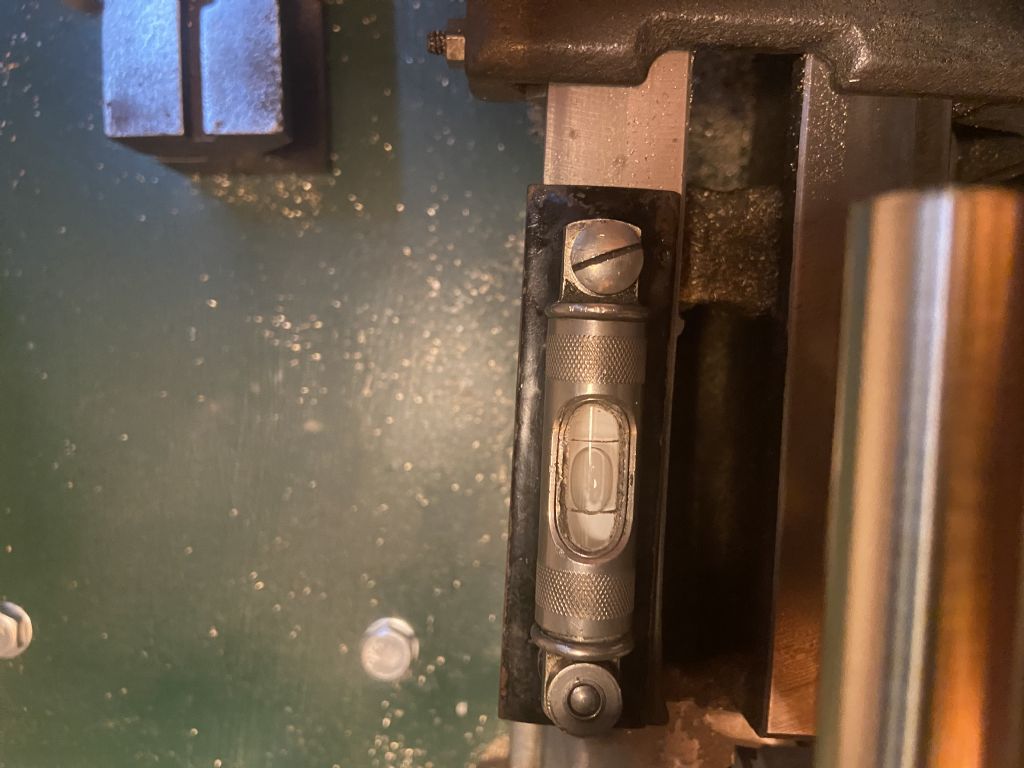
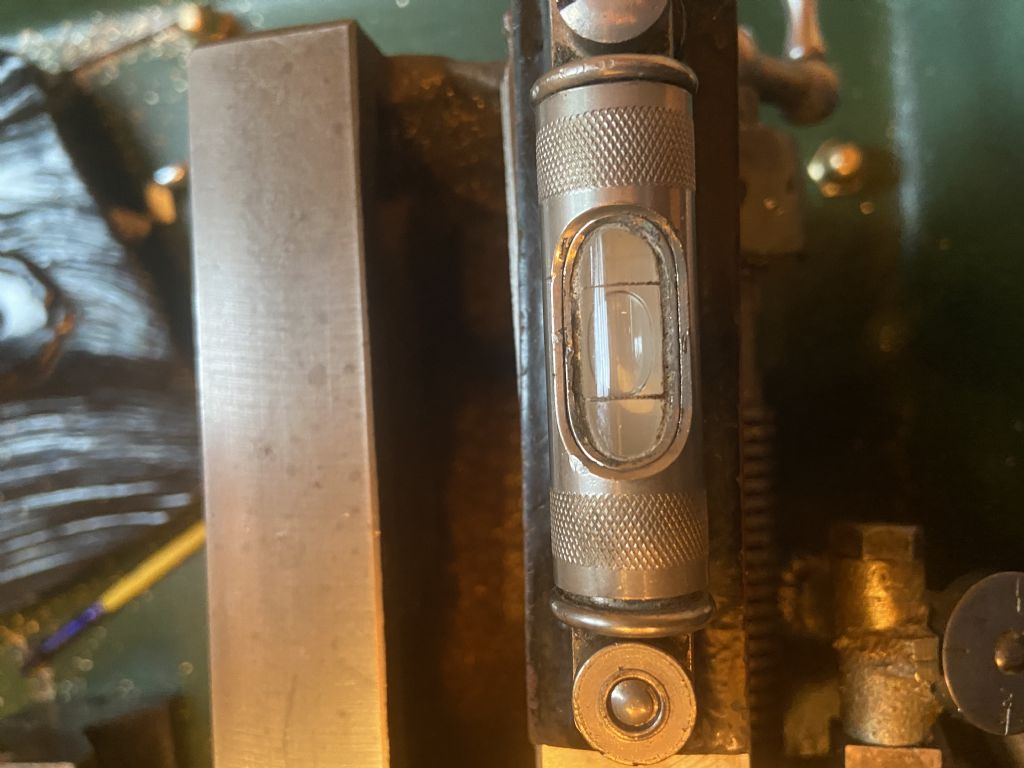
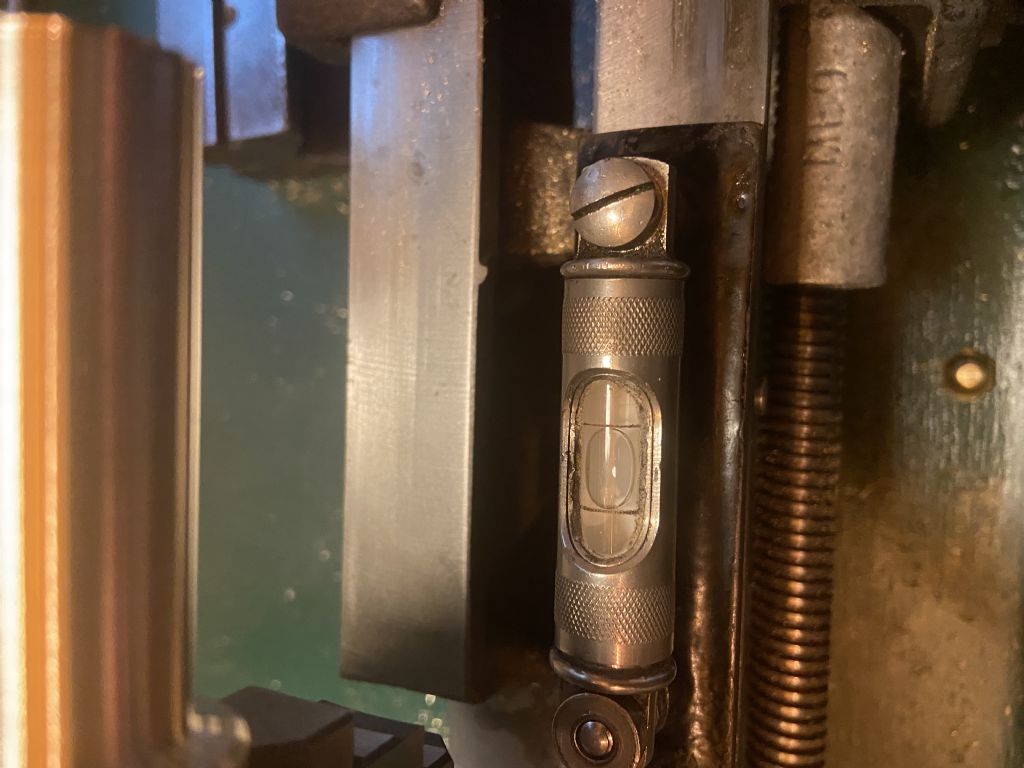
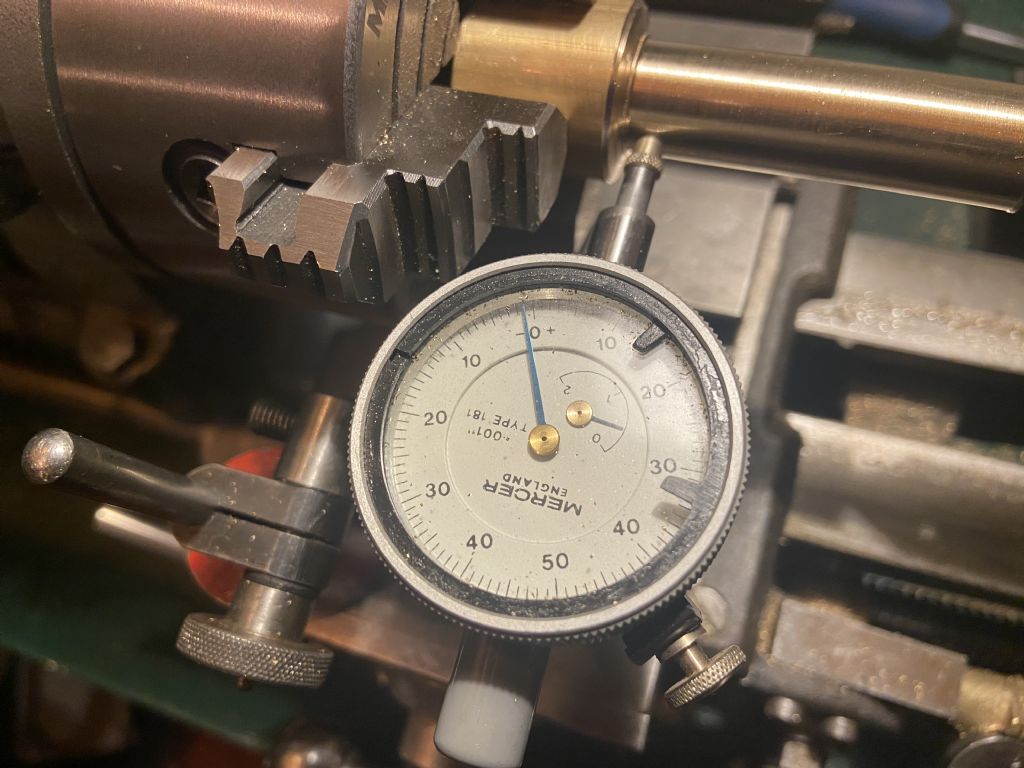
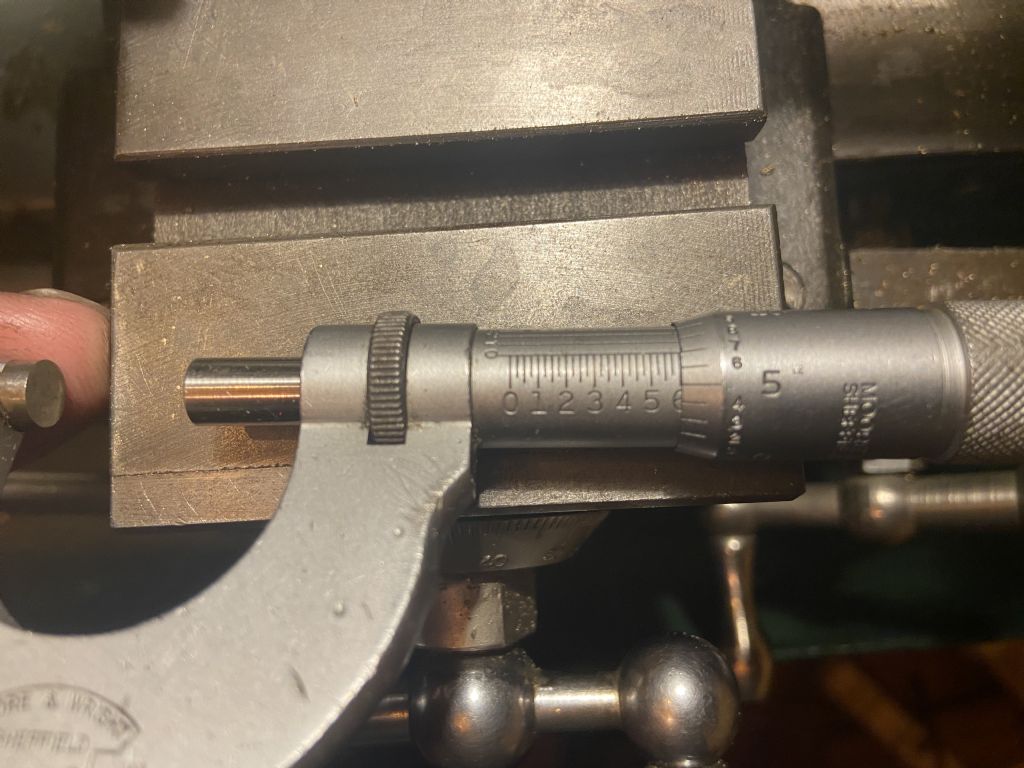
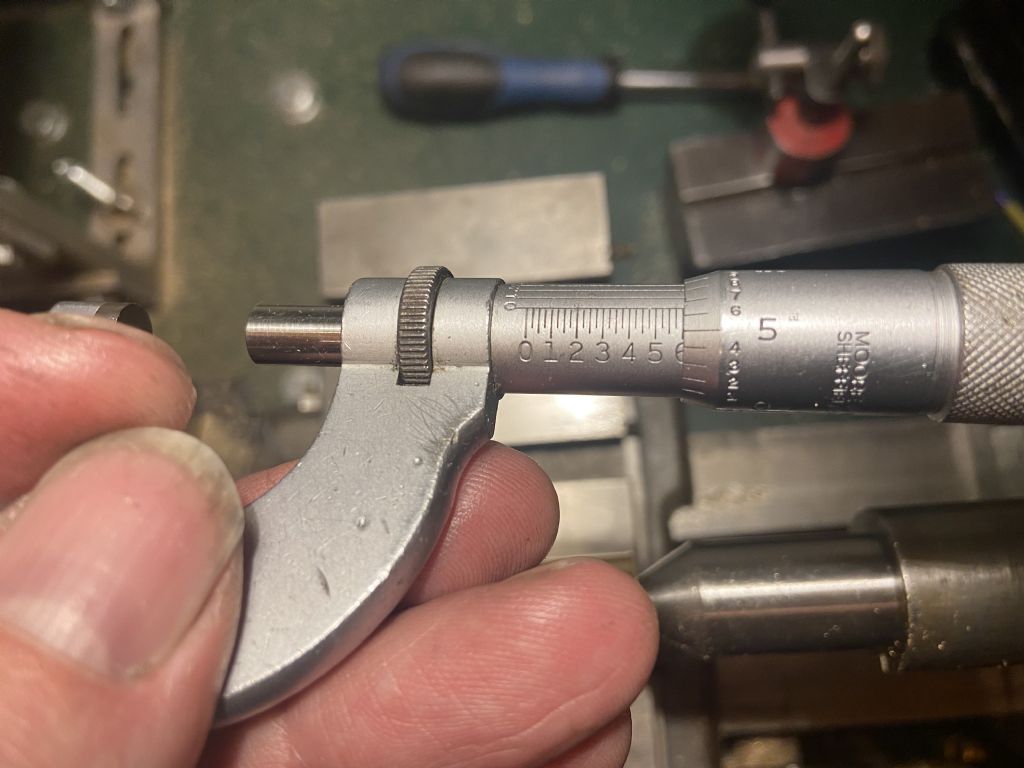
| 321 forum posts 235 photos | Another newbie thread - sorry! I am trying to turn a 2” long brass cylinder to 0.5” diameter, at the same time I’ve been trying to follow Harold’s lathe adjustment instructions on his website. I am finding I am getting an unwanted taper of about 0.008 across 2”. 1) I have used a level to check the ways for twist and it seems minimal. 2) The gibs all seem tight 3) I added tail support (I was getting 0.015 before I did that). I realigned the tailstock when I did that. can anyone please suggest the most likely thing to check or recheck? A few pics below. thanks Steve
Edited By Steve355 on 02/10/2021 20:09:35 |
| Andrew Johnston | 02/10/2021 20:40:55 |
7061 forum posts 719 photos | What sort of level? If you're going to use a level it needs to be an engineers precision level; DIY levels aren't even close. There are methods of correcting tapers that don't need levels, but I'll leave those to others to explain as I've never needed to use them. To start with don't try and machine/measure with the tailstock in place. It simply creates two variables (bed and tailstock) to adjust but only one measurement. So it's doomed to failure. Andrew |
| fizzy | 02/10/2021 20:45:08 |
1860 forum posts 121 photos | thats a lot so im guessing your tail stock is not correctly dialed in. If I ever get taper it is always my tailstock alignment which it to blame. |
| Steve355 | 02/10/2021 20:47:23 |
| 321 forum posts 235 photos | Posted by Andrew Johnston on 02/10/2021 20:40:55:
What sort of level? If you're going to use a level it needs to be an engineers precision level; DIY levels aren't even close. There are methods of correcting tapers that don't need levels, but I'll leave those to others to explain as I've never needed to use them. To start with don't try and machine/measure with the tailstock in place. It simply creates two variables (bed and tailstock) to adjust but only one measurement. So it's doomed to failure. Andrew |
| Andrew Johnston | 02/10/2021 20:58:23 |
7061 forum posts 719 photos | Doesn't look like a precision level; I'd expect to see a number of graduations? What is it's sensitivity? For example on my engineers level one division equates to 0.0005" (half a thou) in 10". Andrew |
| Michael Gilligan | 02/10/2021 21:04:10 |
23121 forum posts 1360 photos | That’s a neat looking little level, Steve … but have you checked its sensitivity ? At that length: If you want to ‘level’ the lathe with it, a piece of cigarette paper needs cause a visible movement of the bubble. MichaelG. . Edit: Andrew [predictably enough] beat me to it. Edited By Michael Gilligan on 02/10/2021 21:05:31 |
| Steve355 | 02/10/2021 21:09:07 |
| 321 forum posts 235 photos | Posted by Michael Gilligan on 02/10/2021 21:04:10:
That’s a neat looking little level, Steve … but have you checked its sensitivity ? At that length: If you want to ‘level’ the lathe with it, a piece of cigarette paper needs cause a visible movement of the bubble. MichaelG. . Edit: Andrew [predictably enough] beat me to it. Edited By Michael Gilligan on 02/10/2021 21:05:31 Obviously it’s an eBay special, but I had to try to find a small one as the lathe is only tiny, I don’t have much info on it other than it’s a Starrett. I will check it with the smallest feeler gauge I can find and see what it does. |
| Pete Rimmer | 02/10/2021 21:10:42 |
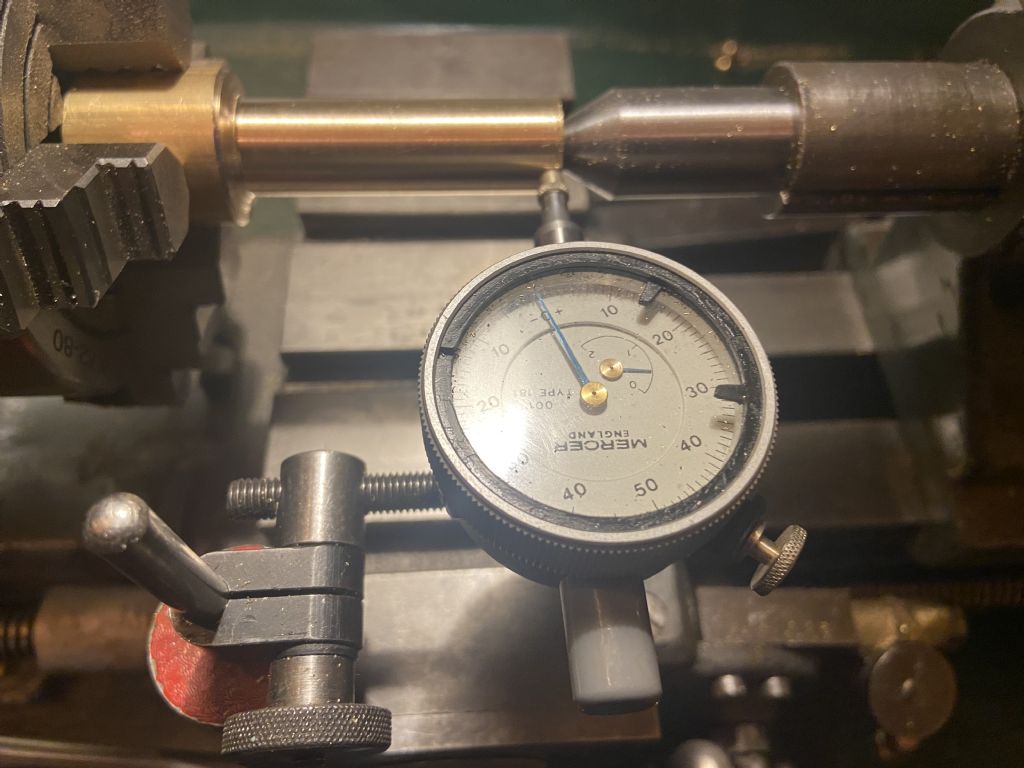
| 1486 forum posts 105 photos | Put the mag base for the dial gauge on the front of the saddle and do your measurement again. That way the dial gauge will be following the path of the tool and should read zero all the way. That gauge setup is a poor way to check for taper if that's what you're doing Steve. You should be using a micrometer to take measurements at each end of your cylinder. The dial gauge reading can be affected by twist or wear in the bedway. |
| Clive Brown 1 | 02/10/2021 21:12:42 |
| 1050 forum posts 56 photos | Surely that's not the way to use a level, even if it's a good one? It should be across the ways I'd advise Steve to set his lathe up to turn parallel by adjusting the mounting feet. Then adjust thr tailstock after that. Also agree with above. The dial indicator might well not be showing anything useful. Edited By Clive Brown 1 on 02/10/2021 21:15:16 |
| Steve355 | 02/10/2021 21:16:59 |
| 321 forum posts 235 photos | Posted by Clive Brown 1 on 02/10/2021 21:12:42:
Surely that's not the way to usea level, even if it's a good one? It should be across the ways I'd advise Steve to set his lathe up to turn parallel by adjusting the mounting feet. Then adjust thr tailstock after that. According to Harold’s website I should measure along and across the ways. Across the ways gave an imperceptible difference, there is a tiny difference along the ways so those are the pics I took. I’m used to winding sticks on wood so across is where I went naturally, I was surprised about the longitudinal measurement too. |
| Steve355 | 02/10/2021 21:18:56 |
| 321 forum posts 235 photos | Posted by Pete Rimmer on 02/10/2021 21:10:42:
Put the mag base for the dial gauge on the front of the saddle and do your measurement again. That way the dial gauge will be following the path of the tool and should read zero all the way. That gauge setup is a poor way to check for taper if that's what you're doing Steve. You should be using a micrometer to take measurements at each end of your cylinder. The dial gauge reading can be affected by twist or wear in the bedway.
|
| Michael Gilligan | 02/10/2021 21:39:29 |
23121 forum posts 1360 photos | If it’s any help … I found this statement which presumably originates with Starrett: Starrett improved machinist level series is a truly American product that is available in varying lengths of 4/6/8/12 inches. The company offers five different models under this series each having a long graduated spirit level that has a sensitivity of 0.42 millimeters/meter or 0.005 inches/foot or 80-90 seconds of arc. Given that your vial is not graduated, I have to assume that it comes from another range. Maybe inferior, or maybe just earlier … but certainly worth checking the sensitivity. MichaelG. |
| Clive Brown 1 | 02/10/2021 21:45:30 |
| 1050 forum posts 56 photos | Steve, levelling along the length of the lathe bed is of no real consequence. Across the bed should give identical readings at either end, but I doubt if your level is sensitive enough to really set the lathe up well. The real test is to take a very light cut along, say, 2-3" of bar held in the chuck and shim the lathe feet to give parallel turning. A tedious job but light lathes have surprisingly flexible beds. Thr bench should be sturdy of course. |
| Steve355 | 02/10/2021 22:06:57 |
| 321 forum posts 235 photos | Posted by Michael Gilligan on 02/10/2021 21:04:10:
That’s a neat looking little level, Steve … but have you checked its sensitivity ? At that length: If you want to ‘level’ the lathe with it, a piece of cigarette paper needs cause a visible movement of the bubble. MichaelG. . Edit: Andrew [predictably enough] beat me to it. Edited By Michael Gilligan on 02/10/2021 21:05:31
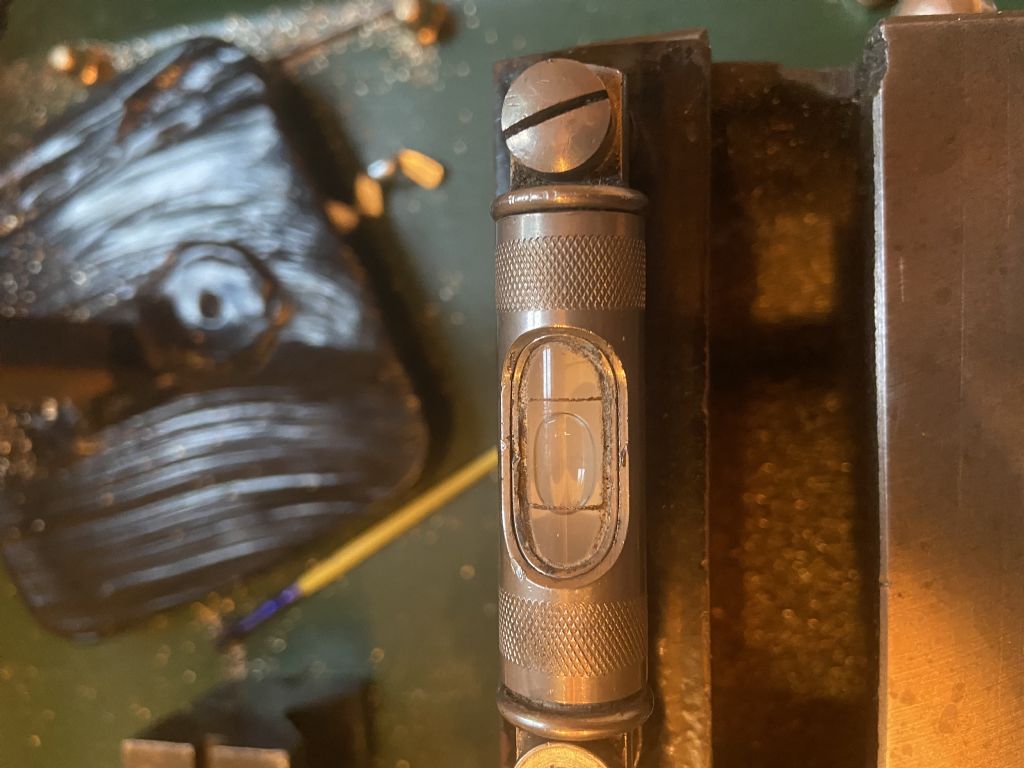
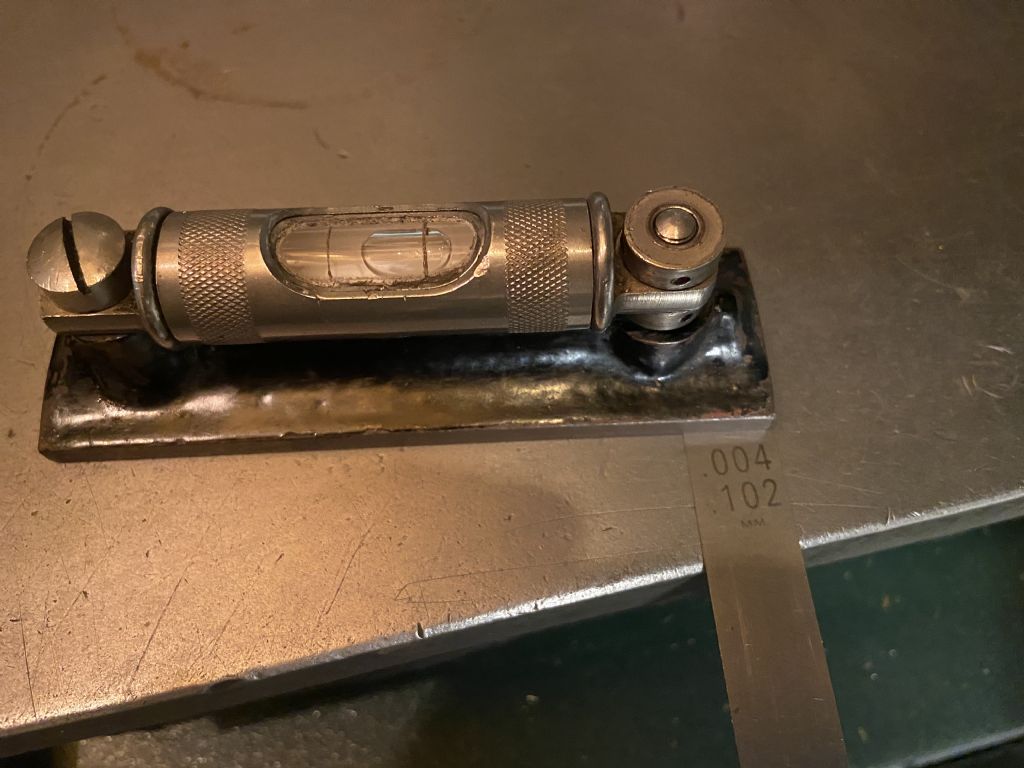
here is a 0.004 feeler gauge under one end. I would imagine that makes it sensitive enough to be useful?
|
| Steve355 | 02/10/2021 22:17:10 |
| 321 forum posts 235 photos | Posted by Steve355 on 02/10/2021 21:18:56:
Posted by Pete Rimmer on 02/10/2021 21:10:42:
Put the mag base for the dial gauge on the front of the saddle and do your measurement again. That way the dial gauge will be following the path of the tool and should read zero all the way. That gauge setup is a poor way to check for taper if that's what you're doing Steve. You should be using a micrometer to take measurements at each end of your cylinder. The dial gauge reading can be affected by twist or wear in the bedway.
Ok, you are right, it’s all me. I did that and it’s very close to parallel - about 1 thou out. I checked again with the micrometer and got the about .5 thou. Luckily this is the “beginners” forum so I am allowed to be an idiot. Why did it give me an incorrect reading on the other side then? |
| Michael Gilligan | 02/10/2021 22:28:31 |
23121 forum posts 1360 photos | Posted by Steve355 on 02/10/2021 22:06:57:
. here is a 0.004 feeler gauge under one end. I would imagine that makes it sensitive enough to be useful?
. I agree … so that’s one ticked-off the list MichaelG. |
| Steve355 | 02/10/2021 22:28:32 |
| 321 forum posts 235 photos | Posted by Clive Brown 1 on 02/10/2021 21:45:30:
The real test is to take a very light cut along, say, 2-3" of bar held in the chuck and shim the lathe feet to give parallel turning. A tedious job but light lathes have surprisingly flexible beds. Thr bench should be sturdy of course. I will give that a go once I’ve finished the current thing, thanks. |
| Andrew Johnston | 02/10/2021 22:34:52 |
7061 forum posts 719 photos | Posted by Steve355 on 02/10/2021 22:06:57:
here is a 0.004 feeler gauge under one end. I would imagine that makes it sensitive enough to be useful? Not really, it needs to be more than an order of magnitude more sensitive, along with multiple graduations. Andrew |
| Pete Rimmer | 03/10/2021 10:12:02 |
| 1486 forum posts 105 photos | Posted by Steve355 on 02/10/2021 22:17:10:
Ok, you are right, it’s all me. I did that and it’s very close to parallel - about 1 thou out. I checked again with the micrometer and got the about .5 thou. Luckily this is the “beginners” forum so I am allowed to be an idiot. Why did it give me an incorrect reading on the other side then? Hard to describe in words coherently but easy enough to show. Your dial is not actually measuring taper as such, I mean it MIGHT be or there might be a taper when it's showing no movement. To measure taper with a dial you'd use a comparator stand. With the dial on the front and mounted on the saddle it is following the same path that the tool took when it did the cutting. It should therefore give the same reading all along the length. If there is any wear or twist in the bed then where the tool was caused to move away from the centreline of the part, so would the dial point. It would show no change. With the dial on the opposite side of the part if there was wear or twist causing the tool to move away from the centreline of the part then the same wear or twist would cause the dial to move TOWARDS the centreline which would give a rising reading. |
| SillyOldDuffer | 03/10/2021 10:16:07 |
| 10668 forum posts 2415 photos | To be explicit, an ordinary bubble level won't cut the mustard. They're good for putting up shelves and most other purposes but aren't sensitive enough to detect a twisted lathe bed. You need an Engineers aka Machine Level. They are made to detect tiny deviations from level, as required to set a lathe accurate to a thou or two over several inches. Typically, in a new installation the lathe stand is set up with an ordinary level first, and then the lathe is tested. If not cutting straight a Machine level is used to check for bed twist, which can be corrected by shimming a foot: some machines have screw-adjustable feet. This example is made by Dasqua and sold by RDG.
In theory new lathes are confirmed to cut straight on a true level surface in the factory, so plonking them down on any decently stiff flat surface should be good enough. In practice, don't expect too much of inexpensive hobby or elderly lathes. Note flat rather than level. It's not necessary for lathes to be level provided the bed is straight: they work perfectly well in storm tossed ships. Levelling is just one way of eliminating twist, and a bent stand is one way of accidentally twisting a machine. In my book Machine Levels aren't good value for money. Pricey and much too sensitive for ordinary work. Fussy and the bubble takes an age to settle. Good for anyone installing lots of machines, dubious for putting one into a shed! After being used once to set-up the owners lathe, I suspect most Machine Levels end up in a cupboard. As an alternative, Rollie's Dad's Method takes longer and is more complicated to do than detwisting with a good level, but it requires no special equipment. A word of warning: high-precision measuring is so difficult it's quite easy to lead oneself up the garden path into a deep maze of confusion. A wobbly DTI moving on a slide will cause trouble. When measuring into the 0.02mm / 0.001" region don't rush to adjust anything based on amateur measurements: they're likely to be flawed because taking them properly is a skill you don't have!!! Therefore, keep measuring simple and use the right tools: detect taper with a micrometer, not a DTI. Check everything - it may take several hours practice to get a micrometer to repeatedly read the diameter of a precision rod consistently. Positioning the micrometer correctly is important, and so it applying the same pressure to the screw every time. The ratchet helps, but trained craftsmen rarely use it; they develop a 'feel'. Some are better than others, so find out how good you are by practising. In the meantime, don't jump to conclusions! Dave
|
Please login to post a reply.
Want the latest issue of Model Engineer or Model Engineers' Workshop? Use our magazine locator links to find your nearest stockist!
Sign up to our newsletter and get a free digital issue.
You can unsubscribe at anytime. View our privacy policy at www.mortons.co.uk/privacy
- *Oct 2023: FORUM MIGRATION TIMELINE*
05/10/2023 07:57:11 - Making ER11 collet chuck
05/10/2023 07:56:24 - What did you do today? 2023
05/10/2023 07:25:01 - Orrery
05/10/2023 06:00:41 - Wera hand-tools
05/10/2023 05:47:07 - New member
05/10/2023 04:40:11 - Problems with external pot on at1 vfd
05/10/2023 00:06:32 - Drain plug
04/10/2023 23:36:17 - digi phase converter for 10 machines.....
04/10/2023 23:13:48 - Winter Storage Of Locomotives
04/10/2023 21:02:11 - More Latest Posts...
- View All Topics
- Reeves** - Rebuilt Royal Scot by Martin Evans
by John Broughton
£300.00 - BRITANNIA 5" GAUGE James Perrier
by Jon Seabright 1
£2,500.00 - Drill Grinder - for restoration
by Nigel Graham 2
£0.00 - WARCO WM18 MILLING MACHINE
by Alex Chudley
£1,200.00 - MYFORD SUPER 7 LATHE
by Alex Chudley
£2,000.00 - More "For Sale" Ads...
- D1-3 backplate
by Michael Horley
Price Not Specified - fixed steady for a Colchester bantam mark1 800
by George Jervis
Price Not Specified - lbsc pansy
by JACK SIDEBOTHAM
Price Not Specified - Pratt Burnerd multifit chuck key.
by Tim Riome
Price Not Specified - BANDSAW BLADE WELDER
by HUGH
Price Not Specified - More "Wanted" Ads...
Do you want to contact the Model Engineer and Model Engineers' Workshop team?
You can contact us by phone, mail or email about the magazines including becoming a contributor, submitting reader's letters or making queries about articles. You can also get in touch about this website, advertising or other general issues.
Click THIS LINK for full contact details.
For subscription issues please see THIS LINK.
Model Engineer Magazine
- Percival Marshall
- M.E. History
- LittleLEC
- M.E. Clock
ME Workshop
- An Adcock
- & Shipley
- Horizontal
- Mill
Subscribe Now
- Great savings
- Delivered to your door
Pre-order your copy!
- Delivered to your doorstep!
- Free UK delivery!



 Register
 Log-in


