Forum sponsored by:

Stainless Watch case
| Dave S | 28/07/2021 13:05:44 |
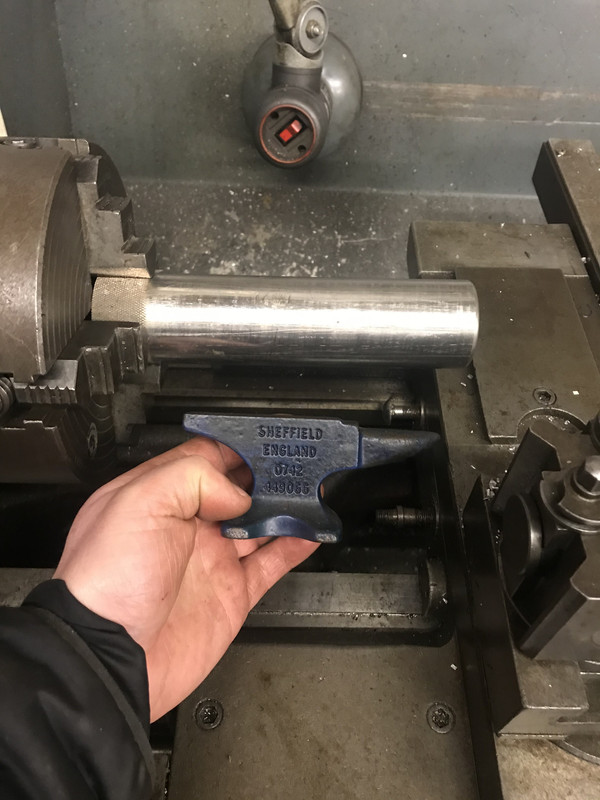
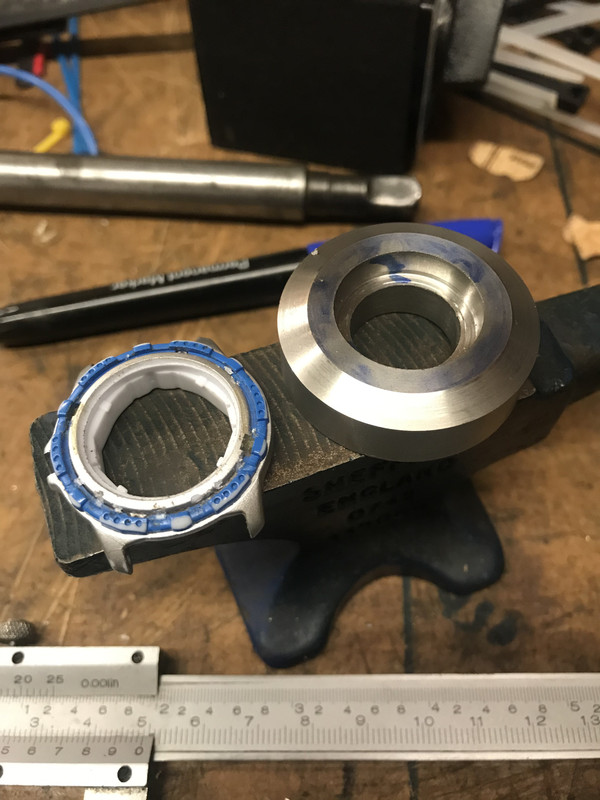
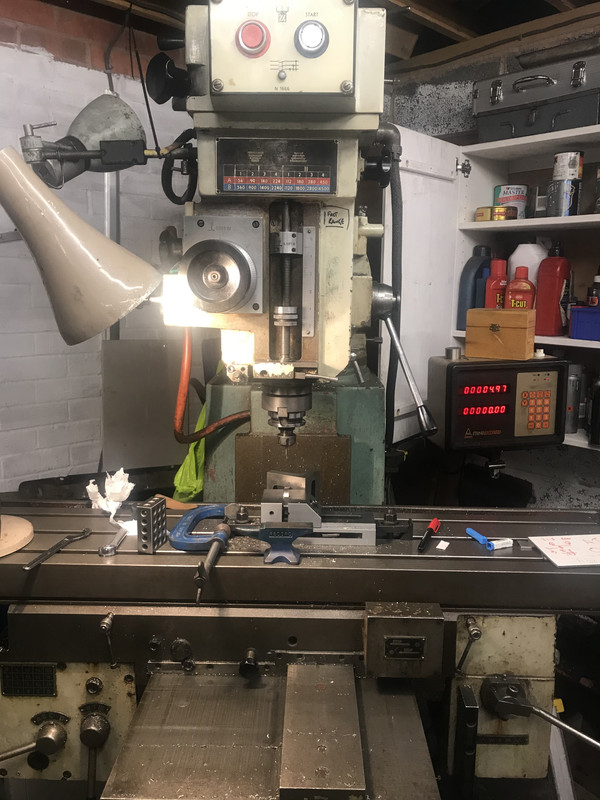
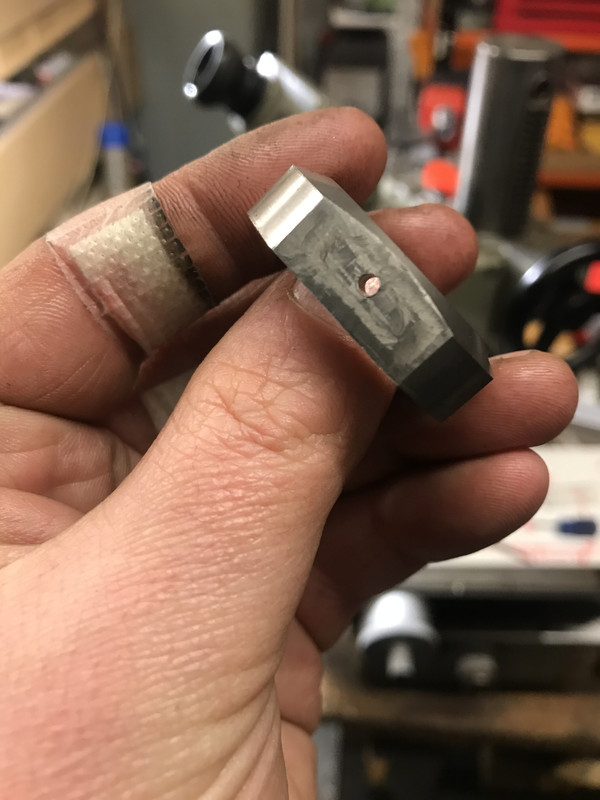
| 433 forum posts 95 photos | Afternoon all, Couple of years ago Daughter picked up a cheap 'dive inspired' quartz watch. Not a bad thing, and for a couple of quid it was reasonably priced given it didn't appear to work. I started by bunging a bar of recently acquired stainless scrapbinium in the lathe and set to. (Anvil for Scale
The stick out was a bit much, so I set up the steady in avoidance of wearing a 2" diameter chunk of steel Faced the bar off to give me an idea of what I was working with,
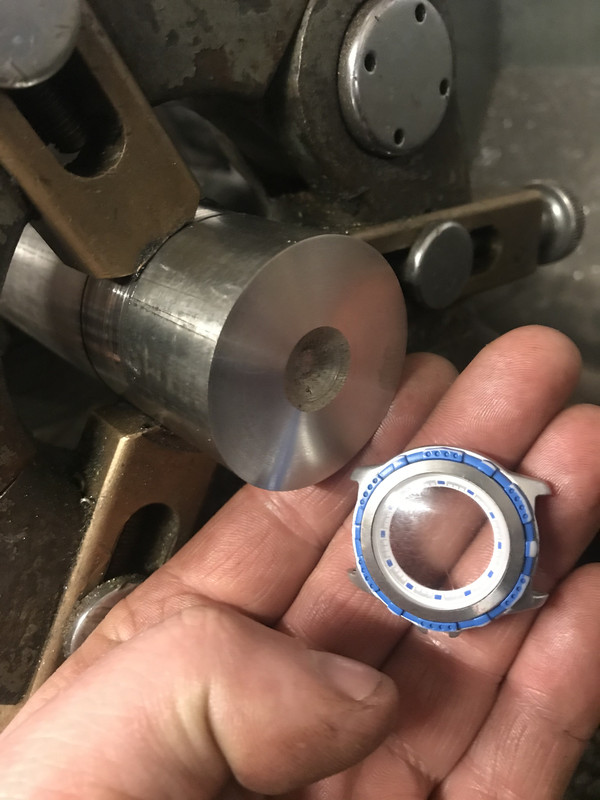
and then chucked a hole at the middle - the movement is actually a lozenge shape, so I roughed out the movement hole and the step for the crystal and chapter ring.
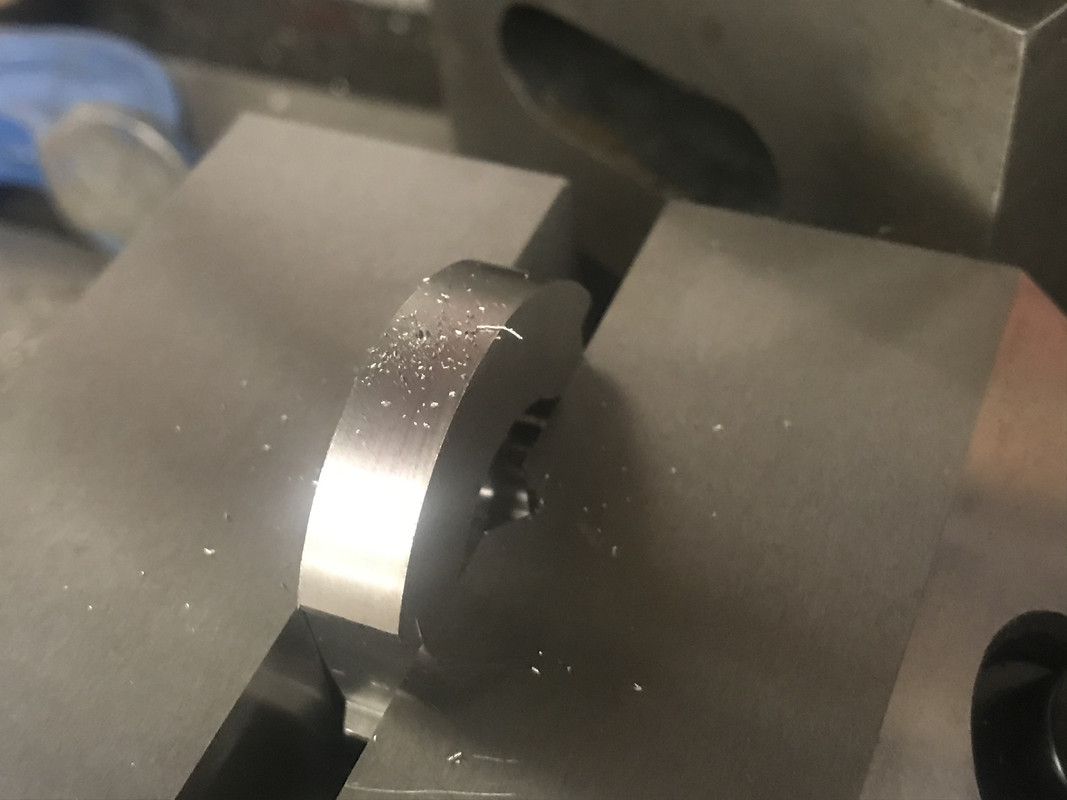
That done I bevelled the front and parted off a roughly case sized ring.
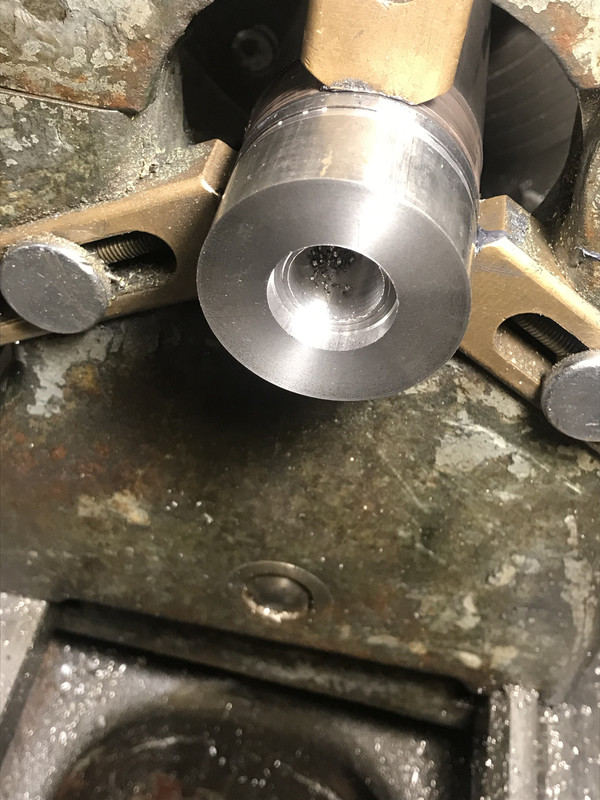
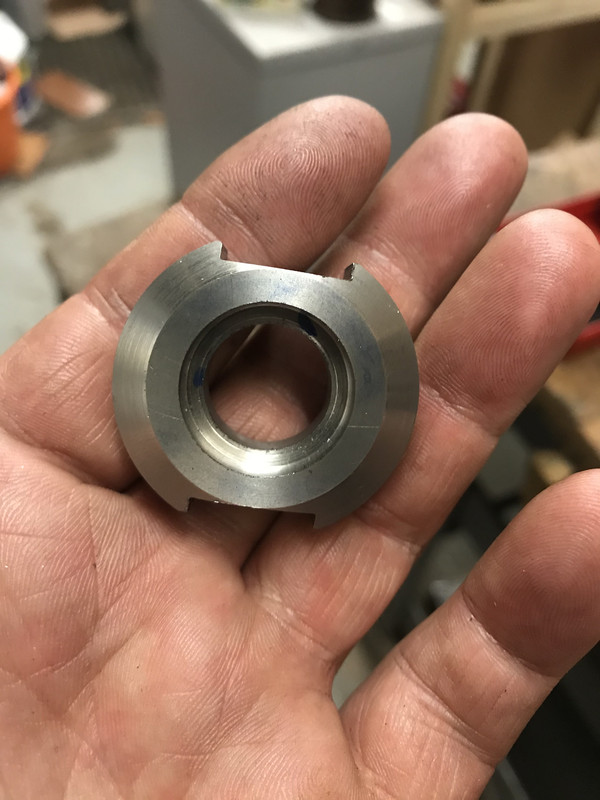
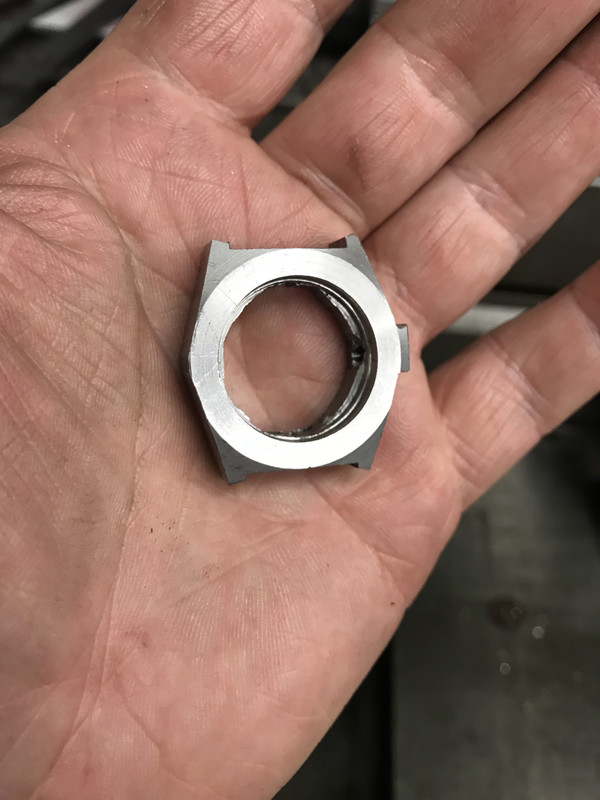
The hacking out of the movement hole will come later - on the Milling machine. Seems I didn't take any photos of the initial lug cutting, but now the round is more of a case blank shape The movement actually sits pressed up against the back of the chapter ring, so my datum point was the recess that the chapter ring sits in. The back of the blank is not yet at a specific place, so I made a brass plug to sit on the chapter ring ledge and allow me to set up from the other side
These 2 mini slots define the ends of the lozengeish movement shape.
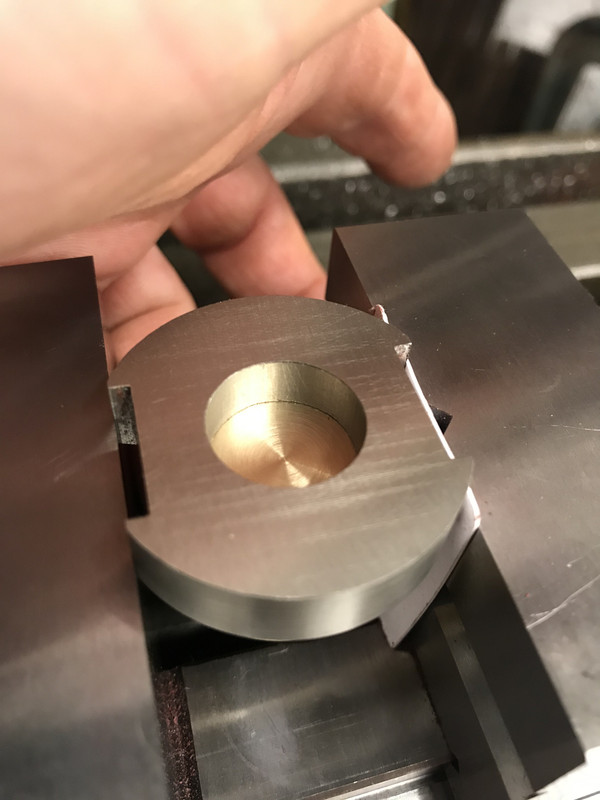
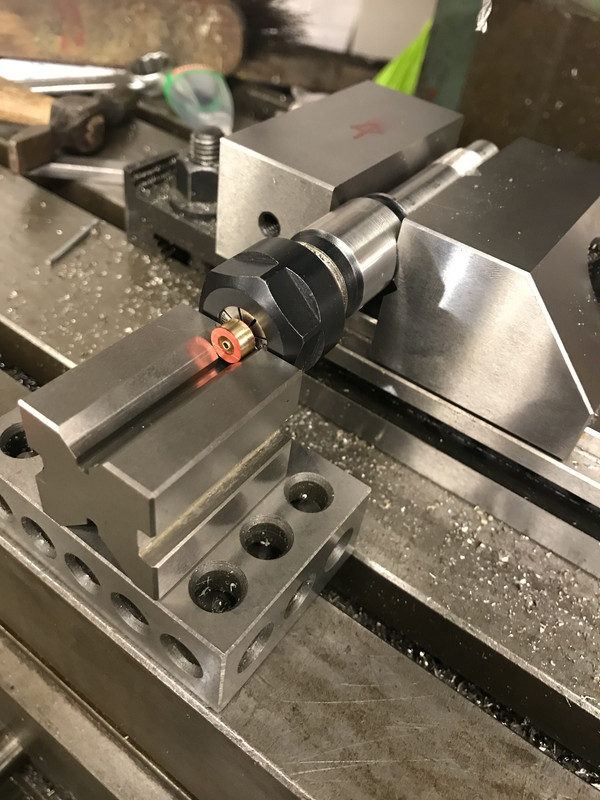
There followed a lot of strange angle milling - which I apparently took no photos of - but that's not too surprising as I had to concentrate a lot... Then the movement fits! You can see the odd shape in the plastic case here. Next up was to work out where the stem and light pusher holes needed to be, and what size.
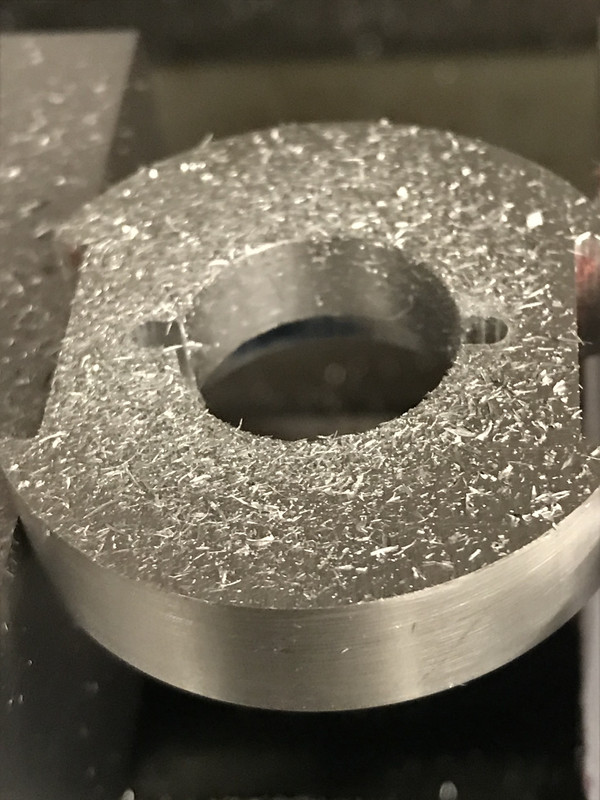
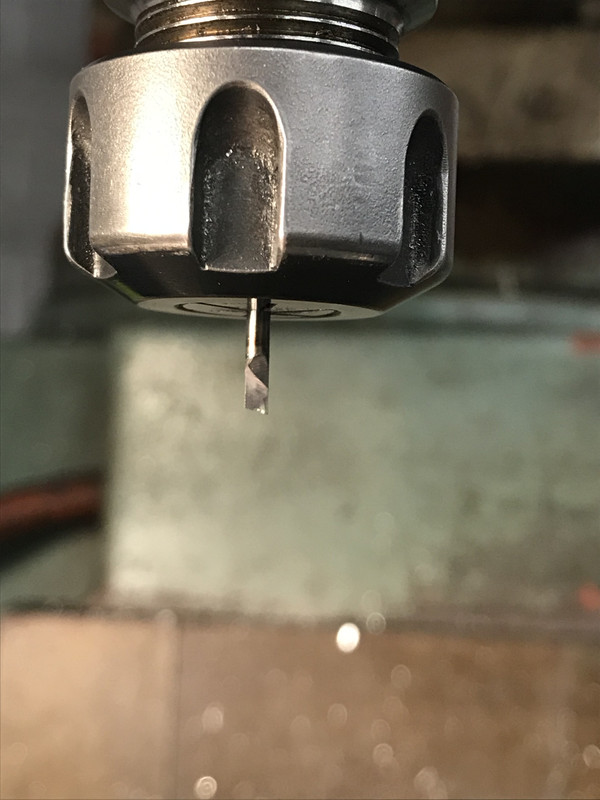
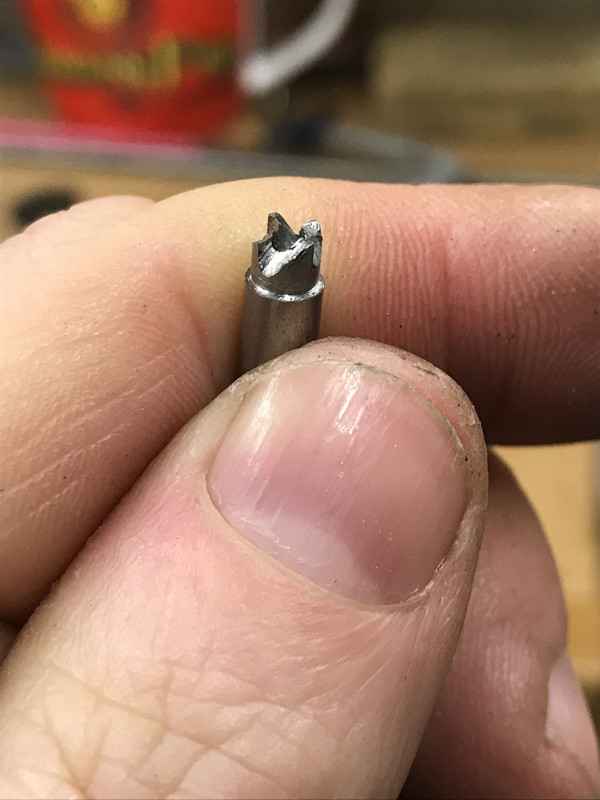
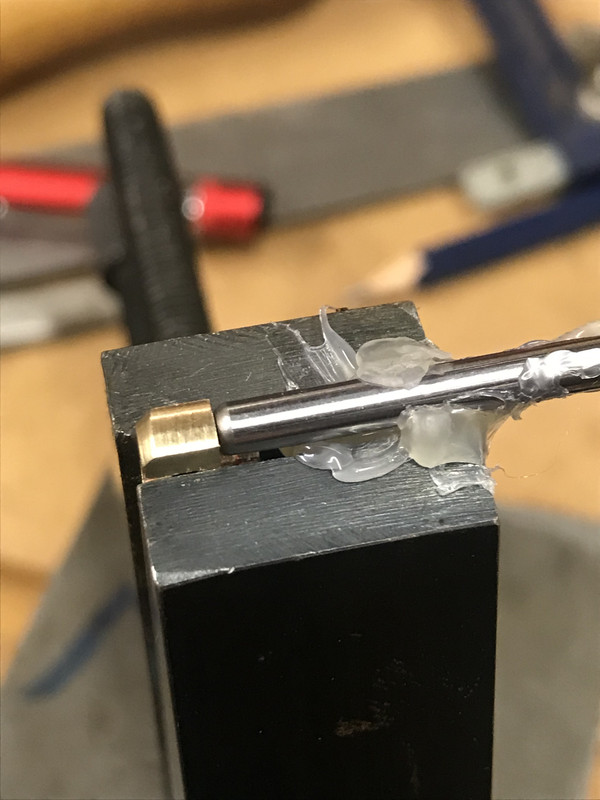
What you can't see in this picture is the snapped carbide drill bit inside the nearly completed hole
These things happen, but I was a little 'upset' about it. Fortunately I've picked up a few machinists rescue methods... This is a single lip cutter - its ground out of a solid carbide bar and is a fair amount bigger that the hole I intended to make, but needs must - I can always sleeve it (shh - spoilers
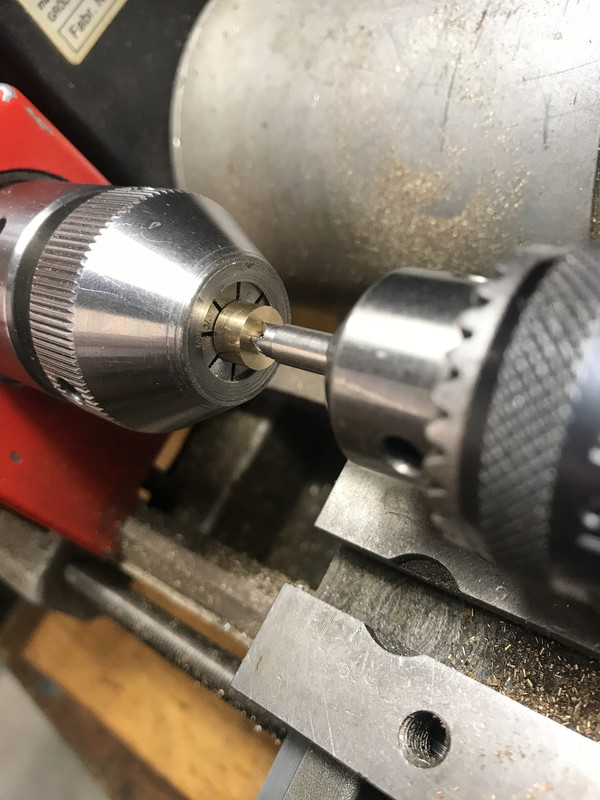
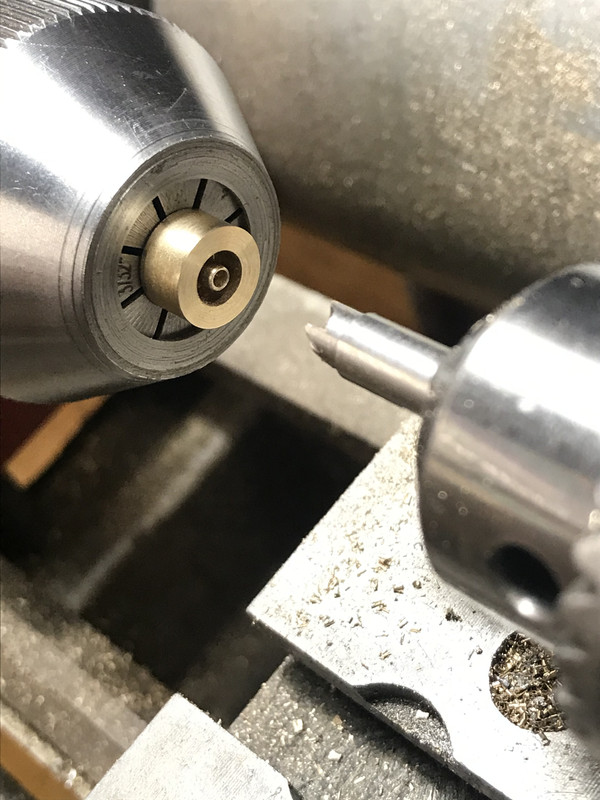
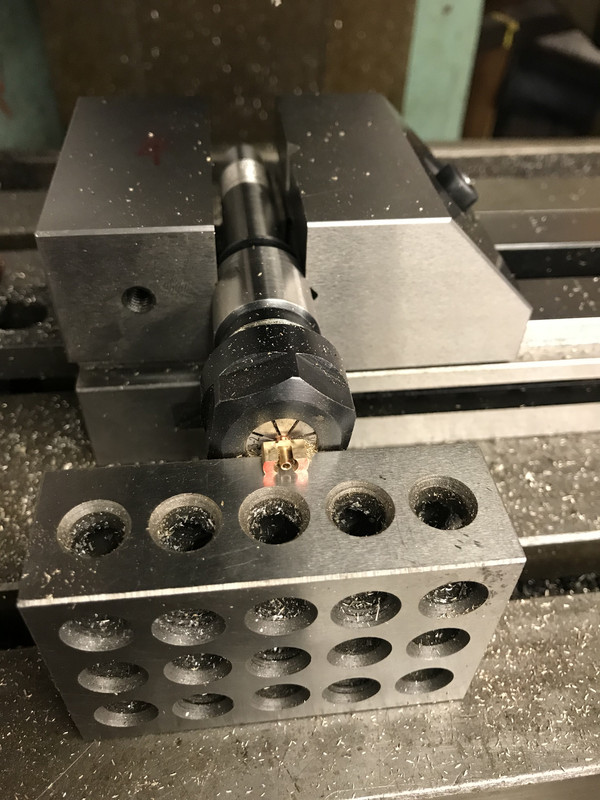
I machined the round surface flat first, so I had a good starting point, and then pecking 1 thousandth of an inch at a time I proceeded to drill out the broken bit and the rest of the hole. Incidentally the plaster is in no way related to the watch case.
Now seemed like a good time to make it more watch case shaped, so I created some angled sides - Straight edges and curves are IMO a good design statement.
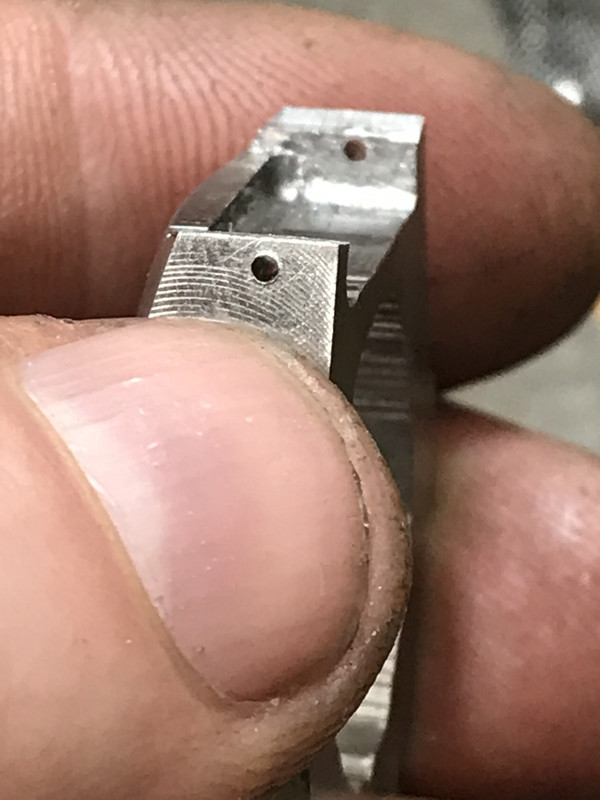
Whilst I had the case setup I put in the spring bar holes - I prefer drilled lugs as it makes strap changing much easier.
Part 2 to follow as the post is too long |
| Dave S | 28/07/2021 13:15:12 |
| 433 forum posts 95 photos | I originally planned to make the case and stem tube in one piece, but the rather large hole required a new plan.
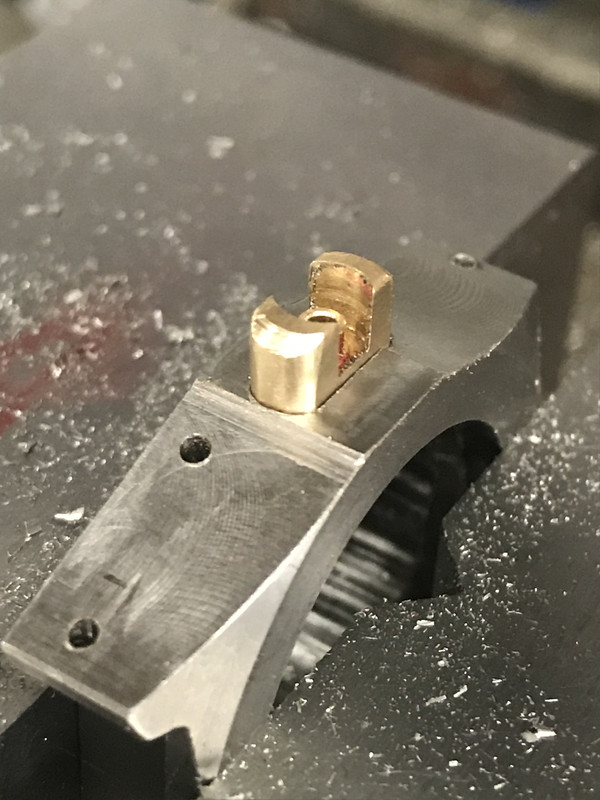
I filed 4 'teeth' onto it.
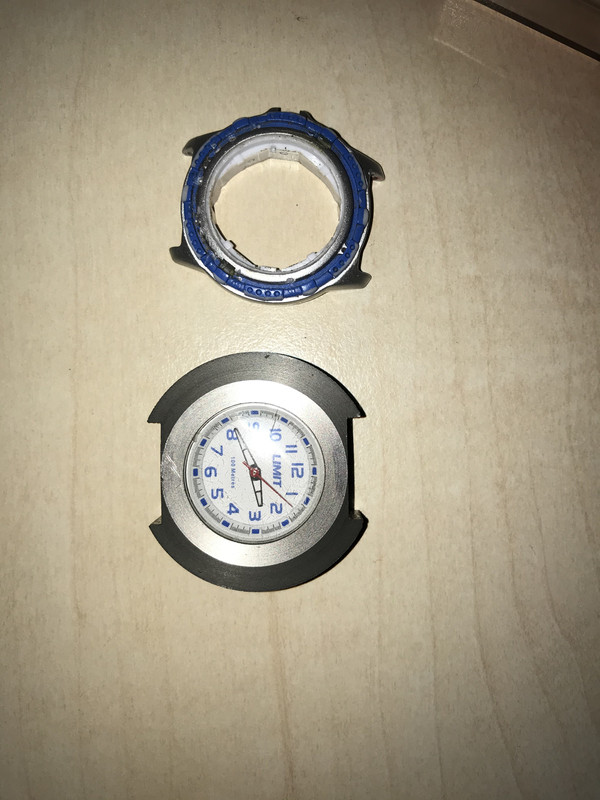
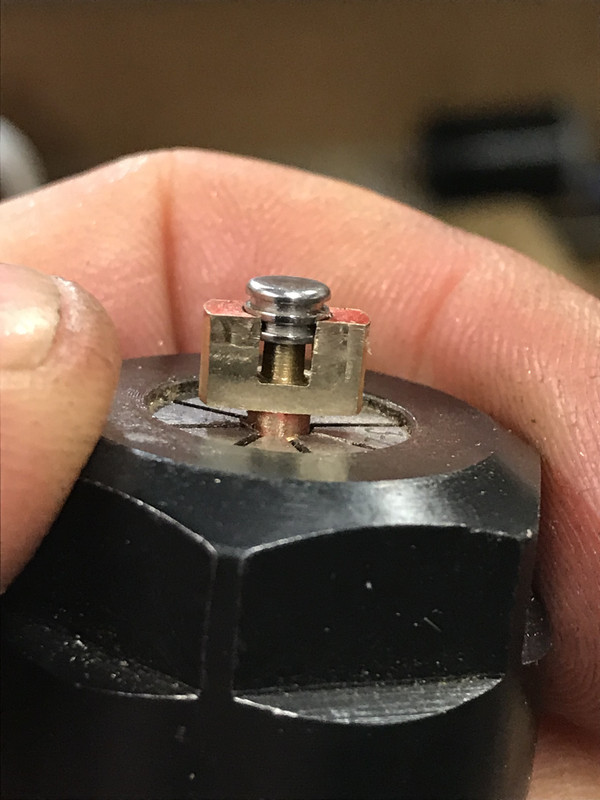
The original crown and stem fit beautifully, Feels like the o-ring seals will be fine.
Of course its somewhat fiddly to get at the crown with it totally surrounded by a guard.
Flip and repeat for the other side
Ta Da! now its simpler to get to
The milling has left somewhat sharp lines on the guard.
I wanted to blend them, so with the help of a hot glue gun and a piece of carbide I made a radius filing jig.
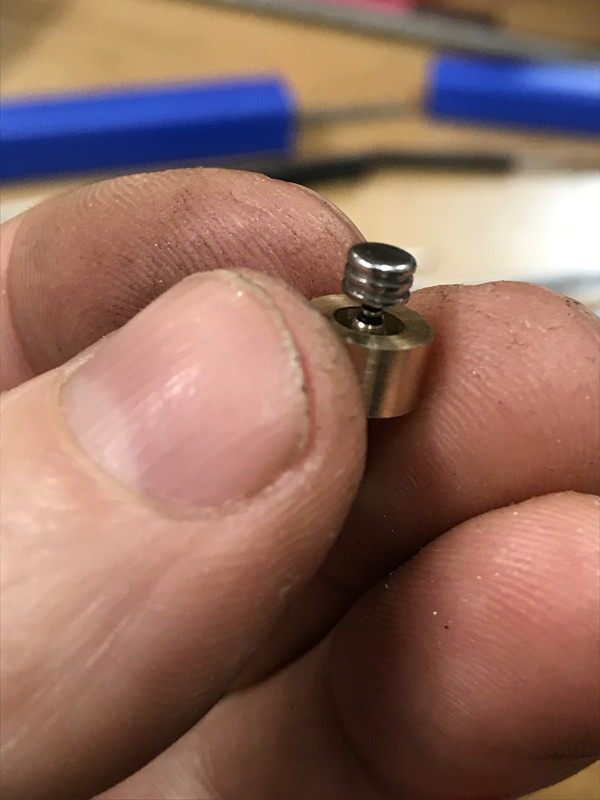
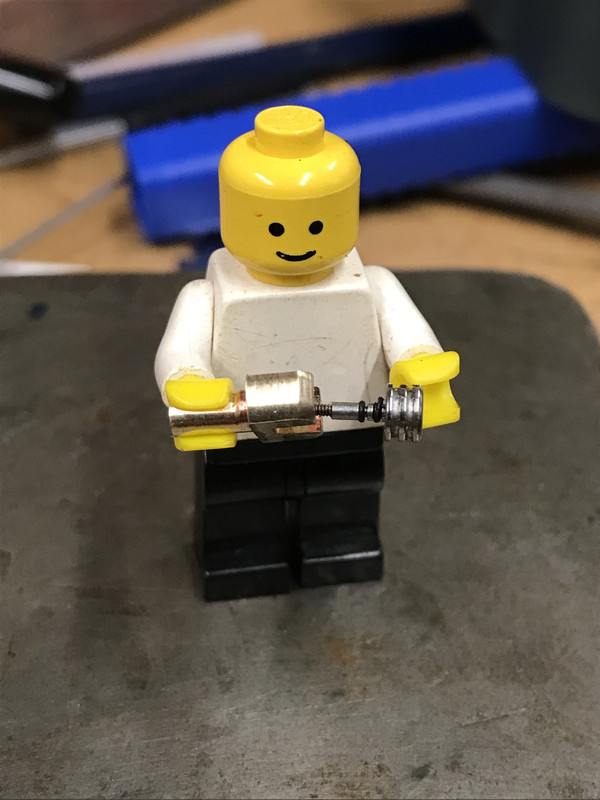
My little assistant helps to illustrate the size of these things
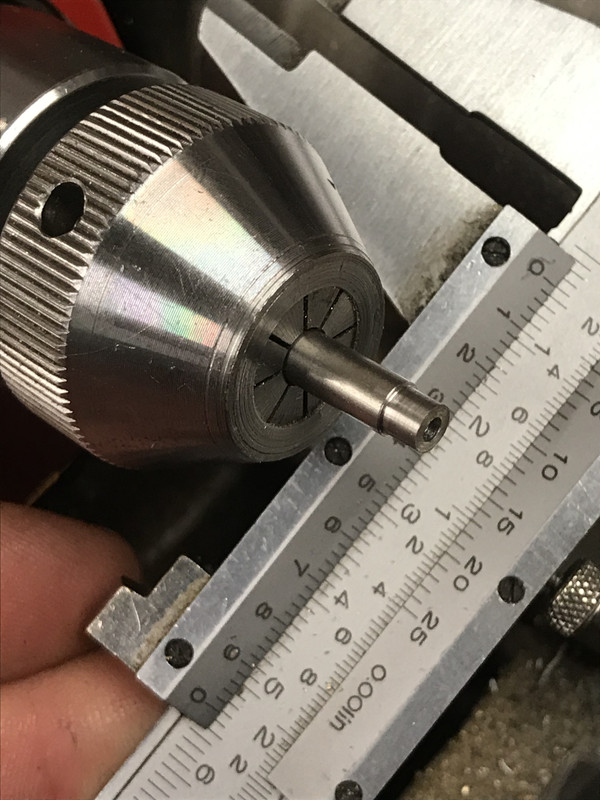
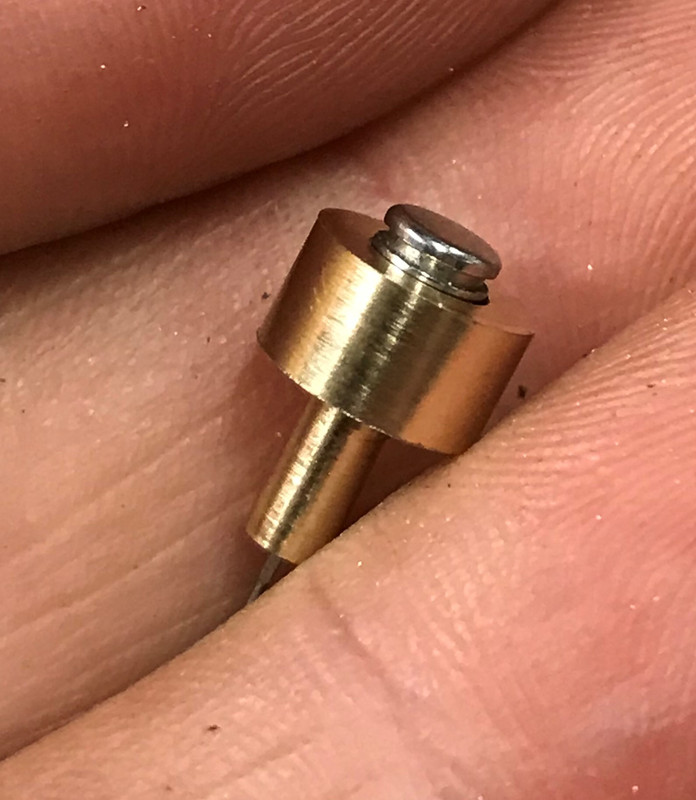
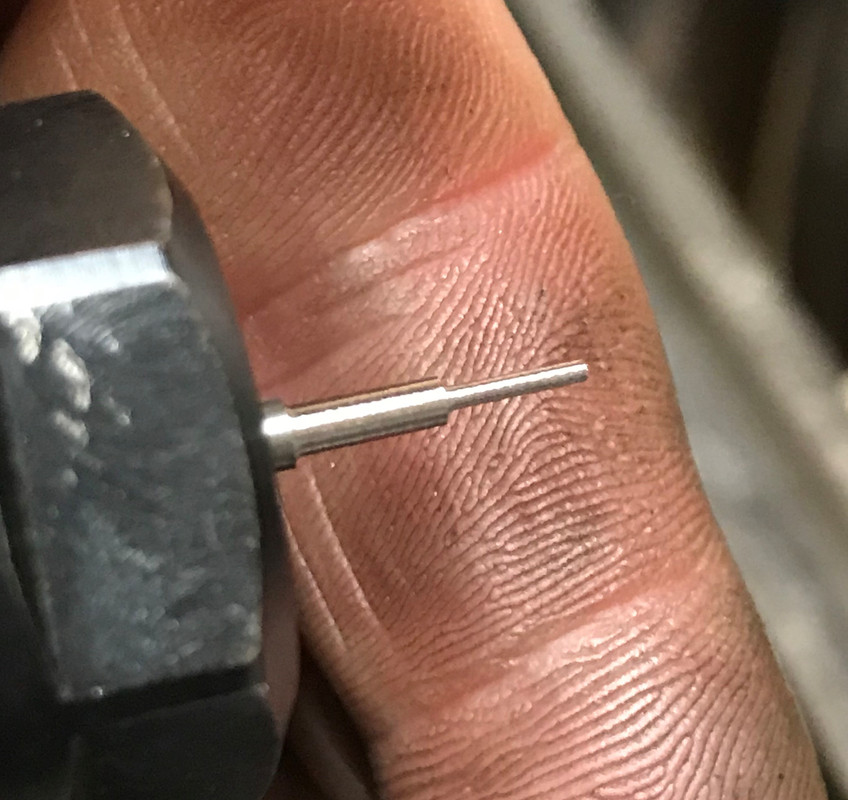
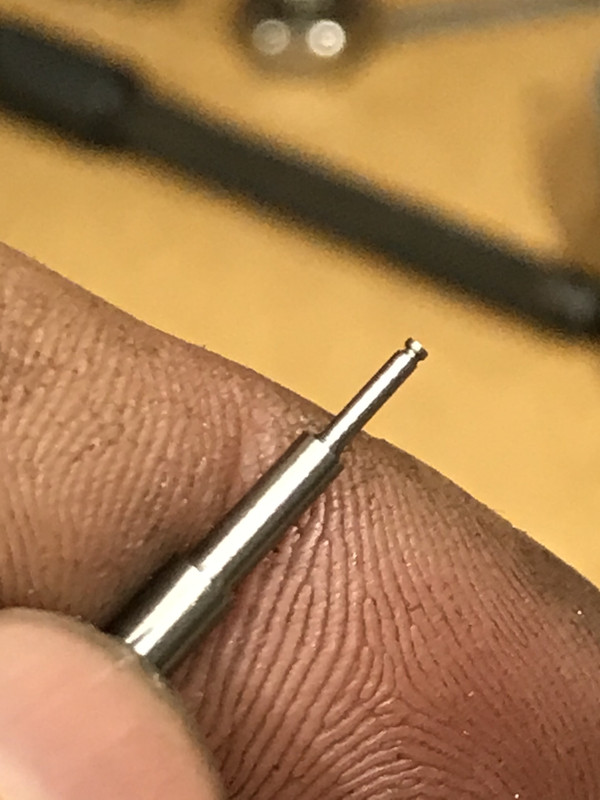
Crown sorted now time to do the light pusher.
Then made a quite long, stepped and very thin thing. To turn this on the lathe would have been 'tricky', especially as the stock is already hardened.
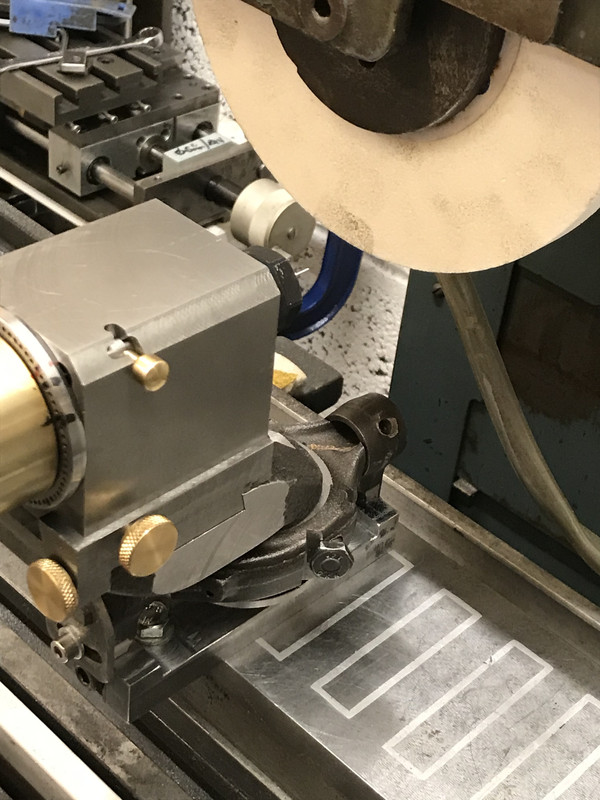
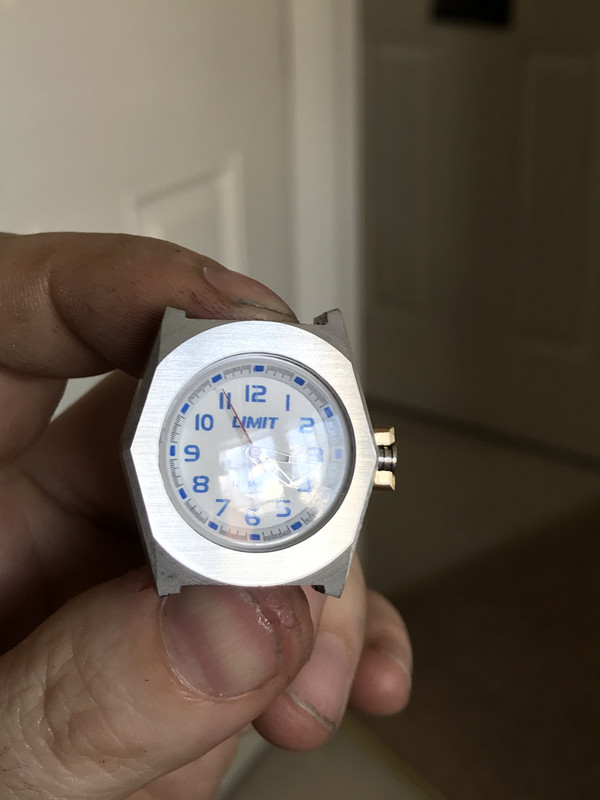
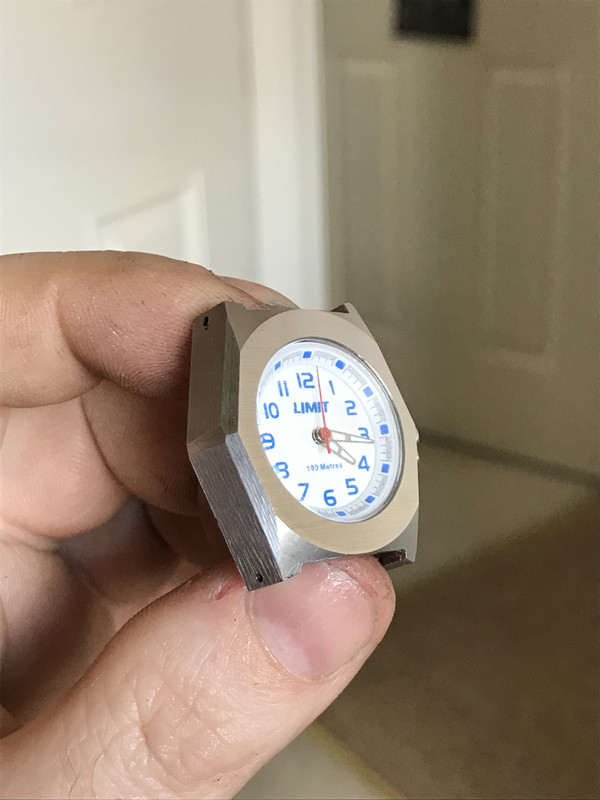
All the bits are made - time for some finishing. I surface ground the straight edges, of course scrapbinium is not magnetic, so I had to make a fixture to hold the case to the chuck. First I ground the sides and then I added some facets - to reduce the weighty look of what is admittedly a large is chunk of metal.
The end result came out ok I think.
Dave |
| duncan webster | 28/07/2021 13:52:52 |
| 5307 forum posts 83 photos | I'm not seeing any photos |
| Ady1 | 28/07/2021 13:55:30 |
 6137 forum posts 893 photos | Your pictures take forever to download or don't download at all, I suggest you make an album in here for what is an interesting project Looks really good so far As a lifelong seiko wearer I would suggest a titanium case because the lightness makes the watchstrap pins last far far longer when in daily use My original stainless needed the pins swapped every few years and was eventually lost one day on a munro in scotland (boo-hoo) My current titanium has been on my wrist every day for 12 years without a hitch |
| Dave S | 28/07/2021 14:10:37 |
| 433 forum posts 95 photos | Will edit later at home - and pull the photos locally. They all show for me - but then if they didn't I would have noticed... Dave |
| Sandgrounder | 28/07/2021 14:18:31 |
| 256 forum posts 6 photos | All the photos show up for me with no problems at all, some great work there to take on, I'd just have bought her a new one. |
| old mart | 28/07/2021 20:14:34 |
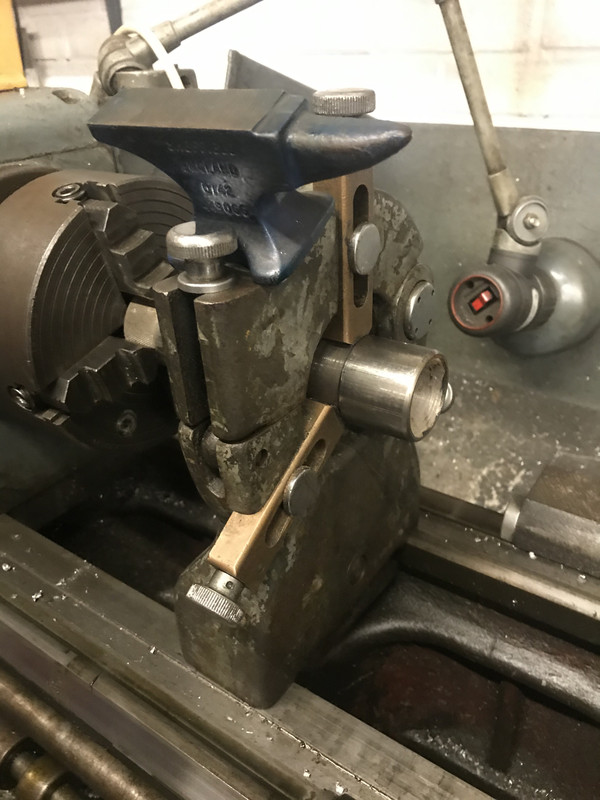
| 4655 forum posts 304 photos | Wonderful precision work. I couldn't see the photo's when I first visited the thread, but now I am logged on, they all work as expected. I have never had that happen on this forum before. Picture 2 made me chuckle, instead of wearing a 2 inch bar, the anvil would be a good substitute. Edited By old mart on 28/07/2021 20:22:09 |
| J Hancock | 28/07/2021 22:14:29 |
| 869 forum posts | Makes you realise what a bargain you are getting for a few Baht in the MK Centre in Bangkok , complete with strap and battery and keep perfect time . How can they sell for that price and make a profit ? |
| Nicholas Farr | 29/07/2021 09:02:18 |
 3988 forum posts 1799 photos | Hi Dave, smart piece of work. Regards Nick. |
 )
)


Please login to post a reply.
Magazine Locator
Want the latest issue of Model Engineer or Model Engineers' Workshop? Use our magazine locator links to find your nearest stockist!
Sign up to our Newsletter
Sign up to our newsletter and get a free digital issue.
You can unsubscribe at anytime. View our privacy policy at www.mortons.co.uk/privacy
Latest Forum Posts
- *Oct 2023: FORUM MIGRATION TIMELINE*
05/10/2023 07:57:11 - Making ER11 collet chuck
05/10/2023 07:56:24 - What did you do today? 2023
05/10/2023 07:25:01 - Orrery
05/10/2023 06:00:41 - Wera hand-tools
05/10/2023 05:47:07 - New member
05/10/2023 04:40:11 - Problems with external pot on at1 vfd
05/10/2023 00:06:32 - Drain plug
04/10/2023 23:36:17 - digi phase converter for 10 machines.....
04/10/2023 23:13:48 - Winter Storage Of Locomotives
04/10/2023 21:02:11 - More Latest Posts...
- View All Topics
Support Our Partners


Shopping Partners
Subscription Offer

Latest "For Sale" Ads
- Reeves** - Rebuilt Royal Scot by Martin Evans
by John Broughton
£300.00 - BRITANNIA 5" GAUGE James Perrier
by Jon Seabright 1
£2,500.00 - Drill Grinder - for restoration
by Nigel Graham 2
£0.00 - WARCO WM18 MILLING MACHINE
by Alex Chudley
£1,200.00 - MYFORD SUPER 7 LATHE
by Alex Chudley
£2,000.00 - More "For Sale" Ads...
Latest "Wanted" Ads
- D1-3 backplate
by Michael Horley
Price Not Specified - fixed steady for a Colchester bantam mark1 800
by George Jervis
Price Not Specified - lbsc pansy
by JACK SIDEBOTHAM
Price Not Specified - Pratt Burnerd multifit chuck key.
by Tim Riome
Price Not Specified - BANDSAW BLADE WELDER
by HUGH
Price Not Specified - More "Wanted" Ads...
Get In Touch!
Do you want to contact the Model Engineer and Model Engineers' Workshop team?
You can contact us by phone, mail or email about the magazines including becoming a contributor, submitting reader's letters or making queries about articles. You can also get in touch about this website, advertising or other general issues.
Click THIS LINK for full contact details.
For subscription issues please see THIS LINK.
Digital Back Issues


Donate

 Register
 Log-in
Model Engineer Magazine
- Percival Marshall
- M.E. History
- LittleLEC
- M.E. Clock

ME Workshop
- An Adcock
- & Shipley
- Horizontal
- Mill

Subscribe Now
- Great savings
- Delivered to your door

Pre-order your copy!
- Delivered to your doorstep!
- Free UK delivery!
All Forum Topics > Work In Progress and completed items > Stainless Watch case