H. Halls mini surface gauge technical question...
| jon hill 3 | 06/09/2020 13:25:26 |
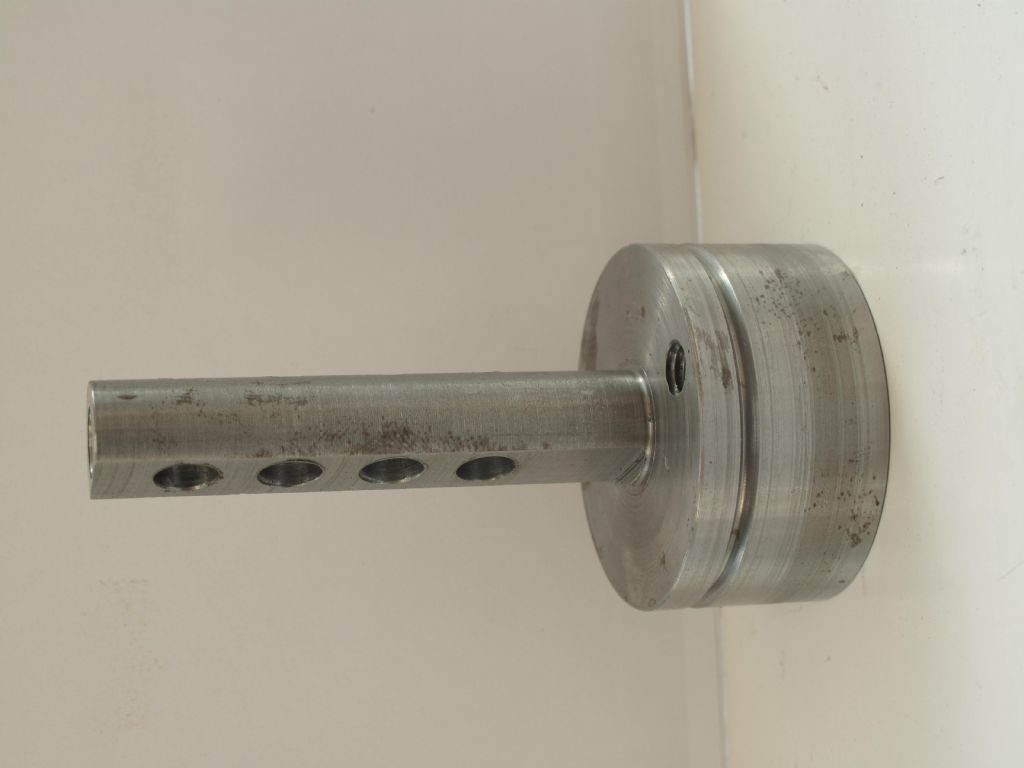
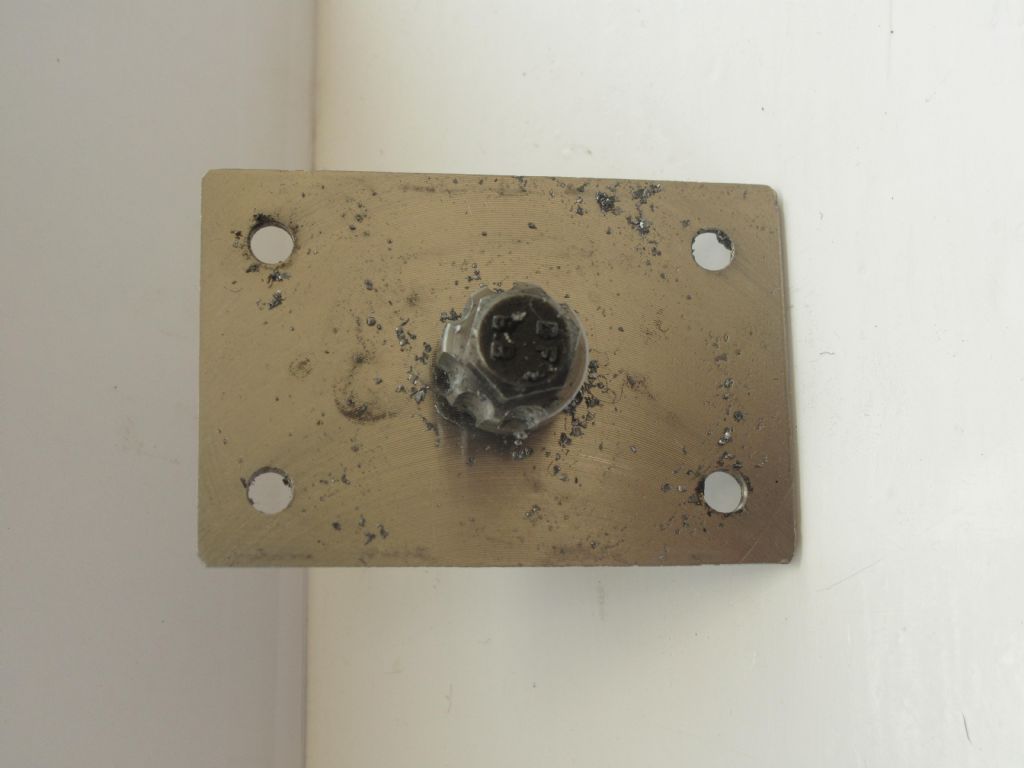
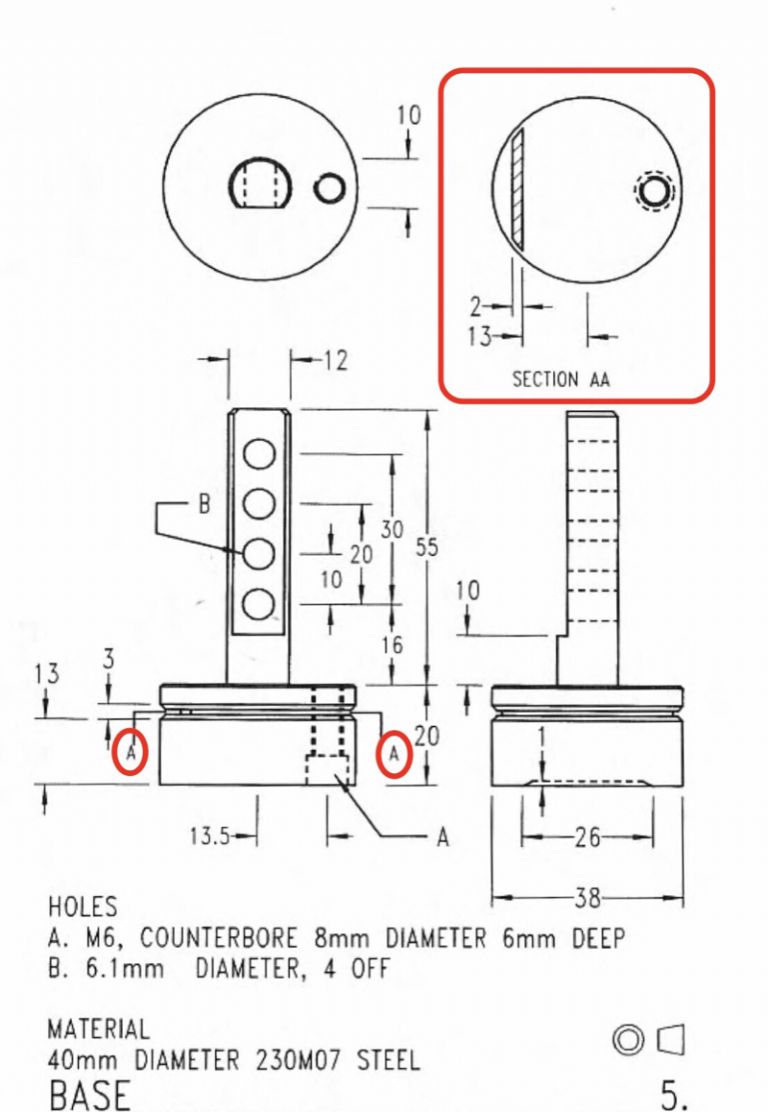
| 166 forum posts 40 photos | In a previous unrelated post another member commented on the technical difficulty of achieving the adjustment mechanism. As I have been working on the same project and also had difficulty understanding the instructions, perhaps some more experienced members could explain the cuts necessary. Perhaps where I am going wrong is I don't fully understand engineering drawings.. One of the many topics I need to get a hold on. Anyway back to the topic from my understanding from the drawing on page 19 'Lathework a complete coarse' it seems that a vertical slot of 2mm is cut into the base. This doesn't make any sense to me as I cannot see why the base would need to flex in this area. Also he mentions the v grove around the circumference disguising a cut or cuts. I am left unclear as to where the cut or cuts should be placed. For instance should it be where the clamping screw goes or adding a 2nd parallel cut on the offside to create a hinge effect or could you use a parting off tool to remove a few mms all round? Pics of project so far including failed attempt at milled 'nurling'. I tried to get a bit amitious instead of hand filing I set up a rotory table I had not used before on the milling machine. The work wasnt sufficiently clamped and the cutter wondered, oh well back to the mark 2 attempt. |
| Michael Gilligan | 06/09/2020 18:35:54 |
23121 forum posts 1360 photos | I think you will find it explained on p26 ... under the heading Method of adjustment MichaelG. . Shout up if it still doesn’t make sense. |
| jon hill 3 | 06/09/2020 20:04:38 |
| 166 forum posts 40 photos | Also as per Michael's ref to pg26, H. Hall mentions cutting down the grove or at least implies this.does this refer to 2 parallel cuts, one bi-secting the tapped hole in the base and another on the opposite side? Or just one cutting throught the hole in the base? Or a third option cutting a deeper groove all the way round the circumference? Perhaps all 3 options may work or only one hence I defer to someone with more experience.... |
| Michael Gilligan | 06/09/2020 20:47:59 |
23121 forum posts 1360 photos | The little sectional drawing at the top right of your picture is the one you need to understand There are two cuts, which nearly meet ... just leaving a little 'partition' which is shown hatched. This is what bends when you tighten the adjuster screw. MichaelG. |
| herbert punter | 06/09/2020 20:53:13 |
| 128 forum posts 1 photos | To be fair to yourself Jon, the drawing isn’t quite as clear as it could be. HH wants you to turn a groove all way round as a guide, and to make the cut neater. Then you need to saw through from the tapped screw hole side, stopping at 6mm from the other side, then cut from the other side stopping when you still have 2mm left. This forms a stiff metal hinge with enough give in it to allow the adjusting screw to tilt the top part to give you the fine adjustment.of the pointer. I think I have this right and I hope it helps you. Bert MG beat me to it, as you would expect! Edited By herbert punter on 06/09/2020 20:54:38 |
| jon hill 3 | 06/09/2020 21:52:05 |
| 166 forum posts 40 photos | Thanks Michael & Bert, if the book had said to cut either side to make a hinge this would have made more sense to a complete novice like myself. I initially thought that the hatched area was an additional vertical cut. Your explanation makes more sense. In my defence a complete newbie has to cover many topics when starting out, some of which come up from technical problems with kit and materials and some form lack of clear explanation to greenhorns like me. |
| herbert punter | 06/09/2020 21:56:59 |
| 128 forum posts 1 photos | Jon you do not need to be defensive, just keep on trying and you will get there. there are no stupid questions, only stupid answers. Bert |
| Michael Gilligan | 06/09/2020 23:12:33 |
23121 forum posts 1360 photos | I think you’ve got it now, jon But, just for clarity, I have marked ‘AA’ The section is taken at the leader lines; so it cuts through the the flexure, which is therefore shown hatched. ... and as the view is downward, the counterbore on the hole is shown dotted. MichaelG. . |
Please login to post a reply.
Want the latest issue of Model Engineer or Model Engineers' Workshop? Use our magazine locator links to find your nearest stockist!
Sign up to our newsletter and get a free digital issue.
You can unsubscribe at anytime. View our privacy policy at www.mortons.co.uk/privacy
- hemingway ball turner
04/07/2025 14:40:26 - *Oct 2023: FORUM MIGRATION TIMELINE*
05/10/2023 07:57:11 - Making ER11 collet chuck
05/10/2023 07:56:24 - What did you do today? 2023
05/10/2023 07:25:01 - Orrery
05/10/2023 06:00:41 - Wera hand-tools
05/10/2023 05:47:07 - New member
05/10/2023 04:40:11 - Problems with external pot on at1 vfd
05/10/2023 00:06:32 - Drain plug
04/10/2023 23:36:17 - digi phase converter for 10 machines.....
04/10/2023 23:13:48 - More Latest Posts...
- View All Topics
- Reeves** - Rebuilt Royal Scot by Martin Evans
by John Broughton
£300.00 - BRITANNIA 5" GAUGE James Perrier
by Jon Seabright 1
£2,500.00 - Drill Grinder - for restoration
by Nigel Graham 2
£0.00 - WARCO WM18 MILLING MACHINE
by Alex Chudley
£1,200.00 - MYFORD SUPER 7 LATHE
by Alex Chudley
£2,000.00 - More "For Sale" Ads...
- D1-3 backplate
by Michael Horley
Price Not Specified - fixed steady for a Colchester bantam mark1 800
by George Jervis
Price Not Specified - lbsc pansy
by JACK SIDEBOTHAM
Price Not Specified - Pratt Burnerd multifit chuck key.
by Tim Riome
Price Not Specified - BANDSAW BLADE WELDER
by HUGH
Price Not Specified - More "Wanted" Ads...
Do you want to contact the Model Engineer and Model Engineers' Workshop team?
You can contact us by phone, mail or email about the magazines including becoming a contributor, submitting reader's letters or making queries about articles. You can also get in touch about this website, advertising or other general issues.
Click THIS LINK for full contact details.
For subscription issues please see THIS LINK.
Model Engineer Magazine
- Percival Marshall
- M.E. History
- LittleLEC
- M.E. Clock
ME Workshop
- An Adcock
- & Shipley
- Horizontal
- Mill
Subscribe Now
- Great savings
- Delivered to your door
Pre-order your copy!
- Delivered to your doorstep!
- Free UK delivery!


 Register
 Log-in


