Forum sponsored by:

Myford Super 7
Slipping clutch
| Geoff Leake | 29/03/2020 14:24:14 |
 3 forum posts 1 photos | Hi, I'm building a classic/special motorcycle and need to turn some relatively uncomplicated parts. I've therefore purchased an old Myford Super 7 lathe, but I've not used any workshop machinery since being at school some 55 years ago! To say I'm a complete novice is a massive understatement. Nevertheless, I took it apart to clean and tidy it up and all seems good, there don't appear to be any broken or worn parts. But having reassembled it, the clutch is slipping. Try as I may, I'm not capable of adjusting it to stop it slipping, so it's not usable in its present state. I guess it's a fairly simple matter to the experienced Myford user but that's definitely not me. Can anybody please help? |
| Kiwi Bloke | 29/03/2020 23:23:49 |
| 912 forum posts 3 photos | I'm pretty sure that you can find a manual for the Super 7 on the 'net (I haven't looked for one, having an old-tech printed one here...). Let's assume that there is indeed nothing broken or missing, and that it's all gone together as intended. Clutch adjustment is by loosening the hex nut in the middle of the bronze 'clutch plate' at the left end of the assembly. This allows the central 'push rod' to be turned relative to the clutch plate, into which it is threaded. Clockwise reduces clutch clearance. Between 45 and 90 degrees of anticlockwise rotation of the push rod from the 'no-clearance' position gives the right amount of movement to disengage. So, move the clutch lever to the disengaged position (push rod moves to the left, against spring pressure), adjust the pushrod until there's clutch contact, than back it off (anti-clockwise) between 45 and 90 degrees, to give clearance. Lock with nut. 'Push rod' is possibly misleading terminology. The clutch compression spring bears on the larger-diameter 'head' of the rod (pushing the rod to the right), thus pulling the bronze plate to the right, into engagement. The 'push' is to disengage the clutch. Hope this helps. |
| Maurice | 30/03/2020 01:33:36 |
| 469 forum posts 50 photos | Geoff may have the older version of the Super 7, which has an expanding clutch ring inside the cone pulley. This requires a screw pug to be removed from the bottom of the grove of one of the larger steps of the pulley. Then, holding the cone pulley still, the interior is rotated until a hex grub screw appears. This is a locking screw. It has to be removed to expose the head of the adjusting screw beneath. No wonder they changed it! Maurice |
| Steviegtr | 30/03/2020 02:03:13 |
 2668 forum posts 352 photos | Yes & the old type had a tendency to snap the cast ring in half. Not available any more. A friend brazed his back together & it is holding fine. Steve. |
| Geoff Leake | 30/03/2020 09:12:55 |
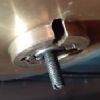
3 forum posts 1 photos | Morning guys, Thank you all for your prompt response, very much appreciated. I'll digest your comments and check things over as you suggest. Having said that, I'd like to send you an image of my clutch but I've not worked out how to add an image to this message. So I'll reply to your individual email messages, attaching the image, which will let you see the type of clutch I have. Thanks again. |
| Sandgrounder | 30/03/2020 09:25:35 |
| 256 forum posts 6 photos | Years ago I aquired a S7 Mk1 with the old style clutch, it didn't work as a clutch because the "push rod" or " actuating rod" running down the spindle centre was missing, however the previous owner had put a long bolt M10? in it's place and tightened down the adusting screw, this locked the pulley to the spindle, result no clutch action but at least it worked as a lathe. John |
| bricky | 30/03/2020 09:32:05 |
| 627 forum posts 72 photos | Geoff,The headstock on the early S7,s has a oil resevoir with a circular sight glass on the front of the spindle if so you have a lathe between 52 and 59 I think and it will have the old clutch.There is a diagram for the clutch on a previous post and as Maurice has said be aware of the double screw . Frank |
| SillyOldDuffer | 30/03/2020 10:38:50 |
| 10668 forum posts 2415 photos | Hi Geoff, Instructions on how to post photos here. You said 'To say I'm a complete novice is a massive understatement. Nevertheless, I took it apart to clean and tidy it up and all seems good, there don't appear to be any broken or worn parts. But having reassembled it...' May I take the opportunity to repeat a bit of advice? When a novel toy is acquired, whether second-hand or brand-new, beginners should resist the temptation to strip it down. It's the devil trying to lead you astray! A full strip-down is a good way of making exciting new problems before the owner knows what he's doing, or what to look for, or understands what matters and what doesn't. Be aware that a dirty used machine could be in excellent condition. If it ain't broke, don't fix it. Nothing wrong with starting with a light clean and lube job, but don't do anything intrusive. First turn the chuck by hand to make sure nothing's jammed and the controls work as expected. Take notes, don't attempt to fix anything yet. With second-hand machines, carefully inspect the electrics looking for damaged cables, broken switches - anything shocking must be fixed. In particular make sure the machine is earthed back to the plug before plugging in. If a jam is found, identify the cause and fix it. (Depending on what it is, may be a good idea to get forum advice. Like as not it will be obvious.) When the machine turns freely, next step is to power-up. This may reveal motor or bearing trouble, again take notes rather than leaping in. Let the lathe run for several minutes and confirm nothing gets hot. Listen for harsh noises, knocking, rhythmic changes, anything that sounds suspicious. At this point review the list. With luck it's a blank page! Don't fret if several concerns appear - many lathe faults don't matter much, or are easily fixed. Assuming the motor spins the chuck OK, now is the time to cut metal. This is the best way in my opinion to identify serious faults and maladjustments like loose or wonky gibs. With a sharp tool, try facing and turning down a metal rod. I recommend brass to start with because it's forgiving. Avoid testing on scrap or DIY store metal because many alloys don't machine well. EN1A and EN1A-Pb are good to cut, otherwise look for metal where the spec mentions 'free-cutting' or 'good machinability'. Screw-cutting is another good test, but may be beyond a beginner. All being well, the machine will produce straight cuts along and across the face with good finish. Tapers and poor finish will need research as will stalling, chatter, vibration, etc. Again, write a list: the fault may be the operator, cutting tool, or material rather than the machine. Don't be afraid to ask on the forum - there are no stupid questions! Also, Sparey's 'The Amateur's Lathe' - is excellent. Provided it works without serious concern, use the lathe for several weeks to get a feel for it and how well, or badly, it works. Now, the owner is better placed to start fixing things, and to judge what matters and what doesn't. The more experience the better - after a year or two it becomes much easier to get results even out of difficult metals and wonky machines. It's also much easier to identify faults and to gauge how difficult or costly they will be to fix. And to know your own limitations - I'm still learning after 8 years... Enjoy! Dave
|
| Geoff Leake | 30/03/2020 11:58:23 |
3 forum posts 1 photos | Morning Dave, Thanks for your very informative response and for your advice. Point taken about “A dirty machine could be in excellent condition”. And I’ve taken all of your other comments on board too. I have to say that apart from this clutch niggle (niggle to an experienced person is all I suspect it will turn out to be), it seems fine with all the gib screws adjusted and all lubrication points attended to. Nothing appears to be jammed, the bearings are running freely and do not appear to be worn. There are no nasty metallic noises, although the running gears do tend to whir somewhat. I’d very much like to have a go at cutting metal and “enjoy”. But until I can get this clutch to grip the taper on the inside of the vee pulley, that’s not possible unless I ignore the clutch adjustment and manually tap it home into the taper, thus operating a direct-drive arrangement without the clutch. I’m not happy to do that. Geoff |
Please login to post a reply.
Magazine Locator
Want the latest issue of Model Engineer or Model Engineers' Workshop? Use our magazine locator links to find your nearest stockist!
Sign up to our Newsletter
Sign up to our newsletter and get a free digital issue.
You can unsubscribe at anytime. View our privacy policy at www.mortons.co.uk/privacy
Latest Forum Posts
- *Oct 2023: FORUM MIGRATION TIMELINE*
05/10/2023 07:57:11 - Making ER11 collet chuck
05/10/2023 07:56:24 - What did you do today? 2023
05/10/2023 07:25:01 - Orrery
05/10/2023 06:00:41 - Wera hand-tools
05/10/2023 05:47:07 - New member
05/10/2023 04:40:11 - Problems with external pot on at1 vfd
05/10/2023 00:06:32 - Drain plug
04/10/2023 23:36:17 - digi phase converter for 10 machines.....
04/10/2023 23:13:48 - Winter Storage Of Locomotives
04/10/2023 21:02:11 - More Latest Posts...
- View All Topics
Support Our Partners


Shopping Partners
Subscription Offer

Latest "For Sale" Ads
- Reeves** - Rebuilt Royal Scot by Martin Evans
by John Broughton
£300.00 - BRITANNIA 5" GAUGE James Perrier
by Jon Seabright 1
£2,500.00 - Drill Grinder - for restoration
by Nigel Graham 2
£0.00 - WARCO WM18 MILLING MACHINE
by Alex Chudley
£1,200.00 - MYFORD SUPER 7 LATHE
by Alex Chudley
£2,000.00 - More "For Sale" Ads...
Latest "Wanted" Ads
- D1-3 backplate
by Michael Horley
Price Not Specified - fixed steady for a Colchester bantam mark1 800
by George Jervis
Price Not Specified - lbsc pansy
by JACK SIDEBOTHAM
Price Not Specified - Pratt Burnerd multifit chuck key.
by Tim Riome
Price Not Specified - BANDSAW BLADE WELDER
by HUGH
Price Not Specified - More "Wanted" Ads...
Get In Touch!
Do you want to contact the Model Engineer and Model Engineers' Workshop team?
You can contact us by phone, mail or email about the magazines including becoming a contributor, submitting reader's letters or making queries about articles. You can also get in touch about this website, advertising or other general issues.
Click THIS LINK for full contact details.
For subscription issues please see THIS LINK.
Digital Back Issues


Donate

 Register
 Log-in
Model Engineer Magazine
- Percival Marshall
- M.E. History
- LittleLEC
- M.E. Clock

ME Workshop
- An Adcock
- & Shipley
- Horizontal
- Mill

Subscribe Now
- Great savings
- Delivered to your door

Pre-order your copy!
- Delivered to your doorstep!
- Free UK delivery!
All Forum Topics > Beginners questions > Myford Super 7