Forum sponsored by:

5 inch 0-4-0 Shunter
| Ron Laden | 10/08/2018 16:54:39 |
 2320 forum posts 452 photos | I am about to start building the loco body and as mentioned I am going with a Class 08..ish style body. The 08 is of course a 0-6-0 loco but there was a prototype built as a 0-4-0.... I was going with a typical green BR body but I found a few other colours for the 08 and I rather like the grey version in the picture below it is a bit different. I may well go for it when it comes to the painting and finishing stage.
Edited By Ron Laden on 10/08/2018 16:55:07 |
| Ron Laden | 19/08/2018 10:28:38 |
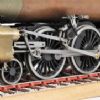
2320 forum posts 452 photos | Well I,ve made a start on the body, built the basics of the front section. It will be based on a 08 (ish) shunter, I know it looks like a box on wheels, but if you take the detail off an 08 thats what your left with (see picture in previous post). So lots of detail to add, well when I say lots, enough to make it at least look like something realistic. The next stage is to add the rear section/cab, the body so far is a combination of 6mm MDF, pine quarter quadrant and 0.8 mm modelling ply. I,ve added the engine access door panels to each side and also fixed the cab front. Ron p.s. Although its not intended as a scale loco I think I will lose the buffer plates, they just dont look right.
Edited By Ron Laden on 19/08/2018 10:32:33 Edited By Ron Laden on 19/08/2018 10:39:56 |
| Ron Laden | 19/08/2018 11:05:02 |
2320 forum posts 452 photos | I think better with the buffer plates removed they were for a different body style. The hardware can be added to the front chassis spreader plate.
|
| Paul Kemp | 20/08/2018 01:19:06 |
| 798 forum posts 27 photos | Ron, I don't post on here very often although I often read the various threads and get a little frustrated with all the pedantic comments and responses to various questions. I have to say though having followed your project, including getting the shed and buying a lathe very well done. When you consider the other thread on here re model engineering in decline to see someone like yourself come along and just get on with it is a breath of fresh air. More power to you you sir! The hobby needs more Rons! Well done, I think you are doing a cracking job. Paul. |
| Ron Laden | 21/08/2018 10:29:39 |
2320 forum posts 452 photos | Thank you Paul, I dont know that I deserve such praise, I just put as many hours in as I can which like many of us never seems enough. I only manage around 20 hours a week as life tends to get in the way. I am part way through building the cab, will add a picture later. Cheers Ron |
| Ron Laden | 21/08/2018 14:58:11 |
2320 forum posts 452 photos | I,ve managed to get the bare bones of the cab area together, doors still to make, window frames and trims to do plus make and fit the roof. Still a lot of detail to do but its coming together and most importantly its fun. Ron
|
| Ron Laden | 21/08/2018 15:34:52 |
2320 forum posts 452 photos | Placed the body on the chassis, starting to look a bit more shunter like...I think..? Ron
|
| Ron Laden | 23/08/2018 09:54:53 |
2320 forum posts 452 photos | Cab roof, doors and window frames added, next job is the front radiator grill and fins. p.s. Forgot to say, Mentioning radiator fins I need to treat myself to a Costa coffee and whilst there sneak away a handful of wooden coffee stirrers.... Edited By Ron Laden on 23/08/2018 10:17:52 |
| Ron Laden | 01/09/2018 09:48:51 |
2320 forum posts 452 photos | I,ve not had too much workshop time this week but managed to add the radiator front assy, decided to add the wasp stripes at the same time.
|
| Neil Wyatt | 01/09/2018 21:08:26 |
 19226 forum posts 749 photos 86 articles | Looking even better now, Ron. Neil |
| Ron Laden | 02/09/2018 09:32:47 |
2320 forum posts 452 photos | Thanks Neil, Fuel tanks, side boxes and vent panels next, its completely make believe of course but if I can get it looking something like a shunter that could have been it will be fine. It started out as a fun loco to carry our two great grand daughters and there is good news on that front. They were suggesting it had to be pink with a Thomas face.. Ron Edited By Ron Laden on 02/09/2018 09:34:01 Edited By Ron Laden on 02/09/2018 09:54:44 |
| Ron Laden | 13/09/2018 09:30:23 |
2320 forum posts 452 photos | Some more added, fuel tanks and side boxes, cab door panel and handrails, cab roof vent. The vent panels which sit in front of the fuel tanks are next, once these are done thats pretty much the main build of the body finished. Its then surface detail and the chassis needs buffers which I aim to turn from aluminium plus the clevis couplings which I will either buy or make. Found some 12 volt - 5mm white led,s which come in a small lens housing so I may get those for the front lights, will just need to make the lamp bodies. Also seen a 12 volt classic motorcycle horn (low tone) which I,m thinking could sound about right for a shunter.
|
| Journeyman | 13/09/2018 10:05:46 |
 1257 forum posts 264 photos | Coming along nicely Ron. Still think it should be pink, but if the granddaughters approve, who am I to disagree? I was mildly curious as to how you control it when driving? Controls on or in the rear cab, a flexible lead with a control box or radio control? Keep up the good work. John |
| Ron Laden | 13/09/2018 10:23:27 |
2320 forum posts 452 photos | Thanks John, I must admit I was sort of warming to a pink version just for fun and to keep the grand daughters happy but when they liked the grey version with the "cool yellow and black zig zags....lol" I was let off the hook. Re driving control, I was thinking a control panel mounted in the cab but having said that it wouldnt be difficult to make a plug in control box. I would only need to extend the speed controller cables for the rotary speed pot and the fwd/rev switch, I could also add the horn and light switches. I can see that a control box on an extension would be more comfortable and save leaning forward all the time. Ron Edited By Ron Laden on 13/09/2018 10:24:30 |
| Ron Laden | 20/09/2018 14:54:08 |
2320 forum posts 452 photos | Still plugging away, fitted the engine door hinges, handrails and the vent panels. Used 1.5mm ali welding rod for the handrails and cable tie ends for the hinges, they are about right size wise and I think they look ok. I think the vent panels on the full size is a grid of small mesh but I havnt found anything yet that fits the bill...any suggestions welcome..? I have slipped in a couple of pieces of 3mm plastazote for now to give some idea.
Edited By Ron Laden on 20/09/2018 14:58:41 |
| Ron Laden | 27/09/2018 16:01:17 |
2320 forum posts 452 photos | Again, not too much workshop time this week but I have added some pipe work to the front plus I have also weathered the front a tad to lose that new look. Painting is next and I plan to use the method I have used on numerous scratch built R/C aircraft over the years as it works really well. I have started with a primer coat which will be cut back with 800 paper (dry) then a coat of filler primer, filler primer is excellent for losing small imperfections and can hide a multitude of sins and again it is cut back with 800. Then the first layer of top coat, cut back with 1200 paper (dry) then the final top coat. Finally a coat of acrylic clear satin varnish, I dont use matt for anything that is regularly handled and gloss to me just looks over the top. All the painting is with aerosols (auto paint) and when it comes to top coat colours there is a massive range.
Edited By Ron Laden on 27/09/2018 16:24:41 |
| Jon Lawes | 27/09/2018 16:13:16 |
 1078 forum posts | That looks excellent so far. My personal opinion is that gloss looks too toylike for some things, so satin sounds like a good shout. |
| Ron Laden | 01/10/2018 10:41:34 |
2320 forum posts 452 photos | Amazing how buffers transform a chassis
|
| Ron Laden | 12/10/2018 09:22:55 |
2320 forum posts 452 photos | Not fifty shades of grey just two, the main painting is finished. A few bits of surface detail to add, weathering and a final top coat of clear satin. Cab to glaze plus correct a wonky window frame, build and fit the cab control panel and finalise the wiring. Chassis needs front and rear foot ladders, some areas of detail plus a pair of clevis couplings, with my first mill arriving next week
|
| Ron Laden | 10/11/2018 11:23:07 |
2320 forum posts 452 photos | Just to say that the 0-4-0 is not forgotten, although I have started the electric traction engine I have been doing some small jobs on the shunter. My aim is to complete it over the winter and have it ready for its first outing early spring. Ron |


Please login to post a reply.
Magazine Locator
Want the latest issue of Model Engineer or Model Engineers' Workshop? Use our magazine locator links to find your nearest stockist!
Sign up to our Newsletter
Sign up to our newsletter and get a free digital issue.
You can unsubscribe at anytime. View our privacy policy at www.mortons.co.uk/privacy
Latest Forum Posts
- *Oct 2023: FORUM MIGRATION TIMELINE*
05/10/2023 07:57:11 - Making ER11 collet chuck
05/10/2023 07:56:24 - What did you do today? 2023
05/10/2023 07:25:01 - Orrery
05/10/2023 06:00:41 - Wera hand-tools
05/10/2023 05:47:07 - New member
05/10/2023 04:40:11 - Problems with external pot on at1 vfd
05/10/2023 00:06:32 - Drain plug
04/10/2023 23:36:17 - digi phase converter for 10 machines.....
04/10/2023 23:13:48 - Winter Storage Of Locomotives
04/10/2023 21:02:11 - More Latest Posts...
- View All Topics
Support Our Partners


Shopping Partners
Subscription Offer

Latest "For Sale" Ads
- Reeves** - Rebuilt Royal Scot by Martin Evans
by John Broughton
£300.00 - BRITANNIA 5" GAUGE James Perrier
by Jon Seabright 1
£2,500.00 - Drill Grinder - for restoration
by Nigel Graham 2
£0.00 - WARCO WM18 MILLING MACHINE
by Alex Chudley
£1,200.00 - MYFORD SUPER 7 LATHE
by Alex Chudley
£2,000.00 - More "For Sale" Ads...
Latest "Wanted" Ads
- D1-3 backplate
by Michael Horley
Price Not Specified - fixed steady for a Colchester bantam mark1 800
by George Jervis
Price Not Specified - lbsc pansy
by JACK SIDEBOTHAM
Price Not Specified - Pratt Burnerd multifit chuck key.
by Tim Riome
Price Not Specified - BANDSAW BLADE WELDER
by HUGH
Price Not Specified - More "Wanted" Ads...
Get In Touch!
Do you want to contact the Model Engineer and Model Engineers' Workshop team?
You can contact us by phone, mail or email about the magazines including becoming a contributor, submitting reader's letters or making queries about articles. You can also get in touch about this website, advertising or other general issues.
Click THIS LINK for full contact details.
For subscription issues please see THIS LINK.
Digital Back Issues


Donate

 Register
 Log-in
Model Engineer Magazine
- Percival Marshall
- M.E. History
- LittleLEC
- M.E. Clock

ME Workshop
- An Adcock
- & Shipley
- Horizontal
- Mill

Subscribe Now
- Great savings
- Delivered to your door

Pre-order your copy!
- Delivered to your doorstep!
- Free UK delivery!
All Forum Topics > Locomotives > 5 inch 0-4-0 Shunter