Forum sponsored by:

Stuart Twin Victoria (Princess Royal) Mill Engine
| Ramon Wilson | 28/08/2022 19:01:59 |
 1655 forum posts 617 photos | Facing your centres off is your choice Doc but personally I'd just give some thought to the fact that if you need to in future - and you may - how you will hold the shaft with a fixed crank at each end and no centre. I was very unfortunate to drop my Double Diagonal going up the stairs at Forncett. That bent the crank slightly enough that it could not be run. Once home and stripped down and held between centres again it was easily brought true. Not saying you might drop yours of course but there are a myriad of reasons you may want to hold it true again in the future As Jason refers too use the smallest 1/8 dia centre drill and size the diameter of the countersunk hole by the depth of the drilling. Sorry to hear you are finding grinding tools difficult. I can only say that practice makes perfect. If you find you get on better with Carbide then by all means use it but mastering grinding will give you another option when a suitable carbide tip isn't available. Just giving a tool edge a hone as Jason suggests is beneficial at times though not always the answer. I have a selection of slip stones however (see here) of varying section and grades to call on for that purpose. A fine grit square one and triangular section type are ideal, perhaps a round one too though not used that often. Best - R PS when centreing using a wobble bar as shown the bar should not rotate as the chuck is turned as a false reading can be had - it's the centre being clocked not the bar. I just hold it with my fingers as the chuck is rotated to prevent that or sometimes restrict it from rotating it by a toolmakers clamp if I need both hands.at the chuck end |
| Dr_GMJN | 28/08/2022 21:12:05 |
 1602 forum posts | This is the centre drill I’ve got: The centering bar I made is spring loaded - works fine. Yes, I hold the end from rotating during measurements. Thanks. |
| Ramon Wilson | 28/08/2022 23:21:07 |
1655 forum posts 617 photos | What is the outer diameter of that Doc? The smallest standard centre drill is usually 1/8th diameter (I'm not certain if they are available in metric sizes but would have thought so - perhaps Jason knows) There are smaller versions available - single ended though and quite tiny in fact but are expensive for what they are and easily damaged. The brand was 'Titex' if I recall correctly. Regards - R |
| Hopper | 29/08/2022 03:07:23 |
 7881 forum posts 397 photos | Posted by Ramon Wilson on 28/08/2022 19:01:59:
Facing your centres off is your choice Doc but personally I'd just give some thought to the fact that if you need to in future - and you may - how you will hold the shaft with a fixed crank at each end and no centre. Reverse centre?
|
| JasonB | 29/08/2022 07:09:13 |
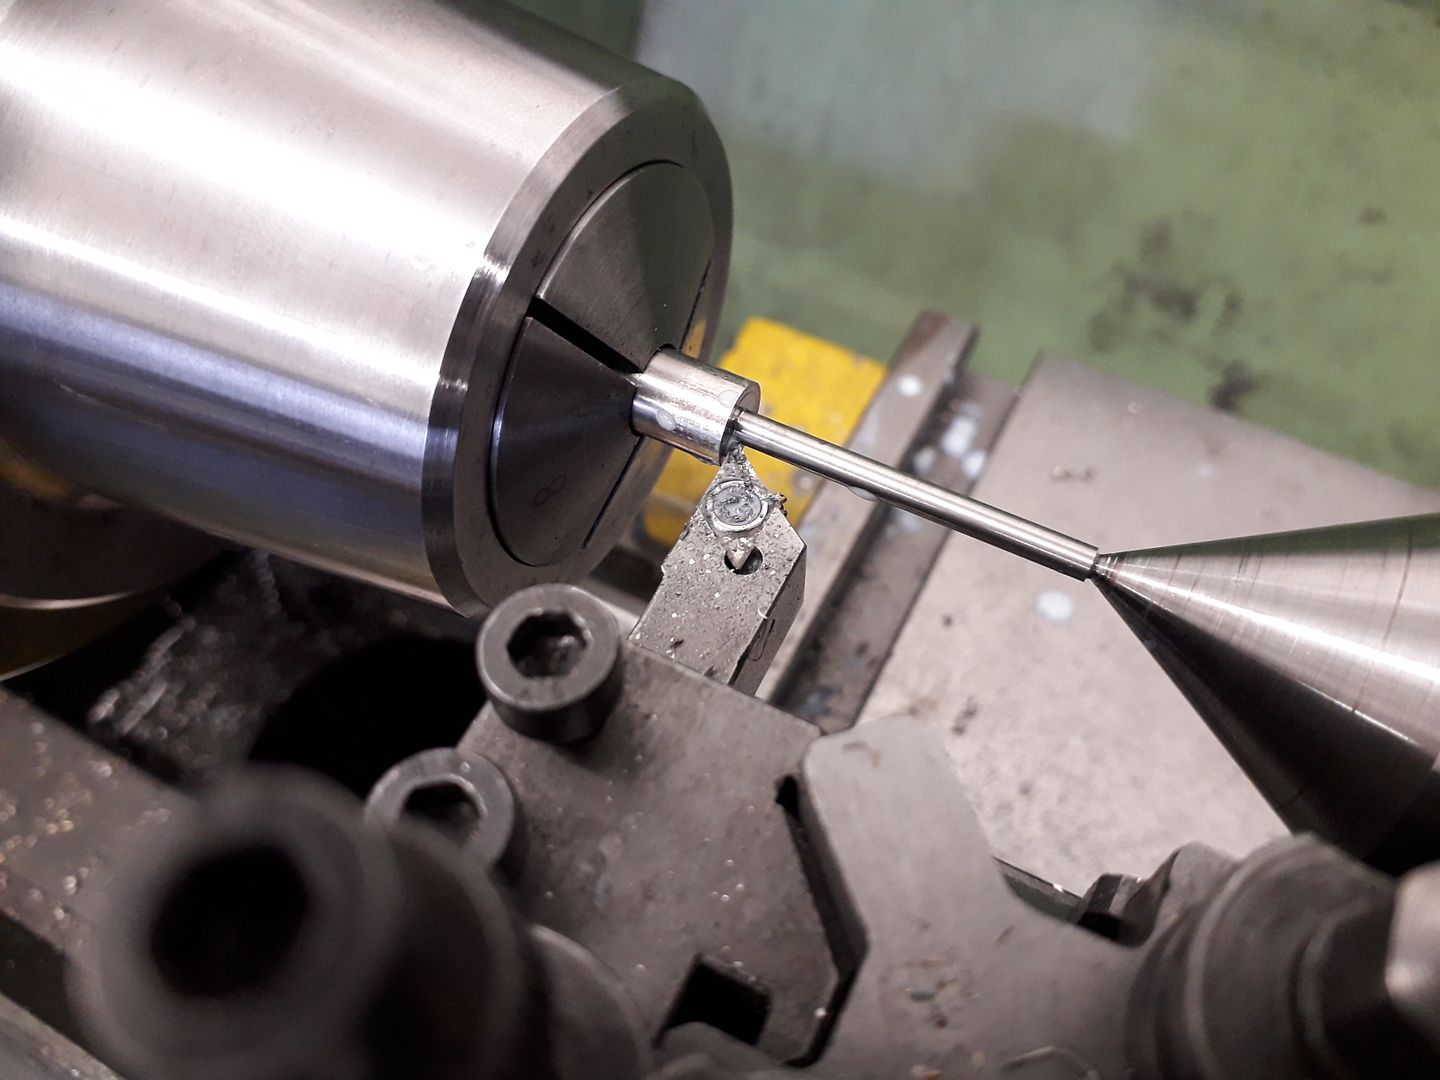
 25215 forum posts 3105 photos 1 articles | You can't turn to the end with a reverse ctr. or use them when the cranks are in place Here are some 3mm dia valve stems being supported with a ctr drilled hole, hole must be 2mm across the top, less on the second image Your picture looks like a 4mm main body with 1.6mm pilot. If you come down to 1/8" imperial or 3.15mm metric then the pilot comes down to 3/64" or 1.25mm. There are smaller pilots available but I doubt they last very long, 0.025" being the smallest.
Edited By JasonB on 29/08/2022 07:30:54 |
| Ramon Wilson | 29/08/2022 09:43:01 |
1655 forum posts 617 photos | Hi Hopper, fine idea as shown for the purpose shown but a shaft with fixed crank webs on each end is a slightly different matter don't you think It's not essential to leave them in - though many full size engines have them left in some don't. My thought is basic, once you machine them off - IF - you need to put it between centres again it's a bit late in the day to say 'I wished I hadn't done that. - money and choice again. Doc, the Titex centre drill I was thinking of was about 3mm dia or less with a very tiny point, probably less than a mm, single ended about 20mm long. I've looked but can't find it so far - personally don't think its worth it just use the smallest standard size with just enough depth to support the shaft if needed.
|
| Dr_GMJN | 29/08/2022 10:01:13 |
1602 forum posts | I need to sort out the turning before I can progress. Do you think a left-had turning tool would be ok - no radius and the flats would be easier to grind? A bit like the boring tool geometry on the round off-cuts Ramon sent me. They seemed fairly easy to get right, although it was on cast iron. Thanks. |
| JasonB | 29/08/2022 10:04:56 |
25215 forum posts 3105 photos 1 articles | You probably mean a right hand tool as a leftie won't cut from tailstock to shoulder With the diameters you have there will be enough clearance on the 7/16" one at the end to use any tool, shape provided the two edges meet at 80deg or less you should be OK. |
| Hopper | 29/08/2022 10:06:04 |
7881 forum posts 397 photos | Posted by Ramon Wilson on 29/08/2022 09:43:01:
Hi Hopper, fine idea as shown for the purpose shown but a shaft with fixed crank webs on each end is a slightly different matter don't you think Doh! Forgot it was a twin with the overhung crankpins. Yes, would be a bit difficult!
|
| Dr_GMJN | 29/08/2022 15:20:35 |
1602 forum posts | Day out today, but just wondering - are the GT inserts the best for bright steel? The good finish I got previously last week was on a mild steel off-cut. I’ll try grinding HSS again later, but I’d much rather use inserts. I’m thinking that the small angle tip I’ve got might exacerbate the surface roughness. I did try a 0.5 radius insert, but strangely it didn’t seem to make a deal of difference. Thanks.
|
| Ramon Wilson | 29/08/2022 17:16:15 |
1655 forum posts 617 photos | Doc, things have moved on so much since I used carbide on a daily basis at work so I can't express an up to date opinion. I can say though that much heavy roughing was carried out using carbides but when a fine finish was called for to an accurate dimension HSS was always used. I know things have changed since the advent of 'CNC everything' but the old principles are just as viable today as they were then. My shaft for the Corliss shown previously was done using hand ground tools and likewise the marine engine double throw one. The quality of steel plays a part too but En1a freecutting is an ideal material for shafts running in bronze on which a mirror finish is possible from simply ground tools - worth persevering perhaps? The Titex centre drills I have are 3mm diameter with a .5mm tip - both broken regrettably but they are available. Best - R Edited By Ramon Wilson on 29/08/2022 17:17:16 |
| Ramon Wilson | 29/08/2022 17:50:14 |
1655 forum posts 617 photos | Just checked - the small Titex centre drill is marked 'Titex Plus K1111 0.5'
|
| JasonB | 29/08/2022 18:21:03 |
25215 forum posts 3105 photos 1 articles | The GT inserts are a lot closer to HSS than the MT ones so allow fine finishing cuts if you need to sneak up to a finished fit and will continue to cut whereas the MT may rub or ride up onto the surface if you try to take small cuts. Not sure where you found a 0.5 tip radius one as the usual increments are 0.2, 0.4 and 0.8 in our smaller size tips. I mostly use the 0.2. with a feed of 0.0025" per rev for finish turning. Once this focuses you can see the stream of 1thou swarf coming off and the bright finish it leaves and that is EN8 which is not quite as nice to machine as EN1A Edited By JasonB on 29/08/2022 18:21:34 |
| Dr_GMJN | 29/08/2022 19:19:30 |
1602 forum posts | Jason - sorry, 0.4mm tip radius. Material is 080A15 steel, in case that’s particularly difficult to machine? Grabbed a couple of hours in the workshop to try and sort this. Unfortunately succeeded only in making more swarf and steel filings. As a sanity check to make sure nothing was fundamentally out, I turned some aluminium with no issue - both with the inserts and the HSS tools I made. Also double-checked centre heights which were also spot on. Not much point doing more until I’ve figured out what’s gone wrong here - there’s a load of steel turning to do on the connecting rods and eccentrics after this. Cheers. |
| JasonB | 29/08/2022 19:39:58 |
25215 forum posts 3105 photos 1 articles | Get some 230M07 (EN1A) which is free cutting rather than that EN3/EN32 which can be a bit gummy. |
| Dr_GMJN | 29/08/2022 20:37:52 |
1602 forum posts | Posted by JasonB on 29/08/2022 19:39:58:
Get some 230M07 (EN1A) which is free cutting rather than that EN3/EN32 which can be a bit gummy. OK I've got some EN1A just the right size, so I'l re-draw it and try again. I think it was EN1A I tried the HSS tool on the other day and it as pretty good. Unfortuntely a lot of the steel I got specifically for this model is 080A15 for some reason. I think it was specified in the instructions, or in the original Stuart parts list maybe. Anyway, that's what I ordered from my stockist. I hope it's easier to mill (but I somehow doubt it). Is there anything that can be done to it (for example heat treatment) to make it easier to machine? Otherwise it looks like replacing it all with EN1A. Or, is there a good way to improve the torn finish on non-critical surfaces? Thanks. |
| Ramon Wilson | 29/08/2022 22:43:57 |
1655 forum posts 617 photos | Doc as I mentioned in my previous post En1a is a good steel combination in a running fit in bronze (or cast iron) It's much easier to machine than En3 or GCQ (General Cutting Quality) which is probably what you have and which will be difficult to machine to a good finish. If the tool is right it will give you an extremely fine finish straight off the tool with fine cuts and can be polished up with fine grit (240) emery or wet and dry paper. The tool you have ground is fundamentally a reasonable basic shape but it's the tip that does the work and that needs to be improved as I see it. The rake on the top is too obtuse for steel so increase that back towards you and back towards the tailstock - a good 10-15 degrees and the tip needs a nice radius - I do mine not by rotating the tool itself against the wheel but rather by dragging the tool at the right (as in more or less correct) front and side back off angles around the corner of the wheel allowing the radius to form by the corner of the wheel. If you are struggling to perceive this then I'll take some pics for you tomorrow.
Re material this was made from En1a and done entirely with hand ground tools - yes it's been emeried but as you have already found the finish has to be there if tool marks aren't to be evident. No form tools were used on this, the radius created by a series of flats and scraping the high points between them
Best - R |
| Paul Kemp | 29/08/2022 22:56:12 |
| 798 forum posts 27 photos | There doesn’t look to be anything fundamentally wrong with your knife tool but the picture is a little blurry, the grinding marks on the top look quite course, what grit wheel have you got on your grinder? However if all the other tools you tried gave the same or similar effect then it’s probably not your tool! You mention changing rpm, tools, with and without cutting oil but no mention of feed rate, did you try altering that? As a test did you try different depths of cut? Does a heavy cut produce the same finish as a light cut? As Jason says it’s likely the grade of steel you have, some low carbon steels tend to tear rather than cut, EN3B can be like that. However it should be possible to get a better finish than that although mirror finish is probably unlikely. It’s counter intuitive but upping the feed rate may give an improvement. Looking at the work piece pictures the deeper scores suggest maybe chips got trapped between the tool and the job? Flood cooling may hep that but I don’t suppose you are geared up for that? As to improving the finish on non critical parts light use of a fine file followed by emery but mind your fingers Paul. predictive, chops for chips, Edited By Paul Kemp on 29/08/2022 22:57:51 |
| Hopper | 30/08/2022 00:15:02 |
7881 forum posts 397 photos | Posted by Dr_GMJN on 29/08/2022 19:19:30:
It's hard to tell from the pic but it looks like your tool could use a lot more angle on that top surface and maybe even a little more on the leading face. Following the advice of LH Sparey in "The Amateur's Lathe" I have found these small, not very rigid hobby lathes work best with much more of a cutting angle than usually recommended in more industrial circles. Sparey recommends about 5 degrees of clearance on the leading face, then grind the top surface at about 30 degrees. Yes 30 degrees. This puts the knife in knife tool. So the included angle between the leading face and the top face is 55 degrees. He recommends checking this angle with the V notch in your 55-deg BSW screwcutting gauge. This angle results in a very sharp edge that cuts well -- but will wear quicker than a more obtuse angled tool but seems to last ok in the home workshop. To get a good finish it is essential to finish the tool off on a bench oil stone after grinding. The type of stone your Granny used to sharpen kitchen knives. Rub the flat surfaces on it until they are nice and flat and smooth and form a cutting edge that is sharp to the feel, like a knife. Then by rotating the tool bit as you rub it back and forth along the oil stone, put a small radius on the cutting tip, running all the way down that edge so basic cutting angles are maintained. Then stone the top surface of the toolbit to remove any burr. And don't be shy about using a bit of emery cloth/paper and a drop or two of oil to remove the last half a thou and get the ultimate finish! By working evenly along the job you can still maintain diameter along the length within a few tenths if desired. Also, the discoloration indicates you might be overheating your tool bit a little while grinding. Take it easy and dip in a tin of water regularly to stop the edge turning blue. Use a fine wheel if you have it for finishing. I have gone back to using 1/4" square toolbits on the Myford and packing them up, just because it takes waaaay less grinding time than the 3/8" bits that are a bit easier to use packing-wise.
See the knife tool A at the top left of the below diagram for the 55 deg included angle.
A) is a right hand knife tool B) is a 'corner tool' C) is a round nose tool and D) is an example of a knife tool used for brass, you should have a round nosed and corner tool as well for brass (and CI)with the same reduced top rake.
Edited By Hopper on 30/08/2022 00:31:15 |
| JasonB | 30/08/2022 07:26:47 |
25215 forum posts 3105 photos 1 articles | Posted by Dr_GMJN on 29/08/2022 20:37:52:
Unfortuntely a lot of the steel I got specifically for this model is 080A15 for some reason.
Your square and rectangular sections are likely to be this spec as that is what is usually available but EN1A is more readily available in round section so worth buying. Drawfiling with emery over the file will clean up flat faces, the fish bellies on the rods will need hand finishing so not really much in the way of turned surfaces on the sq/rec sections to worry about. Blowing some of those images of tools up on Thumbsnap the cutting edges look a bit soft. The cutting edge is really a corner where two flat faces meet and should be as crisp as possible, this is where rubbing on a stone or diamond plate helps. Also try to grind the tool without lots of facets, the belt sander may be easier to do this after initial shaping on the grinder |


_20190908_090826_zpsxxi1lj4z.jpg)


.jpg")


Please login to post a reply.
Magazine Locator
Want the latest issue of Model Engineer or Model Engineers' Workshop? Use our magazine locator links to find your nearest stockist!
Sign up to our Newsletter
Sign up to our newsletter and get a free digital issue.
You can unsubscribe at anytime. View our privacy policy at www.mortons.co.uk/privacy
Latest Forum Posts
- hemingway ball turner
04/07/2025 14:40:26 - *Oct 2023: FORUM MIGRATION TIMELINE*
05/10/2023 07:57:11 - Making ER11 collet chuck
05/10/2023 07:56:24 - What did you do today? 2023
05/10/2023 07:25:01 - Orrery
05/10/2023 06:00:41 - Wera hand-tools
05/10/2023 05:47:07 - New member
05/10/2023 04:40:11 - Problems with external pot on at1 vfd
05/10/2023 00:06:32 - Drain plug
04/10/2023 23:36:17 - digi phase converter for 10 machines.....
04/10/2023 23:13:48 - More Latest Posts...
- View All Topics
Support Our Partners


Shopping Partners
Subscription Offer

Latest "For Sale" Ads
- Reeves** - Rebuilt Royal Scot by Martin Evans
by John Broughton
£300.00 - BRITANNIA 5" GAUGE James Perrier
by Jon Seabright 1
£2,500.00 - Drill Grinder - for restoration
by Nigel Graham 2
£0.00 - WARCO WM18 MILLING MACHINE
by Alex Chudley
£1,200.00 - MYFORD SUPER 7 LATHE
by Alex Chudley
£2,000.00 - More "For Sale" Ads...
Latest "Wanted" Ads
- D1-3 backplate
by Michael Horley
Price Not Specified - fixed steady for a Colchester bantam mark1 800
by George Jervis
Price Not Specified - lbsc pansy
by JACK SIDEBOTHAM
Price Not Specified - Pratt Burnerd multifit chuck key.
by Tim Riome
Price Not Specified - BANDSAW BLADE WELDER
by HUGH
Price Not Specified - More "Wanted" Ads...
Get In Touch!
Do you want to contact the Model Engineer and Model Engineers' Workshop team?
You can contact us by phone, mail or email about the magazines including becoming a contributor, submitting reader's letters or making queries about articles. You can also get in touch about this website, advertising or other general issues.
Click THIS LINK for full contact details.
For subscription issues please see THIS LINK.
Digital Back Issues


Donate

 Register
 Log-in
Model Engineer Magazine
- Percival Marshall
- M.E. History
- LittleLEC
- M.E. Clock

ME Workshop
- An Adcock
- & Shipley
- Horizontal
- Mill

Subscribe Now
- Great savings
- Delivered to your door

Pre-order your copy!
- Delivered to your doorstep!
- Free UK delivery!
All Forum Topics > Work In Progress and completed items > Stuart Twin Victoria (Princess Royal) Mill Engine