What tool do I need? I need to measure the radius of a tiny fillet on a 90° edge.
| SillyOldDuffer | 04/01/2022 16:04:10 |
| 10668 forum posts 2415 photos | Posted by John Smith 47 on 04/01/2022 13:45:24:
... Speaking pragmatically, I currently have no way of ANY sort to measure any of my fillet radiuses. And there don't appear to be any tools that can help much other than a chamfer measuring tool which will of course be making the assumption that the fillet is extremely circular (which it may not be). In which case the answer is to eyeball it, and seeing R0.1mm would need the aid of a loupe. The human eye is good at spotting malformations, especially when the radius can be compared with a gauge with a bright light behind, and then in front of it. Finger tips are remarkably sensitive to tiny irregularities as well. Human sensory methods don't measure anything in the sense that a machine can be told to remove 0.05mm or whatever to correct a dimension. But they do allow the workman to progressively refine his work. From what you've said, your chamfer can be made as well as is needed without measuring it at all. Before science and technology merged everything was made by comparing rather than measuring. Because it takes so long to do well, most early products were crudely made, but craftsmen have been capable of making fine mechanisms like clocks for centuries. Also high-art, decoration, jewellery and other posh stuff. Apart from the cost, other serious problems are training craftsmen, and their inability to make parts identical within tolerances. Whilst craft methods are no good for mass-production, they're often excellent in a home workshop. Likely none of the disadvantages apply to you unless the radius is part of a delicate bearing. Otherwise, the radius can be formed by several strokes of a fine toothed file angled to produce a reasonable curve. If the result looks OK it probably is. If the subject has been done to death, why are you still asking the same sort of question? From my side of the internet I can't tell if you need a gauge and eye-glass costing £10 or a Shadowgraph like this one, £4,388.60 on ebay.
Dave |
| John Smith 47 | 04/01/2022 16:12:44 |
| 393 forum posts 12 photos | Posted by JasonB on 04/01/2022 15:24:07:
Not really a lie, it's a general description of the chamfer type of calliper, if you then click "view full range" it lists the three callipers Edited By JasonB on 04/01/2022 15:24:56 Wrong. If you click on the link to the individual product for Sku:"1180-6" ==> It says "Product Information" and the very first of the bullet says "Measure 30 degree/45 degree/60 degree chamfers".
|
| John Smith 47 | 04/01/2022 16:44:53 |
| 393 forum posts 12 photos | > In which case the answer is to eyeball it, and seeing R0.1mm would need the aid of a loupe. > Finger tips are remarkably sensitive to tiny irregularities as well. > From what you've said, your chamfer can be made as well as is needed without measuring it at all. And really, that's the point, I need to specify the required output not the processes. Re the Shadowgraph, as I have now said more than one, my some of my fillets are quite long and I have assumed that it would be extremely difficult measure the size of a fillet along the length of a longer fillet on a part. Obviously it would also be well beyond the budget of £100 or so, which I have also mentioned more than once. So back to my original question, I was just asking if anyone knew of any tools that would help me measure the radius of very small fillets, at a half-sensible (ideally sub £100) cost. If you think that the answer is "no", then let's move on. |
| Robert Butler | 04/01/2022 17:39:19 |
| 511 forum posts 6 photos | NO Robert Butler |
| Dave S | 04/01/2022 17:45:49 |
| 433 forum posts 95 photos | John wrote:
Yes, but in practice the accuracy of readings will entirely depend on where the inaccuracies are coming from. Whilst that may (or may not) be true without detailed knowledge of exactly how the thing works it is impossible to say where any inaccuracies start. John wrote:
In my experience, if I zero my current digital calipers, and move them to 10mm and back, I would still expect it to read either +0.01, 0.01 or -0.01. Yes, after a large number of measurements it is more likely to no longer still say 0.00, (albeit in my experience not by more than 0.01 or so). i.e. In my experience opening and closing the calipers enough times will eventually create new errors that become obvious when the device closed and no longer reads "0.00mm".
John wrote:
But if opening and closing the calipers multiple times since the last re-zeroing does NOT create new errors, I find that surprising. Either way, in this case are we seriously expecting that if I zero the device and move it by exactly 0.1mm that it will immediately read as much as "0.16mm" or as little as "0.04mm"? Not exactly. I am saying that the range of possible readings it could give and be within the spec is 0.04mm to 0.16mm. Decent calipers almost never need their zero resetting. It more likely to be reset because you are using it for some other purpose than absolute measurement - for instance I have a target sized shaft so I zero on that and now my digital caliper means I dont have to think about how much to take off (apart from the should I divide it by 2 for this lathe cross slide John wrote:
Personally my best guess is that error come from two effects
Guessing is a sure way to be wrong on average 50% of the time... It is very unlikely that total travel distance makes any difference to the accuracy.
Split post because apparently I typed to much...
Edited By Dave S on 04/01/2022 17:46:56 |
| Dave S | 04/01/2022 17:46:21 |
| 433 forum posts 95 photos | Second part to my excessivle long post;
The way *most* of these sort of devices work is based on a pair of printed circuit boards and some sensing electronics. The PCBs form a variable capacior, which is 'driven' to give an output that is proportional to the distance moved. There are many sources of errors in that system. Firstly if there is a clock used to drive things then it is probably a quartz crystal, and temperature senstive. There may be step and repeat errors in the PCB manufacture, as the battery discharges there may be an effect in the sensitivity. usually for an electronic linear measurement device (which the scale in a caliper is) there is a spec like accuracy 100 to 3000 mm -(5+5L/1000) µm
Your anacdotal assertion that your calipers, which are spec'd as +-0.02mm accurate 'seem accurate to +/- 0.01mm' is just that - a seems - unless you have actually checked it properly.
People get fooled by digital - its not any more accurate just becase the computer shows you a certain number of digits... Dave Who used to work in the field of very high precision metrology, and occasionally makes things in is garage |
| Dave S | 04/01/2022 17:50:30 |
| 433 forum posts 95 photos | A high powered inspection microscope has a very thin field of focus. Mine is 40x IIRC, and you can 'zoom' up and down an edge and examine it in great detail by ignoring the out of focus parts. I got mine very cheap, mostly because the guy was moving to the USA and clearing out, but a similar one on ebay would probably not be that much. Ill grab soem pics later when I head out to the garage. Dave
|
| Speedy Builder5 | 04/01/2022 18:08:54 |
| 2878 forum posts 248 photos | for 20 euro, I am tempted to buy this set radius gauge , drill the rivet out, send John the 'leaf' he wants. All those in favour, send me an un franked UK 1st class stamp. Bob |
| Robert Butler | 04/01/2022 18:11:46 |
| 511 forum posts 6 photos | I would repeat in response to the last question by John NO Robert Butler
|
| Jeff Dayman | 04/01/2022 18:26:29 |
| 2356 forum posts 47 photos | +1 on NO My added bit - Hope this thread goes away and people stop wasting their time with this troll OP. |
| JasonB | 04/01/2022 18:27:32 |
25215 forum posts 3105 photos 1 articles | Posted by Speedy Builder5 on 04/01/2022 18:08:54:
for 20 euro, I am tempted to buy this set radius gauge , drill the rivet out, send John the 'leaf' he wants. All those in favour, send me an un franked UK 1st class stamp. Bob Save yourself 19euro and just drill a 1mm hole in a square of scrap, saw and file away one corner and you have an L shaped gauge with 0.5mm internal radius to send to john. I won't suggest he makes one as that could lead to another long thread |
| John Smith 47 | 04/01/2022 18:28:24 |
| 393 forum posts 12 photos | @Dave 2 Yes, interesting stuff... however to my point, is that not exactly what you would expect if errors are proportional to the distance travelled by the sensor, no? And if that is the case, then surely a smaller movement would imply smaller errors. |
| John Smith 47 | 04/01/2022 18:32:52 |
| 393 forum posts 12 photos | Posted by Speedy Builder5 on 04/01/2022 18:08:54:
for 20 euro, I am tempted to buy this set radius gauge , drill the rivet out, send John the 'leaf' he wants. All those in favour, send me an un franked UK 1st class stamp. Bob No. As I said on Page #1, that style of radius gauge is of no use to me because it does not have these features: |
| John Smith 47 | 04/01/2022 18:34:40 |
| 393 forum posts 12 photos | Posted by Jeff Dayman on 04/01/2022 18:26:29:
+1 on NO My added bit - Hope this thread goes away and people stop wasting their time with this troll OP. Nobody is compelling you to visit this thread. |
| Robert Butler | 04/01/2022 18:46:10 |
| 511 forum posts 6 photos | OP promoted to Moderator as well now! And after 4 pages of posts we are are back to where we started from as with other Forum Topics posted by OP who also lacks grace. If this "invention" ever gets beyond prototype stage I pity the poor bugger who draws the short straw to put it into production. Robert Butler |
| Nick Wheeler | 04/01/2022 19:26:29 |
| 1227 forum posts 101 photos | Posted by Robert Butler on 04/01/2022 18:46:10:
If this "invention" ever gets beyond prototype stage I pity the poor bugger who draws the short straw to put it into production.
I'd love to see the inventor's face when he finds all these lovingly crafted high precision features that have cost him so much time and effort immediately deleted in favour of simple to produce parts, that can be assembled by unskilled labour in a sweatshop somewhere none of us have ever heard of. |
| Dave S | 04/01/2022 20:31:59 |
| 433 forum posts 95 photos | Posted by John Smith 47 on 04/01/2022 18:28:24:
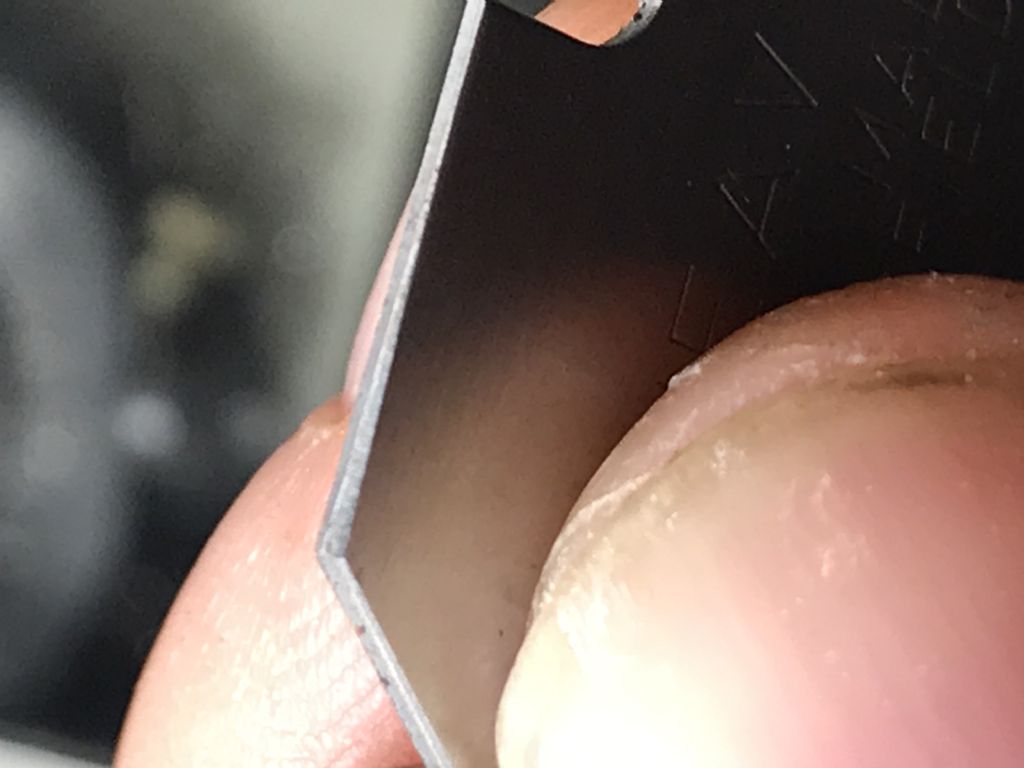
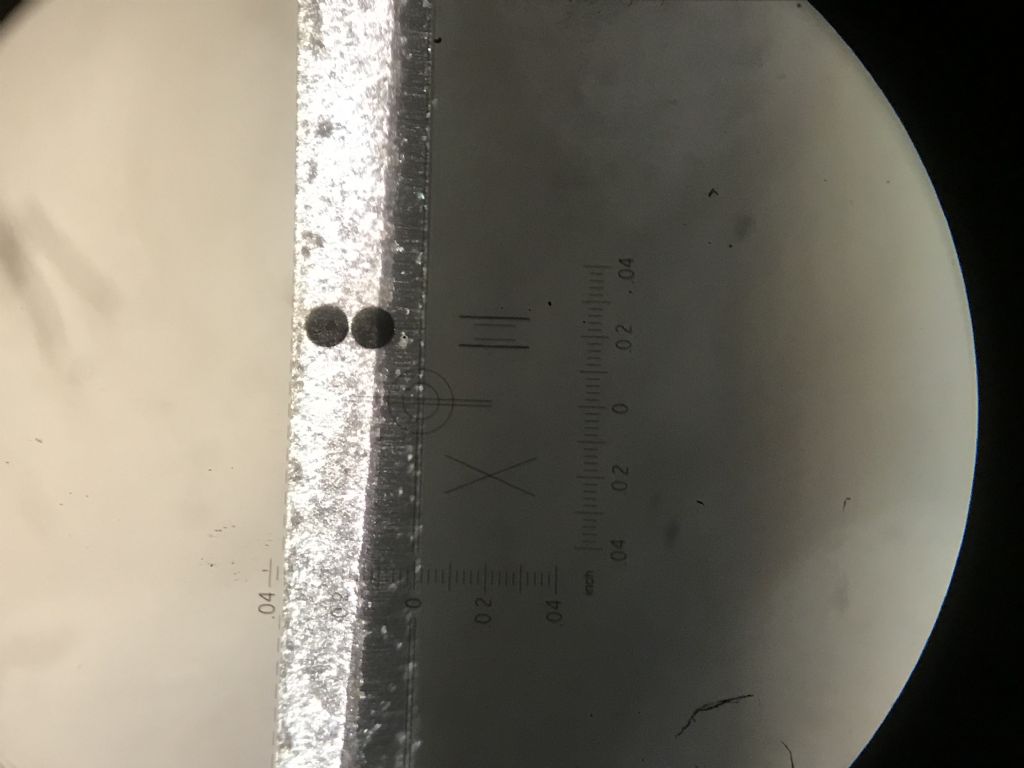
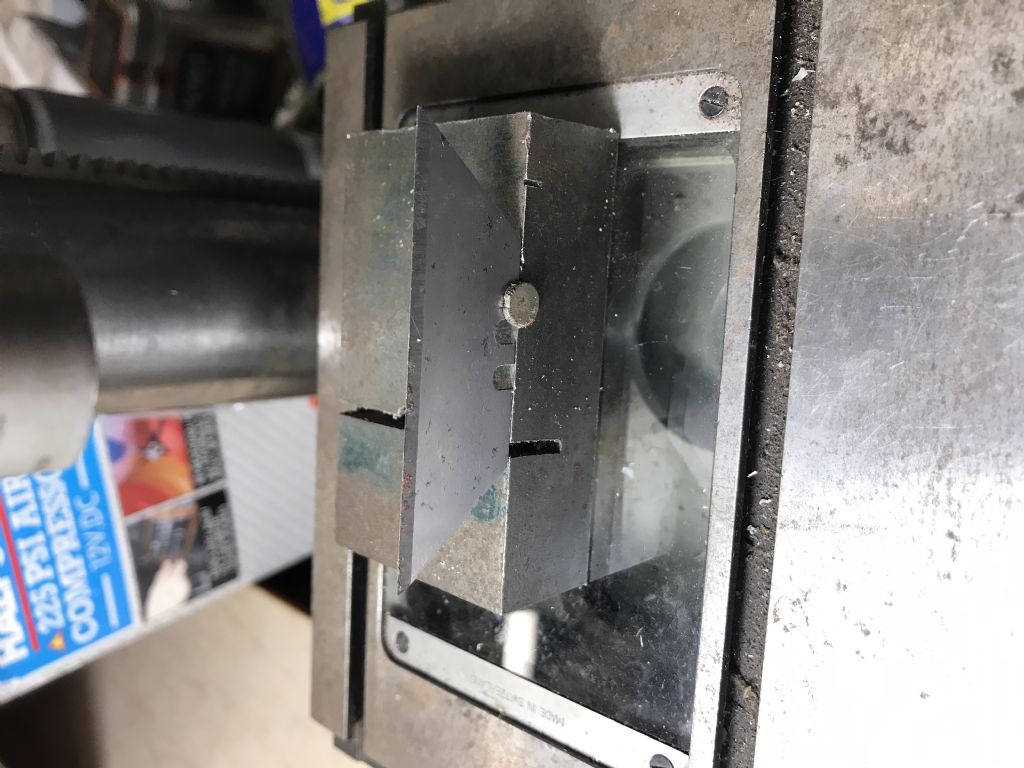
@Dave 2 Yes, interesting stuff... however to my point, is that not exactly what you would expect if errors are proportional to the distance travelled by the sensor, no? And if that is the case, then surely a smaller movement would imply smaller errors. Implicit maybe, but in the spec - not at all. I can legitimately sell you a long scale that is off by 0.05mm after the same move that a short scale would be out of spec at... Distance travelled is only one of the variables that a longer scale introduces. A longer scale is of course the most obvious one (thermal expansion). Time to move is another. There are others as well if you think about it. The main reason I tend to use my traditional Verynears is that, if Im honest, the digital ones nearly always have a flat battery However I also use them because Im not fooling myself that they are super accurate. 0.5mm is plenty for verynears, even if they do read to 0.1mm. Like most here I will often make one part and then make the mating part 'to fit'. For that as long as the first part is within 0.5mm of its nominal it very rarely matters.... In the interests of this thread I have wounded a Stanley Knife blade: I just boshed a 45ish degree 'radius' on the back edge with a diamond stone. This is the (quite poor) photo through an inspecion microscope: measurment of a radius on an edge is potentially doable in this manner, with the bonus that you can inspect the finish as well. Inspection microscopes, unlike dissection ones, have an x-y stage under them. This one is imperial - it does 1/10000" on its dials. I also have one with 0.001mm micrometers. Fixturing is not hard - there is no force. This would be adequate for instance (took it after, when I though a fixture photo would be useful, hence the upside downness of the blade): As you are planning on subbing out this work once a spec is figured out you need to also think about how you are going to inspect and reject sub standard parts. If a spec came to me saying 0.25mm radius I would look at it and think about: A: Quote high enough that the work buggered off, or paid a hansome profit for actually doing the job properly or B: just break the edge like we always do and hope no one notices... If its important enough to spec then its important enough to check. Dave
Edited By Dave S on 04/01/2022 20:32:21 Edited By Dave S on 04/01/2022 20:33:10 Edited By Dave S on 04/01/2022 20:33:51 |
| Andy Stopford | 04/01/2022 20:40:35 |
| 241 forum posts 35 photos | The OP might care to read this article: https://en.wikipedia.org/wiki/Accuracy_and_precision |
| Former Member | 05/01/2022 07:03:39 |
[This posting has been removed] | |
| JasonB | 05/01/2022 07:53:21 |
25215 forum posts 3105 photos 1 articles | I just remembered that out good friends at ARC sell similar "L" shaped gauge sets. Metric set goes down to 0.5mm but the imperial one may be of more use as that gives 0.010", 0.015" and 0.020 (approx 0.25mm, 0.38mm and 0.5mm) so would cover a few of your smaller radii and not a bad price compered with a Starret set link |
Please login to post a reply.
Want the latest issue of Model Engineer or Model Engineers' Workshop? Use our magazine locator links to find your nearest stockist!
Sign up to our newsletter and get a free digital issue.
You can unsubscribe at anytime. View our privacy policy at www.mortons.co.uk/privacy
- *Oct 2023: FORUM MIGRATION TIMELINE*
05/10/2023 07:57:11 - Making ER11 collet chuck
05/10/2023 07:56:24 - What did you do today? 2023
05/10/2023 07:25:01 - Orrery
05/10/2023 06:00:41 - Wera hand-tools
05/10/2023 05:47:07 - New member
05/10/2023 04:40:11 - Problems with external pot on at1 vfd
05/10/2023 00:06:32 - Drain plug
04/10/2023 23:36:17 - digi phase converter for 10 machines.....
04/10/2023 23:13:48 - Winter Storage Of Locomotives
04/10/2023 21:02:11 - More Latest Posts...
- View All Topics
- Reeves** - Rebuilt Royal Scot by Martin Evans
by John Broughton
£300.00 - BRITANNIA 5" GAUGE James Perrier
by Jon Seabright 1
£2,500.00 - Drill Grinder - for restoration
by Nigel Graham 2
£0.00 - WARCO WM18 MILLING MACHINE
by Alex Chudley
£1,200.00 - MYFORD SUPER 7 LATHE
by Alex Chudley
£2,000.00 - More "For Sale" Ads...
- D1-3 backplate
by Michael Horley
Price Not Specified - fixed steady for a Colchester bantam mark1 800
by George Jervis
Price Not Specified - lbsc pansy
by JACK SIDEBOTHAM
Price Not Specified - Pratt Burnerd multifit chuck key.
by Tim Riome
Price Not Specified - BANDSAW BLADE WELDER
by HUGH
Price Not Specified - More "Wanted" Ads...
Do you want to contact the Model Engineer and Model Engineers' Workshop team?
You can contact us by phone, mail or email about the magazines including becoming a contributor, submitting reader's letters or making queries about articles. You can also get in touch about this website, advertising or other general issues.
Click THIS LINK for full contact details.
For subscription issues please see THIS LINK.
Model Engineer Magazine
- Percival Marshall
- M.E. History
- LittleLEC
- M.E. Clock
ME Workshop
- An Adcock
- & Shipley
- Horizontal
- Mill
Subscribe Now
- Great savings
- Delivered to your door
Pre-order your copy!
- Delivered to your doorstep!
- Free UK delivery!


 )
)


 Register
 Log-in


