Forum sponsored by:

mini overhead drive - opinions please
| Ady1 | 16/10/2012 09:43:53 |
 6137 forum posts 893 photos | I borrowed the family braincell for the last bit. Looking at the bit of drainpipe it seemed a wee bit cheap and non permanent and wouldn't it be nice to remain faithful to the original Britannia setup on page 2 with a keyed drive wheel etc I wanted however to keep movement in the x, y and z axis of any attachments so this meant I needed a keyway along the entire length of the drive bar (ugh) ....wouldn't it be nice to have a drive bar which was one long keyway, THAT would save lots of work and fettling and messing about wouldn't it? Well a visit to B+Q sorted it, so anyone can do this A metre of 12mm square iron bar was 6.20 and a metre of 7mm square rolled steel was 6.20 I'm not sure which to go with yet, probbly the 12mm, it's much stiffer so will be better for heavier work like milling
So that's us sorted chaps, the easy bit is done
....just got to make it now...sigh
Edited By Ady1 on 16/10/2012 10:05:58 |
| Michael Gilligan | 16/10/2012 10:10:10 |
 23121 forum posts 1360 photos | Ady, Here is another useful link for you. ... and it's worth browsing his site. The full text of the Lukin Book is there MichaelG.
[added second hyperlink] Edited By Michael Gilligan on 16/10/2012 10:15:08 |
| Ady1 | 04/11/2014 21:50:15 |
6137 forum posts 893 photos | Well it's been a while since I revisited this thread but I've been waiting for a shaper to come along to make my ME work easier. Took me 2 years to get one and I've been doing various bits'n'bobs meantime Got the shaper at last...then puppy wuppy gets ill and decides to shuffle off her mortal coil so after all that I got about a month of free time before puppy wuppy 2 is due at the end of this week so I thought I better write this up... until I get to the next instalment in 2 years time...
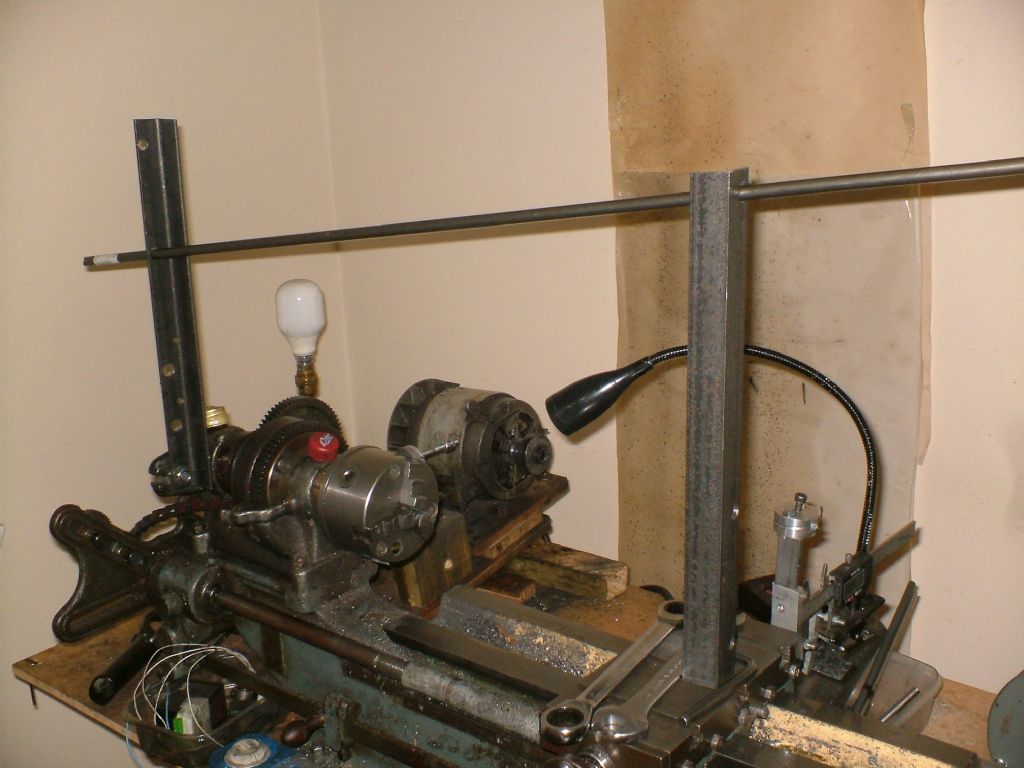
The support bars are about a fiver a pop fencing from B+Q, as is the square drive rod running along the top, they are bolted onto the lathe with 10 or 12mm B+Q threaded rod, there's a big lug at the headstock end of a M-series lathe which makes things miles easier.
The tailstock end is supported by the bottom half of a spare tailstock I had.
The ebay bearings are mounted inside some scrap gas pipe I half-inched from outside a neighbours house when a plumbing job was being done there. Mounting the bearings to the support bars for the drive shaft was going to be a bit fiddly and it was at this point I broke out the 40quid Lidle welding unit I got 2 years ago.
An old lathe belt cone was fettled into position at the headstock end and some old used bits of plastic lathe belting were candle welded back together to make the big drive belt It runs rather nicely, whirring away with only a little vibration from the too stretchy belting, Torque at the drive bar is moderate to low, only mild drilling to 6mm max I would say but this is mainly due again to the stretchy belting. It's going to be fun experimenting with this thing, it definitely has a lot of potential. |
| Ady1 | 04/11/2014 22:05:09 |
6137 forum posts 893 photos | The biggest surprise of all was the welding kit which was a pleasure to use and saved me a lot of messing about
|
| Raymond Sanderson 2 | 12/03/2019 02:05:10 |
 450 forum posts 127 photos | Posted by Ady1 on 15/10/2012 00:48:04:
I've been goofing about and working most of the weekend but done a couple of things, getting bits and bobs It's going to take a while I've found a couple of rare photos of a proper Drummond setup
Getting the detail of these old units can give you ideas of your own
I know its an old thread/post but love the set up great work. How's it going? What have you used it for? |
| Hopper | 12/03/2019 08:57:22 |
 7881 forum posts 397 photos | Wow, that is intriguing. Watch your flapping shirt sleeves though! The old Drummond looks classic in the original black. I wish I had not painted mine Myfraud grey now. |


Please login to post a reply.
Magazine Locator
Want the latest issue of Model Engineer or Model Engineers' Workshop? Use our magazine locator links to find your nearest stockist!
Sign up to our Newsletter
Sign up to our newsletter and get a free digital issue.
You can unsubscribe at anytime. View our privacy policy at www.mortons.co.uk/privacy
Latest Forum Posts
- *Oct 2023: FORUM MIGRATION TIMELINE*
05/10/2023 07:57:11 - Making ER11 collet chuck
05/10/2023 07:56:24 - What did you do today? 2023
05/10/2023 07:25:01 - Orrery
05/10/2023 06:00:41 - Wera hand-tools
05/10/2023 05:47:07 - New member
05/10/2023 04:40:11 - Problems with external pot on at1 vfd
05/10/2023 00:06:32 - Drain plug
04/10/2023 23:36:17 - digi phase converter for 10 machines.....
04/10/2023 23:13:48 - Winter Storage Of Locomotives
04/10/2023 21:02:11 - More Latest Posts...
- View All Topics
Support Our Partners


Shopping Partners
Subscription Offer

Latest "For Sale" Ads
- Reeves** - Rebuilt Royal Scot by Martin Evans
by John Broughton
£300.00 - BRITANNIA 5" GAUGE James Perrier
by Jon Seabright 1
£2,500.00 - Drill Grinder - for restoration
by Nigel Graham 2
£0.00 - WARCO WM18 MILLING MACHINE
by Alex Chudley
£1,200.00 - MYFORD SUPER 7 LATHE
by Alex Chudley
£2,000.00 - More "For Sale" Ads...
Latest "Wanted" Ads
- D1-3 backplate
by Michael Horley
Price Not Specified - fixed steady for a Colchester bantam mark1 800
by George Jervis
Price Not Specified - lbsc pansy
by JACK SIDEBOTHAM
Price Not Specified - Pratt Burnerd multifit chuck key.
by Tim Riome
Price Not Specified - BANDSAW BLADE WELDER
by HUGH
Price Not Specified - More "Wanted" Ads...
Get In Touch!
Do you want to contact the Model Engineer and Model Engineers' Workshop team?
You can contact us by phone, mail or email about the magazines including becoming a contributor, submitting reader's letters or making queries about articles. You can also get in touch about this website, advertising or other general issues.
Click THIS LINK for full contact details.
For subscription issues please see THIS LINK.
Digital Back Issues


Donate

 Register
 Log-in
Model Engineer Magazine
- Percival Marshall
- M.E. History
- LittleLEC
- M.E. Clock

ME Workshop
- An Adcock
- & Shipley
- Horizontal
- Mill

Subscribe Now
- Great savings
- Delivered to your door

Pre-order your copy!
- Delivered to your doorstep!
- Free UK delivery!
All Forum Topics > Beginners questions > mini overhead drive - opinions please