Forum sponsored by:

Graham Meek?s Tailstock Dial - MEW279
Drawing errors
| Martin Kyte | 14/05/2020 13:54:30 |
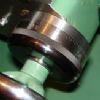
 3445 forum posts 62 photos | Here are my cutters for the gearing. Turned with button tools from silver steel which was annealed beforehand giving a better finish.
|
| Martin Kyte | 14/05/2020 13:59:53 |
3445 forum posts 62 photos | So thats the Tail Stock Topslide and Saddle taken care of. (The Saddle is Graham Meek supplied). All I need now is to make George Thomas' Cross slide modification with a sensible sized lockable micrometer and I'm sorted. Who needs DRO's on Lathes.
|
| Graham Meek | 14/05/2020 17:20:19 |
| 714 forum posts 414 photos | Nice work Martin, you have been busy since we last spoke. Regards Gray, |
| Steamer1915 | 14/05/2020 18:10:44 |
 171 forum posts 42 photos | Posted by Martin Kyte on 14/05/2020 13:59:53:
So thats the Tail Stock Topslide and Saddle taken care of. (The Saddle is Graham Meek supplied). All I need now is to make George Thomas' Cross slide modification with a sensible sized lockable micrometer and I'm sorted. Who needs DRO's on Lathes.
I believe you bought the Saddle Handwheel from me at Harrogate in (believe it or not) 2014. My best regards, Steve. |
| Martin Kyte | 14/05/2020 20:18:07 |
3445 forum posts 62 photos | Yes I did Steve. I wasn't sure who made it, just wanted to point out that one wasn't done by me. Was it that long ago. It's actually moved lathes since then. I made a George Thomas tailstock Micrometer for the last one which has been sitting around in a drawer since I updated the Myford. The new one had the chuncky boss and the solid chrome plated handwheel. At some point I was planning on making an old style curved boss but then Graham published his updated design. regards Martin
|
| Brian Abbott | 22/05/2020 23:19:07 |
 523 forum posts 95 photos | Hello Martin. Can i ask what you used to 'black' the dial ?
|
| Martin Kyte | 23/05/2020 08:50:25 |
3445 forum posts 62 photos | Hi Brian It was actually some cold black from a kit I got about 15 years ago. (BLACK IT brand I think). Don't know hwere from. Chronos do something very similar. My kit was supposed to work as a several step process and they supplied degreaser, conditioner, blacking solution and dewatering oil. The conditioner had leaked and the dewatering oil was like treacle after all this time. I tried it out with just the blacking solution on a piece of scrap and at seemed to work well so just degreased the dial and lobbed it in the blacking solution. Gave it a good soak in oil afterwards and so far so good. I have to say it does look finished with the knurling black. I planed my straight knurl being timid. Somewhere around 280 indexing operations. I do have straight knurls but with several hours invested in the dial blank I wanted to be sure of a result. regards Martin |
| DMB | 23/05/2020 10:09:21 |
| 1585 forum posts 1 photos | Martin, How about a separate thin knurled piece, when satisfied with result, affix it (superglue?) to the dial? I would do it like that as I wouldn't be very happy having done all the other work then bugger it up.. Have made some dials but not woth any knurling. John |
| Martin Kyte | 23/05/2020 10:31:31 |
3445 forum posts 62 photos | No, I've got a planing fixture and it takes about 20 mins to index round so it's quicker in the end. regards Martin |
| Steamer1915 | 23/05/2020 11:11:36 |
171 forum posts 42 photos |    Posted by Martin Kyte on 23/05/2020 10:31:31: Posted by Martin Kyte on 23/05/2020 10:31:31:
No, I've got a planing fixture and it takes about 20 mins to index round so it's quicker in the end. regards Martin I'm with you on this Martin. When I make a batch of Graham's Saddle dials, I use a rig where the slotting head drives a rotary table via a seven tooth ratchet wheel. Each dial takes around 7 mins and the "knurl" is perfect everytime. The dial on your lathe was done exactly like that. There are 504 "teeth" if you care to count them. I shall use a similar rig when I get around to making the tailstock dials. I have made a 6 tooth ratchet for that job - that produces a very similar pitch to the saddle dial even though the diameter of the knurled diameter is smaller. Best regards, Steve.
Edited By Steamer1915 on 23/05/2020 11:13:30 |
| Graham Meek | 23/05/2020 12:18:00 |
| 714 forum posts 414 photos | Posted by DMB on 23/05/2020 10:09:21:
Martin, How about a separate thin knurled piece, when satisfied with result, affix it (superglue?) to the dial? I would do it like that as I wouldn't be very happy having done all the other work then bugger it up.. Have made some dials but not woth any knurling. John
Hi John, The straight knurl here was done with a single wheel straight knurl. While it is not as crisp as Martin's or Steve's it comes a close second. After making 500+ Myford handwheel dials using the same technique I thought I would share with you how I do this. I never knurl a dial after the graduating, and the knurled diameter is always lightly skimmed. The skin of barstock is not the best thing for knurling wheels. The Knurling wheel is set in the toolpost such that the wheel is canted towards the tailstock by a few degrees. This way the leading corner of the wheel is touching the work first. Prepare the knurled portion and have a chamfer at the beginning and the end of the to be Knurled surface. For a 5/8" knurl I usually run at 65 RPM for dials of this size. The feed is about 0.1 mm or 004" per rev. Make sure the knurling wheel is absolutely clean. Touch on the diameter with the knurling wheel and then move towards the Tailstock. Put on a cut of about 0.2 mm or 0.008" deep. Engage the feed and apply a drop or two of cutting oil, preferably out of an oil can, and never with a brush which has been used for turning. The brush will not only end up in the knurl but it has little bits of swarf that will damage the knurl. It may take a couple of cuts to get close to depth. Finally put the knurling tool in the toolpost square on and present to the work with the work revolving. Approach slowly so that the knurl can pick up the work. If you are not happy doing this just bring the knurling tool up to the stationary work and with your free hand just work the knurling wheel back and forth until it engages. Start the spindle and continue to apply light pressure. Move towards the tailstock but be sure to keep the knurl engaged. Re-engage the feed but at half the original feed rate. Using the chamfer tool clean up the chamfers to remove the displaced material. As regards Blacking. I use Curator Antiquing Fluid for Brass, Copper and Steel. De-greasing is paramount and I use Isopropyl as a first step with an old toothbrush. Followed by a wash in warm water which contains washing-up liquid, followed by a warm rinse and a quick dry with the airline. Before immersing in a solution of 10% Curator and water from the workshop dehumidifier. It takes 2 minutes according to what it says on the bottle. I have to admit I was sceptical about this but it does exactly what is says. If trapped air bubbles form on the knurl give it a rub with a clean old toothbrush. The part is removed, rinsed in water and blown dry with an airline before being given a coat of Shell Enisis. The Dial above has been in service for quite a while now and shows no sign of deterioration of the blacking. The bulk of the Curator Fluid bought is still in the bottle ready for the next big item. The made up solution is kept in an air tight container and is still usable for blacking small parts, nuts, bolts etc. Regards Gray,
|
| Martin Kyte | 23/05/2020 14:56:15 |
3445 forum posts 62 photos | Eventually, and I'm nearly there, I shall have completed my Stepper driven headstock dividing head. I have already built a Pic based controller to divide by anything you like. That would reduce the time to about 5 mins. regards Martin |


Please login to post a reply.
Magazine Locator
Want the latest issue of Model Engineer or Model Engineers' Workshop? Use our magazine locator links to find your nearest stockist!
Sign up to our Newsletter
Sign up to our newsletter and get a free digital issue.
You can unsubscribe at anytime. View our privacy policy at www.mortons.co.uk/privacy
Latest Forum Posts
- *Oct 2023: FORUM MIGRATION TIMELINE*
05/10/2023 07:57:11 - Making ER11 collet chuck
05/10/2023 07:56:24 - What did you do today? 2023
05/10/2023 07:25:01 - Orrery
05/10/2023 06:00:41 - Wera hand-tools
05/10/2023 05:47:07 - New member
05/10/2023 04:40:11 - Problems with external pot on at1 vfd
05/10/2023 00:06:32 - Drain plug
04/10/2023 23:36:17 - digi phase converter for 10 machines.....
04/10/2023 23:13:48 - Winter Storage Of Locomotives
04/10/2023 21:02:11 - More Latest Posts...
- View All Topics
Support Our Partners


Shopping Partners
Subscription Offer

Latest "For Sale" Ads
- Reeves** - Rebuilt Royal Scot by Martin Evans
by John Broughton
£300.00 - BRITANNIA 5" GAUGE James Perrier
by Jon Seabright 1
£2,500.00 - Drill Grinder - for restoration
by Nigel Graham 2
£0.00 - WARCO WM18 MILLING MACHINE
by Alex Chudley
£1,200.00 - MYFORD SUPER 7 LATHE
by Alex Chudley
£2,000.00 - More "For Sale" Ads...
Latest "Wanted" Ads
- D1-3 backplate
by Michael Horley
Price Not Specified - fixed steady for a Colchester bantam mark1 800
by George Jervis
Price Not Specified - lbsc pansy
by JACK SIDEBOTHAM
Price Not Specified - Pratt Burnerd multifit chuck key.
by Tim Riome
Price Not Specified - BANDSAW BLADE WELDER
by HUGH
Price Not Specified - More "Wanted" Ads...
Get In Touch!
Do you want to contact the Model Engineer and Model Engineers' Workshop team?
You can contact us by phone, mail or email about the magazines including becoming a contributor, submitting reader's letters or making queries about articles. You can also get in touch about this website, advertising or other general issues.
Click THIS LINK for full contact details.
For subscription issues please see THIS LINK.
Digital Back Issues


Donate

 Register
 Log-in
Model Engineer Magazine
- Percival Marshall
- M.E. History
- LittleLEC
- M.E. Clock

ME Workshop
- An Adcock
- & Shipley
- Horizontal
- Mill

Subscribe Now
- Great savings
- Delivered to your door

Pre-order your copy!
- Delivered to your doorstep!
- Free UK delivery!
All Forum Topics > Model Engineers' Workshop. > Graham Meek?s Tailstock Dial - MEW279