6" Ruston Proctor Traction Engine - Model Build
6" Ruston Proctor Traction Engine Model Build
| Harry Wilkes | 01/02/2016 13:17:48 |
1613 forum posts 72 photos | Great collection of interesting photos it's going to be one very nice engine when finished H
|
| Nick_G | 01/02/2016 13:20:02 |
1808 forum posts 744 photos | . This is brilliant. Your dedication to a long term project and obvious skill is to be admired.
Nick |
| KWIL | 01/02/2016 16:16:55 |
| 3681 forum posts 70 photos | The last pass of welding is superb, don't you know the penetration and build up layers are equally brilliant! |
| Phillip Smith 4 | 27/08/2017 14:16:16 |
| 1 forum posts | Hello Paul,
Phill.
|
| Paul Lousick | 16/02/2019 06:09:40 |
| 2276 forum posts 801 photos | Building my Ruston proctor SD traction engine has been massive project and I am nearing the end after 6 years. I have posted updates on the Traction Talk web site, also a lot work. This is a link to the site for anyone interested. Paul EDIT. You will need to be a member to see the posts and it can be a long drawn out process to get approved. Edited By JasonB on 16/02/2019 09:14:10 |
| Paul Lousick | 16/02/2019 21:43:47 |
| 2276 forum posts 801 photos | Thanks Jason, TT is a good site for those interested in traction engines. Mainly full size but also for models. I thought that visitors could view posts and only members could post. So will copy files to MEW. Paul |
| Paul Lousick | 16/02/2019 22:29:49 |
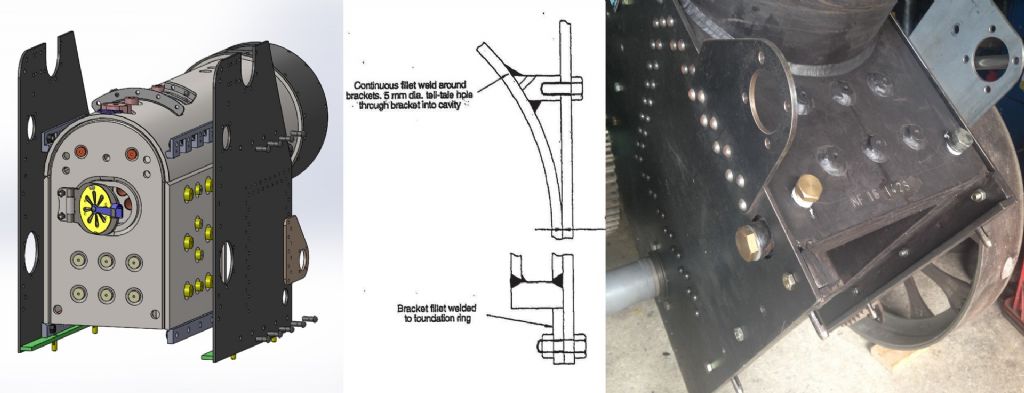
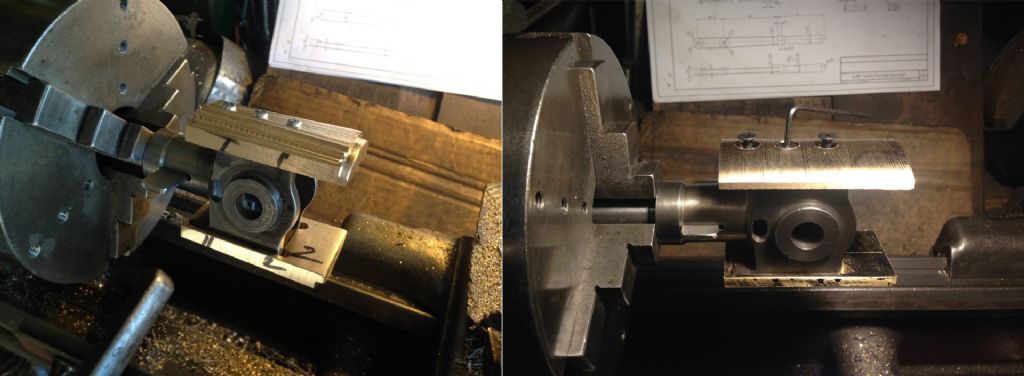
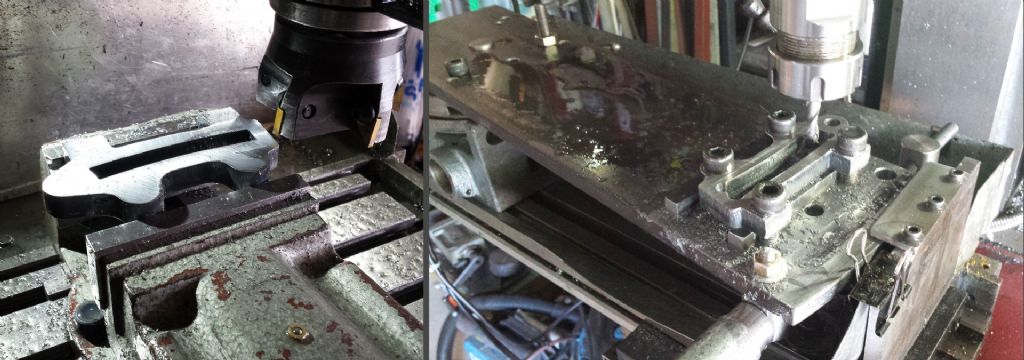
| 2276 forum posts 801 photos | 6" Ruston Proctor SD - Hornplates The Australian code for model steel boilers shows the hornplates attached to support brackets on the side of the boiler and not to threaded holes in the boiler side stays. Loading bolts in shear is not good design practice and not recommended. I also added a plate at the bottom of the hornplate which the boiler sits on, eliminating the shear force on the bolts. Having a gap between the hornplates and the firebox with no direct contact will also help to insulate the boiler.
Both hornplates were plasma cut and tacked together to enable all holes to be drilled at the same time using the milling machine’s digital readout to accurately position all holes. The large hole for the crankshaft bearing rough cut with a series of large holes using a rotor broach in the mill, then finished to size with a boring bar.
The mounting plate for the steering chain shaft was attached to the hornplate with ¼” round head steel rivets. The rear of the hornplates were countersunk and the rivets cold pressed requiring a force of 7 tonnes. The false rivets (just for show) were cut to slightly longer than the plate thickness and hammered flat with a ball peen hammer. They are non-load bearing and only need to be kept in place.
Edited By Paul Lousick on 16/02/2019 22:32:02 |
| Paul Lousick | 16/02/2019 22:30:44 |
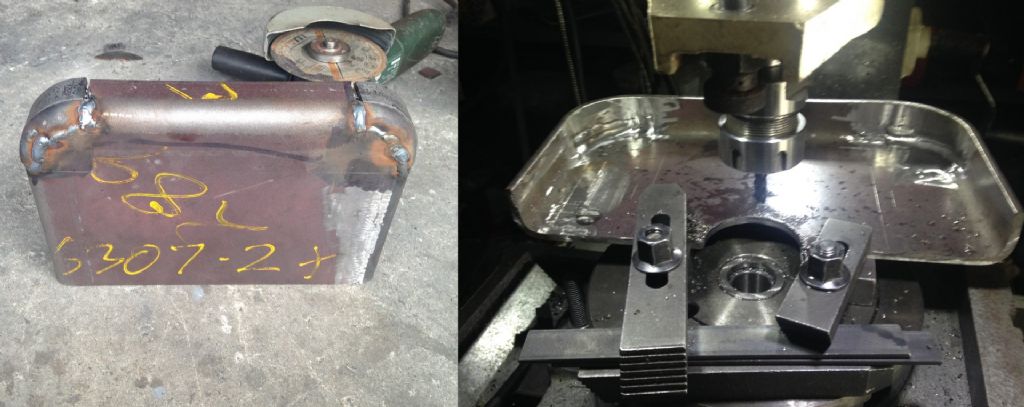
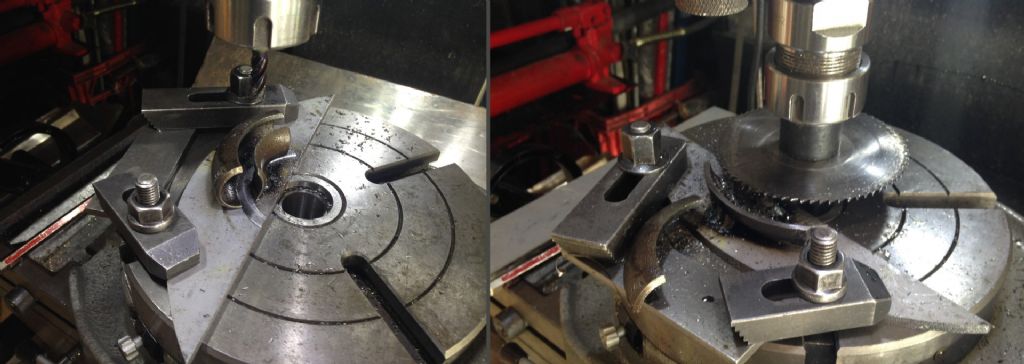
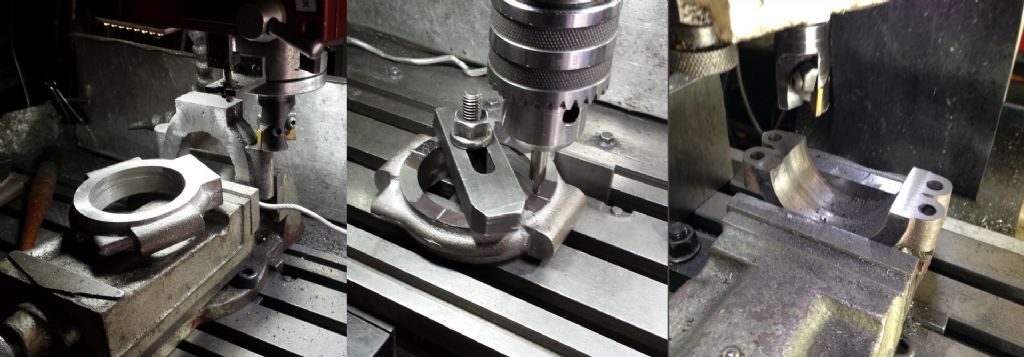
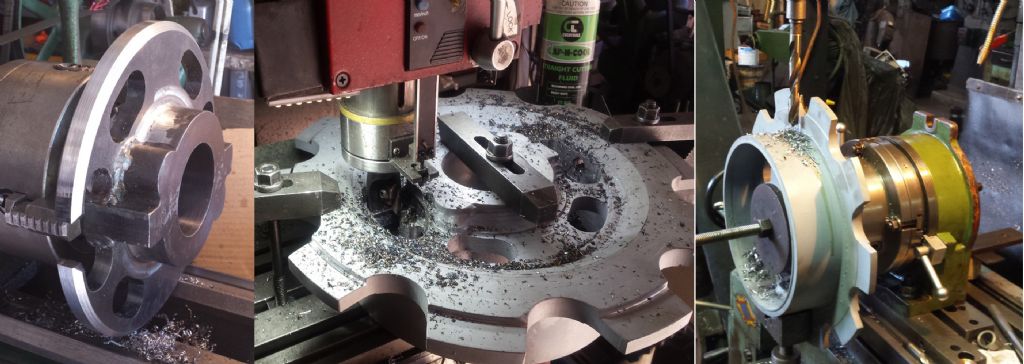
| 2276 forum posts 801 photos | Fabricating Saddle Plates I wanted to make the saddle plates (aka spectacle plates) with rounded corners but did not have bending or forging equipment in my workshop. To do this I fabricated them using pipe elbows for the curved corners. The elbows were tack welded to a plate for mounting on the rotary table and milled as shown, then cut in half with a saw blade on the mill.
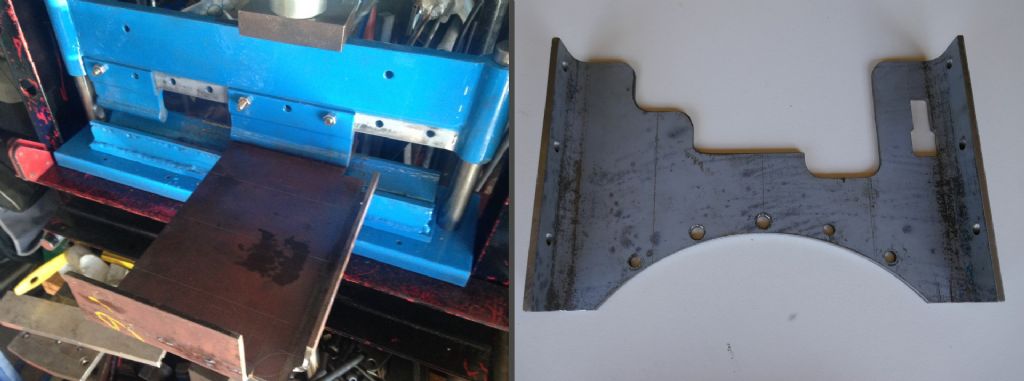
The plates were modelled in 3D, using the same radius as that on the pipe elbow and drawings were produced, using the sheetmetal features in Solidworks to produce a flat pattern for cutting the plate. The edges of the plate bent and the elbow pieces welded in place. (Obtaining an exact distance between two flanges that are produced by bending is difficult but the the bend line position calculated in sheetmetal produced a good fit for the saddle plate between the two hornplates). Bending the specific radius on the plates created another problem. As stated earlier, I did not have any bending equipment, so had to design and built a press brake for my 20t hydraulic press. Bending rear saddle plate (left), Finished front saddle plate (right)
|
| Paul Lousick | 17/02/2019 07:03:28 |
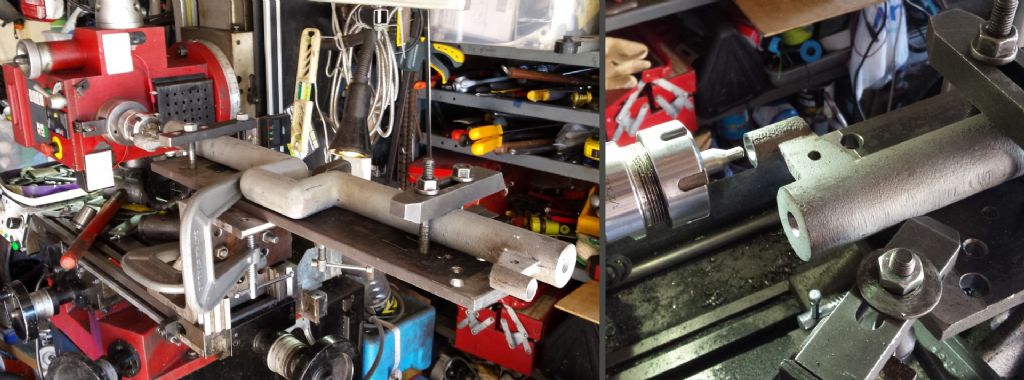
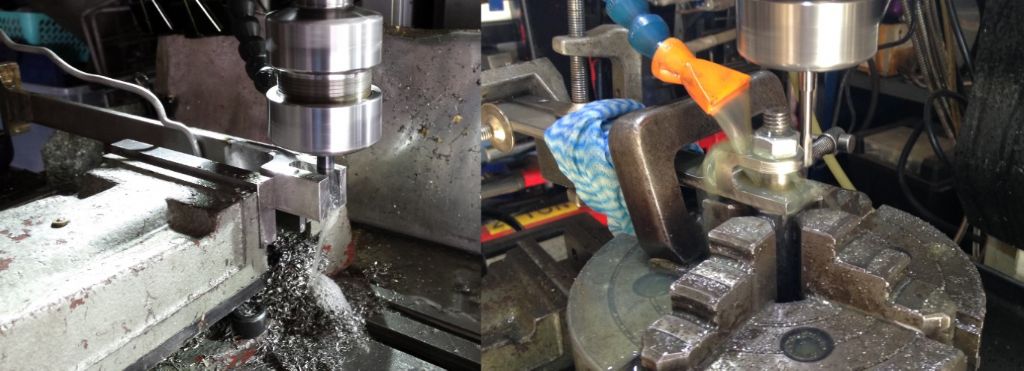
| 2276 forum posts 801 photos | Machining Crankshaft The crankshaft was purchase as a casting. The first operation was to clean up the crank area with a little fettling using a hand linisher and elbow grease.
The crankshaft was mounted on a piece of steel flat bar for drilling centres in the ends of the crankshaft allowing it to be rotated by 180 degrees and keep the same plane thru the centres at both ends. To drill the holes, the mill head was turned to operate horizontally and an edge finder used to find the centre of the crankshaft. After drilling the first hole the mill table was moved by a distance equal to the throw of the crank to drill the second hole.
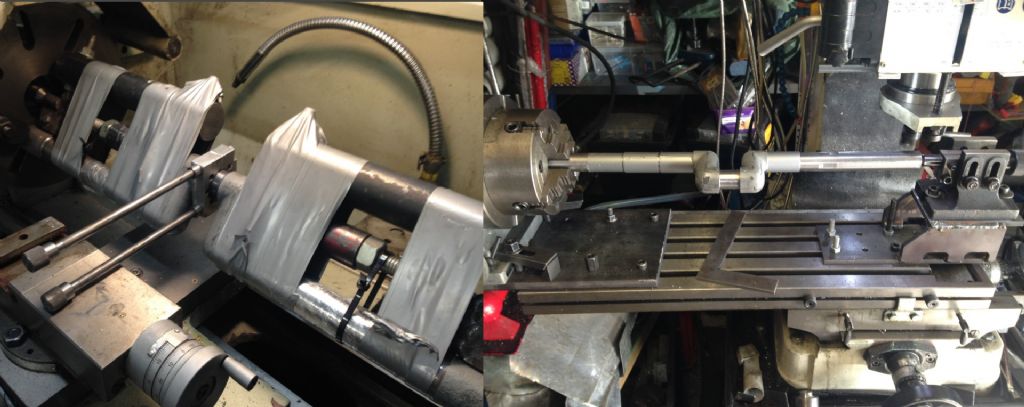
Balance weights and jacking screws to prevent shaft bending were attached to the crankshaft while turning the crank journal and the lathe cutter had to be lengthened to clear the crank. A steel block was wedged between the crank gap to resist any bending by the lathe centres and a steady rest used to stop vibration while turning the crank ends.
|
| Paul Lousick | 17/02/2019 07:04:06 |
| 2276 forum posts 801 photos | The crankshaft jounal for the connecting rod was finished by lapping with a home made tool. The temporary wings cast on the end of the crankshaft for turning were removed and the shaft ends turned to size. Even though the shaft was located on lathe centres, there was a small amount of chatter as I was turning the ends of the shaft. The addition of a fixed steady eliminated the chatter. The shaft diameters for each pulley/eccentric were stepped for ease of assembly so the inner most one slid over the outer one and did not require pressing over it. Keyways then cut with one end clamped to jaw in a rotary table and the other supported in a lathe centre. (Again, special tooling had to be made to raise the fixed centre. Making tools took longer than the actual machining of parts).
|
| David Davies 8 | 17/02/2019 07:37:47 |
202 forum posts 1 photos | Paul, thank you for copying these files across, your graphic account of the Ruston build is captivating reading. Cheers Dave. |
| Paul Lousick | 17/02/2019 11:59:24 |
| 2276 forum posts 801 photos | Thanks Dave, I have received lots of helpful information from members and just returning the favour. Paul |
| Paul Lousick | 18/02/2019 00:43:03 |
| 2276 forum posts 801 photos | Eccentric Sleeves I did not make the eccentrics and straps in the conventional way with groove in the straps on the inside. Instead I put the groove in the eccentric. (I was advised to do it this way by a machinist who has been making locos and traction engines for a number of years.) The mating surfaces are still the same diameter and width. Machining the strap this way is much easier than trying to plunge cut an internal groove to a specific diameter. Turning the eccentric boss is just as easy because all of the surfaces are on the outside. (I recently found a drawing in an early copy of ME with the eccentric sleeve only the width of the groove in the eccentric boss. Looks like they all work OK).
The castings were faced on both sides, rough bored and position of cut marked. Holes for clamping bolts drilled and casting cut in half. Mating faces then machined flat. Special bolts were made to assemble the 2 halves and the straps bolted together with a piece of shim material between them which can be replaced with thinner section as the eccentrics wear.
|
| Paul Lousick | 18/02/2019 00:43:33 |
| 2276 forum posts 801 photos | The eccentric straps could not be held in a lathe chuck because of their shape so make a simple jig to machine the final bore. I use a dial indicator to locate and clamp it approximately on centre and then bored it to size. As the running surface is the smaller diameter, it could simply be bored thru and easily measured to achieve the exact size. The outer groove was then cut on the outside edge. Then the strap turned over in the jig to machine the groove on the opposite side using the DTI to centre the strap in the jig. This diameter only requires clearance with its mating part, and a small inaccuracy with running axis is not critical.
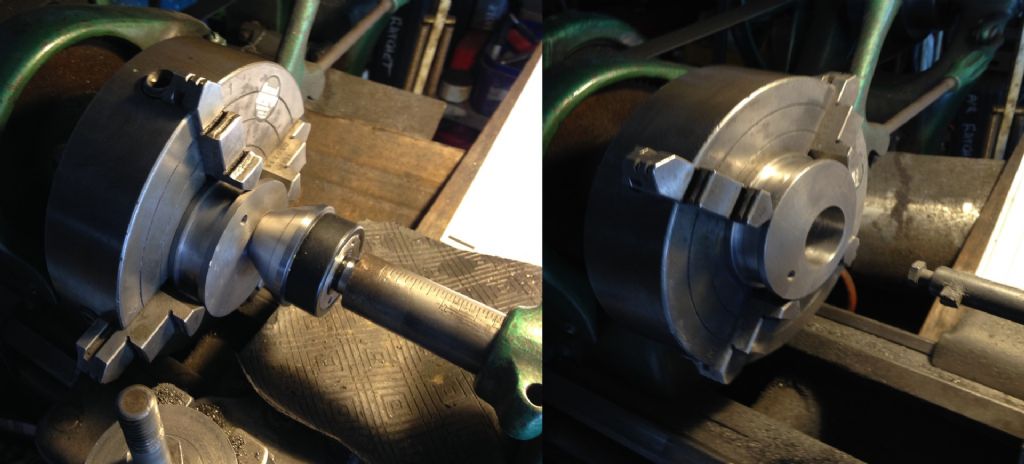
Eccentric Boss The design for the 2 eccentrics on the supplied drawing had them both as part of the same part but I made mine as two separate units with a dowel pin setting the angle between them. The outer shape of the eccentric was turned on the late. (checking for a running fit with the sleeves). Locating the position of the offset hole for the shaft and dowel hole is difficult on the lathe, so I transferred it to the mill and used a rotary table and the digital readout on the table.
Then moved back to the lathe and held the eccentric on centre while tightening the 4 chuck jaws. The hole for the crankshaft then bored to finish size.
|
| Paul Lousick | 19/02/2019 05:19:40 |
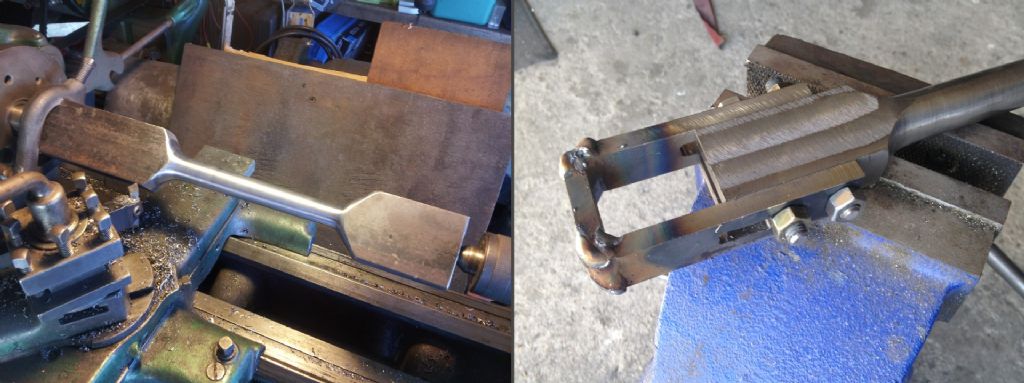
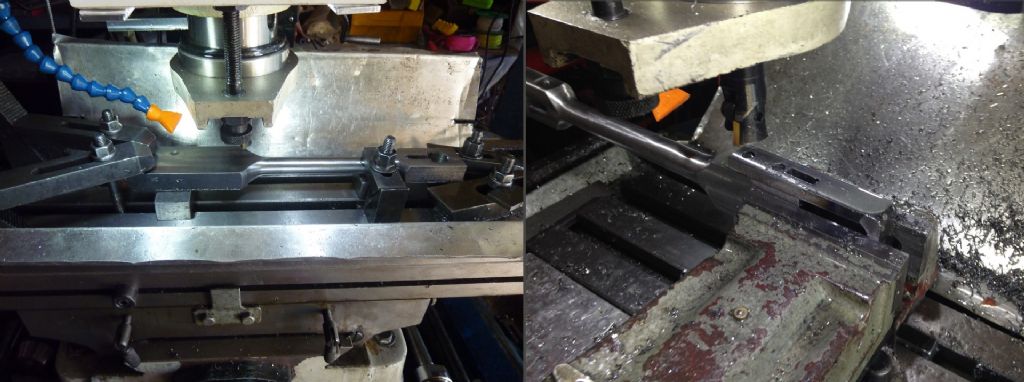
| 2276 forum posts 801 photos | Connection Rod The connection rod was turned from a rectangular piece of 4140 grade steel. The material is harder to machine but has a higher tensile strength. Then the holes for bolts and a slot for a tapered clamp wedge machined for the big end bush. I had trouble trying to bend the saddle for holding the bush so fabricated a welded version instead out of flat bar. The 4 sides, holes for bolts and slot for the wedge machined prior to welding. The 2 side pieces were bolted to the con rod and then the end welded in position.
Excess weld removed and outer faces of bearing strap cleaned up. The result was a good sliding fit with the con rod. Then a hole in small end of connection rod machined for its bush.
Connecting Rod Components and Assembly
Edited By Paul Lousick on 19/02/2019 05:25:11 Edited By Paul Lousick on 19/02/2019 05:29:32 |
| Paul Lousick | 19/02/2019 07:06:03 |
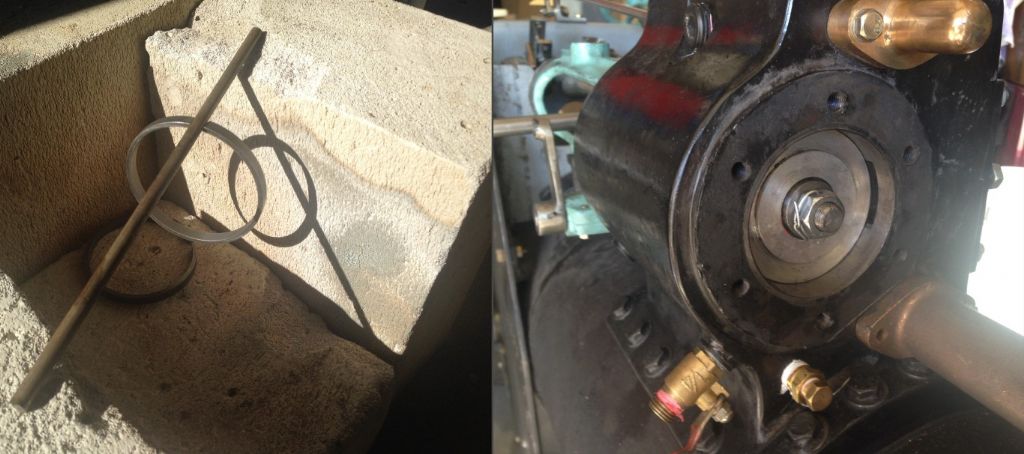
| 2276 forum posts 801 photos | Piston Head and Piston Rings Piston rings were turned from a solid piece of cast iron round bar. A bore gauge used to accurately measure the cylinder and the rings made for a sliding fit. They were then parted with a Dremel grinder. The rings were very tight when I tried fitting them in the cylinder. On checking the bore diameter, I found that the cylinder liner had been compressed at each end as a result of the heat/shrink fit with steam chest and had to be honed to the correct size. The rings were cut with a grinding wheel on a Dremel leaving a 1mm gap. Spring action in the rings made by expanding them over a piece of 6mm rod and evenly heating with a blow torch until they fell off, resulting an enlarged gap of 4-5mm.
|
| Paul Lousick | 19/02/2019 07:09:06 |
| 2276 forum posts 801 photos | The aluminium piston head was made in 2 parts to hold the 2 rings side by side in only one slot. The theory being that if the rings touch each other and the gaps are 180 degrees apart they will seal better. The width of the slot machined to match the width of the rings.
The crosshead was made from a casting and is attached to a taper on the end of the piston rod in a matching tapered hole and secured with a wedge. The bronze slippers were made from segments of old bushes. A machined slot on the underside of the slipper saddles the crosshead and 3 bolts hold each in place. The end of the slippers was turned slightly larger than the trunk guide bore and the majority of metal removed on the mill. The turned surface used as a guide to how much to remove. The holes were countersunk and assembled head turned to a slide fit with the crosshead.
|
| Paul Lousick | 20/02/2019 11:56:26 |
| 2276 forum posts 801 photos | Stephensons Valve Linkage The valve linkage was modelled in 3D to check clearances in all positions of its motion. Solidworks models can be automated and the crankshaft rotated which in turn moves the linkage arms and opens and closes the slide valve. The reversing lever can be moved to reverse the action of the slide valve. Very handy for checking slide valve/port overlap dimensions.
The quadrant link was laser cut from plate and faced on the mill to finish size then the holes for pivot pins drilled and reamed. A mounting plate to extend clamping face of the rotary table was made for holding the links. A CAD drawing with dimensions for the pivot point and for the hold-down bolts made the location of the link easy. With the axis of the RT set at 0,0 the required radius for the slot in the link could be made. The end of the mounting plate was held captive in a slideway, top and bottom and rotated by a lead screw at the end. (The radius was too big to rely on the worm in the RT).
The middle piece made in a similar way but because of its smaller size and only one hole, I made it twice as long and cut it to length after machining.
|
| Paul Lousick | 20/02/2019 11:57:03 |
| 2276 forum posts 801 photos | The control rods and levers for the valve control gear were fabricated from 316 S/S. (not the same as those on the original engine but they will not rust when left unpainted). The fixtures on the end of the rods were made slightly oversize to allow for any misalignment and machined to size after welding. Rounded ends done on a rotary table.
Flat bar bent into a U-shape and a hole drilled in the end with a rota broach in the mill. A piece of round bar then welded to the end and turned to finish size. It was then reversed and the opposite side turned. Hole thru round bar drilled and reamed and bits not needed were removed
Lifting levers also fabricated from flat and round bar and finished on the mill. A bull nose cutter used to create a fillet on some corners. Pivot pins and thick securing washers with a hole for split pin made. |
| Paul Lousick | 10/03/2019 11:54:53 |
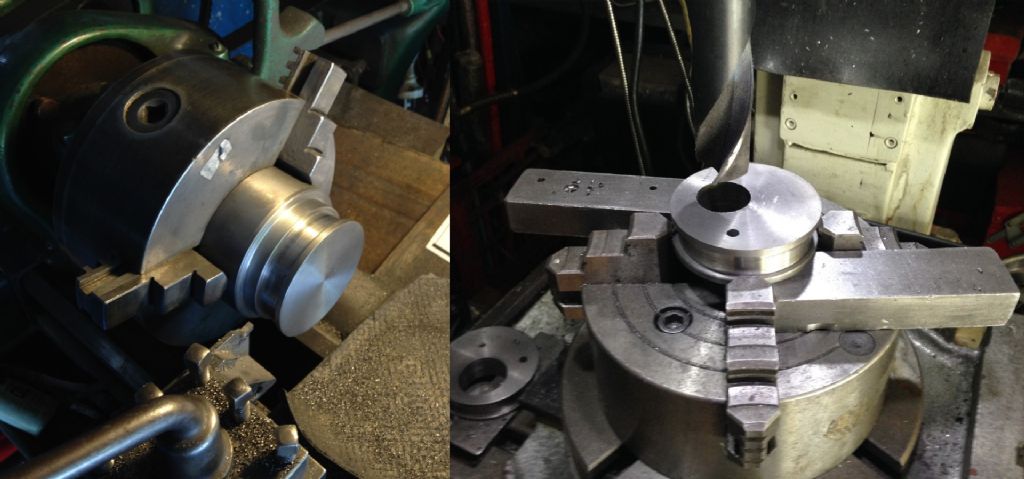
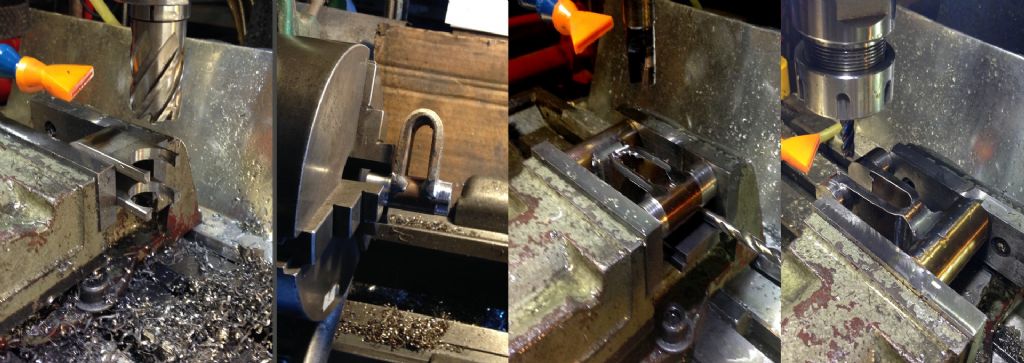
| 2276 forum posts 801 photos | Compensating Centre The compensating centre (differential) is normally made from a casting but this was missed when I ordered the other castings for my engine. The original order was sent to Australia by sea freight and the extra weight would not have increased the delivery by much. Sea freight cargo has to be sent in a large wooden box so it can be loaded by forklift. It also has to be fumigated making it expensive. It is a large, heavy casting which sells for about £120 but would have cost another £160 for air freight. Too expensive, so I fabricated my own from plate and hollow bar.
As well as designing a fabricated version of the hub, I modified the lubrication arrangement. In the original design, a pipe was used to carry oil to the drive gear bush and a hole in the casting to oil the pinion gear shaft. As the gears and bush rotate slowly, I prefer to use grease. Oil lubrication without shaft seals is messy and drips onto the ground. (and my driveway). A hole in the centre of the pinion gear shaft carries grease to both bushes. Access to the grease nipple is thru the holes for the wheel locking pin. The pin is removed and outer gear rotated slightly to expose the grease nipple. The nipple also prevents the shaft from rotating.
Left: Preliminary machining of hub prior to welding hollow bar, Middle: Final machining, Right: Drilling and reaming holes for bevel gear shaft |
Please login to post a reply.
Want the latest issue of Model Engineer or Model Engineers' Workshop? Use our magazine locator links to find your nearest stockist!
Sign up to our newsletter and get a free digital issue.
You can unsubscribe at anytime. View our privacy policy at www.mortons.co.uk/privacy
- *Oct 2023: FORUM MIGRATION TIMELINE*
05/10/2023 07:57:11 - Making ER11 collet chuck
05/10/2023 07:56:24 - What did you do today? 2023
05/10/2023 07:25:01 - Orrery
05/10/2023 06:00:41 - Wera hand-tools
05/10/2023 05:47:07 - New member
05/10/2023 04:40:11 - Problems with external pot on at1 vfd
05/10/2023 00:06:32 - Drain plug
04/10/2023 23:36:17 - digi phase converter for 10 machines.....
04/10/2023 23:13:48 - Winter Storage Of Locomotives
04/10/2023 21:02:11 - More Latest Posts...
- View All Topics
- Reeves** - Rebuilt Royal Scot by Martin Evans
by John Broughton
£300.00 - BRITANNIA 5" GAUGE James Perrier
by Jon Seabright 1
£2,500.00 - Drill Grinder - for restoration
by Nigel Graham 2
£0.00 - WARCO WM18 MILLING MACHINE
by Alex Chudley
£1,200.00 - MYFORD SUPER 7 LATHE
by Alex Chudley
£2,000.00 - More "For Sale" Ads...
- D1-3 backplate
by Michael Horley
Price Not Specified - fixed steady for a Colchester bantam mark1 800
by George Jervis
Price Not Specified - lbsc pansy
by JACK SIDEBOTHAM
Price Not Specified - Pratt Burnerd multifit chuck key.
by Tim Riome
Price Not Specified - BANDSAW BLADE WELDER
by HUGH
Price Not Specified - More "Wanted" Ads...
Do you want to contact the Model Engineer and Model Engineers' Workshop team?
You can contact us by phone, mail or email about the magazines including becoming a contributor, submitting reader's letters or making queries about articles. You can also get in touch about this website, advertising or other general issues.
Click THIS LINK for full contact details.
For subscription issues please see THIS LINK.
Model Engineer Magazine
- Percival Marshall
- M.E. History
- LittleLEC
- M.E. Clock
ME Workshop
- An Adcock
- & Shipley
- Horizontal
- Mill
Subscribe Now
- Great savings
- Delivered to your door
Pre-order your copy!
- Delivered to your doorstep!
- Free UK delivery!
















 Register
 Log-in


