How to read a micrometer
| Michael Gilligan | 22/11/2021 17:40:02 |
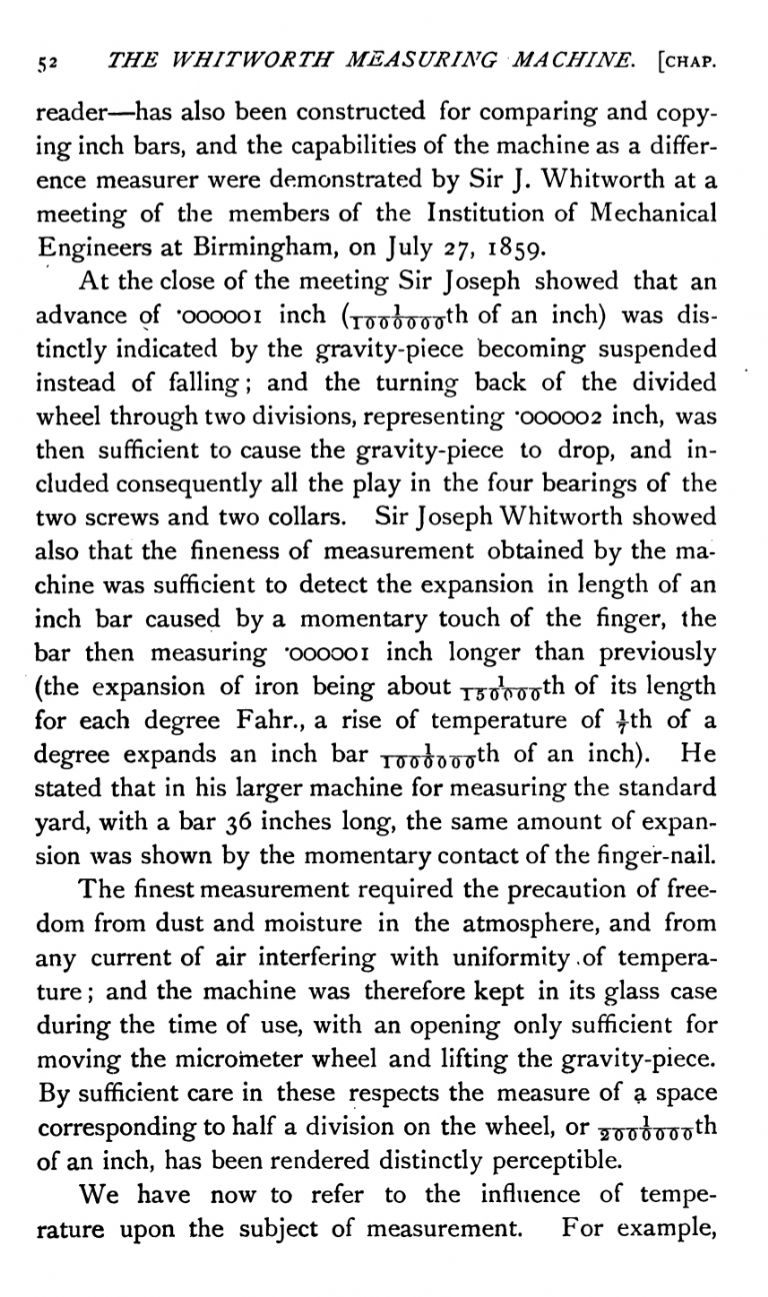
23121 forum posts 1360 photos | Nice demonstration, Bill … it reminded me of this, from one of my favourite books : . MichaelG. |
| mark costello 1 | 22/11/2021 23:57:06 |
800 forum posts 16 photos | We stand on the shoulders of giants. |
| not done it yet | 23/11/2021 06:55:41 |
| 7517 forum posts 20 photos | Posted by peak4 on 22/11/2021 16:40:09:
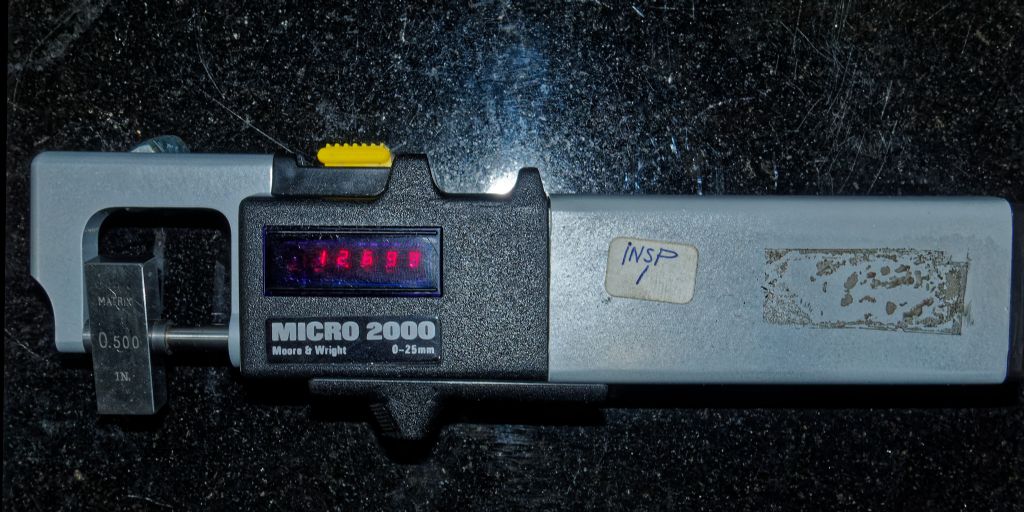
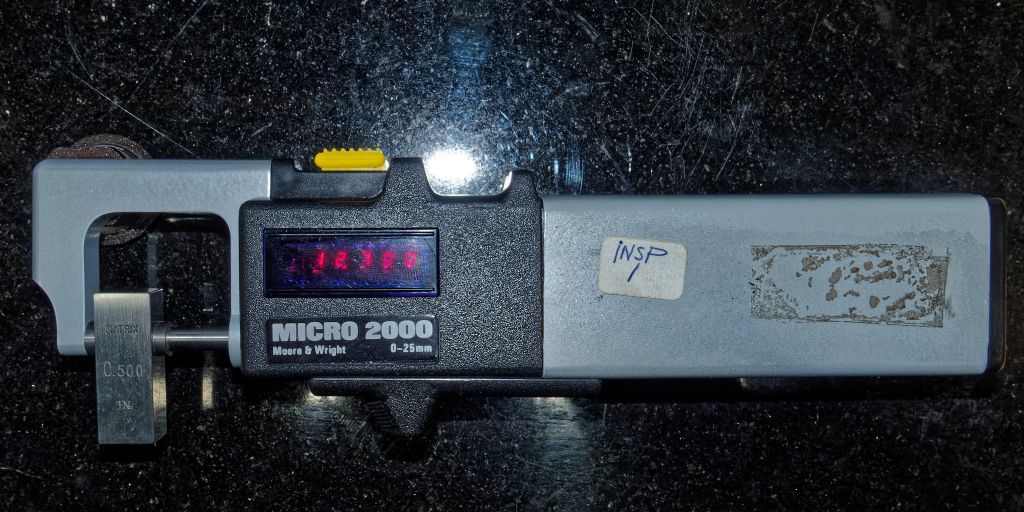
Here you go, a little experiment to illustrate the difficulty in trying to measure to too many decimal points, regardless of units. I picked the ½" block as we know the exact measurement we should be expecting in mm without using a calculator. Both measurements were consistently repeatable; the anvils and block are still in good enough condition to wring together. Bill Edited By peak4 on 22/11/2021 16:42:25 My suggestion of self enlightenment could be easier than relying on machining or emery - just measure and record all digits, then warm the item by a few degrees and record the new digits. Done at the same time with objects multiples in of the smallest item would clearly provide increases of multiples of that smallest increase - if done as a carefully controlled experiment. A 1” inch by 2” block would likely be sufficient if the operator is able to measure both dimensions without causing a change of conditions. Results could easily be confirmed, as accurate, by comparison with the documented coefficient of expansion for that material. We (should) all know that machined items should be allowed to completely cool before taking measurements - particularly important for close-tolerance fits. |
| SillyOldDuffer | 23/11/2021 09:08:24 |
| 10668 forum posts 2415 photos | Posted by not done it yet on 23/11/2021 06:55:41:
Posted by peak4 on 22/11/2021 16:40:09:
...
Here you go, a little experiment to illustrate the difficulty in trying to measure to too many decimal points, regardless of units. ... We (should) all know that machined items should be allowed to completely cool before taking measurements - particularly important for close-tolerance fits. Bill and NDIY make a good point about needing to account for temperature when taking high-accuracy measurements, but it's just one of several factors that reduce the accuracy of very fine measurements. My feeling is good condition thou/0.02mm micrometers are on safe ground for practical purposes because their limitations (about ±0.01mm), hide a raft of errors that become significant when attempting to read tenths (0.002mm). Measuring tenths and better takes one across the border into difficult territory, where the operator has to get everything right. Owning a suitable micrometer in good order is just the first step. Failing to account for sensitive error sources such as temperature means the measurements are unreliable. There's much more to measuring accurately below 0.001" than buying a micrometer, even a good one. I suggest there are two good reasons for buying un-calibrated knocked about second-hand tenths micrometers:
The acid test is turn a selection of rods to various random tenths accurate diameters and have them measured by independently by someone who doesn't know what to expect. Both parties have to get the same answers. You can't mark your own homework! Dave
|
| not done it yet | 23/11/2021 13:26:19 |
| 7517 forum posts 20 photos | Bill and NDIY make a good point about needing to account for temperature when taking high-accuracy measurements, but it's just one of several factors that reduce the accuracy of very fine measurements. Dave, My post was to reinforce that the OP could help himself by making careful measurements on items with slightly different dimensions, to determine how to read his particular instrument. Nothing particularly about absolute accuracy. |
| SillyOldDuffer | 23/11/2021 14:47:42 |
| 10668 forum posts 2415 photos | Posted by not done it yet on 23/11/2021 13:26:19:
Bill and NDIY make a good point about needing to account for temperature when taking high-accuracy measurements, but it's just one of several factors that reduce the accuracy of very fine measurements. Dave, My post was to reinforce that the OP could help himself by making careful measurements on items with slightly different dimensions, to determine how to read his particular instrument. Nothing particularly about absolute accuracy. Understood ta. I hijacked your 'just measure and record all digits, then warm the item by a few degrees and record the new digits.' We're both saying temperature alters dimensions, except I went a step further by pointing out accuracy requires temperature to be taken into account. I think I'm correct in saying modern micrometers are calibrated at 20°C whereas older ones were done at 64°F, causing a tiny error. Measuring tenths in an unheated workshop without recording the temperature is dubious. I'm concerned new boys might waste money buying tenths micrometers due to misunderstanding what they're for. However, far worse things happen in my workshop! Dave |
Please login to post a reply.
Want the latest issue of Model Engineer or Model Engineers' Workshop? Use our magazine locator links to find your nearest stockist!
Sign up to our newsletter and get a free digital issue.
You can unsubscribe at anytime. View our privacy policy at www.mortons.co.uk/privacy
- hemingway ball turner
04/07/2025 14:40:26 - *Oct 2023: FORUM MIGRATION TIMELINE*
05/10/2023 07:57:11 - Making ER11 collet chuck
05/10/2023 07:56:24 - What did you do today? 2023
05/10/2023 07:25:01 - Orrery
05/10/2023 06:00:41 - Wera hand-tools
05/10/2023 05:47:07 - New member
05/10/2023 04:40:11 - Problems with external pot on at1 vfd
05/10/2023 00:06:32 - Drain plug
04/10/2023 23:36:17 - digi phase converter for 10 machines.....
04/10/2023 23:13:48 - More Latest Posts...
- View All Topics
- Reeves** - Rebuilt Royal Scot by Martin Evans
by John Broughton
£300.00 - BRITANNIA 5" GAUGE James Perrier
by Jon Seabright 1
£2,500.00 - Drill Grinder - for restoration
by Nigel Graham 2
£0.00 - WARCO WM18 MILLING MACHINE
by Alex Chudley
£1,200.00 - MYFORD SUPER 7 LATHE
by Alex Chudley
£2,000.00 - More "For Sale" Ads...
- D1-3 backplate
by Michael Horley
Price Not Specified - fixed steady for a Colchester bantam mark1 800
by George Jervis
Price Not Specified - lbsc pansy
by JACK SIDEBOTHAM
Price Not Specified - Pratt Burnerd multifit chuck key.
by Tim Riome
Price Not Specified - BANDSAW BLADE WELDER
by HUGH
Price Not Specified - More "Wanted" Ads...
Do you want to contact the Model Engineer and Model Engineers' Workshop team?
You can contact us by phone, mail or email about the magazines including becoming a contributor, submitting reader's letters or making queries about articles. You can also get in touch about this website, advertising or other general issues.
Click THIS LINK for full contact details.
For subscription issues please see THIS LINK.
Model Engineer Magazine
- Percival Marshall
- M.E. History
- LittleLEC
- M.E. Clock
ME Workshop
- An Adcock
- & Shipley
- Horizontal
- Mill
Subscribe Now
- Great savings
- Delivered to your door
Pre-order your copy!
- Delivered to your doorstep!
- Free UK delivery!


 Register
 Log-in


