Forum sponsored by:

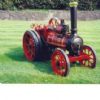
Part built Allchin 1.5 inch
| derek blake | 05/05/2019 12:53:27 |
| 586 forum posts 151 photos |
|
| Jeff Dayman | 05/05/2019 14:30:51 |
| 2356 forum posts 47 photos | The assemblies are looking great Derek! Progress! Your gear guards look extremely neat - they are a hard thing to make. |
| Paul Kemp | 05/05/2019 16:51:54 |
| 798 forum posts 27 photos | Hi Derek, Good to see you are still cracking on. Notice no one answered your question re graphite yarn. On big stuff you would normally cut seperate rings of packing and chamfer the ends together at 45 degrees to the axis of the spindle. However that is not really practical on small glands and valves so yes, wind your yarn around the spindle to a big enough 'lump' to fill the stuffing box and squash it in with the follower. Don't do it too tight, you will bend the follower! A gentle nip is good enough cold, then nip up when hot if it weeps. Generally a packing gland is never 100% leak tight, a small weep allows oil entrained in the steam to get to the packing. Paul. |
| derek blake | 05/05/2019 17:39:52 |
| 586 forum posts 151 photos | Thank you Jeff, I could take all the glory but I did decide to get gear guards laser cut but they were still work to build up. thanks for the question answer Paul, I was supposed to make all my glands to except O rings but for some reason I forgot. this would have got rid of having to use yarn but I will now have to make the best of it. regards Derek |
| derek blake | 30/05/2019 10:48:46 |
| 586 forum posts 151 photos | Hi All Some updated pictures of progress, I have a small question please. I have fitted the gears in the compensating centre, the spur gears are held on by 1/4 silver steel pins, however I had to ream the gears to get them to rotate but its left ever such a small amount of rock on the gear not the pin, do you think this will be ok? thanks in advance
Edited By derek blake on 30/05/2019 10:49:21 |
| derek blake | 30/05/2019 11:48:40 |
| 586 forum posts 151 photos | Sorry I meant the small bevel gears, 3 off |
| Paul Kemp | 30/05/2019 23:14:41 |
| 798 forum posts 27 photos | Derek, "small amount" of play will be fine. In practice the diff gears only really rotate when turning corners and then only a tooth or two at a time or depending on the set up if winching where they may turn proper. If you look at any full size engine gears, your small amount would translate to a brand new running fit! If you think about the age of these machines many of them are well past their sell by date in terms of gear wear but they still run just find albeit a little on the noisy side! Paul. |
| derek blake | 30/05/2019 23:24:23 |
| 586 forum posts 151 photos | Thank you Paul, I’m actually having difficulties with the diff at the moment. when it’s all assembled on the axial and wheel fitted its locked up, I’m guessing the gears are too tight so I’m going to try some shims to push the gears apart slightly hopefully this will free it up as it’s awful at the moment and won’t rotate. |
| Paul Kemp | 31/05/2019 00:15:09 |
| 798 forum posts 27 photos | Derek, Afraid I don't know the detail of the Alchin diff as have never built one but when making the diff on my LS I left the centre boss of the diff housing (both sides) over length from the figure quoted on the drawing. I then set it up in the lathe first one way and then the other and gently faced it back to get a nice engagement with a bit of clearance / backlash on both crown wheels to the pinions. Worth mentioning all gears in the diff on my 6" LS are cast gears (as many full size engines were) so they are not as precise as machined gears! As I am guessing on the Alchin I would say you are on the right track with shims. Ideally you want a little bit of backlash in the diff for smooth running. Paul. |
| derek blake | 31/05/2019 08:30:06 |
| 586 forum posts 151 photos | Thanks Paul, its good to know I'm on the right track with the shims. Regards, Del |
| derek blake | 05/07/2019 15:19:18 |
| 586 forum posts 151 photos |
Good afternoon ive been working on the engine and am wanting to plum up the injector, I have one that’s to drawing but is missing a lot of the internal parts, if I wanted to use a off the shelve injector like someone has used in the below picture what number do I need, I see they they are sold as No 2,3 etc. thank you in advance. |
| derek blake | 05/07/2019 15:20:27 |
| 586 forum posts 151 photos |
|
| Paul Kemp | 05/07/2019 21:27:08 |
| 798 forum posts 27 photos | Hi Derek, Good to see you are still pushing ahead. Traditionally model injectors seem to be rated in fl oz per minute. So in choosing a suitable one look at the volume of water in your boiler at running level and compare to the volume delivered per minute of any proposed injector. General comment I would make is a lot of models seem to have injectors that are over capacity and will raise the level in the glass from empty to full in short order, some within a minute! While that may be desirable for some it is not very kind to the boiler as a large quantity of cool water squirted in by the injector knocks the pressure back which puts quite a significant temperature / pressure stress cycle on the boiler. It is kinder and more efficient to have an injector with a lower delivery that can be left on for longer if needed but if used regularly for smaller amounts you can control the pressure water level much better and do not have such wild fluctuations. Others may well have different opinions but I have never come across a full size boiler yet that you can take from the bottom to the top of the glass in a minute or two! Generally the injectors are matched to balance or slightly exceed the water consumption at full load. Often on railway loco's you have two injectors, one having a higher delivery than the other to better match operating conditions. Paul. |
| MichaelR | 06/07/2019 08:53:13 |
 528 forum posts 79 photos | Posted by derek blake on 30/05/2019 23:24:23:
Thank you Paul, I’m actually having difficulties with the diff at the moment. when it’s all assembled on the axial and wheel fitted its locked up, I’m guessing the gears are too tight so I’m going to try some shims to push the gears apart slightly hopefully this will free it up as it’s awful at the moment and won’t rotate. Another thing, with a three pinion diff the spacing of the pinions have to be equal if there is any discrepancy the diff will lock, worth checking your spacings. Mike. |
| derek blake | 06/07/2019 22:02:07 |
| 586 forum posts 151 photos | Thanks very much Paul and Mike. i brought some shims to space the gears and I feel they rotate much smoother so I’m happy I think, injector I need to research how much water the Allchin holds and go from there. i will update some new pictures soon. |
| derek blake | 14/08/2019 10:36:43 |
| 586 forum posts 151 photos | So its been a while but a good bit of news this week, my boiler is finished and will arrive next week. this means I can fill that gap, and see how the engine will look. As everyone will know I'm a complete novice in building engines and as such before I'm to fix the cylinder I'd very much like to ask a question. I do have to read the book for setting out the cylinder, however when fitting it do you make sure that the piston has an equal gap each end of the cylinder bore on forward and back stroke. I was thinking that I leave the end cover off and watch to how far the piston slides so that the cylinder is set the right distance along the boiler. Regards, Derek
|
| Clive Brown 1 | 14/08/2019 11:11:42 |
| 1050 forum posts 56 photos | Your thinking is correct. The piston screws along the piston rod for adjustment of the end gaps, with a locking nut to fix its position. IIRC, Hughes shows the design for a 'C' spanner to use for this. Edited By Clive Brown 1 on 14/08/2019 11:11:55 |
| derek blake | 14/08/2019 11:15:19 |
| 586 forum posts 151 photos | Right OK, thanks Clive. |
| JasonB | 14/08/2019 11:40:33 |
 25215 forum posts 3105 photos 1 articles | Just bear in mind that under steam the boiler will elongate a bit but the piston rod and motion won't so cold settings of piston and valve will need tweaking when hot. |
| derek blake | 14/08/2019 11:43:31 |
| 586 forum posts 151 photos | Right I see, thanks Jason. hopefully I can get the cylinder in the ballpark from the drawings and be able to tweak with the adjustments on the rod etc as mentioned. I'm sure it will be fine, I just don't want to fit the cylinder in the wrong place and ruin the boiler but I think that's unlikely as I have an idea what's supposed to happen. |


Please login to post a reply.
Magazine Locator
Want the latest issue of Model Engineer or Model Engineers' Workshop? Use our magazine locator links to find your nearest stockist!
Sign up to our Newsletter
Sign up to our newsletter and get a free digital issue.
You can unsubscribe at anytime. View our privacy policy at www.mortons.co.uk/privacy
Latest Forum Posts
- hemingway ball turner
04/07/2025 14:40:26 - *Oct 2023: FORUM MIGRATION TIMELINE*
05/10/2023 07:57:11 - Making ER11 collet chuck
05/10/2023 07:56:24 - What did you do today? 2023
05/10/2023 07:25:01 - Orrery
05/10/2023 06:00:41 - Wera hand-tools
05/10/2023 05:47:07 - New member
05/10/2023 04:40:11 - Problems with external pot on at1 vfd
05/10/2023 00:06:32 - Drain plug
04/10/2023 23:36:17 - digi phase converter for 10 machines.....
04/10/2023 23:13:48 - More Latest Posts...
- View All Topics
Support Our Partners


Shopping Partners
Subscription Offer

Latest "For Sale" Ads
- Reeves** - Rebuilt Royal Scot by Martin Evans
by John Broughton
£300.00 - BRITANNIA 5" GAUGE James Perrier
by Jon Seabright 1
£2,500.00 - Drill Grinder - for restoration
by Nigel Graham 2
£0.00 - WARCO WM18 MILLING MACHINE
by Alex Chudley
£1,200.00 - MYFORD SUPER 7 LATHE
by Alex Chudley
£2,000.00 - More "For Sale" Ads...
Latest "Wanted" Ads
- D1-3 backplate
by Michael Horley
Price Not Specified - fixed steady for a Colchester bantam mark1 800
by George Jervis
Price Not Specified - lbsc pansy
by JACK SIDEBOTHAM
Price Not Specified - Pratt Burnerd multifit chuck key.
by Tim Riome
Price Not Specified - BANDSAW BLADE WELDER
by HUGH
Price Not Specified - More "Wanted" Ads...
Get In Touch!
Do you want to contact the Model Engineer and Model Engineers' Workshop team?
You can contact us by phone, mail or email about the magazines including becoming a contributor, submitting reader's letters or making queries about articles. You can also get in touch about this website, advertising or other general issues.
Click THIS LINK for full contact details.
For subscription issues please see THIS LINK.
Digital Back Issues


Donate

 Register
 Log-in
Model Engineer Magazine
- Percival Marshall
- M.E. History
- LittleLEC
- M.E. Clock

ME Workshop
- An Adcock
- & Shipley
- Horizontal
- Mill

Subscribe Now
- Great savings
- Delivered to your door

Pre-order your copy!
- Delivered to your doorstep!
- Free UK delivery!
All Forum Topics > Traction engines > Part built Allchin 1.5 inch