Forum sponsored by:

Brian's 1" Minnie Traction Engine
| Richard S2 | 24/04/2017 12:34:06 |
 237 forum posts 135 photos | Posted by Brian Abbott on 23/04/2017 21:01:15:
Hello,When i turned the liner on my minnie cylinder i left it about .001" undersize. On rechecking now its fitted i have a slight taper, measures 0.624" at one end to 0.625" at the other. Very annoying, the finish is really good and the plan was to give it a quick polish to remove the last little bit. Do you think lapping would true this up ?hanks. Hello Brian, I had a similar dilemma with the bore, and unsure of the standard of finish necessary. I decided to polish it to size and finish by lapping anyway and before drilling any ports into it. I made a brass lapping tool about 2" (50mm) in length and as true to 5/8" dia and parallel as poss with shallow grooves spaced 3/16" apart along the length to carry an abrasive (T-cut original) mixed with White Spirit. It took me a few hours, but the results were excellent and allowed me to make the piston a real good smooth fit. |
| Brian Abbott | 24/04/2017 13:41:53 |
 523 forum posts 95 photos | Thanks Neil / Richard. Richard, was the bore perfectly true to start with or did it have a taper which the polishing removed ? As Neil said the o ring will allow for some error but would like to try and see how it goes, problem is i have already drilled my ports so will have to take care ! Thanks. |
| Richard S2 | 24/04/2017 18:01:58 |
237 forum posts 135 photos | The bore was not true, as the Plug Gauge I made passed through smoothly for 1.1/8" and then became tighter. I wasn't happy to leave it that way, even though it was only a few tenths of a thou, and so with patience, the lapping removed it. Haven't got a pic of the bore/Lap etc, only this one of the end of the Cylinder with the Piston at full throw-
No reason why you can't do the same if you wish, despite having drilled the passages. All you'll need to do is to fully clean them out after. Regards |
| JasonB | 24/04/2017 18:54:25 |
 25215 forum posts 3105 photos 1 articles | Sorry for not chipping in earlier but I have been working up in london today and this is first time today I have had teh computer on. I made a timber lap from a bit of hardwoodthat just entered teh bore and spun that in teh chuck while sliding teh cyliner up and down, Think I used Silvo or a similar polish. It is also worth lapping anyway as any micro ridges left from turning will wear teh O rings. It was Blackgates that list teh rings, 1 x 111, 1x006, 1x010, 1xRefB (3/32) and 1 x 007 |
| Brian Abbott | 24/04/2017 23:04:42 |
523 forum posts 95 photos | Thanks Chaps for your advice and for the o ring sizes. I have spent a happy few hours tonight sorting this out. Managed to polish the taper out so the plug passed through perfectly. I did turn a brass mandrel which was a slide fit on the bore and tried lapping the bore but found this just tried to “pick up” so must be doing something wrong with that one.. The finish is now is very good with only some very light surface scratched so I am going to call it a day at that i think. Just need to drill the fixing holes and that’s another bit done.. Thanks again, Edited By Brian Abbott on 24/04/2017 23:05:44 |
| Brian Abbott | 06/06/2017 22:39:30 |
523 forum posts 95 photos | Hello All. Need some more O ring help if possible. I am working my way through the cyclinder making the cylinder cover and the piston gland. The recess in the cover for the o ring is 0.290" x 0.250" dp and the gland measures 0.290" x 0.156 leaving a cap of 0.094" Using a BS007 o ring, the thickness of this measures 0.070" Should'nt this o ring be compressed slightly when fitted ? Also, at 0.285" across so its loose in the bore. Thanks in advance. Brian |
| JasonB | 07/06/2017 07:25:19 |
25215 forum posts 3105 photos 1 articles | Yes as it is compressed into the 0.290" dia it also lengthens slightly plus you allow a bit of end float so the ring can roll slightly |
| Brian Abbott | 07/06/2017 21:04:04 |
523 forum posts 95 photos | Ok, thanks Jason, I will have another measure as something does not feel right. Cheers |
| Brian Abbott | 29/06/2017 16:26:49 |
523 forum posts 95 photos | Hello all. back again. Need some help, unsure of what size o ring i use in the regulator chest. I will order a set from Blackgates but none of the sizes make sense. The REF B 3/32 would be the obvious guess but this would add up to having a 0.222 OD. Is this right ? Thanks in advance.
|
| JasonB | 29/06/2017 16:57:51 |
25215 forum posts 3105 photos 1 articles | Looking at a table for the fit of O rings the ref B ring has a nominal diameter of 0.064" usually these would be compressed by about 0.010" but the B ref they give 15-18 thou of compression and a wider groove to accomodate the more oval shape that will result. So if we take a mid value of 0.0165" from our nominal of 0.064" that gives the compressed size of 0.0475" Therefore 2x ring plus shaft = (2x0.0475)+0.094 = 0.188" Drawing gives 0.185" so looks like Mason went towards the max of 0.018" compression which would come out bang on 0.185" Rather than make a 0.185" D bit I would just do the counterbore for the ring with a 3/16" milling cutter |
| Brian Abbott | 29/06/2017 22:34:02 |
523 forum posts 95 photos | Wonder if he made it so tight as to stop the regulator moving? Anyhow, thanks Jason. |
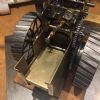
| Brian Abbott | 08/11/2017 12:51:54 |
523 forum posts 95 photos | Hello all. Not sure if anyone's interested but for anyone building one here's a couple of pictures of the Minnie, not much progress lately but still progressing. Thanks.
|
| Brian Abbott | 10/11/2017 12:13:06 |
523 forum posts 95 photos | Hello All, after some help. I am just in the process of making the smoke box, am i right in saying this only pushes onto the boiler by 3/8" ? Also, what the best way to ensure this is fitted true as i am guessing an error here will create a problem when i wrap the boiler cladding. Thanks. |
| JasonB | 11/11/2017 08:01:19 |
25215 forum posts 3105 photos 1 articles | That sounds about right, looking insid ethe smokebox the rivits on mine are 1/8" in from the end of the boiler which would give 3/8" overlap. mason suggests holding a straight edge against the smokebox and chucking you have an even gap down the sides, to and bottom of the boiler, just drill through 4 holes and poke a rivit in loos to hold things, if not quite right adjust and drill a couple more holes. Cladding is not an issue as by the time you have added 1/16" of insulation the cladding can overlap the smokebox by 1/8" so the rivit setback looks the same both ends. |
| Brian Abbott | 26/11/2017 21:14:46 |
523 forum posts 95 photos | Hello all. Jason, can you remember how you did the radius on the smoke box door ? |
| JasonB | 27/11/2017 07:24:07 |
25215 forum posts 3105 photos 1 articles | I seem to remember setting a tool well back on the topslide and pivoting the whole slide about its spigot. Another option would be to draw it out and workout a set of co-ordinates in say 0.010" steps to get the basic shape then blend them in by hand, not quite so easy with the flat part around the edge though using a hand graver would do it, a file catches the flat area.
|
| Brian Abbott | 27/11/2017 12:57:56 |
523 forum posts 95 photos | Thanks Jason, trying to blend something by hand will possibly be my best option. ok..will have a think. |
| Brian Abbott | 11/01/2018 10:11:43 |
523 forum posts 95 photos | Hello all. I am about to start making the connecting rod for my 1" Minnie but not really sure where to start, has anyone got any advice or photos ? Thanks. |
| Richard S2 | 11/01/2018 19:53:12 |
237 forum posts 135 photos | Sorry Brian, my model (Con Rod/Cross Head) is not as per LC Mason's design, so can only advise following his book description. page 129, fig52 and page 149, Chapter 8. I presume you have a copy?. If not, will try and interpret the essentials for you here. Certainly more straight forward than the path I chose for mine. Regards Edited By Richard S2 on 11/01/2018 19:53:53 |
| Brian Abbott | 14/01/2018 21:31:23 |
523 forum posts 95 photos | Hello Richard, Thanks for the reply, will see how i get on.. |

.jpg")
.jpg")


Please login to post a reply.
Magazine Locator
Want the latest issue of Model Engineer or Model Engineers' Workshop? Use our magazine locator links to find your nearest stockist!
Sign up to our Newsletter
Sign up to our newsletter and get a free digital issue.
You can unsubscribe at anytime. View our privacy policy at www.mortons.co.uk/privacy
Latest Forum Posts
- hemingway ball turner
04/07/2025 14:40:26 - *Oct 2023: FORUM MIGRATION TIMELINE*
05/10/2023 07:57:11 - Making ER11 collet chuck
05/10/2023 07:56:24 - What did you do today? 2023
05/10/2023 07:25:01 - Orrery
05/10/2023 06:00:41 - Wera hand-tools
05/10/2023 05:47:07 - New member
05/10/2023 04:40:11 - Problems with external pot on at1 vfd
05/10/2023 00:06:32 - Drain plug
04/10/2023 23:36:17 - digi phase converter for 10 machines.....
04/10/2023 23:13:48 - More Latest Posts...
- View All Topics
Support Our Partners


Shopping Partners
Subscription Offer

Latest "For Sale" Ads
- Reeves** - Rebuilt Royal Scot by Martin Evans
by John Broughton
£300.00 - BRITANNIA 5" GAUGE James Perrier
by Jon Seabright 1
£2,500.00 - Drill Grinder - for restoration
by Nigel Graham 2
£0.00 - WARCO WM18 MILLING MACHINE
by Alex Chudley
£1,200.00 - MYFORD SUPER 7 LATHE
by Alex Chudley
£2,000.00 - More "For Sale" Ads...
Latest "Wanted" Ads
- D1-3 backplate
by Michael Horley
Price Not Specified - fixed steady for a Colchester bantam mark1 800
by George Jervis
Price Not Specified - lbsc pansy
by JACK SIDEBOTHAM
Price Not Specified - Pratt Burnerd multifit chuck key.
by Tim Riome
Price Not Specified - BANDSAW BLADE WELDER
by HUGH
Price Not Specified - More "Wanted" Ads...
Get In Touch!
Do you want to contact the Model Engineer and Model Engineers' Workshop team?
You can contact us by phone, mail or email about the magazines including becoming a contributor, submitting reader's letters or making queries about articles. You can also get in touch about this website, advertising or other general issues.
Click THIS LINK for full contact details.
For subscription issues please see THIS LINK.
Digital Back Issues


Donate

 Register
 Log-in
Model Engineer Magazine
- Percival Marshall
- M.E. History
- LittleLEC
- M.E. Clock

ME Workshop
- An Adcock
- & Shipley
- Horizontal
- Mill

Subscribe Now
- Great savings
- Delivered to your door

Pre-order your copy!
- Delivered to your doorstep!
- Free UK delivery!
All Forum Topics > Traction engines > Brian's 1" Minnie Traction Engine