Member postings for gerry madden
Here is a list of all the postings gerry madden has made in our forums. Click on a thread name to jump to the thread.
| Thread: clock parts disposal ? |
| 29/08/2021 11:14:32 |
Apologies, I should have said. I'm between Leighton Buzzard and Milton Keynes. |
| 29/08/2021 00:16:23 |
Some time ago I inherited quite a lot of clock parts, faces, movements, wheels, springs etc. Can anyone tell me if there is a popular place (online or actual) to try to sell this kind of stuff please ? Perhaps its just ebay ? Gerry |
| Thread: surface grinder |
| 21/08/2021 14:04:00 |
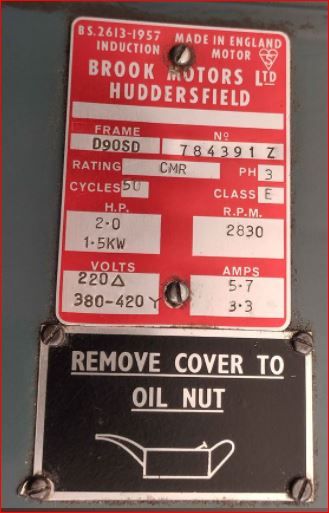
Many thanks all for your contributions. The other day I very nearly placed an order for the Warco when I heard that prices were likely to go up in the future due to dramatic rises in shipping costs. But impulsiveness has caught me out before so I hesitated. Am I'm glad I did because a J&S 540 has come up for sale quite close to me so I must at least have a look at it. This J&S looks 'ligit' and has apparently been in good use until recently when a new and more versatile machine replaced it. Its over 40 years since I last touched and used one of these machines so hoping now that some of you can give me a few pointers on what to look for when I go and see it. SPINDLE - as a bearing engineer this doesn't worry me too much. I have a vibration analyser so will be able to detect any deterioration here. I have callibrated ears too ! BED WEAR - I will do some simple DI checks but I also will ask the owner to grind a steel strip on both sides so that I can measure the thickness variation. If its more than a couple of microns I might have reservations. But what about things like the hydraulics - what should I look for here ? And are there any other points I should check apart for general functionality ? On the nameplate pic I notice it refers to different voltages for star and delta in the motor. Does this mean I can run it directly on 240V just by swopping some wires in the motor connections box ? Also which 'nut' is it that needs oiling ?!!
Gerry
|
| 10/08/2021 17:49:52 |
I'm presently having thoughts about a small surface grinder. I only need a small one and, since it will live in the garage and only get occasional use, I'm not sure I need dust collection systems, dressers etc. I do want it to be repeatable and give good finishes though, I notice Warco do one which looks like it fits the bill perfectly size-wise. However I have no idea of the machining capability of such a machine, as opposed to say a used J&S. 1) Has anyone got a Warco and if so what do you think about it ? 2) There are clones of the Warco design around, with different paint and probably a slightly different price. But is there anything else on the market with a similar size and price tag to the 'Warco design'? 3) For the smallest J&S (1540?) in good condition what should I expect to have to pay for a defect-free machine ? Thoughts and comments appreciated.
Regards, Gerry |
| Thread: A motor or a weight for Wildings Small Tower Clock |
| 26/07/2021 17:31:57 |
Chaps, I haven't progressed far on my tower clock project because I keep thinking of doing things differently. My latest wobble is this. The design is an 8-day and it needs something like an eight foot weight drop for this. Not only does 8 days come around far too frequently for my liking, but finding a convenient 8 feet drop is challenging too. One way of getting rid of the weight might be to drive the thing with a virtually stalled motor. The stall-torque could increased by a very high ratio gearbox, perhaps a fine worm and wheel or epicyclic. Motors used as 'torque generators' are often used in automotive power-assisted steering systems so the idea is not new. But I haven't seen this in a clock before so just wondering, if it has, are there any good recommendations to be had on the best type of motor to use ? I think the internal heating could be easily controlled or limited with speed controller. ...or just a big resistor! Any thoughts or comments would be appreciated on the practicalities of this idea ?
Gerry
|
| Thread: OMT microscope - restored |
| 26/07/2021 17:05:08 |
Thanks all for your comments. Howard - I think I would only need to worry about temperature if the components I measure are not the same material as the structure of the 'scope and its key measuring elements. When everything in the 'system' is steel, it all grows or shrinks together. I have actually attempted to prove this using the accurate opto-mechanical bore measuring device. In an afternoon when my 'workshop' got up to 28C I set it up to measure something and aligned all the cross-hairs in the eyepiece. The following morning when the room and its contents had cooled to about 18C I switched on the lighting, peered through the eyepiece to find that the cross-hairs had not deviated at all and were still perfectly aligned. This wouldn't have been the case if I'd had a lump of aluminium or plastic on the table. I could still measure it of course but would have to make allowance for the differential expansion when ambient temperatures are above or below standards room temperatures. Pete - Yes they are indeed, with big 65mm barrels. I think later machines used smaller ones for some strange reason. I did think they might be worn out and I would ditch them for some metrics but couldn't find any of that size for at a sensible price. However, now I know they are still good I will keep them and have a go at removing the rust in the knurling at the top of the picture. I think I will surround a small patch of it in plasticine and drown it in citric acid. If that seems to improve the appearance I do it some more! One aspect I'm not sure about on these mics is the proper/correct way to set the thread-adjustment nut. Should they for example be tightened to give a certain 'free-play' value in the shaft or perhaps tightened to give a specific friction torque value ? Kiwi - you caught me out. That's one little task still to do. There are a number of minor parts including the nameplate that have been made in brass. All of these were originally nickel plated to match the steel parts but much of it had worn off. I haven't decided yet whether to let someone else do this for me or faff around myself for another 6 months. I'll let you know Gerry
|
| 25/07/2021 20:26:41 |
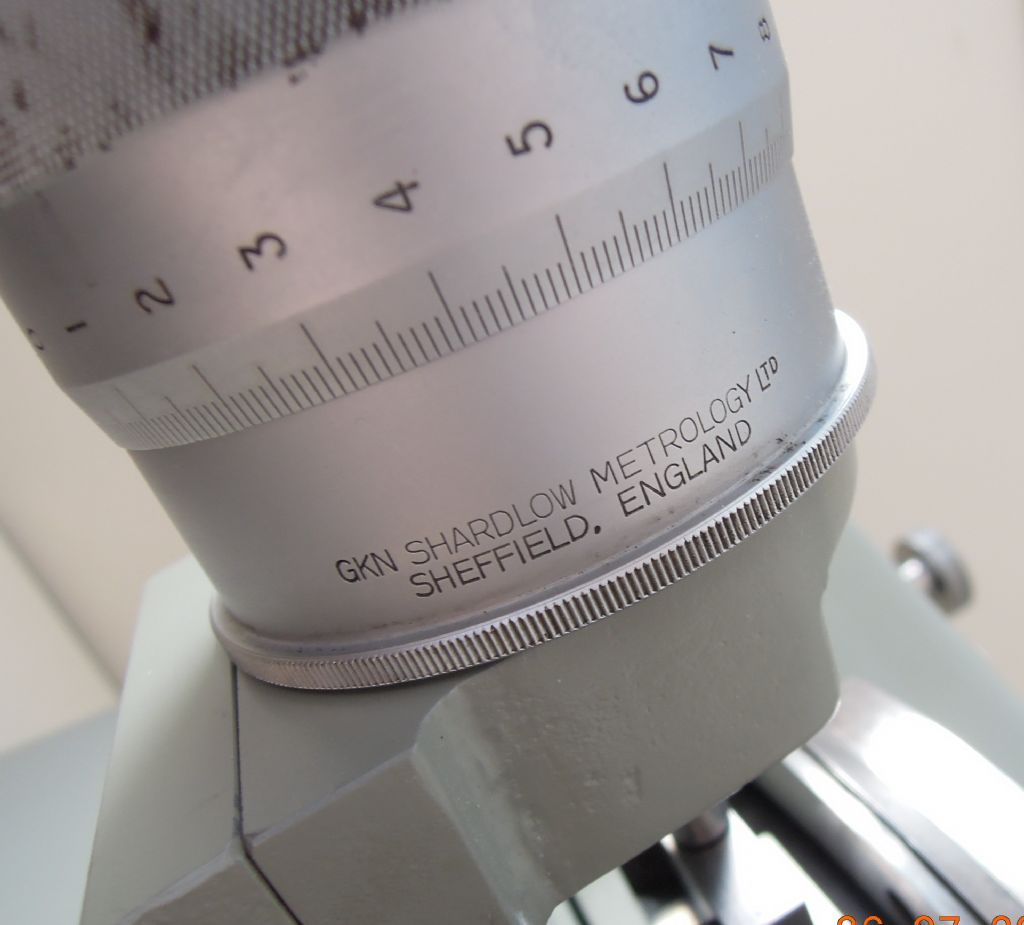
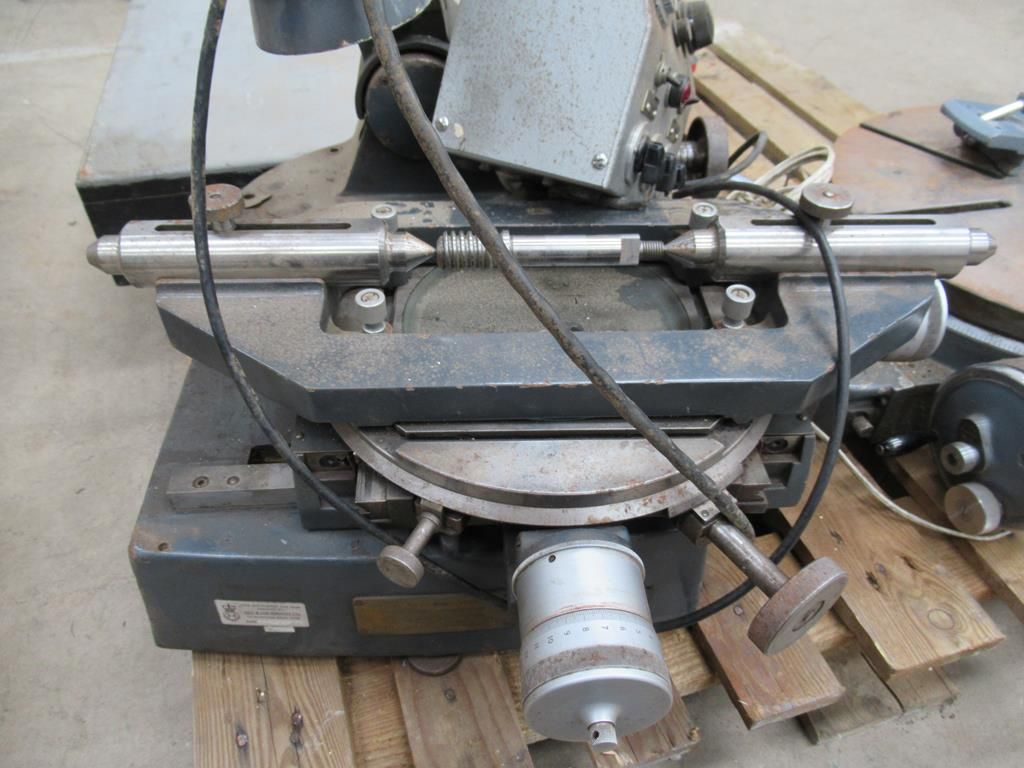
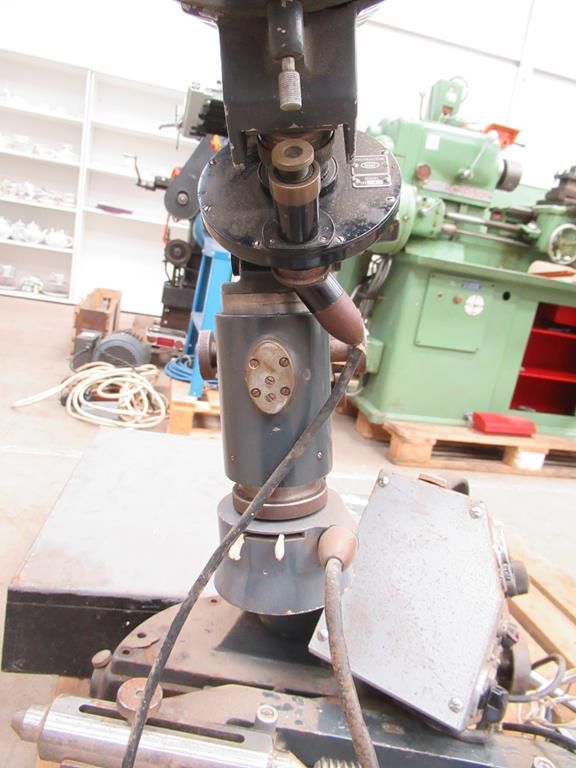
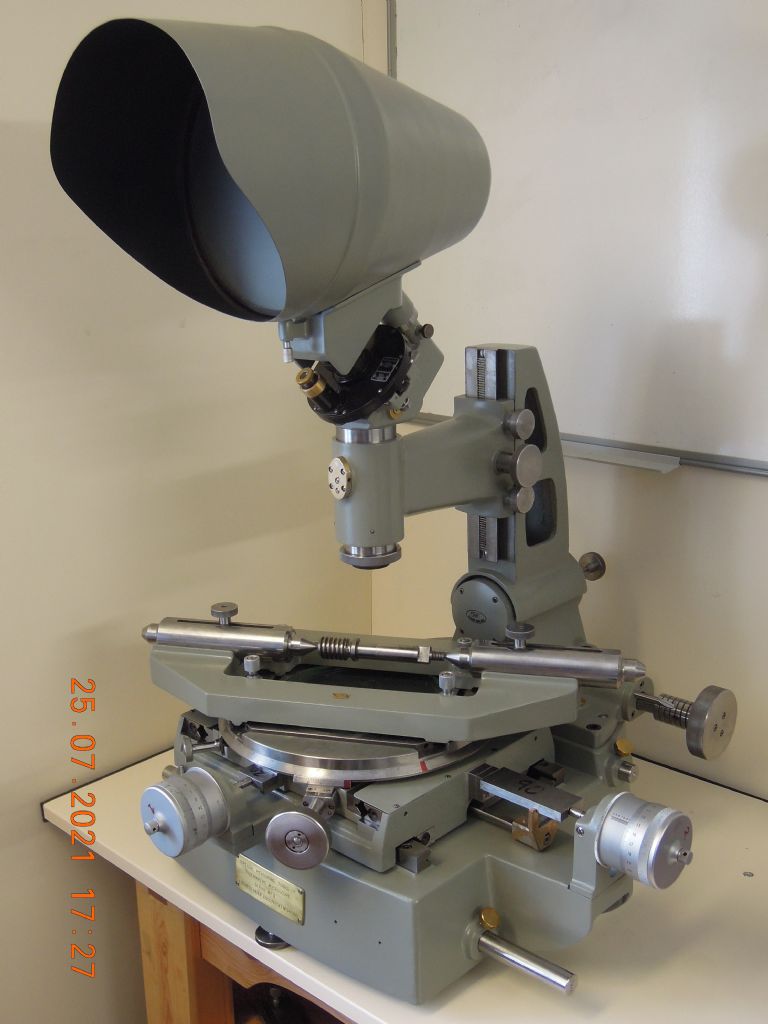
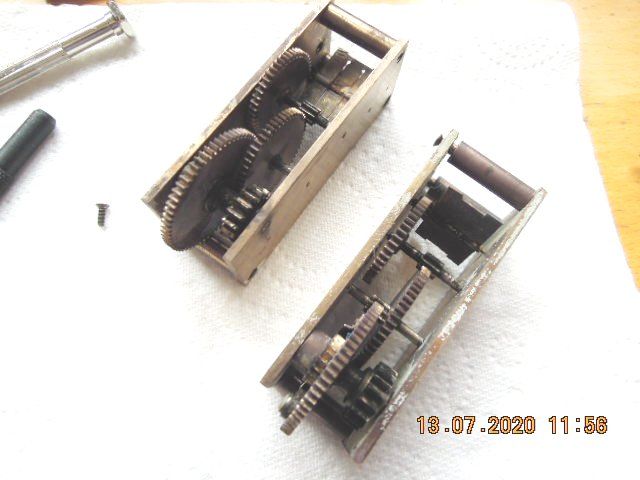
From a canibalised, abused and uncared-for rusty wreck purchased 18 months ago for £65 I now have a rather elegant and useful OMT microscope. Its been a challenging project at times but always a rewarding one. I only lost one small component, a mirror clip which was easily re-made. I have leant about painting, threads, mechanical and optical construction in the post war years and some interesting industrial history too. Good value for money, I think anyway. Here's the microscope when I bought it..... ....and now fully operational clean and shiney..... This particular microscope is serial no. 9. Sales literature for this product shows machines with serial numbers in the 20s so this is certainly an early one made in Slough as opposed to Maidenhead where the bulk of production took place. Technically many changes were made in subsequent models and serial numbers go up into the 700s. Whether these changes were made for cost reduction purposes as opposed to enhancement, I'm not sure, but I can only criticise this model in a few ways if I'm honest One feature I really don't like is the clock-work air-brakes to reduce shock loads on the micrometer heads if the spring-loaded slides are released accidentally against them. These things rattle, buzz and chatter regardless of what you do to them. Later machines I believe had hydraulic dampers which would I'm sure be much smoother and quieter. I'm not so impressed by the optics quality either. My 1970s elcheapo desk stereo microscope with Japanese optics is much sharper. I won't be too hard on the OMT yet though until I have completed the optics clean-up. Some lenses and mirrors are probably permanently damaged though as they have succumbed to the dreaded glass-etching fungus discussed on here previously. One component this machine didn't come with was the back-light unit. I need to do some trials and investigate what I might needed here so I may be back to the forum for some guidance on this later. In terms of accuracy I did expect the machine would have lost some of this in its 70 year life due to imperfect ball guide surfaces giving stick-slip, and wear and impact damage to the micrometer heads. But all seems to be ok. Using the opto-mechanical bore measuring probe I have calibrated the X and Y heads in approximate 2mm increments over the 1" travel using slip blocks. Provided I take a mean of five measurements the head figures will never deviate from the slip-block values by more than a couple of microns anywhere along the full scale. In fact when making these precision measurements its always me that's the problem. The micro-heads on the finest circumferential scales can be interpolated to 0.000 03" Unfortunately its the 0.025" increments on the axial scale that keep catching me out. I have to use an eyeglass to be sure which side of the line I'm on. And if these things don't catch me out, the adding up and converting to mm usually does ! You also need to make sure the parts are properly secured to the table too. Its so easy to loose microns here! Generally this is not a machine to measure with when you are tired or want to do something quickly. But its good fun nevertheless and satisfying to have saved another lovely bit of engineering from the scrapheap. Gerry
|
| Thread: drilling a bearing ball |
| 14/07/2021 12:10:23 |
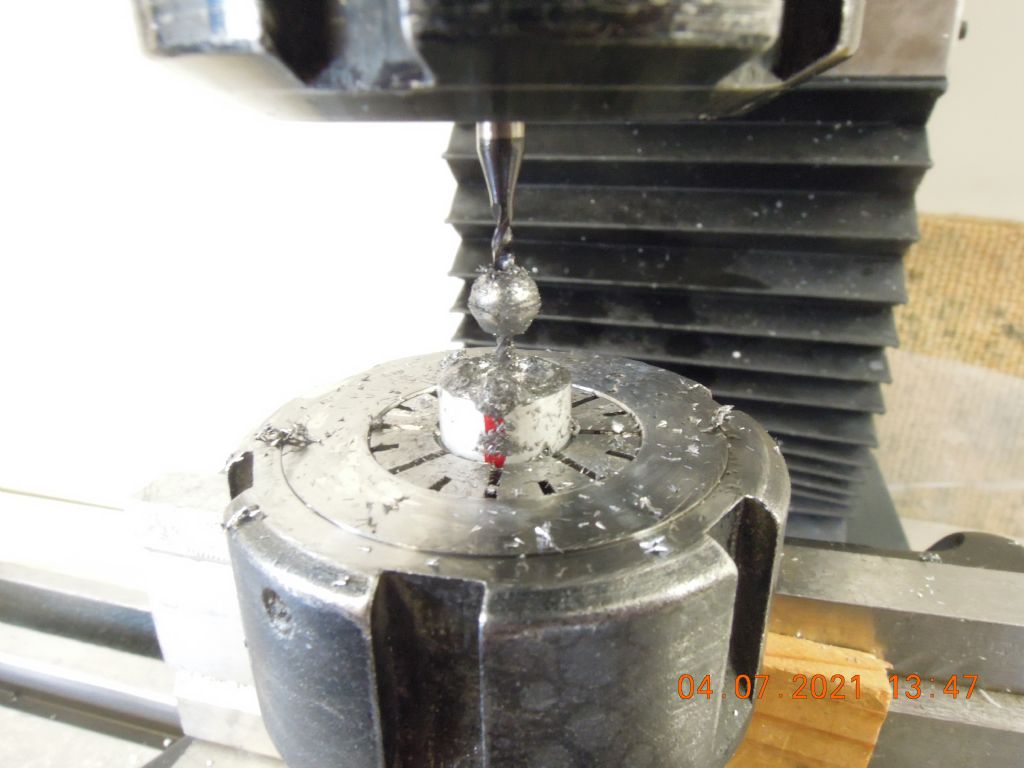
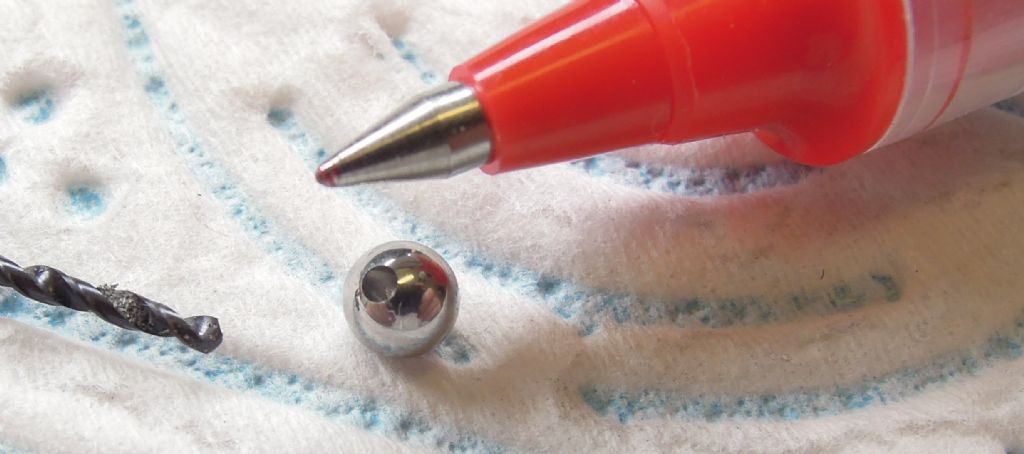
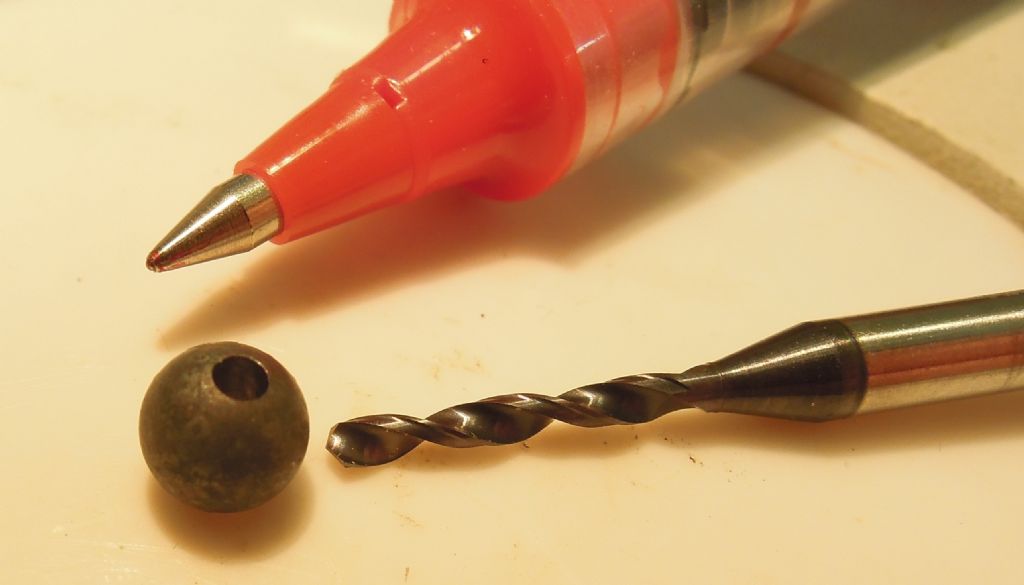
Thanks all for your thoughts and guidance on how to drill holes in balls. After some trial and error I think I have perfected the art a little further and just to help the next one along that wants to do something similar here is the technique that seemed to work well for me. 1) Hold a small piece of a relatively soft material like aluminium in the mill vice. Check the vice is secure and the X and Y slides are locked solidly. 2) Using a conventional centre-drill make a hole in the material. Select a size of centre drill that will ensure that the ball doesn't rest on the entrance to the cylindrical portion of the hole. The ball will be much more stable when it sits in the 'V' portion. 3) Put the ball in the hole then, protecting it with a piece of soft metal to prevent surface damage, give the ball a bit a bit of a thump with a hammer. This will plastically deform the soft seating material and increase the area of contact of the ball in its 'socket'. 4) Remove the ball and put a little super-glue on the seating. Replace the ball and press it into its socket for about 30m seconds. 5) If you still haven't moved those X and Y slides the quill will still be completely concentric with the ball that you want to drill. Its now just a case of drilling with your carbide drill. But one needs to be a little bit 'sensitive' to ensure that the drill doesn't wander off the centre due to other 2nd order excentricities such as chuck runout etc. To help, what I did was remove the strong return spring in my Wabeco mill's quill. Once this was out the quill will drop slowly with only viscous drag under its own weight. The quill clamp should of course be adjusted to remove as much clearance as possible but too much that is stops the quill from moving. 6) Let the drill run for about 1 minute with only 'quill weight' on the drill. Once it's made a small indent you can safely begin to apply finger pressure on the quill arm and begin to cut at a much faster rate. (This is enough to get through a 3mm ball in about 45 seconds running at 3000RPM. ) 7) I couldn't tell if there was much heat being developed in the cut but I dont think so. Quite honestly though with such small parts its difficult to tell what's going on anywhere ! What one does find though is debris builds up and obscures the workpiece so I stopped every so often and cleaned things up with a squirt of WD40. 8) When the drill is through the ball it very kindly pulls the ball out of the socket for you. All you need to do then is slide the ball off the drill and drop it in some acetone to dissolve the remaining hardened glue. 9) If you haven't loaded up the quill too much you will have no chipping on the surface of the ball at break out. You will also have a very high quality hole. For some strange reason the hole is always very slightly tighter on one end. I haven't worked out whether this occurs at the entrance or exit end but its a very small amount and not something that should worry most people. With this technique I feel I could drill holes in bearing balls all day long, completely concentrically and without any surprises or broken drills, and probably on an even smaller scale too. I hope others find this useful. Gerry |
| Thread: PG Optical dividing head |
| 14/07/2021 10:03:14 |
Thanks William. Its nice to know that one can give to the forum occasionally as well as take I also dont know how they can make these things so small ! Gerry |
| 05/07/2021 10:45:14 |
William, just a quick though occurs to me.... some of the graticles in my OMT microscope optics were almost so fine they were invisible to the naked eye. It might be worth going over the glass with a microscope to see if there is anything there, or at least the remnants of something which may show you where to put new marks if that's what you decide to do. Gerry |
| Thread: drilling a bearing ball |
| 01/07/2021 00:17:46 |
A metallurgist colleague advised me that for 'perfect' annealing of 100Cr6 ball steel, the cooling-down process should theoretically take 25 mins. Since this long time period would only result in more scale formation (which I would then have to remove and mess up the diameter in the process) I decided to experiment with the carbide drill today. First I used a 4mm carbide spotting drill. Strangely this really didn't seem to make an impression. Well in truth it made a pin-prick of a mark but it didn't seem to want to go any further. I checked the point of the drill under the microscope and didn't see any obvious damage. Expecting to get another poor result I then popped my new 1.5mm carbide drill in a collet and tried again. Immediately I could tell it was cutting. I ran the mill at 3000RPM and just maintained a light finger force on the quill lever. After about 10 minutes it was through. Perhaps I could have done it quicker by applying more force but these drills are easily broken so I was happy to take my time. The hole quality was superb too. I didn't need this but its always nice to have. So that was the trial. As was suggested I held the ball in a collet. My centre was found by eye but I have to admit now that it wasn't perfect. What I plan to do for the next time around is drill a 'vee' socket in a bit of aluminium and then glue a ball into this. If I keep the X and Y controls locked that should keep me on the perfect centre for drilling the ball. Thanks to all ideas contributors. Gerry. |
| 27/06/2021 17:54:46 |
Jason, I was back on this one today and decided to try both methods discussed. So I've ordered carbide drills and in the meantime thought I would try annealing some 5mm balls. This didn't go too well. I heated two balls to bright redness and held them in that condition for about 1 or 2 minutes. Then over a similar time period let them cool down. When I tried to drill the first one with my favourite HSS spotting drill it made no impression at all. A quick check under the microscope showed the drill was now blunt and there was hardly a mark on the ball so it simply hadn't softened. Clearly I need to tweek the annealing process. What should I be doing ? The other issue is that the balls become quite scaled over from being heated, much more than I expected. Did you have a easy way to remove this scale without too much material loss ? In the carbide drill website it said something to the effect that chucks should have a runout of less than 5um ! I think this is a subtle way of saying expect to break some drills Gerry |
| Thread: Re-making a centre hole in a small crackshaft |
| 27/06/2021 14:02:36 |
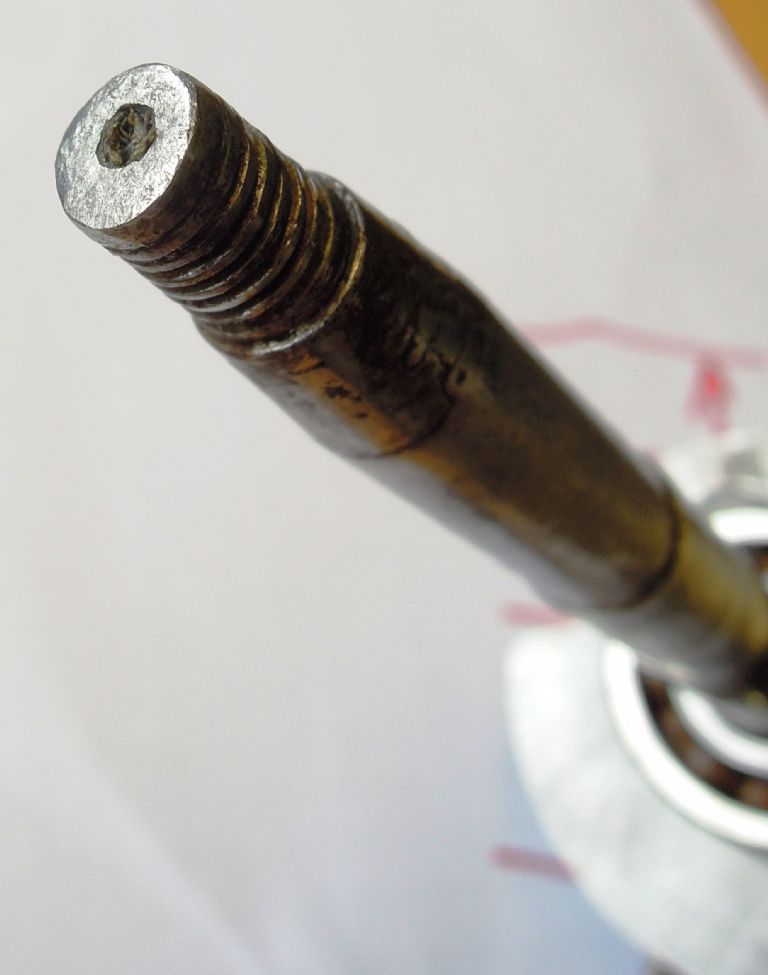
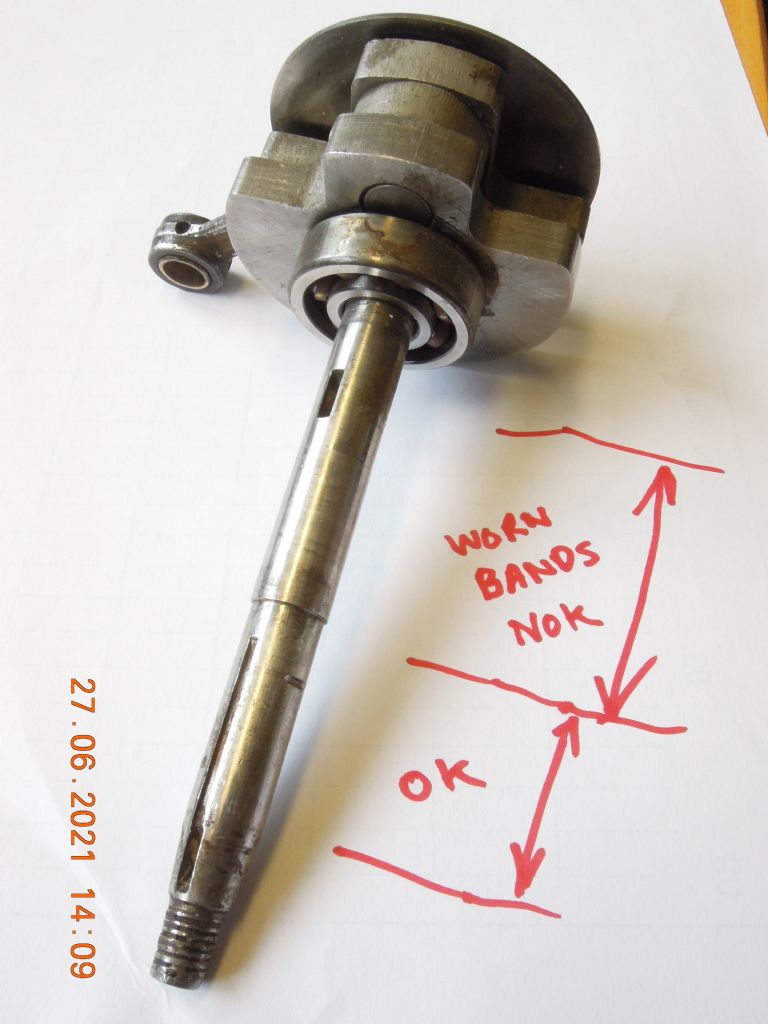
Good afternoon chaps, it's pick your brains time ! Many years ago some horny-handed yoof, almost certainly me, butchered up the end of my Cyclemaster's crankshaft by repeatedly removing the magneto flywheel with the shock of a hammer. Its now well and truly rounded and eccentric as you see in the pic below. There is some damage to the thread and to the taper behind it that I would like to carefully address. Here's the problem.... Apart from the centre hole in the far end of the shaft, the only 'as new' surface is the one shown in the picture. I don't want to break down the flyweight/big-end assembly so how could/should I hold the 'ok' section in order to drill a new centre hole concentrically to it ? (For info the shaft is around 13mm diameter and 6 inches long.) ...ha ha this always happens, as soon as I start to write I think of things. I have a Stevensons block which is through-drilled so I can hold the 'ok' portion in a collet. All I have to do now is to hold the block in the mill and centre it up with a DTI. Any other ideas ? Gerry |
| Thread: Appropriate grease for milling Spindle |
| 21/06/2021 15:18:45 |
Oh and yes I think originally the term 'anderon' came from the company that first developed the vibration measuring equipment. But it's now become an industry-wide term used even across the far east. G. |
| 21/06/2021 15:16:04 |
Hi Nigel,... its been 20 years since I was in the inspection field but 'anderons' are indeed structural vibrational acceleration values. These are then modified mathematically for the speed and the size (i think) of the bearing under test. The overall signal signal was then split into 3 frequency bands, with each band being applicable to the signatures typically produced by different components of the bearing. An inner ring defect would give high vibration in the low band. Grease on the other hand can cause vibration due to the crystaline additives and other hard particle contaminants that gets into grease during manufacture. The 'crackling' sounds that emanate from grease would tend to appear in the high band. These anderon frequency bands enabled one to track down production issues more easily. Gerry |
| 21/06/2021 12:15:21 |
The fundamental problem is that lubricants and bearings are two of the most highly marketed engineering products you can get, which results in reams of apparently confusing / complex / contradictory information which proliferates undue quantities of folklore and old wives tales. The fact is the minutiae are generally only applicable in the cases where you want to push products to the limits of their performance, for example trying to get that last 5% of life or 2 degs lower running temperature at max speed and high loads in some predetermined product test cycle, or 1 anderon less in noise. There is really nothing I come into contact with in my 'hobbying' where I get anywhere near having to meet industrial performance standards and I suspect the same is true for many others on here. So, as a life long bearings engineer, I can recomment not getting too hung up on things like what grease to use in you spindle bearings or other popular devices. If the manufacturer says use 'LM' and you only have a tin of Dow Corning Molykote LT2 containing 'moly' use this instead. It may not be the "technical best" but it will do your spindle no measurable - on a hobby workshop basis - harm, and will probably still outlast you ! Of course there are some exceptions to this general guidance, but not too many. Gerry |
| Thread: Cyclemaster engine rubber bushings |
| 10/06/2021 |
Thanks Robin, I will investigate this. |
| 07/06/2021 13:34:43 |
Good suggestions, as per usual on this forum. Gerry |
| Thread: drilling a bearing ball |
| 07/06/2021 12:42:11 |
Thanks all for your comments. There are some good pointers there and things i hadnt considered. I might try annealing idea but then I will probably want to re-harden. Whether that causes a crack or two remains to be seen. Its a little more likely after its had a hole put in it because the residual stresses are less well balanced. But lets just see, it might well be fine. If it doesn't go well then I'll go the carbide route. I need the hardness because I'm measuring to a couple of microns and if the steel is soft one can easily indent or flat the ball by this amount by a little bit of careless handling much over time. As regards concentricity, as Tony suggests this shouldn't be a major concern in this application as I'm just measuring diameters of holes. I simply add the probe tip diameter to the measured diameter. But in any case just to be sure I will match the probe shaft to that of the hole in the ball after I've made it in order to minimise any eccentricity. I'll come back to you and let you know how its gone after my attempts. Gerry |
| Thread: Cyclemaster engine rubber bushings |
| 06/06/2021 13:36:54 |
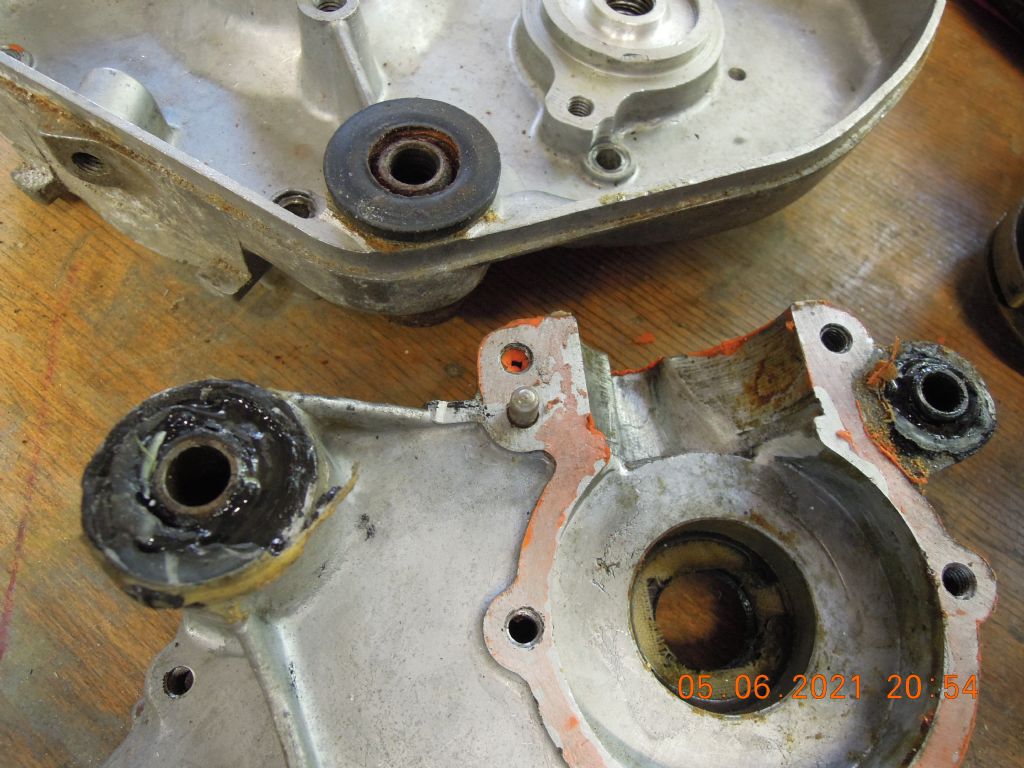
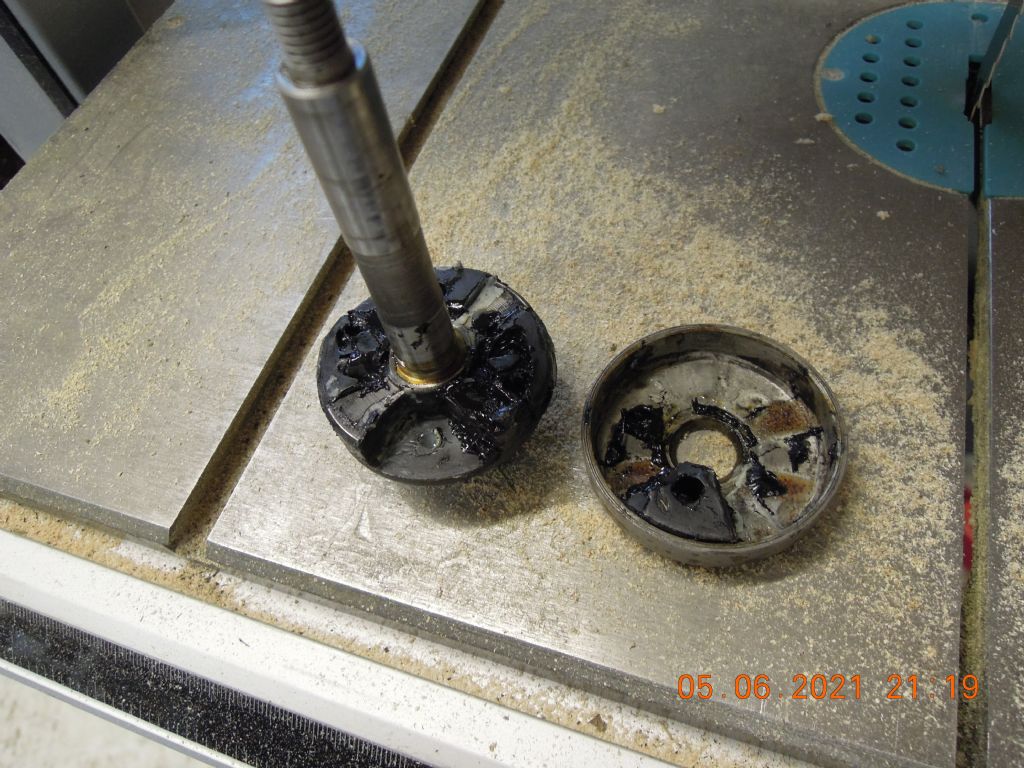
As if I haven't all ready go enough to do, I've just made a start of restoring a 1950s Cyclemaster Motor Wheel. I got it back in the 70's clearing out a neighbours shed. I played with it for a while and it worked pretty well. It must be all this current talk about 'E-bikes' but something is compelling me to get it going again and perhaps use it for climbing mountain tracks in the north. (Might need a change of gearing for that though!) Just a general survey of this mean machine yesterday showed that all the rubber bushed engine mounts and a 'cush-drive' on the output shaft have turned into a black goo. I imagine the original spares will be hard to come by so what do vehicle restorers usually do when faced with perished rubber parts ? Are there sources that can cut new parts from fresh material ? Gerry |
Want the latest issue of Model Engineer or Model Engineers' Workshop? Use our magazine locator links to find your nearest stockist!
Sign up to our newsletter and get a free digital issue.
You can unsubscribe at anytime. View our privacy policy at www.mortons.co.uk/privacy
- *Oct 2023: FORUM MIGRATION TIMELINE*
05/10/2023 07:57:11 - Making ER11 collet chuck
05/10/2023 07:56:24 - What did you do today? 2023
05/10/2023 07:25:01 - Orrery
05/10/2023 06:00:41 - Wera hand-tools
05/10/2023 05:47:07 - New member
05/10/2023 04:40:11 - Problems with external pot on at1 vfd
05/10/2023 00:06:32 - Drain plug
04/10/2023 23:36:17 - digi phase converter for 10 machines.....
04/10/2023 23:13:48 - Winter Storage Of Locomotives
04/10/2023 21:02:11 - More Latest Posts...
- View All Topics
- Reeves** - Rebuilt Royal Scot by Martin Evans
by John Broughton
£300.00 - BRITANNIA 5" GAUGE James Perrier
by Jon Seabright 1
£2,500.00 - Drill Grinder - for restoration
by Nigel Graham 2
£0.00 - WARCO WM18 MILLING MACHINE
by Alex Chudley
£1,200.00 - MYFORD SUPER 7 LATHE
by Alex Chudley
£2,000.00 - More "For Sale" Ads...
- D1-3 backplate
by Michael Horley
Price Not Specified - fixed steady for a Colchester bantam mark1 800
by George Jervis
Price Not Specified - lbsc pansy
by JACK SIDEBOTHAM
Price Not Specified - Pratt Burnerd multifit chuck key.
by Tim Riome
Price Not Specified - BANDSAW BLADE WELDER
by HUGH
Price Not Specified - More "Wanted" Ads...
Do you want to contact the Model Engineer and Model Engineers' Workshop team?
You can contact us by phone, mail or email about the magazines including becoming a contributor, submitting reader's letters or making queries about articles. You can also get in touch about this website, advertising or other general issues.
Click THIS LINK for full contact details.
For subscription issues please see THIS LINK.
Model Engineer Magazine
- Percival Marshall
- M.E. History
- LittleLEC
- M.E. Clock
ME Workshop
- An Adcock
- & Shipley
- Horizontal
- Mill
Subscribe Now
- Great savings
- Delivered to your door
Pre-order your copy!
- Delivered to your doorstep!
- Free UK delivery!



 Register
 Log-in


