Member postings for JasonB
Here is a list of all the postings JasonB has made in our forums. Click on a thread name to jump to the thread.
| Thread: Alyn RLE Last and First |
| 12/08/2023 18:32:57 |
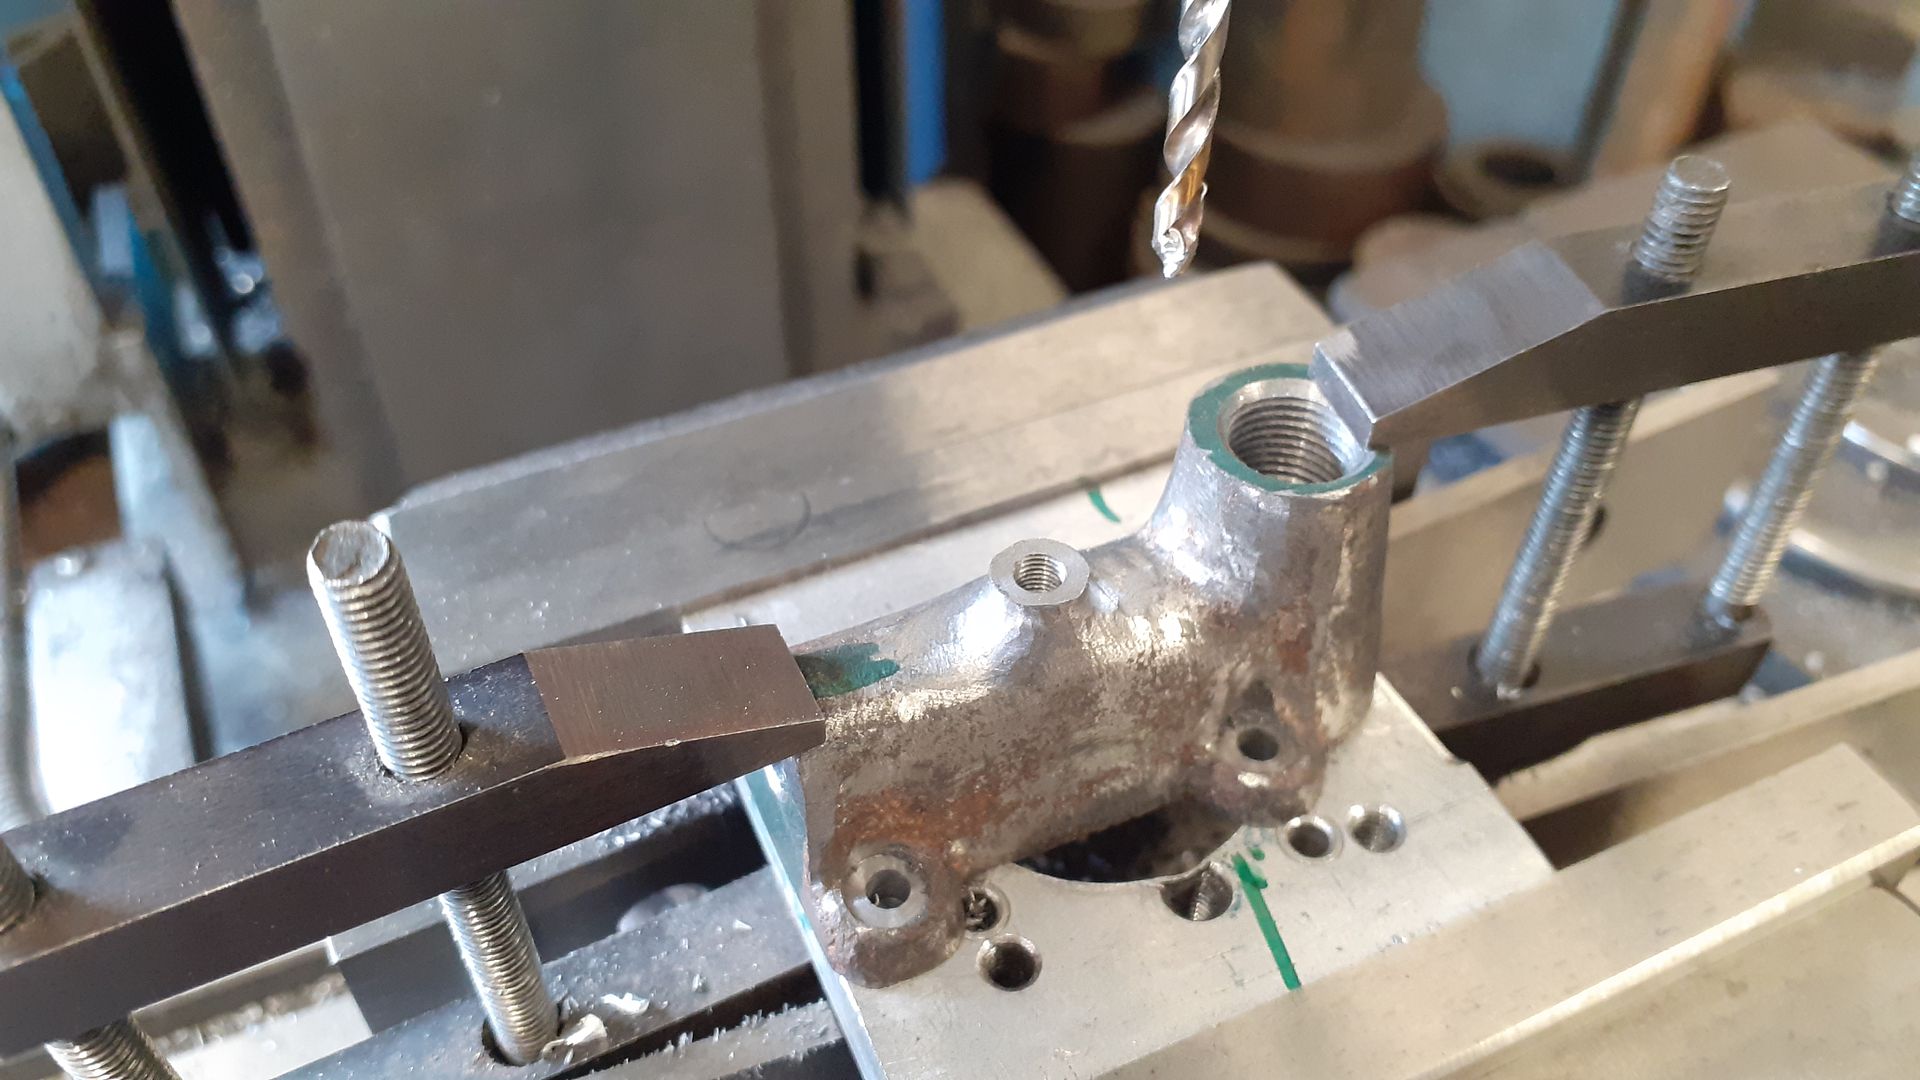
While up at the head end of the engine I thought I would get the last couple of small castings out the way. Starting with the silencer (muffler) halves these were held in soft jaws to turn the overall diameter and the cast surface was cleaned up a bit at the same time. |
| Thread: Which Thread? |
| 12/08/2023 06:48:59 |
The ARC ones are also 18tpi. Why not measure the overall length and then unscrew the arbor 1 full turn and take another measurement, difference between the two will be the pitch of the thread. |
| Thread: Gear head vs variable speed lathe |
| 11/08/2023 20:23:36 |
The inverter drive of the WM250's AC motor should not have the issues that some people may have had with DC brushed or brushless motors and their control boards found on your typical "Mini-lathe" |
| 11/08/2023 15:15:56 |
What sort of things are you expecting to machine? The loss of grunt at low speeds really only comes into play when you have to run a bit slower to keep the cutting speed reasonable on larger diameter work. The average model engine be that loco (wheels) traction engine (gears & Flywheel) and stationary engine (Flywheel) don't have that many large diameter parts when compared to the multitude of smaller items so it is possible to live with the loss on the odd occasion when it may actually be noticed. Carbide can go a long way to reducing the need to run slowly as the spindle can be run at about 3 times the speed that HSS can I had a good quality geared head Emco before I got my Warco 280 and would go with teh Warco's variable speed which has been fine in over 10 years with a lot of use. |
| Thread: Customising a Dreadnought File |
| 11/08/2023 09:03:15 |
Better still use the side of the cutter not the end then if there were any burr it would just be at one end of the long cut. |
| 10/08/2023 13:06:26 |
I'd be tempted to try a carbide cutter to mill the edges and not bother with initial ginding. Finish the edges with a diamond stone. |
| Thread: The Super Adept Is Back On The Menu |
| 10/08/2023 06:52:46 |
As your pulley is between two bearings I'd go with the round urathane or green round belts that can easily be joined at home rather than having to cut less grippy O rings |
| Thread: Alibre There Eventually - Sort of |
| 10/08/2023 06:49:43 |
That is why I show sketching and then extruding equally each side of the plane, that way you don't have to place a new plane or join two parts together The later part of yesterdays first video "half Crosshead" shows how to stick two halves together with basic constraints. I have also shown that if you mirror the features of one of your "half parts" you will get a solid that you can cut the cavity from that just so happens to have a plane down the middle which is ideally placed to sketch the cavity shape onto.. Suggest you watch the last couple of days videos again, slow them down and watch what is being done then try it the way shown. Edited By JasonB on 10/08/2023 07:14:54 |
| Thread: Cutting a 1 1/8 fine pitch thread into PTFE! |
| 09/08/2023 19:27:10 |
Existing gears would give 24tpi which is an imperial pitch and not too far off something like 1 1/8" BSB @ 26tpi or M28 x 1 Put the 75T on the leadscrew and use the others as idlers if there is a hole through the adaptor that may dictate pitch if the wall is thin Edited By JasonB on 09/08/2023 19:33:32 |
| Thread: RDG Dies |
| 09/08/2023 13:41:19 |
5/16 x 32 in brass should not be a problem under power, if it is slipping then die is blunt of chuck not done up/worn Hard brass should not really need backing off as it produces small chips anyway |
| Thread: Ball turners. |
| 09/08/2023 12:28:32 |
The problem I find with a lot of ball turners, even Bernard's one is there is a lot of the tool rotating beyond the radius needed for the ball so you end up having to form the ball a long way from the chuck/collet. The ones that use a boring head type arrangement or even Andrews copy attachment can generally get in a lot closer which saves chatter or having to have a thick stick on the lollypop shape being formed. |
| Thread: RDG Dies |
| 09/08/2023 12:22:06 |
The problem with Tracy is they don't sell specific makes so you might get something nice from Tap & Die Co or you could just get Apex which is what RDG mostly sell |
| Thread: Ball turners. |
| 09/08/2023 10:46:37 |
And there is a message waiting for you from me. |
| Thread: RDG Dies |
| 09/08/2023 09:48:47 |
I've had a couple of poor ME dies from RDG in the past, don't buy from them now. Also checK if he is putting an imperial OD die into a metric holder Why not bring him into the modern world with Metric Fine. Suggest he dumps the oversize 2BA fixings and drops down to at least 3BA with 4BA heads or M4 with small hex again as they are oversize. Watch which drawings and errata sheet he uses some have the wrong length conrod ctrs and the bearing blocks above engine ctr height of 5/8". Piston rod assembly also wrong on the errata sheets
Edited By JasonB on 09/08/2023 09:52:18 |
| Thread: Alibre There Eventually - Sort of |
| 09/08/2023 09:42:48 |
I showed how to do the internal cavity in my second video yesterday by cutting it out of the single solid block, here it is again |
| 09/08/2023 08:28:37 |
Video of how you could do if it initially modelling one half of the cross head firstly by simply mirroring the features down the left side which keeps it as a single "part" and secondly how you could have gone about the assembly using the flip tool to get the two halves face to face and then using constraints to line the two halves up and lastly using the "show ref geometry" to do the same thing. Suggest you try these with the part files you already have. You will also see that creating the rebate that forms the half guide bar groove is just a simple random rectangle that is then dimensioned for depth and width before being cut. |
| 09/08/2023 07:13:35 |
Why did you still do it as a group of assembled parts I wonder if it is worth answering soemtimes. If you want to do it in two halves than sketch and extrude the half and then simply mirror that extrusion and it will become one part. There is a drop down arrow below the rectangle/polygon tool that allows you to construct one from it's centre point out which will give it symmetry and the two axis of the 2D sketch Regarding inside out an backwards, Again just a sin real life mirror reverses things so would have been a way to do it in the assembly. Flip tool that I have mentioned several time sin the last couple of weeks will solve the back to face and change to face to face 180deg out of position can again as I have said be done by right clicking the part and selecting "show reference geometry" then constraining one of the assemblies axis to one of the parts axis failing all that if the two gudgeon pin holes were constrained concentrically you could drag one half round with a mouse and then set its final exact position with simple coincedent constraint. Edited By JasonB on 09/08/2023 07:14:20 |
| Thread: Wooden shed insulation |
| 09/08/2023 06:59:46 |
Is the shiplap already fixed to the frame? You don't mention a breatheable membrane for the walls so I assume it is. Best option will be to take the cladding off and then fit a breathable membrane then refit the shiplap. That way water droplets then ge behind the shiplap won't get any further but moisture vapour can still get out. Polly will do though not as insulating as PU, vapour barrier over that (polythene sheet) then your boarding. This barrier will stop air bourn moisture from breathing or burning propane from entering the wall construction and condensing within the structure. As said fibreglass can act like a sponge so poly or PU would be better, either way don't fully fill your rafters/studs, leave an air space between insulation and outer surface. This is a job I went to put right after the builders got their vapour barriers wrong and other failures, nice £100K job for me. This is fibreglass pulled out through a downlighter hole.
Edited By JasonB on 09/08/2023 07:02:18 |
| Thread: Improve 3-jaw chuck repeatability |
| 08/08/2023 11:57:37 |
Posted by Sonic Escape on 08/08/2023 11:15:46: How good are these numbers?
Compared to what I get yours are at least 10 times worse. On a piece of ground HSS I'm reading 0.0005" which is approx 0.013mm One other thing to consider is that by putting a collet block into the chuck you are moving any workpiece further from the bearings this may result in chatter when taking a large cut or in mind of your other thread when parting off. Your chuck jaws also look quite worn so there is a good chance of them being "bell mouthed" where the gripping surface becomes worn towards the end of the jaws reducing their grip |
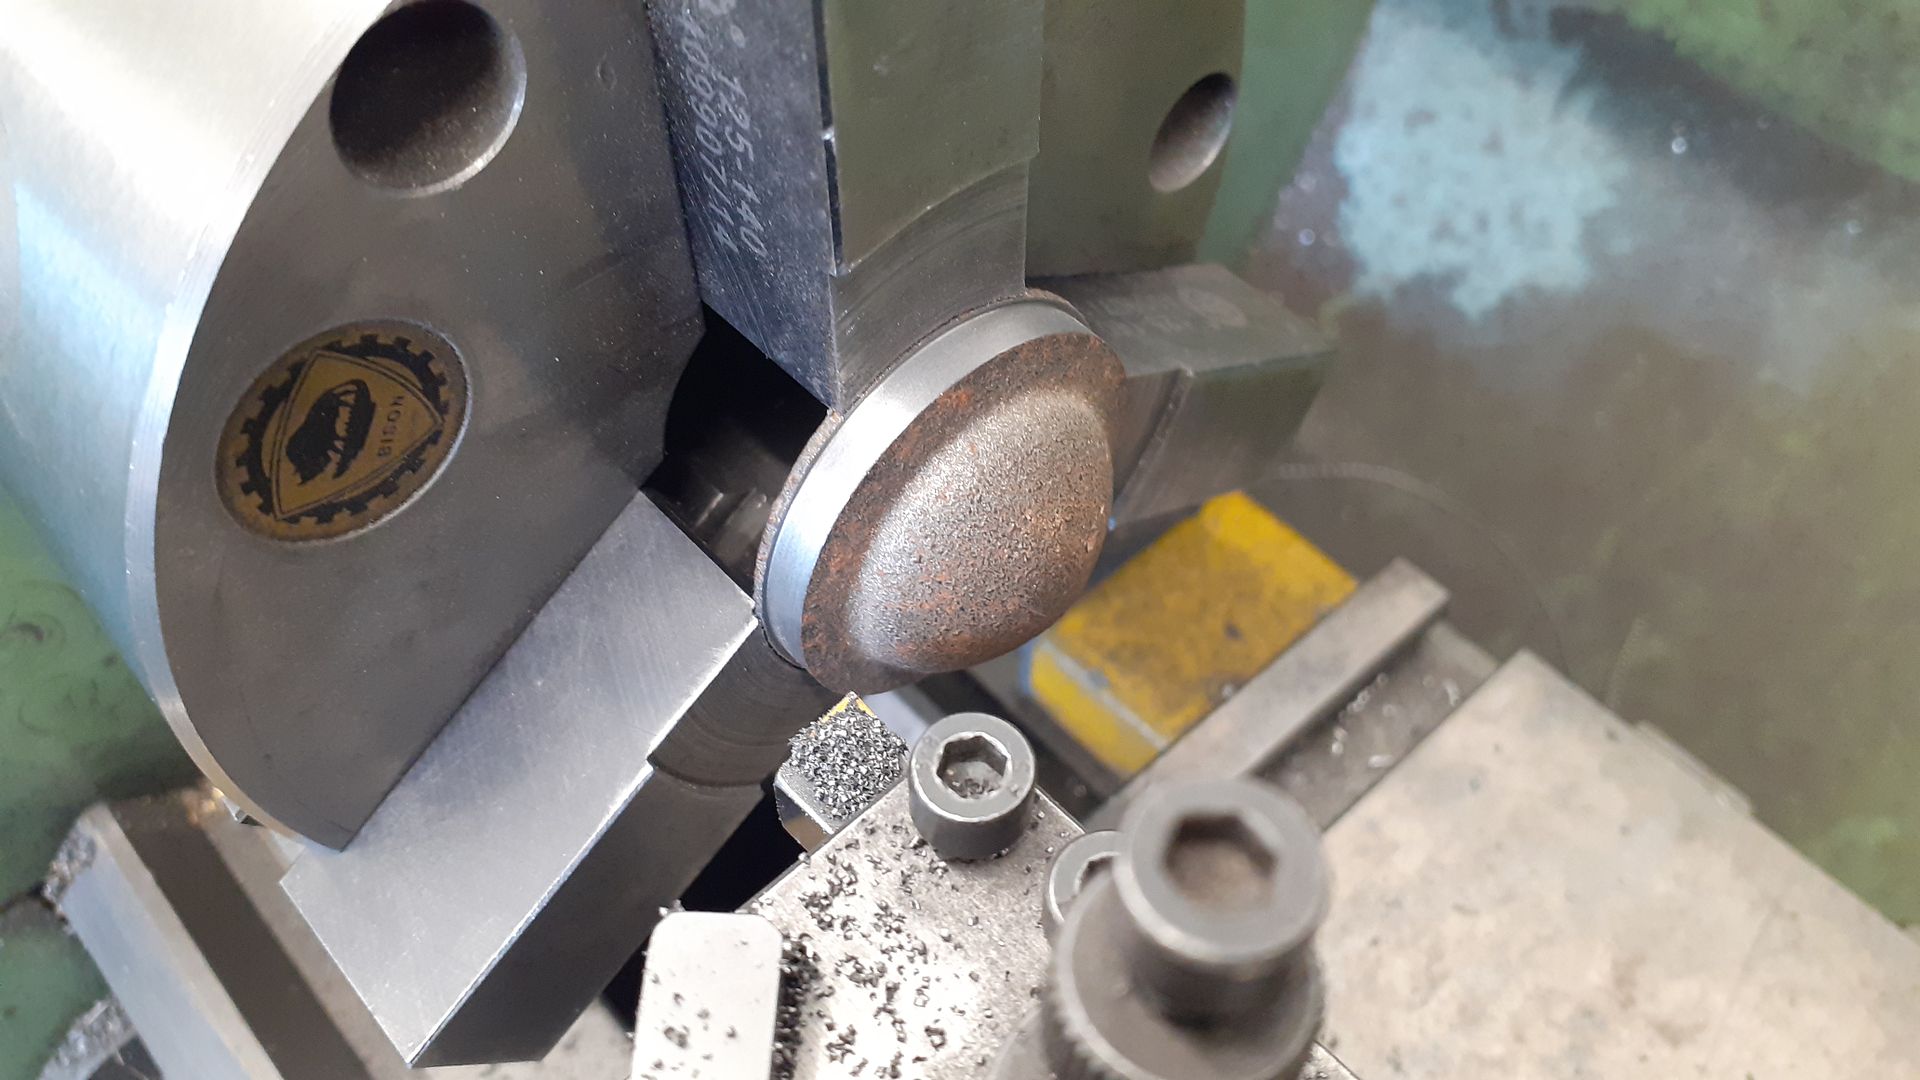
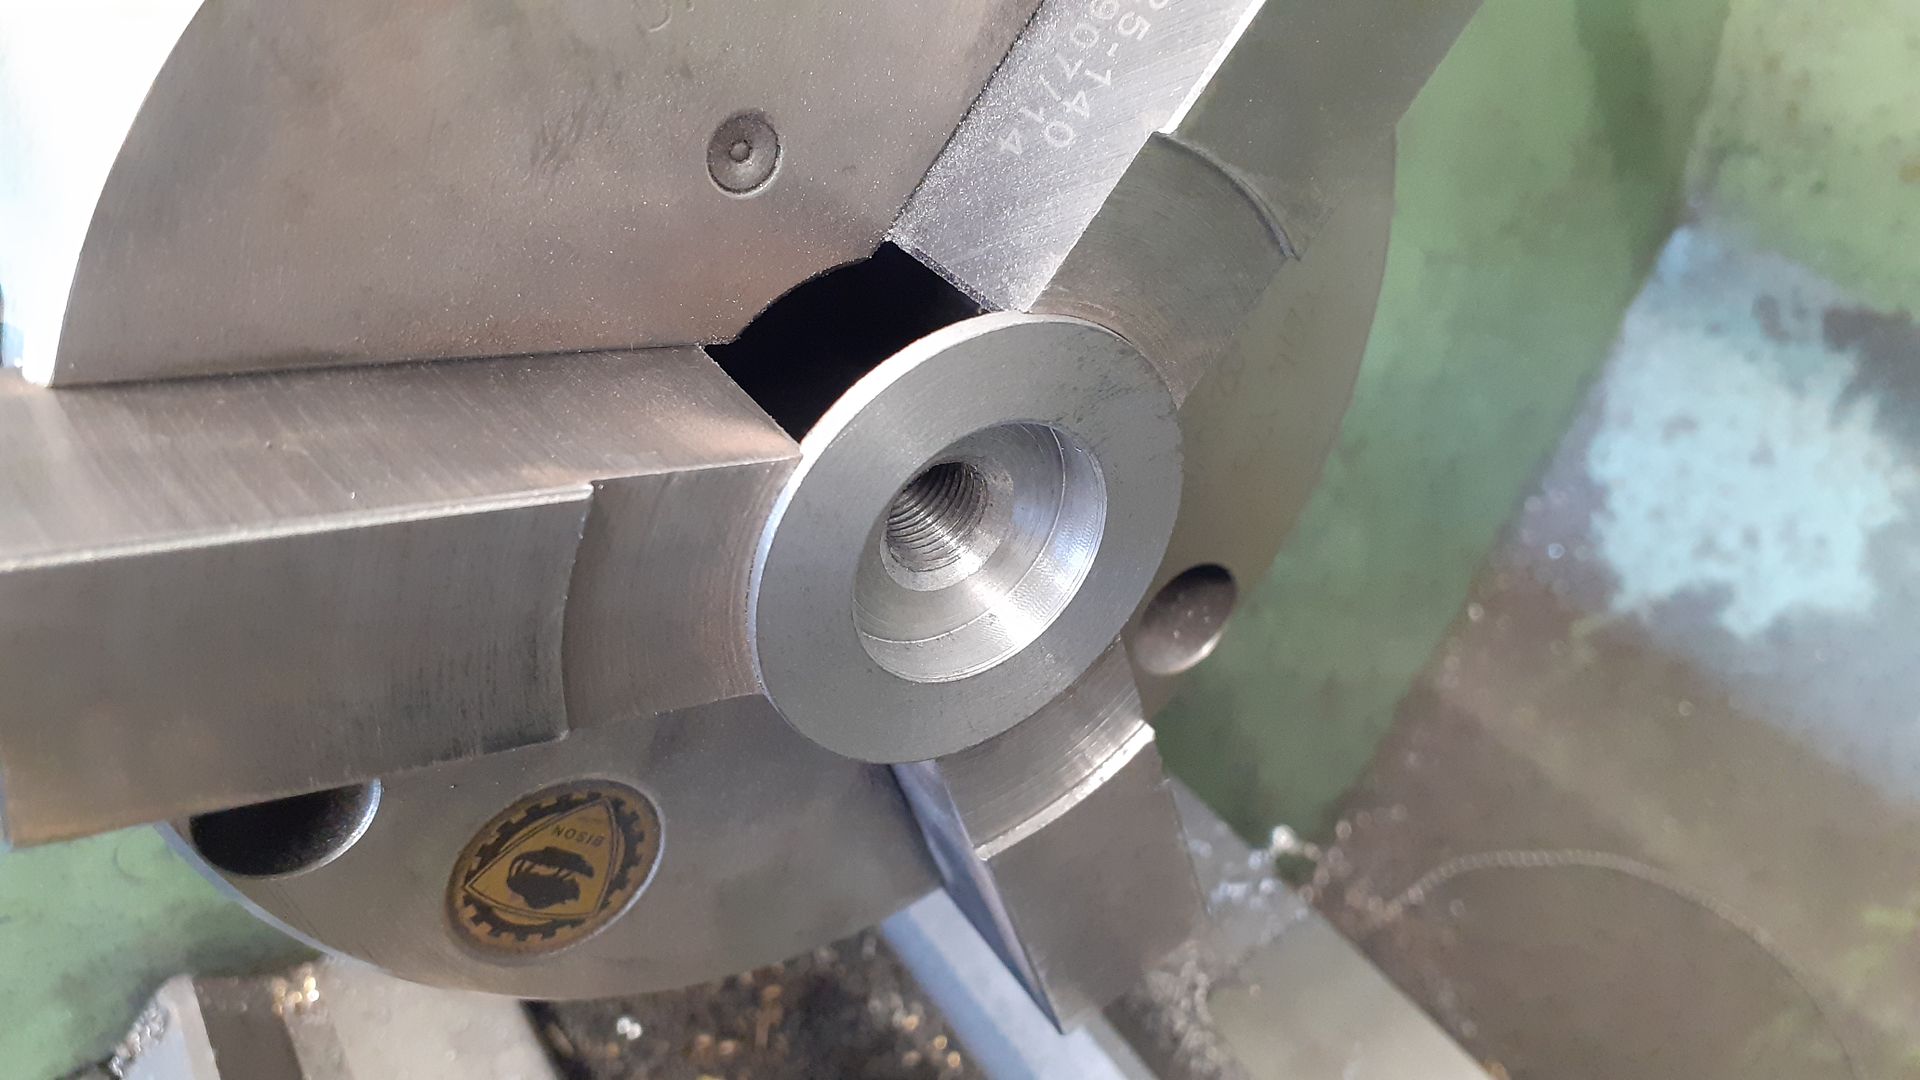
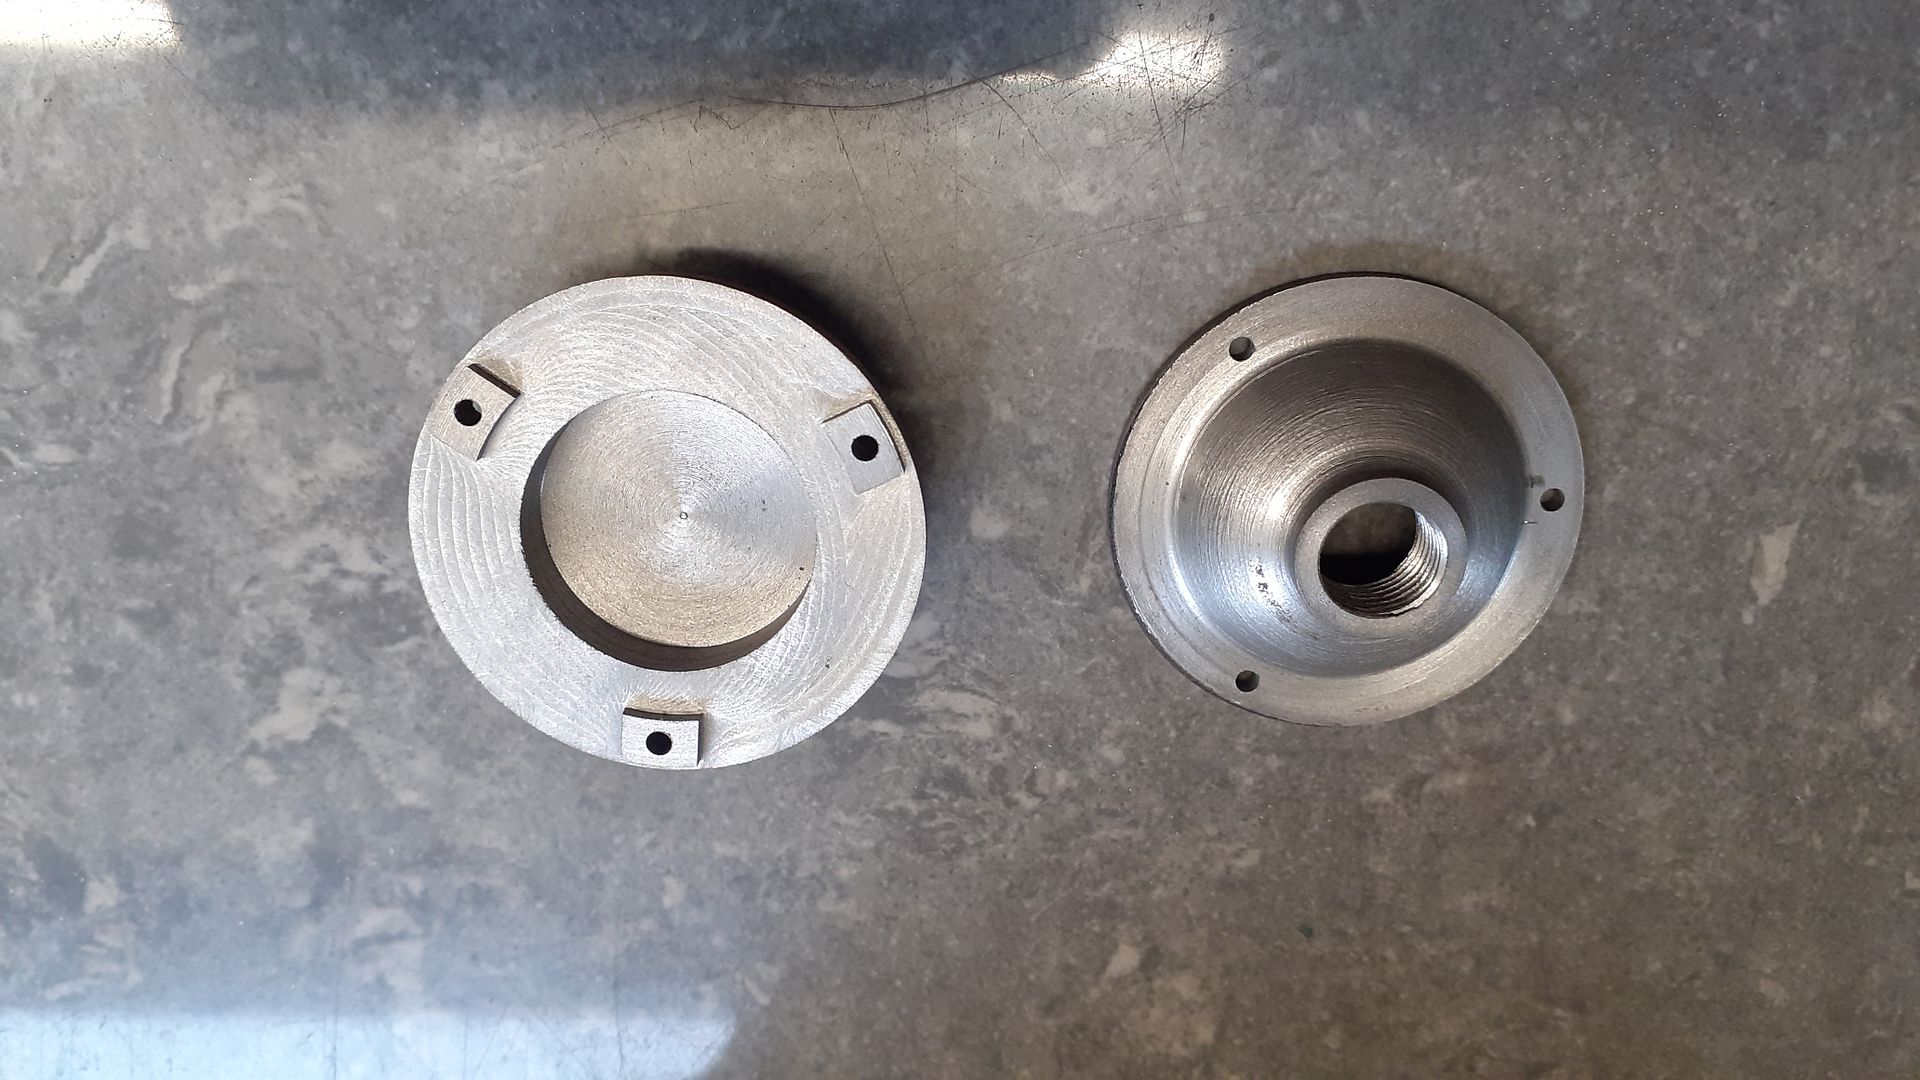
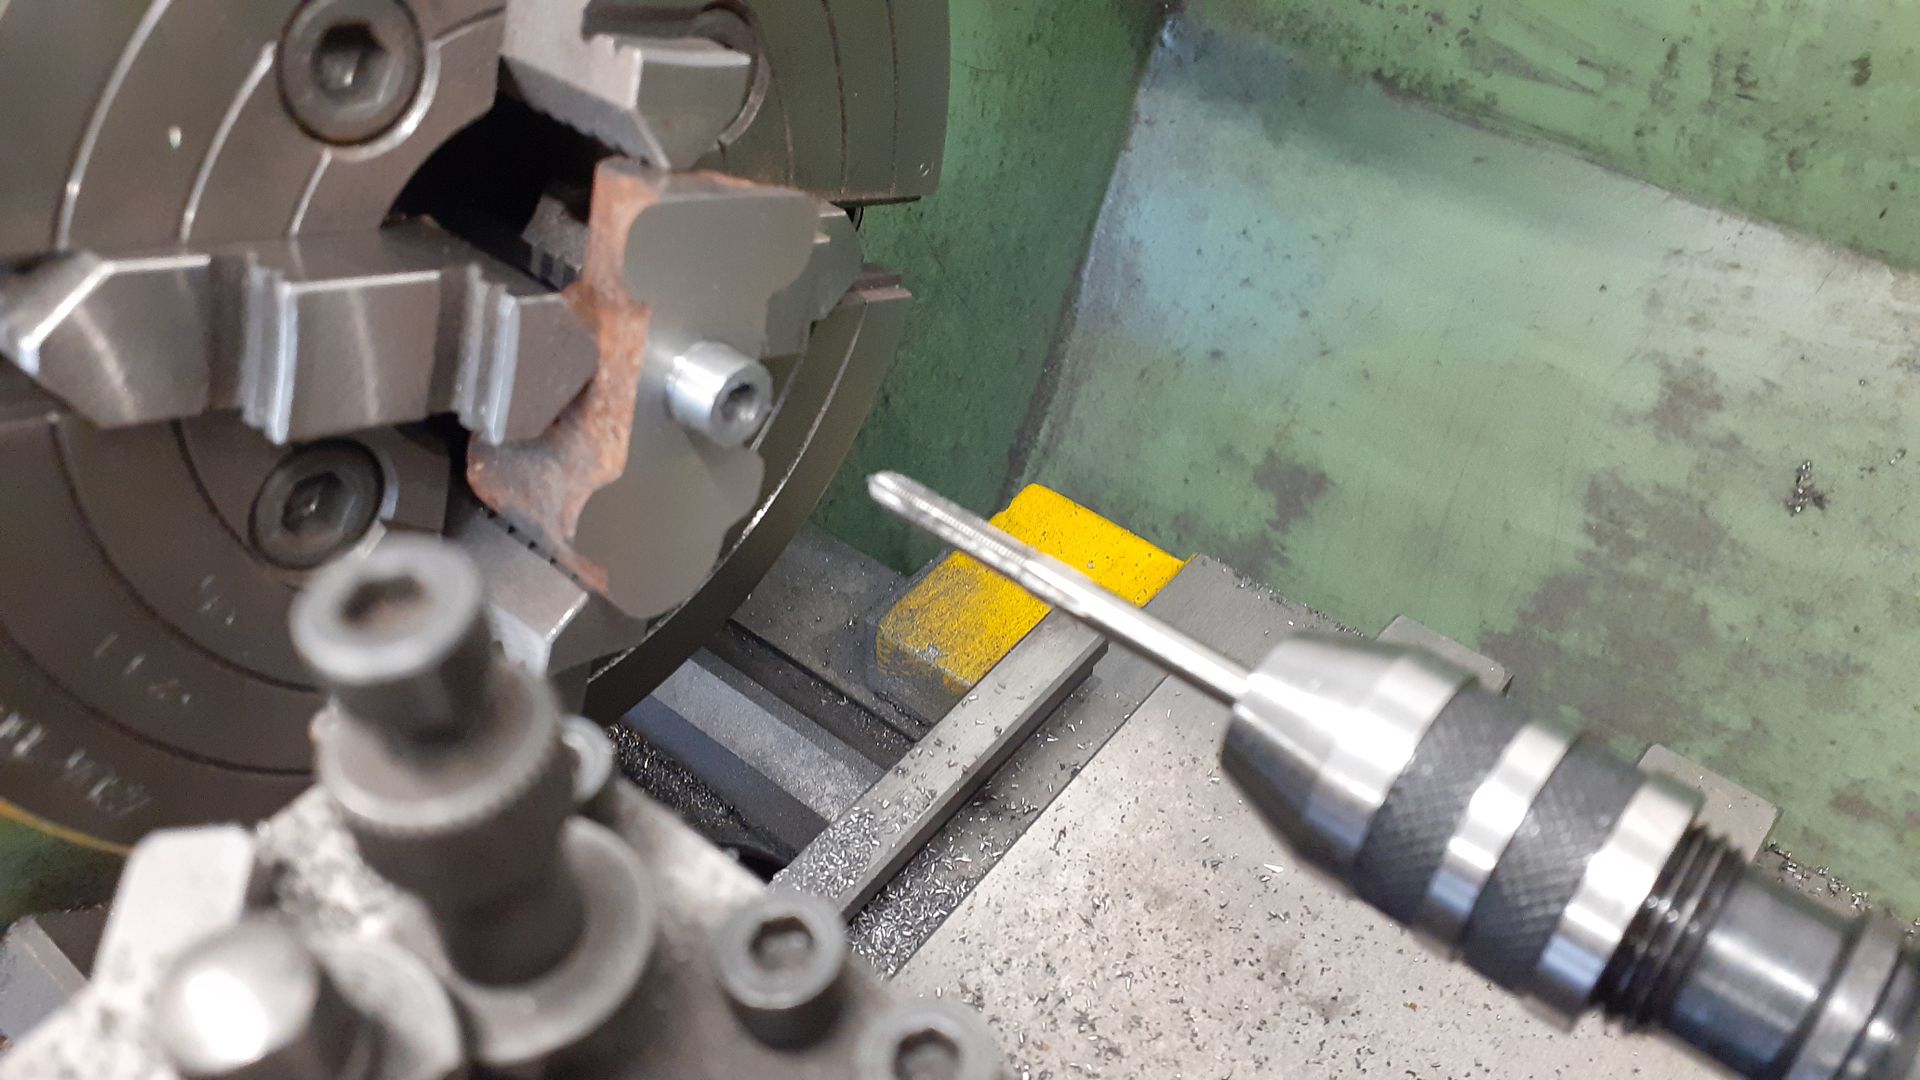
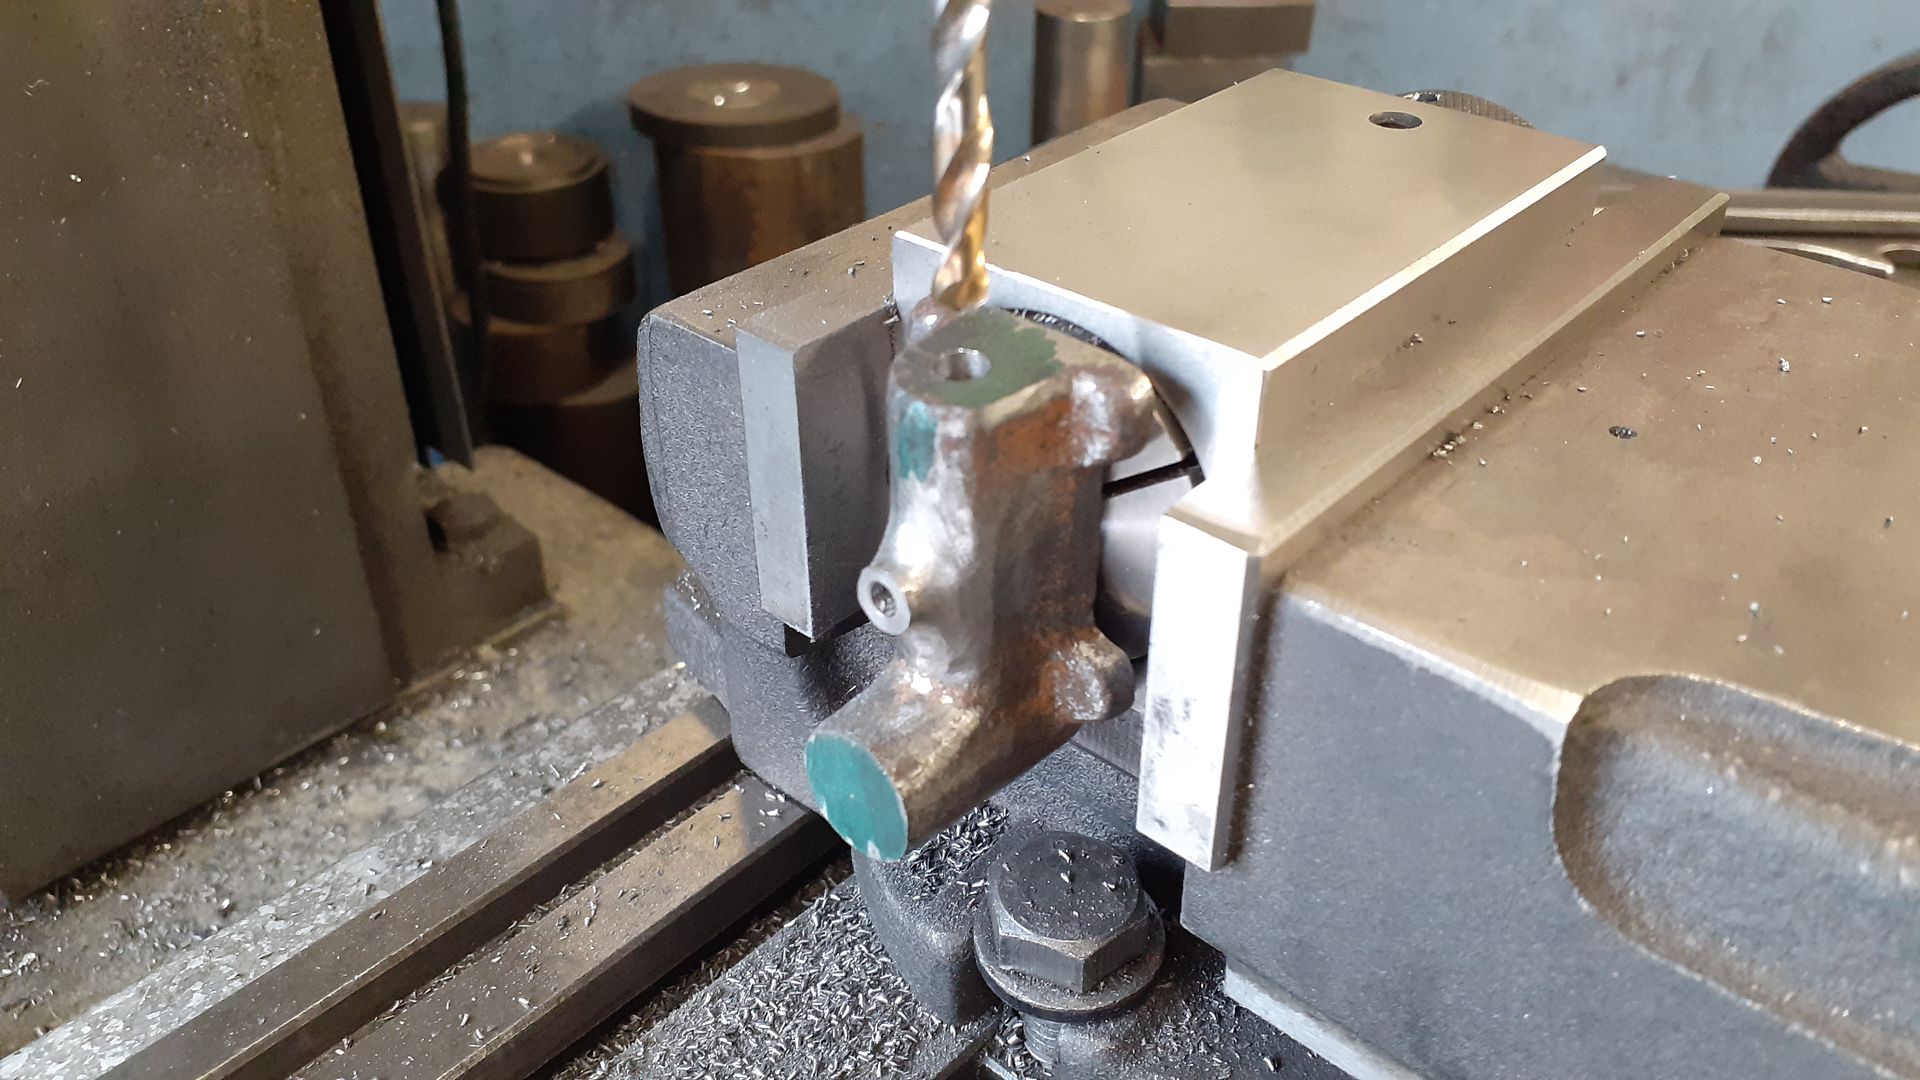
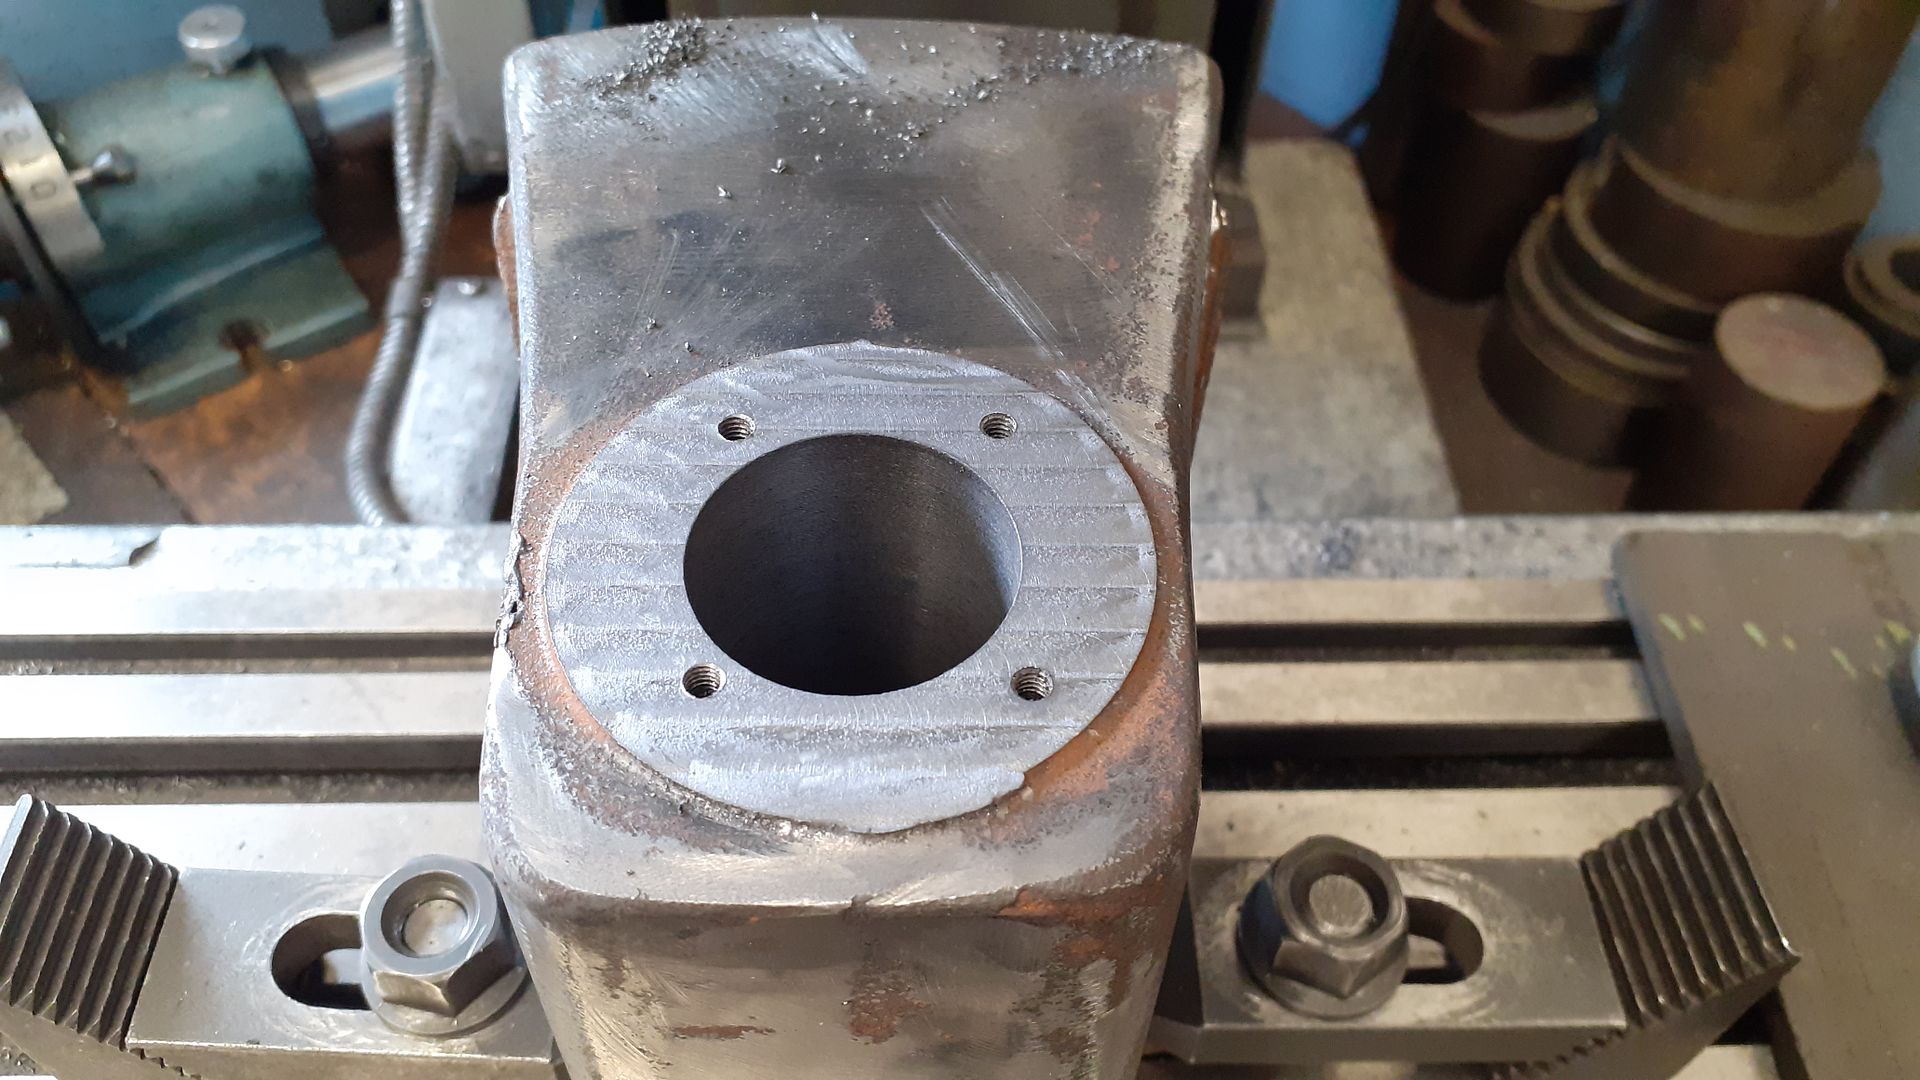
| Thread: Alyn RLE Last and First |
| 07/08/2023 19:21:14 |
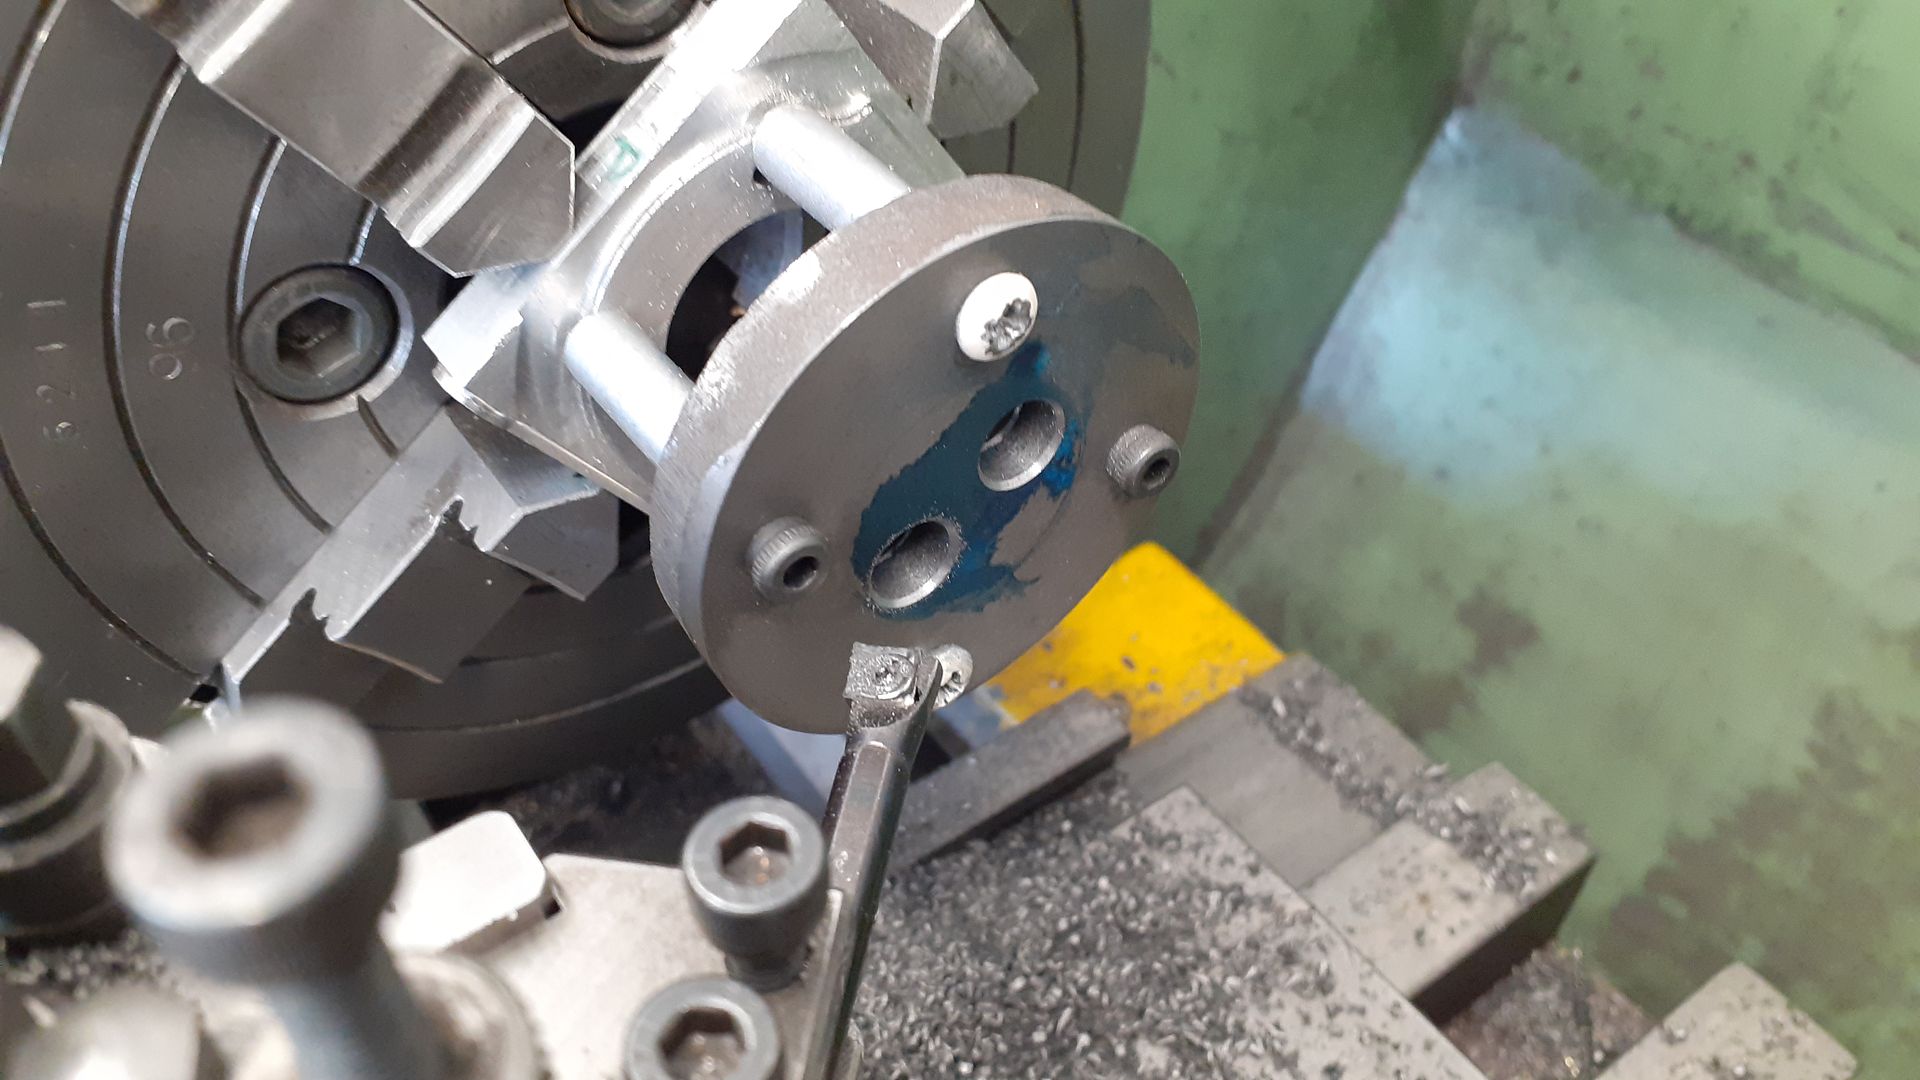
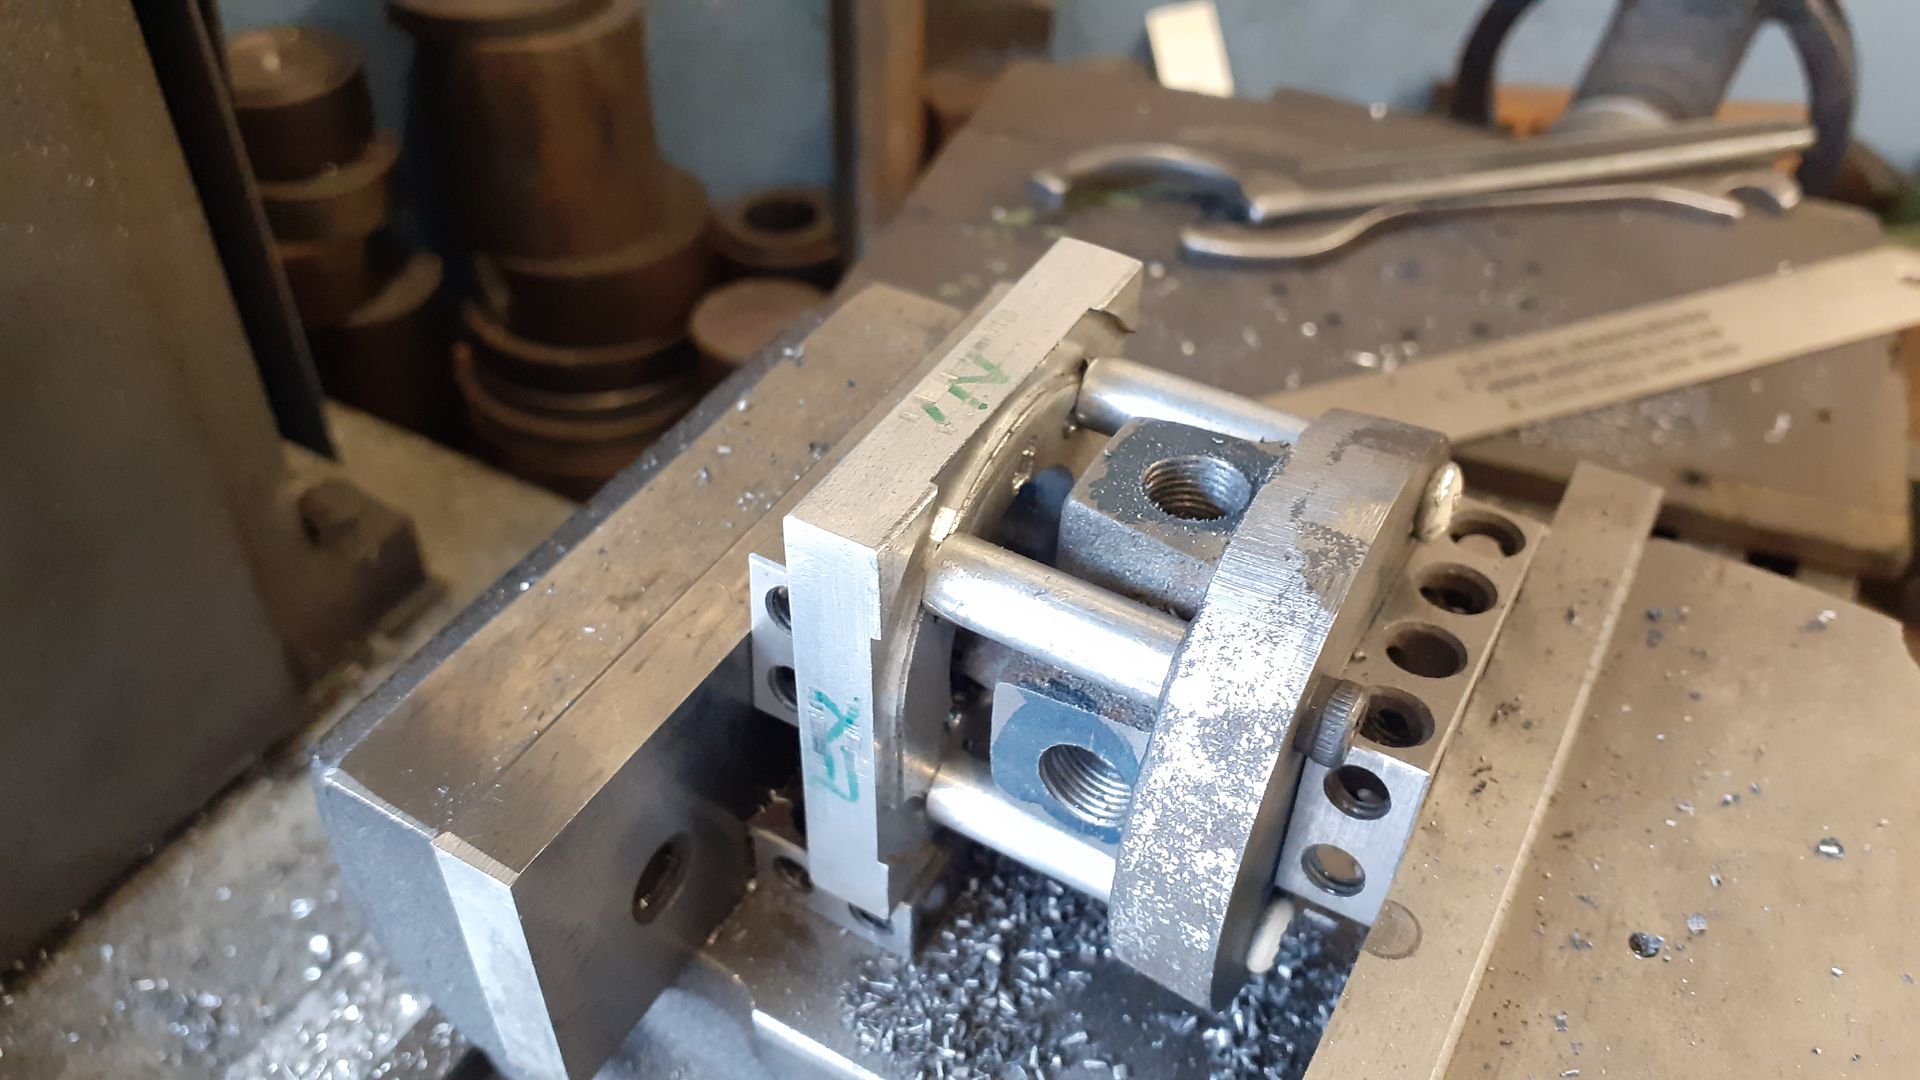
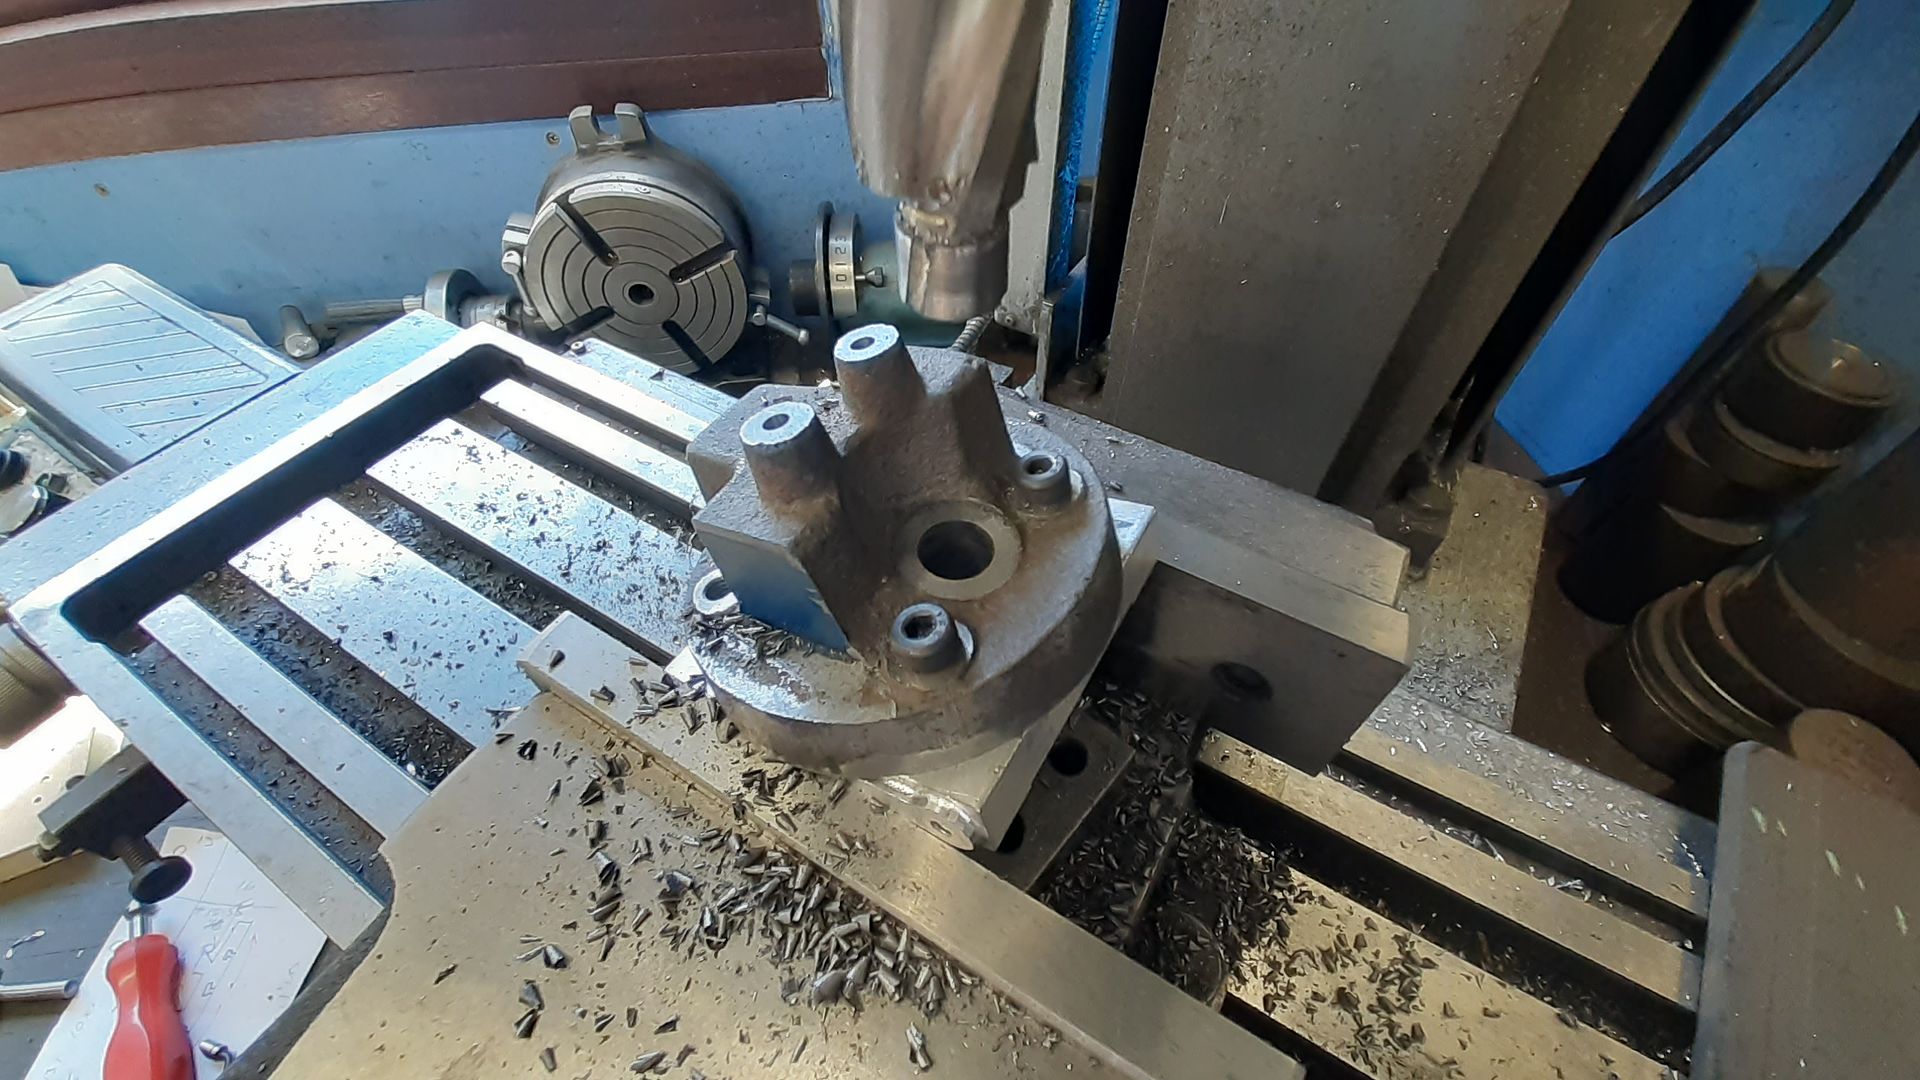
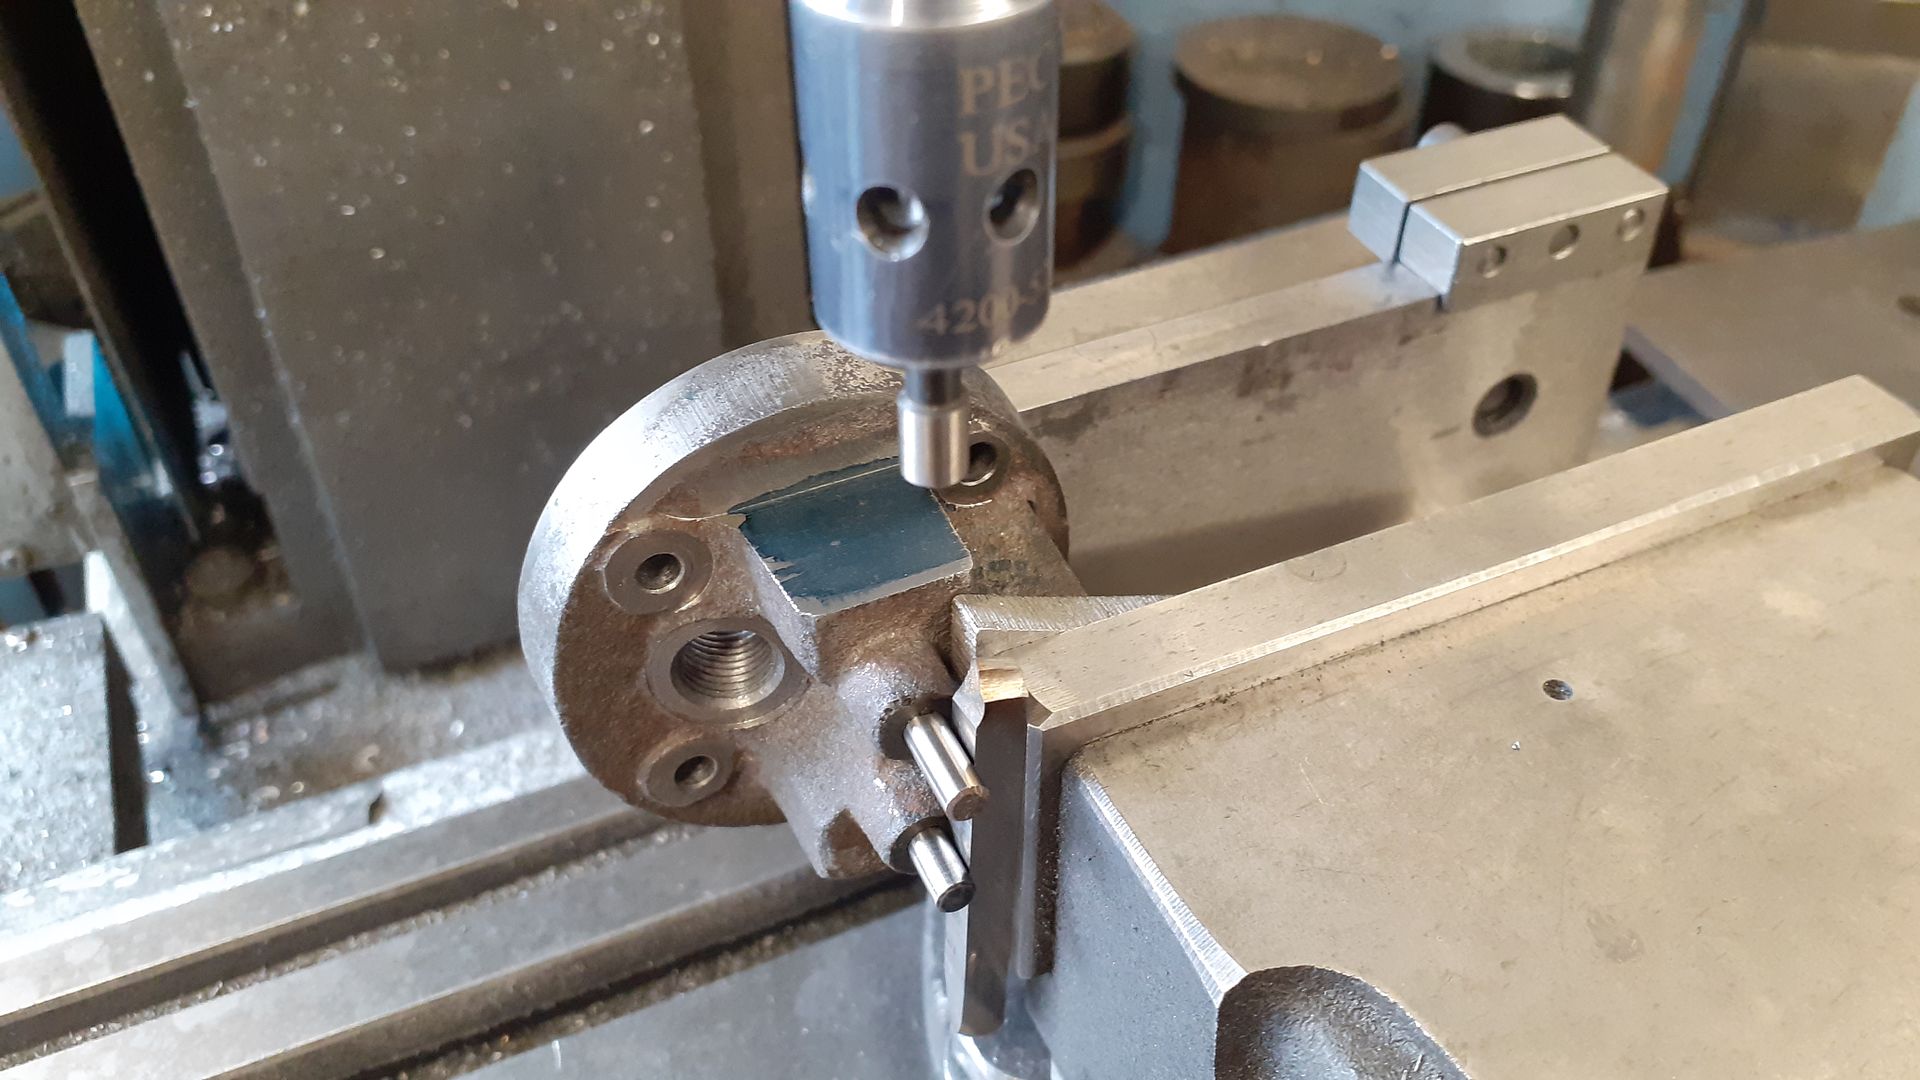
I suppose the cylinder head is the next logical casting to get out the way. After a quick clean up I made a start by holding it in the 4-jaw slipping a parallel under each of the stud bosses in turn to make sure the outer cast surface was reasonably true across the lathe's axis and than machined the underside of the head so I had a good flat surface to work with. I also took the smallest of cuts off the OD to get the head round but not far enough up the sides to remove the draft angle. |


Magazine Locator
Want the latest issue of Model Engineer or Model Engineers' Workshop? Use our magazine locator links to find your nearest stockist!
Sign up to our Newsletter
Sign up to our newsletter and get a free digital issue.
You can unsubscribe at anytime. View our privacy policy at www.mortons.co.uk/privacy
Latest Forum Posts
- *Oct 2023: FORUM MIGRATION TIMELINE*
05/10/2023 07:57:11 - Making ER11 collet chuck
05/10/2023 07:56:24 - What did you do today? 2023
05/10/2023 07:25:01 - Orrery
05/10/2023 06:00:41 - Wera hand-tools
05/10/2023 05:47:07 - New member
05/10/2023 04:40:11 - Problems with external pot on at1 vfd
05/10/2023 00:06:32 - Drain plug
04/10/2023 23:36:17 - digi phase converter for 10 machines.....
04/10/2023 23:13:48 - Winter Storage Of Locomotives
04/10/2023 21:02:11 - More Latest Posts...
- View All Topics
Support Our Partners


Shopping Partners
Subscription Offer

Latest "For Sale" Ads
- Reeves** - Rebuilt Royal Scot by Martin Evans
by John Broughton
£300.00 - BRITANNIA 5" GAUGE James Perrier
by Jon Seabright 1
£2,500.00 - Drill Grinder - for restoration
by Nigel Graham 2
£0.00 - WARCO WM18 MILLING MACHINE
by Alex Chudley
£1,200.00 - MYFORD SUPER 7 LATHE
by Alex Chudley
£2,000.00 - More "For Sale" Ads...
Latest "Wanted" Ads
- D1-3 backplate
by Michael Horley
Price Not Specified - fixed steady for a Colchester bantam mark1 800
by George Jervis
Price Not Specified - lbsc pansy
by JACK SIDEBOTHAM
Price Not Specified - Pratt Burnerd multifit chuck key.
by Tim Riome
Price Not Specified - BANDSAW BLADE WELDER
by HUGH
Price Not Specified - More "Wanted" Ads...
Get In Touch!
Do you want to contact the Model Engineer and Model Engineers' Workshop team?
You can contact us by phone, mail or email about the magazines including becoming a contributor, submitting reader's letters or making queries about articles. You can also get in touch about this website, advertising or other general issues.
Click THIS LINK for full contact details.
For subscription issues please see THIS LINK.
Digital Back Issues


Donate

 Register
 Log-in
Model Engineer Magazine
- Percival Marshall
- M.E. History
- LittleLEC
- M.E. Clock

ME Workshop
- An Adcock
- & Shipley
- Horizontal
- Mill

Subscribe Now
- Great savings
- Delivered to your door

Pre-order your copy!
- Delivered to your doorstep!
- Free UK delivery!