Member postings for Joseph Noci 1
Here is a list of all the postings Joseph Noci 1 has made in our forums. Click on a thread name to jump to the thread.
| Thread: Accurate Clamping |
| 04/08/2021 17:31:24 |
Posted by Paul White 3 on 04/08/2021 12:38:32:
Joe, that trip to the desert, did you see any Hares running? Hello Paul! Actually, only one, and it was not running - doing its best to hide from us. Wildlife very scarce at the moment, after 5 years of drought. In 10 days we saw only the one herd of Springbuck, over 1000km of travel in the North West regions, two Gemsbok ( of the Oryx family), where 5-6 years ago a trip like this would yield 2000-3000 Springbuck, a few hundred Gemsbuck. etc...and the Lions are suffering - many have died from starvation.. terrible situation the Wildlife are in here.. Joe |
| 04/08/2021 09:21:50 |
(!) Joe |
| Thread: CNC Lathe Scratch Build |
| 02/08/2021 19:04:29 |
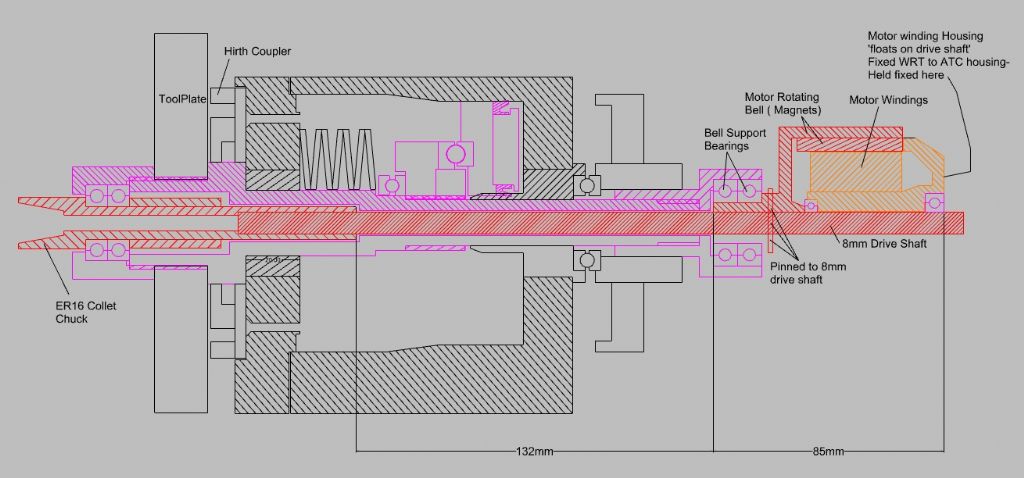
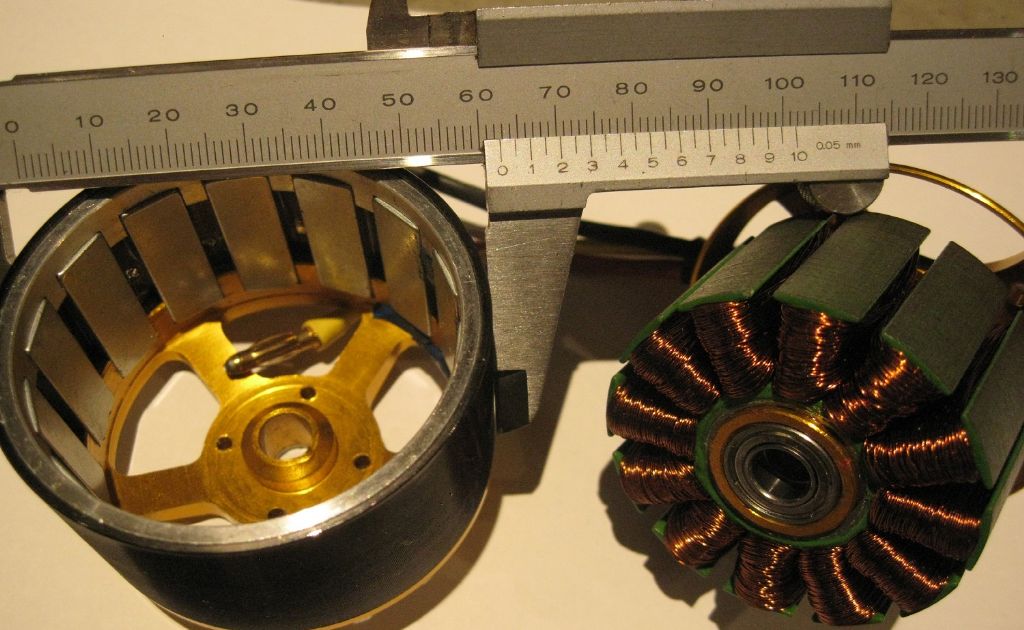
Ok, back to work... Duncan, I think I follow your idea - makes sense and I will see down what road that all takes me.. This thing is certainly taking me down many a painfull track! Still fighting the tool changer - still have not receive the Bellville springs from SA.. So I started think about the live tooling or milling spindle. The ATC is small, so not easy to incorporate conventional live tooling. I would like to have a radial and axial milling capability, but that means swinging the milling spindle around, and doing that servo-ed is not really feasible on the cross slide, space, etc. Manual swiveling is ok, since milling on the C axis is not done often. I considered 2 milling heads, at 90deg - the axial head can remain in place and will ( should..) not crash, but the radial head must be removed at times..all together a pain in the butt! Then I thought if I made the axial spindle coaxial with the ATC main shaft, it would free up space in front of the ATC and allow the radial spindle to be fitted there somewhere. And so the hack began... The 9th toolstation was the ER20 Chuck in the ATC toolplate center ( see previous pics..) - the idea was to remove that, and fit bearings carrying an ER16 chuck, with the chuck drive shaft through the ATC main shaft, out the rear and driven by a BLDC motor at the rear. The RED parts are the milling spindle and spin together. The Lilac parts are the ATC main shaft and are static, except when changing tools - they then rotate to new tool position, and slide left to clear the HIRTH coupler before rotating. On the right is the BLDC motor Bell housing ( contains the motor magnets) which is pinned to the 8mm spindle drive shaft. It is supported by the Bell Support Bearings ( Lilac). The Orange parts on the right are the BLDC motor Windings and rotor(?) core, on bearings, on the 8mm drive shaft. This orange section is constrained from rotating, by a sliding retainer ( not shown) fixed the ATC housing. The orange section, Red and Lilac sections are slide left to clear the Hirth coupler during a tool change. The 8mm drive shaft has a free length of 132mm. I have been trying to model what sort of torsional mode will arise in that section when milling - vibration, resonance, etc, but have given up! Very difficult to find data on milling cutter energy needed for an milling edge to cut say mild steel, given DOC, RPM, etc, etc..and then the resulting twist in the drive shaft, and release of that wind-up when the cutting edge clears, etc.. I cannot go larger than 8mm on that drive shaft - increasing means increasing the through hole in the pneumatic piston for the Bellville spring compression. That means less piston surface area and more air pressure needed. I am trying to stick below 110PSI - if you followed the discussion previously in my posts you will know the reasons behind said pressures.. The milling process is low key - not high rate of metal removal, etc. The BLDC motor is a 400watt motor- 400watts for 60sec it says.. 250watts cont. The largest milling cutter would be 8mm, probably 6mm. The lowest useful spindle RPM would be 300rpm and the highest around 5000rpm. The BLDC motor is capable of 5000rpm at 45VDC supply.
Am I wasting my time??? Joe |
| 02/08/2021 18:34:28 |
Hello Duncan. Forgive my late response - I became a bit despondent with the project and gave it a rest - decided to go and play with the Pussy cats in the desert..Some pics.. |
| 18/07/2021 15:27:12 |
Hello Duncan! I think I have the idea...The moving bits are the tool changer and then the X axis plate and slide bearings - the Tool changer is approx 6.4kg fully loaded with cutting tools, the X axis plate, etc, is another 1.4Kg, so a total of 8 to 9kg max. Not a lot, so probably not worth the effort.. Joe |
| 18/07/2021 12:47:55 |
Martin, The ballscrew nuts are dual, adjustable for nill/low backlash. The Z axis is a 16mm screw, while the X is 12mm so I guess the aim would be to remove the constant load on the smaller balls in the nut on the X screw. It is probably academic as the lathe is the project, not what it will make..The lathe won't have a busy life so the X screw and balls probably won't wear much in the next 10 years! However, as the project is so OTT, why not keep going. Joe |
| 18/07/2021 11:54:29 |
Posted by Kiwi Bloke on 18/07/2021 11:37:28:
Joe. Thanks for the drawing. I'll have to think about this - my intuitive 3-D visualization ain't what it used to be. It looks like you're using a different geometry from that which I was expecting. The standard Hirth, as I'm sure you know, has teeth whose section remains constant, but whose dimension increases proportional to the distance from the centre. (I too find it difficult to describe...) Everything converges to a central point, which is common to both members when mated, so it's all sort-of conical, so the bottom of the 'teeth' get deeper as the radius increases (OK, descriptive powers have been exceeded...). It was that sloping bottom that I couldn't see.
Perhaps Hirth is a misnomer in this application? Certainly this coupler is flat, no cone involved - the convergence to a central point is the common line passing through that tooth flank slope midpoint. Likewise, the center of each tooth, on the disc's periphery, all pass through the disc midpoint, so all is aligned..And as certain, my English fails me hopelessly in my description attempts! The best way to imagine it is perhaps to take one disc as a given, and press it into a flat slab of plasticine - both mate perfectly, both are flat, self centering, etc. How to describe the given disc... The piston counterweight concept does look neat and appears quite simple. I have just done a pneumatic cylinder - the one inside the ATC body, and that was a lot of work! Also, as usual, finding seals and such is complicated here. I see some solutions in the Parker / FESTO catalogues, but I am sure they want both my legs for one.. We will see where this goes! Thanks for the ideas. Joe |
| 18/07/2021 10:23:55 |
Going to read all about air tank.cylinder pressure based counterweights - new to me, and seems that it will be complicated.. Ady1, I fear you have lost me..not sure what you referring to..
Joe
|
| 18/07/2021 10:19:33 |
Posted by Kiwi Bloke on 18/07/2021 04:50:51:
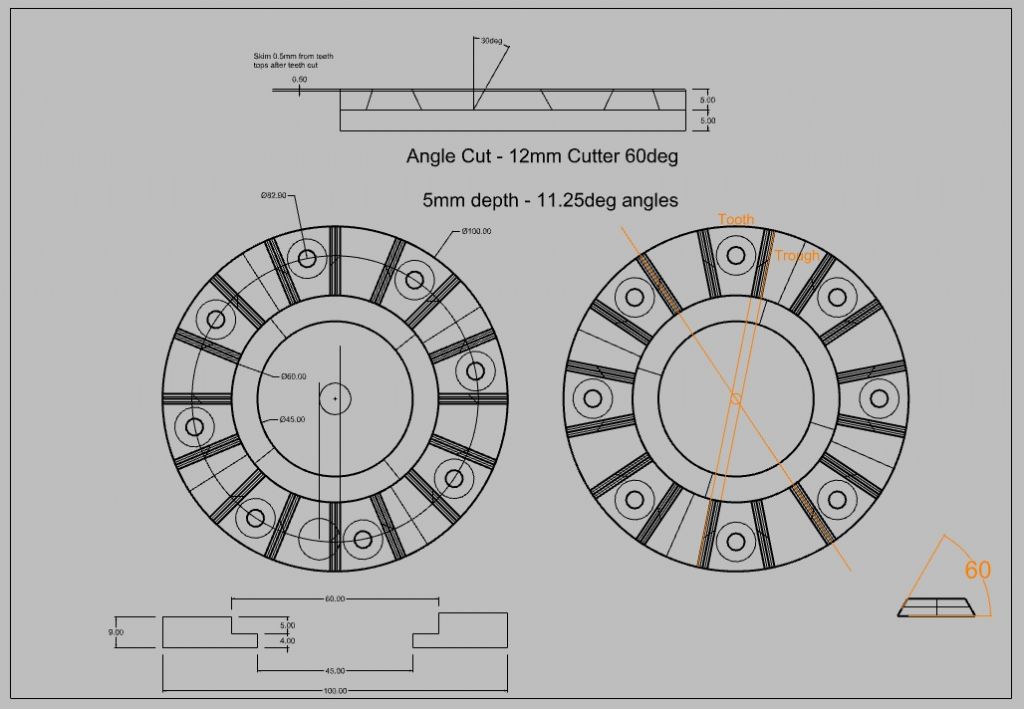
BTW, it may be an optical illusion, but the axial 'depth' of the 'teeth' of your Hirth coupling seems constant across the radial direction, and the 'tooth' flanks appear plane. Does this work? I thought that the usual arrangement was for everything to converge to a central point, common to the two members (hope this makes sense). It is an optical issue - Here is a drawing showing the cut lines for the teeth - the sides are at a 60deg angle and the two par orange lines show the upper and lower part of the tooth flank - they do not pass through the disc center. The single orange line passing through the disc center is aligned with the midslope of the tooth flank. This thing was complex to make, and even worse to describe.. Joe |
| 17/07/2021 20:52:35 |
Still a few bits and pieces to be done on the ATC, swarf guards, etc, but most of the major effort is over. STILL waiting for the Bellville springs - seems I have to wait another 7-10 days, and pay some or other new tax...I am considering ordering from the UK - Will cost a little more, but at least I will get the goods! SA is done...
I have rough drilled out the axial tool holder locations to 19mm after centering in situ in the lathe. That turned out nicely. I will bore them out to final 20mm with a boring bar in the lathe chuck, but I need the Bellville springs in the ATC for proper location and rigidity. Covers are made for the ATC drive belt and the lathe spindle drive belt - to be powder coated now.
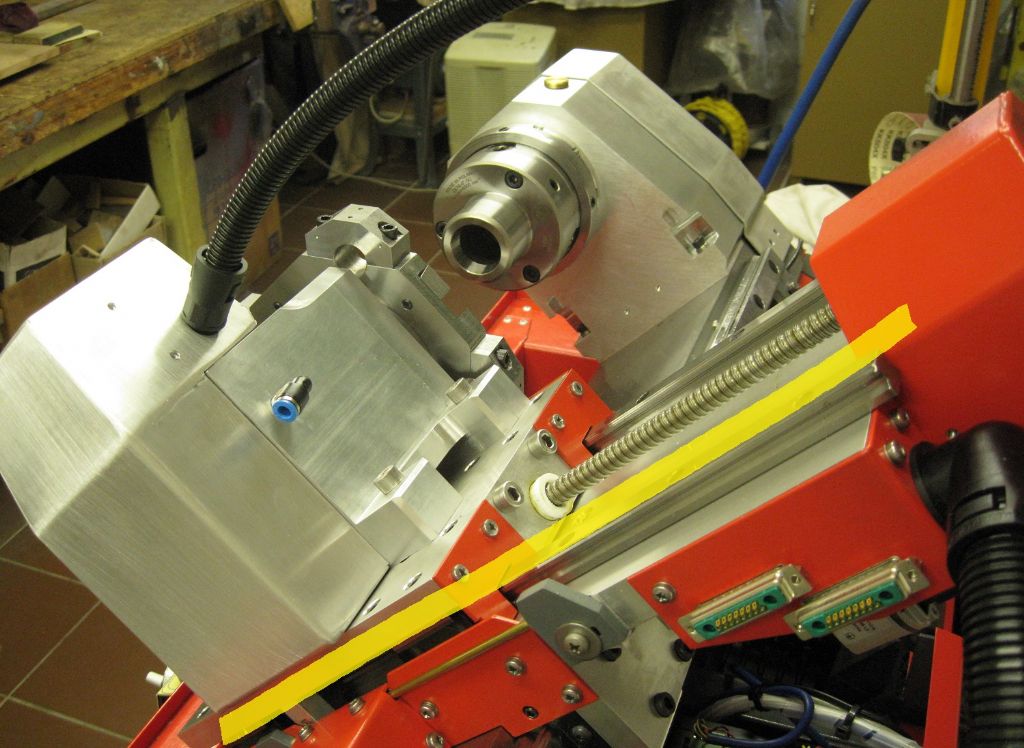
The ATC weighs around 7kg. That is quite a lot of weight at a 45deg slope on the X axis. I am looking for some way to counterweight the X axis. A counter weight and pulley arrangement won't work as the weight would have to move with the Z axis and so flail about...I am looking at the possibility of a gas strut mounted in the plane of the yellow line in the image below - Anyone had any experience with such an implementation? Or any other ideas?
Joe Edited By Joseph Noci 1 on 17/07/2021 20:54:03 |
| Thread: What Did You Do Today 2021 |
| 17/07/2021 20:27:51 |
Posted by Brian H on 17/07/2021 15:56:45:
I've been cutting some Iroko wood to turn some pulleys for the 1896 Ford model that I am making. Not for nothing is it known as ironwood. It's very hard. I'don't use much wood but when I do I go to Nottingham Hardwood Timber who supply small pieces for pencil makers, model makers, furniture makers and even boat builders. http://www.nottinghamhardwoodtimber.co.uk/wood-turning-self-select-timber-store/ I have absolutely no connection with this (largely one-man) business other than as a very satsfied customer. Brian Mmm, not true....Iroko is also known as African Teak or Nigerian Teak, definitely not Ironwood - in fact, there is no such thing as Ironwood, or an Ironwood tree...Poor usage of the term has resulted in any wood heavier than water being termed Ironwood, but there is no botanical wood named such. Iroko is native to the North African West coast and only resembles Teak - it is not Teak... And, Iroko floats on water.. Dad was a Master Cabinet Maker, so I have saw dust in my Blood.. Joe |
| Thread: Can auto darkening welding helmet capsule be restored. |
| 16/07/2021 21:01:20 |
As Andrew said, probably the batteries, and most of these cheap helmets don't allow easy battery replacement - I had two such and did cut open the module - there were two lithium cells, in series, with the center tap also connected so seems like it used a split supply. Did that about 7 months ago, and this weekend the helmet is playing up again.. This helmet also has small PV panels, but as I don't do much welding, the helmet sits in a box so no sunlight and no welding UV and it appears the quiescent current is not insignificant. I again replaced the batteries, but with two D Cells, duct taped to the top of the helmet.. Joe |
| Thread: Amazing Active geared ball joint |
| 15/07/2021 12:35:47 |
This is amazing! Joe |
| Thread: carbide insert tooling |
| 11/07/2021 16:56:31 |
Posted by brian jones 11 on 11/07/2021 16:33:31:
So digging further I then found the EB market smothered in these set boxes, you couldnt buy individual tool holders (unless you got way up in price) not even used parts anyone else noticed this I suspect a conspiracy to flood us with rubbish and fake bits you could waste a lot of money on this. you really could get trapped for our hobby market
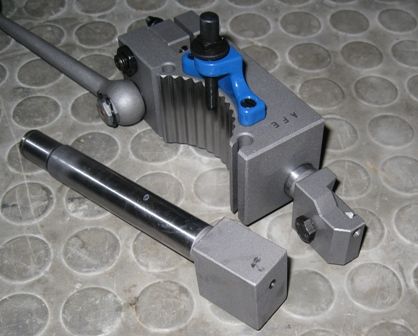
I presume that the implication is that these 'rubbish and fake bits' you refer to are of Chinese source or similar? I must say that I cannot agree with a statement so general in nature.. I have purchased a small handful of those 'sets' - some of the 10mm. some 12mm and some 16mm square tooling. I have found sets with left and right hand complements, in cutting tool and single point threading tools. I have purchased from Banggood, Ali-Express, and one or two other Chinese sources as well, and I have not been disappointed with any of the tools at all. Perhaps there may be one or two types here and there that are dicey, but I have maybe 40 or so different tools and none are bad. I modify them to suit special applications as well - for my small CNC lathe the ATC requires the tool body to be 50mm max in length, so I cut them down as required. And the steel used is very good! A hacksaw feels like it cuts the tool body the first stroke very nicely, but thats because the tool just removed all the sharp peaks of the teeth from the hacksaw blade.. The steel is hard through, not just case hardened. I would not be too quick to speak disparagingly of these tools and suppliers.. Joe |
| Thread: CNC Lathe Scratch Build |
| 11/07/2021 16:39:23 |
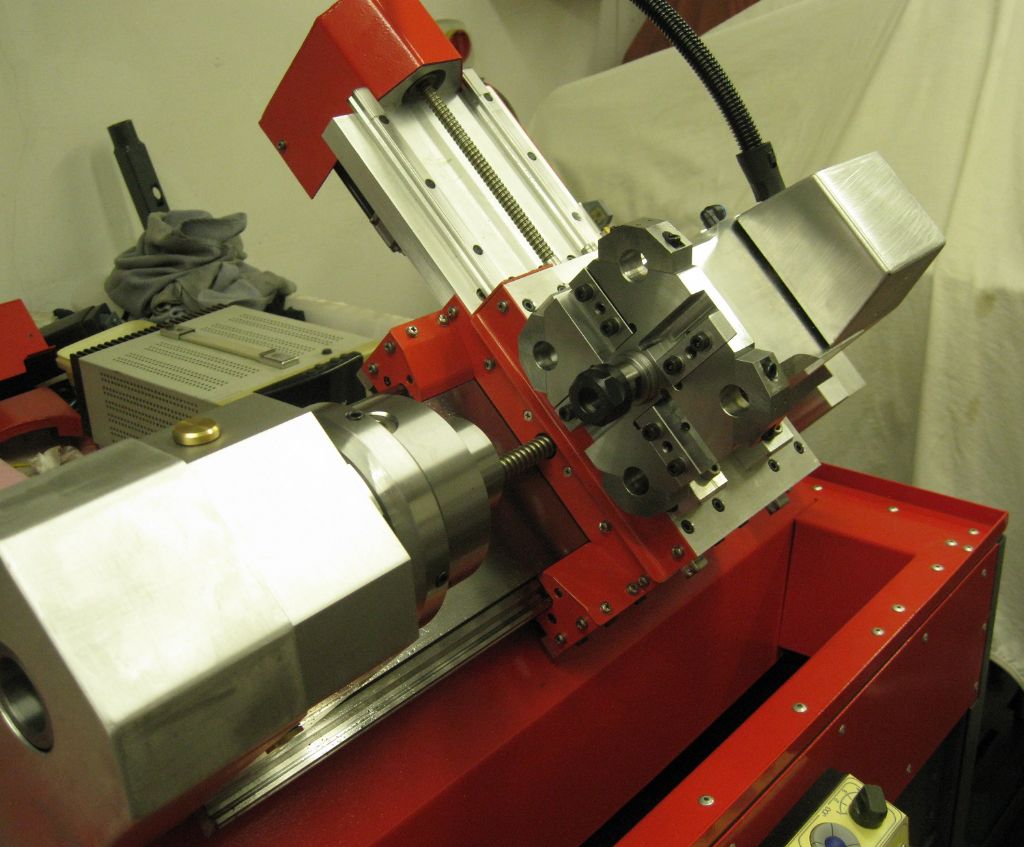
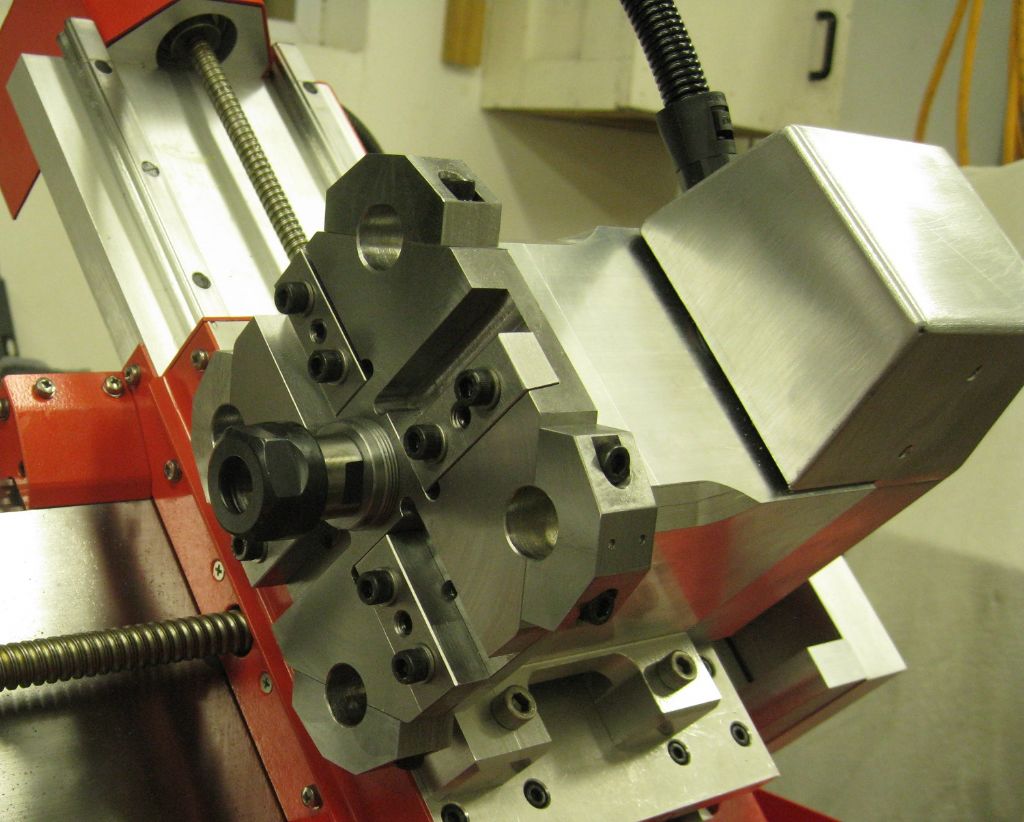
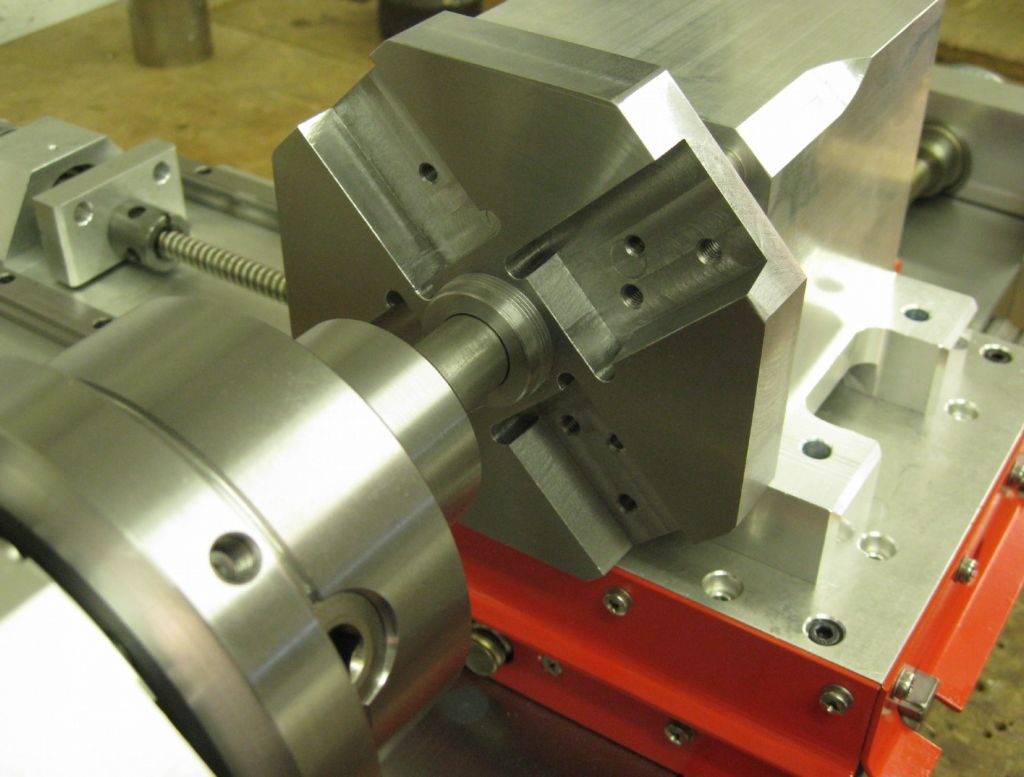
This thing has GOT to come to an end... The ATC is closer to completion - STILL waiting for the Bellville springs from South Africa - all sorts of new red tape with imports - exporters in SA need to be registered for export now, with an export code which takes 6 months..and the office is at half-mast with Covid..So much for the SADC free-trade region..Easier to get the stuff from the UK!
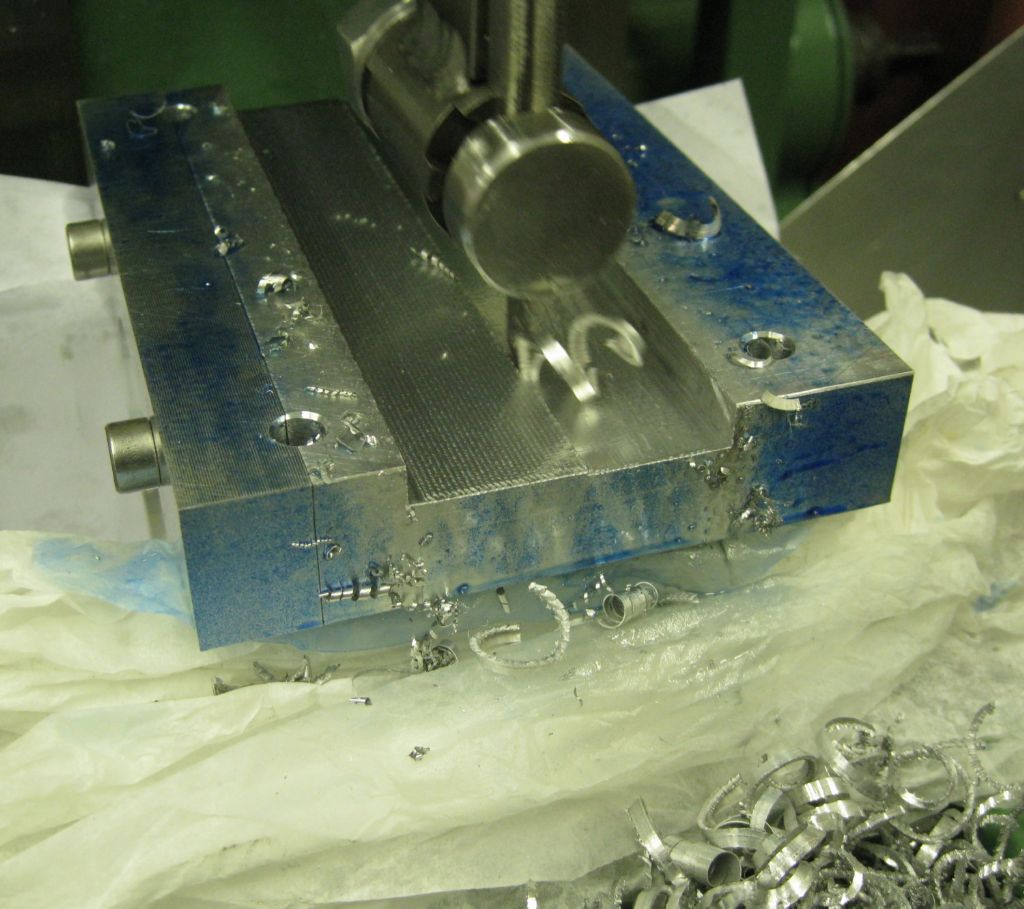
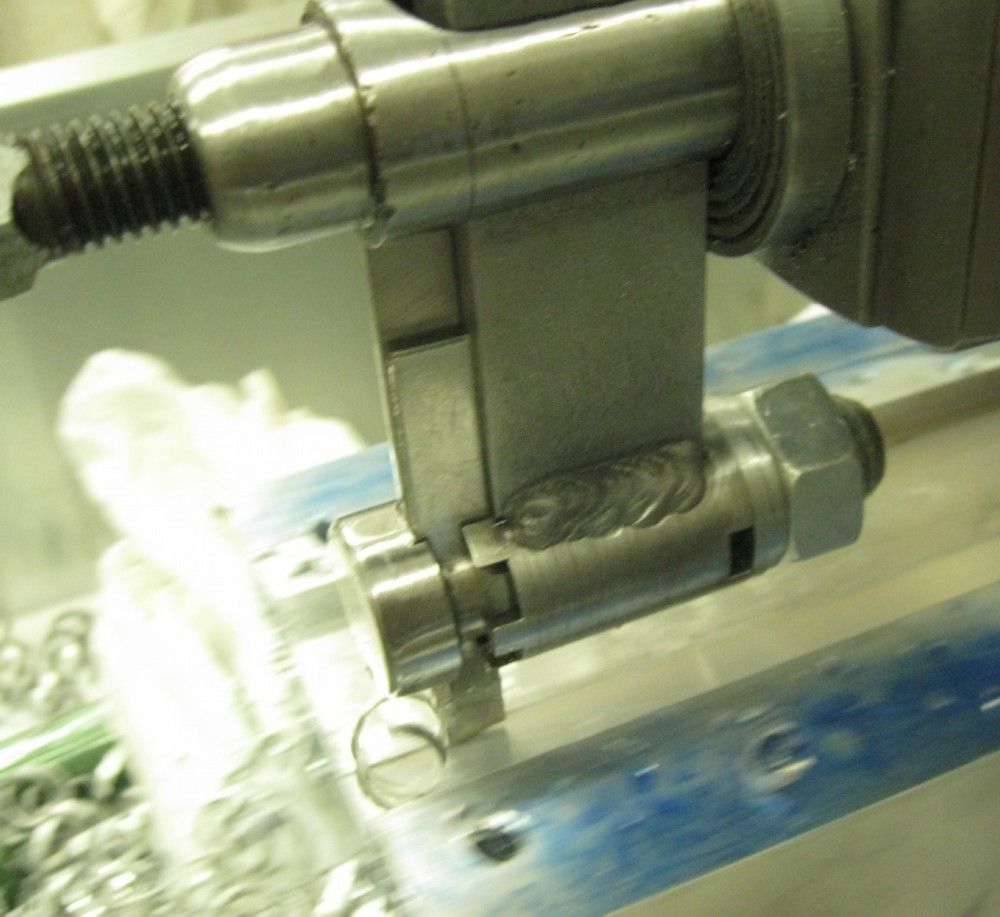
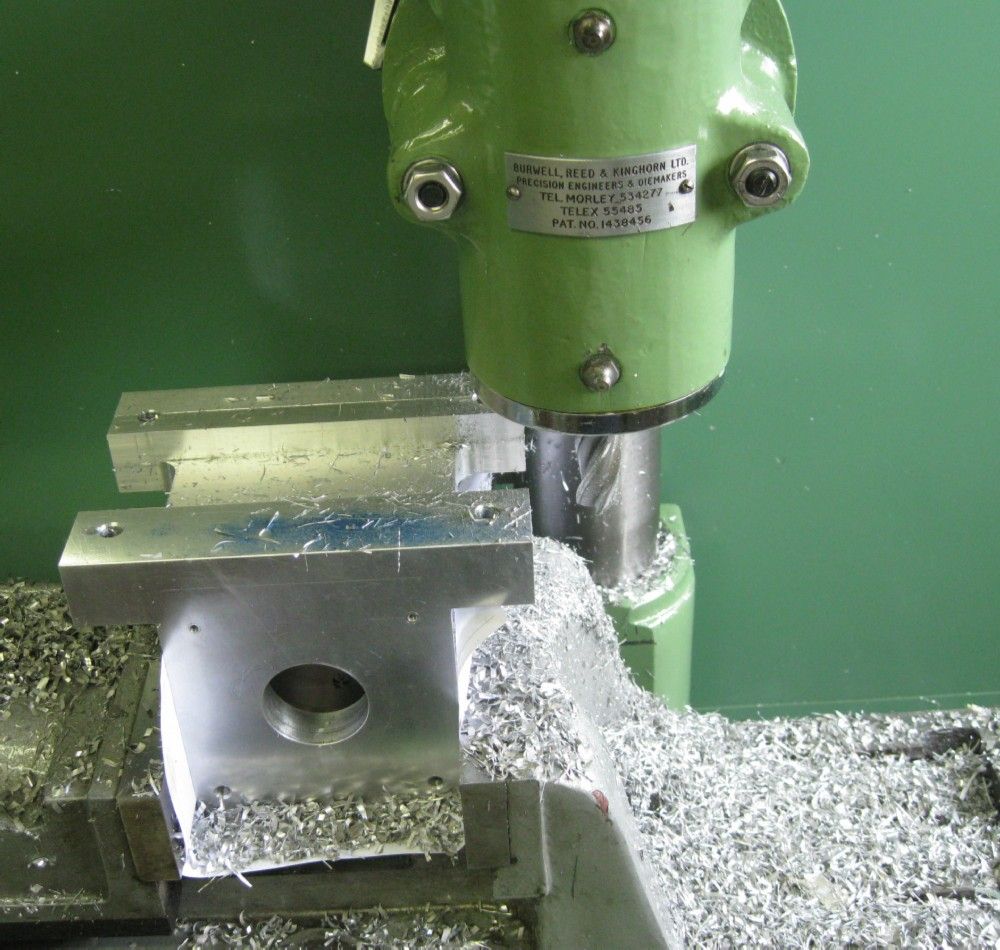
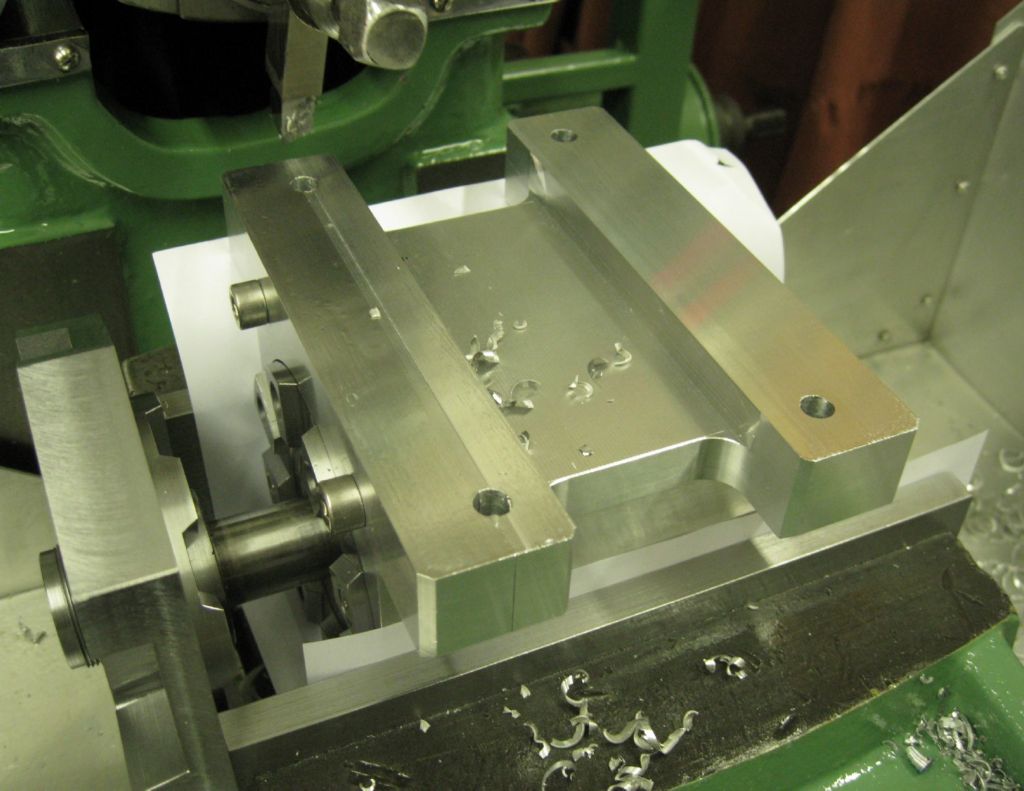
Titivated the ATC housing, losing a bit of excess weight, etc, set it all up with tooling and got the ATC center height set and trimmed. Here slotting out the base underside with a parting tool in the shaper.
And then gapping the sides of the base as well. Here skimming the last 1/100th from the base for center height setting. Center height setting was achieved and tested by fitting a sound piece of 20mm turned bar in the 5C chuck and setting the chuck for near zero runout. The center shaft of the ATC has an accurate 20mm bore, 40mm deep. Said shaft if pushed into that hole resists with trapped air pressure and falls out slowly over around 15seconds when inverted.. This hole was then verified for passage over the shaft as below - worked out nicely. The base of the ATC was skimmed in the shaper till is fitted just right. The ATC shaft central hole is fitted with an ER20 collet chuck after. The ATC body-on-diet can be seen nicely below...lost nearly 350grams..
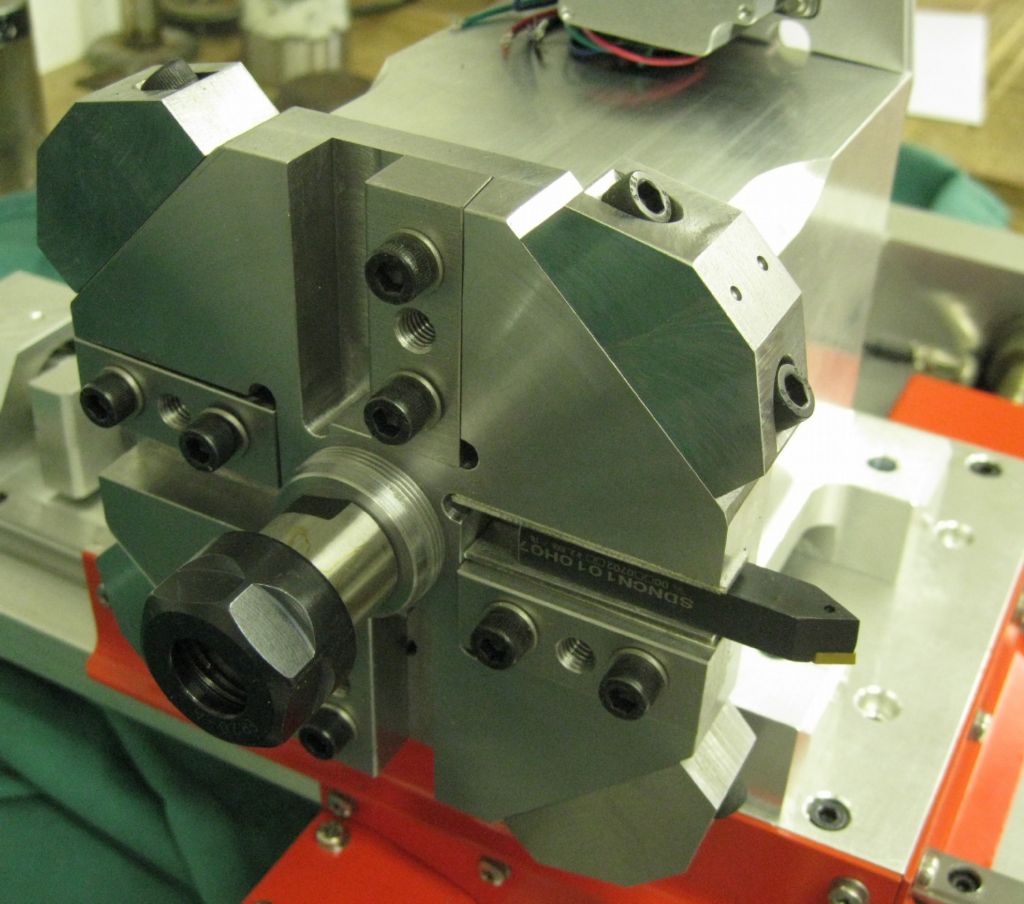
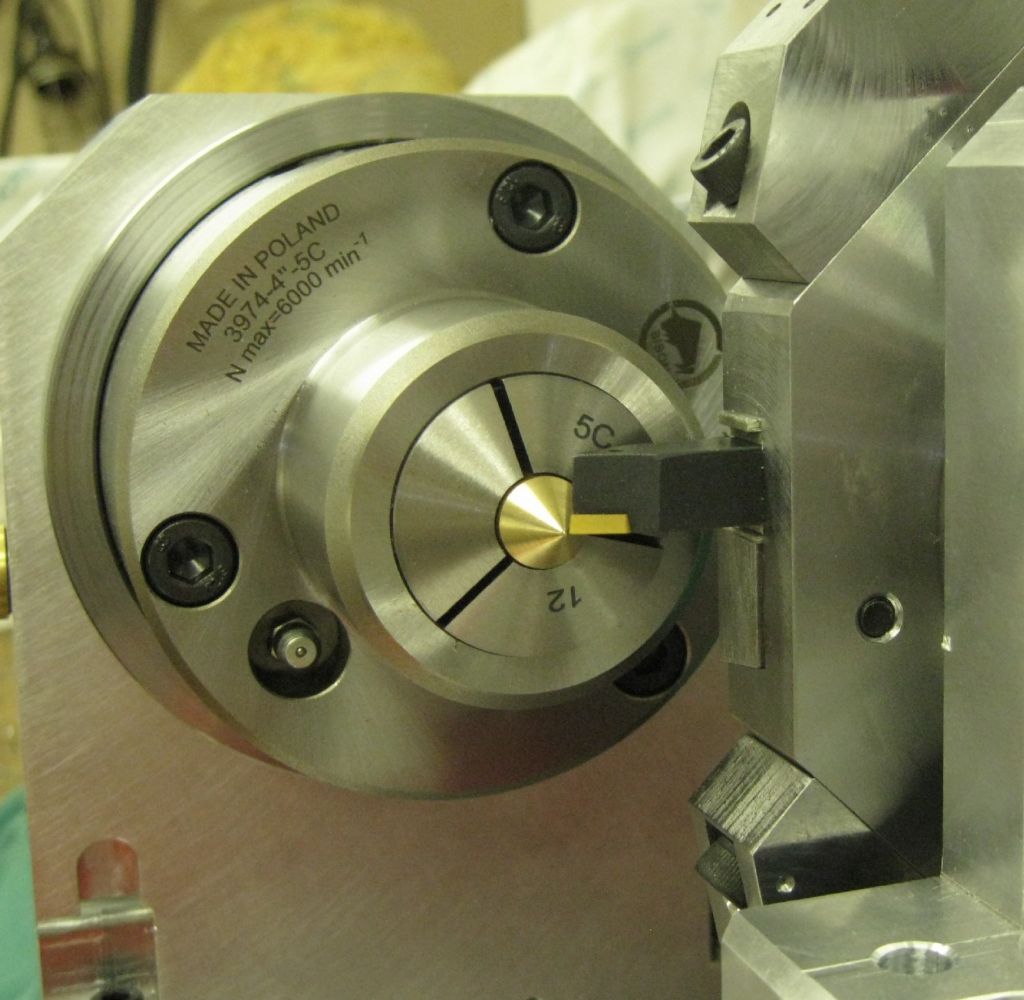
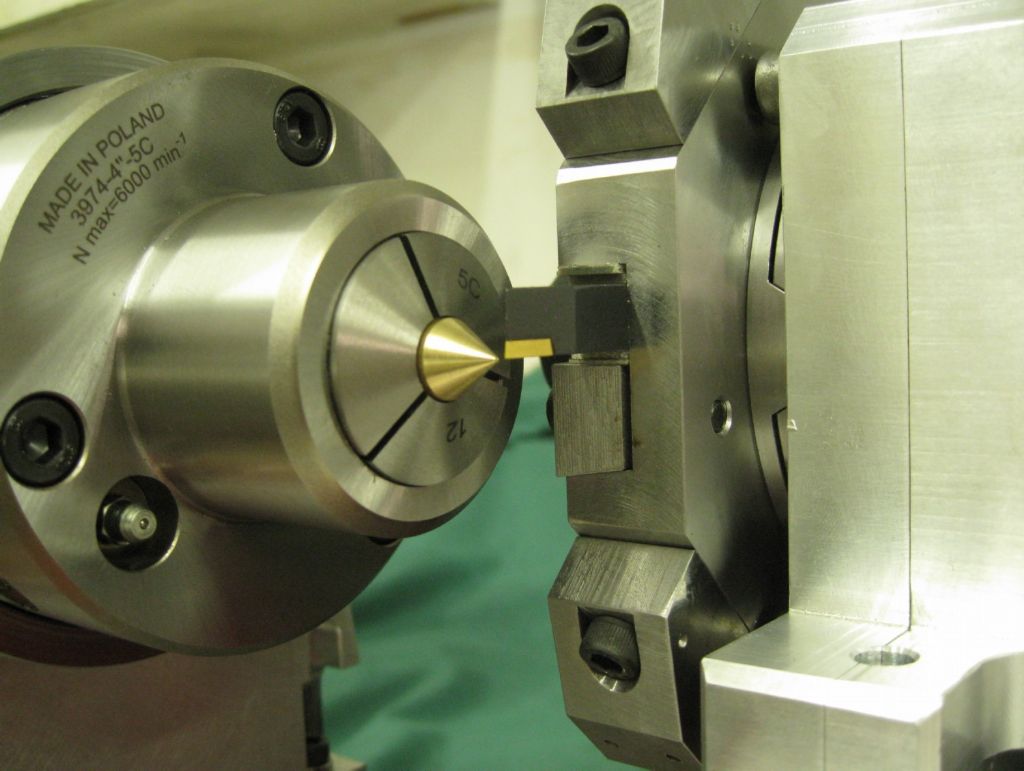
Lathe tool fitted (inverted) and aligned with center pip in 5C chuck.
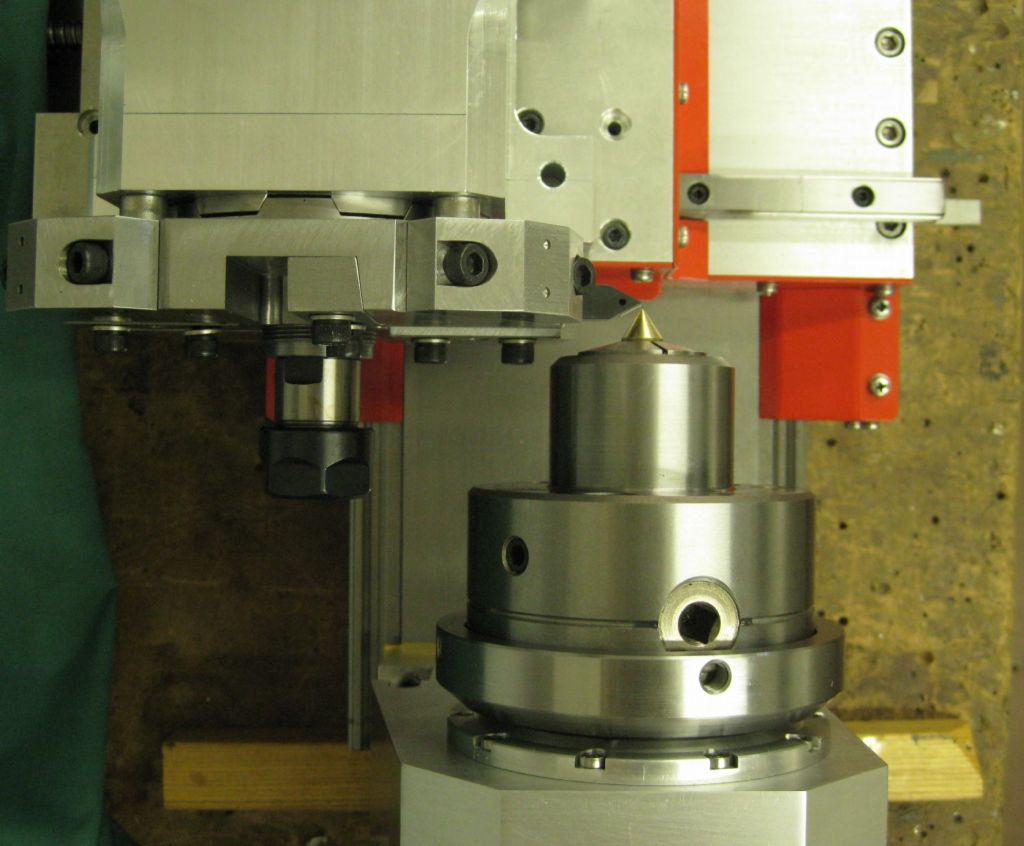
Top view - ER20 collet chuck fitted to tool plate - observe ample crash clearance to 5C chuck with lathe cutting tool brought to Lathe spindle axis center. Have to make/fit a Hirth Coupler guard ring still - can see in this image how swarf would go onto the Hirth rings and possible get caught between the Hirth teeth when the coupler is opened - totally messing up the tool registration and position! Rear side view of same For those still following this effort..! Joe
edit - spelling.. Edited By Joseph Noci 1 on 11/07/2021 16:41:37 |
| 09/07/2021 12:35:50 |
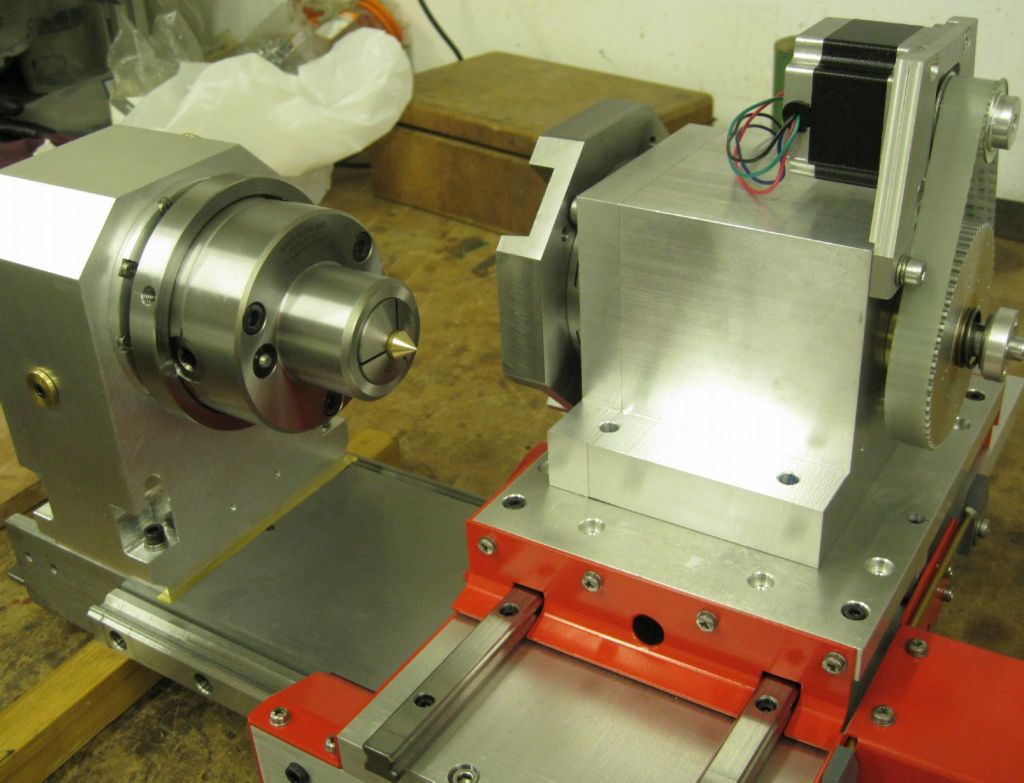
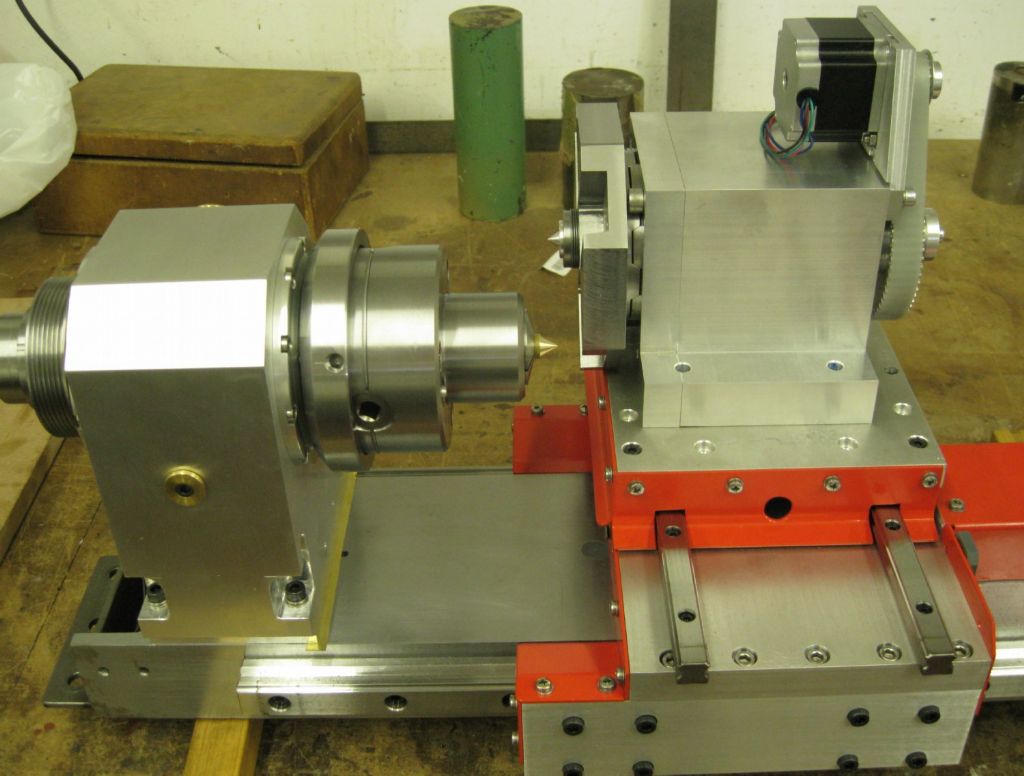
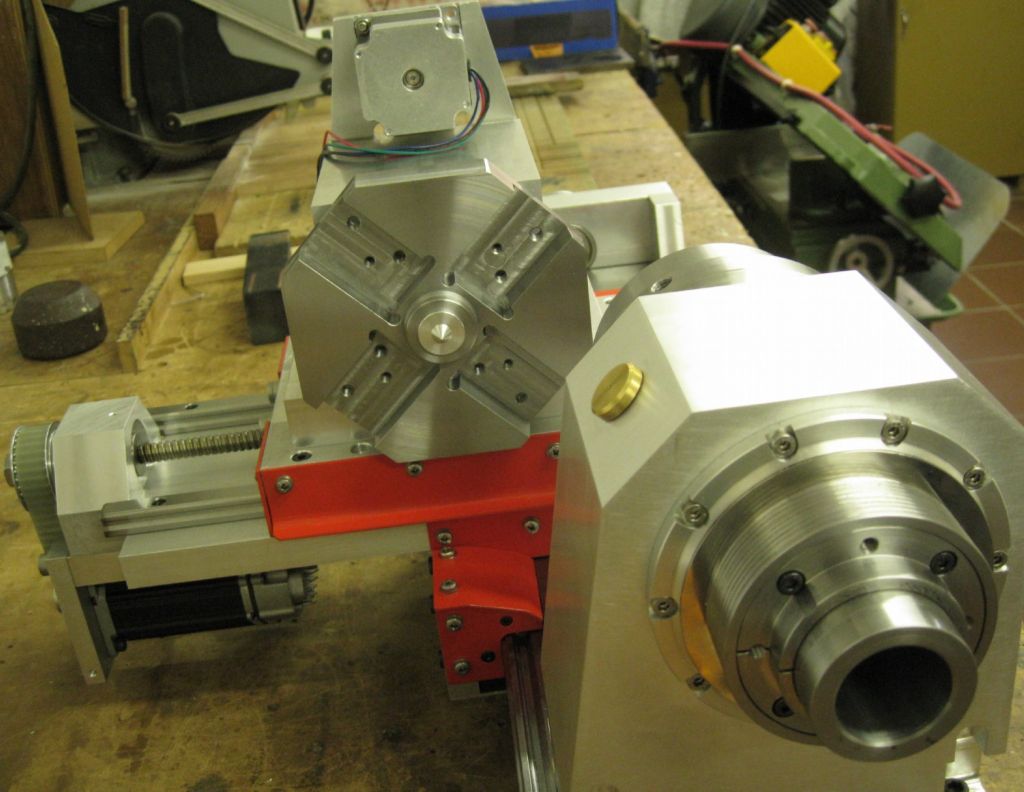
Some more photos - The ATC placed on the lathe to determine center height, etc..The ATC center is 1.75mm higher than Lathe spindle center - this was done on purpose, although the 1.75mm was not 'designed' in - the idea being that once it is all together I will invert the ATC body in the shaper and bring it to proper height. This was done so since it is awkward to determine beforehand precisely the buildup of tolerances over the months of build... The stepper drive concept is seen here.
Joe |
| 09/07/2021 12:27:26 |
Posted by Ross 77 on 06/07/2021 22:36:27:
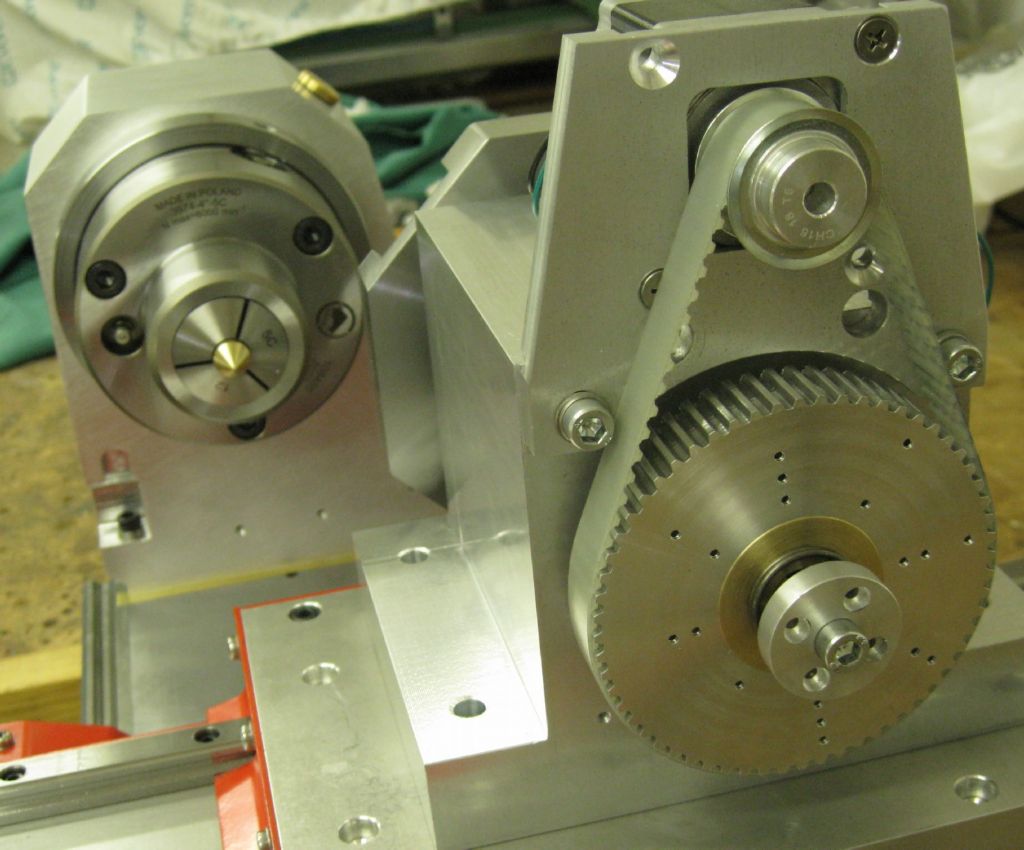
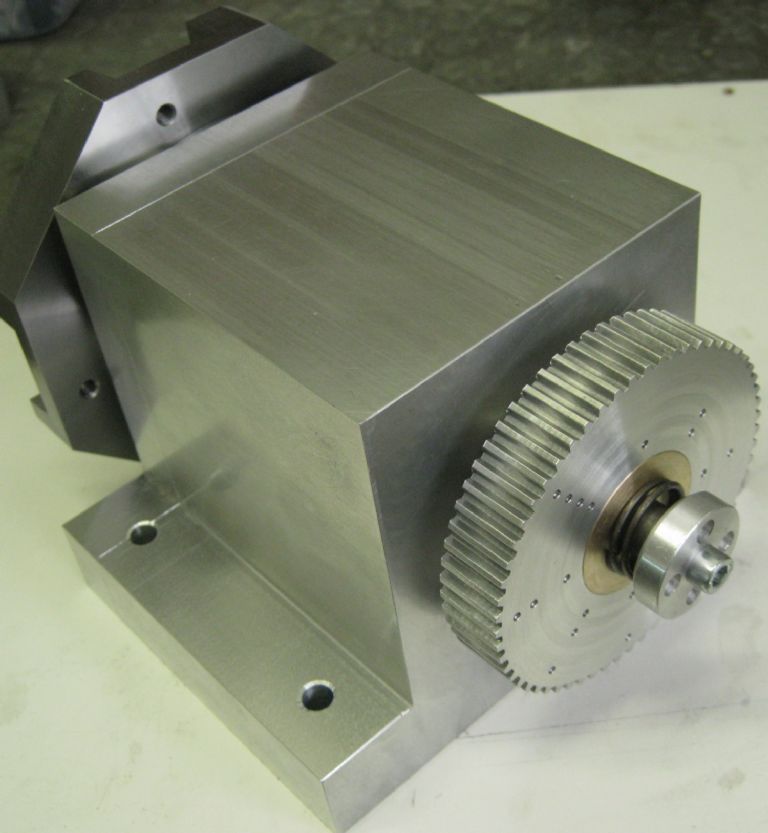
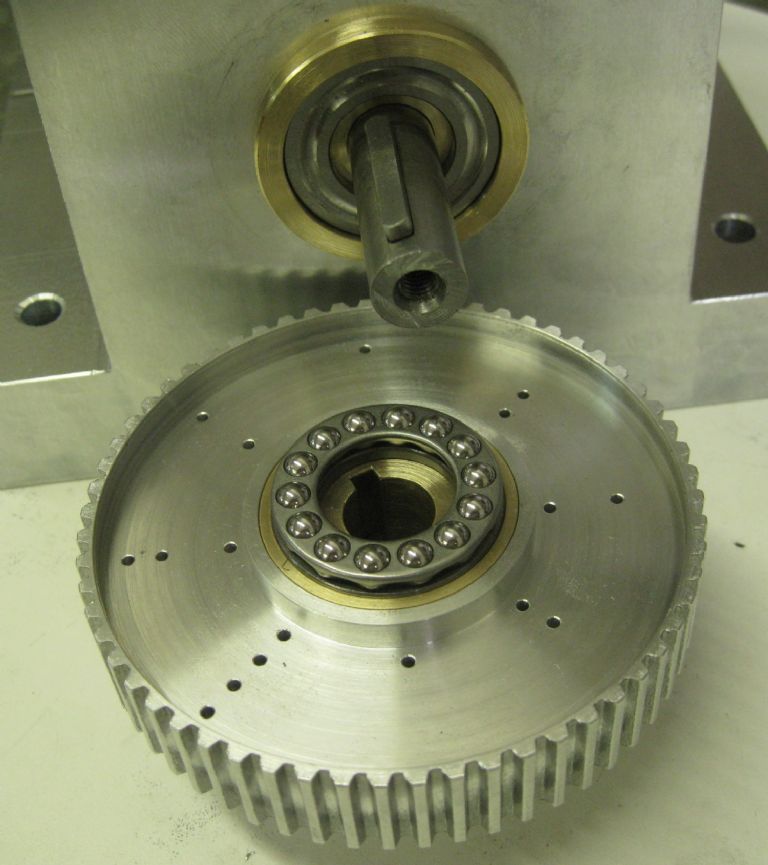
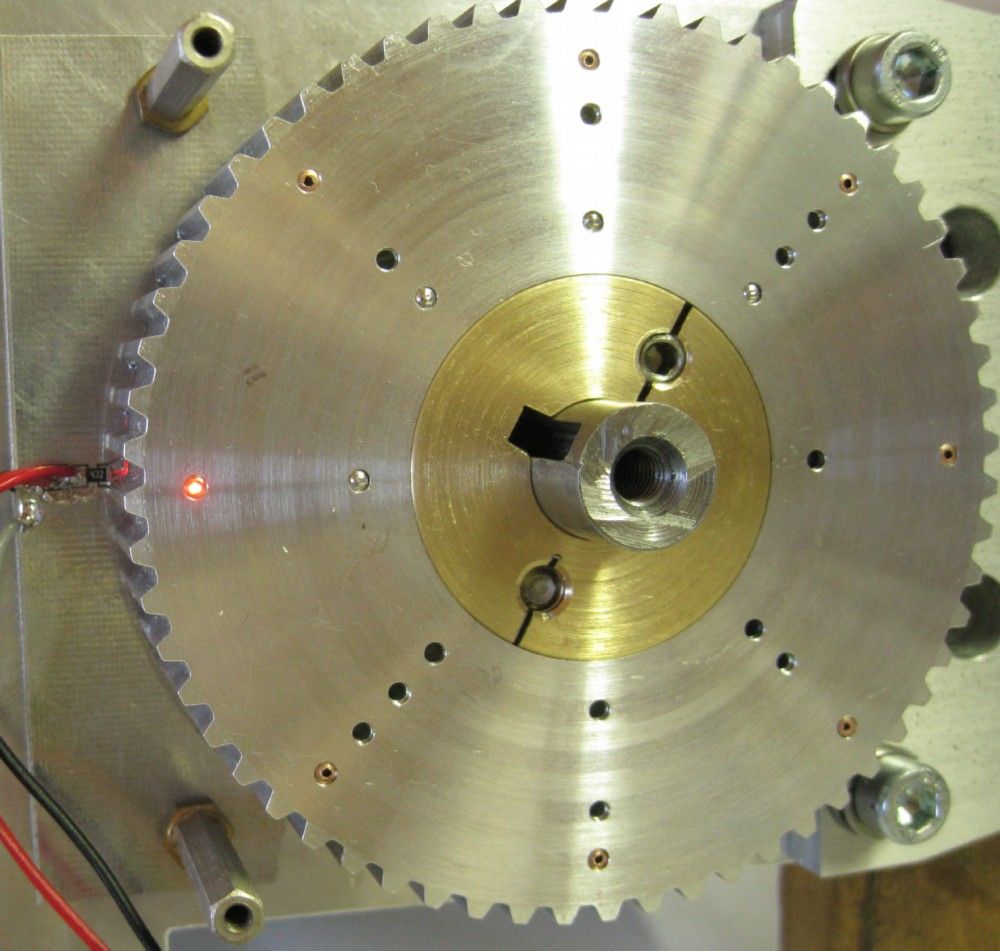
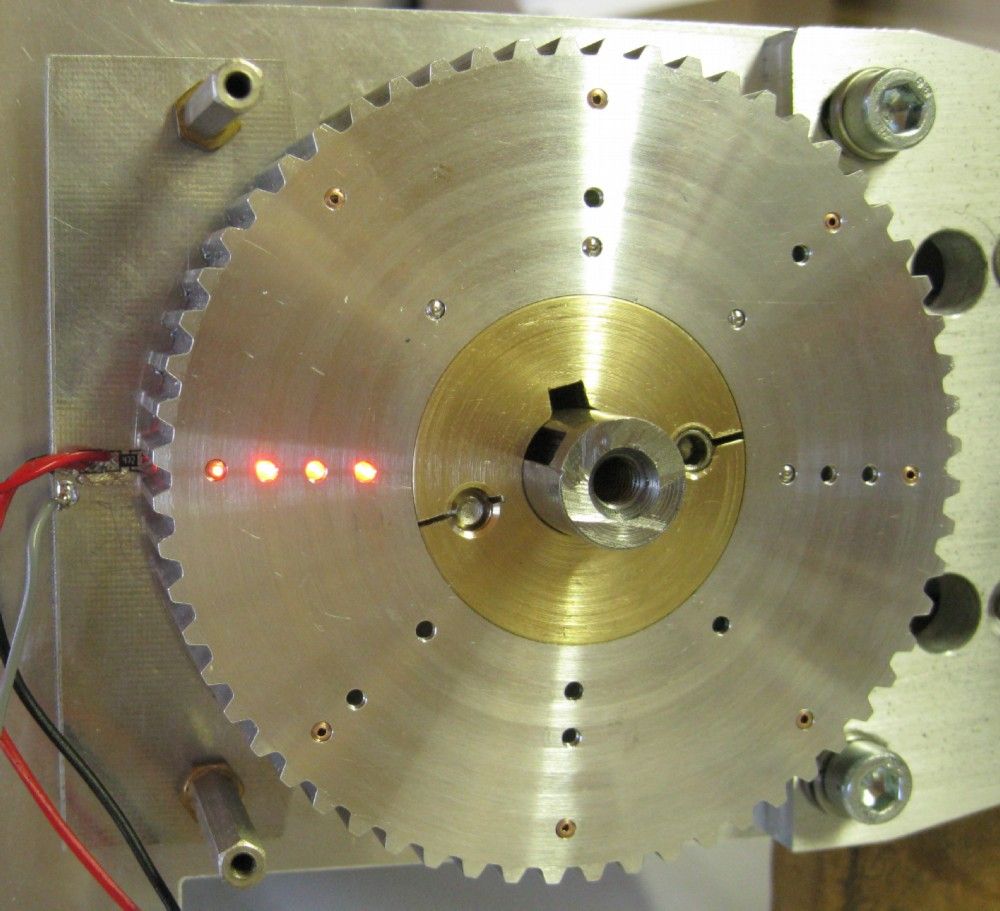
Really nice to see this come together and how you have approached it in a different way to how we did. The results are amazing and I cant wait to see it in action. The Hirth coupling looks good. The math for tilting the head stock must have been fun! Have you thought about the motor and encoder set up yet? Thank You for your support! Yes, The motor/encoder is essentially done - The electronics for tool position detection is working well in prototype form and that is being 'industrialised' now. So photos of the progress: The drive motor is a NEMA 23 Stepper, with a 18 tooth pully driving the main shaft pulley of 60 teeth. At 800 steps/rev this gives a neat 333 step pulses per 45deg tool position selection. The tool positions are denoted by optical detectors, using a Binary code per position ( Gray is an overkill, and not easily recognized by eye without gymnastics..). The shaft drive pulley incorporates the encoding as seen below. Reverse side of pully with thrust bearing and drive keyway. The pulley slide on the shaft as the pneumatics push the toolplate out 5mm to clear the Hirth couplers.
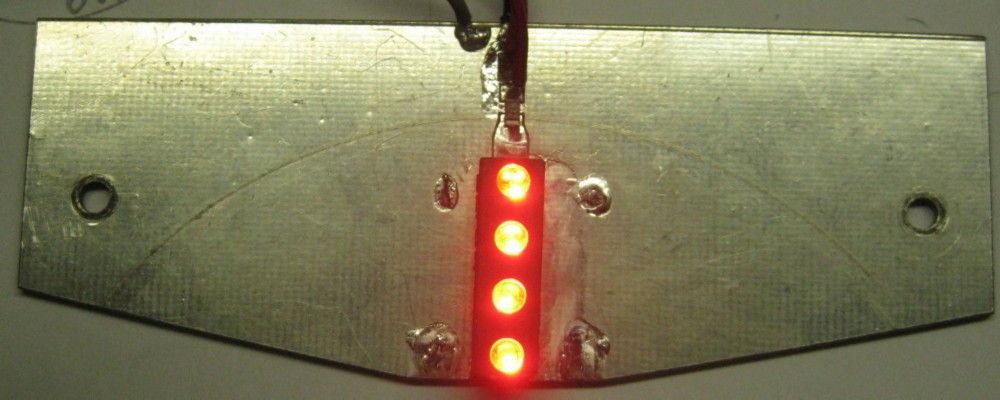
The LED Illuminator PCB - sits behind the encoder pulley lined up with the holes.
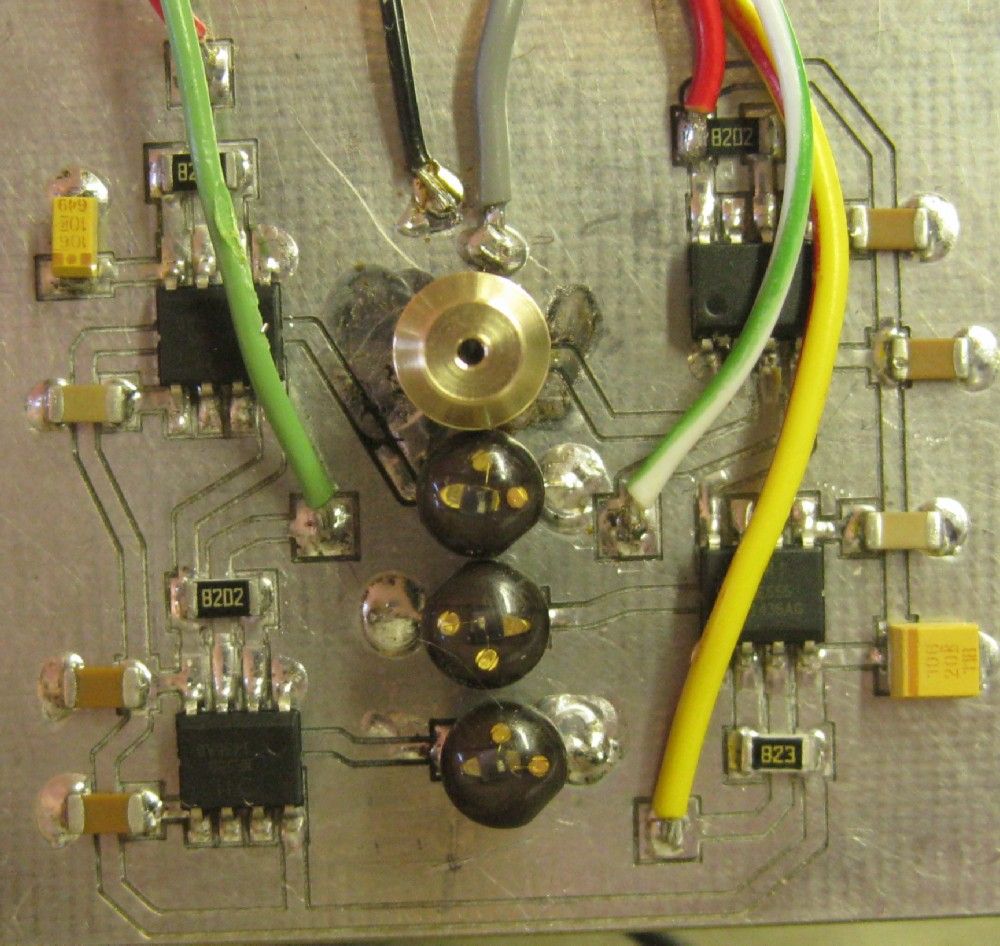
The photo transistor detector PCB prototype. This fits in front of the encoder pulley, over the illumination holes. 4 Transistors, with one ( upper one in photo below) in a brass cap to present a small optical orifice - see reason in explanation with following photos.
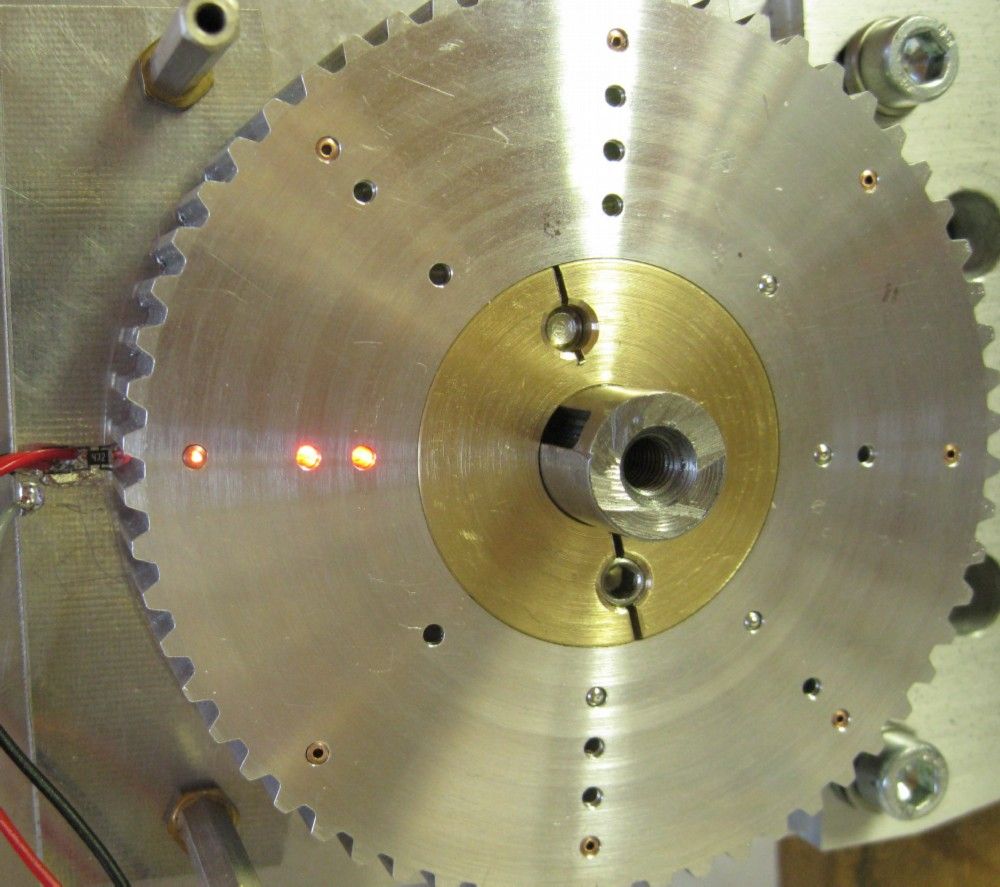
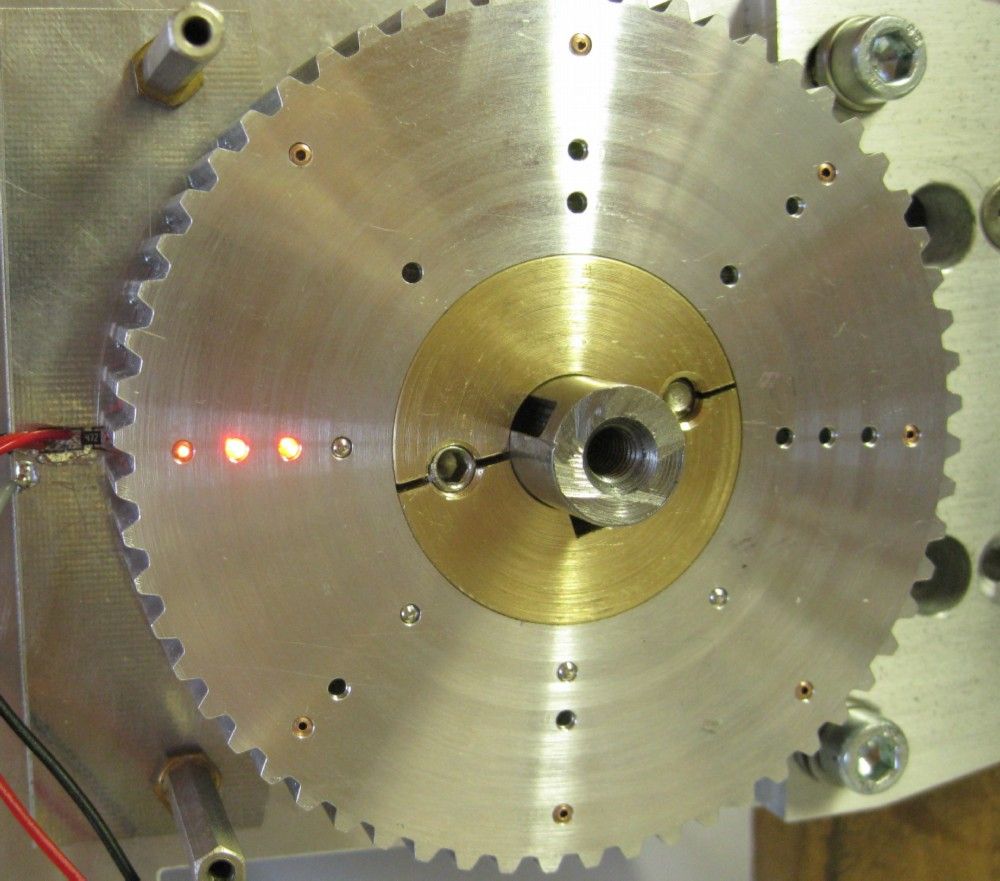
The encoding is in binary, 0-7 giving 8 tool positions. There is a 9th position, in the toolplate center, but that is available at any tool position selection and is differentiated by tool offsets only. There are however 4 sets of holes in the encoder - the inner 3 are the binary encode and the outer is a tool position reference - whenever this detector is active, the other three binary detectors conditions are guaranteed valid. This reference detector is optically stopped down so that there is about 1.5 to 2 deg of movement withing which it is valid. The other detectors optical windows are larger and will detect position before the reference, and maintain position after the reference is declared invalid. This ensures there is never a false tool number for a selected position.
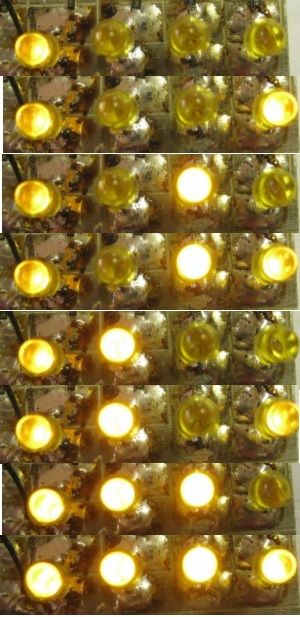
I knocked up a small PCB with 4 leds to be driven by the optical detectors so I could visually validate each position. I did verify that the detection signal is clean, with an oscilloscope - no oscillations, etc. The photo-detector interfaces to a 555 Timer IC. I drive the internal voltage divider and the 555 is fed from +12v. The signal from the phototransistor must go below 4volts to activate the 555 output ( lit by illuminator LED) and then must go above 8volts to deactivate the 555 output. There is therefore a large hysteresis and no possibility of oscillation. Binary code per tool position below - from 0 to 7, with the left hand LED showing the reference detector valid with each position. ( the right hand led - Bit-0, is not as clear as the others...camera position issue..) Joe
Edited By Joseph Noci 1 on 09/07/2021 12:29:18 Edited By Joseph Noci 1 on 09/07/2021 12:37:51 |
| Thread: Universal thread cutting |
| 05/07/2021 17:18:28 |
Posted by JasonB on 05/07/2021 12:26:31:
Can I ask what the ELS users do about returning the carriage for th enext cut when doing say a metric thread on an imperial leadscrew equiped machine? Do you still have to leave the half nuts engaged and then use the driven screw for a fast rewind after retracting the tool. As Tony said, yes. Although the point of metric with imp. leadscrew etc becomes moot with the ELS - you simply don't bother with needing to know any of that - keep the halfnuts engaged - the ELS takes care of the rest. Thread start point and end point are user settable then remain fixed till you are done - you just take care of retracting the threading tool and putting on cut for the next pass - don't have to clinch as you approach the dead shoulder, etc, metric, imperial threads or a 1.95mm pitch thread if you wish.. And if you use a lever retractable cutting tool, it's even simpler. |
| Thread: CNC Lathe Scratch Build |
| 04/07/2021 20:29:00 |
Ady1/Andrew, thank for the encouragement.. This is turning out to be rather overwhelming..
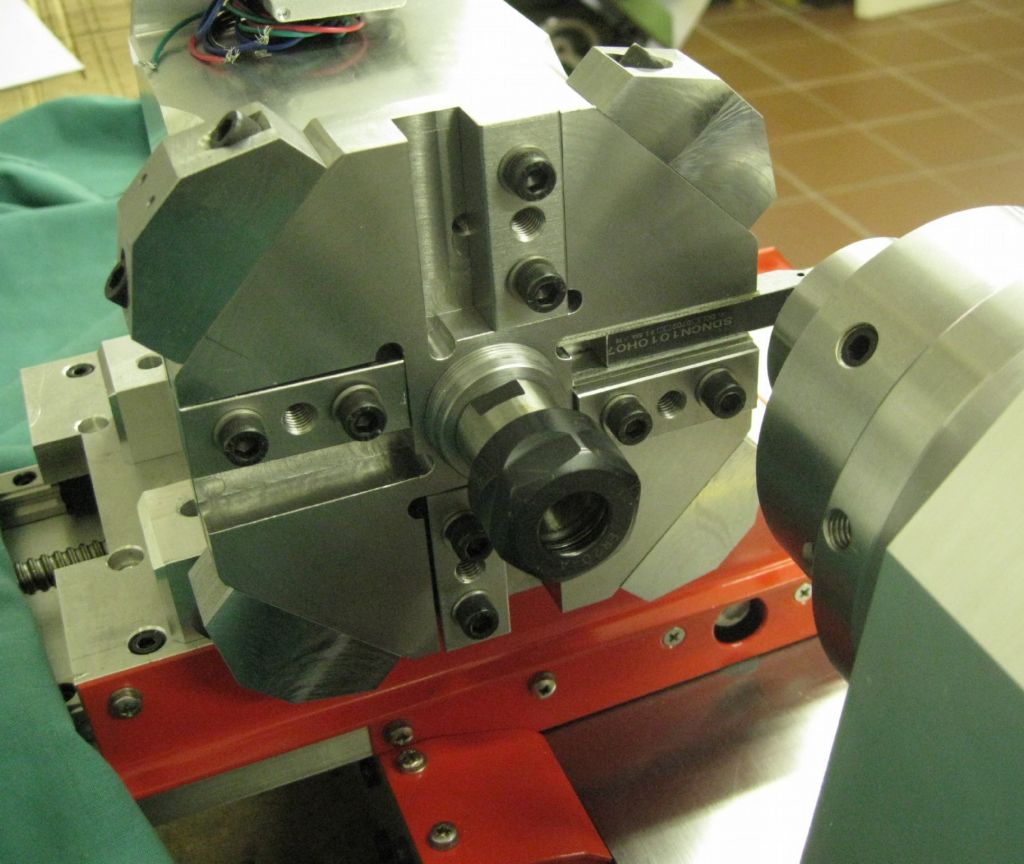
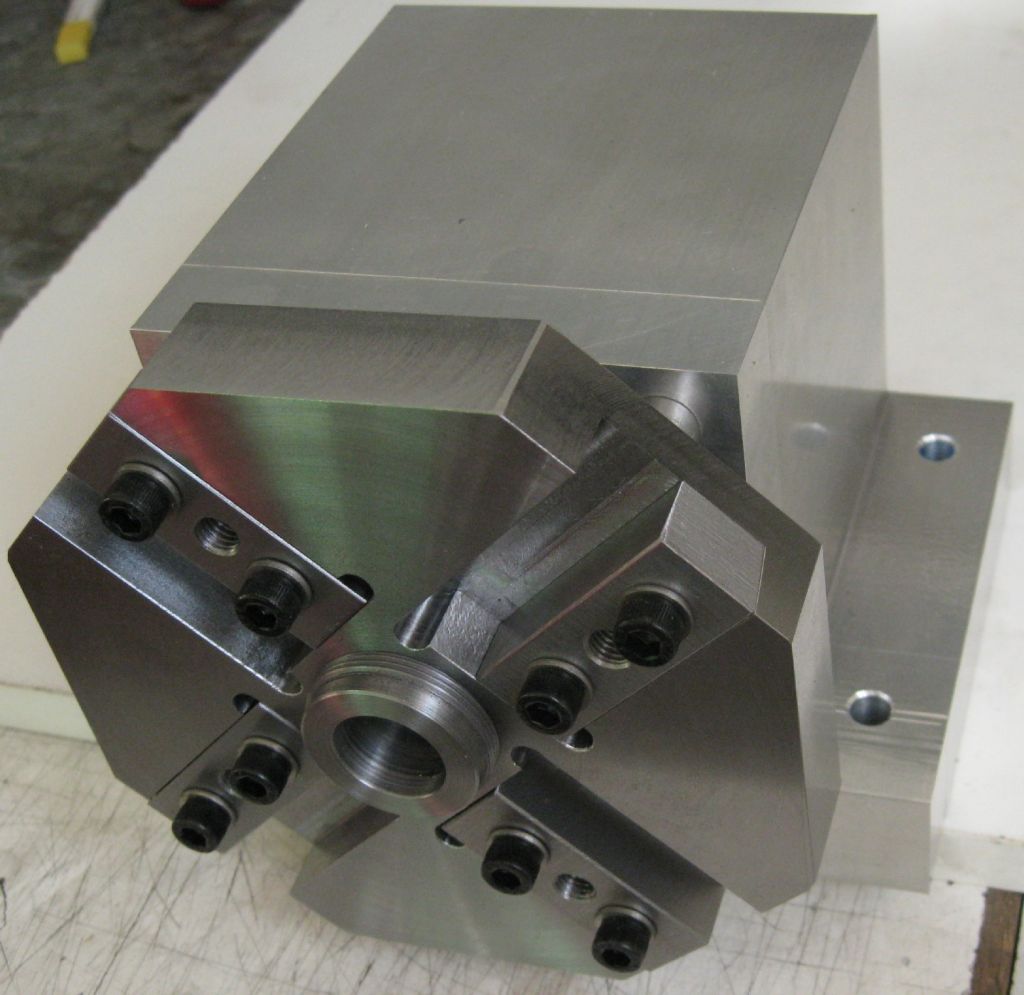
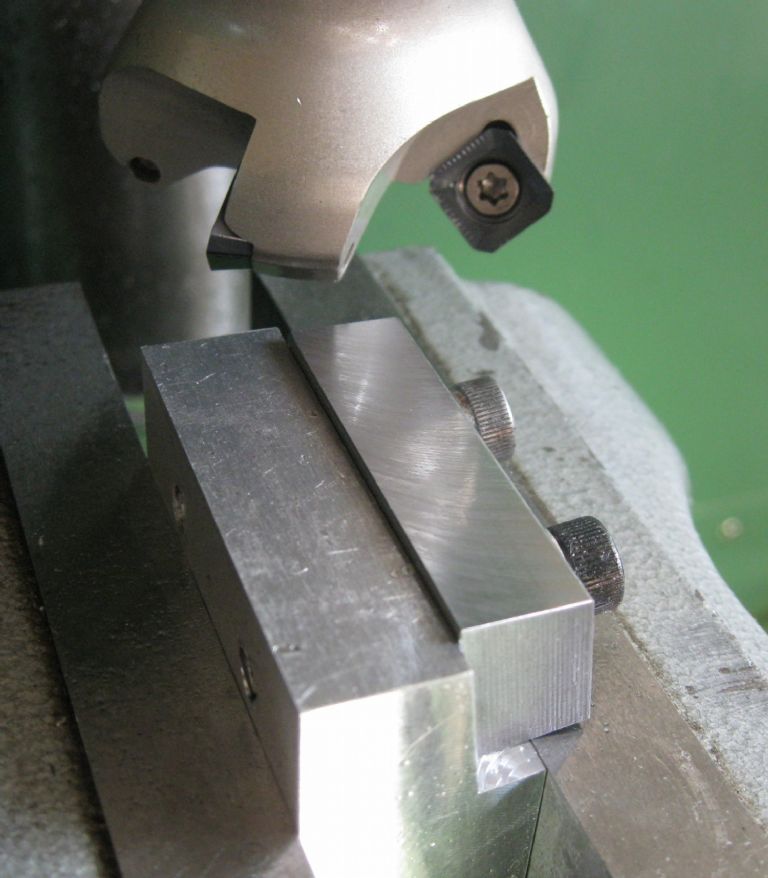
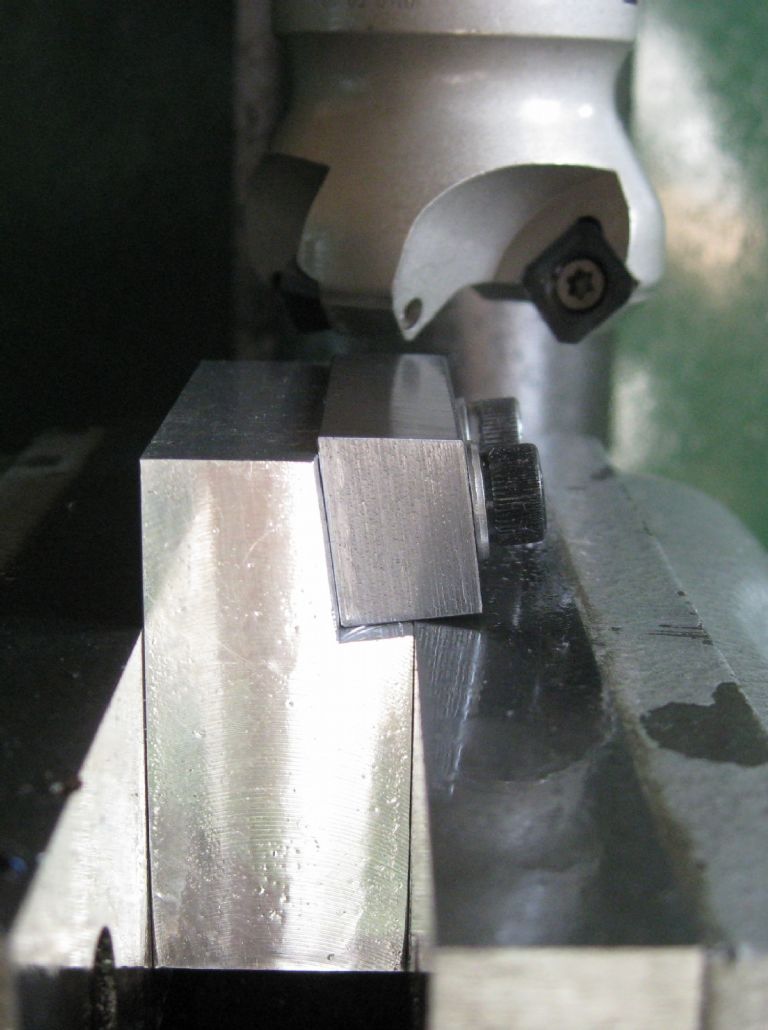
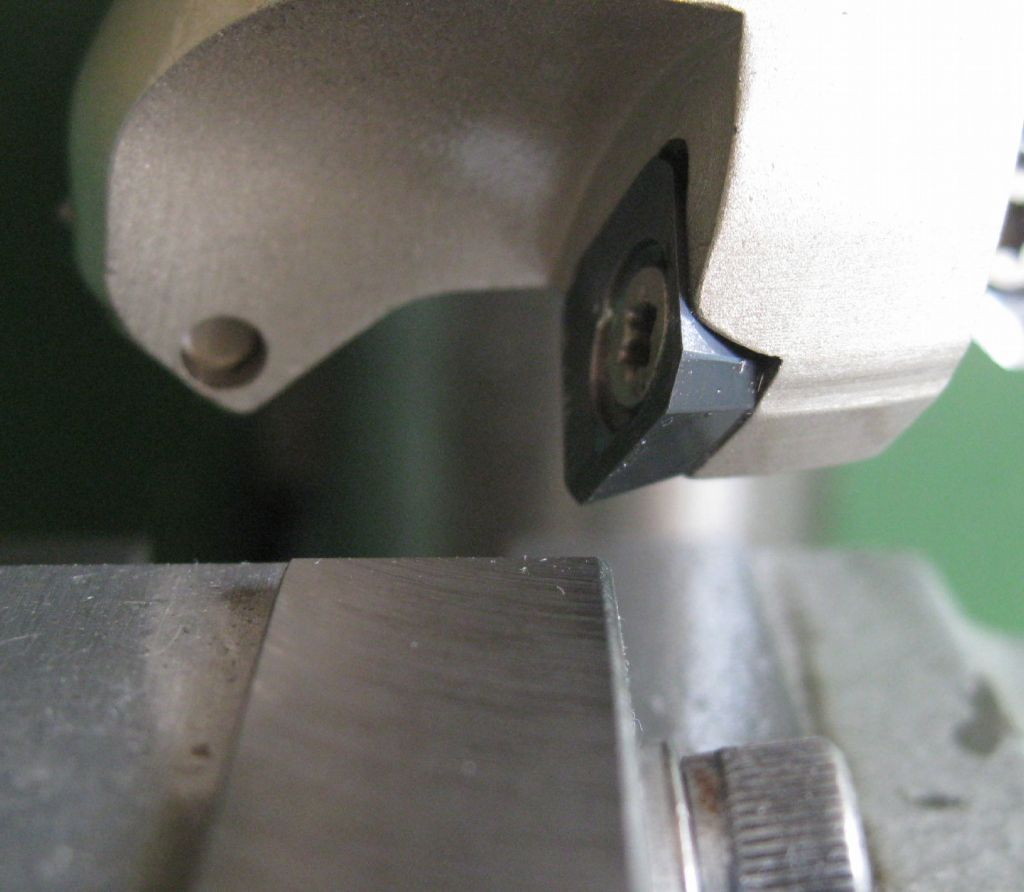
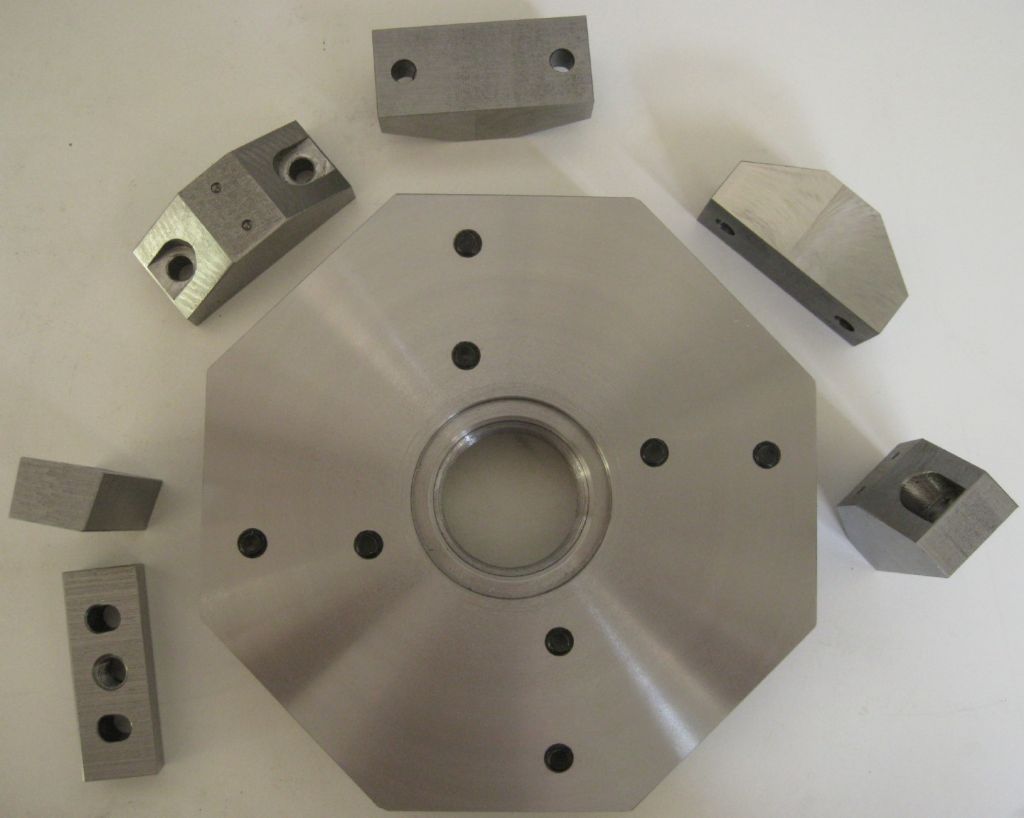
I have progressed well on the toolplate. A slice of 150OD x 30mm thick steel from a MASSIVE hydraulic ram that had bent...(!) was the raw stock. This was faced both sides down to 23mm thick, and then lots of milling. The cutting Tool wedges were previously roughed to dimension on the shaper. An angle jig was made up to hold each wedge in the mill vice to cut the pressure angle as is in the toolplate itself. A 4-insert carbide mill cutter was used to cut the angle. The cutter has a very high rake angle and very sharp carbide tips and cuts the steel beautifully, leaving a gleaming mirror finish.
Closeup of the cutter tips and Rake angle
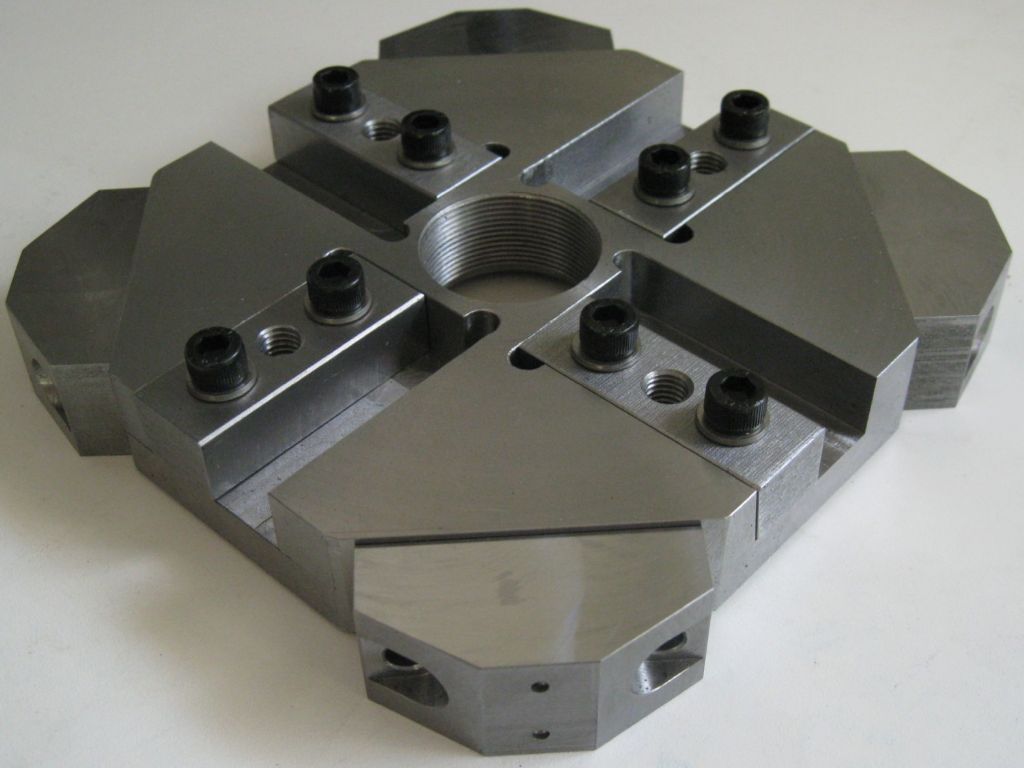
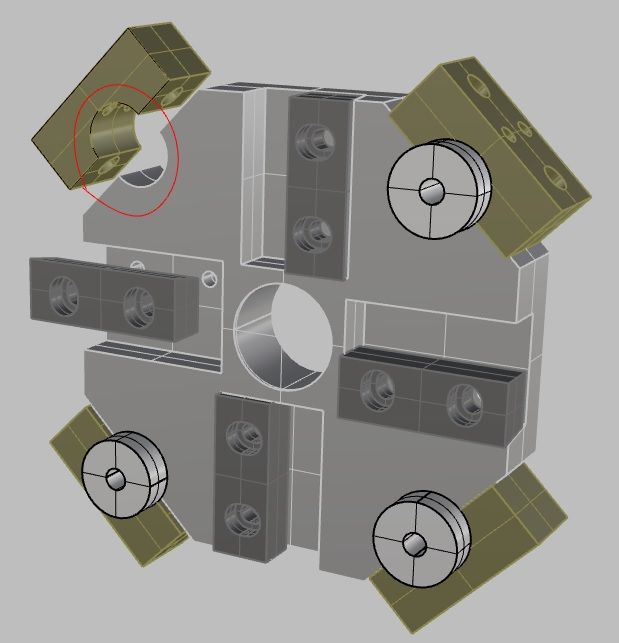
Holes still required in the tooplate are the holes for the axial tools, as circled in red in the rendering below the toolplate image under. Those holes will be done in situ once the toolchanger is fitted to the lathe and the cutting centers determined. This will ensure the tools end up on lathe spindle axis. Also, the holes threading on the rear of the toolpate for the toolpate Hirth coupler. The hole for the axial tooling circled in red below Toolplate rear view.
Now to get the new spindle/headstock assy aligned on the lathe. Once done, I can trial fit the ATC and trim the body base under to get the ATC spindle axis aligned with the lathe spindle axis. Then fix the ATC in place and drill a and bore out the axil tooling holes in situ. And find more cardboard boxes for the swarf.. Joe |
| Thread: Acrylic as an Insulator |
| 01/07/2021 08:36:56 |
Posted by old mart on 30/06/2021 18:53:32:
If you have a digital meter, set it to 20 megohms and test that black plastic, it is very unlikely to be a conducting grade, but, being black, it could be antistatic, there is a remote possibility. Edited By old mart on 30/06/2021 18:54:5 An Urban Legend that... If there are any carbon chains in that sort of coloured material, they never are in contact and never form a continuity path in the material below the hundreds of meg-ohms region. Any finger grime on the material will conduct more than the material innards! The same applies to Anti-static bags ( for electronic components, etc) - the pink, black and silver bags that are common in the field have a spec to which compliance is required - clean with alcohol and then distilled water, warm to 35deg C for 1 hour, and resistivity must be such that less than 1nanoamp will flow with 1000VDC applied to two 1cm contacts spaced 20mm apart... So the possibility of conduction in black perspex is not even remote.. - @ 5V you could use a bit of Tomato Box... Joe
|
Want the latest issue of Model Engineer or Model Engineers' Workshop? Use our magazine locator links to find your nearest stockist!
Sign up to our newsletter and get a free digital issue.
You can unsubscribe at anytime. View our privacy policy at www.mortons.co.uk/privacy
- *Oct 2023: FORUM MIGRATION TIMELINE*
05/10/2023 07:57:11 - Making ER11 collet chuck
05/10/2023 07:56:24 - What did you do today? 2023
05/10/2023 07:25:01 - Orrery
05/10/2023 06:00:41 - Wera hand-tools
05/10/2023 05:47:07 - New member
05/10/2023 04:40:11 - Problems with external pot on at1 vfd
05/10/2023 00:06:32 - Drain plug
04/10/2023 23:36:17 - digi phase converter for 10 machines.....
04/10/2023 23:13:48 - Winter Storage Of Locomotives
04/10/2023 21:02:11 - More Latest Posts...
- View All Topics
- Reeves** - Rebuilt Royal Scot by Martin Evans
by John Broughton
£300.00 - BRITANNIA 5" GAUGE James Perrier
by Jon Seabright 1
£2,500.00 - Drill Grinder - for restoration
by Nigel Graham 2
£0.00 - WARCO WM18 MILLING MACHINE
by Alex Chudley
£1,200.00 - MYFORD SUPER 7 LATHE
by Alex Chudley
£2,000.00 - More "For Sale" Ads...
- D1-3 backplate
by Michael Horley
Price Not Specified - fixed steady for a Colchester bantam mark1 800
by George Jervis
Price Not Specified - lbsc pansy
by JACK SIDEBOTHAM
Price Not Specified - Pratt Burnerd multifit chuck key.
by Tim Riome
Price Not Specified - BANDSAW BLADE WELDER
by HUGH
Price Not Specified - More "Wanted" Ads...
Do you want to contact the Model Engineer and Model Engineers' Workshop team?
You can contact us by phone, mail or email about the magazines including becoming a contributor, submitting reader's letters or making queries about articles. You can also get in touch about this website, advertising or other general issues.
Click THIS LINK for full contact details.
For subscription issues please see THIS LINK.
Model Engineer Magazine
- Percival Marshall
- M.E. History
- LittleLEC
- M.E. Clock
ME Workshop
- An Adcock
- & Shipley
- Horizontal
- Mill
Subscribe Now
- Great savings
- Delivered to your door
Pre-order your copy!
- Delivered to your doorstep!
- Free UK delivery!




 Register
 Log-in


