Cormak Z7045 Mill
| John MC | 15/03/2023 09:02:05 |
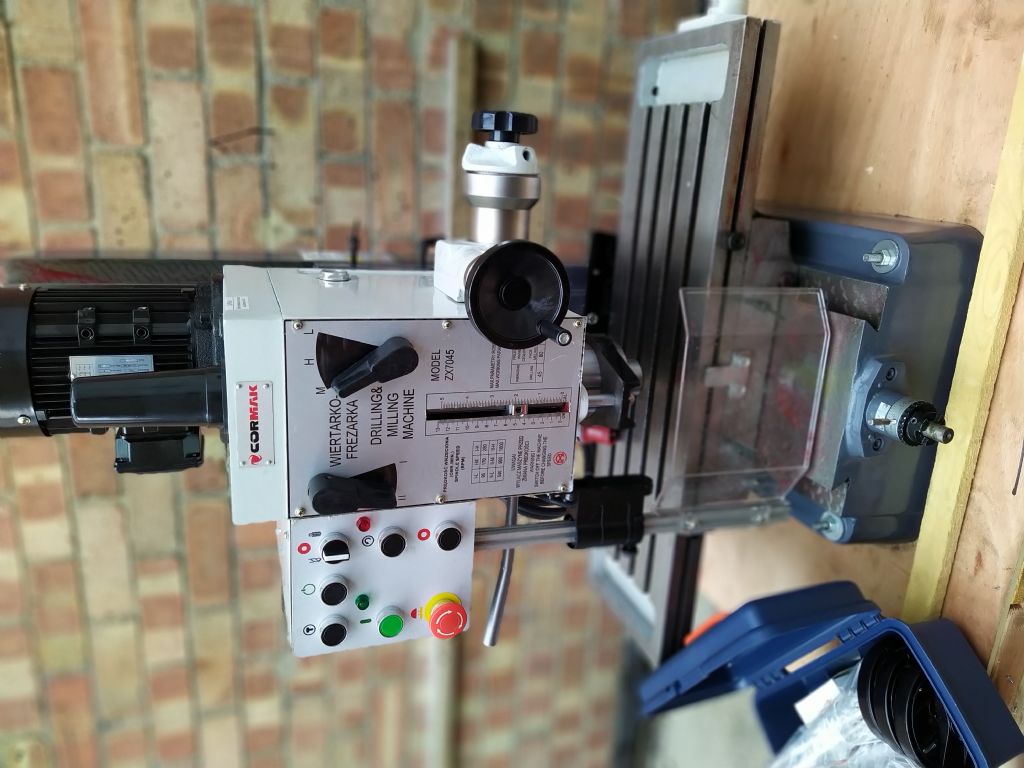
464 forum posts 72 photos | This thread has been inspired by Taf_Pembs Chester Super Lux thread . The Cormak Z7045 is a very similar machine to the Chester as are the offerings from Warco, Grizzly, Arc and several others. The main difference between these machines seems to be the claimed quality and therefore price. Not wanting to hijack Tafs thread I’ll start a new thread outlining the problems I have found and how I’ve gone about sorting out the machine. First some background. My first mill was a far eastern mill/drill sold under the “Union Jag” label, bought from LS Machine Tools in Leicester. I purchased it in the late 1970’s before the poor reputation (at that time) of far eastern machinery established itself. I got lucky though, a couple of minor problems easily sorted. The machine was versatile and, with careful use, reasonably accurate. This machine was replaced with a Herbert 0V, a sturdy, accurate machine that has served me well for some 30 years. My only complaint was the lack of workspace on the machine. This being the reason for buying the Cormack. So, after “due diligence” the order was placed then delivered a few weeks later. I already had reservations about the fundamental accuracy of the machine so the first thing I did after dismantling the packaging was an accuracy check. One recurring criticism of this type of machine is the vertical column not being vertical. I measured an error of 0.03mm over 300mm in the Y direction. Nothing detectable in the X direction. Promising, I thought. Also not particularly important, its what the quill is doing that is more important. There I did find an error that may need correcting, more about this later. The machine was still outside, but undercover. To move it in to the workshop I would need to dismantle it in to a two man lift. I planned to strip the machine anyway so as to be sure all was well. I wanted to make some modifications anyway, some essential and some ideas that had formed examining similar machines. What I have done is not on the epic level of Taf_Pembs work, fortunately for me! What is readily apparent is the poor detail design, regardless of supplier. To paraphrase a comment by someone else here, its like you are buying a potentially good machine but its going to take some work to get there. So, as they say, watch this space. John |
| Daggers | 15/03/2023 10:40:13 |
| 52 forum posts | Hi, Jons Workshop on youtube has a similar machine and has posted a number of videos shown modifications bot large and small. Might be worth a look if you have not already seen them. This link is for his latest modification but there are others on his channe. https://youtube.com/playlist?list=PL0Vhhmr4B_RWbb2ArG2MNKYvxtmbDoZ5W |
| Taf_Pembs | 15/03/2023 15:25:44 |
| 126 forum posts 96 photos | Hi John, Good luck with it! Mine is something of a mission but I'm really enjoying doing it (although difficult being pretty well 1 handed at the moment) and I'm learning a lot in the process.. between us and the wealth of knowledge and helpful folk on here I'm sure we'll end up with something reasonable!
|
| John MC | 16/03/2023 16:20:19 |
464 forum posts 72 photos | Daggers, found that link while researching which machine to buy. Not impressed with it, doesn't seem to address the fundamental problems. I may well have missed the detail, the videos are far too long, hours of viewing there! Also some dubious practises going on, he's a little to fond of his hammer. There are better videos, one in particular discusses the "Optimum" version of the machine. Taf, the one thing I wanted was to avoid a "mission" by buying new. No where near as much work to do as you, but its heading in to "mission" territory!
|
| John MC | 17/03/2023 11:28:13 |
464 forum posts 72 photos | Time to get started on checking and reassembling the machine. The first task after dismantling the machine was to assemble the stand. A thin sheet metal box held together with a few nuts and bolts. My first thought was this is going to vibrate, it does. There is a small door on one side, for a coolant tank and pump, I believe. Not fitting a coolant system so I have cut out part of the front of the stand and fitted a shelf inside. This will create useful storage space. I also raised the height of the stand with a couple of pieces of 4x4 timber for a more comfortable working height. Lifting the base of the machine was a two man job as was upending it to remove the moulding sand still stuck to the casting. What must that do to the manufacturers machines? Accuracy checks, two rollers in the dovetail and measured with a micrometer and the depth of the dovetail were good. I tidied up the slot for the Y axis nut passes through and went over all the machined surface to remove any burrs. All the cast surfaces had been filled and painted, the filler often being of considerable thickness. This I removed from wherever a nut or bolt is located. Absolutely vital for a properly clamped joint. |
| John MC | 19/03/2023 11:05:35 |
464 forum posts 72 photos | Something odd going on here. The previous post is now incomplete and a subsequent post has disappeared all together. Any idea as to what has happened? |
| John MC | 19/03/2023 12:08:39 |
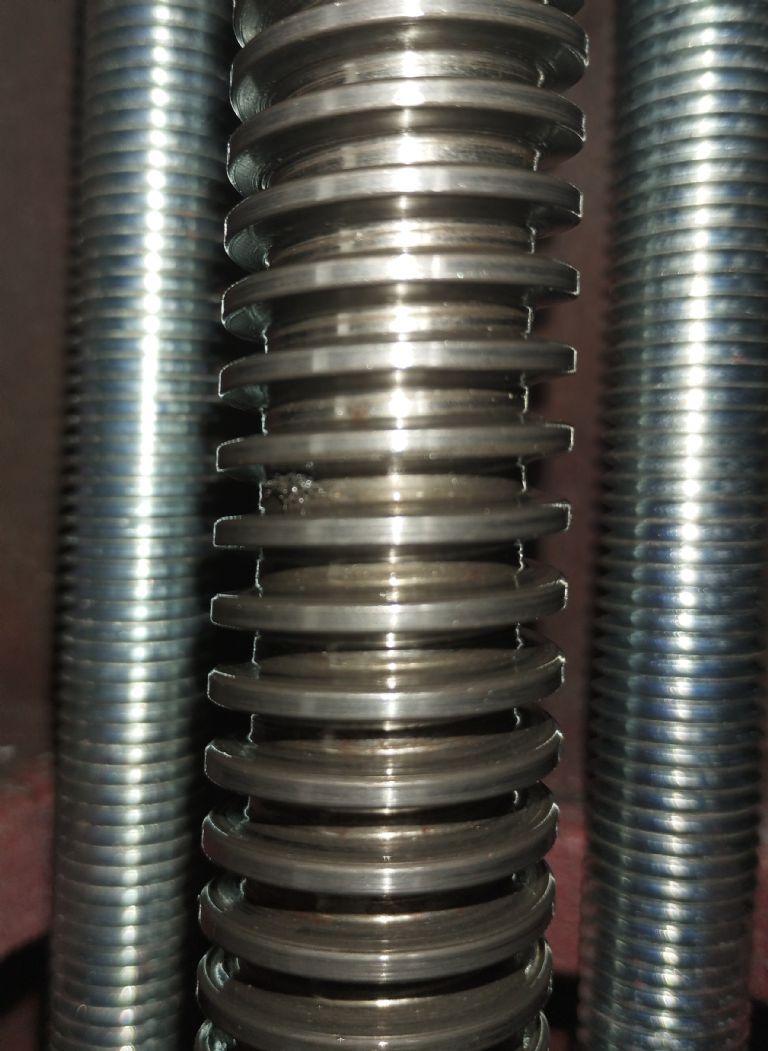
464 forum posts 72 photos | To continue, the base is now bolted down to the stand. I checked that doing this would not distort the base. The stiffness of the base overwhelmes that of the stand so all okay. Now ready to look at the column. In my research in to these machine the column can cause consdireable grief due to it often not being vertical, anything up to 1mm error over the length of the column. How important is it for the column to be truly vertical? With this type of machine the head is moved in to position, roughly. The accurate movement is then done with the quill. This, for me would be true for most jobs. Any job needing a Z movement greater than the quill range can be done by moving the column up/down the column. Knowing where the error is can be compensated for. Never the less, zero error would be better. I checked the slideway for accuracy. I found with the tapered gib adjustment that it ran out of adjustment before a satisfactory fit was acheived. Easily sorted. I sorted out the lubrication of the elevating gear, a couple of grease nipples to get grease in to the thrust bearing that takes the weight of the head and to lubricate the bevel gears sorted this out. The hand crank to elevate the head was held on the it's shaft by a grubscrew bodging on to a flat on the shaft. I have keyed the crank on to the shaft and clamped everthing together with an axially positioned M8 bolt. After some careful preparation pf the joint faces and removal of the paint/filler from the bolt seatings I reassembled. While doing this I speculated that rigidity would be greatly improved if the base and column were cast in one piece and could I do anything to improve rigidity in this area. To this end I have fitted two lengths of M16 all-thread that further clamp the column down to the base. A thick steel plate on top of the column and another under the ribbing on the underside of the base. I tightened the nuts to somewhere around 230Nm (170 ft lbs), to load the column in compression. Will this help, yes, but con't ask me how much! The two legths of all-thread fitted snuggly either side of the Z axis leadscrew as the photo shows. At this point I checked the vertical accuracy, slightly better than it was. I have decide not to spend too much time fretting over accuracy for the moment. To get a better picture of accuracy I'll waiting until the machine is substantially complete.
|
| John MC | 22/03/2023 15:05:00 |
464 forum posts 72 photos | Next job on this project was to have a look at the work table and the saddle. All seemed okay. I used an angle grinder to cut some oil ways into the fixed slideways of the X and Y movements so as to distribute lubrication to where its needed. Also fitted some oil cups to make oiling easier. Two features I noticed that, at first glance, looked good, were leadscrew backlash adjustment and ball thrust bearings for the leadscrews. The backlash is adjusted by distorting the nut, not the best way of doing the job but better than nothing. What was, I felt, unsatisfactory, were the thrust bearings. It was possible for both the fixed and rotating thrust washers to do the opposite to the intended. Also there was no means of adjusting the bearings so as to eliminate backlash. As built the guy who assembled the machine must have assembled the relevant parts on the machine then drilled through the "dial clutch" and hammered in a roll pin, presumably hoping for the best!. So far the worst bodgery on the machine. The micrometer dial was also a very poor fit. To sort this out I discarded the thrust bearings and replaced with a deep groove ball race (6203). I bored a suitable hole in the leadscrew supports and fitted a small ring to clamp the bearing in place. Wanted to use circlips but not quite enough metal to allow me to do this. The Y-axis leadscew is only supported by the nut and one support. The X-axis leadscrew is supported at both ends and the nut. I have arranged the thrust to be carried by the R/H bearing, the other just guides the leadscrew. I made two new "dial clutches" from steel that are keyed on to the leadscrew and a much better fit on the dials. The order of assemlby on the leadscrew was support with bearing, a spacer, "dial clutch" handwheel all clamped in place with an M8 bolt threaded in to the end of the leadscrew.. This resulted in zero backlash other than the (minute) clearance in the bearing. The nut backlash adjusters could not be adjusted to eliminate backlash in the threads but quite close before causing the threads to stiffen. Oil cups fitted for lubrication. I also arranged some pipe work to get oil into the X-axis leadscrew nut, the Y-axis is easy to get at, just lift the swarf gaurd. The gibs needed some tidying up before assembly. No further problems found during assembly, the table movement feels nice now. So far not a lot of work needed to bring the machine up to an acceptable condition. That was about to change..........
|
| John MC | 25/03/2023 16:18:02 |
464 forum posts 72 photos | Before opening up the gearbox I decided to run the motor. I bought the 3 phase version so I could use a VFD to increase the speed range aswell as use the variable speed option. The head was sat on the workshop at this point in a wooden cradle. I connected up the VFD with the help of a couple of forum members. Would have been easier if the instructions for the VFD were correct! I ran the motor from 5 to 80 Hertz, all seemed well, reasonably quiet and gear selection okay. So far so good. I removed the motor then lifted the top off the gearbox. I've seen some real horror stories about the muck found in gearboxes of these machines. None of that for me, thankfully. The only thing of concern was a circlip lying in the bottom of the box. The other circlips were all in place so I guess whoever assembled the box dropped it, then, rather than retrieve it just grabbed another from the parts bin. I drained the oil, very clean but less than an hours running. I extended the drain for the box, oil changes will be a lot less messy in the future! I always fit a magnet to an oil drain plug but having extended the drain it would be too well shielded so I drilled and tapped a hole in the side of the box. I checked the fit of the spigot in the back of the box, the pivot that the box rotates on to set the angle or otherwise of the head. I can think of a couple of workshop expressions that would describe the fit, I'll call it "slack". This, I think, is typical of the poor design of these far eastern machines, poorly proportioned. This spigot needs to be a lot longer, rather than ~12mm, 50mm+ would be much better. On the short spigot the head, on releasing the clamping bolts, will tilt forward and, possible, jam, making adjustment difficult. I reduced the clearance in the spigot to 0.05mm by mounting the Z axis sliding member on a face plate. Reduced the diameter by 6mm. Pressed a sleeve on and machined it to get the necessary clearance. While on the faceplate l checked the parallelism of the z axis slide, spot on! More on this later. I then reassembled the head on the machine, refitted the top of the box and motor. I scraped away the paint from where the three clamping bolts fit and made some thick washers. I modified the oil filler bolt so that there was no chance of anything finding its way in to the gearbox. Next job was to remove the quill.
|
| John MC | 26/03/2023 12:39:34 |
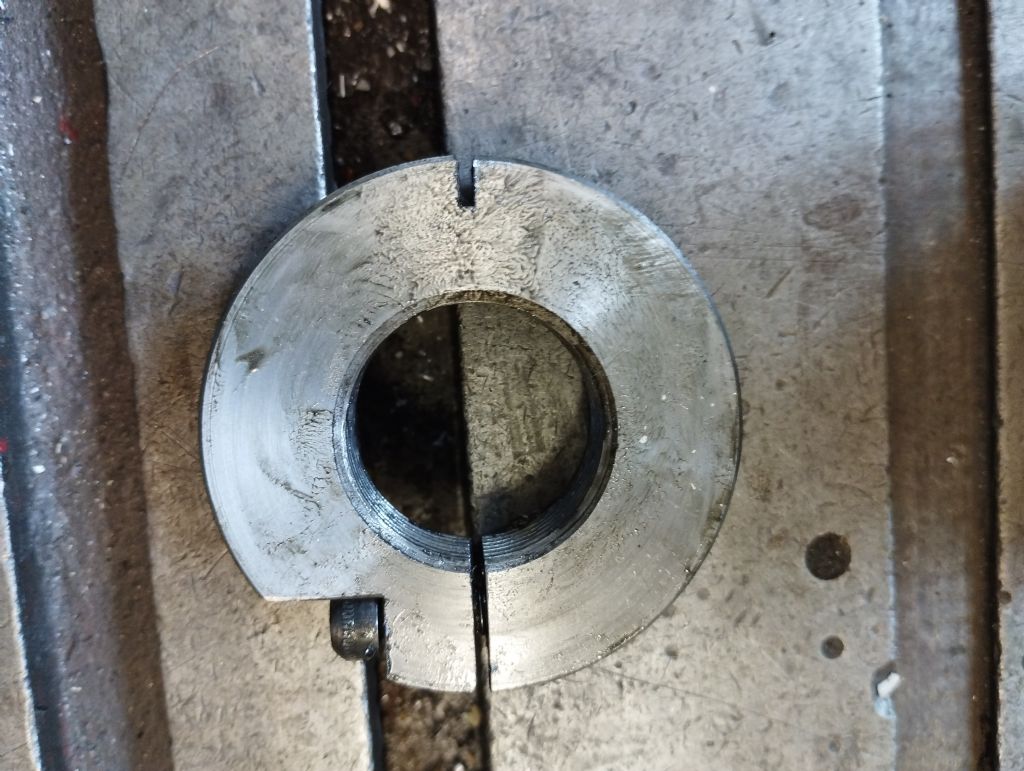
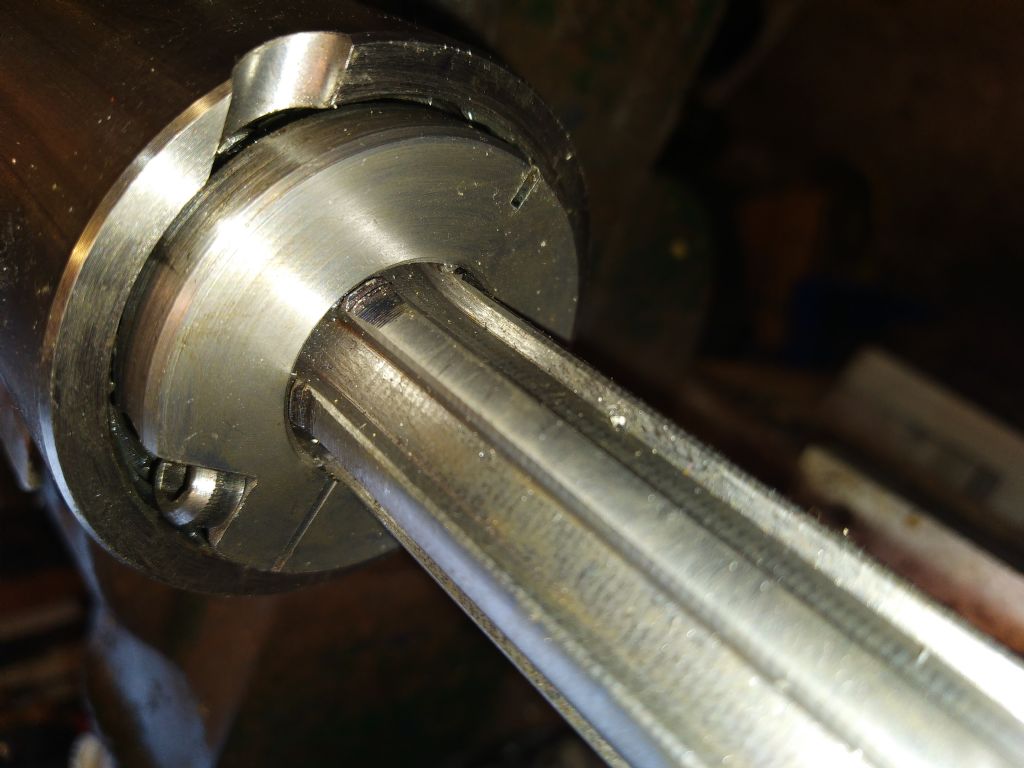
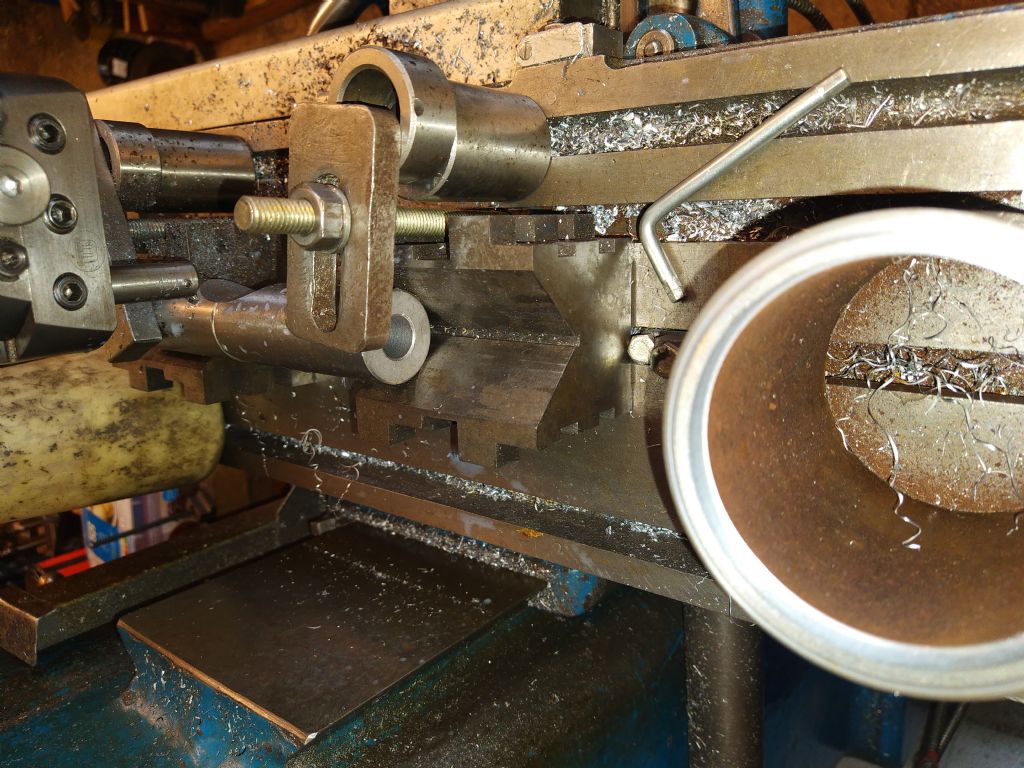
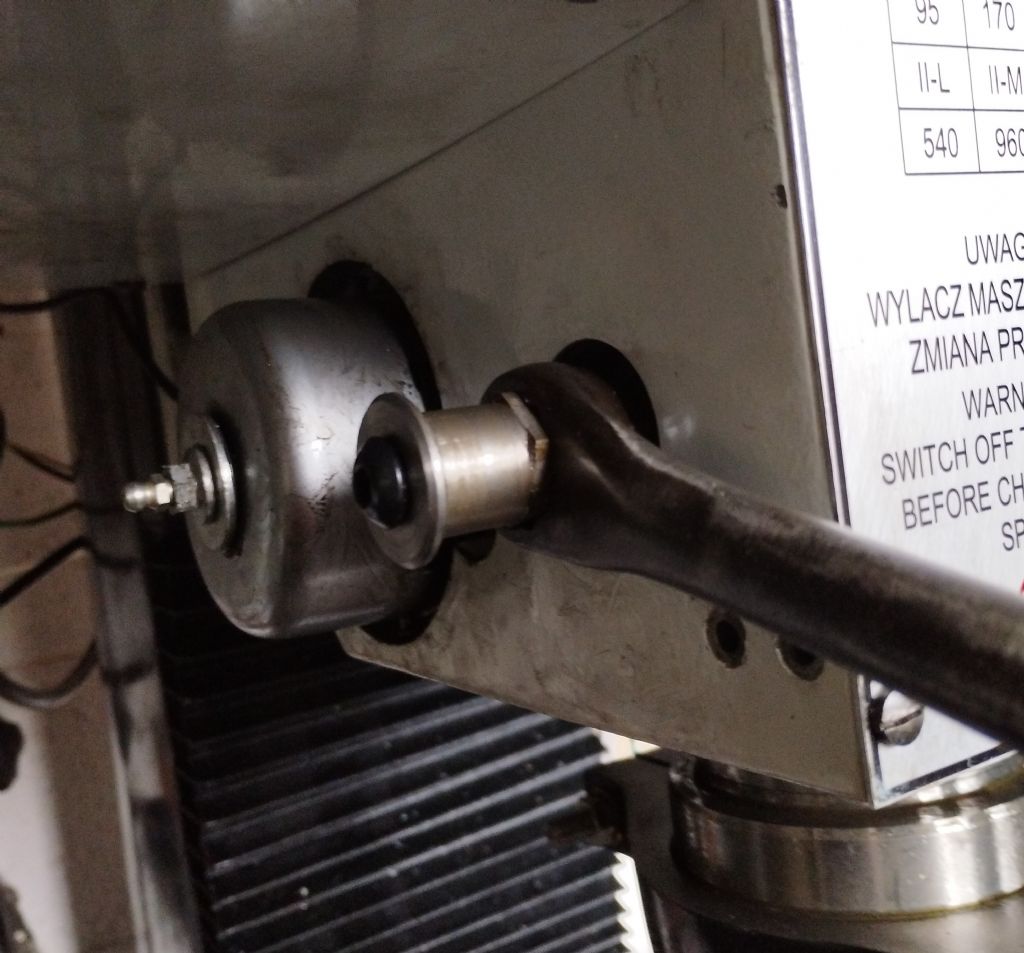
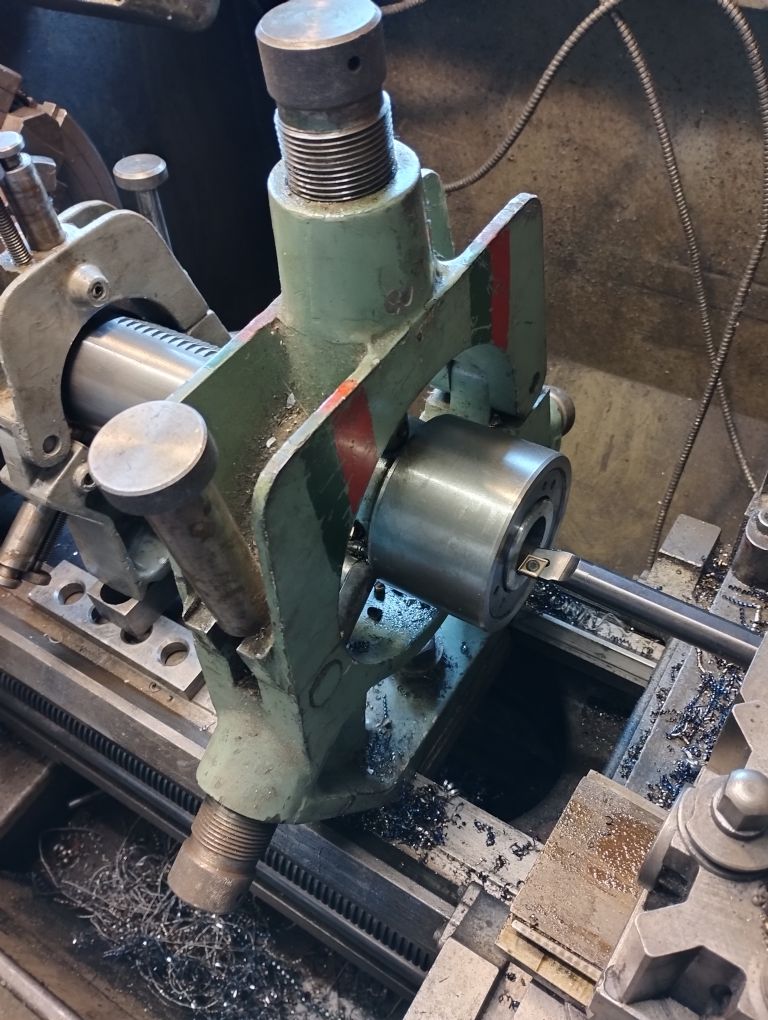
464 forum posts 72 photos | The Quill was straightforward to remove. The quills key (to stop rotation) is an M10 grubscrew locked in to position with a nut. All of this is down a deep counterbore that is too small to get a socket on the lock nut. I made a new locknut with a smaller AF dimension so a slim socket could get at it. With the quill on the bench I removed the spindle. No horrors here. I fitted an oil seal in to spindle dust cover. The outside diameter of the spindle is 45.5mm so no seal available. I fitted a 45mm I/D seal with a 68mm O/D, it seems to have the flexibility to cope with the oversize shaft. The bearing adjustment was a very poor arrangement, a slotted nut held in place (hopefully) with a tab washer. Something very common on these far eastern machines. I made a theaded ring with a split the can be locked in place with an M6 cap head screw. As can be seen from the photo it was necessary to machine a small slot to give access to an allen key. This arrangement gives a far more positive clamping force than the original arranement. The tapered roller bearings need to be adjusted with, ideally, zero clearance. In practice difficult to achieve so aim for a slight preload. It won't hurt the bearings and will improve rigidity. I checked the fit of the quill in the head, good, the only play I could find was when the quill was almost out of the head, beyond where the normal travel would go. If there was play then, depending on the amount of play I would have had the quill decoratively chromed if play was minimal. Indusrial chrome for big clearance and honed the head bore to suit. I also considered slitting the head so the clearance could be adjusted. The quill lock is a good arrangement poorly executed. The locking handle, extended to clear the electrical equipment box gave very poor feel as to how tight or otherwise the clamp was. The lock itself is two pieces of cast iron with crude chamfers that pinch the quill to lock. I machined a radius in to the two clamps equal to the radius of the quill. The photo shows the arrangement for doing this, the tube in the foreground was use to set the boring head to the correct radius to do the job. I fitted a "loose" spanner, captive on an extended nut to act as the clamping lever. There was, on the end of the pinion shaft a thumbscrew, all it seemed to do was hold the return spring in position. I discarded that and fitted a bolt and washer arrangement to hold the spring in position. I also fitted a grease nipple for lubrication. I also made sure lubrication was taken care of at the other end of the quill pinion shaft. I adjusted the return spring to just be able to carry the weight of the quill rather than sending the quill flying back in to the head as it was as purchased. The pinion shaft had no proper axial location other than the thumbscrew adjacent to the return spring. I made a collar to fit around the shaft that located the shaft properly. I decided at this point to give the machine some use to settle things down. Then have a look at the various alignments. Ps. Sorry about some of the photos being on their side, how do you sort that?
|
| mgnbuk | 26/03/2023 13:54:30 |
| 1394 forum posts 103 photos | I made a theaded ring with a split the can be locked in place with an M6 cap head screw. Awful style of "locknut" those. If, when you check spindle runout with a test bar, you find that there is a runout error - suspect that locknut first. I once spent a couple of days trying to eliminate a runout error in a Boko borer spindle that my former employer was rebuilding. New precision bearings fitted, but the spindle runout was out of spec. Tried all ways to set one of that style of locknut, but regardless of what order of assembly or tightening, the final "nip" on the screw always introduced a runout error. Fortunately the spindle thread was a standard size that was available as an SKF KMT precision locknut - not cheap items, but fitting one had the spindle preloaded to spec with the locknut fully tightened & locked with no spindle runout within 10 minutes of delivery of the SKF nut. I concluded that the spilt style locknut nut twisted when the locking screw was tightened, causing an uneven application of thrust to the bearings. Nigel B. |
| John MC | 26/03/2023 17:26:42 |
464 forum posts 72 photos | Something not right there. Assuming it was a Boko metalworking machine, these are substantial machines, it would take a lot of force to distort the spindle to introduce an error. Where was the bearing adjustment ring? For rigidity at the top of the spindle? Probably some 300mm separation? Clamping the adjuster upsets run-out at the cutter end? If the KMT's ability to be tightened selectively to reduce error then that error needed to be investigated. I would strongly suggest the error was elsewhere. I did consider useing a KMT style locknut, axially too long, not enough room to accomodate. Also, it would be clamping on a splined part of the shaft, it might clamp on the thread, it might not. The locking ring I have described is very effective. Easy to make, the accuracy is easy to achieve, clamping/adjusting face perpendicular to the screw thread when machined at the same settting. Made properly, once the adjustments made it will not upset that setting. I hope your comments do not put others off using it. |
| mgnbuk | 26/03/2023 18:00:23 |
| 1394 forum posts 103 photos | I hope your comments do not put others off using it. Can only speak as I found John. Yes the Boko was a substantial spindle & it absolutely had a runout issue caused by that style of locknut. Fitting a KMT nut cured the issue - the issue was not elsewhere as you suggested. The abililty of the KMT nut lcoking mechanism to lock the nut against rotation without axial displacement was, I think, the reason. If your application isn't suitable for that style of nut then fair enough. Given my past experience , I would have chosen to stick with the original arrangment. If you are happy that the split nut is an improvement, also fair enough. Regards, Nigel B. |
| John MC | 28/03/2023 16:34:45 |
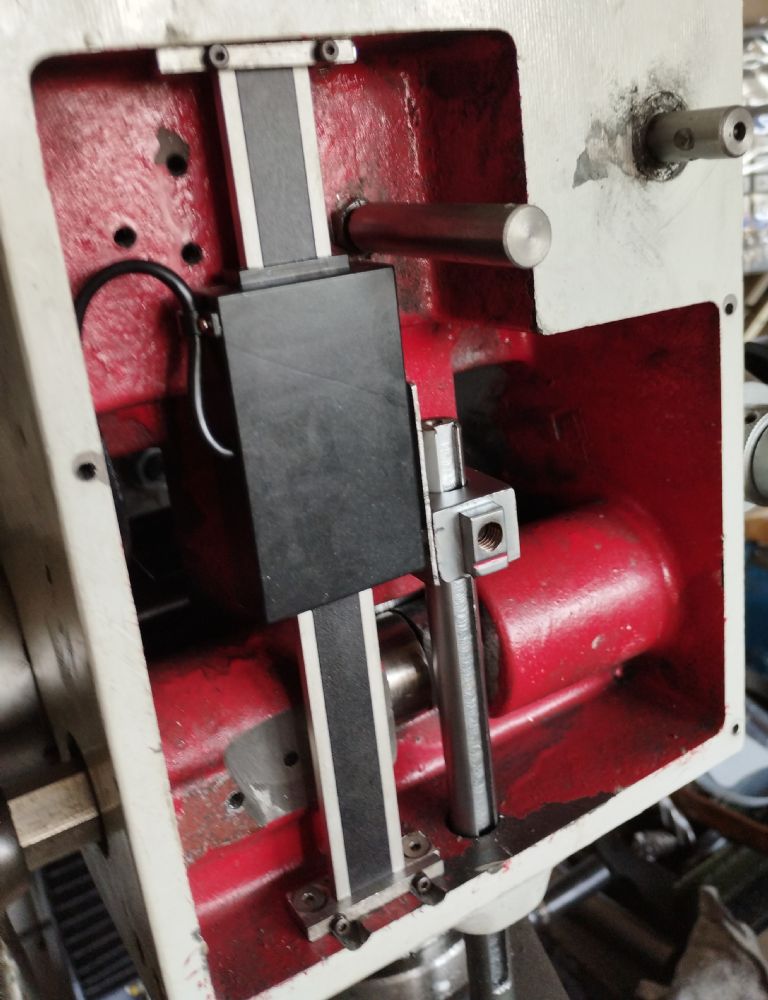
464 forum posts 72 photos | In reply to the previous post, the original method of locking the bearing adjustment is unsatisfactory so I have just applied good engineering design and practice to sorting it out. To rubbish this style of locknut without understanding why it caused a problem and why another type apparently sorted it does not sit well with me. Anyway back to the Cormak. The machine was now back in one piece, any problems so far were relatively easily sorted. At this point I fitted a two axis DRO to the X and Y movements. I decided not to fit to the Z (column) axis, this is for positioning the head, the precision movement is done by the quill. I hope my reasoning remains valid! I fitted a basic DRO to the quill and was delighted by the fact I could get it fitted within the head casting, just. I also connected the VFD using the existing switchgear box for the VFD remote controls.
The round bar adjacent to the dro is for oiling the quill and its bearings. Its screwed in to an existing hole in the quill guide and protrudes through a hole in the cover. An oil cup screws in to the top of the bar. Time to get the machine running. To start with I ran the machine at various speeds checking nothing got hot, all seemed well. Before cutting metal I attempted to set the head vertical. Difficult due to its weight and poor location. Managed it eventuall but began thinking of ways to make it easier, more on this later. Setting up the head did show a significant error. Side to side good. Front to back and error that would need 0.2mm (0.008" The error I found in the column had reduced somewhat. Over the full movement of the column, assuming my large angle plate and cast iron box are accurate, the error was under 0.04mm. Not much over one and a half a thou. This was both for side to side and front to back. Pleased with that. I ignored this error initially and did a few jobs on the mill. Not.hing like a some big cuts to settle things down! Allowing for the known error the machine seemed accurate. The machine has a 4MT location for my various chucks etc. I noticed that the ER40 chuck was hanging out the spindle by some considerable distance, excessively so. This needed to be sorted out. My first thought was to make compact chuck that would locate on the O/D and end face of the spindle. Couldn't get a useful reduction in overhang. Also would not help with other tooling. So I shortened the spindle, I'll describe that later. The machine was now showing some promise.
|
| John MC | 02/04/2023 09:56:25 |
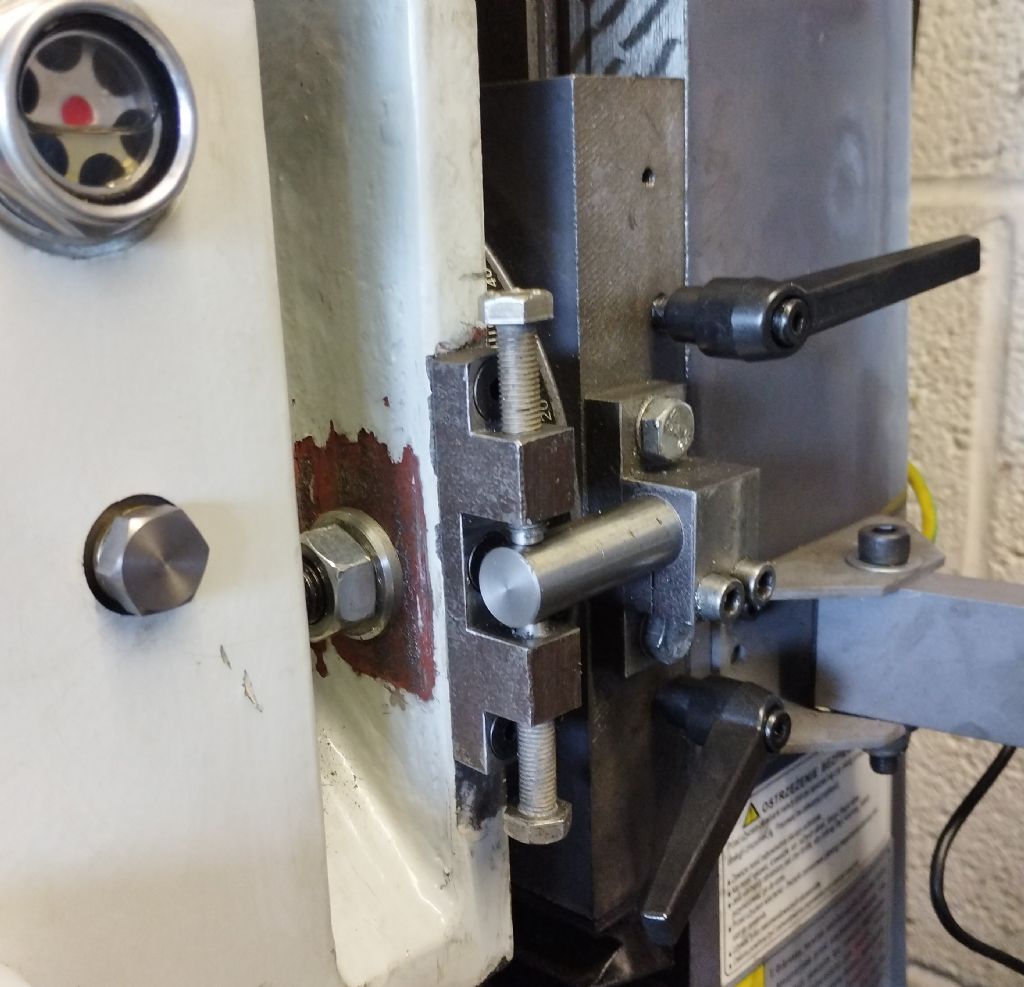
464 forum posts 72 photos | Time to sort out the "nodding head" error. To recap, the head needed 0.008" (0.2mm) shim trapped between the head and Z axis slide to bring the quill perpendicular with the work table. After gettting a friend to check my reasoning/method I clamped the slide to the work table of another mill. I shimmed it in such a way as to duplicate the shimming that corrected the error. A fiddly job manipulating the cutter around the spigot! Before machining I checked that the spigot would not jam as it would be misaligned. A bit of trig showed the error was very small and as I mentioned before, when I improved the fit of the spigot I left some clearance to avoid jamming when the clamp bolts were released, just as well I did! Reassembled and checked the accuracy. Remembering the error was 0.008" (0.2mm) over 6" (150mm). The error front to back (Y axis direction), is now ~0.0015" (0.04mm) across the full width of the table, 9.5" (240mm). Happy with that for now. What I wasn't so pleased about was creating another error to remove an error. In my defence, it was the easiest way. Ideally the metal removed to correct the error should have come off the head casting. That would have stretched my facilities and been a diificult to set up. To set the head vertical "tramming" as its called here, wasn't easy. The head is a big lump of metal to nudge very small amounts. To make this easier I made the device in the photo. Hopefully it's operation is self explanatory. Only useful for the vertical (or near) position. The round bar can be unclamped to move out of the way for any other angle. Another mill of my aquaintance has a geared arrangement (worm and wheel) to rotate the head. I considered this, lots of work to do, maybe for the future. At this point the machine got some more use. All seemd well except for the excessive overhang of the cutter from the the bearing that is supposed to carry the cutting forces. I thought it was limiting the machines ability to remove metal.
|
| John MC | 06/04/2023 16:02:57 |
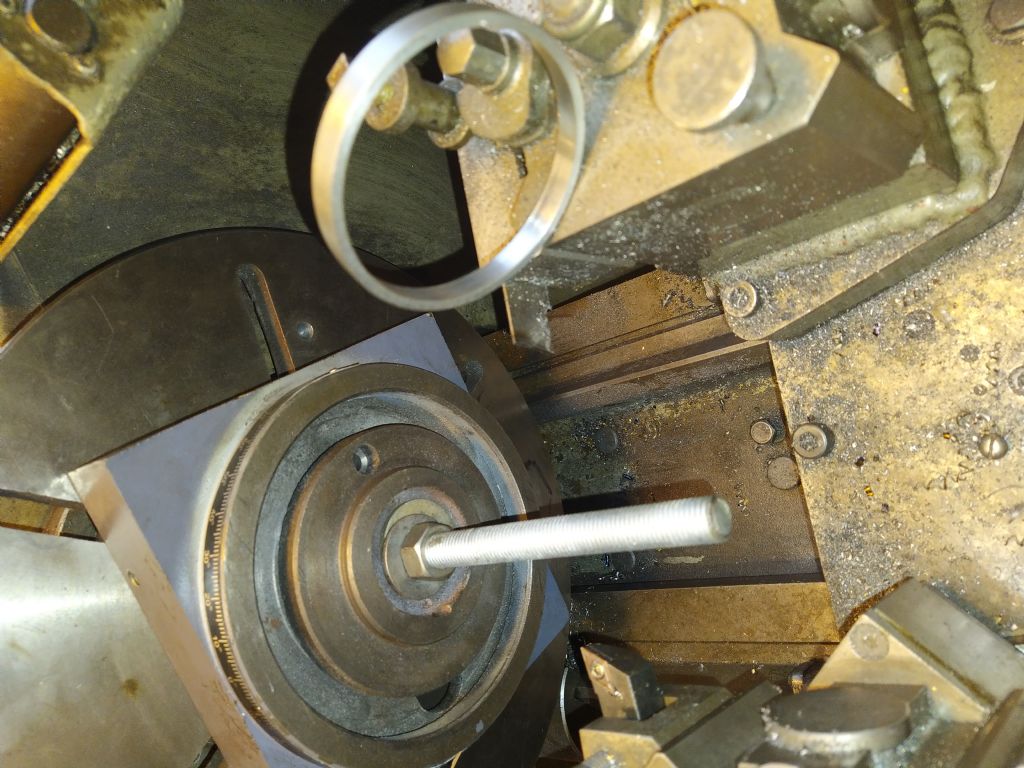
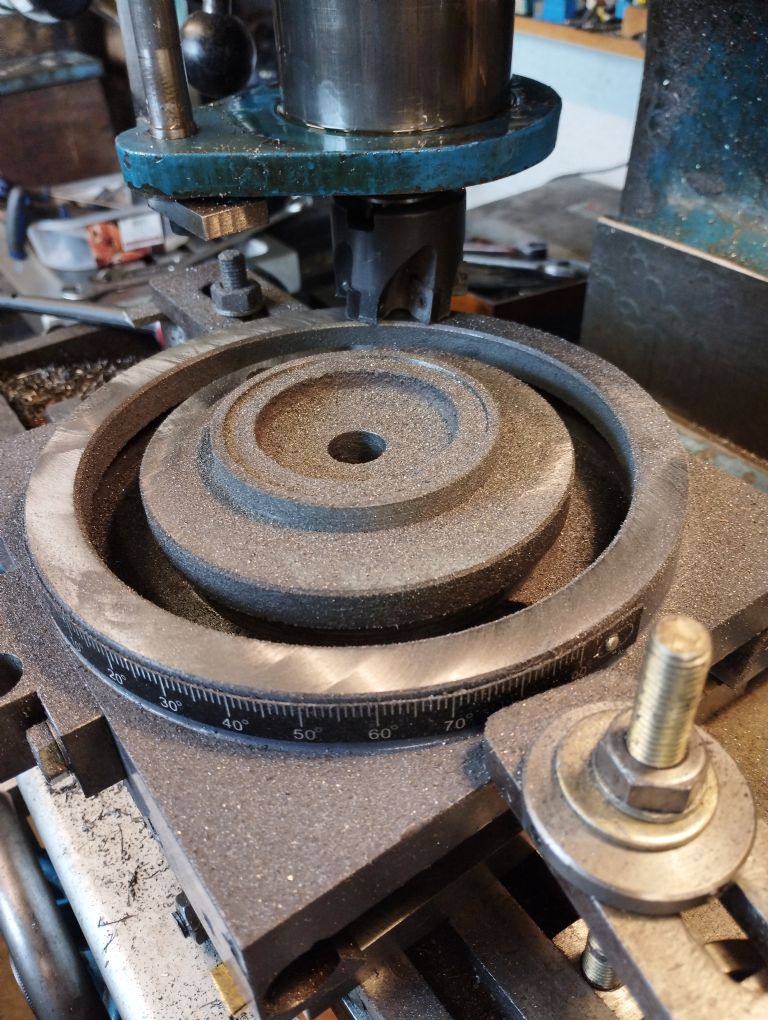
464 forum posts 72 photos | The excessive overhang from the lower spindle bearing seems to be a generic feature of this style of machine. It will, without doubt, hamper the performance of the machine. It would be so easy at the design stage to eliminate this unneccessary overhang. Could it be done so as to incorporate driving slots for face mills and the like? Very necessary on large powerful industrial machines that are made to work hard but our machines don't need it. My first go at reducing overhang reduced it by some 35mm, that is to say the bearing was 35mm closer to the load it is supporting. I achieved this by maching away the overhang until the spindle was almost flush with the end of the quill and what was now the oil seal holder. Then I remachined the 4MT to bring the various chucks etc as close as possible to the end of the spindle. This, of course, made the drift slot redundant. A tap on the drawbar unlocks the bearing. The photo shows the setup for machining. The spindle mounted in its bearings in the quill. The steadies holding the quill so that the spindle runs in its own bearings. This ensures absolute accuracy. It was fortunate that the spindle had enough "meat" in it to allow modification. The machine was reassembled and put to work. The improvement was noticed immediately. By way of a comparison I used the machining of the head adjusting device I described earlier. I machined some of it before and some after the spindle shortening work, this made for a good comparison. I wish at this point I could say I was pleased with this but I cannot. I could not help but feel what I had done in reducing the overhang was a "half a***d" job. Look at the photo of the machining setup, the lower end of the quill is a big lump. The bearing sits some 15mm from the end of the quill. While the spindle was dismantled for cleaning up after the work described I took measurements of the quill, spindle and other components related to the assembly. Then drew the assembly on the computer. I have now reduced the overhang by a further 21mm. This will mean (I haven't done it yet) a new spindle and modifications to the quill. I'll describe this when its done. I've only just ordered the the steel (EN8) for the spindle and bearings. There may be some further gain, I need to see the bearings "in the flesh" to see how the cup and cones of the tapered rollers fit together and determine the space needed. I think SKF's recommendations look rather generous. Incidentally, the original quill is case hardened, not really necessary, I think, especially as the morse taper surface and the splines were not hard! The spindle did not machine well, a hardness test revealed that the spindle was just over 200 Brinell, so not much harder than mild steel. As an old colleague would say, thats made from old park railing!
|
Please login to post a reply.
Want the latest issue of Model Engineer or Model Engineers' Workshop? Use our magazine locator links to find your nearest stockist!
Sign up to our newsletter and get a free digital issue.
You can unsubscribe at anytime. View our privacy policy at www.mortons.co.uk/privacy
- hemingway ball turner
04/07/2025 14:40:26 - *Oct 2023: FORUM MIGRATION TIMELINE*
05/10/2023 07:57:11 - Making ER11 collet chuck
05/10/2023 07:56:24 - What did you do today? 2023
05/10/2023 07:25:01 - Orrery
05/10/2023 06:00:41 - Wera hand-tools
05/10/2023 05:47:07 - New member
05/10/2023 04:40:11 - Problems with external pot on at1 vfd
05/10/2023 00:06:32 - Drain plug
04/10/2023 23:36:17 - digi phase converter for 10 machines.....
04/10/2023 23:13:48 - More Latest Posts...
- View All Topics
- Reeves** - Rebuilt Royal Scot by Martin Evans
by John Broughton
£300.00 - BRITANNIA 5" GAUGE James Perrier
by Jon Seabright 1
£2,500.00 - Drill Grinder - for restoration
by Nigel Graham 2
£0.00 - WARCO WM18 MILLING MACHINE
by Alex Chudley
£1,200.00 - MYFORD SUPER 7 LATHE
by Alex Chudley
£2,000.00 - More "For Sale" Ads...
- D1-3 backplate
by Michael Horley
Price Not Specified - fixed steady for a Colchester bantam mark1 800
by George Jervis
Price Not Specified - lbsc pansy
by JACK SIDEBOTHAM
Price Not Specified - Pratt Burnerd multifit chuck key.
by Tim Riome
Price Not Specified - BANDSAW BLADE WELDER
by HUGH
Price Not Specified - More "Wanted" Ads...
Do you want to contact the Model Engineer and Model Engineers' Workshop team?
You can contact us by phone, mail or email about the magazines including becoming a contributor, submitting reader's letters or making queries about articles. You can also get in touch about this website, advertising or other general issues.
Click THIS LINK for full contact details.
For subscription issues please see THIS LINK.
Model Engineer Magazine
- Percival Marshall
- M.E. History
- LittleLEC
- M.E. Clock
ME Workshop
- An Adcock
- & Shipley
- Horizontal
- Mill
Subscribe Now
- Great savings
- Delivered to your door
Pre-order your copy!
- Delivered to your doorstep!
- Free UK delivery!

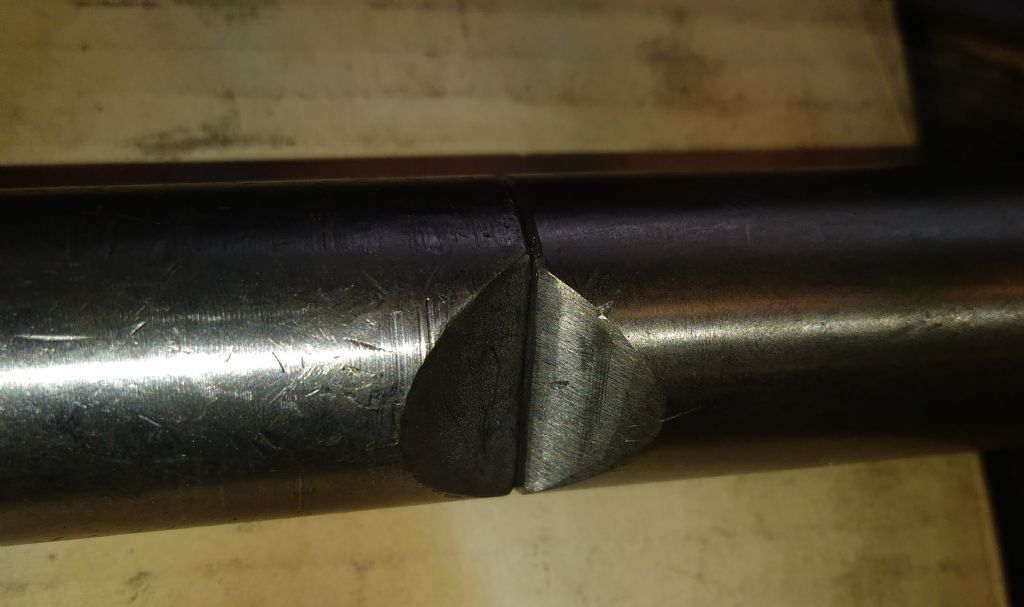
 removing to correct. The 0.2mm error was over a distance of 150mm.


 Register
 Log-in


