Forum sponsored by:

Clough42 Electronic Leadscrew on Colchester Roundhead Student
| Kevin McCartney | 24/03/2020 23:26:32 |
| 9 forum posts 9 photos | Well.....after the comments from my last post regarding NEMA selection I've had a busy couple of weeks fitting an electronic leadscrew conversion to my roundhead Student. It is now fully fitted and I'm glad to say so far it is behaving perfectly. I'm certainly not re-inventing the wheel here and all of the credit for software development etc belongs to James Clough. The information available and Youtube videos from Clough42 are first class - it was more the selection, and placement of components that was the challenge for me and this is probably most likely to be of interest to others on the forum. I chose a NEMA 24 4NM servo motor and driver kit from stepper online, Omron encoder and 3D printed all of the pulleys. The pulleys took a bit of trial and error to get right but I think they'll be strong enough. I used a pulley generator on Thingiverse and inserted the Colchester spline centre using Tinkercad. All pulleys printed at 40% infill.
I chose to drive the encoder 1:1 with 60T GT2 10mm wide pulleys. I am driving the leadscrew with a 3:1 24T - 72T HTD 5mm pitch 15mm wide pulley. Clough42 uses a die cast box from Bud industries for the control box. I couldn't find one in the UK (and didn't think to get one from from Mouser US when I placed the order for the LaunchXL) but found that a Hammond one available in the UK has exactly the same dimensions although the corner radiuses are slightly different. I can live with that. I 3D printed the lid and printed the control button information on a laser label.
After much deliberation I went with a 36v switching PSU for the servo motor and got a din mount 5v PSU for the LaunchXL and enclosure fan. Component layout below:
It took ages to decide on where to place the motor but in the end I placed it between the main drive belts. This meant there was absolutely no modification of the lathe needed. It fits nicely with loads of adjustment available.
The encoder was slightly easier but care had to be taken to keep it inside the cover
Finished power box below. I thought the box was going to be overkill size wise but I'm glad I left some breathing space!
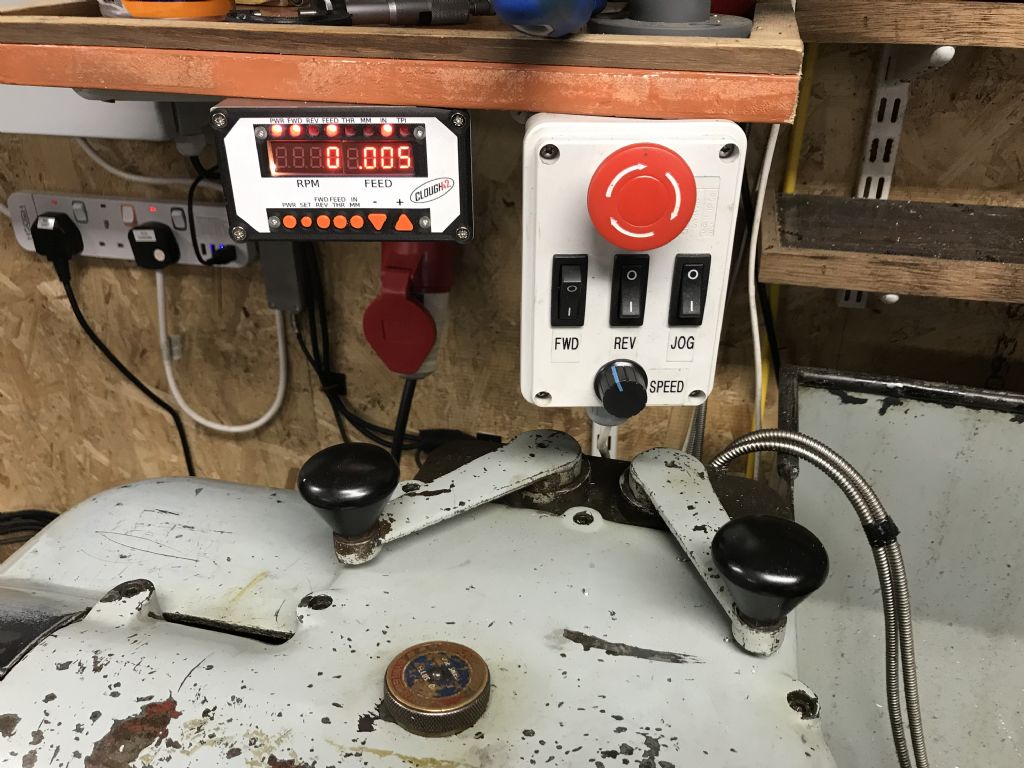
Control box sits nicely next to the vid control
I really enjoyed the project and am pleased with the results and consider the outlay worthwhile. Although I have most change gears it was a pain swapping them over and it is now nice to be able to select surfacing and facing speeds at the press of a button. I hope everyone here is able to stay safe and well during the COVID-19 lockdown and hopefully get to make the most of some workshop time. Kevin |
| Rockingdodge | 24/03/2020 23:34:08 |
 396 forum posts 111 photos | Nice one Kevin, I'll get the stepper and controller next month and still waiting for my psu to come through from where it's stuck in China. Only modding a 7x24 though, My big one Denham Junior mkII has a geared leadscrew and impossible to fit anything to it. Roger |


Please login to post a reply.
Magazine Locator
Want the latest issue of Model Engineer or Model Engineers' Workshop? Use our magazine locator links to find your nearest stockist!
Sign up to our Newsletter
Sign up to our newsletter and get a free digital issue.
You can unsubscribe at anytime. View our privacy policy at www.mortons.co.uk/privacy
Latest Forum Posts
- *Oct 2023: FORUM MIGRATION TIMELINE*
05/10/2023 07:57:11 - Making ER11 collet chuck
05/10/2023 07:56:24 - What did you do today? 2023
05/10/2023 07:25:01 - Orrery
05/10/2023 06:00:41 - Wera hand-tools
05/10/2023 05:47:07 - New member
05/10/2023 04:40:11 - Problems with external pot on at1 vfd
05/10/2023 00:06:32 - Drain plug
04/10/2023 23:36:17 - digi phase converter for 10 machines.....
04/10/2023 23:13:48 - Winter Storage Of Locomotives
04/10/2023 21:02:11 - More Latest Posts...
- View All Topics
Support Our Partners


Shopping Partners
Subscription Offer

Latest "For Sale" Ads
- Reeves** - Rebuilt Royal Scot by Martin Evans
by John Broughton
£300.00 - BRITANNIA 5" GAUGE James Perrier
by Jon Seabright 1
£2,500.00 - Drill Grinder - for restoration
by Nigel Graham 2
£0.00 - WARCO WM18 MILLING MACHINE
by Alex Chudley
£1,200.00 - MYFORD SUPER 7 LATHE
by Alex Chudley
£2,000.00 - More "For Sale" Ads...
Latest "Wanted" Ads
- D1-3 backplate
by Michael Horley
Price Not Specified - fixed steady for a Colchester bantam mark1 800
by George Jervis
Price Not Specified - lbsc pansy
by JACK SIDEBOTHAM
Price Not Specified - Pratt Burnerd multifit chuck key.
by Tim Riome
Price Not Specified - BANDSAW BLADE WELDER
by HUGH
Price Not Specified - More "Wanted" Ads...
Get In Touch!
Do you want to contact the Model Engineer and Model Engineers' Workshop team?
You can contact us by phone, mail or email about the magazines including becoming a contributor, submitting reader's letters or making queries about articles. You can also get in touch about this website, advertising or other general issues.
Click THIS LINK for full contact details.
For subscription issues please see THIS LINK.
Digital Back Issues


Donate

 Register
 Log-in
Model Engineer Magazine
- Percival Marshall
- M.E. History
- LittleLEC
- M.E. Clock

ME Workshop
- An Adcock
- & Shipley
- Horizontal
- Mill

Subscribe Now
- Great savings
- Delivered to your door

Pre-order your copy!
- Delivered to your doorstep!
- Free UK delivery!
All Forum Topics > Manual machine tools > Clough42 Electronic Leadscrew on Colchester Roundhead Student