Mill tramming discrepany between tools- confused.
| pgk pgk | 27/07/2015 22:26:42 |
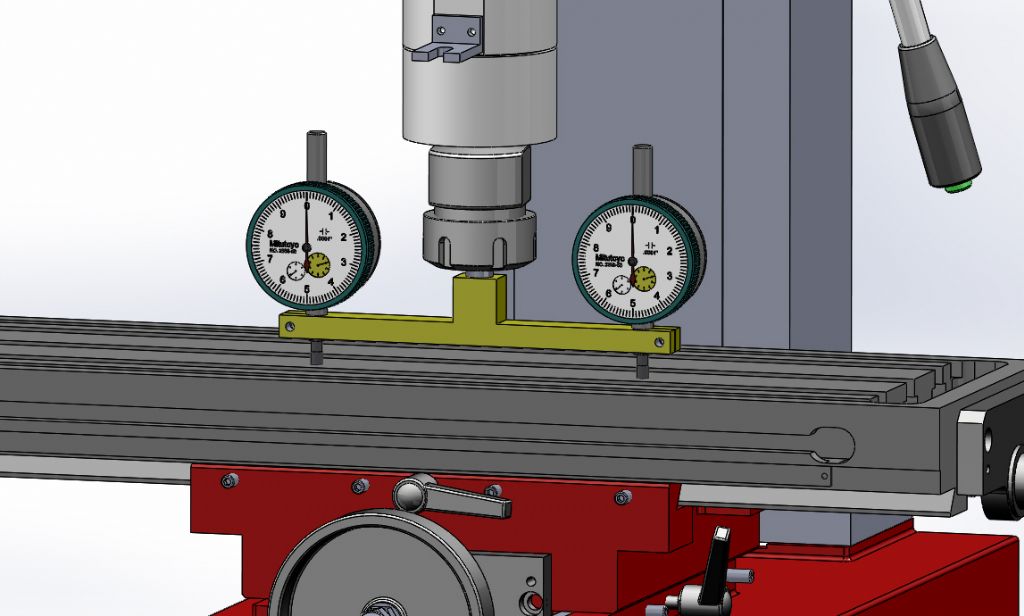
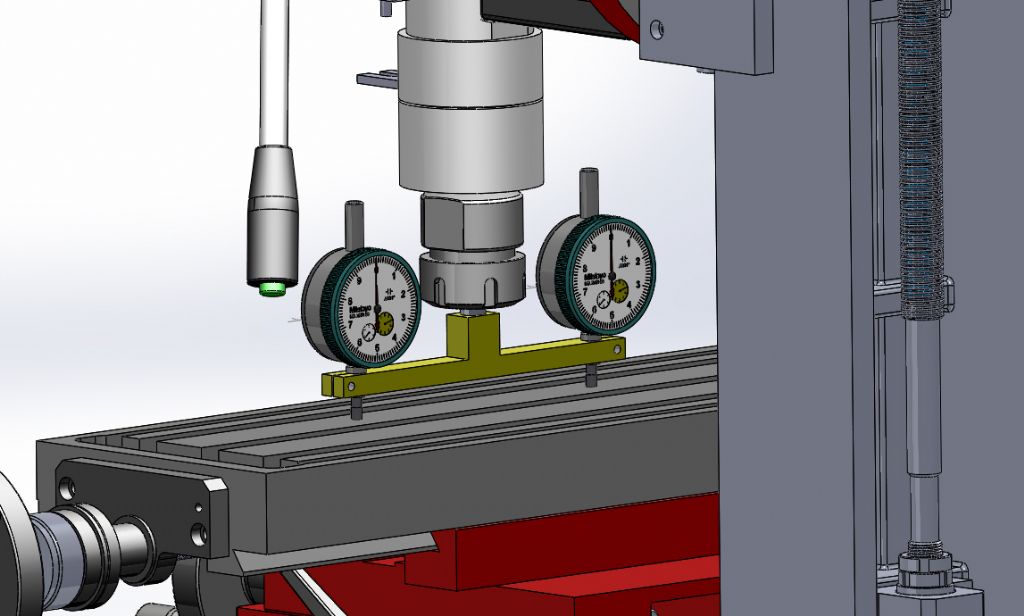
| 2661 forum posts 294 photos | Sorry this is a bit longwinded. I have a Chester Superlux MIll. It's a PITA to tram 'cos whenever you dog the bolts down th tram shifts and you have to play offset back and forth to fid a sweet enough spot for it to be trammed when dogged down. I;ve been using a c-clamp holder for a DTI clamped above the collar of a e32 collet holder and swinging it by turning the spindle at the top of the machine to avoid disturbing the DTI. It's a slow process and the best I've ever got is within 1 thou or a 7in swing diameter. So i thought I'd make a bogstandard style twin DTI holder over the last several days and trued the spindle on that bolted to a freshly skimmed faceplate, centred as close to the bar as I could get a dti without fouling the mounting bolts and the twin holder spindle trued with light cuts. I don't have a surface plate so the twin mm DTI's were set with the tool sat on the mill table on the flats of parallels (end to end and there's no ridge as a finger nail runs over them) I then find that my swinging an inch dti as before gives me currently a 2thou discrepancy over it's swing diameter whereas the dual system gives me 20 hundredths of a mm discrepancy over it's separation of 206mm (sorry for the mixed math) So I have a disrepancy of some 0.14mm between tools. Feeler guages under the dual indicator suggest it's actual readings are true. So the questions are which is the more accurate tool method and if the dual indicator's spindle isn't perpendicular how to correct it. I have already had it back on the faceplate, reclocked it and turned it down a bit more once after re skimming it's feet on a freshly trammed mill using the single dti method. I had it trammed to 1/2 a thou yesterday for that and today it's reading the 2 thou
|
| peak4 | 27/07/2015 22:55:50 |
2207 forum posts 210 photos | Unless I'm misunderstanding something here, which is quite possible as I've just come back from the pub, the two scenarios aren't quite the same. In one case, with the single DTI, the spindle turns, with the dual DTI it doesn't. Does this imply that either the spindle isn't running quite true or that the collet/toolholder in which the dual DTI device it mounted isn't quite true to the spindle? |
| pgk pgk | 28/07/2015 00:07:50 |
| 2661 forum posts 294 photos | Now that's something I hadn't considered. Perhaps i need to spend more time in the pub? I should be able to check that by mounting the single dti once and again at 90 degs to previous around the collet and also creating an internal collet held system for it? that should at least show whether there's run out between the inside of the collet and it's outer body. I'm not sure how one could check for spindle not running true apart from mounting a fine pointer by collet and seeing if it scratches a circle turned manually compared to power running? Visually cutters and edgefinders seem to run true. I'll try to find time for that tomorrow.
|
| Paul Lousick | 28/07/2015 05:16:24 |
| 2276 forum posts 801 photos | Hi pgk, Have both indicators been set at the same height? I do not have a twin DTI holder or a surface plate for tramming my mill but the setup is the same for a single dial indicator (someone correct me if I am wrong). Firstly I zero the indicator on one side of the mill table then swing the indicator thru 180 degrees to the other side. The disadvantage with a single indicator is that I have to view it from the rear of the mill. If you have 2 indicators they both have to be zeroed from the same reference point. (ie zero the first indicator then rotate the support by 180 degrees and then zero the second indicator. Both are now set at the same height). Now the indicators can me rotated 180 degrees so both can be viewed from the front to adjust the angle of the milling head. After it is set square to the table, the dial indicators should be rotated thru 180 degrees again to confirm that your setup is correct. Both indicators should have the same reading. Paul. |
| pgk pgk | 28/07/2015 07:11:07 |
| 2661 forum posts 294 photos | As I understood it the idea is that the dual DTI spindle has to be perpendicular to the base of the tool. So I set the DTI's with the tool sat on a flat reference surface (the parallels on the mill table). In any event the discepancy held when the dual system was swung through 180 degs. With the single dti method I arrange the dial to be viewed from the sides.. easier than tryng to look from the back. I should add that I've played with taking these measurements both with parallels flat on the mill table and without and readings are the same but the parallels make up for any possible tiny dings. I think my first way to go has to be to compare a single dti method held in the collet rather than clamped around it.. |
| Paul Lousick | 28/07/2015 08:30:58 |
| 2276 forum posts 801 photos | It should not matter where you attach the dti to the mill spindle. As long as it is secure. (also worth checking if there is any play in your mill spindle which could give a false reading). The twin DTI setup is similar to a single. Remove one indicator and it is used the same as a single. Just makes tramming of the head a little easier because you can see both indicators at the same time. As long as they both have been set at the same height. Personally, I prefer to use a single indicator because it does not rely on setting the height of the DTI's to each other. The arm on the mount for my DTI is 300mm long, which checks the height difference of the table at 600mm centres. More accurate than the 150mm centres on some of the twin setups. Paul. |
| pgk pgk | 28/07/2015 10:56:29 |
| 2661 forum posts 294 photos | Doh! Feeling stupid.. I was overthinking this and assuming that the care I'd taken had lead everything to be square - as it should have. Resetting the dti's and using them each as single arms for reading etc and the mill tram on their 206mm seperation gives me a consistent 0.055mm out of tram... close enough to the 2thou I measured with the c-clamp yesterday to allow for flex in moving things etc. Dual guages will make it a lot easier with this 'it moves when you dog the bolts' problem. I can only assume the following ..that in bolting the assembly to the faceplate the bolts were just inside the feet (limit of the faceplate slots with the assembly length the same as the faceplate diameter) and I must have induced flex in the base? The base is a bar ally 19x38x240mm with 30mm feet from each end before the relief. Perhaps these would be better made with any relief between the feet side milled after the spindle is trued? Thanks but feelng disheartened over my 0.15mm error pgk |
Please login to post a reply.
Want the latest issue of Model Engineer or Model Engineers' Workshop? Use our magazine locator links to find your nearest stockist!
Sign up to our newsletter and get a free digital issue.
You can unsubscribe at anytime. View our privacy policy at www.mortons.co.uk/privacy
- hemingway ball turner
04/07/2025 14:40:26 - *Oct 2023: FORUM MIGRATION TIMELINE*
05/10/2023 07:57:11 - Making ER11 collet chuck
05/10/2023 07:56:24 - What did you do today? 2023
05/10/2023 07:25:01 - Orrery
05/10/2023 06:00:41 - Wera hand-tools
05/10/2023 05:47:07 - New member
05/10/2023 04:40:11 - Problems with external pot on at1 vfd
05/10/2023 00:06:32 - Drain plug
04/10/2023 23:36:17 - digi phase converter for 10 machines.....
04/10/2023 23:13:48 - More Latest Posts...
- View All Topics
- Reeves** - Rebuilt Royal Scot by Martin Evans
by John Broughton
£300.00 - BRITANNIA 5" GAUGE James Perrier
by Jon Seabright 1
£2,500.00 - Drill Grinder - for restoration
by Nigel Graham 2
£0.00 - WARCO WM18 MILLING MACHINE
by Alex Chudley
£1,200.00 - MYFORD SUPER 7 LATHE
by Alex Chudley
£2,000.00 - More "For Sale" Ads...
- D1-3 backplate
by Michael Horley
Price Not Specified - fixed steady for a Colchester bantam mark1 800
by George Jervis
Price Not Specified - lbsc pansy
by JACK SIDEBOTHAM
Price Not Specified - Pratt Burnerd multifit chuck key.
by Tim Riome
Price Not Specified - BANDSAW BLADE WELDER
by HUGH
Price Not Specified - More "Wanted" Ads...
Do you want to contact the Model Engineer and Model Engineers' Workshop team?
You can contact us by phone, mail or email about the magazines including becoming a contributor, submitting reader's letters or making queries about articles. You can also get in touch about this website, advertising or other general issues.
Click THIS LINK for full contact details.
For subscription issues please see THIS LINK.
Model Engineer Magazine
- Percival Marshall
- M.E. History
- LittleLEC
- M.E. Clock
ME Workshop
- An Adcock
- & Shipley
- Horizontal
- Mill
Subscribe Now
- Great savings
- Delivered to your door
Pre-order your copy!
- Delivered to your doorstep!
- Free UK delivery!


 Register
 Log-in


