Forum sponsored by:

Stuart Twin Victoria (Princess Royal) Mill Engine
| Hopper | 06/03/2021 01:08:23 |
 7881 forum posts 397 photos | Posted by Ramon Wilson on 03/03/2021 22:49:33:
Also - if using very small brass BA screws (14/16 BA) as fasteners - it's a lot less stressful to drill and tap small individual brass inserts in the lathe and fit them to suitable holes in the casting rather than drilling and tapping the casting itself.
Now that is a cunning idea! Do you then Loctite the brass inserts into the hole in the casting? For me, the tapping of all those tiny holes is the big bugbear of doing small model work. The fear of snapping a tap off in the last hole in an expensive casting with days of machining work already gone into it is always there. This sounds like a great solution. Thanks for the tip. |
| Ramon Wilson | 06/03/2021 08:20:26 |
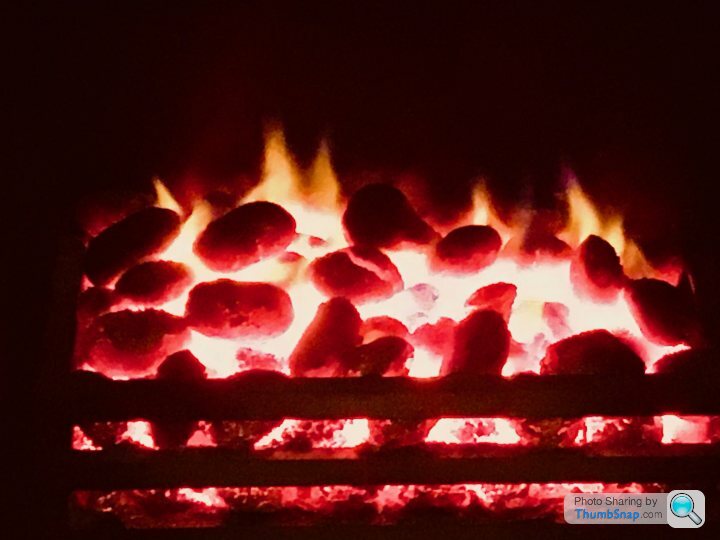
 1655 forum posts 617 photos | Doc, I'm not sure if you are aware so I hope you won't mind me saying but the annealing of cast requires very slow cooling - as long as possible infact. It's best to bank the coals over the parts and allow the fire to die down completely before exposing or to bury the red hot casting in fire ash kept for the purpose and leave overnight. I have a large container of it just for that purpose. Any chill the casting may experience if the cooling is not controlled could lead to inducing hardness or cracking. Hopper, Nothing cunning about it just an idea born of the same fear of yourself - breaking the tap! Yes the parts are loctited in - they are tapped blind so that the loctite does not enter the thread. I shall be doing this on the latest build in due course.
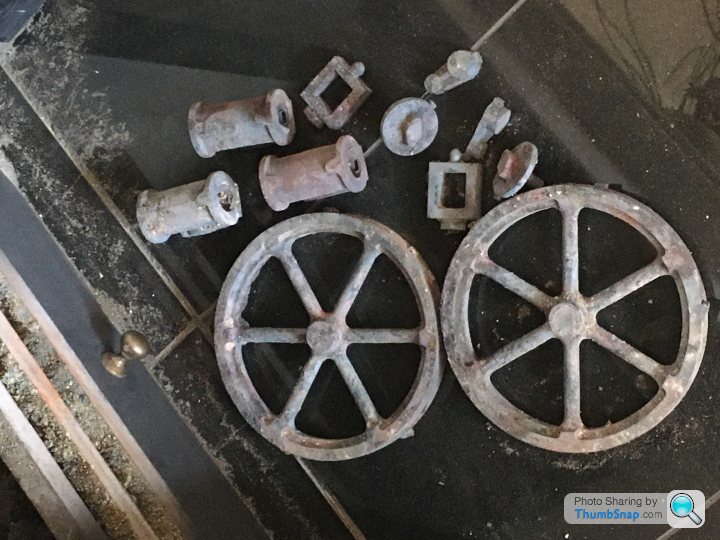
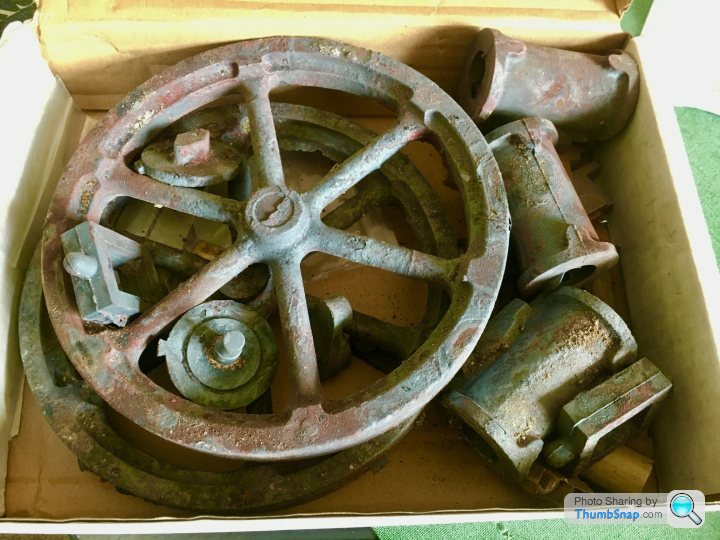
Here's some pics of the Double Ten rebuild which Doc G may also find of use
This looks far messier than it was- I used the silica powder to thicken the JBW into a thick paste to reinforce that central bush
and once fettled
Hope thats of use to both of you
Ramon (Tug)
|
| Dr_GMJN | 06/03/2021 09:01:44 |
 1602 forum posts | Thanks Ramon - I’ll try the brass insert trick on the cladding holes. I decided to try the annealing on only two parts - they have been in the fire all night, and it’s in fact still warm. Assuming they’re ok I might repeat the process tonight with all the castings together, and save the ashes from last night for insulation. Presumably the brass/gunmetal castings aren’t treated like this? I deliberately only used two castings in case anyone came up with additional advice ha ha. Cheers!
|
| Ramon Wilson | 06/03/2021 09:38:22 |
1655 forum posts 617 photos | Posted by Dr_GMJN on 06/03/2021 09:01:44:
Presumably the brass/gunmetal castings aren’t treated like this? Er No. Most definitely no Sounds like the two parts will be okay - when I had the table for my mill cast the foundry put it in the furnace and left it overnight to cool - machined like butter Ramon
|
| Dr_GMJN | 06/03/2021 10:09:06 |
1602 forum posts | Posted by Ramon Wilson on 06/03/2021 09:38:22:
Posted by Dr_GMJN on 06/03/2021 09:01:44:
Presumably the brass/gunmetal castings aren’t treated like this? Er No. Most definitely no Sounds like the two parts will be okay - when I had the table for my mill cast the foundry put it in the furnace and left it overnight to cool - machined like butter Ramon
I’m guessing no post-machining heat treatment is needed? Surely it doesn’t make them too soft? |
| Dr_GMJN | 06/03/2021 10:13:37 |
1602 forum posts | Talking of minimising risk of messing up a casting - I’ve been reading about the procedure for getting the rope grooves in the flywheel. I can see me screwing this up, but I’ve seen some examples with a separate band - with the grooves - fitted to the o/d. I think I might do that, because I also like the look of a thin band of different material around the circumference, maybe slightly overhung with a chamfer on the inside? |
| Hopper | 06/03/2021 10:59:28 |
7881 forum posts 397 photos | Thanks Ramon. That takes about 10/10ths of the stress out of small tapping for me. Going from working on Harleys to that small stuff is sometimes a challenge. 150 ft lb one day, two fingers the next. |
| JasonB | 06/03/2021 12:31:27 |
 25215 forum posts 3105 photos 1 articles | Doc you will be getting close to the point where the GM castings will bend under their own weight if not actually melting. Also they don't tend to suffer chill so no need to heat treat, just hope there are not oxides in them which is unlikely on Stuart castings. The smaller iron parts are the ones that are more likely to want heat treating as being thin they cool much faster after casting than say the flywheel which is all reasonably large sections. The Valve chest cover and cylinder end covers will be the most suseptable. I've been working on the donated Victoria today and the partly machined valve chest cover was definately harder than the other iron bits so I played safe and finished i with carbide |
| Ramon Wilson | 06/03/2021 13:10:22 |
1655 forum posts 617 photos | Unless it's cast material then a ring will not have the right 'colour' if it is a scale effect you are wanting. Personally I would not go down this route as that's a deep ring to get aligned over two flywheel widths. Not saying it can't be done but it has potential difficulties especially if it gets locked before fully in place. Grooves themselves are easy enough to form but it's much easier if you gash the grooves first with a narrow tool then use a form tool rather than try to do it all in one. The latter usually leads to chatter and needs very slow speed to possibly prevent it. I have a feeling that somewhere I may have the tool I ground for mine - if I can find it you can have it. I know I still have the form tools for the cross head spacers - so you might be in luck. Glad that was of use Hopper - now all you need is some (in)expensive 14 BA taps
|
| JasonB | 06/03/2021 13:25:32 |
25215 forum posts 3105 photos 1 articles | If you were to do it them roughing out the ring and flywheels before assembly would save having to worry about getting things lined up as you could then final turn the outside and bore the hub as one "casting" Could even slip it together with JBW to get a longer assembly time. It's a shame that RDG don't do their reasonably priced 8" dia x approx 3" wide flywheel castings now as that would have been ideal to use and had a nice bit of weight to boot. I've still got a couple tucked away. I would have thought that you two plastic model makers would have perfected a paint finish to replicate cast iron and that blue brown of iron cylinder clading, can't be any harder than the rust I did on the Heinrici |
| Dr_GMJN | 06/03/2021 18:32:00 |
1602 forum posts | Thanks for the offer of the tool Ramon. I assumed a series of 60 degree v slots would suffice, but it seems to be a specific profile - I suppose a circular or radiussed form? I know it’s in the instructions, but they’re not to hand. So couldn’t the finished rim be made size-for-size and heated in the oven, the just pushed into place with some Loctite for good measure? Not like it’s under load. Maybe it’s just over complicating things though. Jason - you mentioned your Twin Victoria before - is there a thread somewhere - can’t see it? What is the cladding cover you’re talking about? Can’t picture it. Anyway, all the iron castings are now in the fire - I’ll leave them untouched this time until they’re cold in the morning. Thanks.
|
| Ramon Wilson | 06/03/2021 18:54:37 |
1655 forum posts 617 photos | I certainly wouldn't recommend using a size for size fit and expanding the outer. If that cools before seating all the way home it will be well and truly stuck. I know a lot of wheels had tires fitted by expansion but these were craftsmen doing it day in and day out in controlled circumstances The issue of a large diameter relevant to it's length is one of wringing - if it gets out of line it can very easily jam - sometimes solidly! Much better to do as Jason suggested and have a good loose fit - maybe 5-6 thou clearance and apply the wheel with JBWeld to give you lots of time and movement to get it right - the JBW can be used as a fillet too should you want. I know I mentioned it before but it's worth repeating - the only thing wrong with the flywheel as drawn is that the grooves and spacing are over scale for the type of engine you are building. It is a specific profile in real life I think it's narrower than 60 degree and has straight sides at its outer edges.
Jason, Much as I enjoy simulating metallic surfaces on plastic models I don't think I would want to use the technique on a model engineering project - some of the latest finishes are good, extremely good infact but I don't think you'd fool a model engineer with them - that is on a 'model engineering' project |
| JasonB | 06/03/2021 20:46:08 |
25215 forum posts 3105 photos 1 articles | All you need to know about rope grooves though as Ramon says those ribs between the grooves would not scale well and likely break up.
It's a single Victoria that I am doing and will be quite close to how Mr Stuart intended, No photos or thread yet, I will wait for the change in forum software. I was talking of replicating the look of the traditional blued steel or "Russian Iron" used to clad cylinders, It's a blue brown much like the darkest of temper colours with a hint of the underlaying steel so would need to be done with a transparent acrylic which is probably more something I'm used to with artwork than model making where opaque colours tend to be used more even if diluted to washes. |
| Dr_GMJN | 06/03/2021 20:53:50 |
1602 forum posts | OK. I thought the Princess Royal was more to scale with its 12 grooves? It does mention the flanges being very fragile, which is why they were omitted. The drawings show 40 degrees included angle, not 45, but minor detail. Multiple layers of a Blue/Brown varnish misted over bare aluminium with an airbrush might look ok, or even Alclad, but it’s a fragile coating.
|
| Ramon Wilson | 06/03/2021 22:33:06 |
1655 forum posts 617 photos | I'm not familiar with the PR layout - I was referring to the original Stuarts drawing. Twelve grooves would be much more in keeping. It appears there are several angles of rope groove depending on source. Spooners machine construction gives 40 degrees with flanges and 30 degrees for ropes up to 1" diameter without. Personally I'd go with the 40 degrees - 30 would look too fine and 45 may raise the chatter problem though doing each side of the groove separately would ease that issue. I'm up for the qualities of Alclad and AK Extreme metal paints but theres no way I would introduce them onto a model engineering project as a compromise. 'Blueing' shim steel is not difficult and does replicate the original very well but as always it's down to the individual - everything is about choice
|
| Dr_GMJN | 06/03/2021 23:47:54 |
1602 forum posts | No I’d rather not use paint to replicate an engineering finish. I used paint on the 10v because I didn’t know any better, and also because the chances of machining anodised plate without damaging it would be slim for me. As a post machining finish maybe. |
| JasonB | 07/03/2021 07:17:24 |
25215 forum posts 3105 photos 1 articles | Looking at full size the clading sheets are not always left with the blued finish, quite a few are painted in the same colour as the rest of the cast metal or even a contrast. So that is another option. |
| Dr_GMJN | 07/03/2021 10:32:21 |
1602 forum posts | Posted by JasonB on 07/03/2021 07:17:24:
Looking at full size the clading sheets are not always left with the blued finish, quite a few are painted in the same colour as the rest of the cast metal or even a contrast. So that is another option. TBH I was going to keep the Meccano dark blue and satin black scheme from the 10V. Same blue for the Minnie. Yes, I know its not very adventurous, but I like the contrasts with steel and brass, and it would be a kind of signature finish for the three models I’ll end up with. I noticed a couple of other 10Vs in blue on the forum recently, I think one might have even been the exact same paint. Usually they’re green from what I’ve seen online and at the couple of shows I’ve been to. |
| Ramon Wilson | 07/03/2021 11:17:16 |
1655 forum posts 617 photos | Posted by Dr_GMJN on 07/03/2021 10:32:21:
TBH I was going to keep the Meccano dark blue and satin black scheme from the 10V. Same blue for the Minnie. Yes, I know its not very adventurous, but I like the contrasts with steel and brass, and it would be a kind of signature finish for the three models I’ll end up with. I noticed a couple of other 10Vs in blue on the forum recently, I think one might have even been the exact same paint. Usually they’re green from what I’ve seen online and at the couple of shows I’ve been to.
Definitely would agree with that principle Doc - stick with it |
| Dr_GMJN | 07/03/2021 18:12:38 |
1602 forum posts | To be fair it was only a question of chucking in the fire for the evening and hoping for the best. It's supposed to make it cut like butter. |
.jpg")
.jpg")
.jpg")

Please login to post a reply.
Magazine Locator
Want the latest issue of Model Engineer or Model Engineers' Workshop? Use our magazine locator links to find your nearest stockist!
Sign up to our Newsletter
Sign up to our newsletter and get a free digital issue.
You can unsubscribe at anytime. View our privacy policy at www.mortons.co.uk/privacy
Latest Forum Posts
- hemingway ball turner
04/07/2025 14:40:26 - *Oct 2023: FORUM MIGRATION TIMELINE*
05/10/2023 07:57:11 - Making ER11 collet chuck
05/10/2023 07:56:24 - What did you do today? 2023
05/10/2023 07:25:01 - Orrery
05/10/2023 06:00:41 - Wera hand-tools
05/10/2023 05:47:07 - New member
05/10/2023 04:40:11 - Problems with external pot on at1 vfd
05/10/2023 00:06:32 - Drain plug
04/10/2023 23:36:17 - digi phase converter for 10 machines.....
04/10/2023 23:13:48 - More Latest Posts...
- View All Topics
Support Our Partners


Shopping Partners
Subscription Offer

Latest "For Sale" Ads
- Reeves** - Rebuilt Royal Scot by Martin Evans
by John Broughton
£300.00 - BRITANNIA 5" GAUGE James Perrier
by Jon Seabright 1
£2,500.00 - Drill Grinder - for restoration
by Nigel Graham 2
£0.00 - WARCO WM18 MILLING MACHINE
by Alex Chudley
£1,200.00 - MYFORD SUPER 7 LATHE
by Alex Chudley
£2,000.00 - More "For Sale" Ads...
Latest "Wanted" Ads
- D1-3 backplate
by Michael Horley
Price Not Specified - fixed steady for a Colchester bantam mark1 800
by George Jervis
Price Not Specified - lbsc pansy
by JACK SIDEBOTHAM
Price Not Specified - Pratt Burnerd multifit chuck key.
by Tim Riome
Price Not Specified - BANDSAW BLADE WELDER
by HUGH
Price Not Specified - More "Wanted" Ads...
Get In Touch!
Do you want to contact the Model Engineer and Model Engineers' Workshop team?
You can contact us by phone, mail or email about the magazines including becoming a contributor, submitting reader's letters or making queries about articles. You can also get in touch about this website, advertising or other general issues.
Click THIS LINK for full contact details.
For subscription issues please see THIS LINK.
Digital Back Issues


Donate

 Register
 Log-in
Model Engineer Magazine
- Percival Marshall
- M.E. History
- LittleLEC
- M.E. Clock

ME Workshop
- An Adcock
- & Shipley
- Horizontal
- Mill

Subscribe Now
- Great savings
- Delivered to your door

Pre-order your copy!
- Delivered to your doorstep!
- Free UK delivery!
All Forum Topics > Work In Progress and completed items > Stuart Twin Victoria (Princess Royal) Mill Engine