Determining/measuring sub-micron displacement
How to measure the displacement of the ball of an edge finder at edge detection
| Michael Gilligan | 01/04/2022 21:07:59 |
23121 forum posts 1360 photos | Posted by Howard Lewis on 01/04/2022 15:57:58:
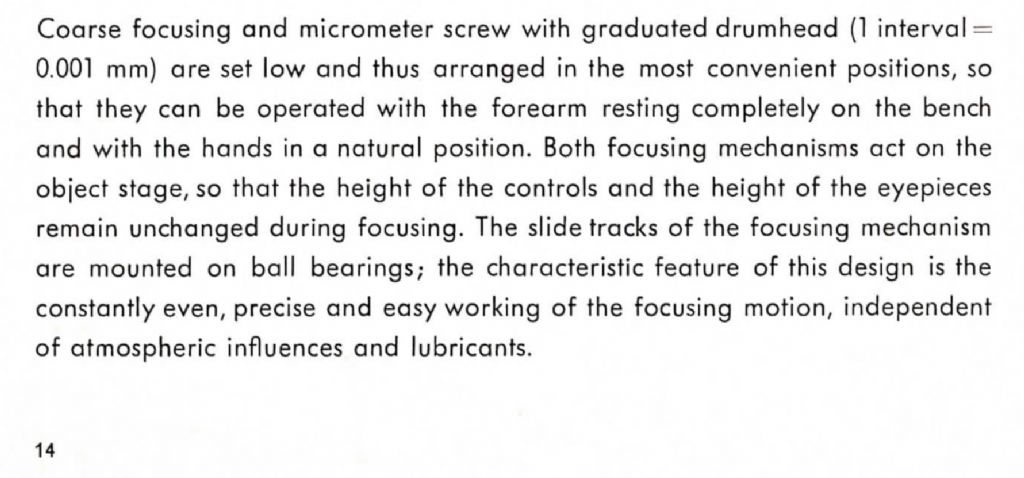
Sub micron suggests some form of optical measurement to me, such interference patterns The sort of dimension that changes as you breathe near it! After all, 0.001" is 25.4 microns (One third of the thickness of blonde human hair) and you are looking to measure less than 1/25th of that. Howard . As I said earlier, Howard … In the context of Joe’s requirement, the measurement is trivial and can be easily achieved with seventy year old mechanisms. It is perhaps not intuitively obvious, but: whilst measuring a metre to +/- half a micron may be difficult, measuring a millimetre to to +/- half a micron is easy. MichaelG. . Edit: __ This is the model of instrument whose basic stand I was offering to Joe . Edited By Michael Gilligan on 01/04/2022 21:33:32 |
| old mart | 01/04/2022 21:13:43 |
| 4655 forum posts 304 photos | I have a microscope slide with divisions calibrated in 10 microns, with that I could probably get to a tenth of a micron under magnification. |
| Michael Gilligan | 01/04/2022 22:11:26 |
23121 forum posts 1360 photos | Meanwhile … This is non-trivial in terms of price, but it is a stock commercial item: **LINK** https://www.thorlabs.com/newgrouppage9.cfm?objectgroup_id=9862&pn=PFM450E Check the specification MichaelG. |
| Kiwi Bloke | 02/04/2022 10:15:22 |
| 912 forum posts 3 photos | The more I think about this problem, the worse it seems. I think the problem of achieving a tiny, known, controlled displacement has many similarities to measuring such a displacement. After all, a micrometer measures by producing displacement. But there's really difficult, more fundamental problem, which, until solved, prevents further progress. How does one detect the initial contact of probe to surface, as the probe advances, before the electronic detection occurs? It gets worse: for the probe to produce meaningful results, its ball-end's diameter must be known (presumably to sub-micron accuracy), as well as the amplitude of its vibration at the times when electronic detection occurs, as well as at initial contact. In other words, the envelope produced by the vibrating ball's surface must be known (again to sub-micron accuracy). Also, to be useful in practice (to sub-micron accuracy), the centre of the ball must be aligned with the machine spindle to sub-micron accuracy. And then there are the standard metrology bugbears of the effects of temperature, air movement, surface contamination, gravity, etc., etc.. It's a horrible collection of problems! I still think that optical methods might be able to solve more of the problems than purely mechanical methods, but it sounds like very large magnification would be required, so microscopy might be out (oil-immersion objectives don't sound practicable here). What about projection methods? I know little about electronics, however, a feedback system is described. Can the feedback sensor's signal be used to, for instance, detect initial contact, before resonant vibration is damped by heavier contact? One might hope that the hard ball, clattering against a stiff-enough surface, at initial contact, might produce an albeit tiny, detectable signal, or at least distort (clip?) the feedback signal's waveform. I can think of other problems, but it seems bad enough already. Glad it's not my problem... Most impressive - good luck! |
| Jouke van der Veen | 02/04/2022 10:57:02 |
| 203 forum posts 19 photos | Without deep thinking: Submicron displacements to be measured by means of Michelson interferometry? And that with monochromatic light (laser)? Is this a variant of or improvement of the Foucault measurement mentioned earlier? Jouke Edited By Jouke van der Veen on 02/04/2022 10:58:26 |
| Graham Meek | 02/04/2022 11:07:06 |
| 714 forum posts 414 photos | Hi Joe, I have been giving this some thought and think that a horizontal lever which is suspended vertically preferably by a thread. At one end mount a small mirror at an angle. Have a fixed stop for the lever to butt up against when at rest. Shine a Laser pen at the mirror and have the spot somewhere convenient on the workshop wall. If you move your probe into contact with the lever and mark the dot on the wall. Move away to break the contact and mark the dot again. the difference should be simple trig to sort out. We used to use a similar technique when setting up the lasers on the Radiotherapy treatment machines. Regards Gray, |
| KWIL | 02/04/2022 12:34:19 |
| 3681 forum posts 70 photos | Laser spots are a always too fuzzy for me. What is the error size when deciding where the centre actually is? How does this compare to Joe's desire for finite small measurements? |
| Michael Gilligan | 02/04/2022 13:11:39 |
23121 forum posts 1360 photos | I must confess utter bewilderment at the devious complexities being suggested My microscope stand provides an entirely mechanical solution to Joe’s problem [just think of it as a big, sensitive, micrometer] … Joe’s device identifies contact [ that’s what it’s for ! ], so the exercise is simply one of measuring the mechanical hysteresis of the device, to a few tenths of a micron. Why is everyone making it so complicated ?
|
| SillyOldDuffer | 02/04/2022 13:19:32 |
| 10668 forum posts 2415 photos | Posted by Michael Gilligan on 02/04/2022 13:11:39: ... Why is everyone making it so complicated ?
Joe is in Namibia? Why is nothing ever easy?
Dave
|
| Michael Gilligan | 02/04/2022 13:48:14 |
23121 forum posts 1360 photos | Yes I know Joe is in Namibia, Dave But that’s no justification for over-complicating the solution with smoke and mirrors Joe could surely make something which approximates the basic mechanics of the Leitz focusing mechanism. MichaelG. |
| Graham Meek | 03/04/2022 10:54:38 |
| 714 forum posts 414 photos | Clearly my simple solution has upset a few. The principle is based on the Galvanometers used in my College days. Above all, there is no need to manufacture anything to achieve a fairly accurate result, the materials would I suspect be readily to hand. Silly me, I thought this was the purpose of the post. Regards Gray,
|
| Michael Gilligan | 03/04/2022 12:34:31 |
23121 forum posts 1360 photos | Posted by Graham Meek on 03/04/2022 10:54:38:
Clearly my simple solution has upset a few. . Good afternoon, Gray If by a"a few" you mean me ... Then no, it hasn't Sorry if it appeared otherwise. . If I am upset by anything, it is the fact that most of the respondents appear to think that this is a difficult problem. You and I both know that magnification of the movement is all that's required. I suggested doing it at input / you suggested doing it at output. The underlying concept is essentially the same. MichaelG.
|
| Joseph Noci 1 | 03/04/2022 15:00:24 |
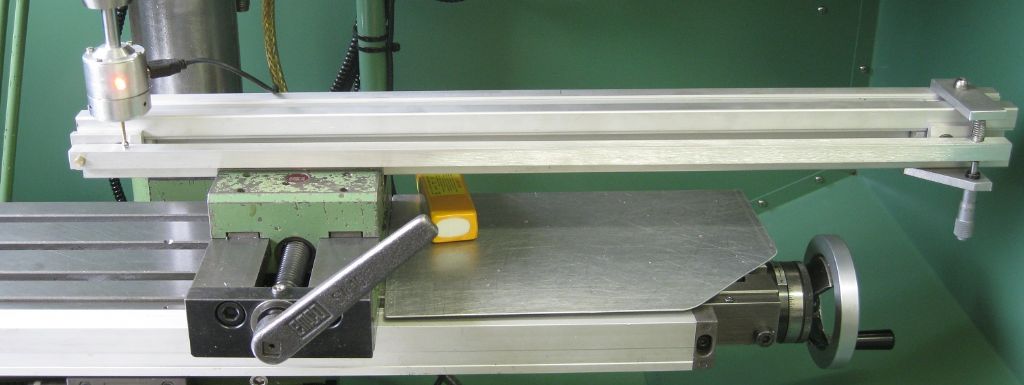
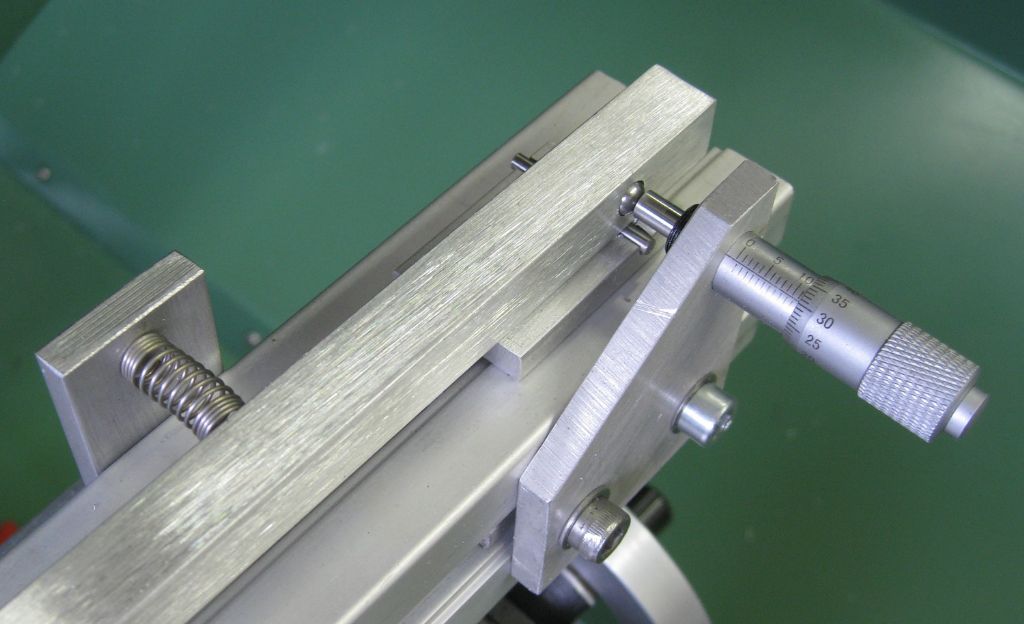
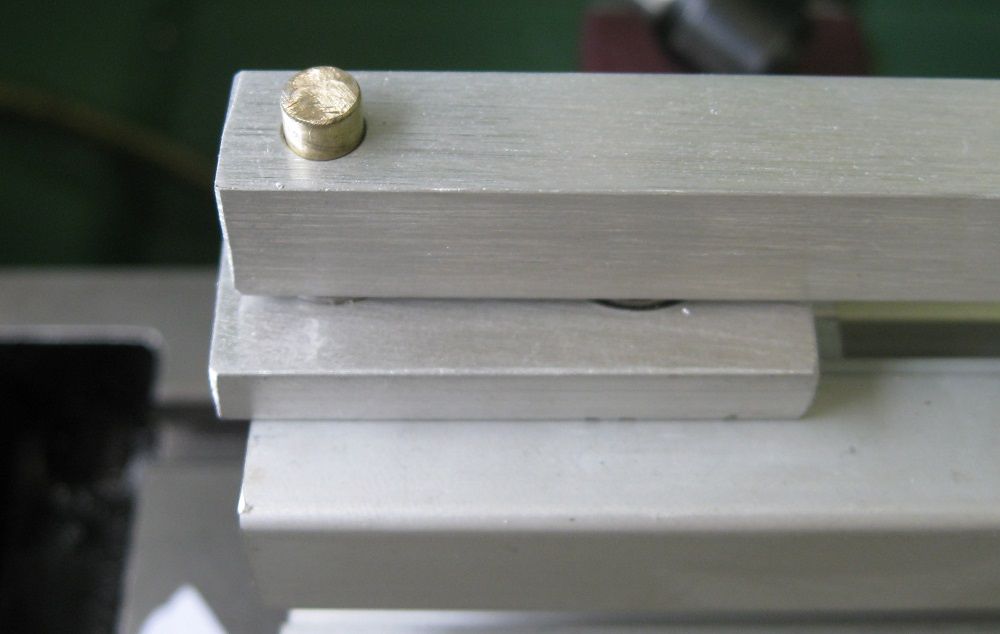
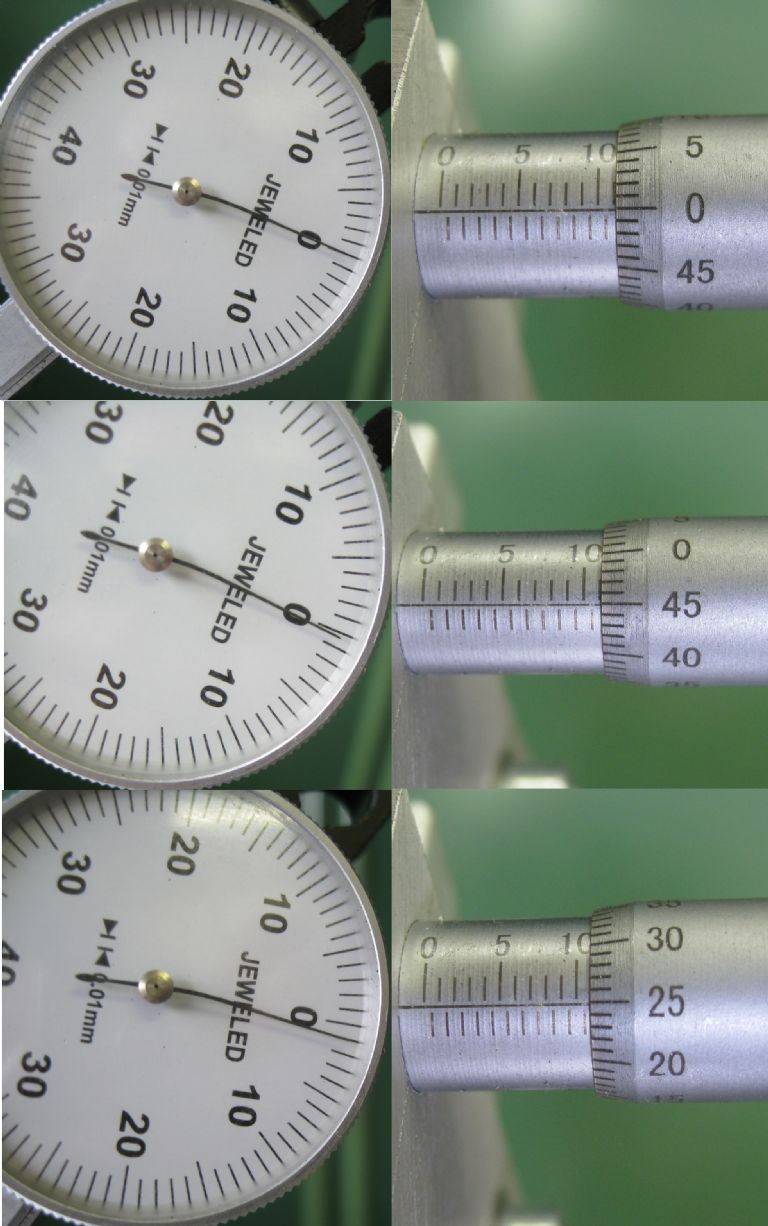
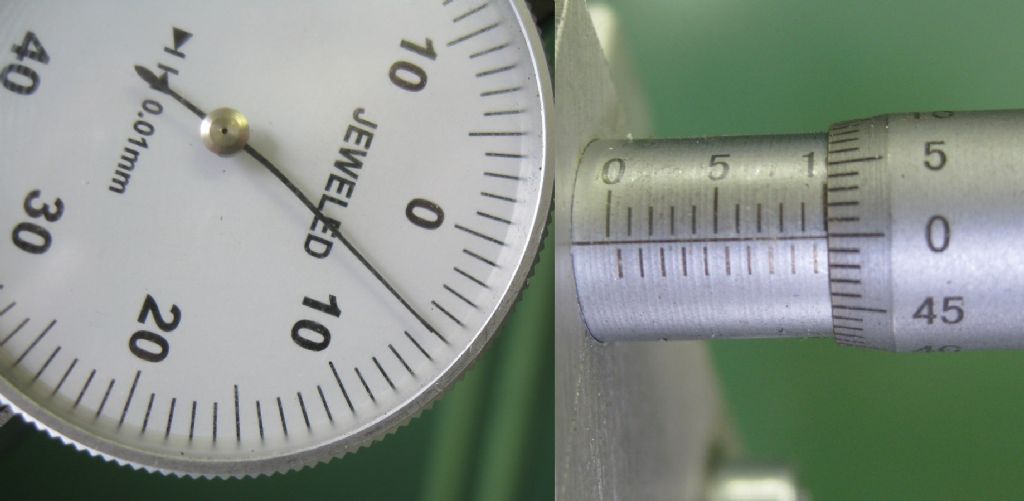
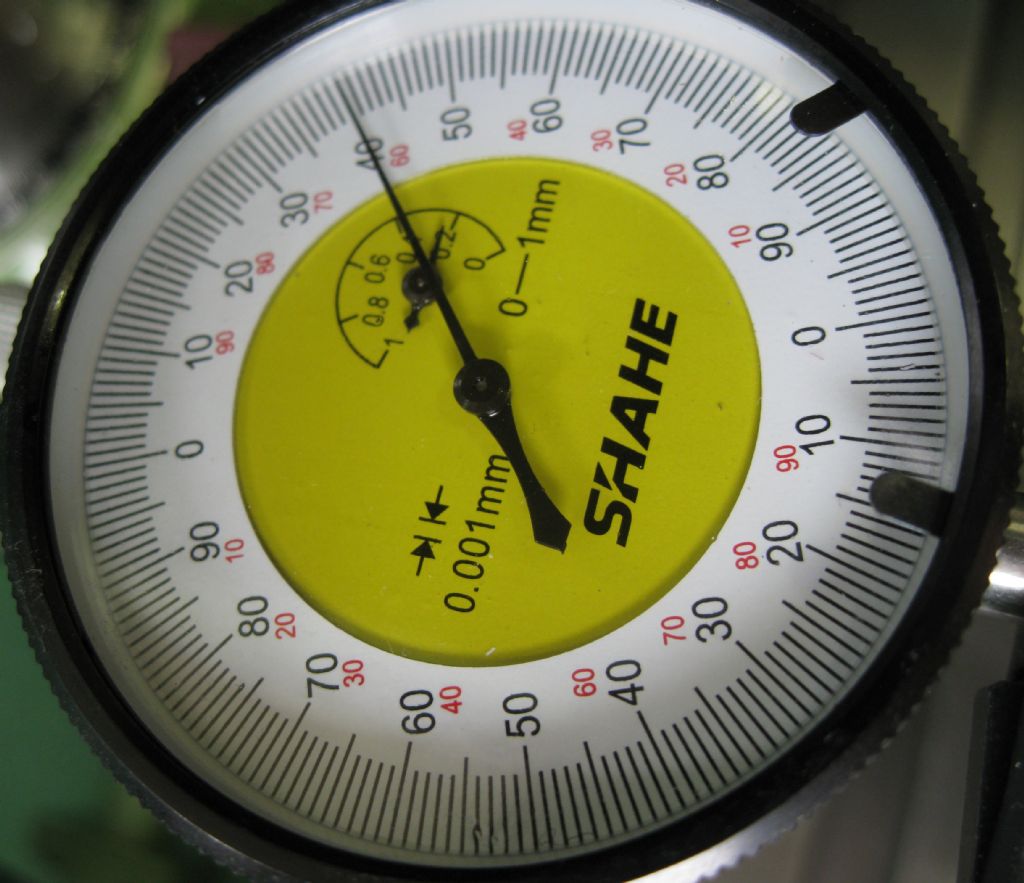
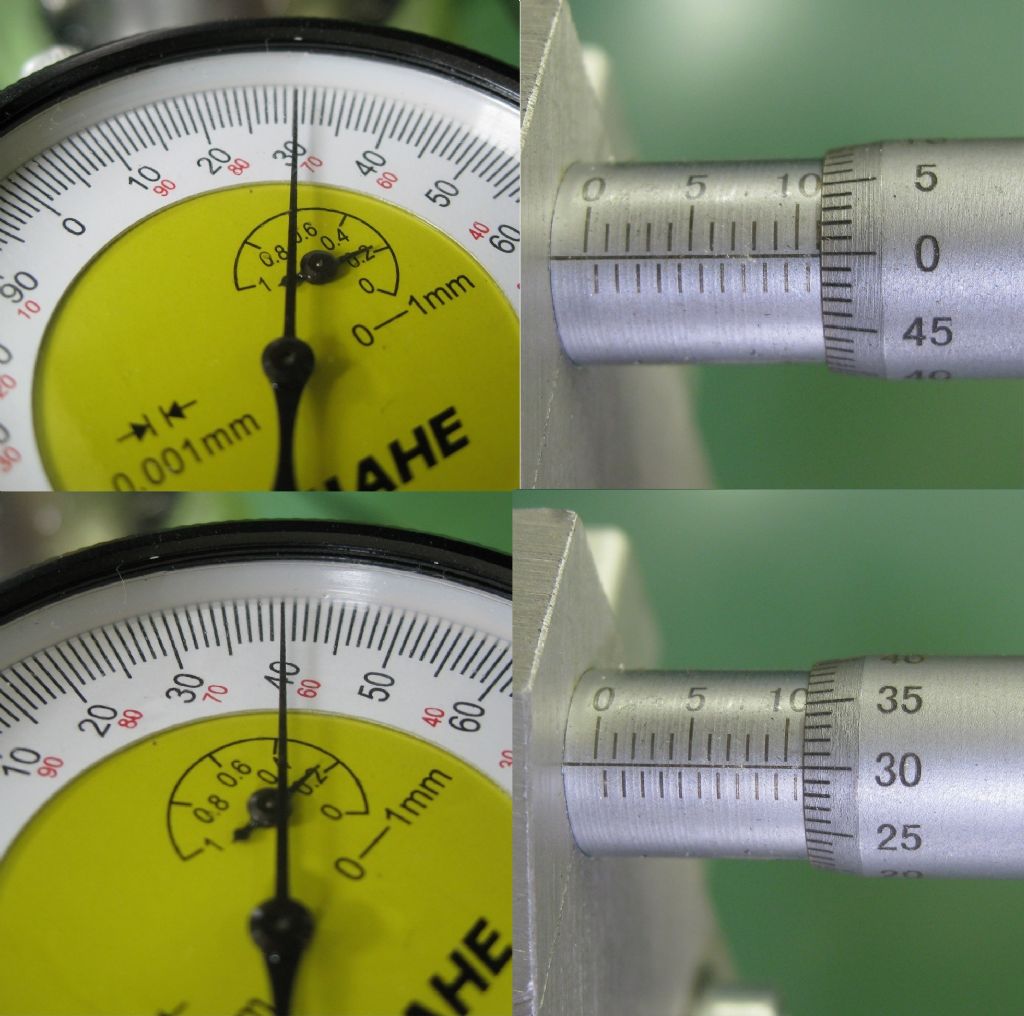
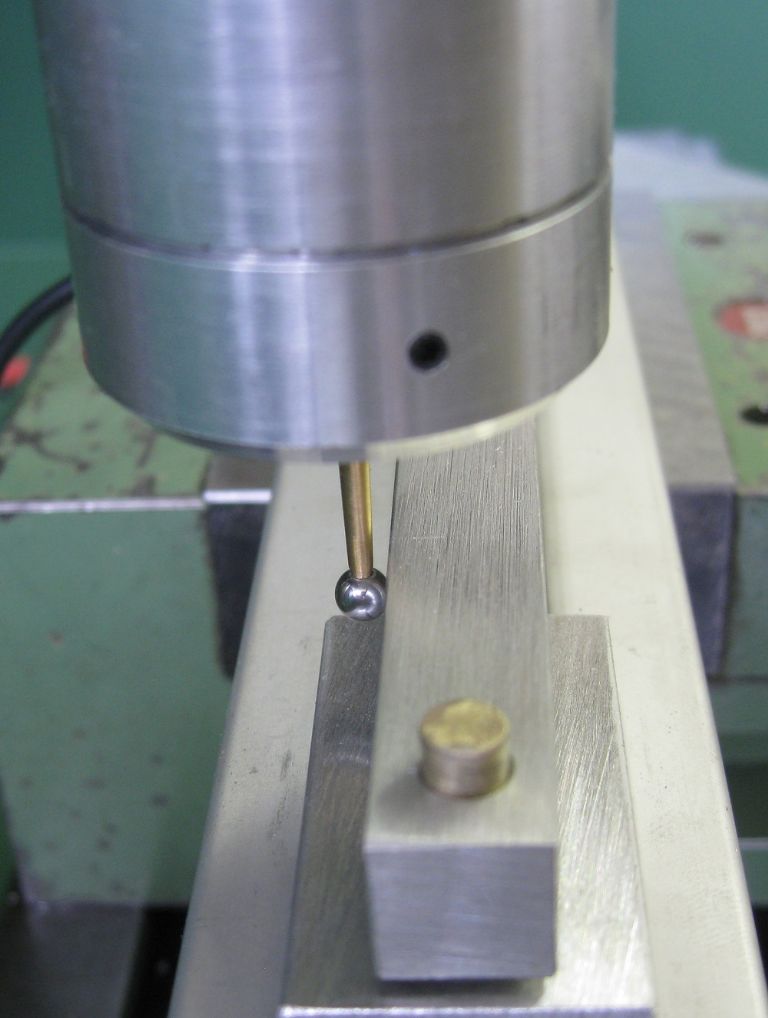
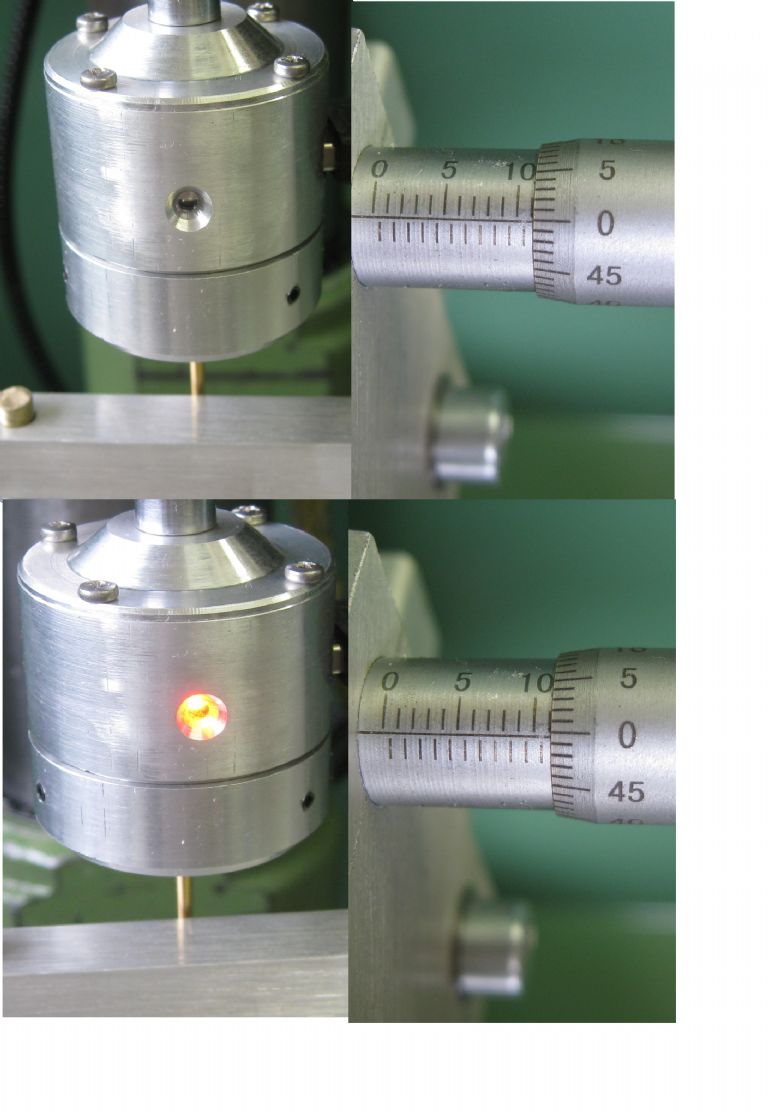
| 1323 forum posts 1431 photos | Chaps, it was not my intention to stir the pot so badly...I am certainly not upset with anyone here! Perhaps I do share some of the blame however- I indicated I am trying to measure the displacement, when I suppose what is really needed is to find a way to show that the detection 'accuracy' is 'good enough' to within limits so small that the actual value of the deflection does not matter. In other words, for a edge detection probe, one would probably be safe to assume a deflection of less than 0.01mm is acceptable, since we rarely work to better than that anyway. But if I can achieve better than 0.005mm, then that would be really good. If the actual value lies somewhere between 0.001mm and 0.008mm, it is still really good, but not definitive - but perhaps that does not matter to be able to use the probe definitively. So my absolute requirement statement was poorly put and I apologise.. That said, I went and made a mechanical 'magnifier' - a long arm, pivot one end, micrometer at 600mm from the pivot, and my probe at 30mm from the pivot, so a 1:20 reduction of Micrometer anvil motion. This is not perfect of course, working in an arc, etc, so the linear movement at 30 mm is not true....but its good enough! Set up in the mill and tested with a 0.01mm indicator, and then a 0.001mm indicator ( of dubious nature..) Then I set the probe in the mill and tested that for contact - I do believe my contact displacement is less than 0.0005mm, maybe even 0.0002mm...Judge for yourselves.. The device in the mill, turned 90deg to check Z axis of the probe: Pivot end: Using a 0.01mm indicator-below: (note, arm multiplier = 20) Fist row - Dial and Mic at Zero. Second row - Mic plus 5div x 0.01mm = 0.05mm div 20 = 0.0025mm at indicator Third row - Mic 25 divisions = 25 x 0.01mm = 0.25mm div 20 = 0.0125mm at indicator. Dial appears to be under-indicating by 0.002mm maybe? Mic moved in 1mm, div 20 = 0.05mm, Dial shows 0.05mm - correlates OK. Now using a dubious 0.001mm indicator: First row - Dial 'zeroed' at 30, Mic zeroed at 11mm, Second row - Mic moved plus 20div = 20 x 0.01mm = 0.2mm div 20 = 0.01mm Dial moves from 30 to 40 = 10 div x 0.001mm = 0.01mm - correlates with Micrometer. Then fitted the probe - see contact point with lever in photo below. Photo below shows probe OFF, Mic = 0 Second row shows probe on - contact made, Mic = 1/2div (maybe?) = 0.01 / 2 =0.005mm 0.005mm / 20 ( lever multiplier) = 0.00025mm movement at probe tip...Believe it or not!
Similar tests were done in the Z plane with the test lever on its side - similar results obtained!
|
| Michael Gilligan | 03/04/2022 15:19:35 |
23121 forum posts 1360 photos |
|
| Michael Gilligan | 03/04/2022 15:19:37 |
23121 forum posts 1360 photos | . Edited By Michael Gilligan on 03/04/2022 15:21:27 |
| Michael Gilligan | 03/04/2022 15:19:38 |
23121 forum posts 1360 photos | . Edited By Michael Gilligan on 03/04/2022 15:20:56 |
| Michael Gilligan | 03/04/2022 15:19:40 |
23121 forum posts 1360 photos | Oops ... Typing on the phone Edited By Michael Gilligan on 03/04/2022 15:24:02 |
| Jouke van der Veen | 03/04/2022 20:48:53 |
| 203 forum posts 19 photos | Joe, I somewhere read in your topic that you found that the ball is oscillating in a more or less spherical motion. You already used a laser interferometer for that. So forget about my Michelson interferometer. But I have a question. Could it be that stopping the ball from its “random” spherical oscillation needs more displacement (harder contact) than to start the ball oscillate again in a different mode when loosing contact? But then contact position should change by repeating touches, or not? Jouke |
| John Haine | 03/04/2022 21:14:38 |
| 5563 forum posts 322 photos | Sounds like you have cracked the measurement problem Joe. A very interesting design, how do you cope with over travel? The original Renishaw tri-bar design is pretty robust, but am I right that the probe is solidly attached to the piezo disc? |
| Joseph Noci 1 | 03/04/2022 21:40:31 |
| 1323 forum posts 1431 photos | Posted by Jouke van der Veen on 03/04/2022 20:48:53:
Joe, I somewhere read in your topic that you found that the ball is oscillating in a more or less spherical motion. You already used a laser interferometer for that. So forget about my Michelson interferometer. But I have a question. Could it be that stopping the ball from its “random” spherical oscillation needs more displacement (harder contact) than to start the ball oscillate again in a different mode when loosing contact? But then contact position should change by repeating touches, or not? Jouke Hi Jouke, Yes, I had access to the interferometer lab for those measurements, but the test lab setup is for very small objects and to build some mechanism to do the deflection measurment in a manner that is cold fit into their chamber was a bit of an issue, and the Lab manager got cold feet... I was also wondering about possible hysteresis in the contact/break contact process, but in the tests I did with the lever arm above I did 20 repetitions in the horizontal plane, and redid them with the probe rotated 90deg about its vertical axis - The delta was lost in the noise around the 0.0002mm region, which is so small that I called the deflection to be 0.005mm or better and left it at that! |
Please login to post a reply.
Want the latest issue of Model Engineer or Model Engineers' Workshop? Use our magazine locator links to find your nearest stockist!
Sign up to our newsletter and get a free digital issue.
You can unsubscribe at anytime. View our privacy policy at www.mortons.co.uk/privacy
- hemingway ball turner
04/07/2025 14:40:26 - *Oct 2023: FORUM MIGRATION TIMELINE*
05/10/2023 07:57:11 - Making ER11 collet chuck
05/10/2023 07:56:24 - What did you do today? 2023
05/10/2023 07:25:01 - Orrery
05/10/2023 06:00:41 - Wera hand-tools
05/10/2023 05:47:07 - New member
05/10/2023 04:40:11 - Problems with external pot on at1 vfd
05/10/2023 00:06:32 - Drain plug
04/10/2023 23:36:17 - digi phase converter for 10 machines.....
04/10/2023 23:13:48 - More Latest Posts...
- View All Topics
- Reeves** - Rebuilt Royal Scot by Martin Evans
by John Broughton
£300.00 - BRITANNIA 5" GAUGE James Perrier
by Jon Seabright 1
£2,500.00 - Drill Grinder - for restoration
by Nigel Graham 2
£0.00 - WARCO WM18 MILLING MACHINE
by Alex Chudley
£1,200.00 - MYFORD SUPER 7 LATHE
by Alex Chudley
£2,000.00 - More "For Sale" Ads...
- D1-3 backplate
by Michael Horley
Price Not Specified - fixed steady for a Colchester bantam mark1 800
by George Jervis
Price Not Specified - lbsc pansy
by JACK SIDEBOTHAM
Price Not Specified - Pratt Burnerd multifit chuck key.
by Tim Riome
Price Not Specified - BANDSAW BLADE WELDER
by HUGH
Price Not Specified - More "Wanted" Ads...
Do you want to contact the Model Engineer and Model Engineers' Workshop team?
You can contact us by phone, mail or email about the magazines including becoming a contributor, submitting reader's letters or making queries about articles. You can also get in touch about this website, advertising or other general issues.
Click THIS LINK for full contact details.
For subscription issues please see THIS LINK.
Model Engineer Magazine
- Percival Marshall
- M.E. History
- LittleLEC
- M.E. Clock
ME Workshop
- An Adcock
- & Shipley
- Horizontal
- Mill
Subscribe Now
- Great savings
- Delivered to your door
Pre-order your copy!
- Delivered to your doorstep!
- Free UK delivery!




 Register
 Log-in


