Sieg KX3 Y_Axis Skipped Stepper Steps😢
| Joseph Noci 1 | 07/05/2021 06:47:18 |
| 1323 forum posts 1431 photos | Posted by Nicola Casali on 05/05/2021 23:22:24:
I've now gone for your suggested 10us pulses and started a job without stock. I've reduced the acceleration for Y from 300 to 200 in Mach3. With 5us pulses that didn't make any difference. Let's see with the 10us pulses. Actually, the table is gradually moving away from me, meaning it's having problems 'moving' the spindle in the + direction. The only rapids are once at the start and then rapids only for z throughout.
Actually, there are many rapids in X,Y and Z in your file , with the Y rapids the longest paths, so maybe there is still something there.. Do you know what the rapid traverse rate is set up for? It is just a bit confusing from your descriptions though- It's on the second passes that the penny suddenly dropped. The endmill is not touching the -Y side but cuts heavily into the opposite side, +Y. It can't now be workholding, maybe the steel is being stress relieved during milling? Using a dial indicator before and after air cutting a job instead of the stock, it seems the Y axis is out by a massive 0.20 - 0.30mm. Job finished. Y is off by -0.25mm. JasonB, when the dial indicator I set up is indicating zero, the ball screw has returned to its mark. However, in Mach3 readout it's off by 0.25mm. To me that means the ball nut is fine, at least I put this in a loop in a text file and ran it 200 times at F250. It didn't skip a single step, or didn't accumulate lost steps. This implies that you don't lose steps, but that the machined parts is incorrect in Y, and when you don't loose steps the MACH3 DRO shows you are 0.25mm out.... It is not possible to move a fixed distance while not loosing steps ( Confirmed by DTI) but Mach3 DRO show 0.25mm still to go...so nothing sensible here... Your G code file has X/Y moves in the 30mm range with many XY rapids - Maybe try John's file thus: Set a round rod in the chuck - say 10m OD and place in table center - zero all axes, Set the DTI on the table , up against the rod at the diagonal of the square in the MDI text below and zero DTI, then run the MDI text below ( Run the file first to be sure which direction to place the DTI so you don't crash it!) G91 (sets incremental mode) Run that say 10 times and see that the tool tip is back at zero, and that the DRO says 0 Joe |
| JasonB | 07/05/2021 07:27:13 |
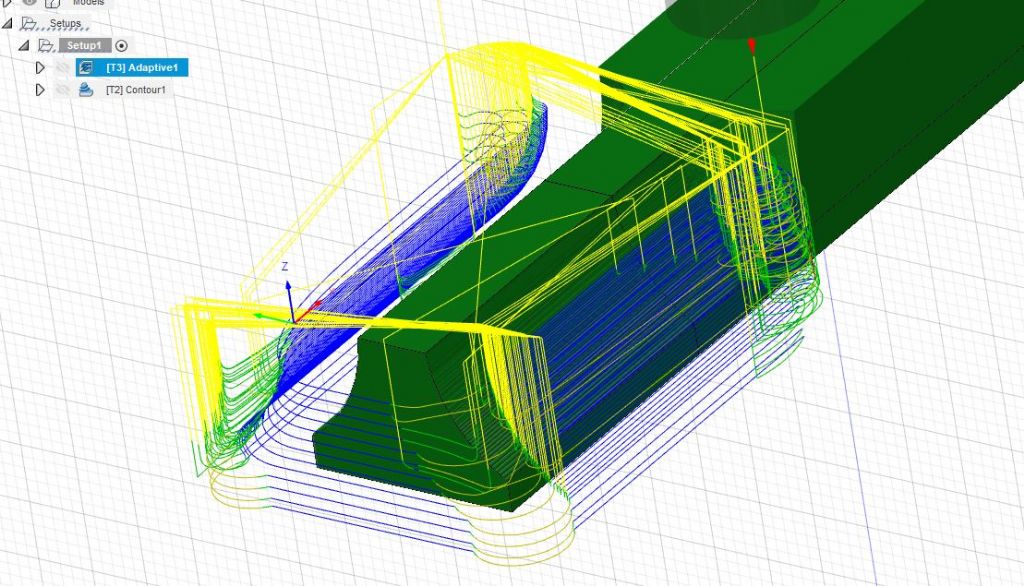
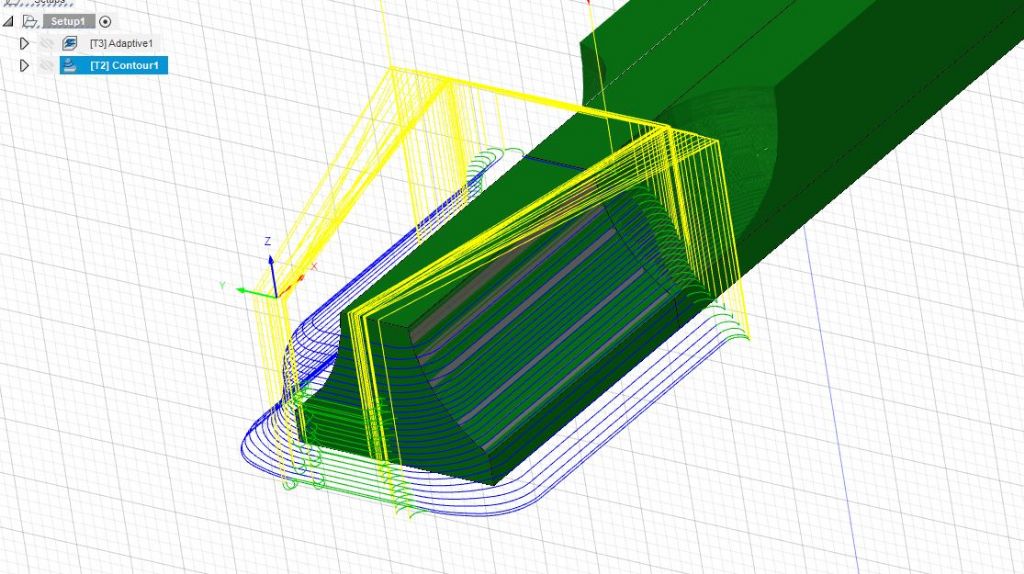
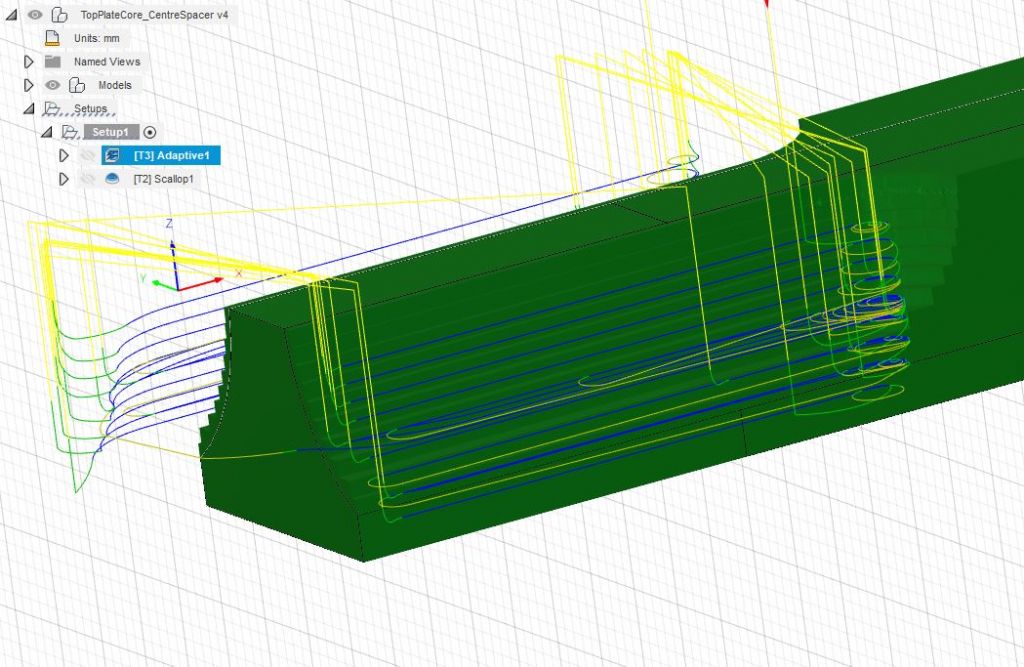
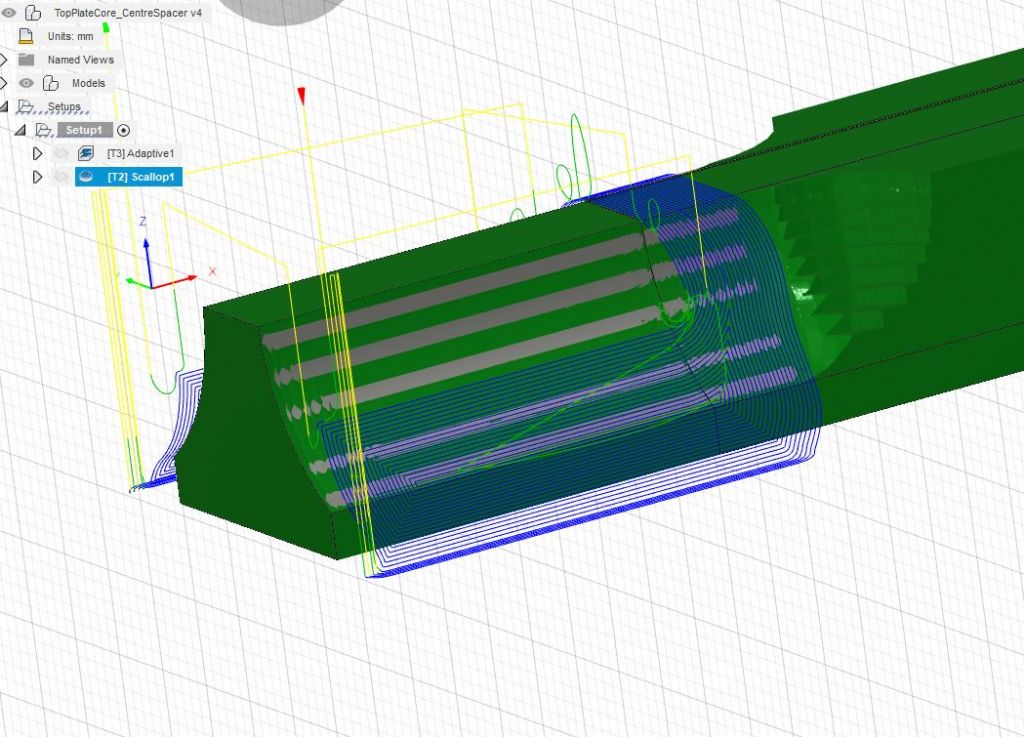
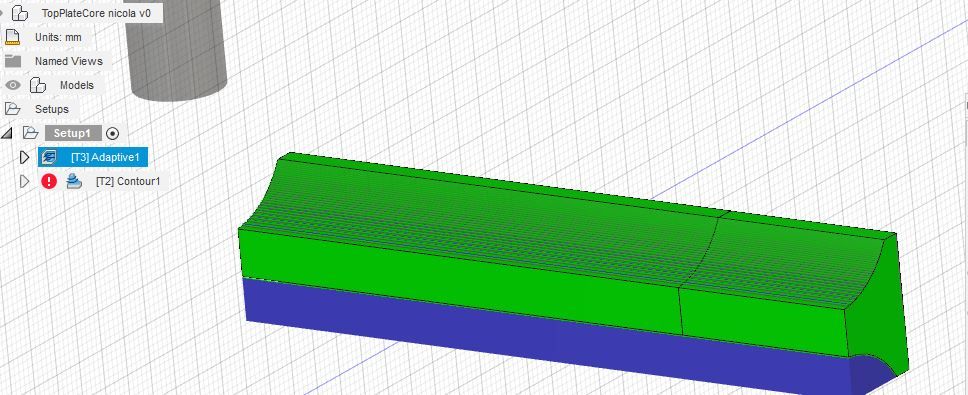
25215 forum posts 3105 photos 1 articles | Nicola, when you do those tests that show the Dti reading zero but Mach screen 0.3 are you moving by jogging until dti reads zero? I would have thought you need to get mach to move to a position and then back to zero and then compare dti to screen. Joe, I'm not sure if Nicola pays for F360, I have a feeling she is using the free version in which case Rapids will not be enabled and it will be moving at the feed rate, seemed like that when I ran a bit of the code on my machine yesterday Nichola sent my her F360 file and I can't see anything that would make the metal distort in Y so that early question can be ruled out. There are some quite heavy cutter engagements of the 12mm tool (unless Nicola is using shorter stock) Could it be play/backlash ? otherwise cuts are quite light at 3mm wide x 1mm deep. Maybe try putt the dti on the table and jogging one way then the other and see how many 0.01mm jogs it takes before the dti shows movement. maybe also play in the X gibs. These show the her tool paths which I have suggested some alterations to as step downs are much too small on the adaptive and take a long time with that slow moving hss tool. Yellow are "rapids" but likely running at tool feed rate. Blue is cutting. Then she had a contour with 10mm ball to finish, not in the g-code Compared to my adaptive but still with here tool choice and speed/feed And my scalope to finish again with her tool
Edited By JasonB on 07/05/2021 07:28:47 |
| Joseph Noci 1 | 07/05/2021 08:12:40 |
| 1323 forum posts 1431 photos | Posted by JasonB on 07/05/2021 07:27:13:
Joe, I'm not sure if Nicola pays for F360, I have a feeling she is using the free version in which case Rapids will not be enabled and it will be moving at the feed rate, seemed like that when I ran a bit of the code on my machine yesterday
G0 Z5. < Quickly..... G0 Z5. G0 Z5. Many dozens of these in the Gcode file Nicola sent me... Still think its a velocity/acceleration issue at high traverse rates, but I am normally wrong.. Joe |
| JasonB | 07/05/2021 08:32:42 |
25215 forum posts 3105 photos 1 articles | Put it another way, there were no excessively rapid movements on my machine which is set up as stock, I think Nicola said hers was too so without going to look that's 1000 or 1500mm/min rapids. But it does rapid in Z and Y to get back to the beginning of the next cut Edited By JasonB on 07/05/2021 08:39:49 |
| Nicola Casali | 07/05/2021 12:30:49 |
| 33 forum posts 6 photos | JasonB, i thought I was looking at my machine for a second. There's a bit of cardboard to stop the vibrations just like on mine. I have them also stuffed in the main enclosure. The enclosure seems to amplify all the noise. My machine is up against a single brick thick party wall in an attached garage. For the F360 job, I'm setting up the DTI so that it reads 0 when Mach3 reads -30.0000 mm in Y. After the job I jog the Y until the DTI reads zero again and check the Mach3 Y readout. It would show -29.7500 mm, for example. Actually, I had to cave in and purchase a year F360 subscription. I have so many components being used at once. I was using Aspire, but mostly for 2D milling and engraving. I've moved to F360 cam. Might as well since I'm paying for it now. And the designs move seamlessly into the cam module. I see now. There's lots of rapids. I was looking at G0 Z5. and not realising the subsequent lines were rapid moves too. I checked the rapid speeds in Mach3. It was set to 1999. One of those settings I was messing about with a few months back and forgot to set back. It will have worked fine in X, but would be on the edge of failure for Y. My little vise seems to have pushed it over that edge. The first component I produced was clamped without a vise. But some heavy cuts were causing sliding. Once I attached the vise I lost accuracy. That first component produced so perfectly was confusing me. What had changed?! I'll double check after running the job again (with JasonB's update), but hope that's the problem fixed. But thanks for all your invaluable input. I'll update soon.
[edit] Forgot to say I ran the job cutting air and there were no missed steps. Edited By Nicola Casali on 07/05/2021 12:45:47 |
| JasonB | 07/05/2021 13:07:44 |
25215 forum posts 3105 photos 1 articles | My X & Y are set at 1500mm/min, Z is less at 650 but I think I altered that due to damage from the previous user. I was running one of the ARC 100mm versatile vices the other day which is a lot larger than the 80mm I usually use and did not notice any problems. The job should take a lot less time, your code ran at 48mins, mine using your feeds 22mins and if I change to 6mm carbide tooling it comes down to 11mins. Were you actually machining the end of that long stock or did you just put a short bit in to test as I wondered why the profile is drawn the whole length but you are only cutting part of it if a smaller part then time would come down even more |
| Nicola Casali | 07/05/2021 13:26:22 |
| 33 forum posts 6 photos | I'm only machining a part of the extrusion. About 25mm at a time and then cutting the machined piece off and starting again. i need about 16. I can't work out how to clamp the whole length without collision, so I'm using a vise with a chunk sticking out. Not ideal. I'm using whatever scrap metal I found in my cupboard to mill from. But it distorted along the length after cutting on my bandsaw, anyway. I've received some carbide ball endmills from Arc. But I'm going to continue using the HSS one until it's dull. Not sure I can sharpen ball endmills with any accuracy that's worth the pain though. I do sharpen flat ones on a universal grinder. Edited By Nicola Casali on 07/05/2021 13:27:27 |
| JasonB | 07/05/2021 13:37:54 |
25215 forum posts 3105 photos 1 articles | I would cut the lengths off first and then just hold by the 25mm long edge in the vice with about 1.5mm in the jaws (may not work with your large dia ball mill. That way you don't get the large engagement where profile stops being cut in the bar. Or hold it on edge and do one side at a time with the full length running in the X direction |
| Andrew Johnston | 07/05/2021 14:39:16 |
7061 forum posts 719 photos | Posted by Nicola Casali on 07/05/2021 12:30:49:
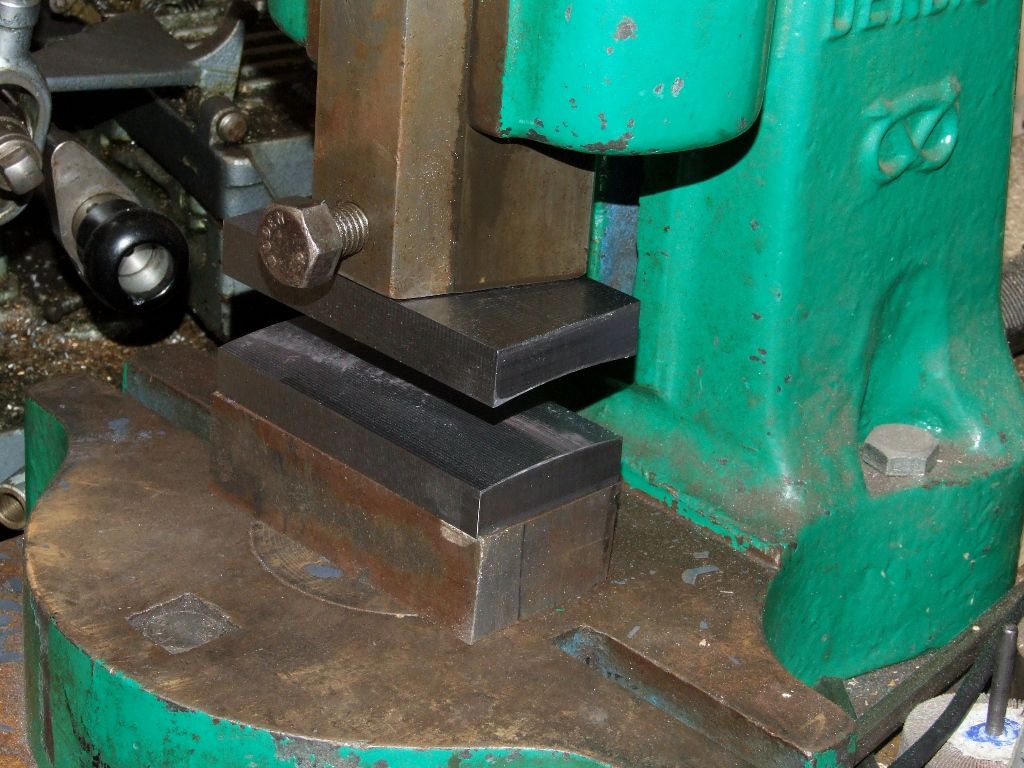
The enclosure seems to amplify all the noise. There's something wrong if vibration and noise are being generated. It may be worth playing with speeds and feeds. I can hear my CNC mill outside the garage door, but it's not intrusive, even on heavy cuts in steel. Less noise than most DIY, and one could hold a normal conversation without a problem. If I walk to the pavement (about 10m) then I can barely hear the mill. I'm sensitive to noise and live in a quiet rural village so noise is a no-no. I learnt early on to use small cutters and high speeds rather than hog out with large cutters as I was doing on my manual mills. For a start my CNC mill is less rigid than the manual machines and has a higher top speed. Also the motor is run from a VFD so at the lower speeds spindle power is reduced. The curved surfaces on these press tools was formed with a 10mm ballnose cutter and 3D toolpaths: Andrew |
| Nicola Casali | 07/05/2021 15:10:34 |
| 33 forum posts 6 photos | I'm being overcautious with the noise. I have time after 7pm to do milling. I continue until 10:30pm. Outside my garage I can hear surprisingly little. But I've no idea how well the low frequency vibrations transmit through walls. It just sounds loud in the garage with the noise reflecting off bare walls. I'm not sure why I am using larger diameter cutters for this job. I do have 6mm carbide flat endmills. I have a load of 12mm HSS ones I bought a while back and just went with those for this job. I'll try the 6mm ones with a higher rpm. That could make the difference. I did not think about that. Thanks. |
| JasonB | 07/05/2021 15:49:54 |
25215 forum posts 3105 photos 1 articles | Mine came with those bits of card, thought it was OEM |
| Andrew Johnston | 08/05/2021 12:10:45 |
7061 forum posts 719 photos | Posted by Nicola Casali on 07/05/2021 15:10:34:
But I've no idea how well the low frequency vibrations transmit through walls. Brick is pretty good at absorbing sound, but does get worse at lower frequencies. Is the party wall onto another garage? I suppose it depends upon how one gets on with the neighbours. I use 6mm and 10mm carbide cutters for most vertical/CNC milling unless I need a particular size or shape of cutter, or have large flat areas to machine. If I were making the part I would do what was needed in terms of fixtures to hold the part vertically. Roughing both sides would be done with an endmill with large DOC and shallow WOC, cutting in both directions to minimise rapids. Finishing would be done with a ballnose mill. Since this would be cutting on a steep face the contact edge will be running at a sensible surface speed. Running the part flat means that when using the ballnose cutter it is mostly the nose that is cutting, where the speed is low, and zero at the centre. I'd probably run 10mm cutters for both, to get the reach. I regard a 10mm cutter as small. Andrew |
| JasonB | 08/05/2021 14:06:52 |
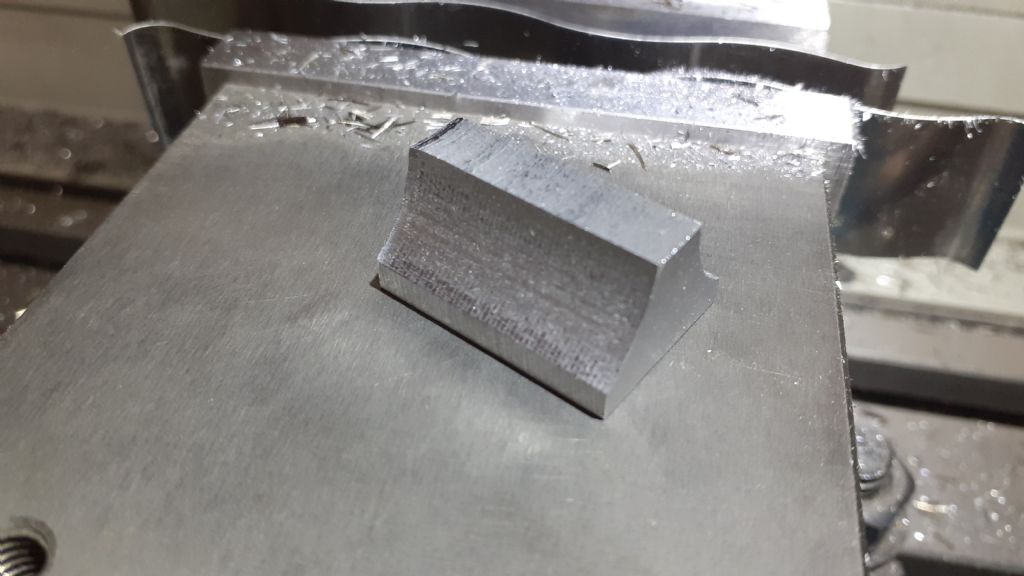
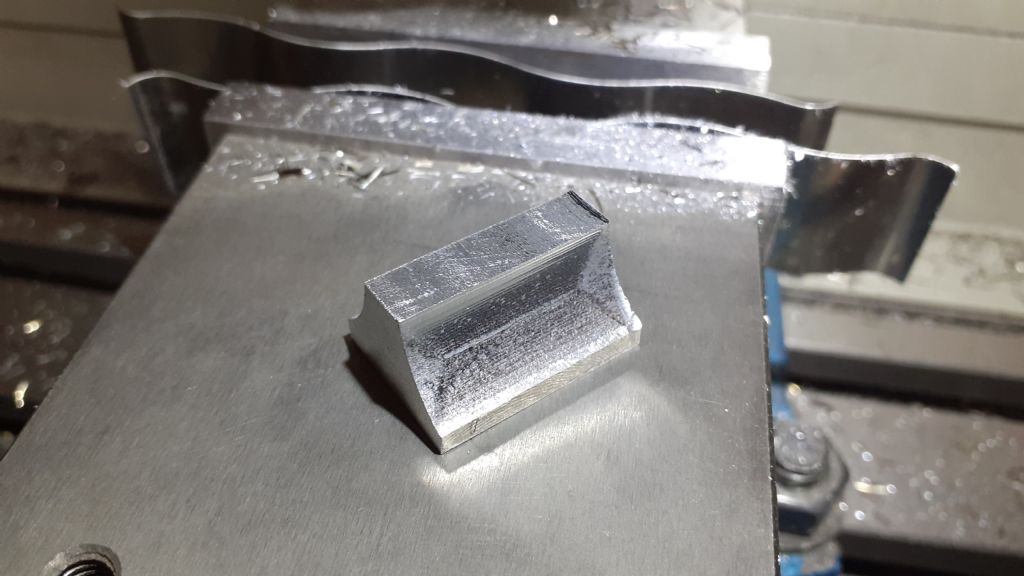
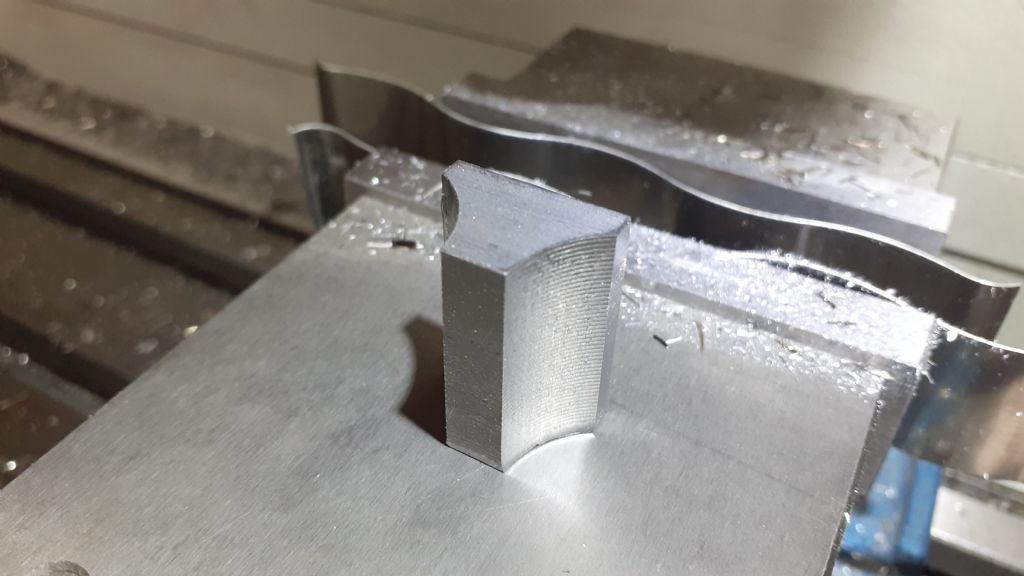
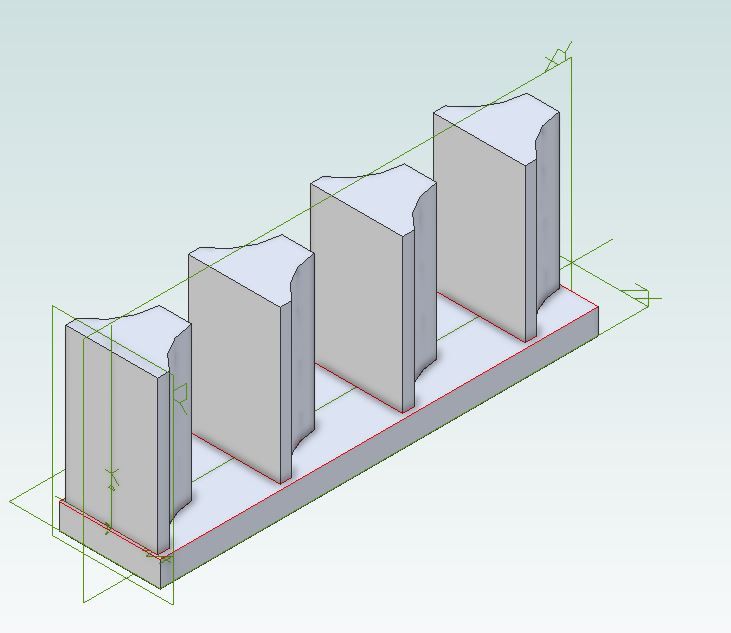
25215 forum posts 3105 photos 1 articles | While the machine was turned on for machining another CI flywheel I thought I would have a quick go at one of Nicola's parts. As I said a few posts up doing them from individual blocks 25mm long would be better than working on the end of a bar so roughed out a bit of scrap black bar of unknown spec. Started with adaptive clearing with my usual 6mm 3-flute carbide cutter taking 5mm vertical x 1mm horizontal cuts and then stepping up the profile in 1mm steps, set to leave 0.5mm stock. 5000rpm, 400mm/min feed Then did two options, firstly a scallop 0.25mm stepover on one side and then on the other a parallel path following the curve so stepover remained a constant 0.25mm. These were done with a 6mm ball nose tool with 4 flutes 5000rpm 500mm/min feed. Not the best of finishes, so could do with a bit of playing around with settings or some known stock but enough to give an idea of what's possible and at just over 7mins run time better than Nicola's original 50+mins particularly as 16 are needed. Parallel Scallop This gives a smoother surface roughness test (done with finger nail)
Andrew did you mean doing them like this when you said vertically? |
| Nicola Casali | 08/05/2021 19:01:47 |
| 33 forum posts 6 photos | Great job! Now, how did you get scallop to do one side at a time? Mine's doing a column at a time and then going to the other side, back and forth. Lots of time wasted.
[edit] Got it. I unselected the top face and it seems to be doing something similar to yours. Where did you get those lovely wavy parallels from? I definitely need those! Edited By Nicola Casali on 08/05/2021 19:04:09 Edited By Nicola Casali on 08/05/2021 19:06:06 |
| JasonB | 08/05/2021 19:32:38 |
25215 forum posts 3105 photos 1 articles | When in the geometry part of the scallop setup click avoid surfaces, I did this anyway to top, sides and ends but also added one of the curved surfaces so there was just the one left that it could machine. Simply marking the top surface as one to avoid will get it doing one side and then the other rather than going back and forth over the top as though it's machining it but there is no metal to come off as you have found out.. That nice man Ketan at ARC may sell you a set if you ask nicely and cross his palm with silver. I don't use them that much but the tallest pair is just right in the 80mm vice when you want to hold a minimal amount in the jaws. Also handy for thin items less than the usual 1/8" thickness of most other parallels as they squash down, just watch where they are if drilling through. J
PS you do know that the profile as drawn is not quite symmetrical |
| Andrew Johnston | 08/05/2021 19:55:11 |
7061 forum posts 719 photos | Posted by JasonB on 08/05/2021 14:06:52:
Andrew did you mean doing them like this when you said vertically? No, I meant as in the third picture. I'd definitely finish machine the curved surface with horizontal cuts and a stepdown. You'll get a better finish for a given step size, or with an adaptive stepdown and a specified scallop height it'll need fewer passes. If the parts are only 25mm long I'd do them as a couple of long parts and slice up later. One could make a fixture to hold them in the vice with screws into the base of the parts at each end. I'd probably dispense with the vice and use a length of material for a fixture clamped directly to the table. If it isn't acceptable to have screw holes in the bottom of the part, just make each length slightly longer so the screw holes get lost when slicing. Andrew |
| JasonB | 08/05/2021 20:10:18 |
25215 forum posts 3105 photos 1 articles | I did mean the last (third picture). Could probably do them on a piece just over twice the length, cut one end and then flip over to do the other before cutting in half and cleaning up the cuts. Something like this is no screw holes possible? Your thinking of a ball nose to finish the vertical curves is that it is likely to leave a less visible step I assume and could be done in say 5mm high steps so just 5 passes would indeed be a lot quicker. It would certainly give a better finish than either the scallop or parallel as the stepovers leave ridges unless you do them really small and that just takes up time. Edited By JasonB on 08/05/2021 20:22:31 |
| JasonB | 08/05/2021 20:50:00 |
25215 forum posts 3105 photos 1 articles | Nicola, this is the way Andrew is suggesting the work is done with the profile on end then you get a much smoother finish. You could get away with less finish passes with a larger dia tool, I did more to let any spring out of the 6mm cutter as I had to use that for the size of my internal fillets. Edited By JasonB on 08/05/2021 20:53:49 |
| Nicola Casali | 10/05/2021 00:57:56 |
| 33 forum posts 6 photos | Didn't have time to look at the replies as I was machining the pieces. All done. But did have trouble with my Warco vice lifting when holding stock on the last couple of millimetres of the jaws. My toolmakers vice was even worse. I managed to minimise it by hammering the stock down, as recommended in other threads. If there's a vice that doesn't lift, please suggest one. Machining vertically would have been much simpler. Simpler setup and just one step. I don't have a 25mm long carbide endmill at this moment. That's one amazing project you've got going there with that engine. I've always been nervous about loading the cutters too much. But the carbides were cutting as if they were tackling aluminium or even hardwood. That's given me a lot more confidence. I really appreciate the help to sort out my machine and all the advice. |
| Martin Connelly | 10/05/2021 08:08:45 |
2549 forum posts 235 photos | There are some vices that have an angled surface inside the moving jaw that pushes the jaw down as it is tightened, Kurt are popular in the USA. They are big and expensive so will probably be unsuited to your needs. There are cheaper smaller versions but they may have quality issues as they are aimed at non-professionals. There is also the technique of putting a round bar in a horizontal position between the moving jaw and the workpiece so that the jaw lift doesn't raise the workpiece but this need to be used with care as it is not as secure as direct contact with the jaws. Have you considered direct clamping to the machine bed for some parts, there will not be a vice jaw to lift when this is done. You could also use clamps to press the moving jaw down after you have tightened the vice on the workpiece but they can get in the way with some work. Martin C
|
Please login to post a reply.
Want the latest issue of Model Engineer or Model Engineers' Workshop? Use our magazine locator links to find your nearest stockist!
Sign up to our newsletter and get a free digital issue.
You can unsubscribe at anytime. View our privacy policy at www.mortons.co.uk/privacy
- hemingway ball turner
04/07/2025 14:40:26 - *Oct 2023: FORUM MIGRATION TIMELINE*
05/10/2023 07:57:11 - Making ER11 collet chuck
05/10/2023 07:56:24 - What did you do today? 2023
05/10/2023 07:25:01 - Orrery
05/10/2023 06:00:41 - Wera hand-tools
05/10/2023 05:47:07 - New member
05/10/2023 04:40:11 - Problems with external pot on at1 vfd
05/10/2023 00:06:32 - Drain plug
04/10/2023 23:36:17 - digi phase converter for 10 machines.....
04/10/2023 23:13:48 - More Latest Posts...
- View All Topics
- Reeves** - Rebuilt Royal Scot by Martin Evans
by John Broughton
£300.00 - BRITANNIA 5" GAUGE James Perrier
by Jon Seabright 1
£2,500.00 - Drill Grinder - for restoration
by Nigel Graham 2
£0.00 - WARCO WM18 MILLING MACHINE
by Alex Chudley
£1,200.00 - MYFORD SUPER 7 LATHE
by Alex Chudley
£2,000.00 - More "For Sale" Ads...
- D1-3 backplate
by Michael Horley
Price Not Specified - fixed steady for a Colchester bantam mark1 800
by George Jervis
Price Not Specified - lbsc pansy
by JACK SIDEBOTHAM
Price Not Specified - Pratt Burnerd multifit chuck key.
by Tim Riome
Price Not Specified - BANDSAW BLADE WELDER
by HUGH
Price Not Specified - More "Wanted" Ads...
Do you want to contact the Model Engineer and Model Engineers' Workshop team?
You can contact us by phone, mail or email about the magazines including becoming a contributor, submitting reader's letters or making queries about articles. You can also get in touch about this website, advertising or other general issues.
Click THIS LINK for full contact details.
For subscription issues please see THIS LINK.
Model Engineer Magazine
- Percival Marshall
- M.E. History
- LittleLEC
- M.E. Clock
ME Workshop
- An Adcock
- & Shipley
- Horizontal
- Mill
Subscribe Now
- Great savings
- Delivered to your door
Pre-order your copy!
- Delivered to your doorstep!
- Free UK delivery!

![20210507_101557[1].jpg 20210507_101557[1].jpg](/sites/7/images/member_albums/44290/893593.jpg)
![20210507_101611[1].jpg 20210507_101611[1].jpg](/sites/7/images/member_albums/44290/893594.jpg)


 Register
 Log-in


