Forum sponsored by:

RMC Type-B Engine Build
| JasonB | 28/12/2019 20:23:06 |
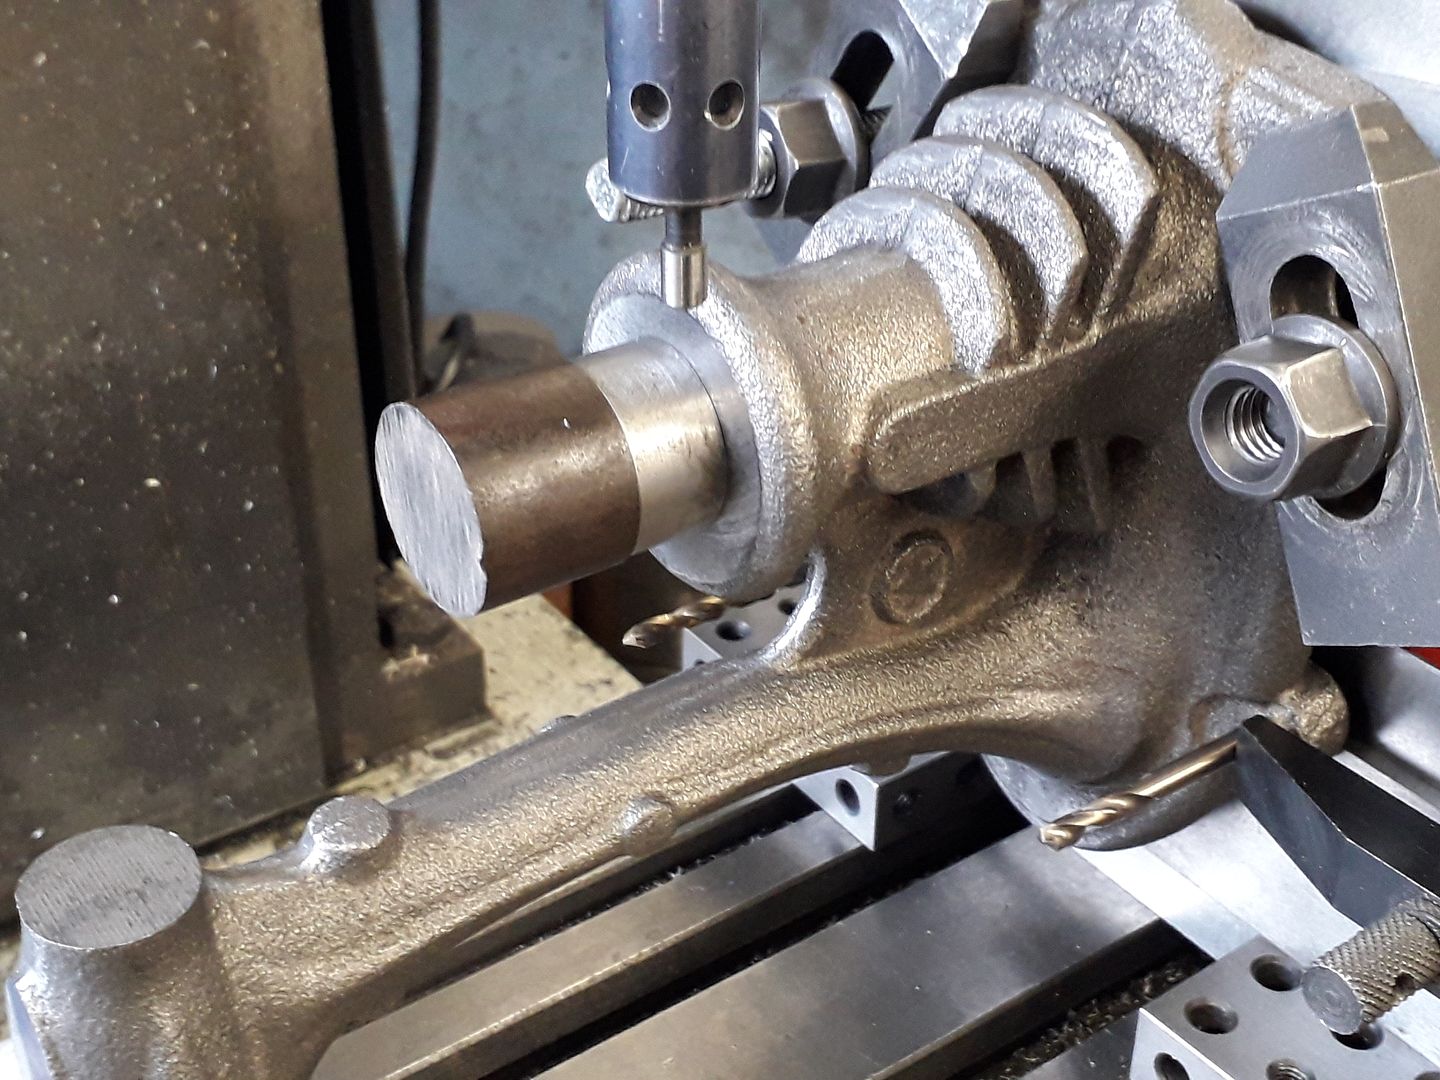
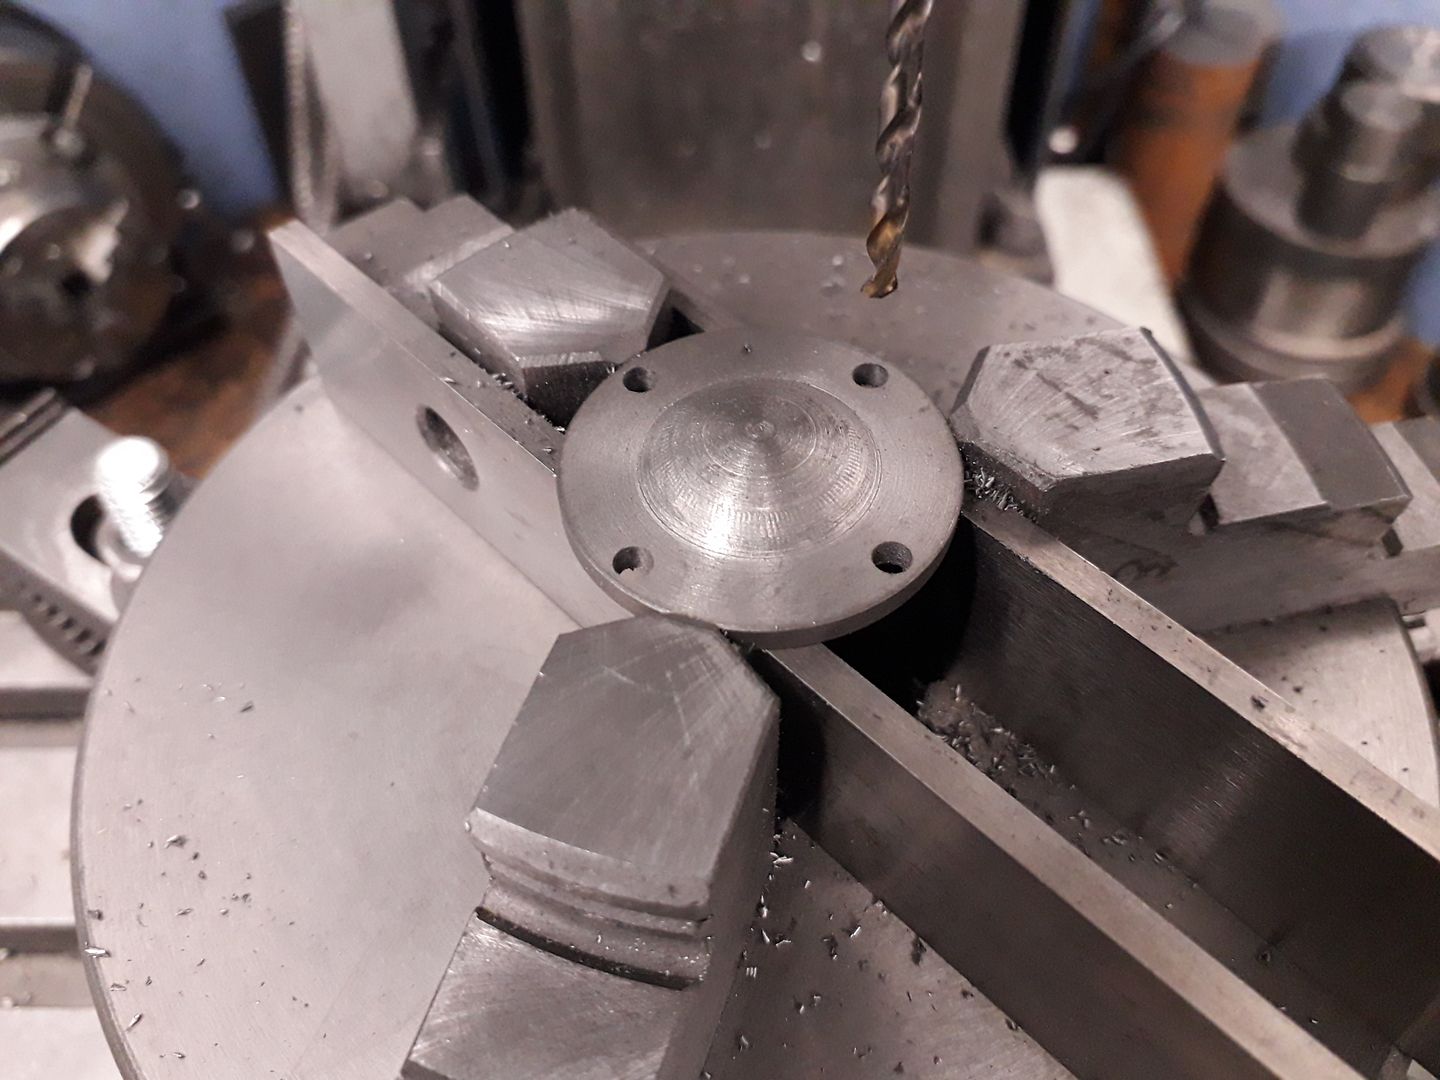
 25215 forum posts 3105 photos 1 articles | With two drill bits poked into the feet holes resting on parallels the base was clamped to an angle plate, to locate the ctr line of the cylinder I turned up a close fitting plug and touched off each side of that, heights were easy enough touching off the angle plate.
The bearing housing could then be drilled and reamed 1/2", I added some aluminium packets at teh bottom to stop any deflection from drilling pressure.
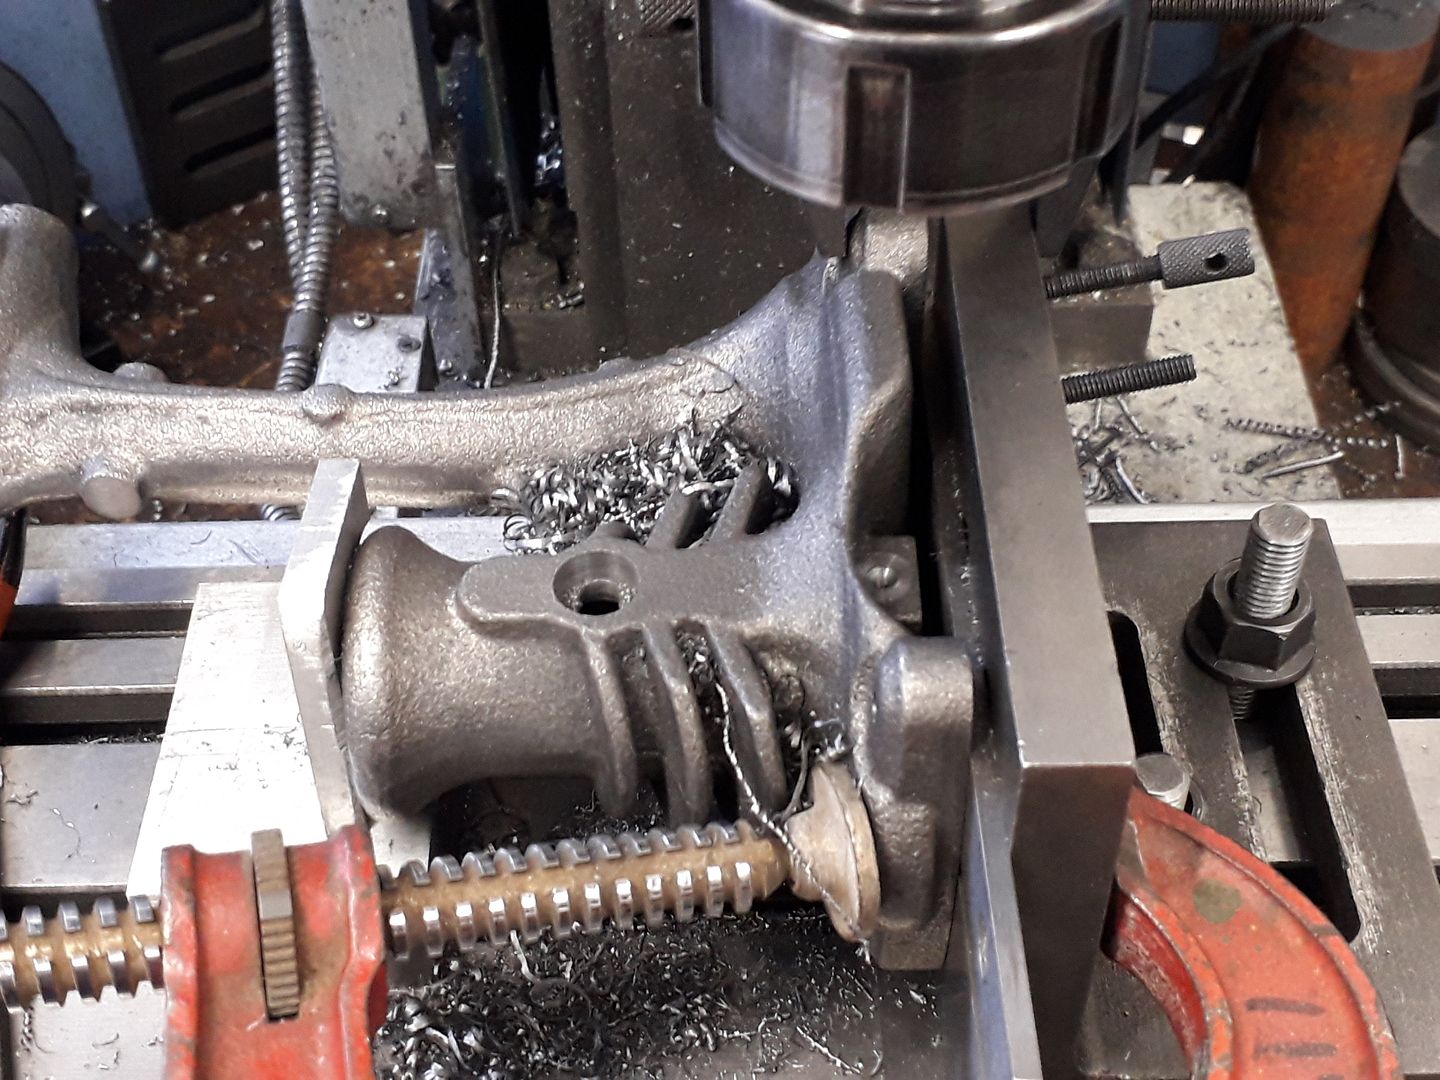
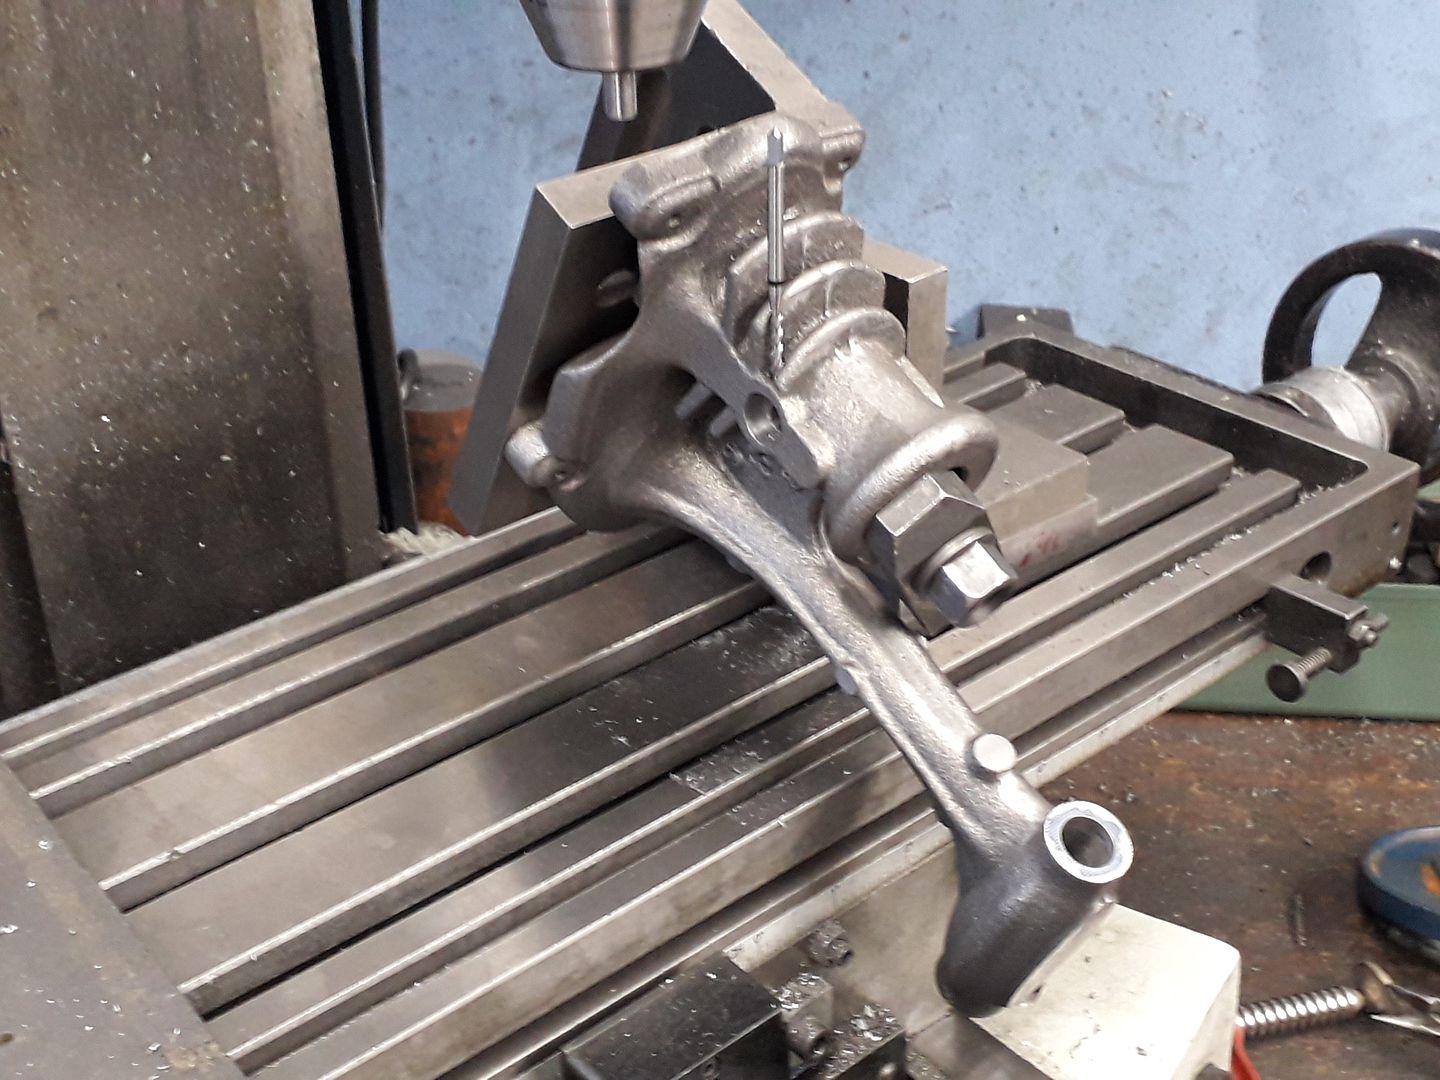
The casting was then rotated 90deg and with pins in the dowel holes again lined up to do the exhaust and spark plug contact holes
Then rotated 180 degrees to drill and tap for the sparkplug
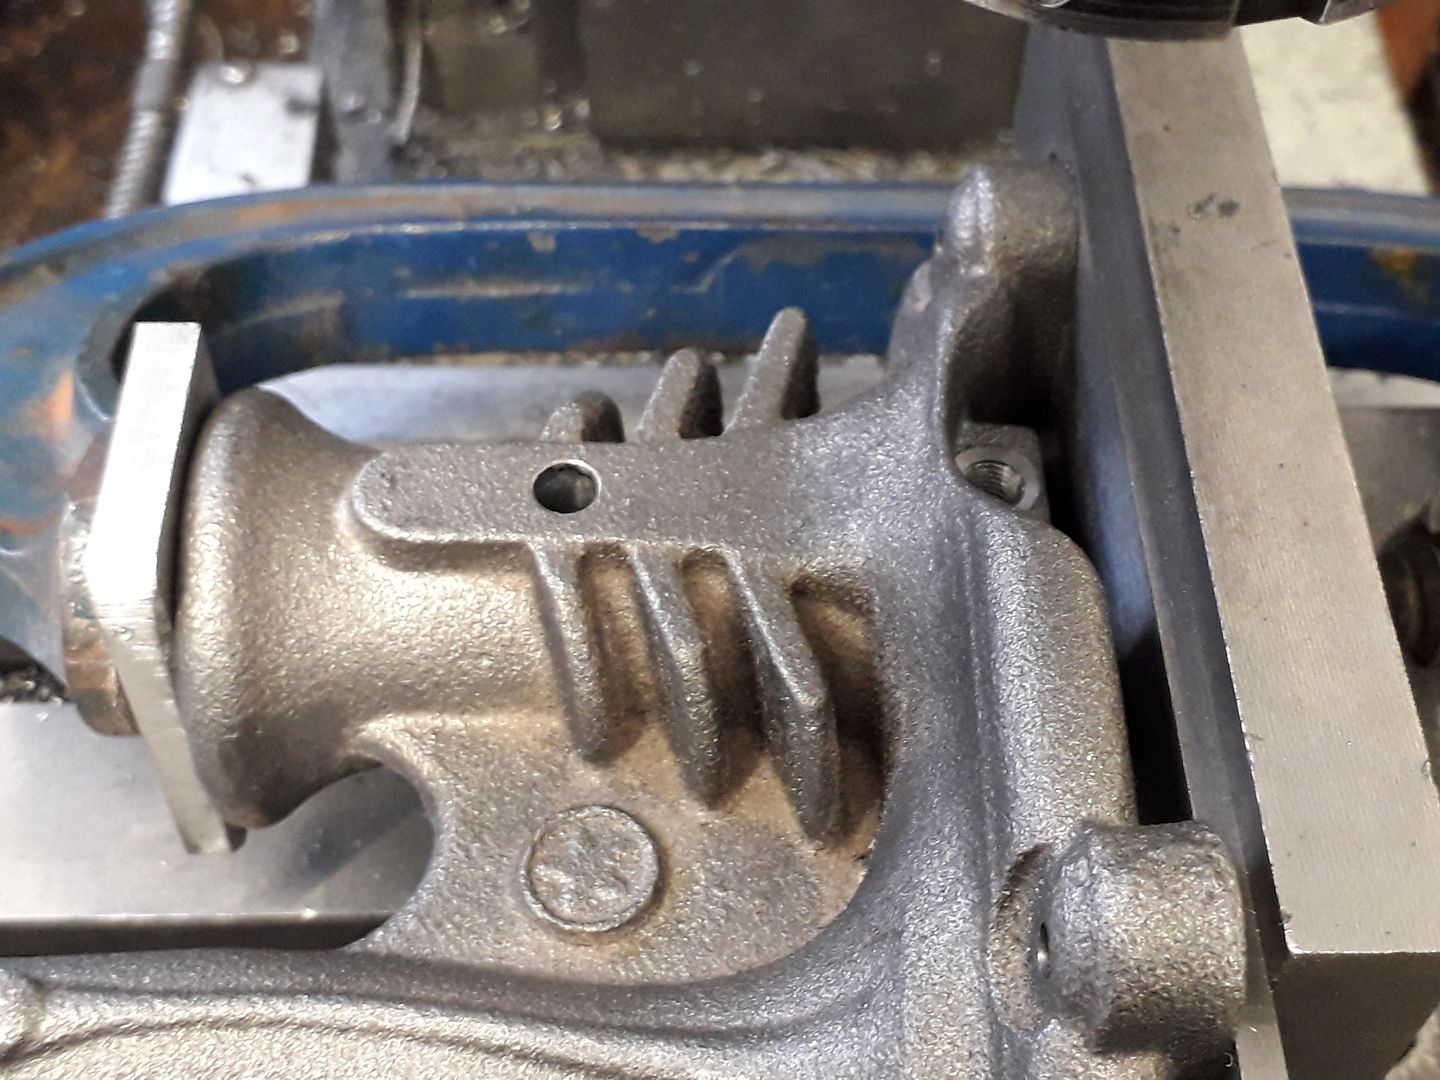
Finally two angle plates were cobbled together so the casting could be held at a suitable angle to drill and tap for a grub screw to retain the exhaust which has to fit between two of the sloping cooling fins.
just enough done for a trial assembly.
|
| JasonB | 03/01/2020 17:11:52 |
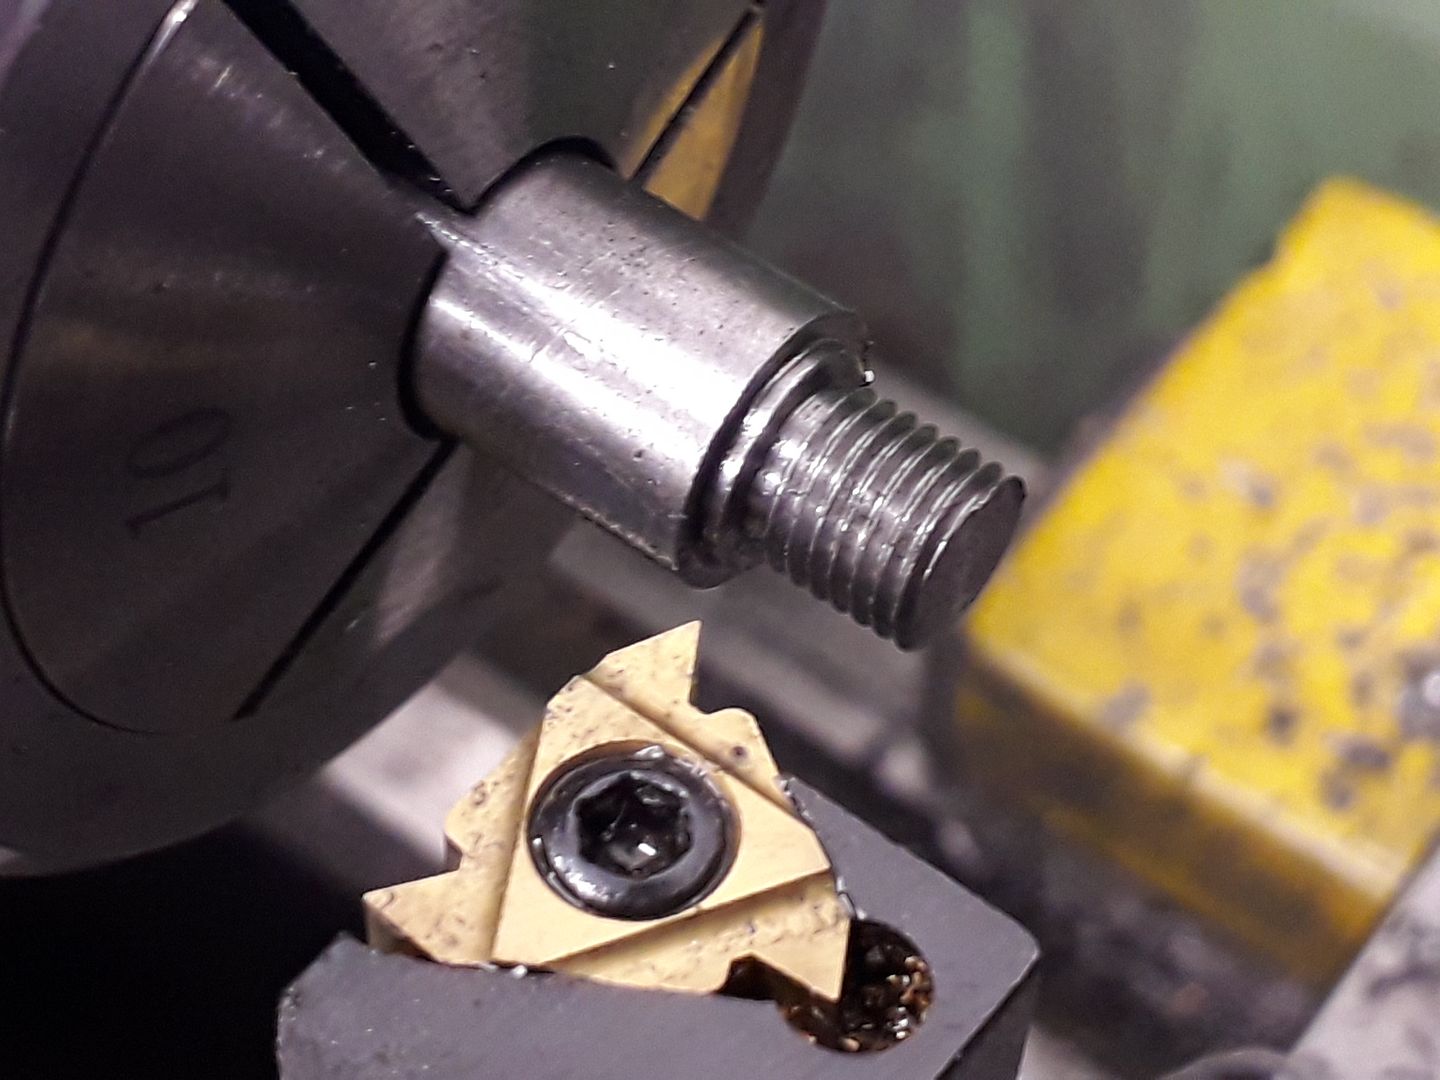
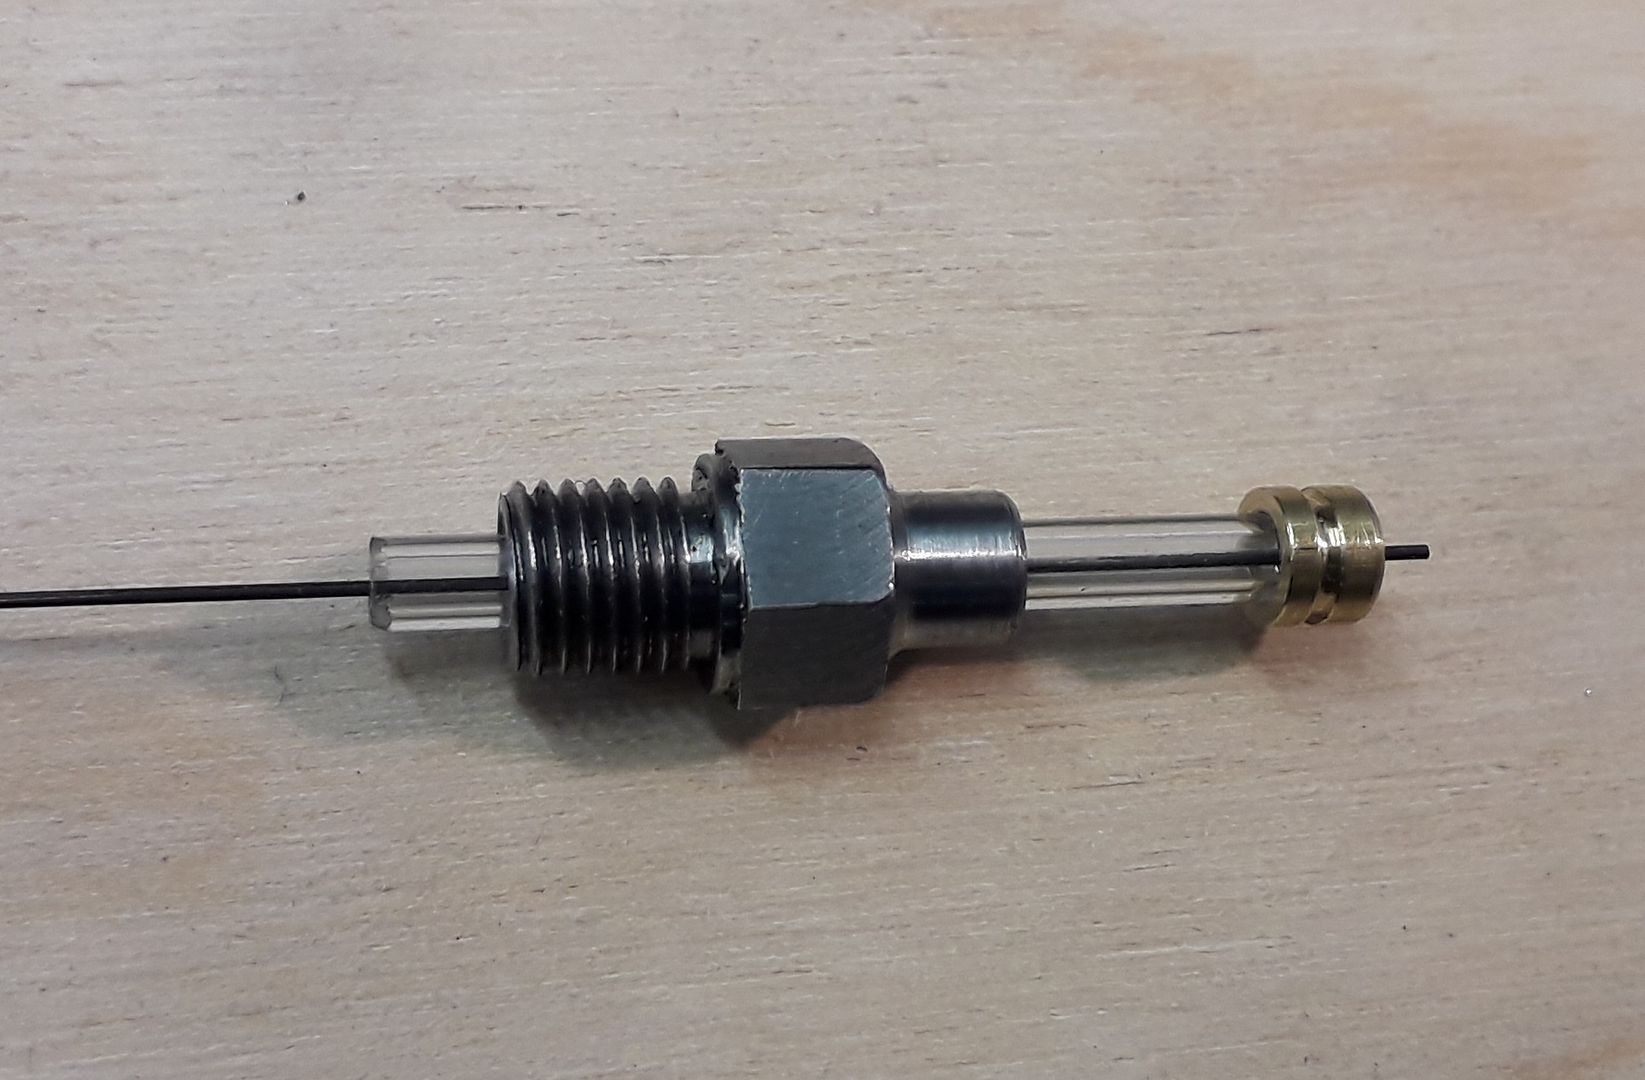
25215 forum posts 3105 photos 1 articles | The drawings include details for a home made spark plug to suit the engine so I had a go at making one, well two actually as the extra can be used in the Type D when I get round to making that. The body started out being turned on the end of some EN1A bar and then screwcut 1/4 x 32 UNEF as I only have a tap that size. The large picture makes it look rougher than it is.
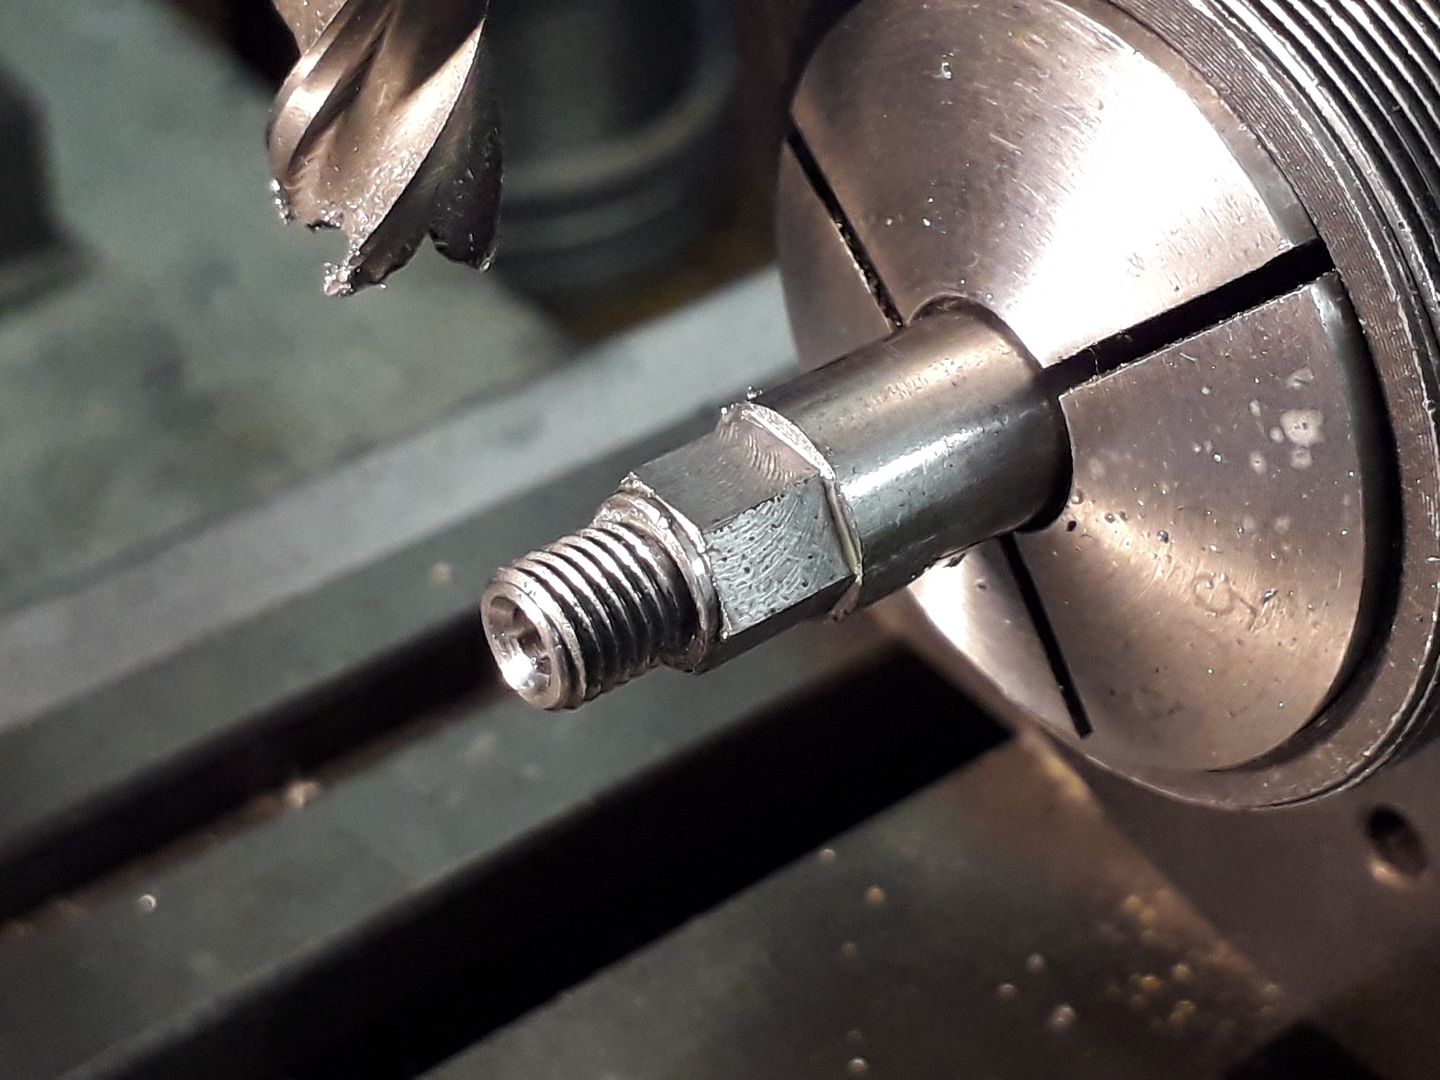
Next over to the spin indexer to mill the 5/16 hex
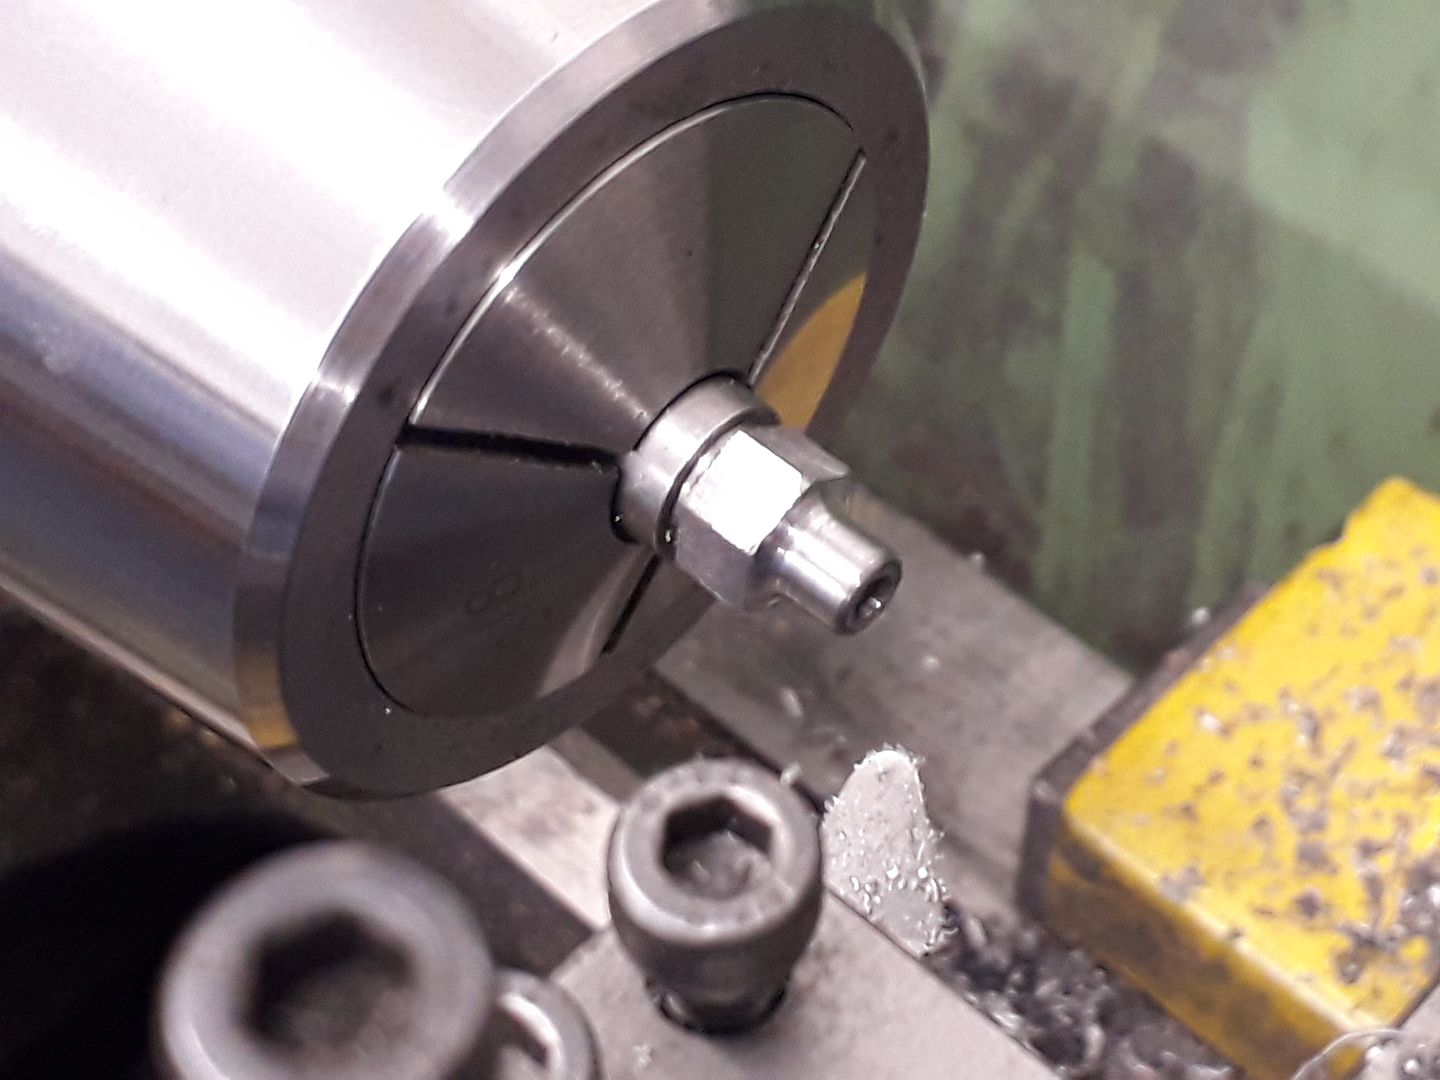
A suitable female thread was tapped into the end of a bit of scrap so the body could be held to finish the top end.
The insulator is a length of 3mm glass tube which cut very easily with a diamond coated disc in the Dremel, I used the slowest speed to avoid heating the glass and then just twisted the glass in my fingers against the disc to chamfer off the sharp edges
The central electrode is a piece of 0.5mm tig welding electrode and the final part is a small brass cap with a groove to accept the wire clip. The electrode is trimmed to length after assembly.
The plugs are assembled using Loctite 380 "Black Max" adhesive. I could not get the plugs to work at first and it turned out that the adhesive had insulated the electrode from the brass cap, a quick spot of electrical solder on the end soon cured that problem and the engine ran better than with the standard length Rimfire plug that I had been using for initial testing. Unlike a conventional plug the spark does not travel from the central electrode to the plug body but to a long screw that enters from the opposite side of the cylinder, plug gap is adjusted by turning this screw and securing with a locknut. At one time Nick did offer a disc of glass that coul dbe fitted to a modified cylinder head so you can tip the engine up when running to watch the spark and ignited fuel. |
| DiogenesII | 03/01/2020 17:53:49 |
| 859 forum posts 268 photos | Ha, that brings back the days of the Colourtune! ..seriously though, that's a very clean & consistent burn - do you know what fuel it's running on in the video? |
| JasonB | 03/01/2020 18:28:23 |
25215 forum posts 3105 photos 1 articles | Just regular pump petrol. |
| JasonB | 06/01/2020 19:29:49 |
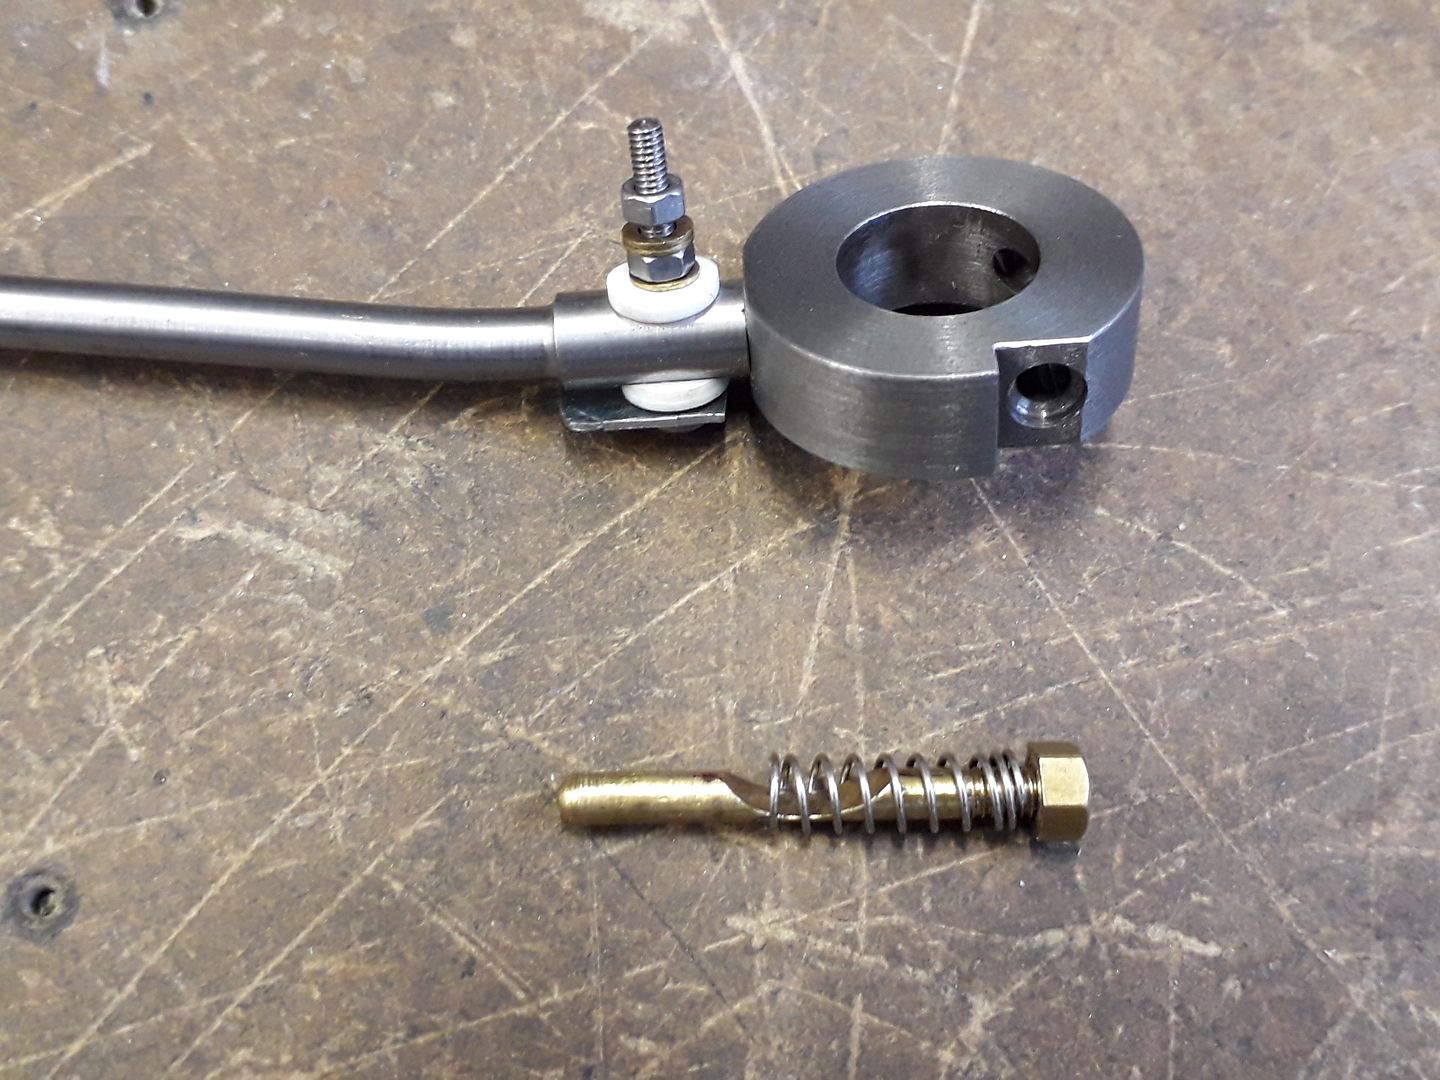
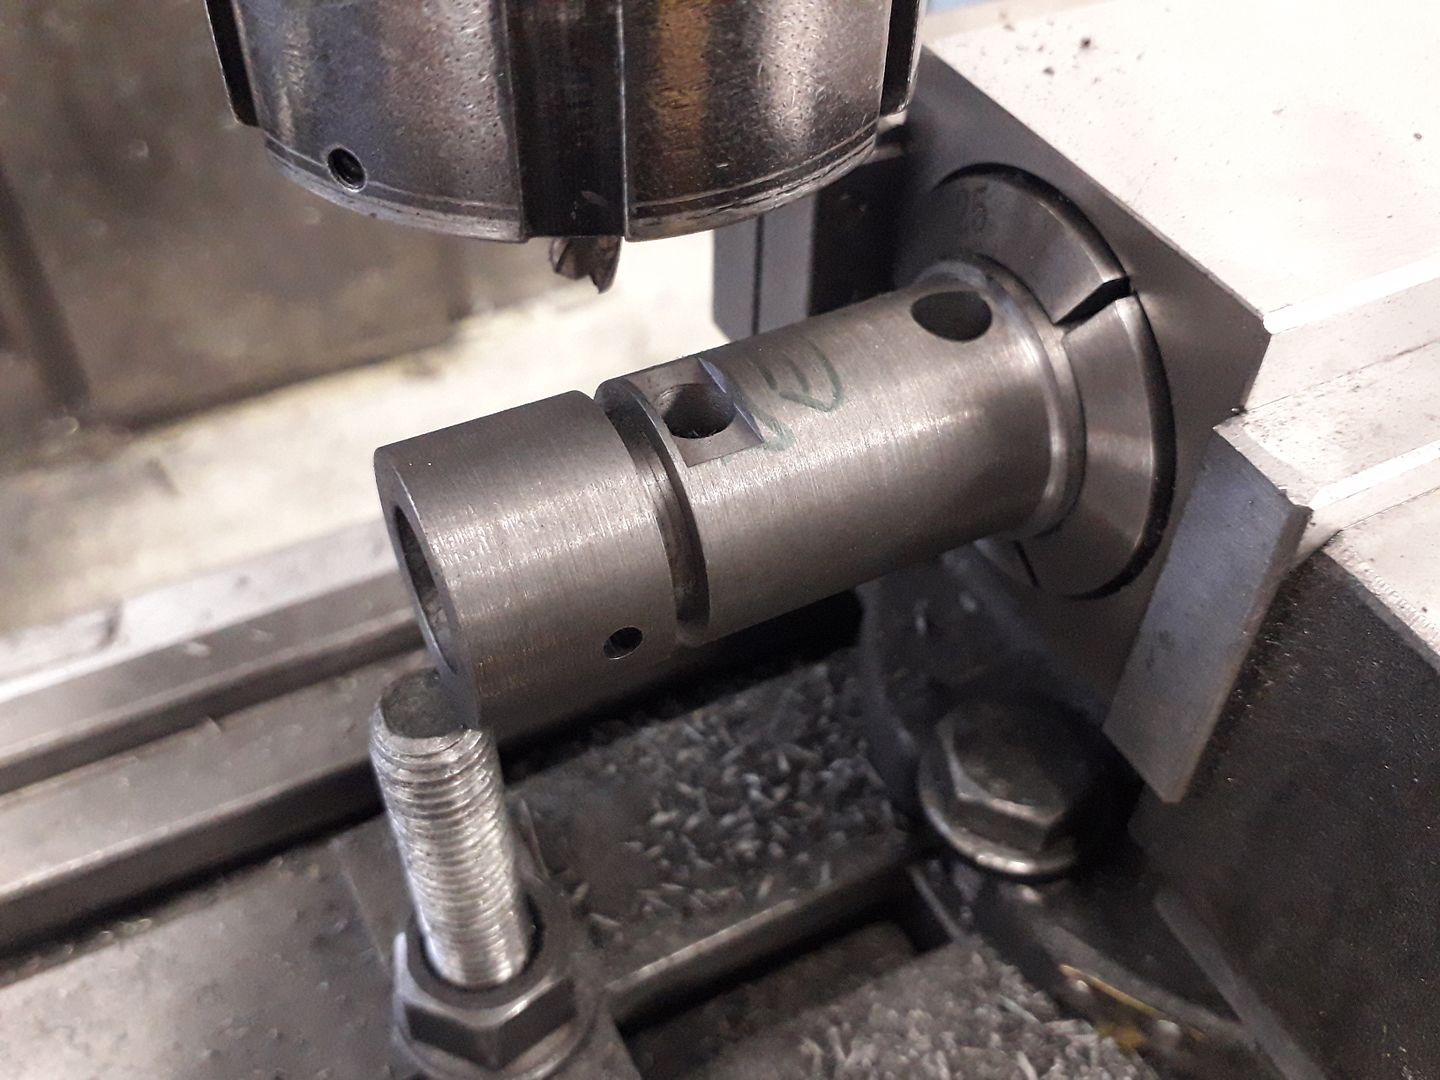
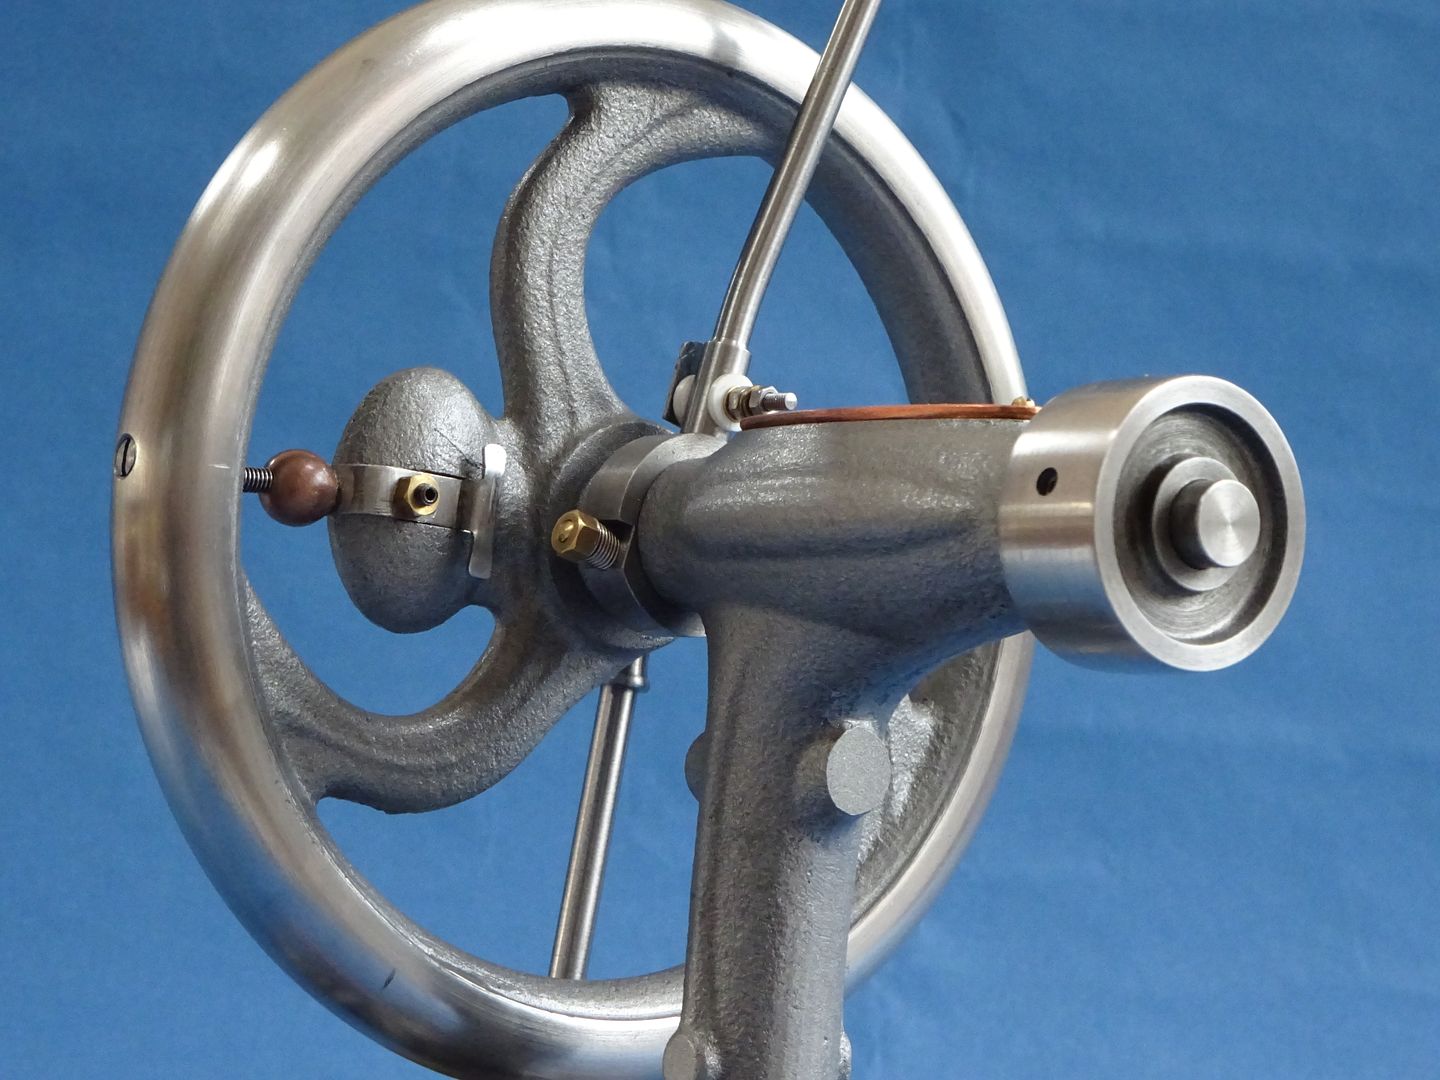
25215 forum posts 3105 photos 1 articles | I did not take many photos of the adjustable timing bracket. Below is the lever having had a 2BA thread put on the end it was slid out of the chuck to reduce most of it's length to 3/16" leaving a 1/4" collar for the contact.
After cutting off it was held the other way round and a decorative ball turned on the end. The collar is straight forward turning and milling and the brass cotter applies the friction to hold it in position but still allow easy movement to advance and retard the timing. I opted to use Corian as the insulators rather than the suggested materials.
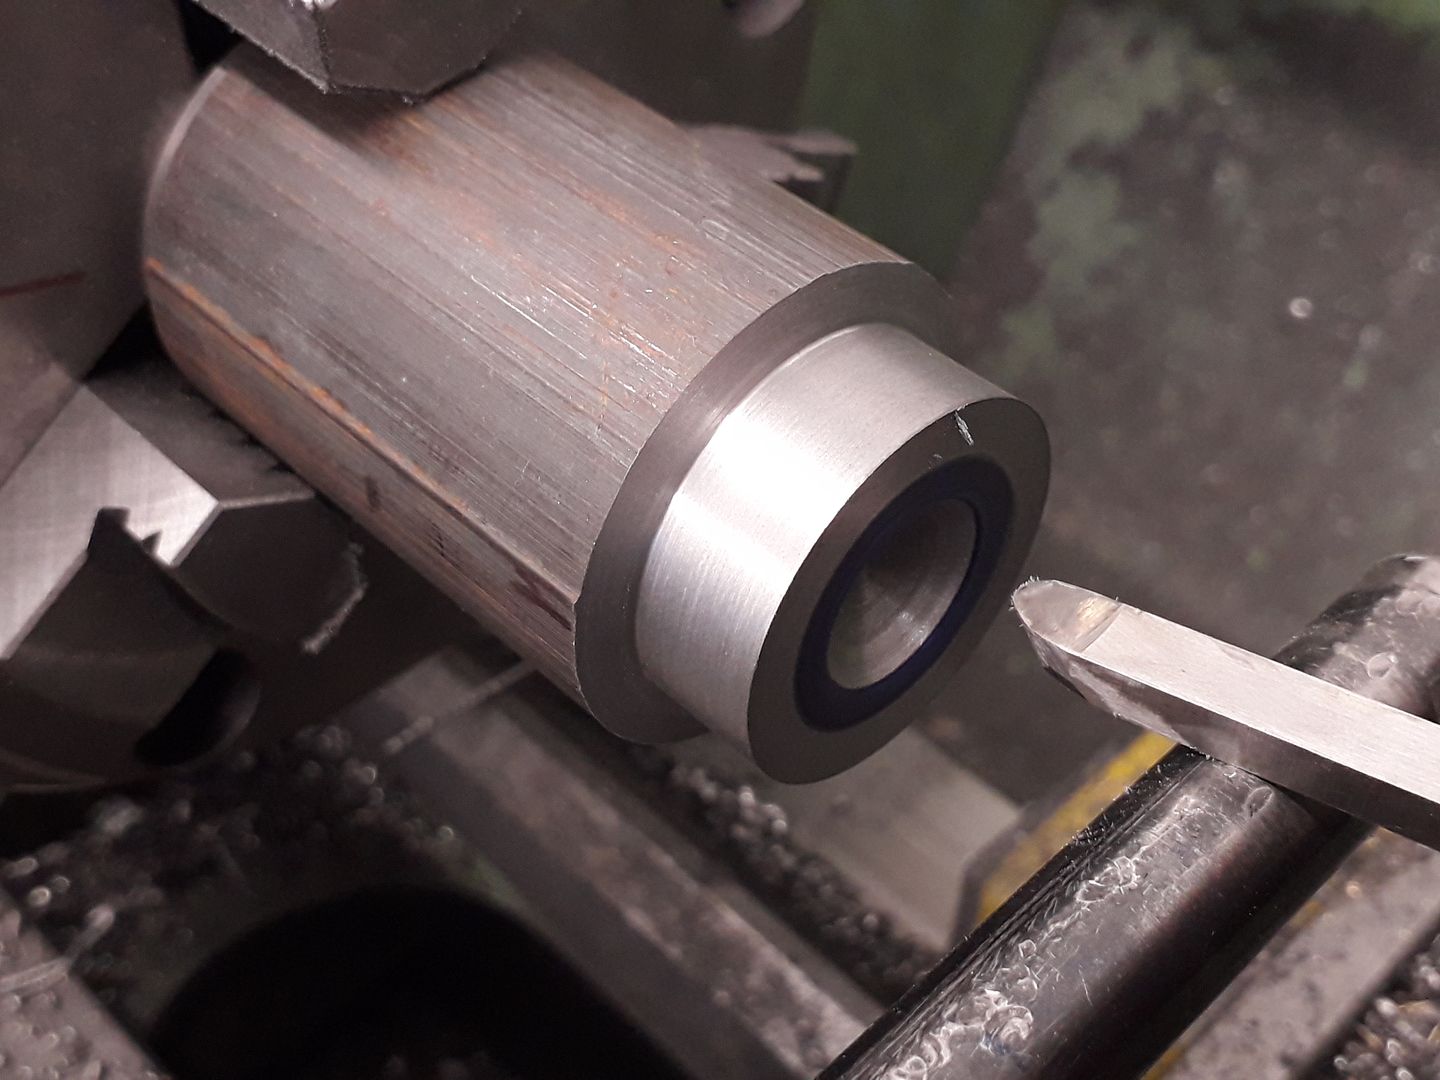
The "hemi" cylinder head was turned from some cast iron and as I don't have the large diameter ball nose cutter suggested I first drilled to depth and then hand cut the shape.
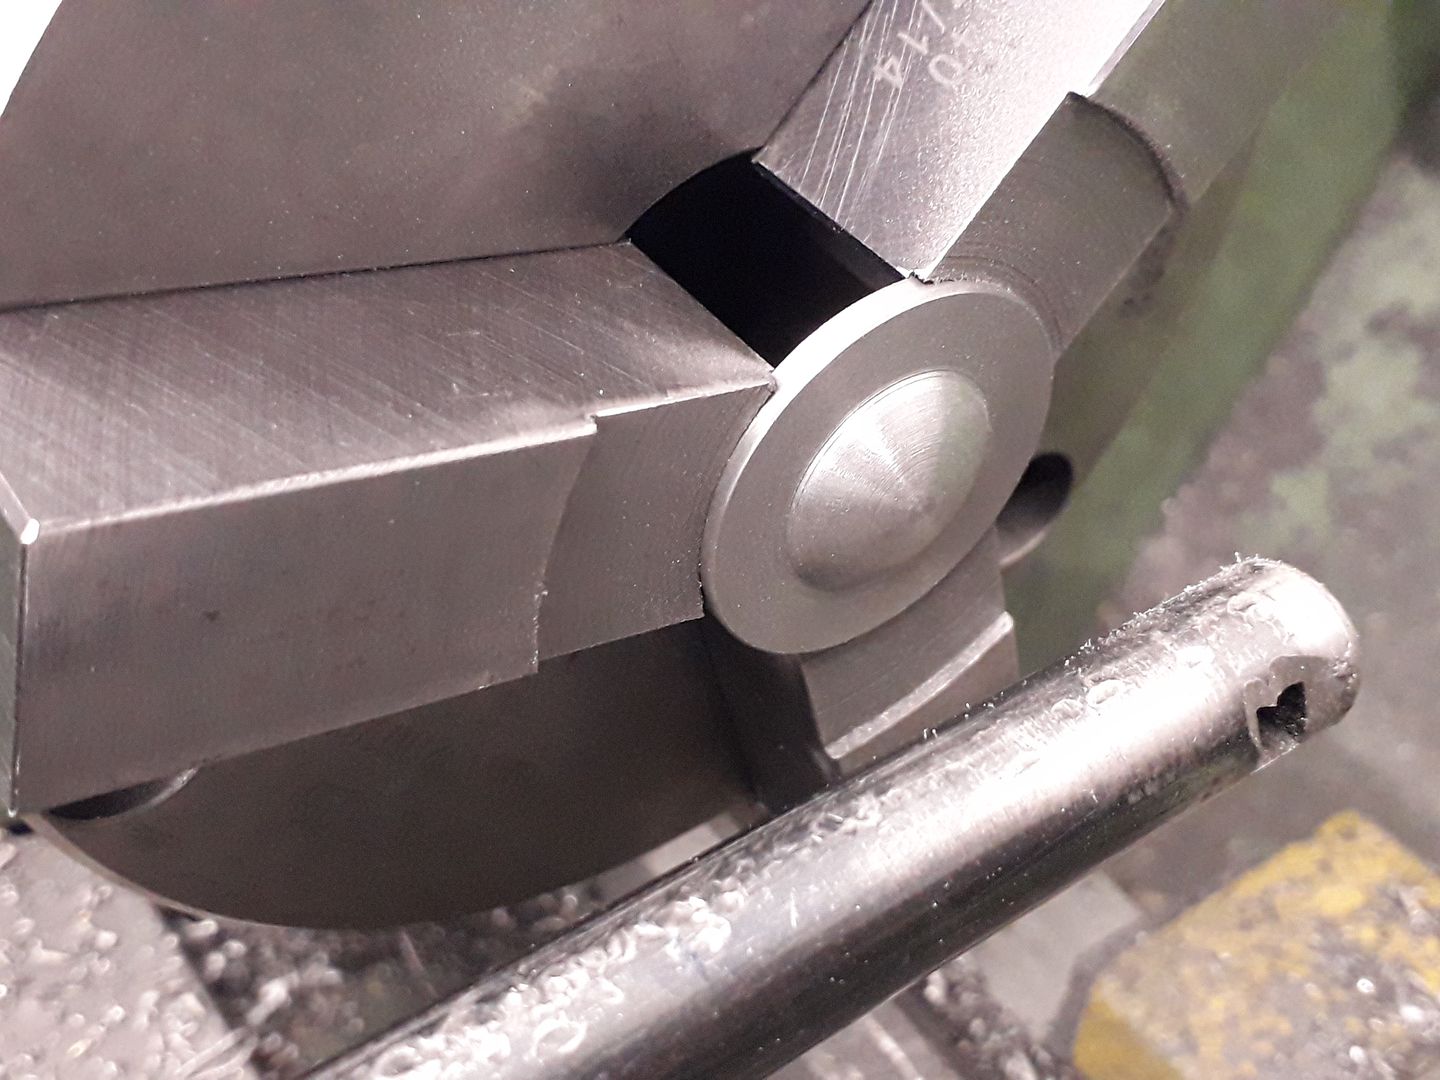
It was then held the other face out in the soft jaws and the outer curve also shaped by hand turning with a flat ended tool.
Finally over to the mill to drill for the fixings
The fairly long piston can be turned from the chucking spigot that was cut off of the base casting but I chose to use some 25mm CI bar. After turning and cutting the groove for the quad ring it was held in a collet block to have assorted holes and notches cut which provide the porting for the Loyal cycle.
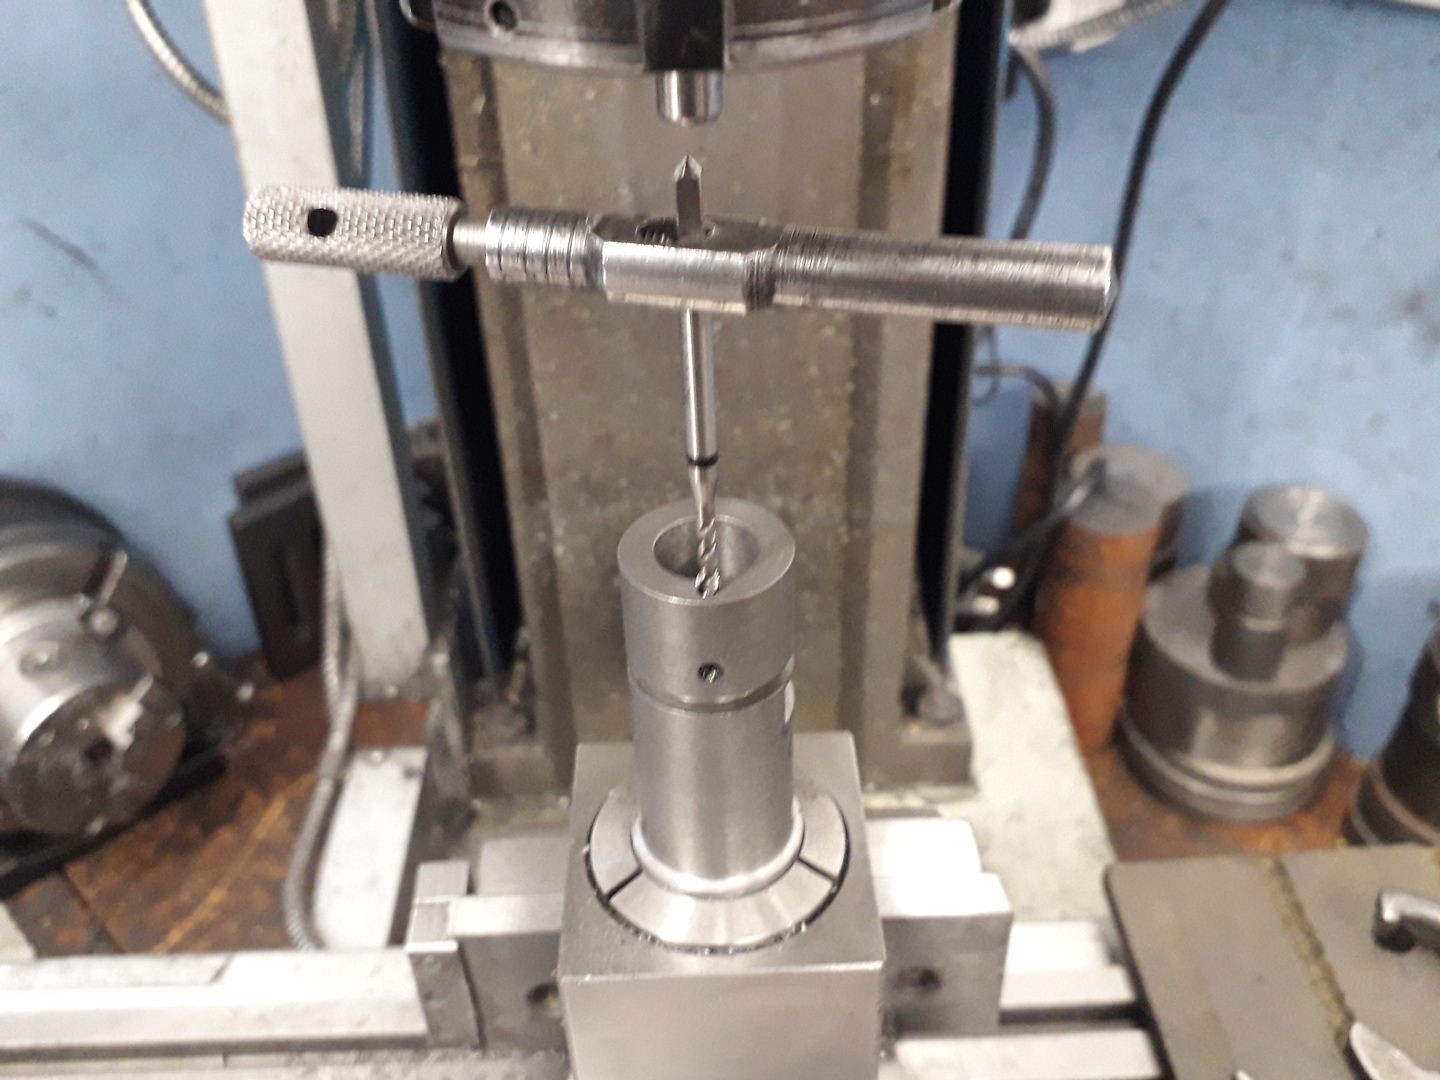
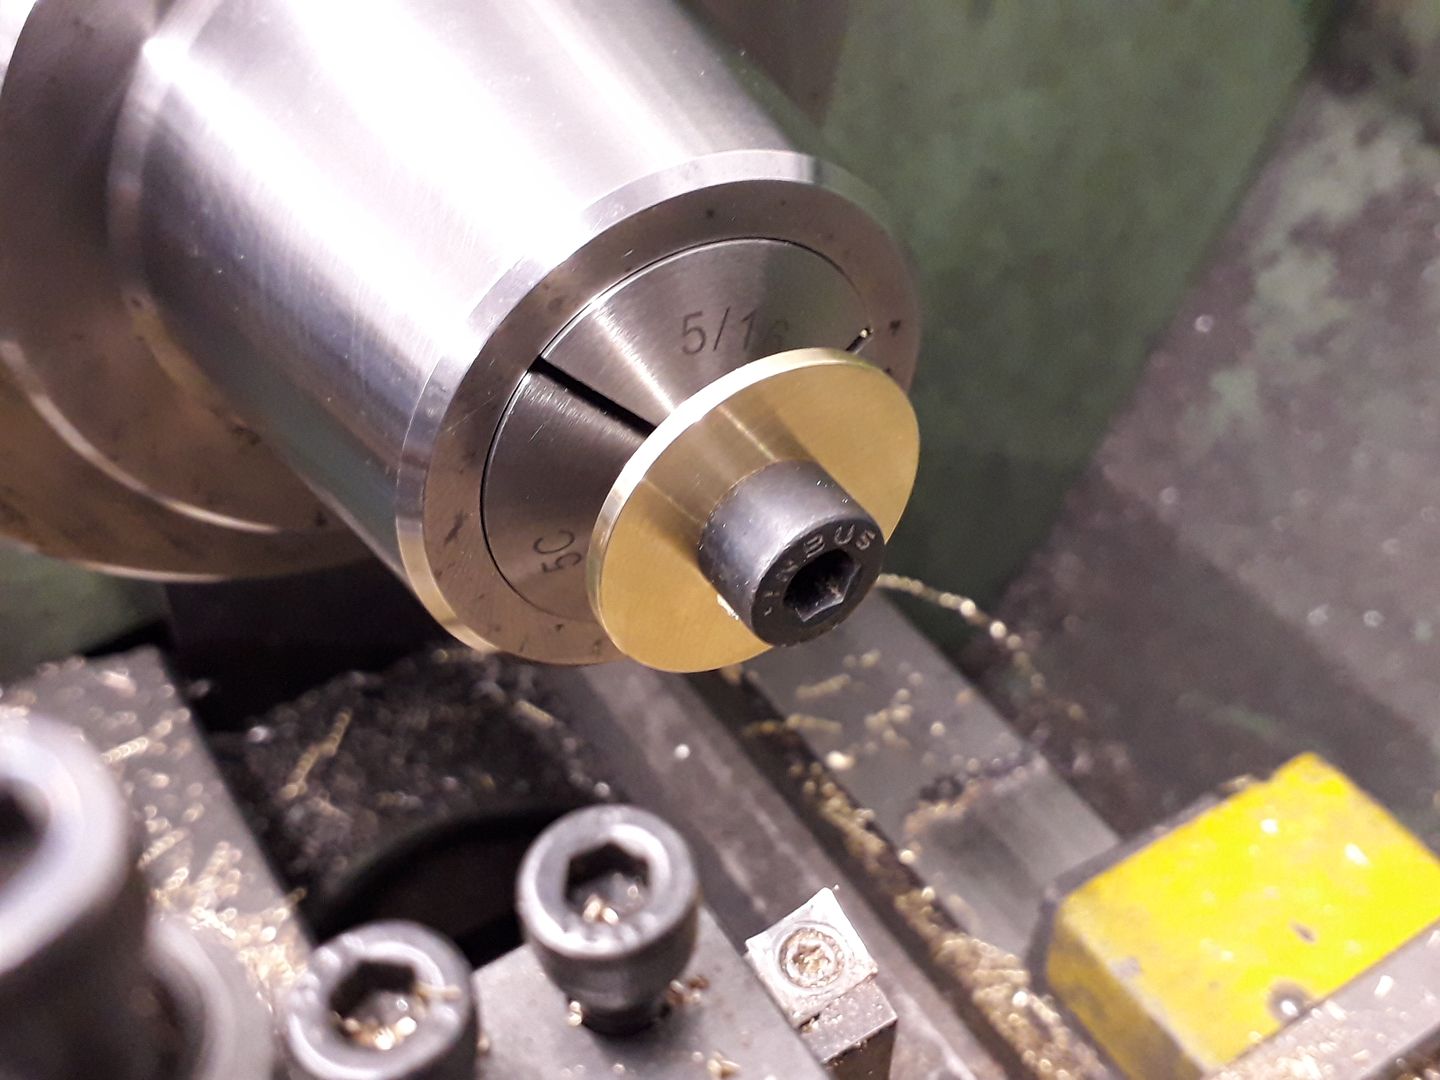
The engine is designed to run on a surface vapour fuel tank which is based on a 1/2 pint "Ball" jar, to increase the surface area a felt wick is fixed to the lid and sits down in the fuel. This is held together with a central screw that is drilled for the vapour and has a reduced diameter end for a fuel pipe, here the head of the screw is being slotted.
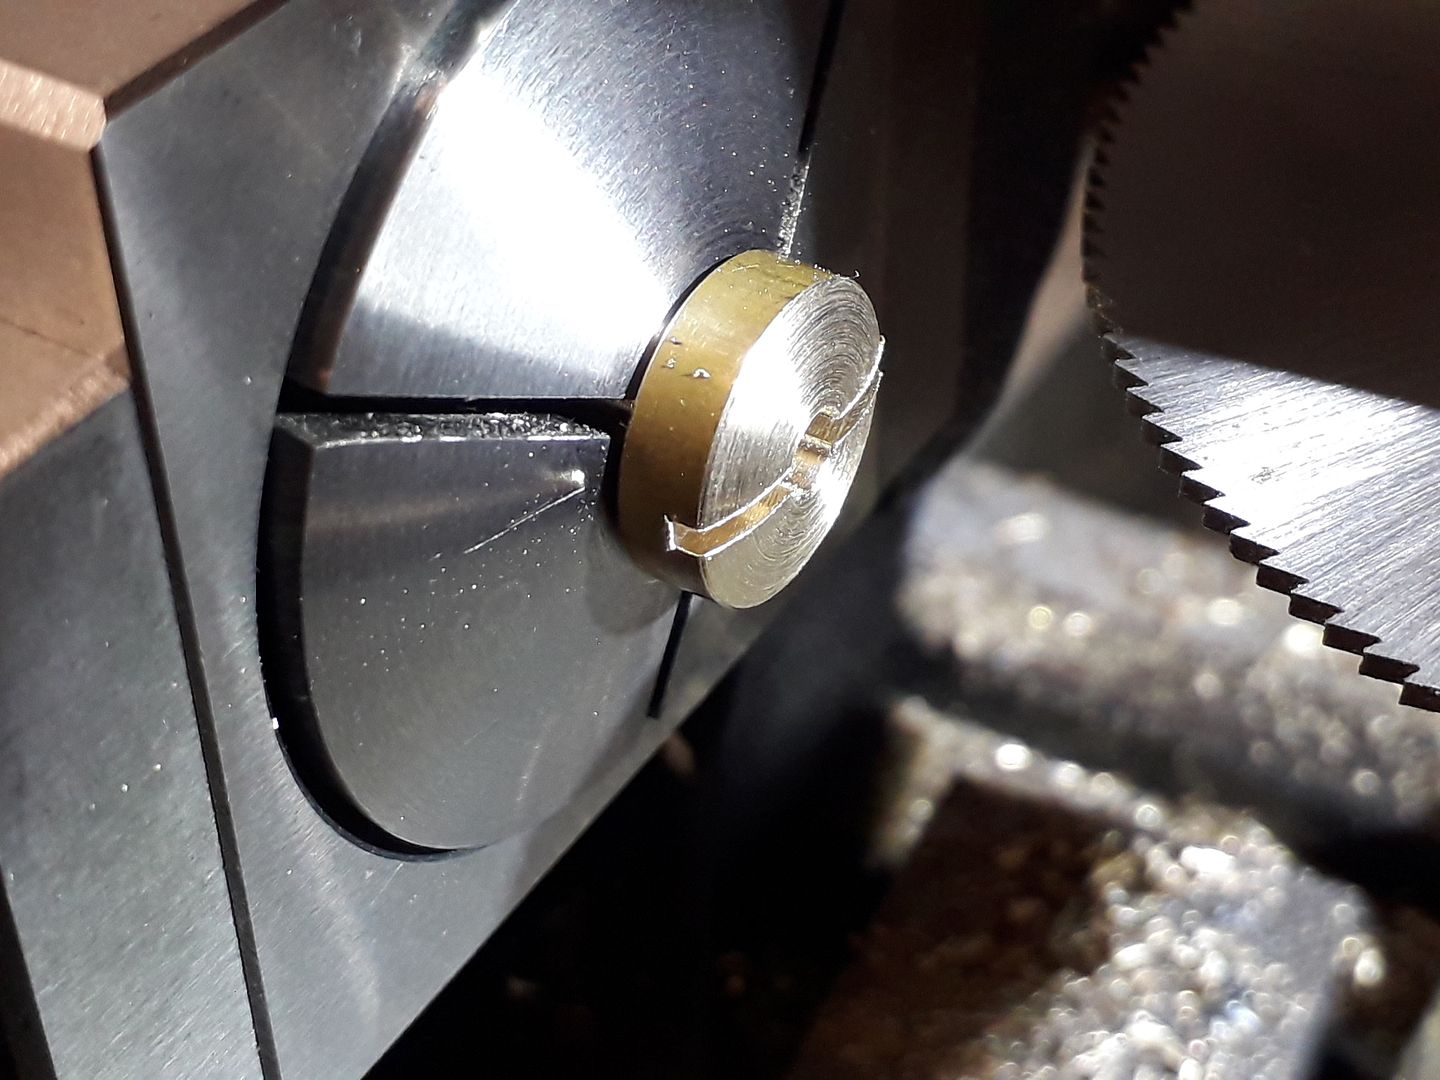
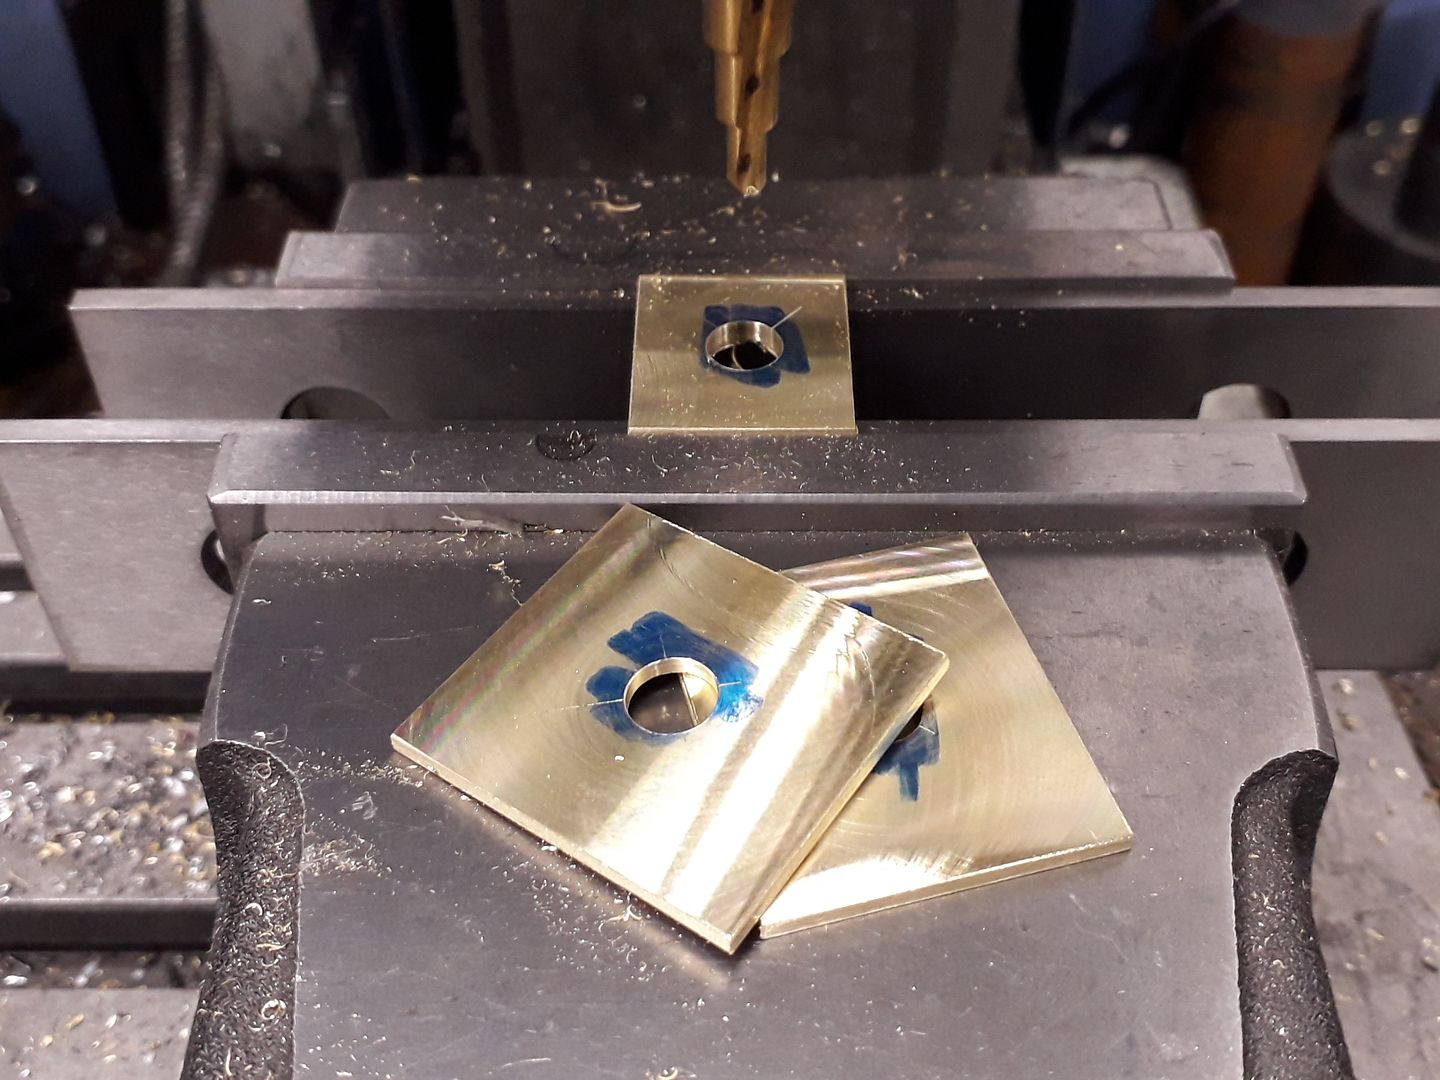
Some large brass washers are also needed, rather than slicing up good bar stock I had some old 1/8" brass door kick plates that were cut up and milled to thickness followed by drilling the central holes, a step drill saves the risk of a jobber drill snatching in the brass.
They were then rounded off in the lathe.
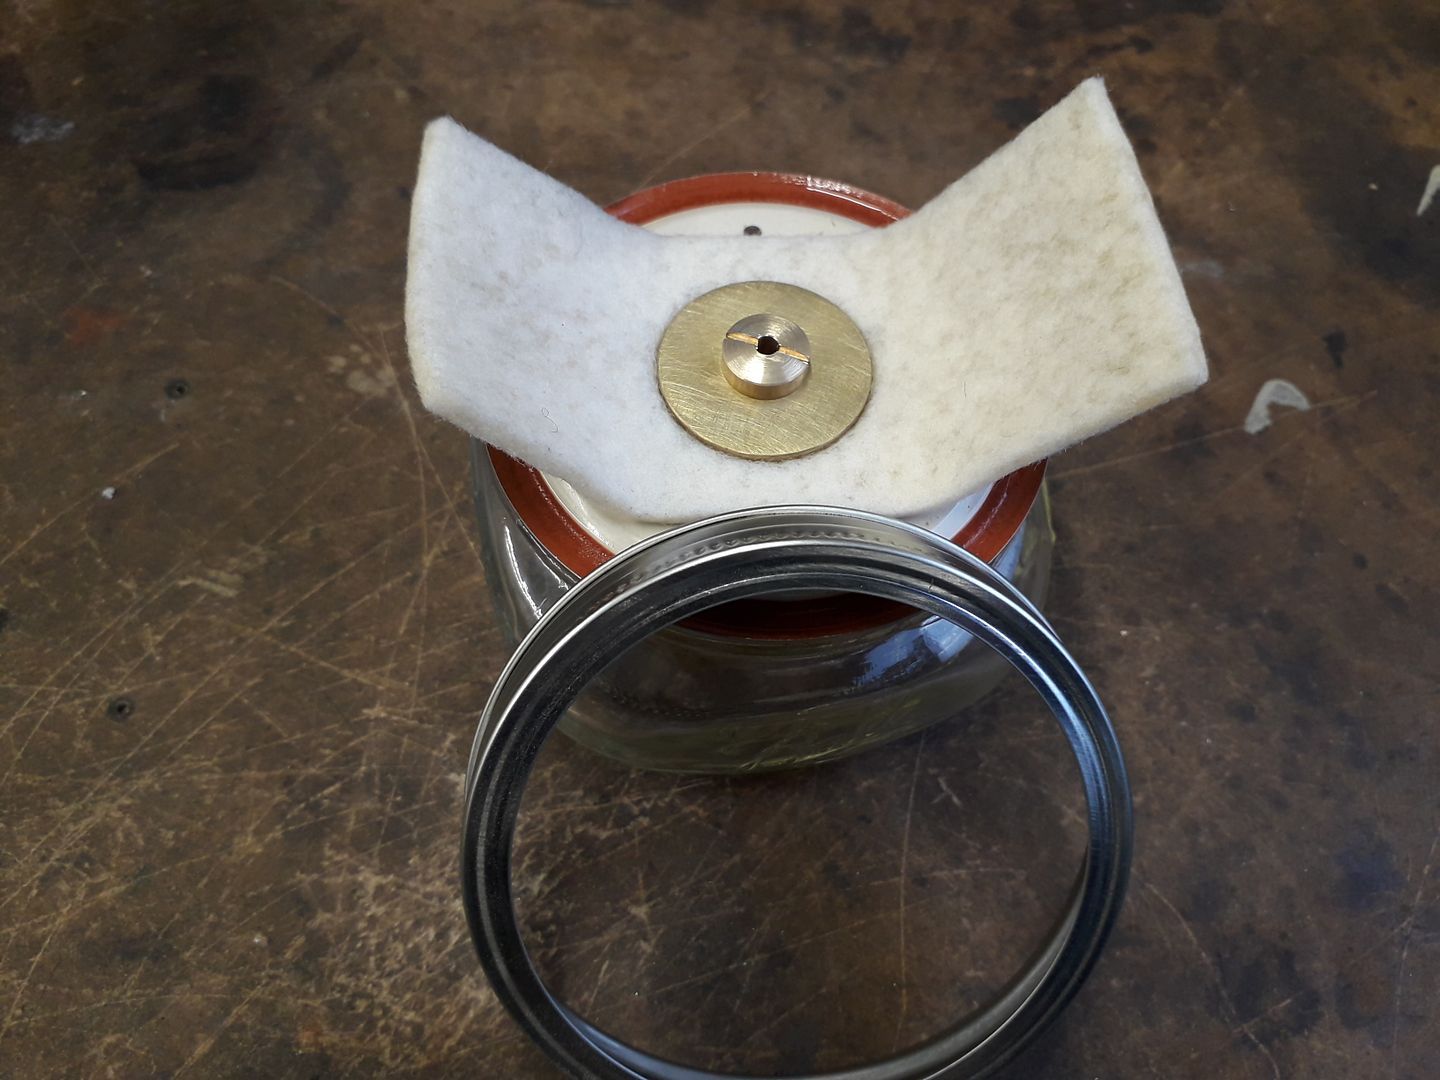
This is the finished vapour tank
And the inside showing the felt wick
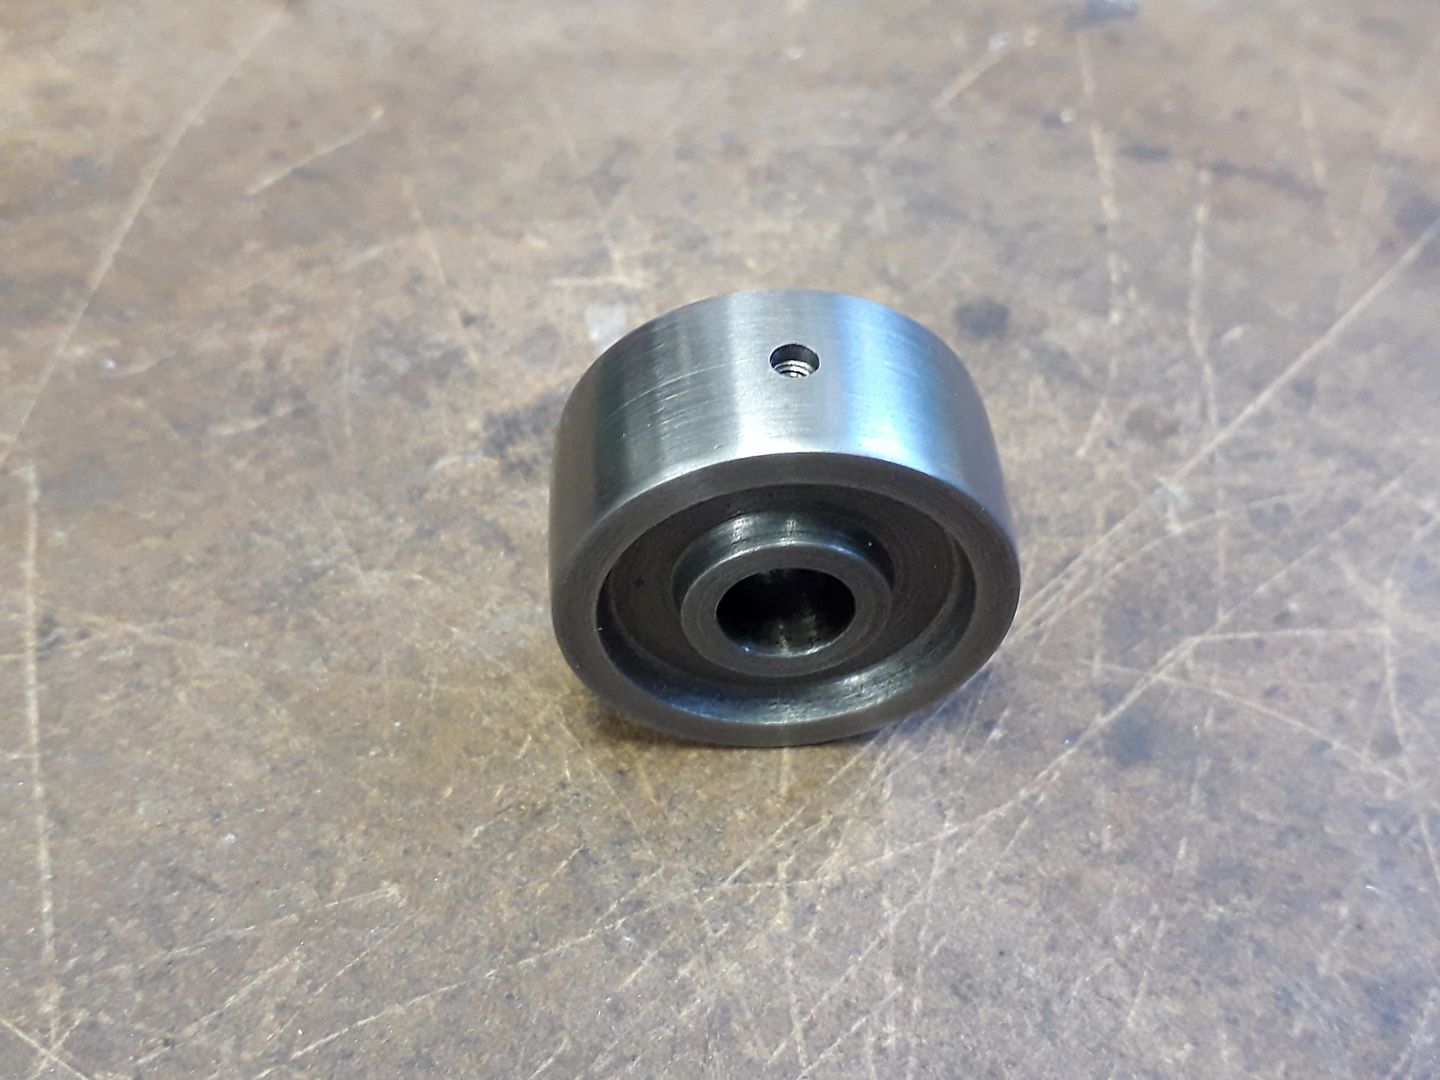
Final finishing touches are a pulley to go on the other end of the crankshaft turned from the chucking piece
And the nicely etched nameplate. This also has two recessed pockets in it to hold oil and holes are drilled through this, the bearing housing and bearings to get the oil down to where it is needed.
|
| Claudio Masetto | 13/01/2020 08:45:33 |
| 3 forum posts | Hi Jason, I am interested in building the B type loyal engine but I would like to build it from bar stock. Do you know if Nick Rowland is still selling plans for this engine. I have tried to email him but I have had no response. Regards Claude. |
| JasonB | 13/01/2020 10:19:15 |
25215 forum posts 3105 photos 1 articles | Claude, as far as I know Nick does not sell separate plans for any of the engines from casting kits but it is worth asking. he can take a few days to reply particularly if you e-mailed him over the weekend as he is usually busy playing with engines both full size and model. He does have some engines with a similar cycle that can be made from barstock and hopes to have ready made and also just plans available later in the year such as this SB2c |
| Ron Laden | 14/01/2020 08:23:17 |
 2320 forum posts 452 photos | Nice work Jason, interesting, I picked up on the hand turning have never tried that will have to give it a go. I am guessing that the tool support bar is fixed to the tool post. The oil channel built into the nameplate is a neat idea I like that. |
| Claudio Masetto | 14/01/2020 08:51:45 |
| 3 forum posts | Hi Jason, thanks for the response. If Nick does not sell the plans separately I will try and see if he still has the complete kit with the castings available. I really like the look of the B type engine. I have heard that the ring cut in the piston is for an o-ring. How does this stand up to wear when passing the ports? Regards Claude.
|
| JasonB | 14/01/2020 09:44:45 |
25215 forum posts 3105 photos 1 articles | Ron, The support is just the shank of a 1/2" boring bar held in the toolpost. Claude, Nick does have the type B engines for sale every so often in small batches on e-bay, if you add him to your saved sellers list you can keep an eye out, this is him. The insides of the ports are just rounded over with riffer files which reduces the risk of wear, I have run the engine without a ring so a bit of wear won't make too much difference but there will be a slight loss of compression. |
| JasonB | 14/01/2020 09:50:08 |
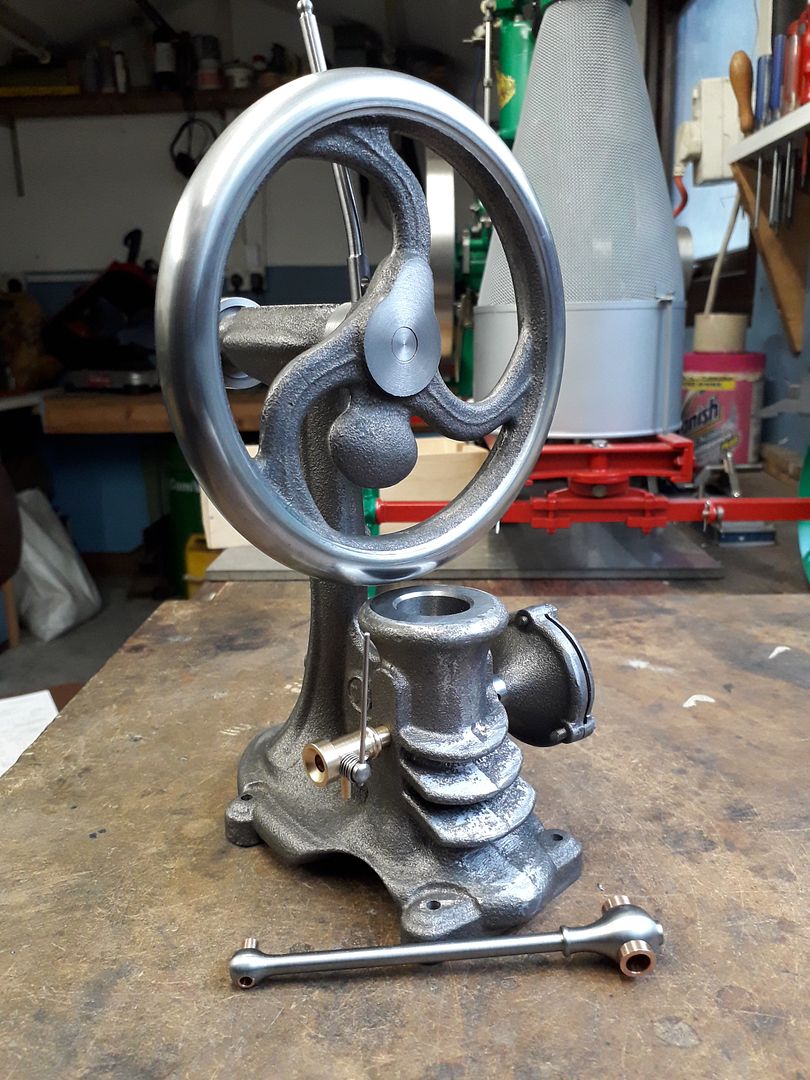
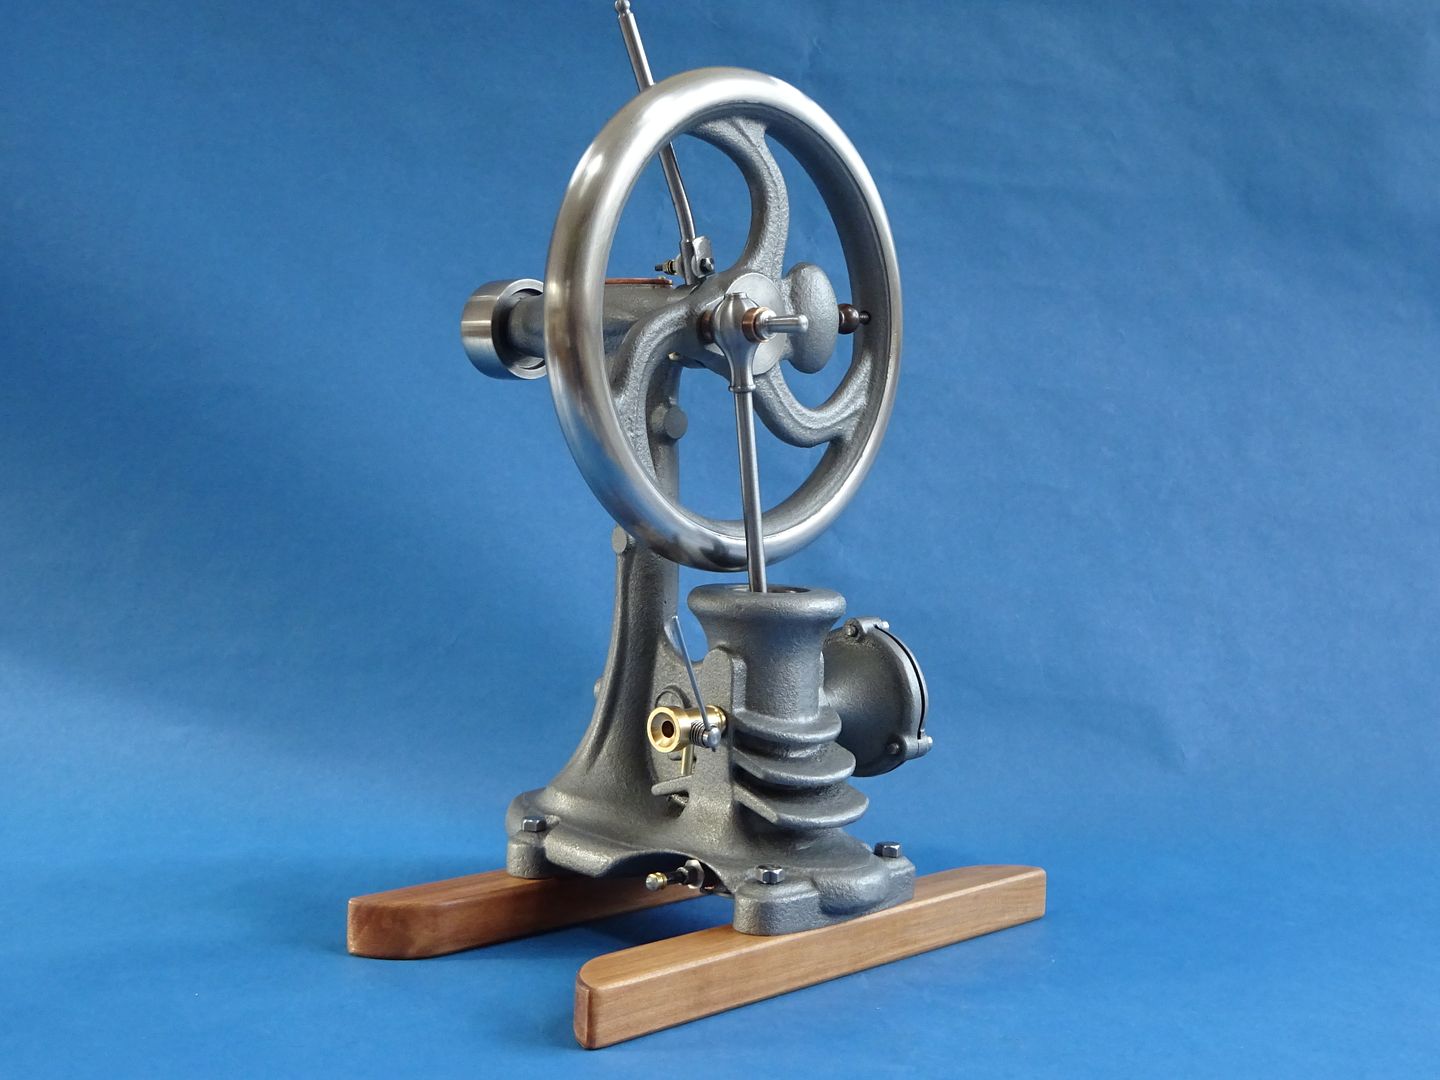
25215 forum posts 3105 photos 1 articles | So with all the parts made it was time for a trial. As I mentioned earlier the homemade plug did not work at first so I used a standard length (too short) Rimfire and I also had a job getting the Viton Quad ring so initially tried a nitrile one which started to swell with the fuel/oil so I just ran without rings. It would not run that strongly or for long, not helped By the bloke who keeps playing with the carb and ignition timing! After a few e-mails from Nick which gave me some pointers things have started to get better, this is it running with the home made plug and a Viton O ring which has got the compression back up. I will bite the bullet and pay the high postage to get a Viton Quad Ring from the US and also want to try one of Nicks buzz coils which should give a stronger spark than the S/S single spark CDI that I am using at the moment. To start with the engine has the governor weight free to move and is running in Hit & miss mode then tightened up to run with throttle control via carb and ignition timing. It will also run in either direction though i did not show that on the video. I'm undecided if I like this paint job or whether I should have stuck with the bare cast iron, this is Rustoleum "cast iron" but it's a bit light in colour and looks "flat" as in lifeless not the opposite to gloss. Skids are apple.
|
| Ron Laden | 14/01/2020 14:31:45 |
2320 forum posts 452 photos | Very nice, I am ok with the paint job, quite like it in fact makes a change from reds, greens and the like.I can only go by the pictures but I wouldnt say it looks lifeless in fact quite the opposite it has areas of reflected light and highlights, looks a very clean finish, well to me at least. |
| Claudio Masetto | 15/01/2020 09:46:15 |
| 3 forum posts | Thanks Jason. I will try to email him to see if he has the complete casting set available, otherwise I will keep a look out on ebay. Regards Claude. |


Please login to post a reply.
Magazine Locator
Want the latest issue of Model Engineer or Model Engineers' Workshop? Use our magazine locator links to find your nearest stockist!
Sign up to our Newsletter
Sign up to our newsletter and get a free digital issue.
You can unsubscribe at anytime. View our privacy policy at www.mortons.co.uk/privacy
Latest Forum Posts
- *Oct 2023: FORUM MIGRATION TIMELINE*
05/10/2023 07:57:11 - Making ER11 collet chuck
05/10/2023 07:56:24 - What did you do today? 2023
05/10/2023 07:25:01 - Orrery
05/10/2023 06:00:41 - Wera hand-tools
05/10/2023 05:47:07 - New member
05/10/2023 04:40:11 - Problems with external pot on at1 vfd
05/10/2023 00:06:32 - Drain plug
04/10/2023 23:36:17 - digi phase converter for 10 machines.....
04/10/2023 23:13:48 - Winter Storage Of Locomotives
04/10/2023 21:02:11 - More Latest Posts...
- View All Topics
Support Our Partners


Shopping Partners
Subscription Offer

Latest "For Sale" Ads
- Reeves** - Rebuilt Royal Scot by Martin Evans
by John Broughton
£300.00 - BRITANNIA 5" GAUGE James Perrier
by Jon Seabright 1
£2,500.00 - Drill Grinder - for restoration
by Nigel Graham 2
£0.00 - WARCO WM18 MILLING MACHINE
by Alex Chudley
£1,200.00 - MYFORD SUPER 7 LATHE
by Alex Chudley
£2,000.00 - More "For Sale" Ads...
Latest "Wanted" Ads
- D1-3 backplate
by Michael Horley
Price Not Specified - fixed steady for a Colchester bantam mark1 800
by George Jervis
Price Not Specified - lbsc pansy
by JACK SIDEBOTHAM
Price Not Specified - Pratt Burnerd multifit chuck key.
by Tim Riome
Price Not Specified - BANDSAW BLADE WELDER
by HUGH
Price Not Specified - More "Wanted" Ads...
Get In Touch!
Do you want to contact the Model Engineer and Model Engineers' Workshop team?
You can contact us by phone, mail or email about the magazines including becoming a contributor, submitting reader's letters or making queries about articles. You can also get in touch about this website, advertising or other general issues.
Click THIS LINK for full contact details.
For subscription issues please see THIS LINK.
Digital Back Issues


Donate

 Register
 Log-in
Model Engineer Magazine
- Percival Marshall
- M.E. History
- LittleLEC
- M.E. Clock

ME Workshop
- An Adcock
- & Shipley
- Horizontal
- Mill

Subscribe Now
- Great savings
- Delivered to your door

Pre-order your copy!
- Delivered to your doorstep!
- Free UK delivery!
All Forum Topics > I/C Engines > RMC Type-B Engine Build