Forum sponsored by:

Model Turbines
Sharing information about model turbines
| Turbine Guy | 31/03/2022 20:54:57 |
| 541 forum posts 578 photos | I decided to try a drag rotor with 90 degree blades that will be called Drag Rotor 6. The following photo shows the front view of the casting. The drawing shows the design dimensions of the casting with the actual measured dimensions in parenthesis.
|
| Turbine Guy | 01/04/2022 12:08:24 |
| 541 forum posts 578 photos | I completed the machining on Drag Rotor 6. The following photo shows the finished rotor and the drawing shows the final dimensions.
|
| Turbine Guy | 04/04/2022 13:30:03 |
| 541 forum posts 578 photos | I ran Drag Rotor 6 with Cover 3 using the TC-96T airbrush compressor similar to the test described in the 17/08/2021 Post of Drag Turbine 3. The following is copied from that post with the values I measured in this test shown in parenthesis next to the values shown for that test. “I made the following four pressure measurements. First, I measured the pressure with the cover plate removed and pressed tight against a flat surface. The pressure was approximately 6.5 psig (6.5 psig). That is the pressure required to push all the flow through the existing channel size with smooth walls on all sides. The second measurement was with the cover plate bolted tight to the turbine housing with the rotor supported by the ball bearing but pushed tight against the cover plate. The pressure was approximately 12.5 psig (10.0 psig). That is the pressure required to push all the flow through the existing channel size with blades and without leakage. The 6 psig (3.5 psig) increase in pressure was due to the resistance to flow that the blades cause. The third measurement was with the 0.007” (0.040) total thickness of shim washers keeping the face of the rotor as close to the face of the cover plate as I was able to do without any contact. The pressure was approximately 12.0 to 12.5 psig dependent on the rotor position(8.5 psig in all positions) . That is the pressure required to push all the flow through the existing channel size with blades and with leakage. The fourth pressure measurement was with everything the same as the third measurement except with the turbine running at a speed of 26,000 rpm (23,000 rpm). I was able to reach that speed with the GWS EP 2.5x0.8 propeller. The pressure was approximately 9.5 psig (7.0 psig).” The power required by the GWS EP 2.5x0.8 propeller at 23,000 rpm is 2.3 watts and at 26,000 rpm is 3.4 watts. The power using Drag Rotor 6 was only 68% of the power using Drag Rotor 3 but the power of Drag Rotor 6 was the same running in either direction.
Edited By Turbine Guy on 04/04/2022 13:32:25 |
| Jon Lawes | 04/04/2022 13:52:48 |
 1078 forum posts | I really enjoy these posts, please keep them up. Thanks,
Jon |
| Turbine Guy | 04/04/2022 16:41:07 |
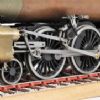
| 541 forum posts 578 photos | Thanks for you kind remarks Jon. I’m glad you find these posts interesting. Each of the things I try is to give someone thinking about making a model turbine an understanding of what is involved in making the part(s) and what to expect in performance. I am hoping that having actual test results is helpful. Werner Jeggli in the 06/01/2021 Post suggested that a bidirectional turbine would be very helpful. These tests with only the rotor being different were intended to show how much loss in performance would occur using the 90 degree bidirectional blades of Drag Rotor 6 instead of the more efficient 40 degree blades of Drag Rotor 2. The following photo shows the housing, cover, and rotor of Drag Turbine 3, only the rotor was different in the comparison.
|
| Turbine Guy | 06/04/2022 15:46:20 |
| 541 forum posts 578 photos | I ordered a casting for the cover I intended to use with Drag Rotor 6 but this casting was rejected because the inlet and outlet tubes were too long. The following isometric drawing shows that cover in what was intended to be Drag Turbine 6. I changed the design adding bosses that will have tubes inserted to project to the needed length. The following photo shows the front view of Cover 6A Cast. The drawing shows the design dimensions of the Cover 6A Cast with the actual measured dimensions in parenthesis.
Edited By Turbine Guy on 06/04/2022 15:47:49 |
| Turbine Guy | 10/04/2022 19:02:18 |
| 541 forum posts 578 photos | I finished the machining of Cover 6A shown in the following photos. This cover was intended to improve the performance by reducing the change in direction of the flow into and out of the flow channel. To determine the reduction in pressure loss I pressed Cover 6A tightly against a flat plate and measured the pressure required to force the maximum flow through in each direction. The required pressure was 5.0 psig in both directions. The pressure required to pass the maximum flow for Cover 3 was 6.5 psig in both directions. Cover 6A reduced the pressure required for maximum flow by approximately 1.5 psi. I thought this reduction in pressure would result in higher performance for Cover 6A compared with Cover 3, but despite which drag rotor I used, the performance was always better with Cover 3. I checked Cover 6A for flatness after lapping it on an oilstone. I could not detect any spots with clearance between a ground bar and the rotor face anywhere. I finally found that the increase in leakage of Cover 6A more than offset the improvement of reducing the pressure drop. The following drawing shows the increase of channel peripheral lengths and reduction in minimum distance between ports for Cover 6A compared to Cover 3 that significantly increases the leakage.
|
| Turbine Guy | 11/04/2022 12:56:29 |
| 541 forum posts 578 photos | The following test report shows the results of my testing of various combinations of rotors and covers intended to show the advantages or disadvantages of each combination. I initially planned on finding the best combination that gave approximately the same performance running in either direction. Mike Tilby suggested that I also look at how Drag Rotor 3, that was designed to run in only one direction, performed running in the opposite direction. He pointed out that even though the efficiency in one direction might be much higher, the performance in the opposite direction might be adequate. The tests show how Cover 3 outperformed Cover 6A in all combinations as I discussed in the last post. The tests also showed that even though Drag Rotor 3 was designed to run in only one direction, it could still produce a significant amount of power in the opposite direction.
|
| Turbine Guy | 12/04/2022 16:37:07 |
| 541 forum posts 578 photos | Because Drag Rotor 6 can be used with any of my existing covers, I decided to give each combination a name. The combination of Cover 3 and Drag Rotor 6 is Drag Turbine 6. The combination of Cover 6A and Drag Rotor 6 is Drag Turbine 6A. The combination of Cover 5 and Drag Rotor 6 is Drag Turbine 6B. The drawings for Drag Turbine 6 and Drag Turbine 6A are shown below. I hope this will make it a little clearer what was compared in the last post. I added Drag Turbine 6B since Cover 5 has given me the best performance of any of the covers with any rotor running in one direction. The nozzle in the inlet restricts the flow too much for the rotation to be reversed. Drag Turbine 6B will be covered in the next posts.
|
| Turbine Guy | 13/04/2022 19:21:56 |
| 541 forum posts 578 photos | Adding a nozzle on the inlet ports makes Cover 5 different from any drag turbines I have seen. I made Cover 5 for Drag Rotor 5 to help reduce the leakage and it was very effective on Drag Turbine 5. The nozzle is small enough to cause the air or steam to go supersonic so the impact on the blades is significant. I found in my testing, that the drag turbines using Cover 5 had something unique in the way they produced torque to match the requirements of different propellers. All my impulse turbines whether axial or tangential made less torque as the speed increased. Drag Turbine 4 and Drag Turbine 6B shown in the following drawings actually started to get an increase in torque when the speed got high enough that the corkscrew type of circulation in the channel became more significant as will be shown and explained with the test results added in the next post.
|
| Turbine Guy | 13/04/2022 20:26:05 |
| 541 forum posts 578 photos | The following test report is for Drag Turbine 4 and Drag Turbine 6B shown on the drawings of the last post. Both turbines showed a drop in torque when the propeller was changed from an APC 4x3.3 EP propeller to the GWS EP 2510 propeller but showed an increase in torque when the propeller was changed from the GWS EP 2510 to the GWS EP 2508. Drag Turbine 4 was throttled to keep the speed at 28,000 rpm when using the GWS EP 2508 propeller so that is why the torque was the same as Drag Turbine 6B but its efficiency was higher. As the speeds got higher Drag Turbine 6B started to get closer to the performance of Drag Turbine 4 but always had less efficiency. If these drag turbines were given a load that allowed them to run at higher speeds they may be capable of out performing the impulse turbines since their torque appears to be capable or increasing with speed. All my turbines would perform better at higher speeds so I am going to try to find better ball bearings that will last longer running at the higher speeds. I am also going to try to see if I can find an adjustable load that can be run at high speeds like Werner Jeggli’s test setup he showed in the 18/06/2019 Post and I commented on in the 10/09/2020 Post.
|
| Turbine Guy | 14/04/2022 15:31:25 |
| 541 forum posts 578 photos | I decided my best source for highspeed bearings would be the ceramic ball bearings made for dental handpieces. These bearings are used in the tiny turbines that run on air at speeds over 200,000 rpm. Because of the large numbers of dental handpieces in use, these ball bearings are readily available at relatively low cost. I found in the Dental Bearing Sizes link a description of features and sizes of the ball bearings used by the different manufacturers of dental handpieces. The most common size was 1/4” OD x 1/8” ID. Only one of the manufacturers used an OD of 5/16”, the size used in all my turbine housings. I wanted to try a maintenance free ceramic ball bearing so I selected the ball bearings used in the Star 430 handpieces and ordered the ball bearing shown below. This will require me to press fit sleeves in the bearing bores of my turbine housings but will give me the most options for purchasing dental bearings.
Edited By Turbine Guy on 14/04/2022 15:34:16 |
| Turbine Guy | 21/04/2022 15:13:59 |
| 541 forum posts 578 photos | I believe the fairest way to compare the different turbines is to run them with the same propeller, with the same energy source, and at as close to the same speed as possible. Since most of the turbines I have tested used the GWS EP 2508 propeller, I decided to make a test sheet using only this propeller. Since the latest turbines can overpower this propeller, I throttled the air to keep the propeller to a maximum speed of 28,000 rpm. The throttling reduces the energy available to the turbine, so the efficiency of the turbine is the best comparison of the performance. The lower the energy required to turn the propeller at its maximum speed results in the highest efficiency. I decided to remove the sleeve in the nozzle of Axial Turbine 2 and run a test with a nozzle size closer to the other turbines. I successfully removed the sleeve in the nozzle bore so I could change the diameter from 0.024” to 0.035”. The 0.035” diameter gave me the best performance and is better suited to my largest airbrush compressor. I ran Tangential Turbine 5, Axial Turbine 3N, and Drag Turbine 4 with the same ball bearings so that I can see the change in performance with the dental bearings when I try them. I already had run Drag Turbine 4 with the GWS EP 2508 propeller, but I ran it again to see if the ball bearings used in these last tests gave the same performance as in the previous test. The results were identical. I received the dental ball bearings described in the last post and the items needed to make the reduction sleeve for the existing turbine housings. I will add the reduction sleeve to one of the turbine housings and run a test of the dental ball bearings. The date shown for the test of Drag Turbine 6B should have been 4/9/2022. Edited By Turbine Guy on 21/04/2022 15:21:44 |
| Turbine Guy | 23/04/2022 17:47:39 |
| 541 forum posts 578 photos | I added a sleeve to Housing 3 SD Gap to reduce the bore used by the ball bearings from 5/16” diameter to 1/4” diameter. The following drawing shows the sleeve added and the bearings changed to the R144 size used by the dental handpieces. I installed the Ameriden 11FS dental bearings shown in the 14/04/2022 post and ran the first tests that will be described in the next post.
|
| Turbine Guy | 23/04/2022 18:15:55 |
| 541 forum posts 578 photos | I added the test results for Tangential Turbine 5 run with the Ameriden 11FS dental ball bearings to the following table. These ball bearings have stainless steel races, ceramic balls, phenolic cages, and are lubricated for life. Since they are lubricated for life, the test results should be more consistent. The previous ball bearing’s friction depended on the amount of oil. If the bearings had more or less than the optimum amount of oil, the friction would increase. I made several runs of Tangential Turbine 5 without changing anything and the results stayed the same using the dental ball bearings. |
| Turbine Guy | 28/04/2022 14:01:53 |
| 541 forum posts 578 photos | I noticed that the pressure required to turn the GWS EP 2508 propeller to a speed of 28,000 rpm was slowly getting less than what I found in the tests described in the last post. I kept making runs of Tangential Turbine 5 with the GWS EP 2508 propeller until the pressure required to turn the propeller at 28,000 rpm reached a minimum of 28 psig. This took several runs with the pressure reducing very slightly on each run and then staying very consistent for all runs after the minimum pressure was reached. I updated the table given in the last post as shown below. As can be seen in the following table, the dental ball bearings raised the efficiency significantly over what was obtained using the previous ball bearings.
|
| Turbine Guy | 30/04/2022 14:44:25 |
| 541 forum posts 578 photos | Axial Turbine 3 was intended to be similar to Axial Turbine 3N except use the aluminum Housing 3 SD Gap. I decided to make three versions of Axial Turbine 3. The first version I call Axial Turbine 3A is without a tight clearance between the rotor OD and the housing like Axial Turbine 3N has. The following drawing shows the dimensions of this assembly when the rotor was in the position that gave the best performance. It should be noted that there is a clearance of 0.003” between the set screw collar and the shim washer next to the outer dental ball bearing. For the direction of rotation of Axial Turbine 3, the GWS EP 2508 pushes the rotor in the direction that closes this clearance and reduces the 0.006” shown in the drawing between the face of the rotor and the inner face of the cover to 0.003”. This assembly uses the same dental ball bearings used in the last test of Tangential Turbine 5. Axial Turbine 3B will be identical to Axial Turbine 3A except a sleeve will be added between the housing and the rotor OD to make a tight clearance. My intent is to see how the performance compares with and without the tight clearance. Axial Turbine 3C will be identical to Axial Turbine A except Rotor 5 will have a shroud added. This will allow me to compare the performance of Axial Turbine 3 with an open rotor, tight clearance on the OD of the rotor, and with a shroud added to the rotor. I updated the test sheet shown in the last post to include the test of Axial Turbine 3A and will show it in the next post.
|
| Turbine Guy | 30/04/2022 15:07:24 |
| 541 forum posts 578 photos | The following test results added the test of Axial Turbine 3A. The dental ball bearings reduced the friction caused by the oil viscosity used in the ball bearings I had been using to a level that allows the performance to be checked with very low energy inputs. The results shown were very repetitive. I made multiple runs and then disassembled Axial Turbine 3A to take some pictures and then reassembled it and made some more runs. The results were almost identical for all the runs, so the dental ball bearings appear to have reached their optimum condition.
|
| Turbine Guy | 03/05/2022 15:42:28 |
| 541 forum posts 578 photos | Since Axial Turbine 3N already had a close clearance between the OD of the rotor and the housing I decided to add a sleeve and the dental bearings to it. The following drawing shows the position of the rotor that got the best performance. I updated the test sheet shown in the 28/04/2022 post adding the test results for Axial Turbine 3N R2 and it will be shown in the next post.
|
| Turbine Guy | 03/05/2022 15:44:51 |
| 541 forum posts 578 photos | The following test results added the test of Axial Turbine 3N R2. I was only able to get the maximum performance in one run. I was in the process of trying different positions of the rotor when I got the lowest pressure required to turn the propeller at a speed of 28,000 rpm. I never was able to get the rotor back in the position that got the best performance. The nylon housing can distort enough when tightening the nuts that press the cover against it to close small gaps. To check if it was a bearing issue, I added the ball bearings back in Axial Turbine 3A. I was able to position the rotor as shown in the 30/04/2022 post very easily and the pressure required to turn the propeller at a speed of 28,000 rpm was a little lower than was shown in the test results of the 30/04/2022 post. I never had an issue with the nylon housing when running the larger gaps needed for the higher pressures.
|


Please login to post a reply.
Magazine Locator
Want the latest issue of Model Engineer or Model Engineers' Workshop? Use our magazine locator links to find your nearest stockist!
Sign up to our Newsletter
Sign up to our newsletter and get a free digital issue.
You can unsubscribe at anytime. View our privacy policy at www.mortons.co.uk/privacy
Latest Forum Posts
- hemingway ball turner
04/07/2025 14:40:26 - *Oct 2023: FORUM MIGRATION TIMELINE*
05/10/2023 07:57:11 - Making ER11 collet chuck
05/10/2023 07:56:24 - What did you do today? 2023
05/10/2023 07:25:01 - Orrery
05/10/2023 06:00:41 - Wera hand-tools
05/10/2023 05:47:07 - New member
05/10/2023 04:40:11 - Problems with external pot on at1 vfd
05/10/2023 00:06:32 - Drain plug
04/10/2023 23:36:17 - digi phase converter for 10 machines.....
04/10/2023 23:13:48 - More Latest Posts...
- View All Topics
Support Our Partners


Shopping Partners
Subscription Offer

Latest "For Sale" Ads
- Reeves** - Rebuilt Royal Scot by Martin Evans
by John Broughton
£300.00 - BRITANNIA 5" GAUGE James Perrier
by Jon Seabright 1
£2,500.00 - Drill Grinder - for restoration
by Nigel Graham 2
£0.00 - WARCO WM18 MILLING MACHINE
by Alex Chudley
£1,200.00 - MYFORD SUPER 7 LATHE
by Alex Chudley
£2,000.00 - More "For Sale" Ads...
Latest "Wanted" Ads
- D1-3 backplate
by Michael Horley
Price Not Specified - fixed steady for a Colchester bantam mark1 800
by George Jervis
Price Not Specified - lbsc pansy
by JACK SIDEBOTHAM
Price Not Specified - Pratt Burnerd multifit chuck key.
by Tim Riome
Price Not Specified - BANDSAW BLADE WELDER
by HUGH
Price Not Specified - More "Wanted" Ads...
Get In Touch!
Do you want to contact the Model Engineer and Model Engineers' Workshop team?
You can contact us by phone, mail or email about the magazines including becoming a contributor, submitting reader's letters or making queries about articles. You can also get in touch about this website, advertising or other general issues.
Click THIS LINK for full contact details.
For subscription issues please see THIS LINK.
Digital Back Issues


Donate

 Register
 Log-in
Model Engineer Magazine
- Percival Marshall
- M.E. History
- LittleLEC
- M.E. Clock

ME Workshop
- An Adcock
- & Shipley
- Horizontal
- Mill

Subscribe Now
- Great savings
- Delivered to your door

Pre-order your copy!
- Delivered to your doorstep!
- Free UK delivery!
All Forum Topics > Stationary engines > Model Turbines