Forum sponsored by:

Colchester Student Mk1 Won't Start
| Herman van der Merwe | 15/05/2020 07:45:08 |
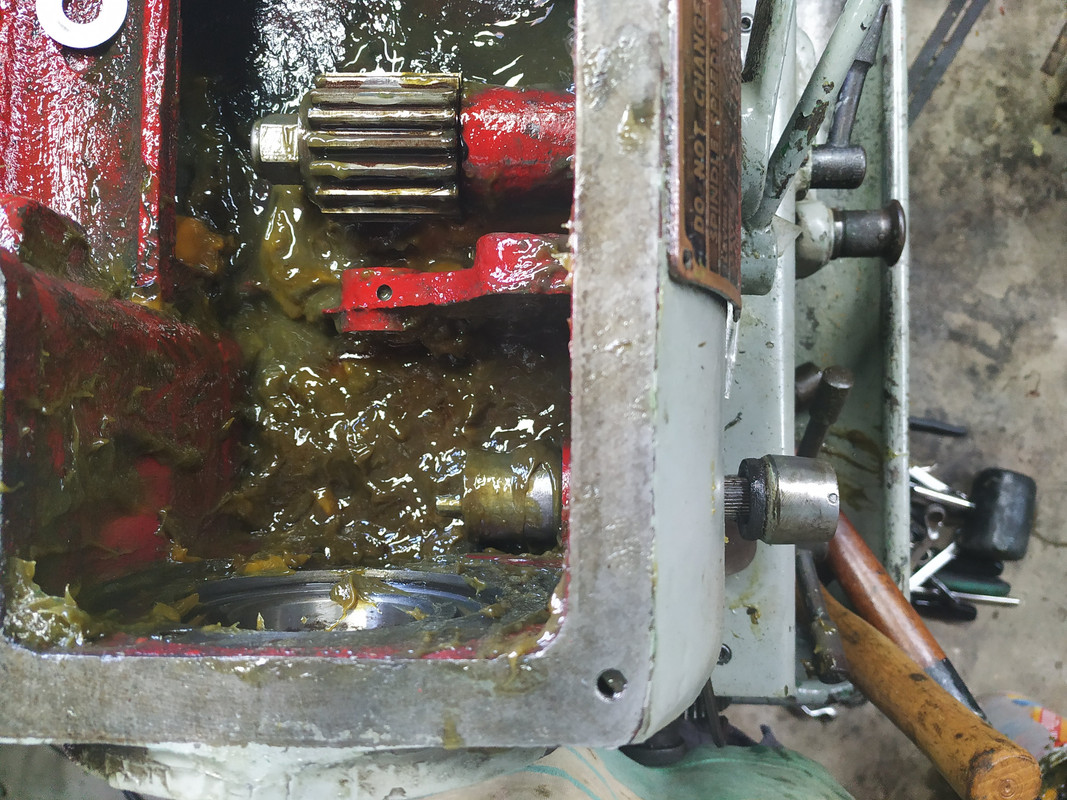
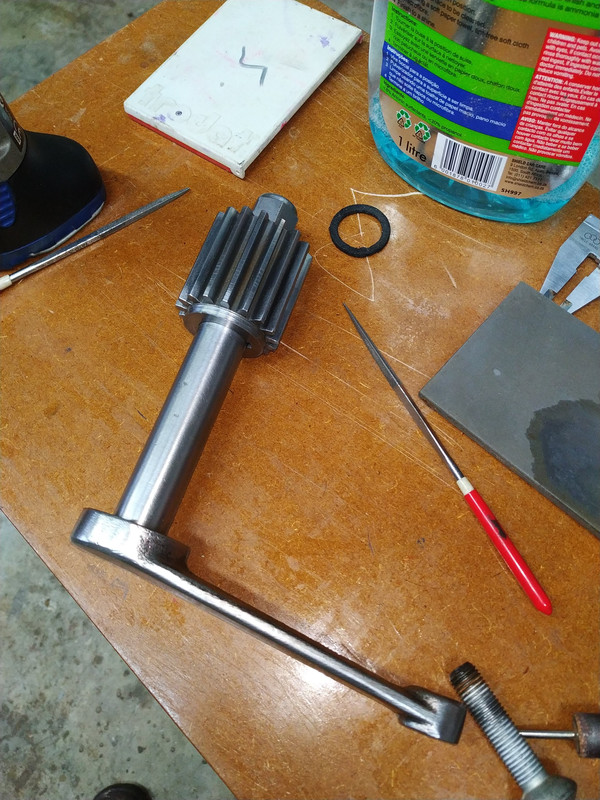
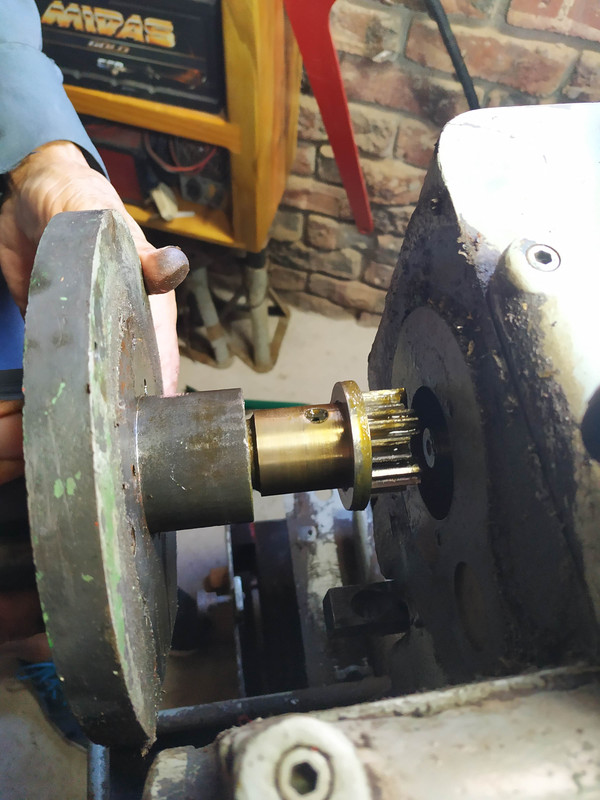
 180 forum posts | Thanks for the great feedback. I was worried that I am doing something wrong, but it seems this is one of those new word learning exercises. I was thinking (dangerous) and I will make a small gear puller this morning and see if that will work. Yes, the shaft of mine leaked grease, so there will be no leather washer and I will need to install something new like you did. Here is what the gear on my lathe looks like.
|
| Herman van der Merwe | 15/05/2020 11:51:34 |
180 forum posts | Posted by Richard Kirkman 1 on 28/03/2020 16:21:38:
As for the tumbler arm mystery, you tell me if I'm being blind, I can't see a dutch key! Looks like there's the starts of the threads on one the actual tumbler arm, but the shaft doesn't seem to have anything?
Edited By Richard Kirkman 1 on 28/03/2020 16:28:10 Richard, I figured this one out. You need to remove the grub screw in the cap. Then screw in one of the longer gearbox cover cap screws and then either use a puller or a slide hammer slide the cap of. It is almost a press fit but does slide out. In my case the entry to the hole was damaged, so I countersunk it a bit and retapped the thread. Then you remove the two revealed grub screws and the main big mamma of a cap screw in the arm and the arm slides off.
|
| Phil Whitley | 15/05/2020 19:09:24 |
 1533 forum posts 147 photos | A solution!! That explains a lot Richard!! Phil |
| Richard Kirkman 1 | 16/05/2020 15:38:47 |
| 334 forum posts 799 photos | Solution played out perfectly, except from the oil that leaked out of the end. It was much easier to dismantle than to reassemble, but still not too difficult. It would have been much easier if I had drained the change gear box first! Still, thanks a lot Herman, very helpful. The more info that's around, the more that it can help others too. I took it off, cleaned a little, then put it back together.. I didn't want to lose too much oil. But it did make me want to paint it.
Still no LED bulb, 4 weeks since it was posted. I emailed and they've sent another one out last Monday, but now that's already late too! Looks like i'm going to be waiting a while. I need to replace the gasket at the back of the lathe where the brake is, since that's getting oil in and becoming ineffective. I also need to look at the other seals again, since i'm getting a bit of a leak out of the end of the main spindle. When I took this to pieces, it seemed like there were rings for a gasket of some sort and a space in the end cover for one too. Any thoughts on that? |
| Richard Kirkman 1 | 16/05/2020 15:41:43 |
| 334 forum posts 799 photos |
You can just see a drip below the spindle. It's not anything to worry about, I know, but if possible I'd like to sort it. Especially if there is a place for a gasket/seal Edited By Richard Kirkman 1 on 16/05/2020 15:42:42 |
| Phil Whitley | 16/05/2020 16:03:53 |
1533 forum posts 147 photos | Richard, does yours have the same type of all metal brake as Hermans does? Phil. |
| Richard Kirkman 1 | 16/05/2020 17:03:01 |
| 334 forum posts 799 photos | Phil, it is not the same as Hermans, I have material on mine. The leak is trickling down the lathe and pooling over time in the tray. You can just see a slight bit in here since I cleaned it the other day.
Leak is definitely coming from the inside of the brake
Covered in oil inside. Doesn't make for an effective brake, and makes my lathe messy!
This is where I get stuck. I need to remove the sprung bit, but I cannot seem to get it off. I tried taking out the bolt, but it doesn't feel quite right. There's a circlip on the shaft below that turns to push the brake out, but I don't see that helping disassembly yet. Any Ideas?
I've been working on making a tailstock die holder the past day or so. I've run out of material so I've ordered some steel from my local steel place. So I have a few days to stop this leaking I also got myself a knurling tool, which arrived today, I tried it out and I'm very impressed, you get so much more grip on knurled parts. I think I'll have to knurl everything now |
| Herman van der Merwe | 16/05/2020 19:10:49 |
180 forum posts | I am glad you got the arm loose.
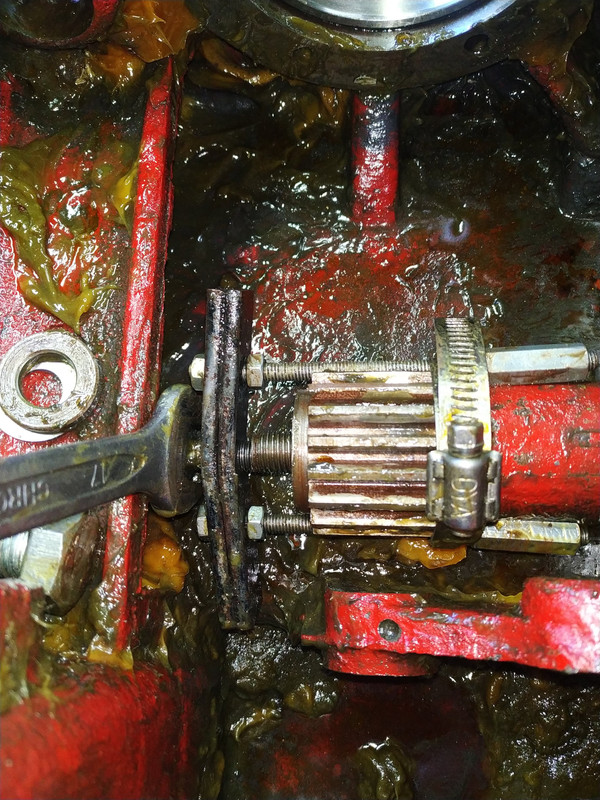
Took me two days to get the speed change gear off the handle selector shaft and then another three hours to fix it up. I ended up making a puller.
The gear was knocked oval, the shaft had hammer dings on it that created edges standing out from the shaft and the Woodruff key was knocked about so badly that it was stuck solid. The key took about an hour to flatten on a diamond plate. All fixed, sliding and fitting as it should.
|
| Phil Whitley | 16/05/2020 19:22:16 |
1533 forum posts 147 photos | Richard, you cant do with oil leaking into the brake drum like that, there is a seal in the flanged bearing (which is actually a bush), take of the brake shoes, and remove the allen screw or screws, depending on which it is, seems like on the early, there is one, but three on the later, and the flange should come off. there appears to be a cork gasket behind it. the circlip only hold the pivoting cam for the brake into the backplate. Have a look on the parts diagrams on the manuals, that makes it easier to see. Phil
Edited By Phil Whitley on 16/05/2020 19:22:55 Edited By Phil Whitley on 16/05/2020 19:24:09 |
| Herman van der Merwe | 16/05/2020 19:22:58 |
180 forum posts | Drum brakes all work the same. You need a drum brake spring plier to remove the bottom spring first. Then the two shoes will open up and you can undo the top spring. Your shoes needs to be replaced. Not expensive as you take it to any brake service place and they glue new shoes on. Ask them to skim the drum as well and then sand the new shoes to match the drum. Installation is the reverse of disassembling. I have seen a guide somewhere. Will try and find it for you. |
| Phil Whitley | 16/05/2020 19:25:53 |
1533 forum posts 147 photos | Nice work on the speed change shaft and gear Herman! |
| Herman van der Merwe | 16/05/2020 19:26:14 |
180 forum posts | Posted by Phil Whitley on 16/05/2020 19:22:16:
Richard, you cant do with oil leaking into the brake drum like that, there is a seal in the flanged bearing (which is actually a bush), take of the brake shoes, and remove the allen screw or screws, depending on which it is, seems like on the early, there is one, but three on the later, and the flange should come off. there appears to be a cork gasket behind it. the circlip only hold the pivoting cam for the brake into the backplate. Have a look on the parts diagrams on the manuals, that makes it easier to see. Phil
Edited By Phil Whitley on 16/05/2020 19:22:55 Edited By Phil Whitley on 16/05/2020 19:24:09 It is an oil seal part # 99. |
| Herman van der Merwe | 16/05/2020 19:34:35 |
180 forum posts | Posted by Phil Whitley on 16/05/2020 19:25:53:
Nice work on the speed change shaft and gear Herman! Thanks Phil! |
| Herman van der Merwe | 16/05/2020 19:43:32 |
180 forum posts | Posted by Richard Kirkman 1 on 16/05/2020 17:03:01:
You have a bigger problem now.... your one V-belt is wet with oil. Oil and rubber in a belt do not go together as it will ruin the belt. More so when you have a matched set (which I trust you have). If one belt stretches more than the other due to the oil, or slips, your tighter belt will try to play catchup and hunt causing a vibration in your drive. For this reason I only use Nu-T belts. Try and soak the wet belt in some acetone for a short while and rub it with a dry cloth to get the oil out. Repeat until no more oil is on the cloth. Also clean the grooves in the pulley and if they are glossy sand the grooves with 600 grit wet sandpaper. |
| Herman van der Merwe | 16/05/2020 19:49:14 |
180 forum posts | Posted by Herman van der Merwe on 16/05/2020 19:22:58:
Your shoes needs to be replaced. Sorry, I meant the shoe lining of each shoe needs to be replaced. |
| Richard Kirkman 1 | 16/05/2020 20:38:01 |
| 334 forum posts 799 photos | Posted by Herman van der Merwe on 16/05/2020 19:49:14:
Posted by Herman van der Merwe on 16/05/2020 19:22:58:
Your shoes needs to be replaced. Sorry, I meant the shoe lining of each shoe needs to be replaced. Shame, I was going to treat myself to a nice pair of stilettos Last time I cleaned in there when there was only a bit of oil, they worked really well, so I don't think they need replacing. Speed change shaft is looking very nice Herman. I'm glad I didn't have that much trouble with mine! I had a nap to think on it then headed back out to try again. I managed to get it off, I pried it off at the bottom then undid the screw, while putting a block of wood on to keep it from snapping closed again, so it'll go back on more easily. I'll see if I can get the spare brake shoes from Tracy. It's about time I messaged her again, it's been a month, but I was waiting on the bulb to arrive first so I could finish that chapter. As for the flange/bearing thing, It doesn't seem to want to budge. So I put some penetrating oil on it and I've left it. The 3 screws that came out smelt quite funny, not like a normal grease but sort of sweet maybe? I don't know but it didn't smell normal.
I don't particularly want to order a new seal from the spares place as they'll probably charge a small fortune for something that I could possibly make myself? Or perhaps source from elsewhere cheaper? All university work is done now, so I'm free to play for the next 19 weeks
|
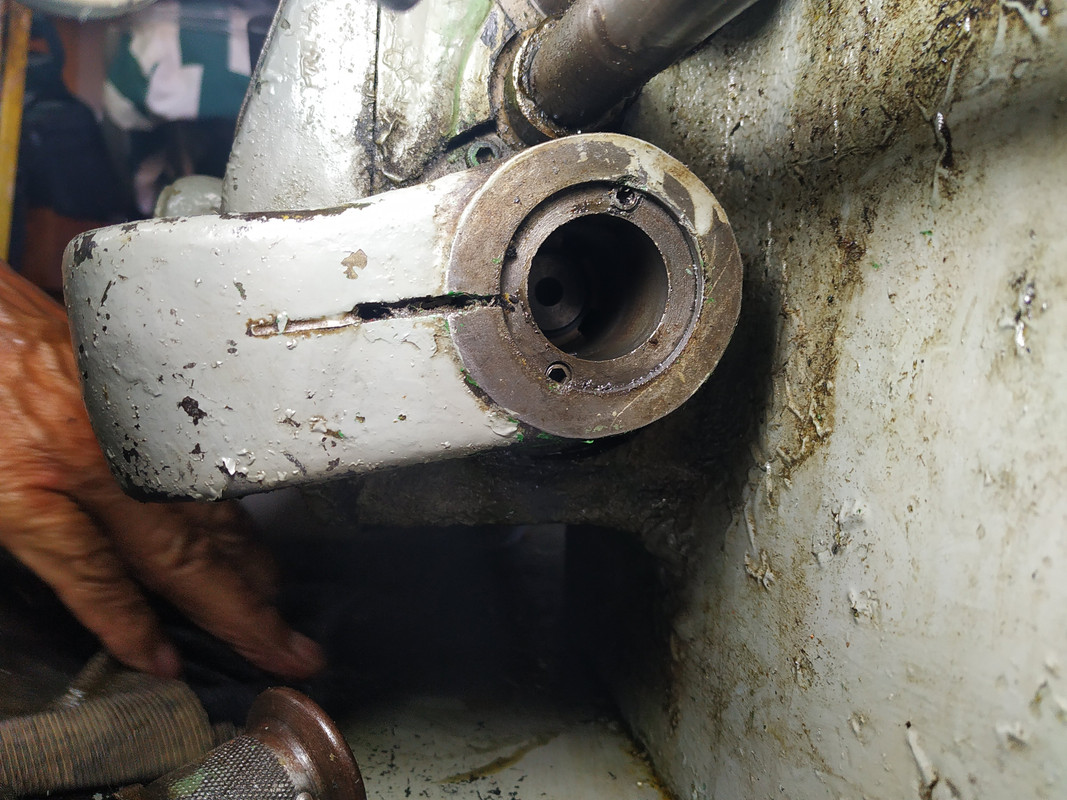
| Richard Kirkman 1 | 16/05/2020 20:52:27 |
| 334 forum posts 799 photos | A few more pictures to Illustrate. There seems to be some red stuff which I presume is the gasket material. I think the bolts had some red on them too
Red stuff doesn't scratch away easily. Someone could have added glue to stop it leaking at some point? |
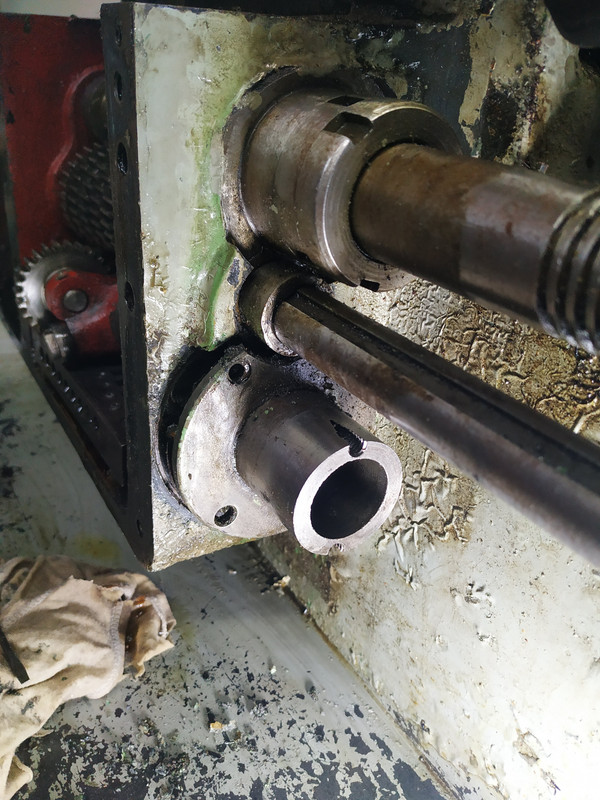
| Herman van der Merwe | 16/05/2020 20:57:50 |
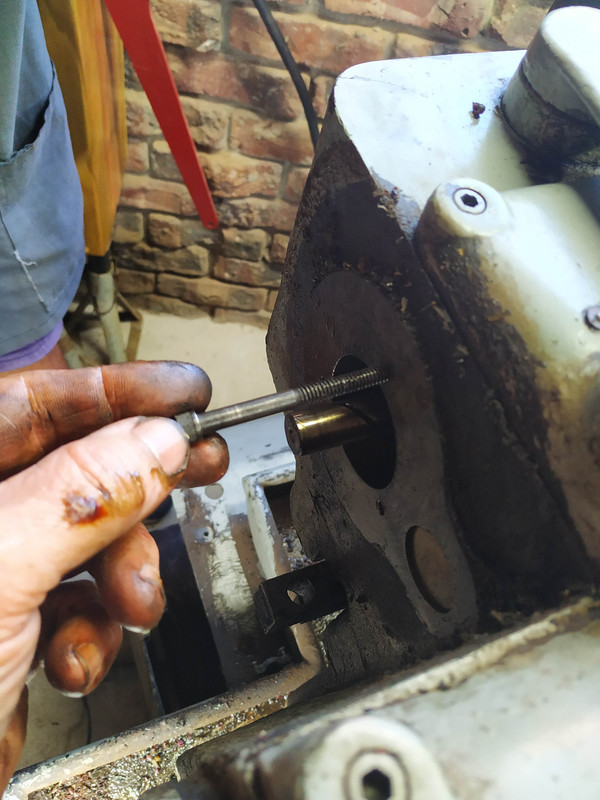
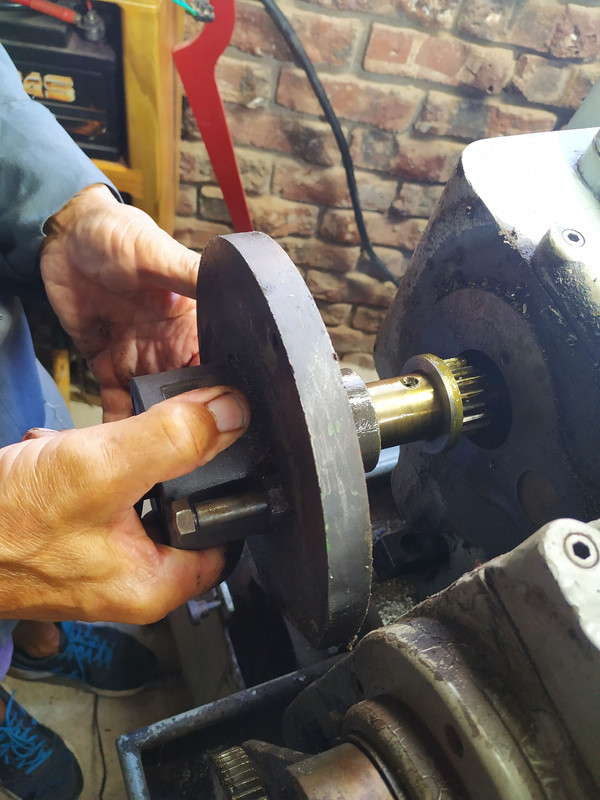
180 forum posts | My lathe has the cap screws located in the smaller diameter collar that stands out from the larger flange.
This is how mine came out.
|
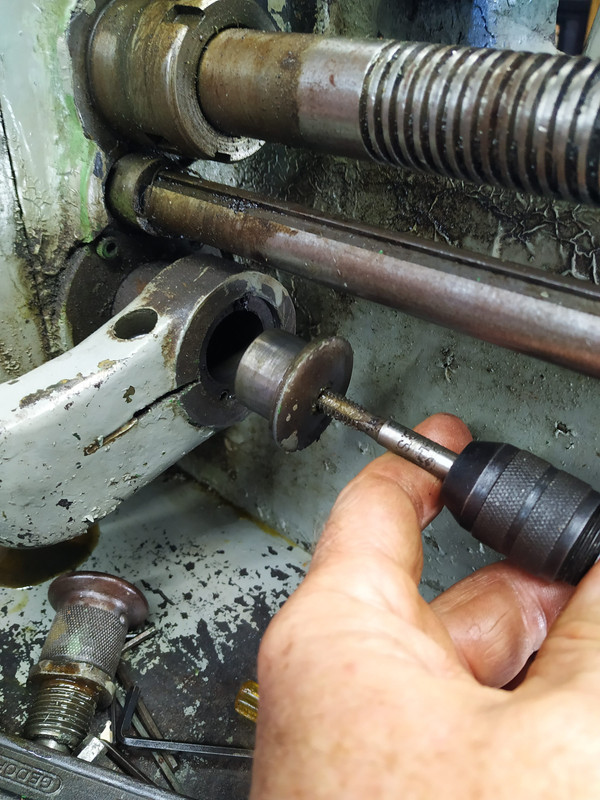
| Herman van der Merwe | 16/05/2020 21:01:23 |
180 forum posts | The red stuff is gasket maker. You need to heat it up with a hot air gun and then stick two putty knives in there to wedge it apart while the gasket stuff is hot and soft. Only way to get the red gasket stuff off is to wire brush it with a brass wire cup. You can also make three hard wood wedges and drive these in between the flange you want to remove and the headstock body. Edited By Herman van der Merwe on 16/05/2020 21:01:55 Edited By Herman van der Merwe on 16/05/2020 21:02:54 |
| Phil Whitley | 16/05/2020 21:02:00 |
1533 forum posts 147 photos | Red hermatite gasket cement, thats why it wont come off, it sets, not mega hard like Osotite, but hard enough to need wedges or an extractor to give it a straight pull. Hermatite is non standard on Colchesters, so I think we can guess it has been off before! Can you use a longer bolt in the threaded hole to push against the headstock and gently break the seal? Phil Edited By Phil Whitley on 16/05/2020 21:03:27 |


Please login to post a reply.
Magazine Locator
Want the latest issue of Model Engineer or Model Engineers' Workshop? Use our magazine locator links to find your nearest stockist!
Sign up to our Newsletter
Sign up to our newsletter and get a free digital issue.
You can unsubscribe at anytime. View our privacy policy at www.mortons.co.uk/privacy
Latest Forum Posts
- hemingway ball turner
04/07/2025 14:40:26 - *Oct 2023: FORUM MIGRATION TIMELINE*
05/10/2023 07:57:11 - Making ER11 collet chuck
05/10/2023 07:56:24 - What did you do today? 2023
05/10/2023 07:25:01 - Orrery
05/10/2023 06:00:41 - Wera hand-tools
05/10/2023 05:47:07 - New member
05/10/2023 04:40:11 - Problems with external pot on at1 vfd
05/10/2023 00:06:32 - Drain plug
04/10/2023 23:36:17 - digi phase converter for 10 machines.....
04/10/2023 23:13:48 - More Latest Posts...
- View All Topics
Support Our Partners


Shopping Partners
Subscription Offer

Latest "For Sale" Ads
- Reeves** - Rebuilt Royal Scot by Martin Evans
by John Broughton
£300.00 - BRITANNIA 5" GAUGE James Perrier
by Jon Seabright 1
£2,500.00 - Drill Grinder - for restoration
by Nigel Graham 2
£0.00 - WARCO WM18 MILLING MACHINE
by Alex Chudley
£1,200.00 - MYFORD SUPER 7 LATHE
by Alex Chudley
£2,000.00 - More "For Sale" Ads...
Latest "Wanted" Ads
- D1-3 backplate
by Michael Horley
Price Not Specified - fixed steady for a Colchester bantam mark1 800
by George Jervis
Price Not Specified - lbsc pansy
by JACK SIDEBOTHAM
Price Not Specified - Pratt Burnerd multifit chuck key.
by Tim Riome
Price Not Specified - BANDSAW BLADE WELDER
by HUGH
Price Not Specified - More "Wanted" Ads...
Get In Touch!
Do you want to contact the Model Engineer and Model Engineers' Workshop team?
You can contact us by phone, mail or email about the magazines including becoming a contributor, submitting reader's letters or making queries about articles. You can also get in touch about this website, advertising or other general issues.
Click THIS LINK for full contact details.
For subscription issues please see THIS LINK.
Digital Back Issues


Donate

 Register
 Log-in
Model Engineer Magazine
- Percival Marshall
- M.E. History
- LittleLEC
- M.E. Clock

ME Workshop
- An Adcock
- & Shipley
- Horizontal
- Mill

Subscribe Now
- Great savings
- Delivered to your door

Pre-order your copy!
- Delivered to your doorstep!
- Free UK delivery!
All Forum Topics > Help and Assistance! (Offered or Wanted) > Colchester Student Mk1 Won't Start