Forum sponsored by:

Colchester Student Mk1 Won't Start
| Phil Whitley | 28/03/2020 17:01:23 |
 1533 forum posts 147 photos | That pic is upside down innit?
|
| Richard Kirkman 1 | 28/03/2020 17:05:50 |
| 334 forum posts 799 photos | Yeah upside down, I can't seem to get them to post in the right orientation I'll test some more with the multimeter later, just need to warm up a bit Thanks |
| Phil Whitley | 28/03/2020 17:37:57 |
1533 forum posts 147 photos | You need one of them nice halogen radiant heaters from B&Q! |
| Richard Kirkman 1 | 28/03/2020 20:45:27 |
| 334 forum posts 799 photos | Had a scrub at the end of the tumbler shaft, definitely no Dutch key. Inside of the headstock is looking a lot cleaner than it was, and I can't really get it any cleaner without taking more parts out, which I really don't want to do. So I'll reassemble tomorrow. If you look at the before and after, it's a lot better than it was
Took off the thread counter and found lots of rubbish behind there too
I need to sort out the little lighting transformer to get the electrics finished. So I need a transformer to take the 415v to 250v then use my current transformer to get it right? I also need to order the correct length belts now the motor has changed, the old ones don't fit at all Thanks for your help today Phil, big progress! |
| Richard Kirkman 1 | 29/03/2020 14:15:45 |
| 334 forum posts 799 photos | Reassembly has had to come to a stop. I'm getting gear misalignment between the main selector ones. Once the spindle is back in, the gear just will not slide over any more than that. There's nothing clearly blocking it that I can see. So I have no idea why it's happening Any ideas? I'll go back and take another look but I think they should line up more than that. It was like this before I took it to pieces too
|
| Phil Whitley | 29/03/2020 15:15:08 |
1533 forum posts 147 photos | Hi Richard, I am going to the workshop tomorrow, so I will take a pic of the dutch key in my machine, unless I have one on file, I will look today Re the gearbox problem, have you got the mesh on the sliding shifter one tooth out? that is certainly not meshing sufficiently with the driving gear! I gather that the gear is not coming in to contact with the boss on the spindle visible in your picture. If there is a stop on the sliding shifter handle, the handle nay be hotting ther stop before the gear is fully meshed. No doubt this problem is in my future too, when I replace my spindle bearings. "So I need a transformer to take the 415v to 250v then use my current transformer to get it right?" Yes, but I have had one of those "DOH" moments that us oldies have when we have skated over the obvious solution! If your new motor is running in star, and the star connection is accesible, you can derive a neutral from the star connection in the motor. I have a 3 phase steam cleaner on which the pressure jet oil burner and ignition is all single phase, and it gets its "neutral" from the star point of the motor, so it may be that you already have 240v L/N available in the machine!. I will be online most of today, so get back to me if you need any more misleading information!! Phool
|
| Richard Kirkman 1 | 29/03/2020 17:19:40 |
| 334 forum posts 799 photos | Meshing problem solved. The keyway in the spindle was machined in using a horizontal mill, so the end of the keyway has a radius, but the key only has a radius on one end. When I first got the machine, the gears were misaligned, as I replaced a part and made sure to put the key back in the same orientation, which was wrong. Anyway, now it's in the right orientation, the spindle went back together beautifully, first try as well!
I had pictures of when I first received the lathe so I could see if there was any damage in there and they were definitely misaligned then too. So big improvement I managed to find the picture of the headstock the first time I'd drained it, makes for a pretty before/after picture. A vast improvement
As for reassembly, it's just the same as disassembly, but backward. Phil, you'll need to take the main spindle apart a bit further to access the front bearings in there if you can see them, You'll need some c-spanners to get the locking ring off I think. To start reassembling, put the main spindle through the right hang hole, with the sliding gears already in the headstock, slide the spindle through them as you insert it. You must put both gears on at this point, but the ring spacer at the end can be left off as that can be slid on at the end. Leaving this off allows you some space to fiddle with getting everything aligned onto their keys and to get the handle into the right position for the sliding collar since you need to account for the movement of the spindle pushing the handle back over.
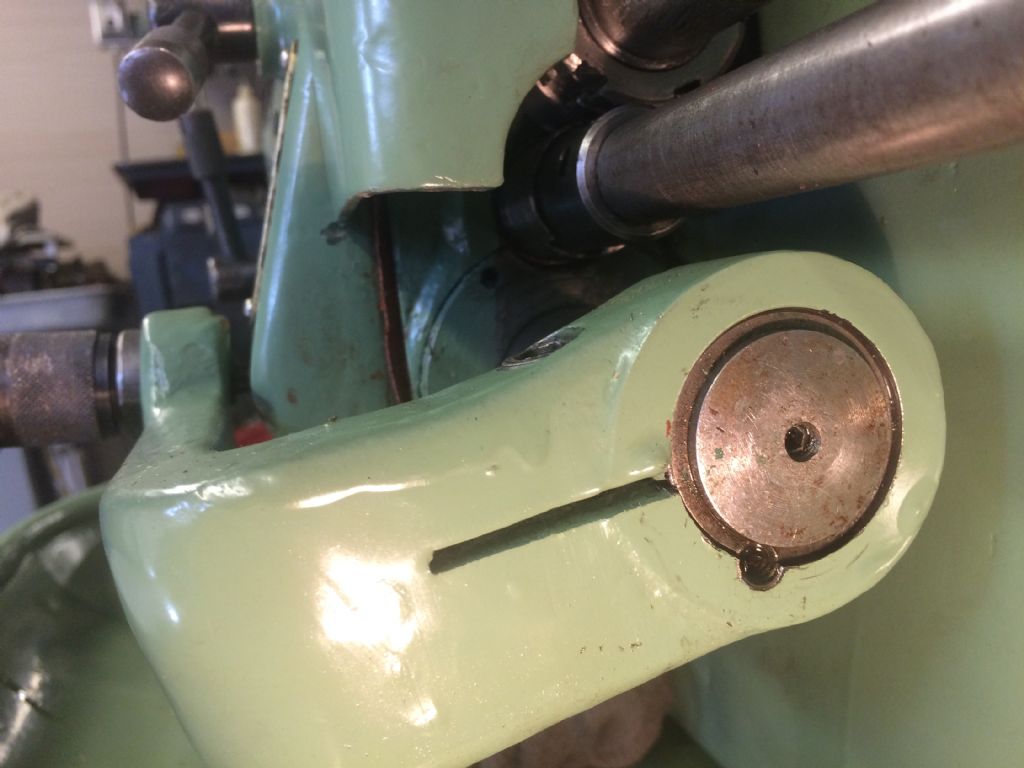
You've got to make sure the spindle lines up with a bass/bronze pin that you can just about see in the last picture. This must be aligned before you start to tap the spindle back in place. The actual part that the bolts go through can be spun into place later, but the spindle must be started in the right place, with the oiling hole that you can see, facing directly up to the sky. |
| Richard Kirkman 1 | 29/03/2020 17:19:50 |
| 334 forum posts 799 photos | As the spindle is tapped back, using a copper mallet or block of wood and such things to not damage the spindle nose, put in the rear bearing as this will help align the shaft and make sure it is going in square. This helps it go in much easier
Once the spindle is back in place, you must put all the bolts in, lining up the gasket at the same time. I made my gasket tight over the bolts so that it would stay in place and aligned while I tapped the spindle back in
Then you can slide the spacer ring back on that I was on about earlier. If you put the bearing back in to align the shaft then this must be removed before you can do this. Then the bearing goes back in
Then the locking ring, making sure to tighten it down quite tightly Then I put my gasket and end cover back on. I realized as I was doing this that it wasn't going on square, so I took it off and had a look. I knew the casting was broken, but I thought it was broken on one of the through-holes. Turns out it had broken in one of the recessed holes, making it a through-hole, so this piece is only being secured by two bolts. Not ideal, but it will do for now. I'm still trying to get spare parts from Tracy so hopefully, that'll come too. This means it's not applying lots of pressure to the gasket all the way around, so it may leak there, but I tried to tighten the other bolts up enough to put a bit of pressure on it. Hopefully, it'll work.
So, it's all back together, I can continue to work on cleaning it up. I've put some PTFE tape around the plugs so they won't leak anymore either. I have more than enough gasket material to make at least another 20 sets of gaskets, so I'm going to replace the one from the headstock too. Phil, If you want any nitrile rubber to replace any of your gaskets with, I'd be happy to send you some since I have so much spare. I know you've done them already but may as well offer. It makes me think of the ridiculous profit margin on the precut gaskets on eBay. 35 quid for that is stupid. But I suppose some people will pay! I'm very pleased with today's progress. I'm still going to go back out and get it fully reassembled though. Maybe even continue cleaning the other parts! Not too sure how the motor will be running. Is it simpler to just spend the 25 quid on the transformer and wire that up? |
| duncan webster | 29/03/2020 17:47:47 |
| 5307 forum posts 83 photos | Posted by Bob Unitt 1 on 27/03/2020 11:13:18:
Posted by Phil Whitley on 27/03/2020 10:40:44:
. It is British, of course it leaks oil!! Phil It's like an old Triumph motorbike - the oil leak was to let you know there was still some oil in it. Just before they went bust I had a job offer from BSA Triumph, part of the interview was a trip round the factories. All the bikes went on a dyno at the end of the line, so obviously had oil in. One of the technicians said 'we've found a way of stopping then leaking oil all over the showroom floor'. Expecting some great engineering revelation we asked him to elaborate. 'We drain it out' was the reply. Incidentally, he told us the 650 BSA usually produced slightly more BHP than the Triumph, but they didn't let on in the advertising |
| Phil Whitley | 29/03/2020 19:29:34 |
1533 forum posts 147 photos | Duncan, I always preffered BSA to Triumph, as a teenager I had a rash of Bantams as pit bukes, and a very George Todd tuned one as a road bike, which was good, but unreliable, suffering from constant low crankcase pressure, many years later I realised that I had been putting the seals in the wrong way round, ignoring the rule of "always put the spring to what you are sealing in! In my twenties I had an A10, which was very reliable, but left a torrey canyon size slick wherever it went!. Also prefered the Rocket 3 to the trident, but there you go! Richard, problem solved using sound engineering principle of pulling it down and having a good look! never fails! Yes, I would love some neoprene, but don't leave yerself short! Thanks for the extra pics, I am getting more confident about tackling my spindle, and obvs will note the key position!! On the tumbler shaft, i will post up a pic of mine, but it is essental to lock the shaft to the handle once the gears have been set up to mesh correctly in all positions, and if yours hasn't been dutch keyed (VERY odd, but it is an early one) then they must have used some other method, which is the reason it won't come off. It seems to be there in the handle, but not the shaft. Has someone fitted, or even made, a replacement shaft? Take the clamping bolt right out of the handle, and have a good look around it for hidden roll pins or screw holes. As to the motor thing, it will be running in star, but whether you could do as I suggest will depend on whether the star connection point is in the terminal box, or buried in the windings. If the motor can be connected in star or delta, it will be. It is an option for future consideration, and would provide an "onboard" neutral without extra wiring and five pin plugs and sockets. Phil |
| Phil Whitley | 29/03/2020 19:42:06 |
1533 forum posts 147 photos | "If the motor can be connected in star or delta, it will be" (should have continued) in the terminal box!. Phil |
| Richard Kirkman 1 | 30/03/2020 12:36:37 |
| 334 forum posts 799 photos | I finished off yesterday by cleaning up all the parts that had come off. So all of the gears on the end have had a thorough degreasing and toothbrushing till they were the right colour again! It's looking much better. However i'm still at that stage where I don't really feel like anything is properly finished? Even though I've done a lot I even put the 4 jaw chuck on for the first time. It seemed a lot lighter than I remember, especially after moving the 3hp motor around! The 4 jaw felt a lot bigger than the 3, but it just felt right.
I made a new gasket for the headstock since the old one was a loose fit on the bolts, so every time it was a pain to line it up to get the bolts through. This new one is tight over the bolts, so stays in place while you move the cap back onto the lathe. So I gave the underside a good clean too since it needed to be cleaner. It makes a big difference
Phil, I'll have a look at the gasket material I've got left and post you a chunk of it. You can get the gearbox and the two spindle ones out of a very small piece. I probably have enough to make 4 or 5 full sets, so plenty spare. As for the motor neutral stuff, I have no idea. I still need to wire in the new motor, but I'll look in a few days. I'm still fancying the transformer more. You'll have absolutely no trouble with your spindle, it's no where near as difficult as it looks. The only real issue is the main sliding sleeves lever. I was getting leaks through that before, so I replaced the leather gasket. When I put it back together I tightened the locking nut on the end of the shaft down quite a lot, so the level is stiffer to turn. This meant that it stayed in the position I wanted it to when reassembling the spindle. Very handy since last time i had to use my knee while my hands were full with the spindle. I think a video teardown would be great. Your cold frames looked fine to me! Anyway, I'm going to have a break from the lathe for a few days. I'm going to try to align my table saw fence and things perfectly since I have a dial indicator now. I could actually do with replacing the fence with a piece of plywood, since it's currently a piece of beech, so it expands and contracts in different directions depending on the temp and humidity, so It'll never stay completely aligned. Then i'll finish off some jewelry boxes I started in the summer (shocking I know, woodwork talk on an engineering forum) Edited By Richard Kirkman 1 on 30/03/2020 12:40:33 Edited By Richard Kirkman 1 on 30/03/2020 12:41:02 |
| Phil Whitley | 30/03/2020 15:57:39 |
1533 forum posts 147 photos | Here you go Richard, the dutch key!
|
| Phil Whitley | 30/03/2020 16:00:30 |
1533 forum posts 147 photos | Note that the shaft on mine has a shoulder that yours doesn't have!
|
| Richard Kirkman 1 | 30/03/2020 21:18:07 |
| 334 forum posts 799 photos | You're right, mine doesn't have a shoulder. I'll have another look at mine tomorrow or at some point Didn't get much done today. Faffed around trying to get my table saw fence aligned so I mounted my indicator on something that could slide up and down the table slot. It helped a lot Anyway, I needed to glue some wood up so I had a few hours spare.
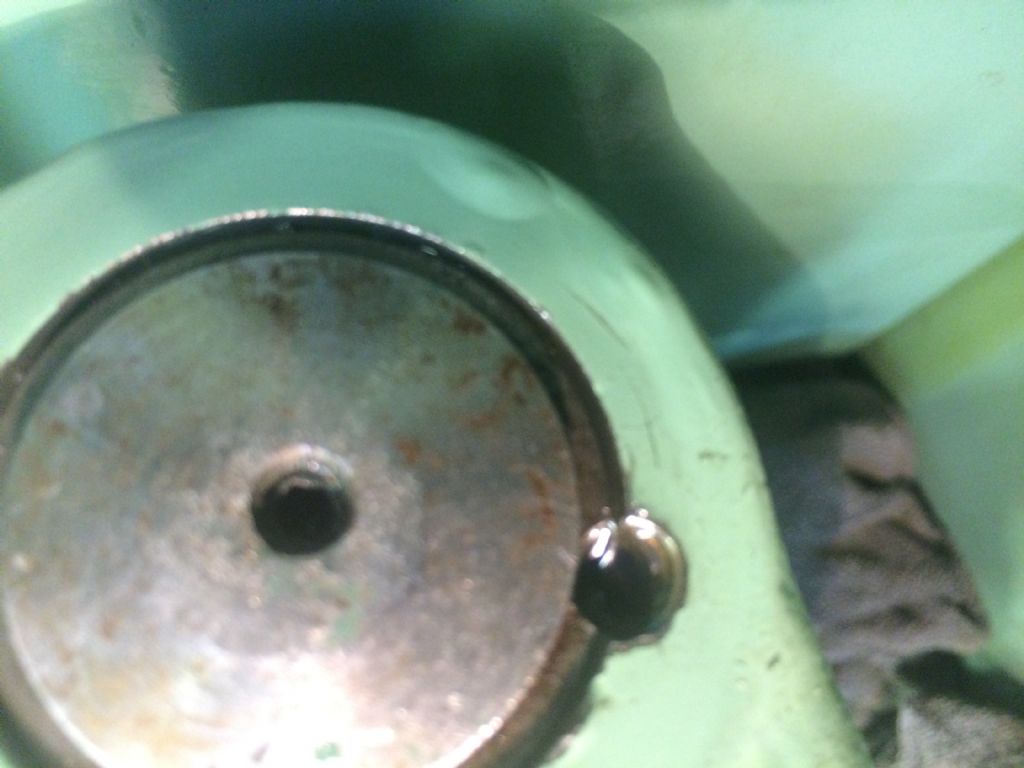
Upside down, but still understandable.
So that's how I've wired it. Seems fine to me Then I took the coolant pipe and tap to pieces. I think I might need a new one I've cut the gasket material up. Got a sheet of around 40x40cm for you Phil. That's more than enough to replace all the gaskets in the lathe Will that transformer that you linked to from rs do the job that I need. So I wire from the 415v to the transformer. Then to the low lighting one? Because I need to order the new belts as well. Plus it would be nice to get All the wiring finished
|
| Phil Whitley | 31/03/2020 13:05:17 |
1533 forum posts 147 photos | Hi Richard, the star point is the metal link across the three terminals in the connector box, so you could take a wire from there and it would be a neutral as far as its relationship to any of the other phases is concerned, but after another "DOH" moment, I realised that this is only when the motor is running, and to have the light go out when you stop the lathe is unacceptable, to say the least! Get the transformer, and link it to your existing LEd power supply. You need to get some flexible conduit and end bushes to go between the contactor and the motor terminal box, those wires are only single insulated, and would chafe through in no time, plastic flex conduit and end bushes are VERY cheap, local electrical wholesaler, or screwfix. Always be doubly safe with three phase! short circuits between phases are LOUD and quite spectacular! The RS transformer appears correct, as long as it is continously rated for use, I would prefer it if you got RS to confirm it as suitable, explain the use you want to put it to in an email to their tech dept, and they should be able to confirm it is correct for purpose. I have a natural aversion to loud noises, even at this range! Thanks for the gasket material, really appreciate it!, I noticed yesterday when I took the pic that my sc box is leaking from the drain plug too! new copper washer methinks. Phil Edited By Phil Whitley on 31/03/2020 13:06:43 |
| Phil Whitley | 31/03/2020 13:22:11 |
1533 forum posts 147 photos | Afterthought! you would be connecting the new transformer across the two fuses that originally supplied the lighting transformer, so it would be a protected circuit, so if the transformer did fail, it would just blow a fuse! no loud bangs, very undramatic!! |
| Richard Kirkman 1 | 31/03/2020 13:34:19 |
| 334 forum posts 799 photos | There is a flexible metal conduit going already, I just need the Gromit thing to mount it to the hole in the motor. I'm never too sure what they're really called, but I need one. I found it, It's a cable gland. I'll get one I'm not entirely convinced mine is leaking from the drain plug, I think it might be leaking from the broken casting bit, then running down and dripping off the plug. So, I'll wait till I get the replacement part, then I'll take it all to bits again. Rs said they didn't know if it was continuous duty or not. I'm sure it'll be fine, so I've ordered it along with the new belts. Not sure when I'll get the gasket to you Phil, but I will at some point. I was hoping to get the spare parts from Tracy first so I could send you a few little bits since I remember your lathe didn't have the oiler on the end of the larger gear on the LHS. The coolant tap may need replacing as I took off all the tape that was on it and its a bit broken. Unless anyone would recommend how to fix it? I'll put up pictures later I've ordered myself some new pipe for the coolant pump too since the old stuff was orange and I couldn't clean the inside
|
| Phil Whitley | 31/03/2020 15:43:40 |
1533 forum posts 147 photos | Hi Richard, no panic for the gasket, and the oiler would be spiffing if you can get one! we are all in limbo at the moment. That flexible coolant pipe is very similar on the Covmac, I noticed that the carriage was very difficult to move, then there was a POP and it freed off, the coolant pipe had aged and gone rock hard, and then snapped! Flexible metal conduit, the guy I served most of my apprenticeship with called it "oss cock"! If it is the metal spiral type same as mine, you might struggle to get one, luckily, magpie that I am, I have some in a tin in the "stores" let me know if you can't get one. Phil. |
| Richard Kirkman 1 | 31/03/2020 20:42:18 |
| 334 forum posts 799 photos | Coolant pipe all sorted today. Had to wait for wood to glue again, so did a bit of cleaning. Think I need to take the light to pieces if the wiring is going to be done soon
I think it looks quite fitting. The splash guard at the back isn't original. No idea where it came from, but it doesn't fit very well. Still need the tube to arrive, but that shouldn't be long Rs package should arrive tomorrow so I'll be able to wire that up with some guidance... Thanks Richard |


Please login to post a reply.
Magazine Locator
Want the latest issue of Model Engineer or Model Engineers' Workshop? Use our magazine locator links to find your nearest stockist!
Sign up to our Newsletter
Sign up to our newsletter and get a free digital issue.
You can unsubscribe at anytime. View our privacy policy at www.mortons.co.uk/privacy
Latest Forum Posts
- *Oct 2023: FORUM MIGRATION TIMELINE*
05/10/2023 07:57:11 - Making ER11 collet chuck
05/10/2023 07:56:24 - What did you do today? 2023
05/10/2023 07:25:01 - Orrery
05/10/2023 06:00:41 - Wera hand-tools
05/10/2023 05:47:07 - New member
05/10/2023 04:40:11 - Problems with external pot on at1 vfd
05/10/2023 00:06:32 - Drain plug
04/10/2023 23:36:17 - digi phase converter for 10 machines.....
04/10/2023 23:13:48 - Winter Storage Of Locomotives
04/10/2023 21:02:11 - More Latest Posts...
- View All Topics
Support Our Partners


Shopping Partners
Subscription Offer

Latest "For Sale" Ads
- Reeves** - Rebuilt Royal Scot by Martin Evans
by John Broughton
£300.00 - BRITANNIA 5" GAUGE James Perrier
by Jon Seabright 1
£2,500.00 - Drill Grinder - for restoration
by Nigel Graham 2
£0.00 - WARCO WM18 MILLING MACHINE
by Alex Chudley
£1,200.00 - MYFORD SUPER 7 LATHE
by Alex Chudley
£2,000.00 - More "For Sale" Ads...
Latest "Wanted" Ads
- D1-3 backplate
by Michael Horley
Price Not Specified - fixed steady for a Colchester bantam mark1 800
by George Jervis
Price Not Specified - lbsc pansy
by JACK SIDEBOTHAM
Price Not Specified - Pratt Burnerd multifit chuck key.
by Tim Riome
Price Not Specified - BANDSAW BLADE WELDER
by HUGH
Price Not Specified - More "Wanted" Ads...
Get In Touch!
Do you want to contact the Model Engineer and Model Engineers' Workshop team?
You can contact us by phone, mail or email about the magazines including becoming a contributor, submitting reader's letters or making queries about articles. You can also get in touch about this website, advertising or other general issues.
Click THIS LINK for full contact details.
For subscription issues please see THIS LINK.
Digital Back Issues


Donate

 Register
 Log-in
Model Engineer Magazine
- Percival Marshall
- M.E. History
- LittleLEC
- M.E. Clock

ME Workshop
- An Adcock
- & Shipley
- Horizontal
- Mill

Subscribe Now
- Great savings
- Delivered to your door

Pre-order your copy!
- Delivered to your doorstep!
- Free UK delivery!
All Forum Topics > Help and Assistance! (Offered or Wanted) > Colchester Student Mk1 Won't Start