Bennys Tools
Workshop tooling
| Benny Avelin | 08/03/2017 05:56:20 |
| 80 forum posts 86 photos | Since I like building tools I will probably make a continuous stream, thus I felt it easier to make one thread for all my tool builds. |
| Benny Avelin | 08/03/2017 06:05:21 |
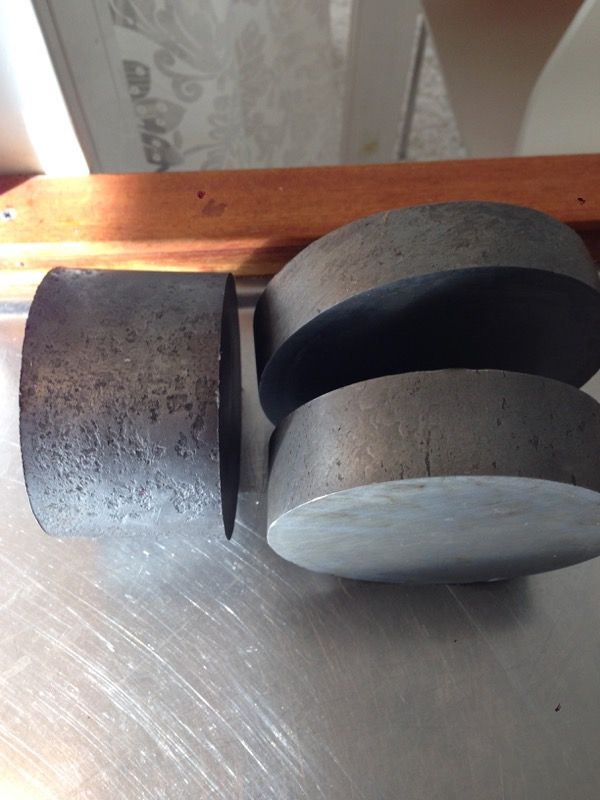
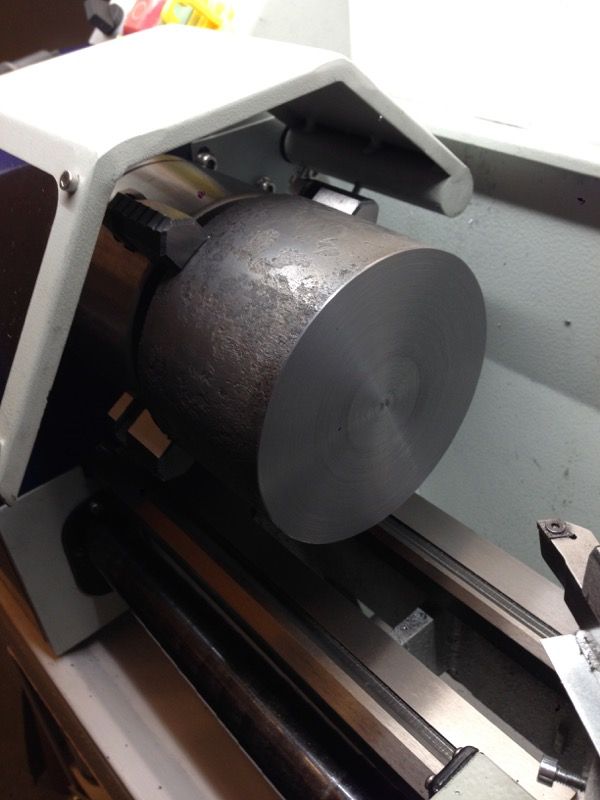
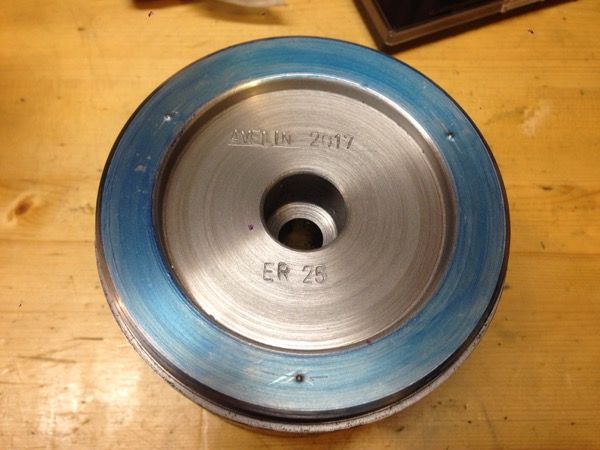
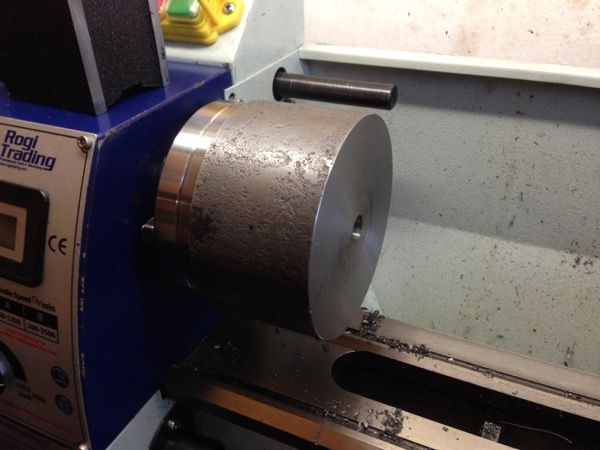
| 80 forum posts 86 photos | I will start off this thread with pictures of my current ongoing project. It is a ER25 Collet chuck that mounts directly to the backplate of my mini-lathe. Why ER25 you ask? Well, ER32 would be better due to the upper size limit of 20mm which corresponds to the spindle bore instead of ER25 16mm max. But I had a set of ER25 collets for my milling chuck so I decided to reuse. The base material is S355 hot rolled, I acquired these slugs and this is what they look like after pickling in some vinegar to remove the mill scale. The leftmost piece (105mm dia) will be the chuck, one of the pieces to the right will eventually become a steady rest. I faced of one end and then got discouraged and left the lump for a couple of months... Well some months later things got started up again and now I just kept going, I started making the back face and register for the chuck. Strangely the register on the lathe is 72.04mm as best I can measure (caliper, could not reach with a micrometer, would be nice to have a set of disc-mics). Time to put a makers mark and drill and tap the mounting holes. I am quite surprised at how straight the stamping became... |
| Benny Avelin | 08/03/2017 06:12:52 |
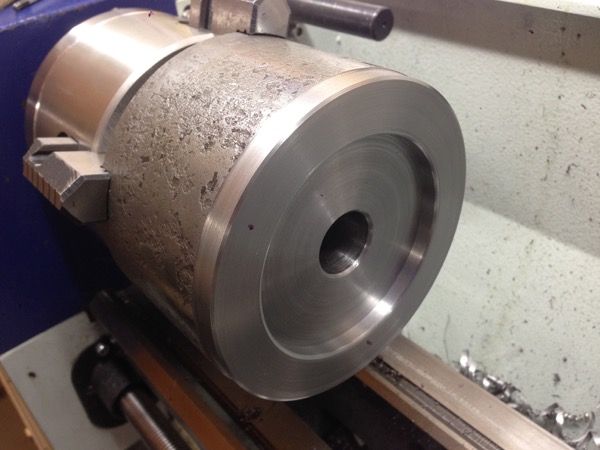
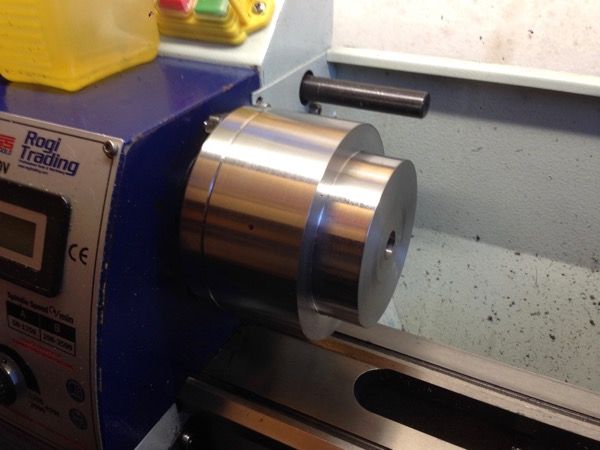
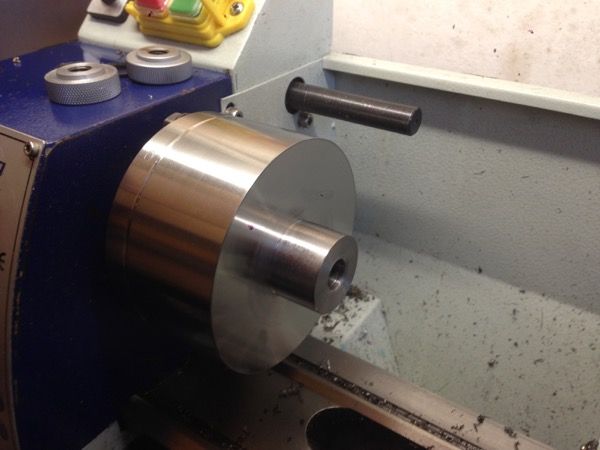
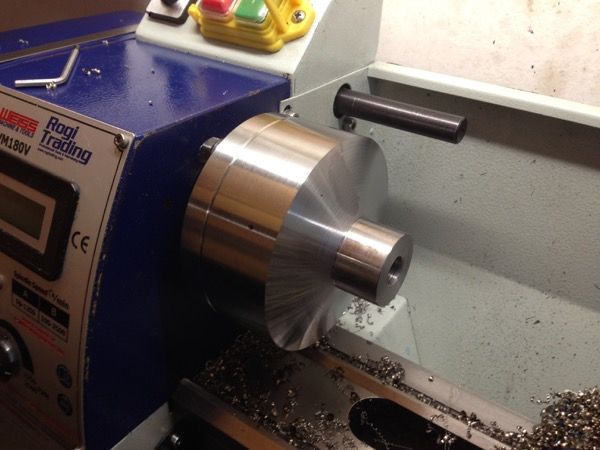
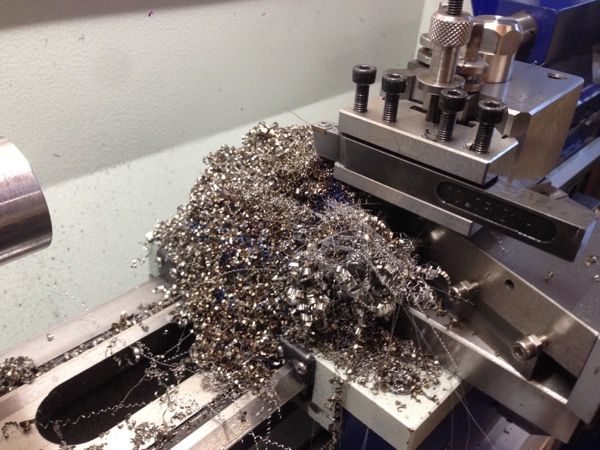
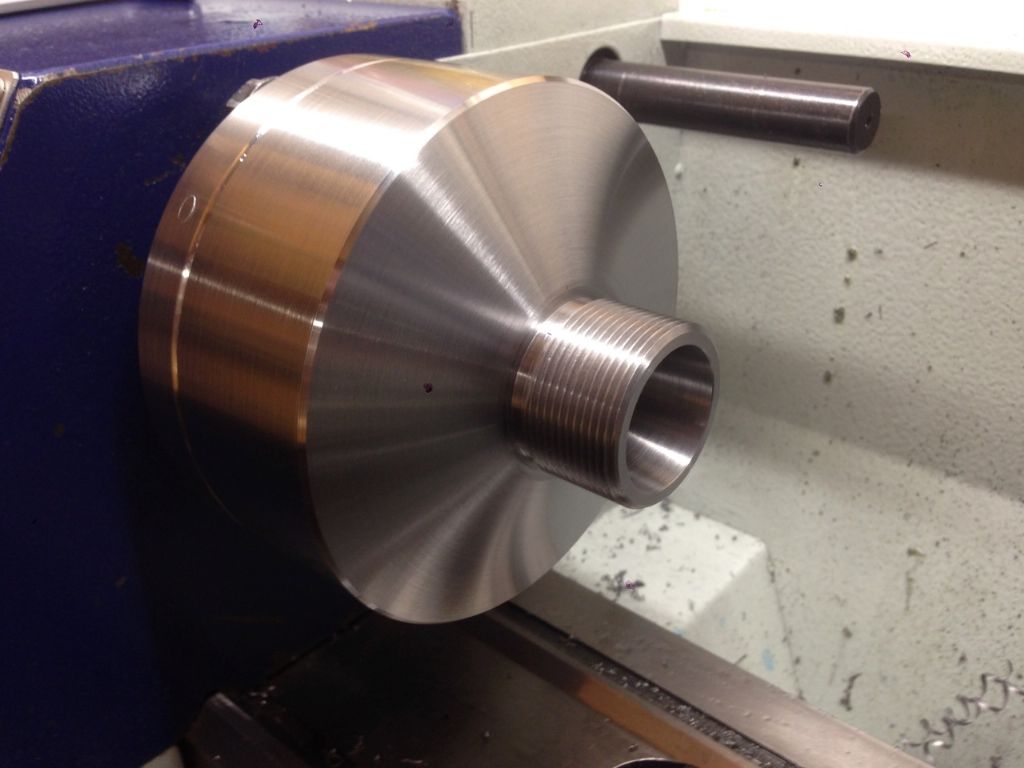
| 80 forum posts 86 photos | I then proceeded to mount it on the lathe, a very snug fit indeed but it is removable. I call that a success! Now it is time to hog out some material, not a trivial task on this small lathe. At this point I was discouraged, I had been using HSS tools and the low rpm range of the lathe lacked a bit of strength at this diameter as well as it got hot and started to smell hot lacquer (nooot good). I then switched to insert tooling and maxed the rpm and kicked up the feed rate quite substantially and some time later and a bag full of chips I came to this point Next I proceeded to make a bevel on the front face, firstly for cosmetic reasons, secondly to get access with my threading tool to the small diameter. which also ended up with a mountain of swarf
|
| Benny Avelin | 08/03/2017 06:14:01 |
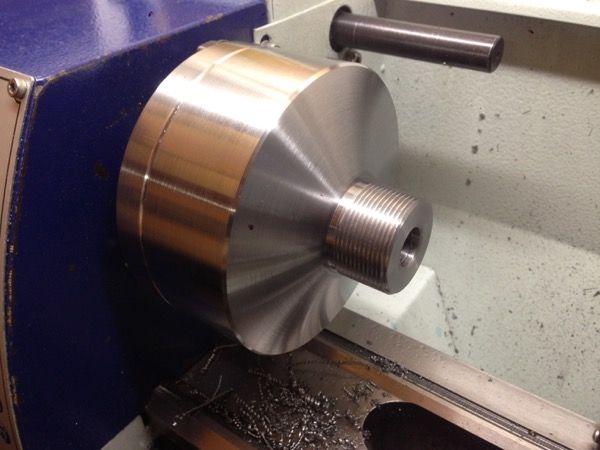
| 80 forum posts 86 photos | Next I proceeded to thread the M32x1.5 thread and test fitted a nut. This is all for today. Edited By Benny Avelin on 08/03/2017 06:14:51 |
| bricky | 08/03/2017 06:44:11 |
| 627 forum posts 72 photos | Hi Benny Great work and a nice finish. Frank |
| Bob Stevenson | 08/03/2017 08:19:29 |
| 579 forum posts 7 photos | How did you transfer the positions of the fixing studs from the spindle plate?....this was the tricky bit for me as you cant get proper access to spot thru accurately. |
| Benny Avelin | 08/03/2017 21:54:25 |
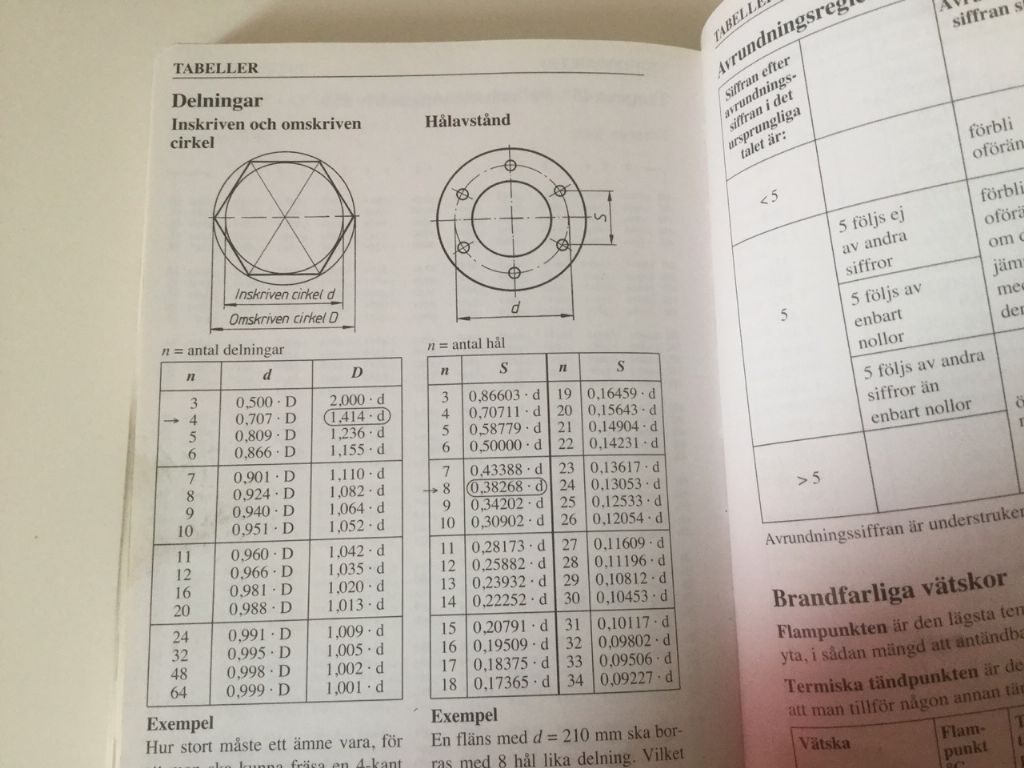
| 80 forum posts 86 photos | Bob. The way I do it is to measure the distance between the holes with a caliper and then subtract the hole diameter to get the cc distance. Then I use this table (disregard the Swedish) to calculate the diameter that the holes lie on, this can then be marked out on the target, then using a compass to mark out the holes. |
| Benny Avelin | 08/03/2017 21:56:50 |
| 80 forum posts 86 photos | Thanks Frank! I managed to cut the taper today, I am not sure if I am going to grind the taper with a toolpost grinder or not. |
| Benny Avelin | 09/03/2017 16:14:32 |
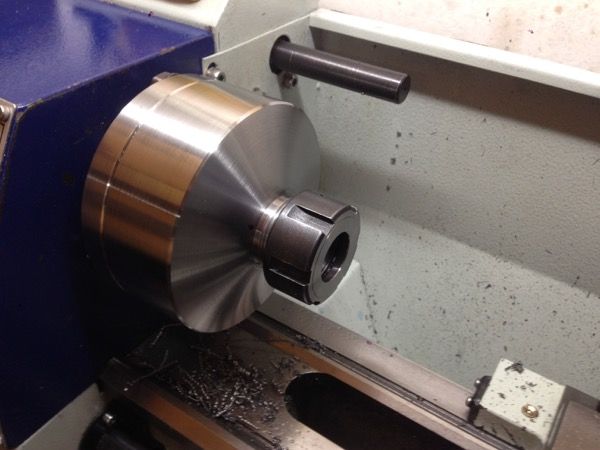
| 80 forum posts 86 photos | This was an interesting turn of events. When I removed the chuck to drill holes for a tommy bar, I realized that the fit over the register was almost loose but before it was a tight interference fit. My guess is that although it is hot rolled it must have been slightly compressed from the mill. This compression got reduced as I turned down the outer layer and thus enlarged the register by a couple of 0.01 mm. I am usually very wary about this when I mill cold rolled steel but I did not know this could happen. I would say cool! Apparently it registers good enough and I have 0.005 mm runout on the body and 0.02 TIR at a test bar 15mm dia 40mm out from the chuck, this is actually smaller than the stated runout on the collets, again cool! As everything seems to work I will not grind the internal taper since I got such a fantastic finish on it. |
| Raymond Anderson | 09/03/2017 17:02:30 |
785 forum posts 152 photos | Him Benny, Nice work, looks a great finish. Am wondering why you made the body so wide ? I would have thought it would have been better to have the body thinner and thus the collets are then closer to the spindle nose. Still nice work though |
| Benny Avelin | 09/03/2017 20:04:27 |
| 80 forum posts 86 photos | Well it is a combinations of things that led to the wider body. My original thought was that it would look better, secondly it suited the material at hand, thirdly (and this is an afterthought) greater rotational mass seems to improve finish and reduce vibrations when turning. Maybe these are valid points but who knows it's a god question. |
| Benny Avelin | 09/03/2017 21:24:29 |
| 80 forum posts 86 photos | Just a thought... in the data sheet for s355 steel one notices different material tensile strength for different bar diameter (lower strength for larger bars). This must be an indication that the outer layer is compressed from the rolling process, and the smaller diameter the compressed layer makes up more of the bar and thus it becomes stronger? |
| Benny Avelin | 12/03/2017 09:38:08 |
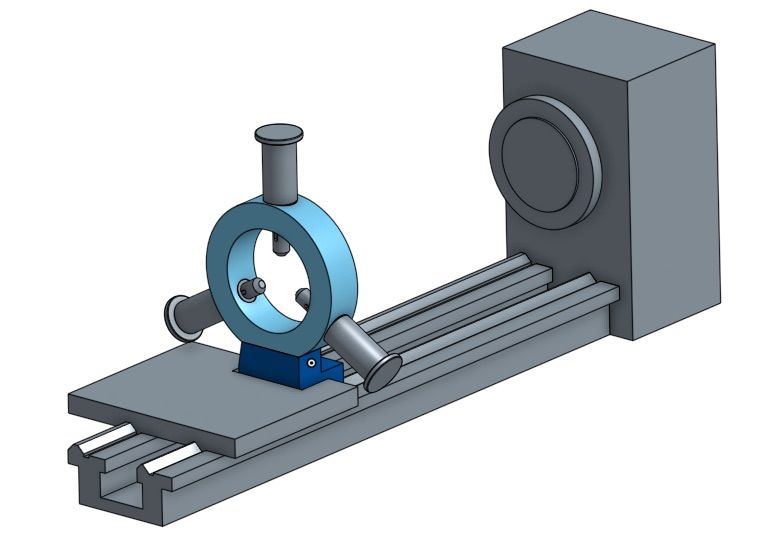
| 80 forum posts 86 photos | Begun mocking up a steady rest. I decided that this southbend type design is quite neat, now I need a good locking mechanism... |
| SillyOldDuffer | 12/03/2017 10:02:48 |
| 10668 forum posts 2415 photos | Posted by Benny Avelin on 08/03/2017 06:05:21:
... Time to put a makers mark and drill and tap the mounting holes. I am quite surprised at how straight the stamping became...Nice work Benny. How do you keep your stamping so neat? My efforts are drunk in comparison. Dave |
| Benny Avelin | 12/03/2017 12:28:32 |
| 80 forum posts 86 photos | Posted by SillyOldDuffer on 12/03/2017 10:02:48:
Nice work Benny. How do you keep your stamping so neat? My efforts are drunk in comparison. Dave Thanks Dave. I have to say I don't really know, it is almost a hit and miss procedure. This one came out really nice according to my standards, even though they have in average improved through training they often have at least one letter that looks drunk. I do stamping freehand and usually scribe a line to follow, then when I place a letter I try to look from the side to see where the edge of the letter is and just judge the distance to the previous letter and the scribed line. Getting the letter straight is easily done by gauging the square shank of the stamp against the scribed line.
|
| Tim Stevens | 12/03/2017 12:33:39 |
1779 forum posts 1 photos | Benny - there is another reason why large diameter steel is not the same as small, as regards tensile strength and some other characteristics. This is because the large bar is likely to be made from a large billet given a heat treatment. Any change in temperature in this process takes time to be conducted through from the outside (where the change starts) to the inside. With a small bar - likely to be heat treated as a small bar - the distance is shorter and so the changes take place more quickly. And the speed of the change can make a big difference to the effect. A second cause with some material is the rate of cooling (and therefore the crystal size and composition) when a billet is cast. A big casting is never as good in the middle as it is around the outside, and this effect can persist as the cast steel is rolled to size. I'm not saying you are wrong - just that there is (as too often) more to it than that. Cheers, Tim |
| Benny Avelin | 12/03/2017 21:31:38 |
| 80 forum posts 86 photos | Tim, those as excellent points! I actually found some research papers on the second cause. I.e. The residual stress in hot rolled profiles due to the uneven cooling, in that case the made the simplification that the profile is rolled and left in a hot annealed state and then cooled by advection, this then caused the uneven residual stress. |
| Benny Avelin | 13/03/2017 05:32:42 |
| 80 forum posts 86 photos | This is the paper I was talking about, the pictures are at the end. Specifically see page 80 for a rectangular plate. |
| Benny Avelin | 16/03/2017 08:41:28 |
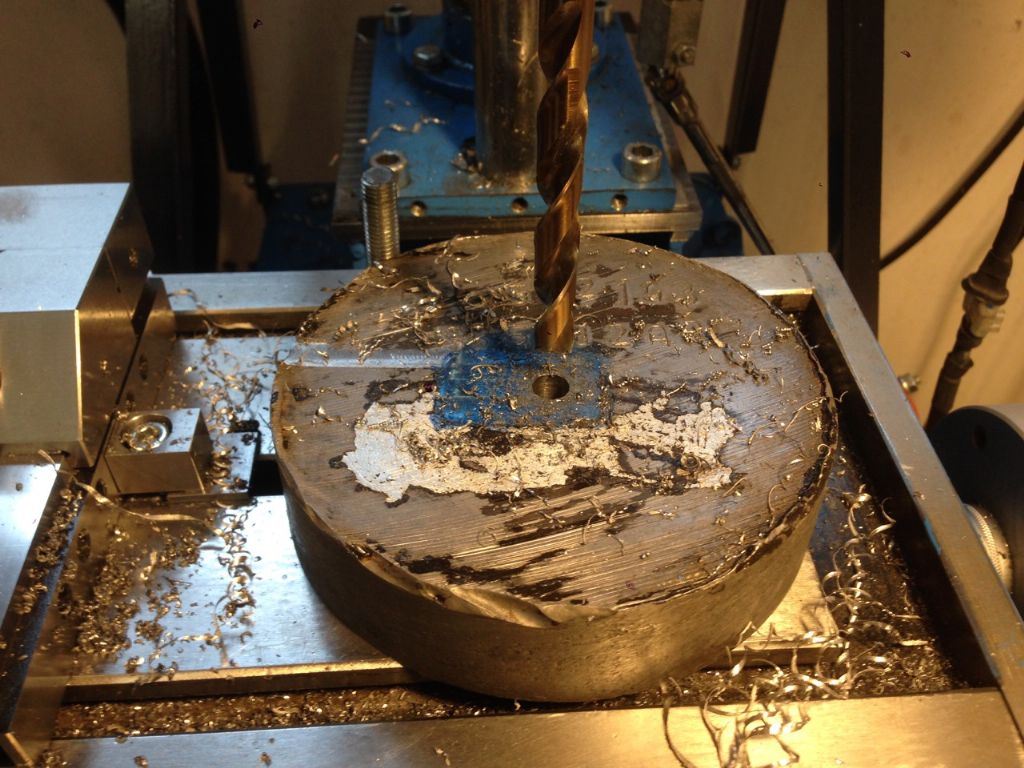
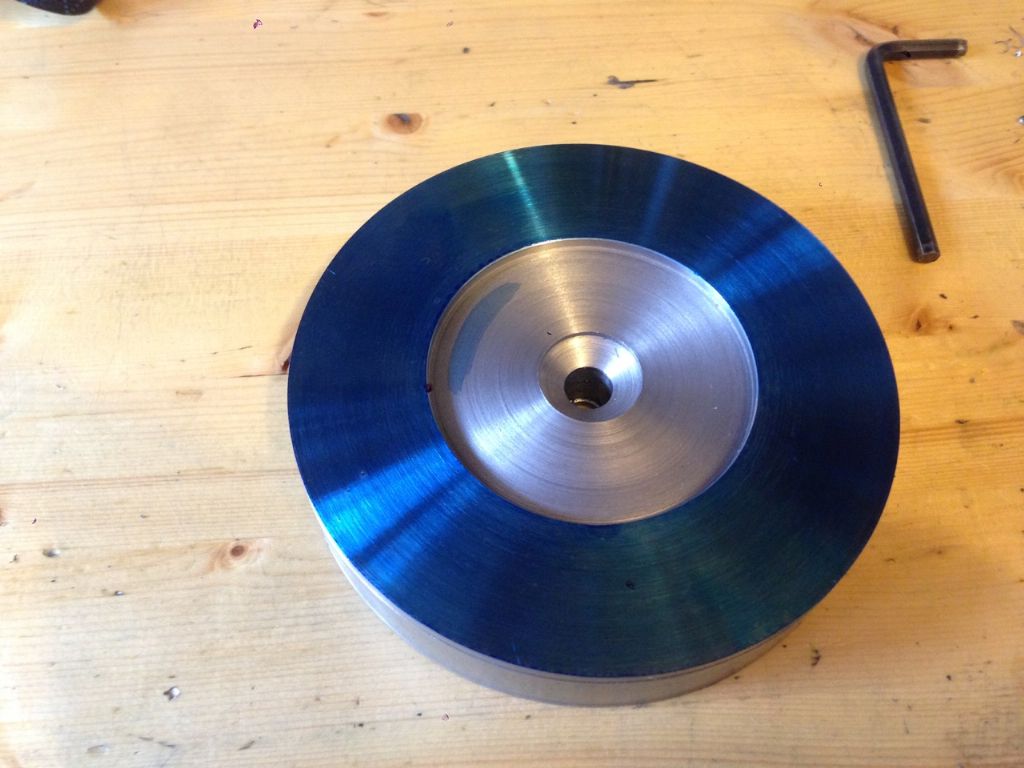
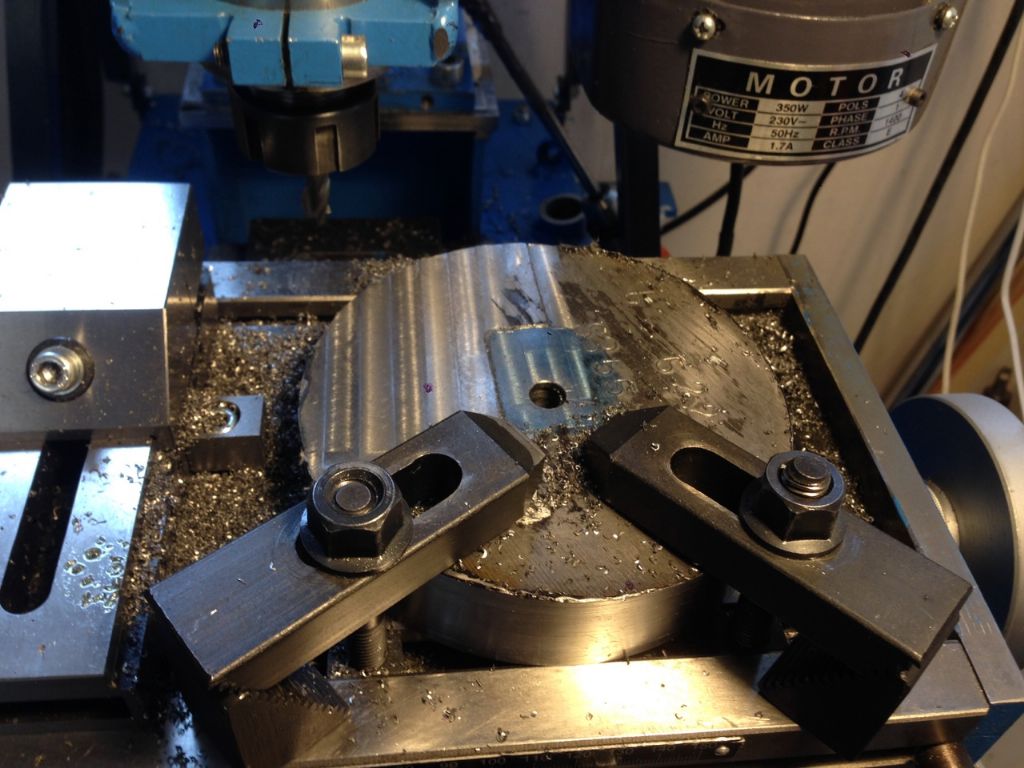
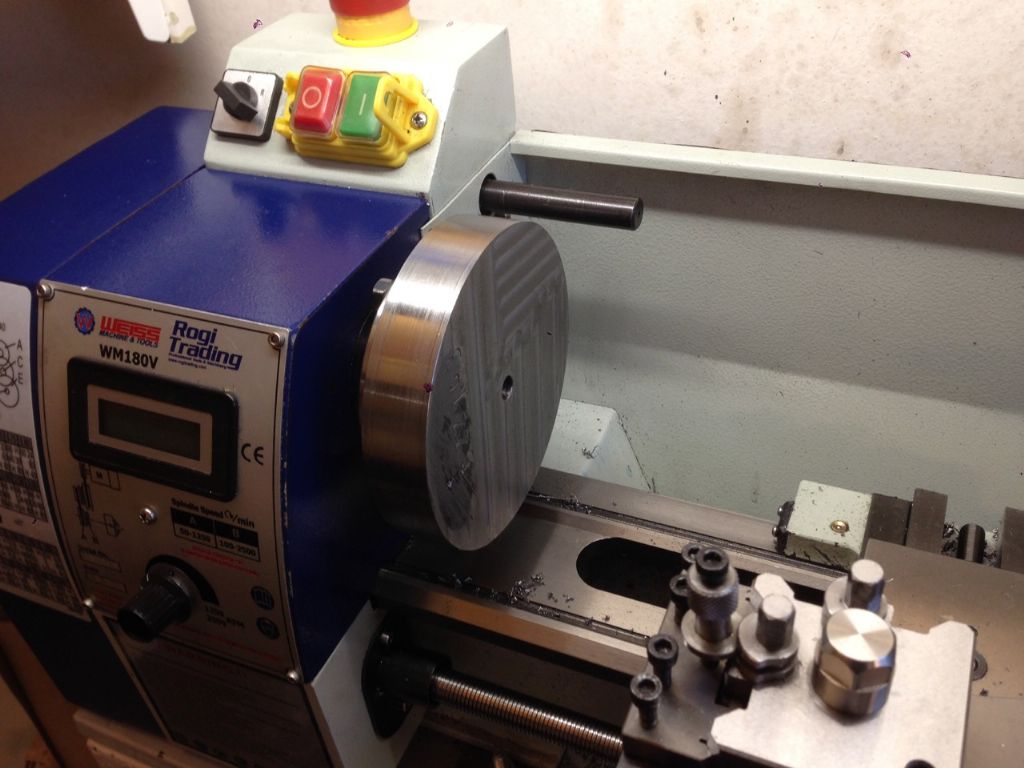
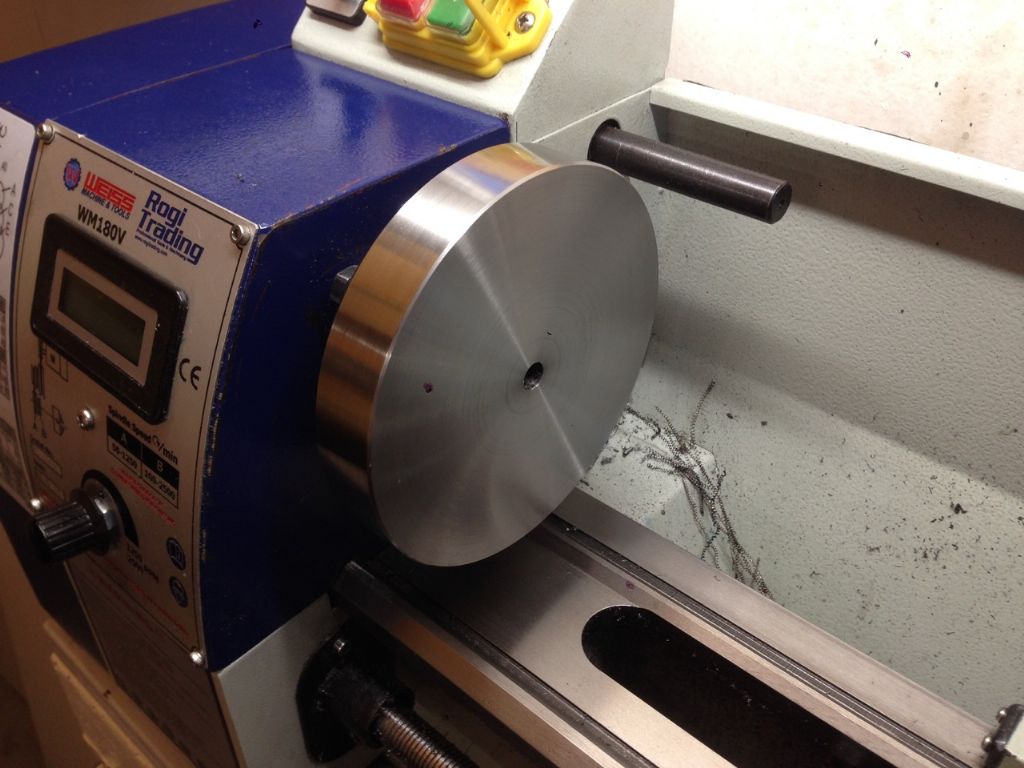
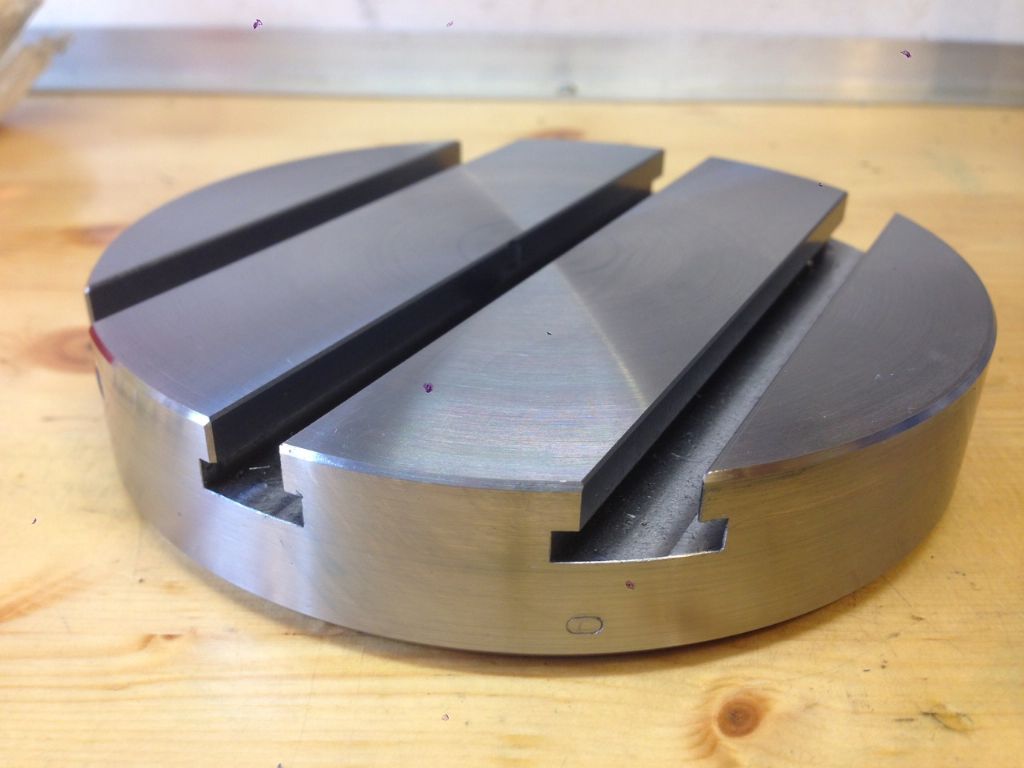
| 80 forum posts 86 photos | Recently I have had a lack of time in the shop, but I managed to get some time to work on the faceplate. First I drilled and reamed a 10mm hole and milled a flat around the hole. I then pressed this onto a turned spigot and proceeded to face off and prepare the step for the spindle. The reason for the spigot is that I cannot mount this large piece in any reasonable way on the lathe. However drilling the mounting holes I needed to keep the disc flat on the milling table and since this is a scrap piece, actually the end of a bar I had to mill the other side reasonably flat before drilling the holes for the mounting screws. This is where I realized that end-pieces can be quite tricky. One of the edges had a moon shaped inclusion of steel that was noticeably harder than the bulk material, had to take it slow on my less than rigid milling machine. I then drilled the mounting holes and put it on the lathe. This is where I again noticed the problem with the hard inclusion, it showed up when turning. Even though I was taking material off the whole diameter the lathe sounded like it was taking a mild interrupted cut and the finish was terrible on the harder part. I hope it will not come back and bite me but I just decided to polish the surface until everything looked homogeneous. I decided that the next step will be to mill t-slots in the faceplate. On the Myford you have a threaded spindle so the faceplate for that can have slots all the way through and almost all the way down to the centre of the plate. However these mini-lathes have this rediculous backplate making the faceplate concept less then ideal, therefore t-slots will allow me to move the mounting points as I please. I will be making the t-slots to the Myford dimensions to improve compatibility of things.
Btw. In all my photos you will find splotches, this is due to my broken camera that I have not taken the time to fix (Iphone). Apparently a new camera costs about 10 £, but you have to disassemble most of the phone to get to it. Maybe I will take the effort at some point. Edited By Benny Avelin on 16/03/2017 08:43:40 |
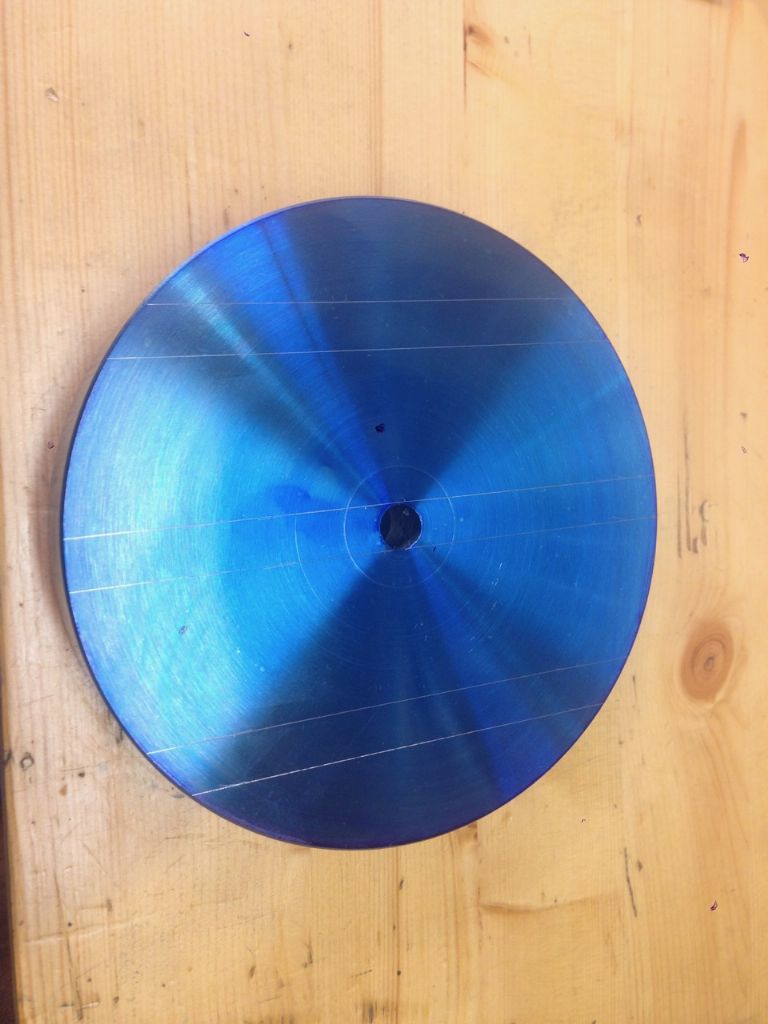
| Benny Avelin | 18/03/2017 15:07:25 |
| 80 forum posts 86 photos | I have now milled the T-slots. Wow that was time consuming Of course it got crooked after milling. So now how do I get it straight again? Maybe I should try to straighten it by pressing or should I just mount it back on the lathe back plate and that would maybe make it straight, as long its on the lathe. |
Please login to post a reply.
Want the latest issue of Model Engineer or Model Engineers' Workshop? Use our magazine locator links to find your nearest stockist!
Sign up to our newsletter and get a free digital issue.
You can unsubscribe at anytime. View our privacy policy at www.mortons.co.uk/privacy
- hemingway ball turner
04/07/2025 14:40:26 - *Oct 2023: FORUM MIGRATION TIMELINE*
05/10/2023 07:57:11 - Making ER11 collet chuck
05/10/2023 07:56:24 - What did you do today? 2023
05/10/2023 07:25:01 - Orrery
05/10/2023 06:00:41 - Wera hand-tools
05/10/2023 05:47:07 - New member
05/10/2023 04:40:11 - Problems with external pot on at1 vfd
05/10/2023 00:06:32 - Drain plug
04/10/2023 23:36:17 - digi phase converter for 10 machines.....
04/10/2023 23:13:48 - More Latest Posts...
- View All Topics
- Reeves** - Rebuilt Royal Scot by Martin Evans
by John Broughton
£300.00 - BRITANNIA 5" GAUGE James Perrier
by Jon Seabright 1
£2,500.00 - Drill Grinder - for restoration
by Nigel Graham 2
£0.00 - WARCO WM18 MILLING MACHINE
by Alex Chudley
£1,200.00 - MYFORD SUPER 7 LATHE
by Alex Chudley
£2,000.00 - More "For Sale" Ads...
- D1-3 backplate
by Michael Horley
Price Not Specified - fixed steady for a Colchester bantam mark1 800
by George Jervis
Price Not Specified - lbsc pansy
by JACK SIDEBOTHAM
Price Not Specified - Pratt Burnerd multifit chuck key.
by Tim Riome
Price Not Specified - BANDSAW BLADE WELDER
by HUGH
Price Not Specified - More "Wanted" Ads...
Do you want to contact the Model Engineer and Model Engineers' Workshop team?
You can contact us by phone, mail or email about the magazines including becoming a contributor, submitting reader's letters or making queries about articles. You can also get in touch about this website, advertising or other general issues.
Click THIS LINK for full contact details.
For subscription issues please see THIS LINK.
Model Engineer Magazine
- Percival Marshall
- M.E. History
- LittleLEC
- M.E. Clock
ME Workshop
- An Adcock
- & Shipley
- Horizontal
- Mill
Subscribe Now
- Great savings
- Delivered to your door
Pre-order your copy!
- Delivered to your doorstep!
- Free UK delivery!



 Register
 Log-in


