Member postings for John Purdy
Here is a list of all the postings John Purdy has made in our forums. Click on a thread name to jump to the thread.
| Thread: Three Cylinder Steam Aero Engine |
| 17/03/2021 02:58:03 |
|
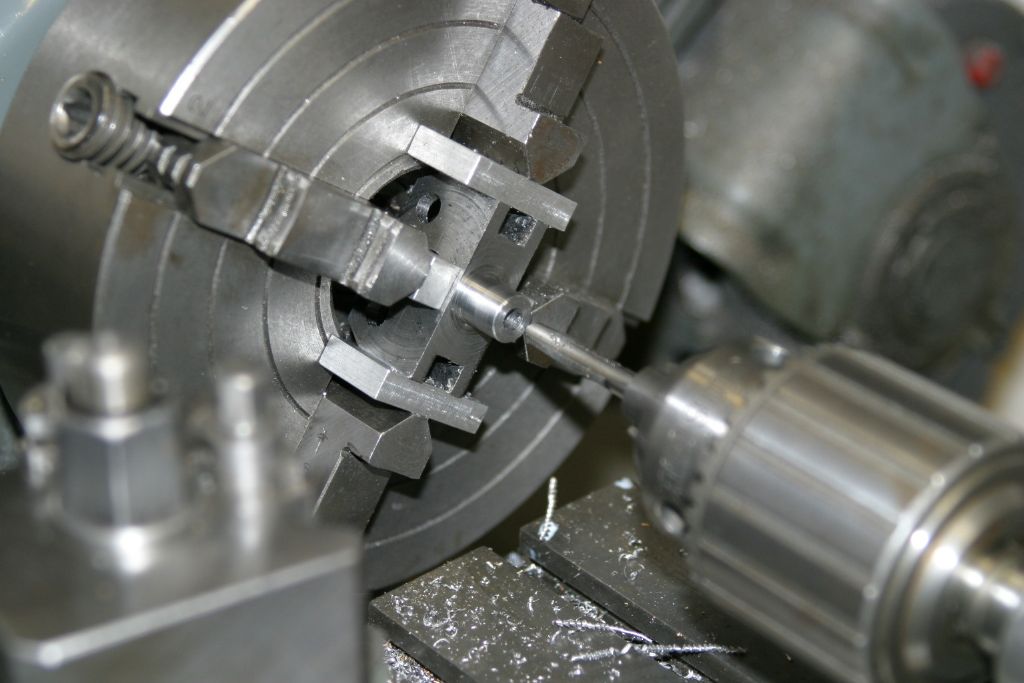
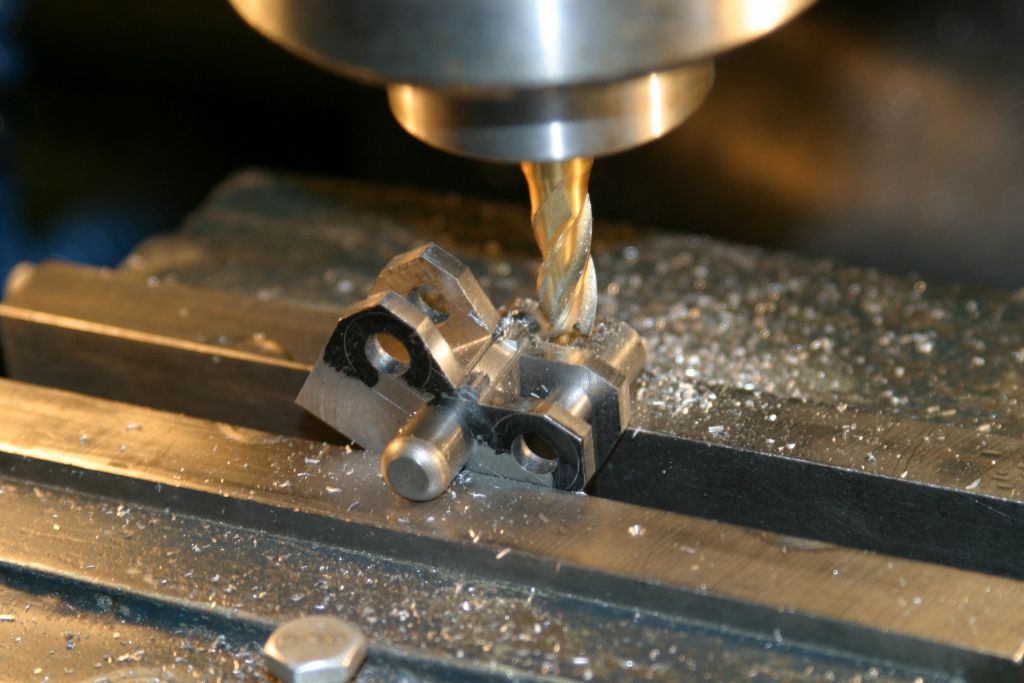
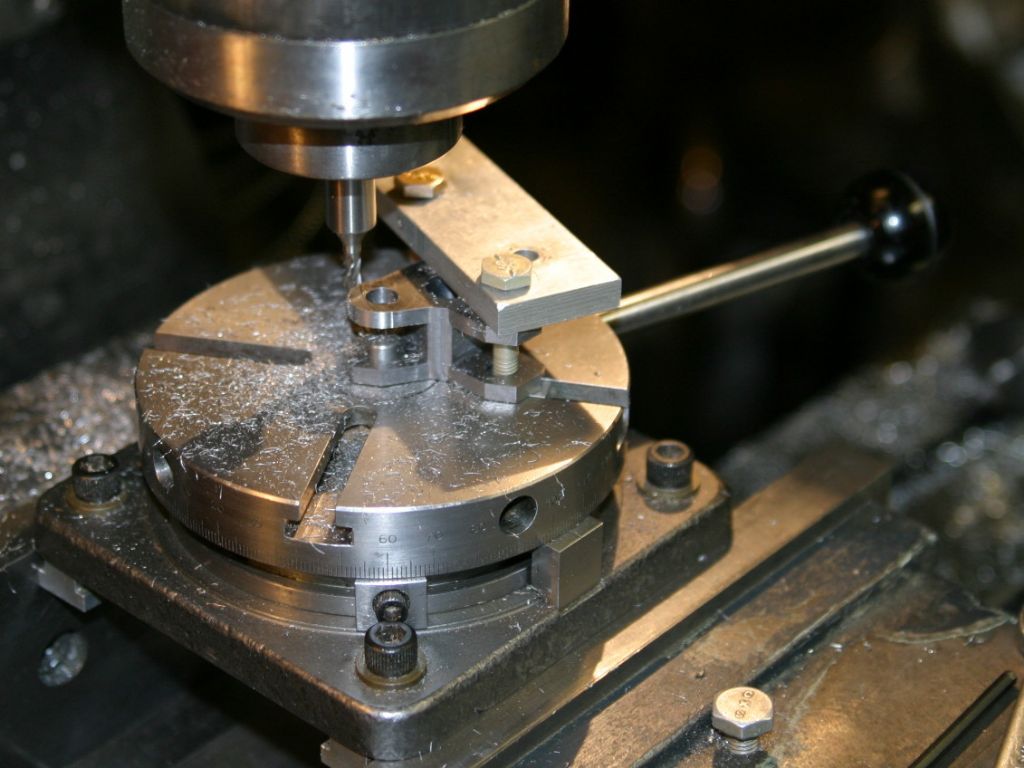
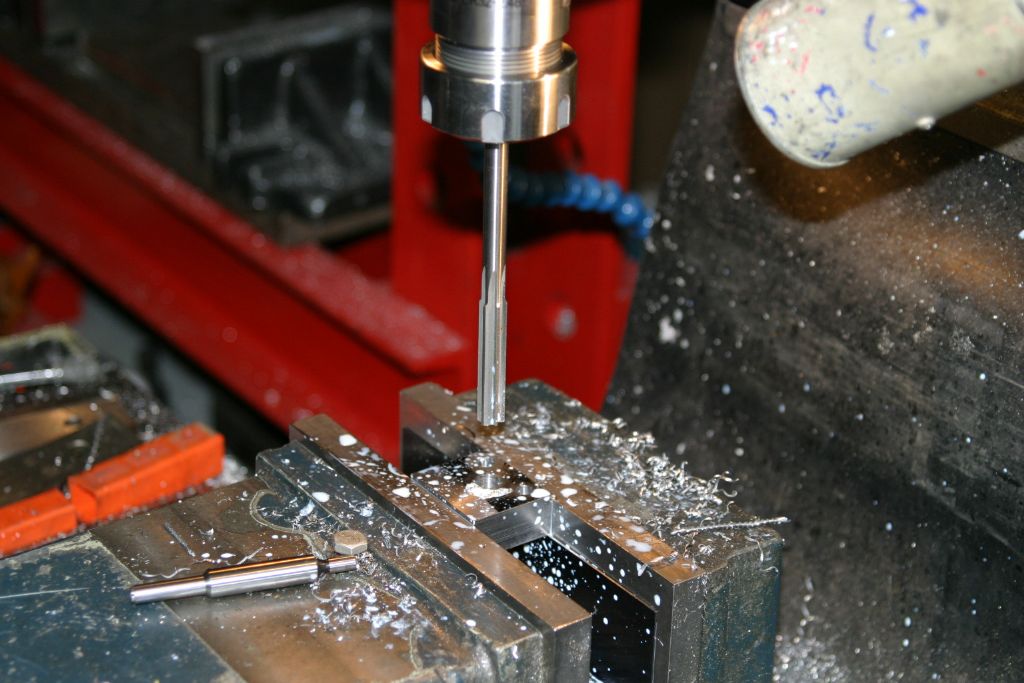
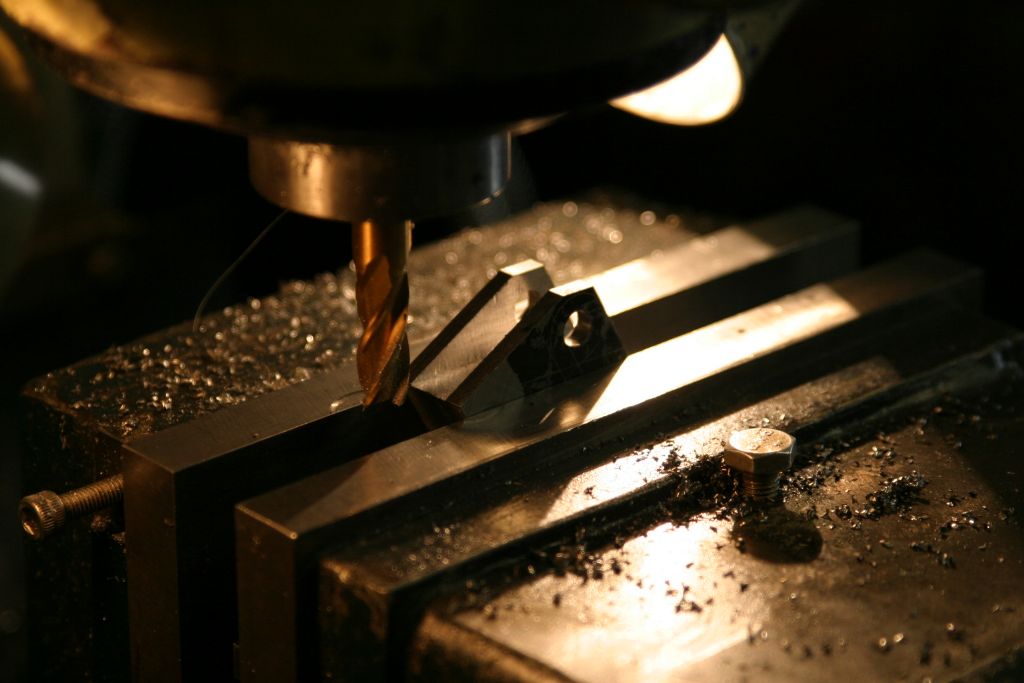
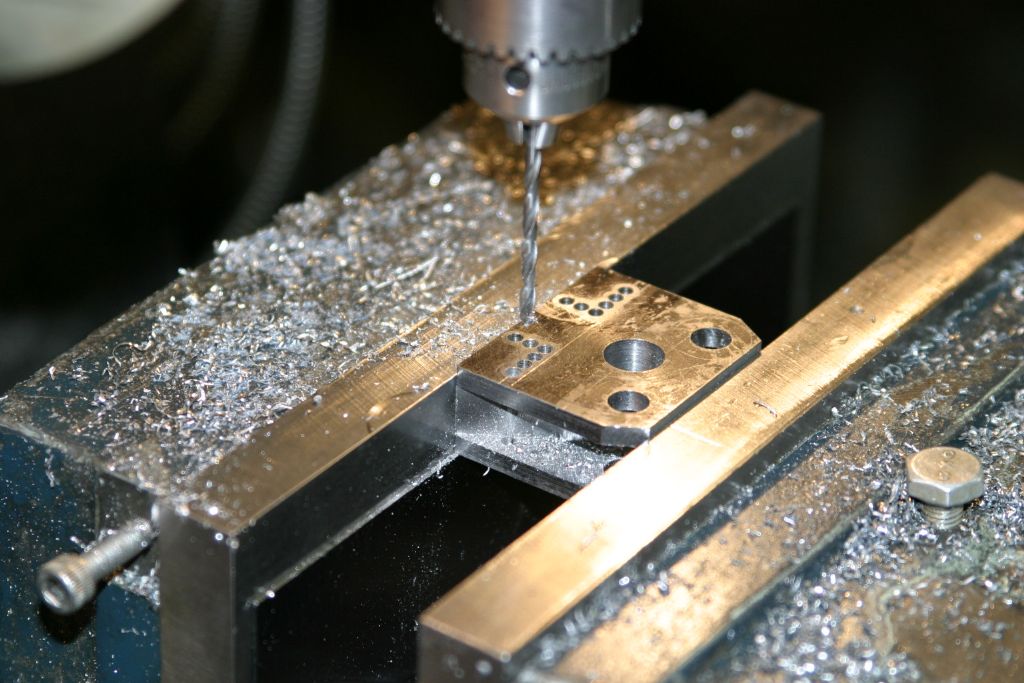
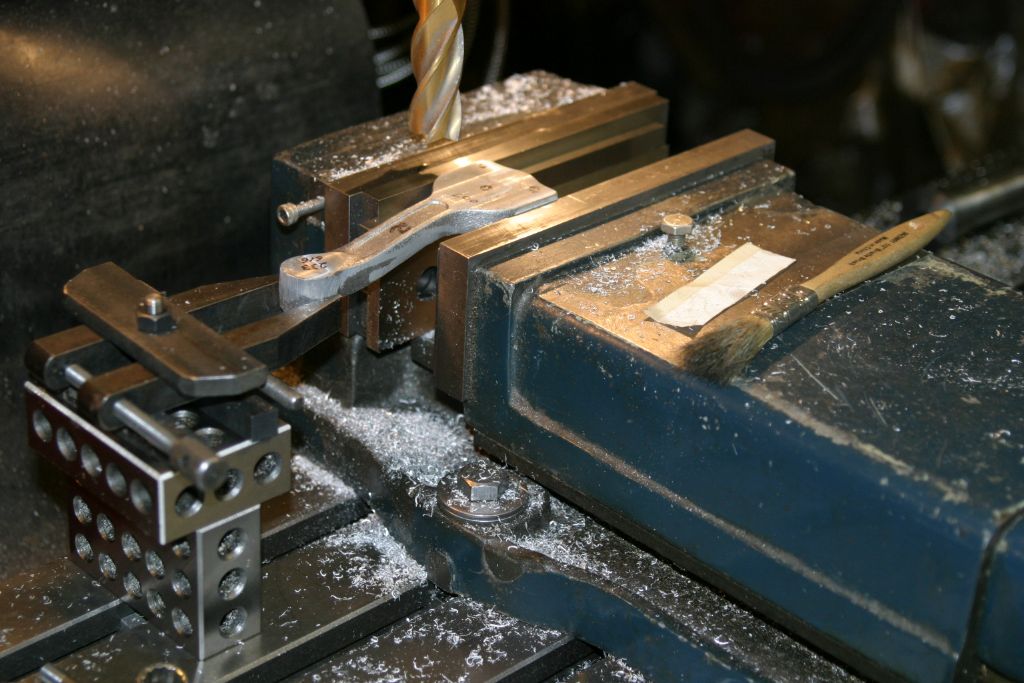
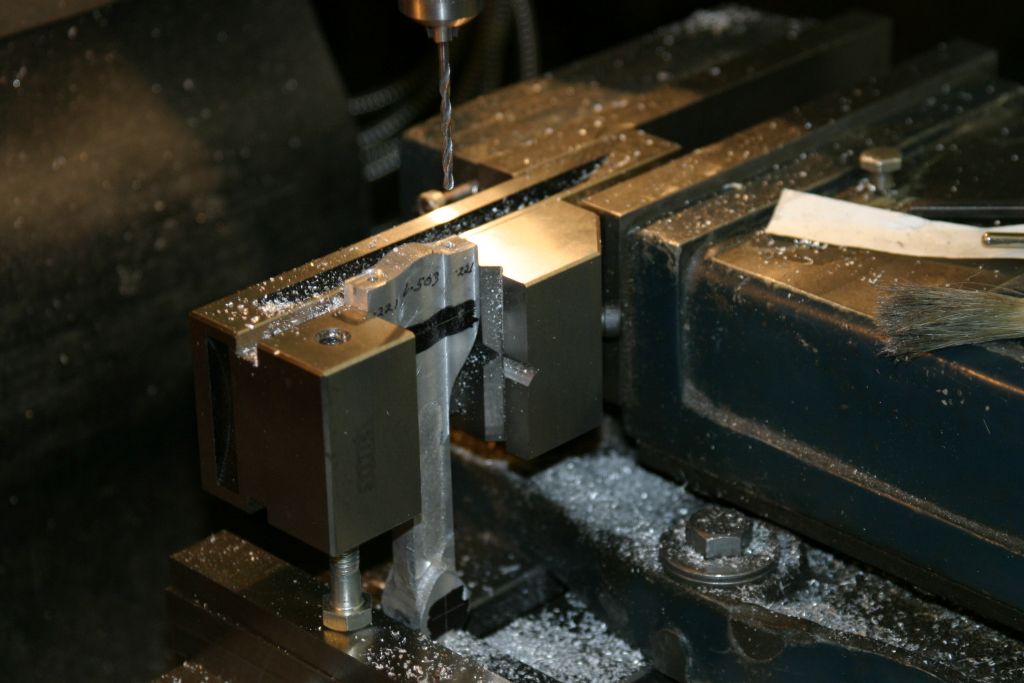
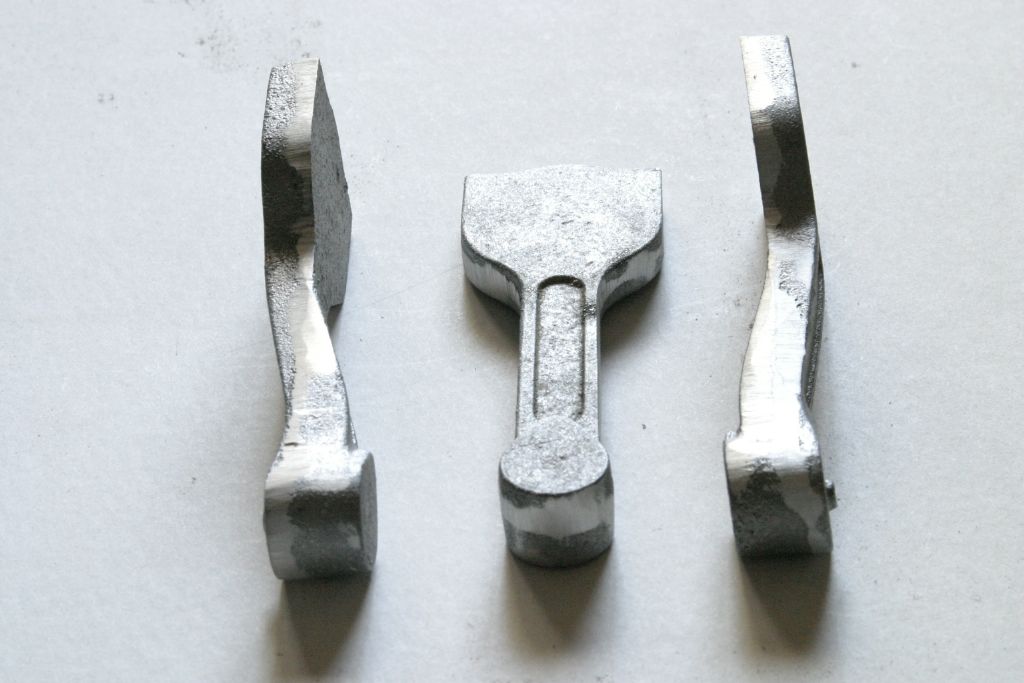
The bottom face has been cleaned up to dimension and the boss turned and drilled #10 ready to tap 7/32-40 for the valve rod. To profile the outside, a button .480" dia. with a .250" spigot was machined up from a scrap of 1/2" rod to use as a jig to mark out the profile of the top of the "ears" around the 1/4" holes to act as a guide for milling the sides to the right width. Short lengths of 3/8" and 1/4" rods were placed in the centre 3/8" and one of the two 1/4" holes and the eccentric was clamped in the mill vice with the ends of the rods hard against the top of the vice jaw, but with the 1/4" rod sitting on a 1/16" shim. This makes the centre lines of the two holes parallel to the horizontal table movement enabling the sides of the ears to be milled to dimension and at the right angle. The setup was then repeated for the other 3 sides. Milling out the inside sides of the ears using the setup as outlined above. Now to turn it horizontal with a pin in each of the 1/4" holes resting on the vice jaw to mill out the pip left in the centre using an 1/8" end mill. The eccentric was then turned over to mill the outside profile. Mounted on a 1/4" pin in the centre of my small 4" rotary table, the ends of the ears were rounded off using an 1/8" end mill.
Edited By John Purdy on 17/03/2021 02:59:55 |
| Thread: Accuracy to be expected from a 0-1" travel DTI |
| 16/03/2021 17:12:24 |
I have three dial indicators and just out of curiosity I just checked them. Two are 1" travel of Chinese manufacture and one is a 1/2" travel UK "Oldak". One Chinese is spot on and the other is 1/2 thou low using a 1" slip gauge. The 1/2" one reads 1 thou over using a .500" slip gauge. John |
| Thread: Three Cylinder Steam Aero Engine |
| 14/03/2021 02:39:55 |
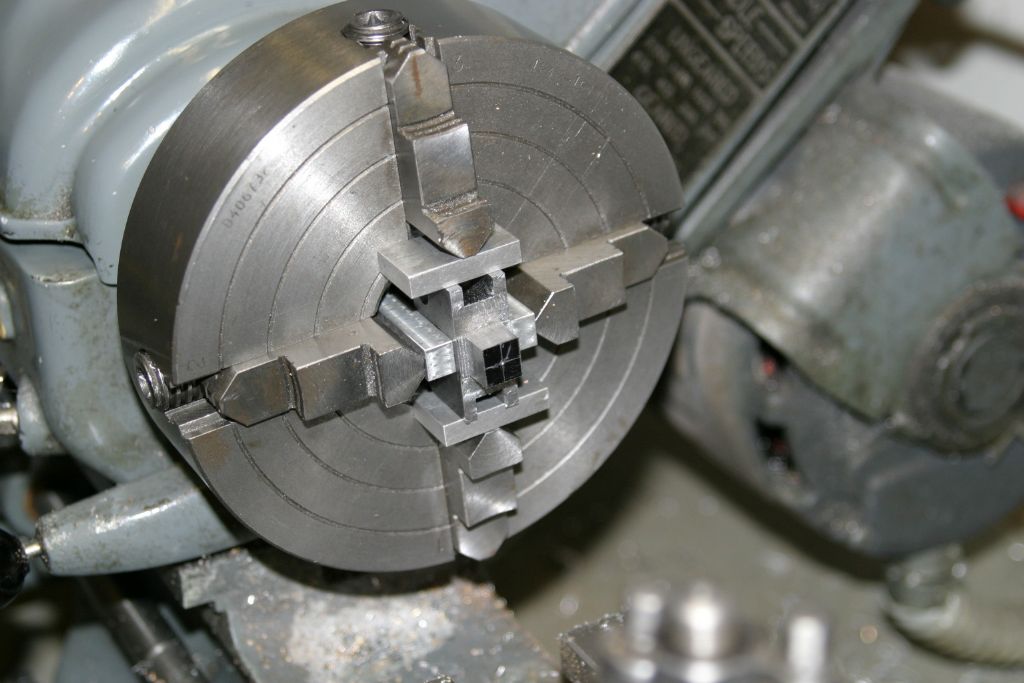
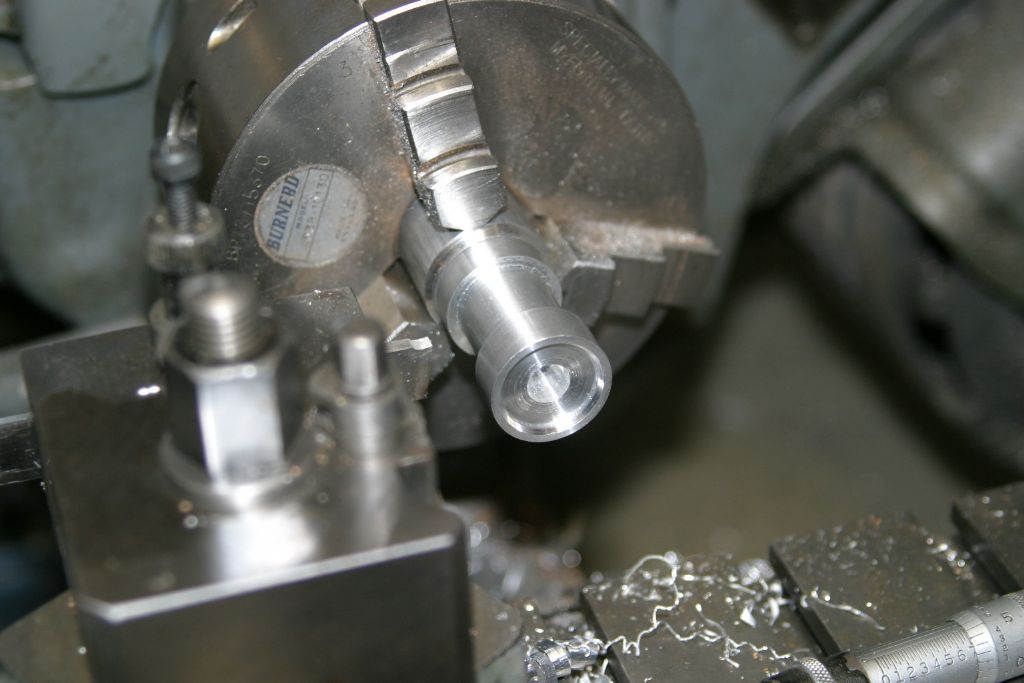
Started on the "eccentric" unit. Found a piece of 3/4" thick 4" x 10" steel of unknown parentage that had been flame cut out of some plate, so rather than fabricate it I've hack sawed a piece off and will hack it out of the solid. I've squared up a piece to 1.520" x 1.300" x .625" and its definitely not free cutting steel, its pretty tough. Wonder how my end mills will hold up? After marking out, the blank was mounted in the mill and, using coordinates, the .375" hole for the eccentric pin bush and the two .250" holes for the two upper pivot pins for the valve rod ends were drilled and reamed. The lower valve rod is threaded into a boss in the bottom of the unit. Set up in the mill vice at a 60 degree angle to mill out the first slot for the valve rod end with a 5/16" end mill. The 5/16" was switched for an 11/32" end mill which was run through the middle of the slot at full depth and then the slot was widened out to the plan dimension of .350" by taking cuts from each sides ensuring that the two ears ended up the same thickness. Note was made of the X axis DRO readings on the final pass on each side so the other slot would end up the same width. The block was then turned over 60 degrees the other way to do the slot on the other side. Chain drilling before sawing out the excess in the bottom corners in preparation for mounting in the 4 jaw to turn, drill, and tap the boss on the bottom for the fixed valve rod. Before mounting in the 4 jaw it was back to the mill to clean up the rough edges and leaving it about .010" oversize for finishing. At the same time the width of the centre boss was brought to .420" to make it roughly square so there would be less kerchunking while turning it round to .400" dia. in the 4 jaw. Set in the 4 jaw ready to clean up the bottom face to dimension and turn the boss to .400" diameter, then drill and tap 7/32-40 for the inner end of the lower valve rod. The drawings call for each end of the valve rods to be threaded 12-28 but I have made the outer ends 12-28 but the inner ones 7/32-40 (#12 is .216 dia.). This will give a finer adjustment of the valve position. |
| Thread: Is this a daft idea please? |
| 05/03/2021 17:55:40 |
Tifa 8572 When I bought my mill, similar to the Warco VMC or Chester 830VS. which weighed 1350 lbs (612 Kg) I had to move it from my garage into the basement of the home I was renting. I disassembled it into its major pieces. All the pieces were light enough to carry except the cast iron base which required a dolly. It worked with no problems and had the added advantage that the bits could be given a good clean to remove the shipping dirt and grim from its trip from Taiwan. The same thing was done when I moved from Winnipeg out here to BC so the movers could get it out of the basement.. You should have seen the look on the movers faces when they first saw it in the basement! It hasn't suffered in the least. From My experience I say go for it. John |
| Thread: Delay to Issue 299 |
| 01/03/2021 17:27:43 |
Here on the west coast of Canada finally received 299 last Friday, still waiting on 300 and 301. Last ME received was 4655 (1 Jan) a week ago. I subscribe to 6 periodicals, 3 from the UK, 2 from US and one from Canada. Over the past year I have received them all in a timely manner EXCEPT those from My Time Media, strange. John Edited By John Purdy on 01/03/2021 17:32:23 |
| Thread: Three Cylinder Steam Aero Engine |
| 28/02/2021 18:38:44 |
I have given it some thought but a scale prop would be 24" in dia 4 blade. A major project in itself. I seem to recall some details of making a prop in a past issue of ME. I believe it was in conjunction with Blackmore's rotary engine, will have to dig it out. |
| Thread: Taper angle/length for spindle handle lock? |
| 28/02/2021 18:03:58 |
I made mine, many years ago, basically to G H Thomas's design (in Model Engineers Workshop Manual) and it uses a taper of 20 degrees included. I only tighten it up with finger pressure and has worked well but occasionally slips if I'm asking too much of it, like tapping a 3/8" hole. I made the tommy bar in the end of the drawbar 1 3/4" log overall but it would be better if it was longer which would allow it to be tighten a little more The slits in mine are just over 2" long John. |
| Thread: Three Cylinder Steam Aero Engine |
| 28/02/2021 01:47:30 |
|
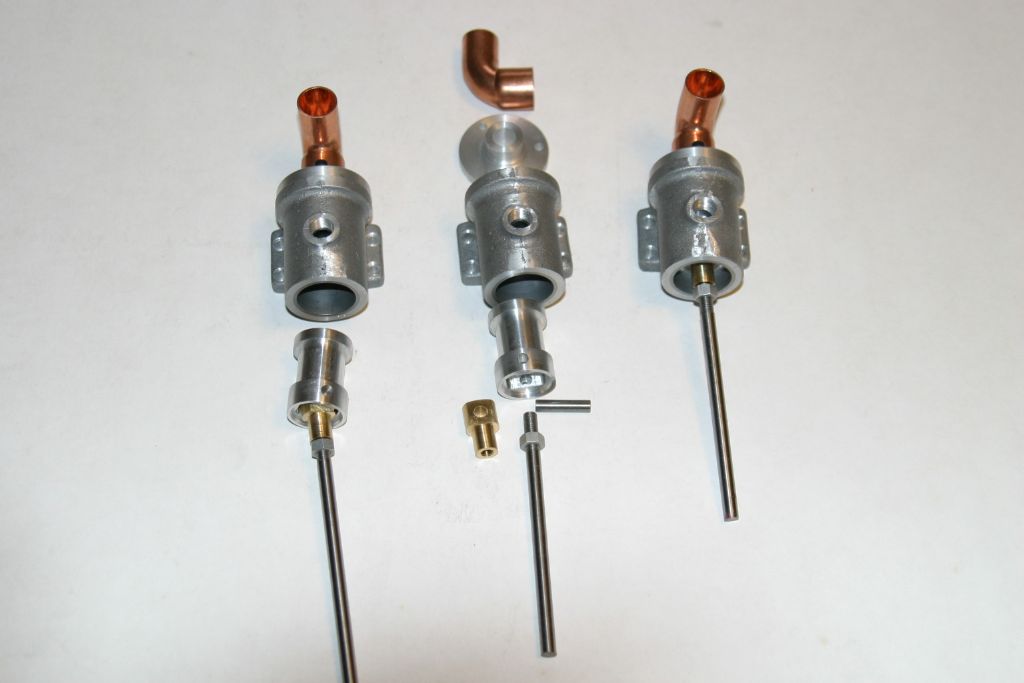
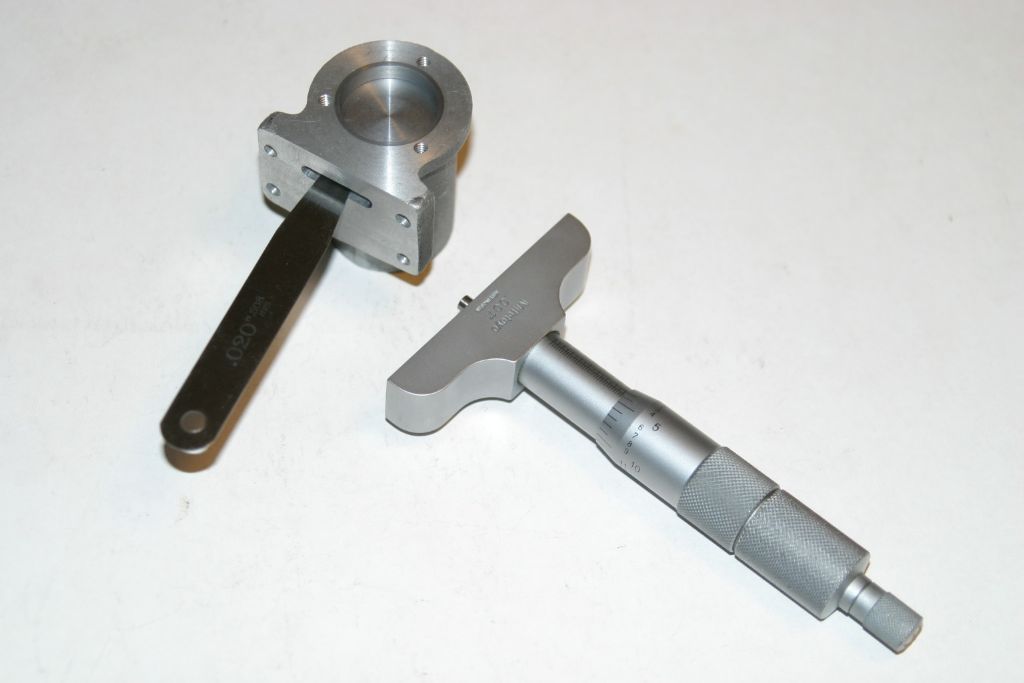
The completed valve bodies and valves. The bottom end of the valve rods still need to be cut to length and threaded. Have to wait till the eccentric is done to check the measurements. After some head scratching I came up with this idea. Before mounting the valve body and valve on the engine, put the valve in the body and push it up till the upper land is above the port, then with a .020" feeler gauge inserted in the port, push the valve down till it traps the feeler. With a depth mike measure the distance from the top of the valve to the top of the valve body. In this case the mike read .179" therefore with the the engine assembled, if the valve is set with the piston at TDC so that the distance from the top of the valve to the top of the valve body is .199" (.179 + .020 for the feeler gauge) then the port should be just opening. That's the theory anyway! Now to tackle the "eccentric". I think it will have to be fabricated as I don't have any suitably sized material to hack it out of the solid.
|
| 24/02/2021 23:09:20 |
|
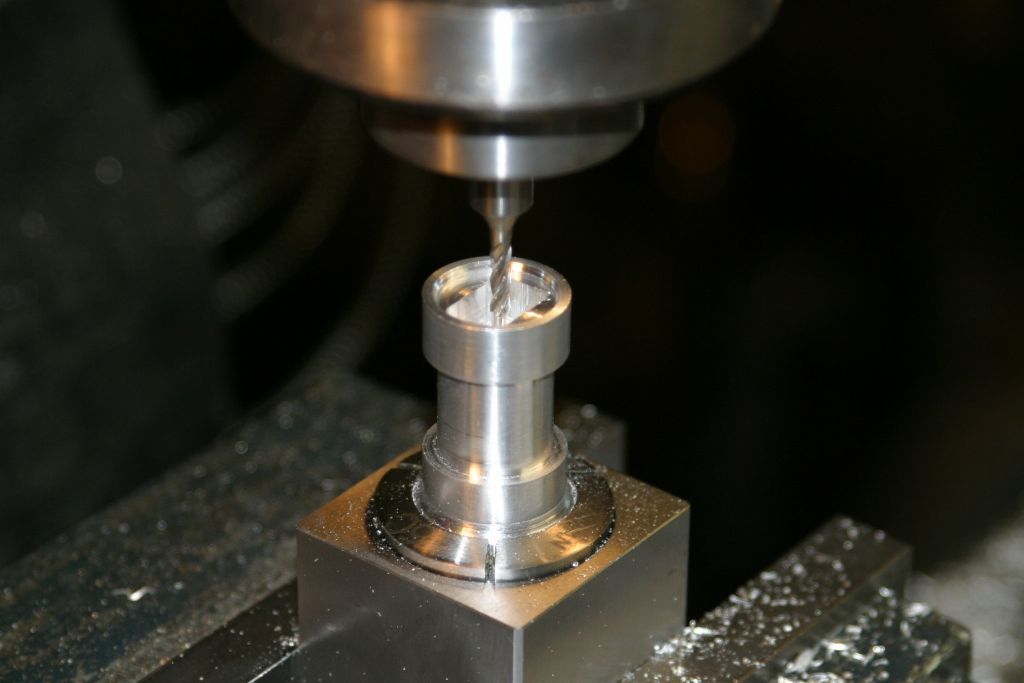
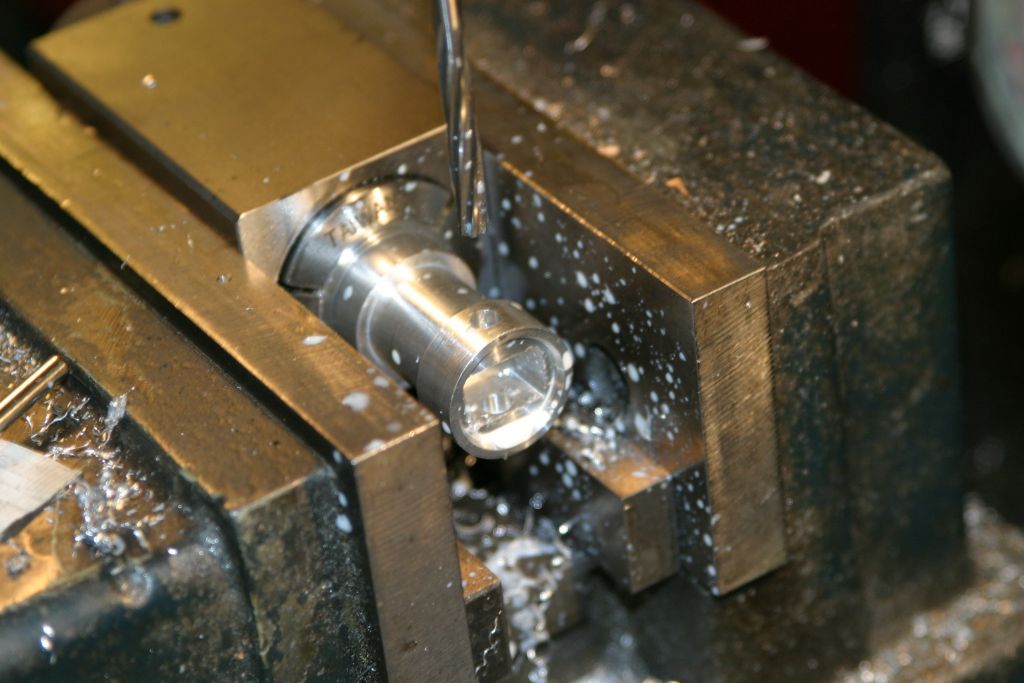
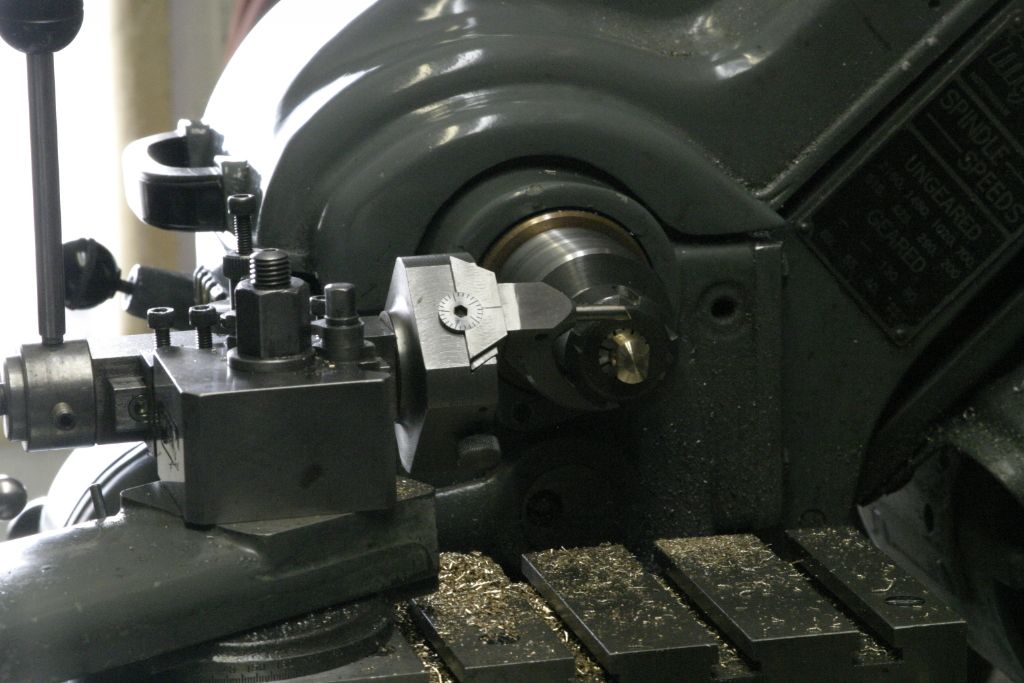
Turning the OD of the valves for a -.0005" fit in the valve bodies from 1" dia.6061 T6 .aluminum rod. Held in a 1" 5C collet in a collet block the valve was set vertically in the mill to mill out the pocket for the valve rod head. A 5/16" slot drill was first used to mill out the recess to the finished dimensions of .560"x.380"x.500" deep, opening out the 5/16" hole previously drilled while turning the OD in the lathe. The 5/16" end mill was switched to an 1/8" end mill to clean out the corners to give clearance for the valve rod head to rock back and forth. The plans show the corners as square, not quite sure how this would be done other than perhaps planning? A quick calculation shows that the valve rod swings through an arc of about 7 degrees as the eccentric rotates and a trial fit shows that the 1/16" radius corners provides sufficient clearance to accommodate this. The collet block, now set horizontally, for drilling and reaming for the valve wrist pin. After drilling to .015" under size it was reamed through .1870 then one side opened up with a .1875" reamer. This allows the .1875" drill rod wrist pin to be a push fit through one side and through the valve rod head then to be a press fit into the other side, thus retaining it in place. Now back to the lathe to cut off and face the cut off end to bring the valve to 1.250" long overall. More importantly to have the flange at the top finish at .180" wide as this controls the timing. Finished valve, one down, two more to go. |
| 12/02/2021 06:02:16 |
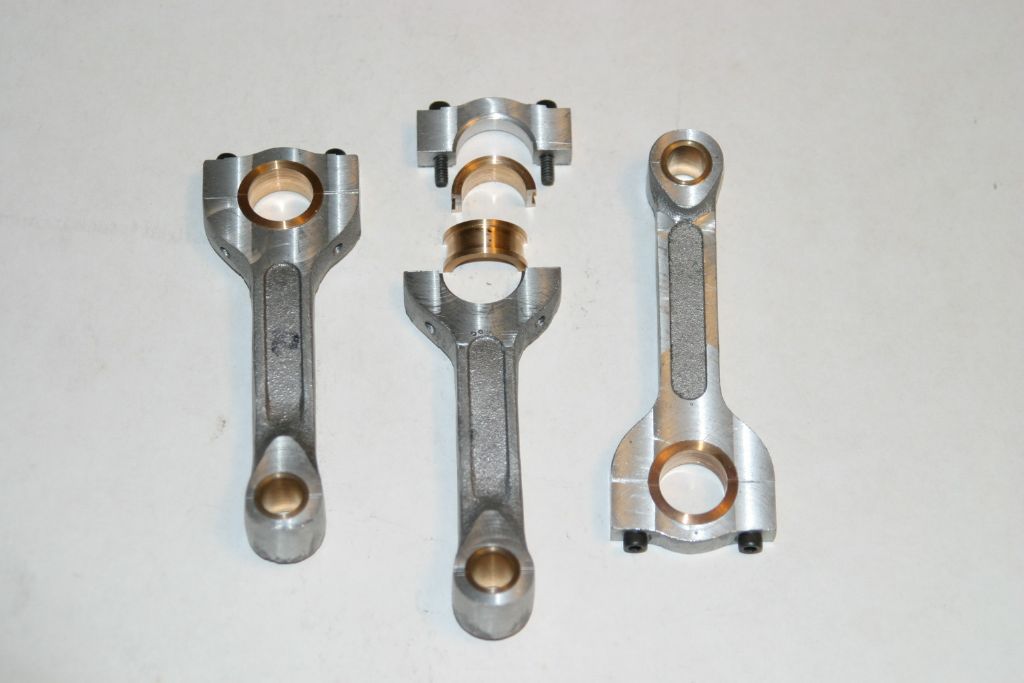
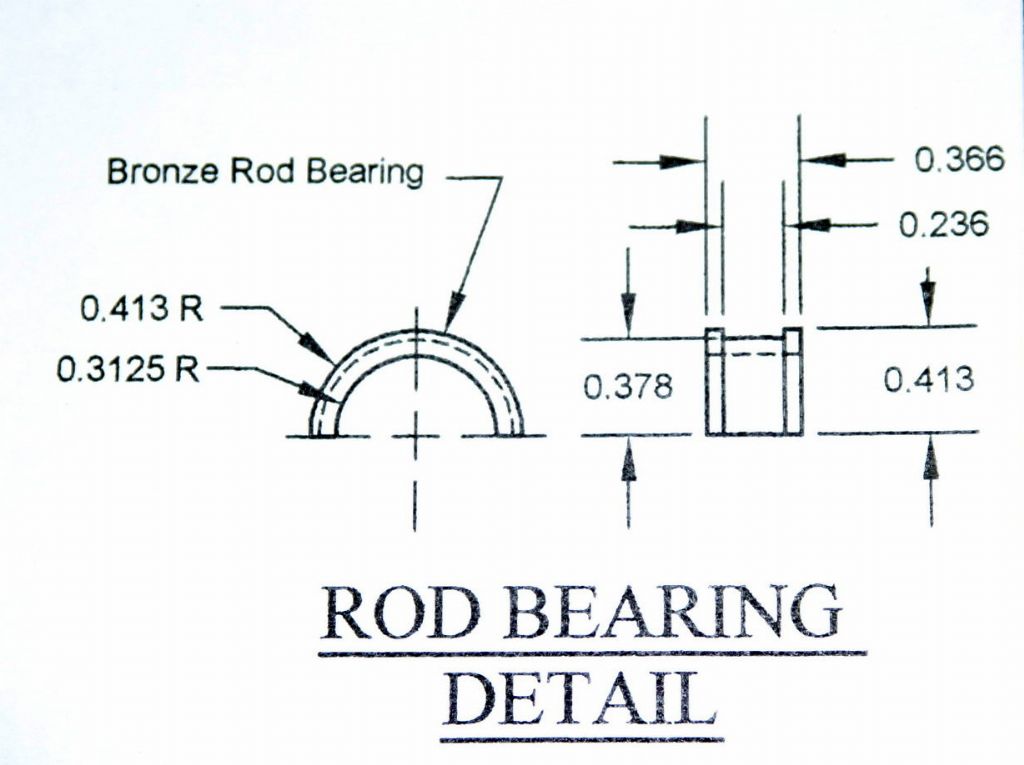
The big end bearings started as a 2" length of 1" dia. bronze rod. It was first drilled through 1/2" and then using a 1/32" slitting saw was split longitudinally in half. Each half was then mounted in the mill vice, with the sawn faces parallel to the table, and cleaned up with an end mill, as I have found a thin slitting saw tends to wander and seldom cuts straight. The two halves were then tinned with 50/50 SnPb solder, clamped together and heated to sweat them together. The bar, now decidedly oval due to the material removed in splitting it, was mounted in the 4 jaw and "centred" using a dial indicator. When I say "centred" I mean the chuck was adjusted so that the readings each side on the split line were the same and the two at 90 deg. were the same. In other words the two high points gave the same reading and the two low points were also the same. This should ensure that the split line is in the middle of the finished bearing. Once set, the OD was skimmed to clean up to be round as far as the chuck jaws. Transferred to the 3 jaw, with the other end (still oval) outward, it was turned down to the same diameter as the first. The centre was then bored out to .656" for a running fit on the crank pin. After boring for the crank pin, the OD was turned to .825" for a running fit in the recesses in the sides of the con rods and then, using a small cutoff tool, the groove was cut and the bearing cut off slightly over length. After all 3 were turned they were mounted one at a time on an expanding mandrel and the cutoff end faced back to give an overall length of .366". They were heated with the torch to separate the two halves and once cool the excess solder was removed by rubbing on a fine file. A trial fit on the crank pin found they all fit and rotate but are a little tighter than I would like so will require some easing. |
| Thread: MEW issue 301 |
| 11/02/2021 18:19:01 |
Here in Canada I have yet to receive 299 or 300 never mind 301! John |
| Thread: Three Cylinder Steam Aero Engine |
| 31/01/2021 01:12:21 |
|
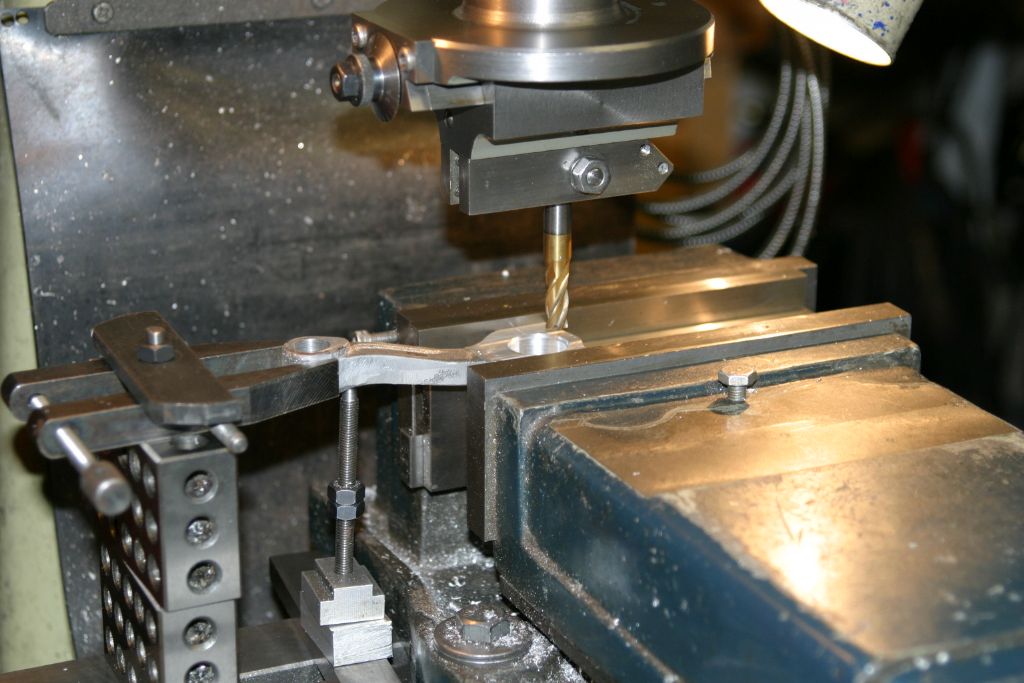
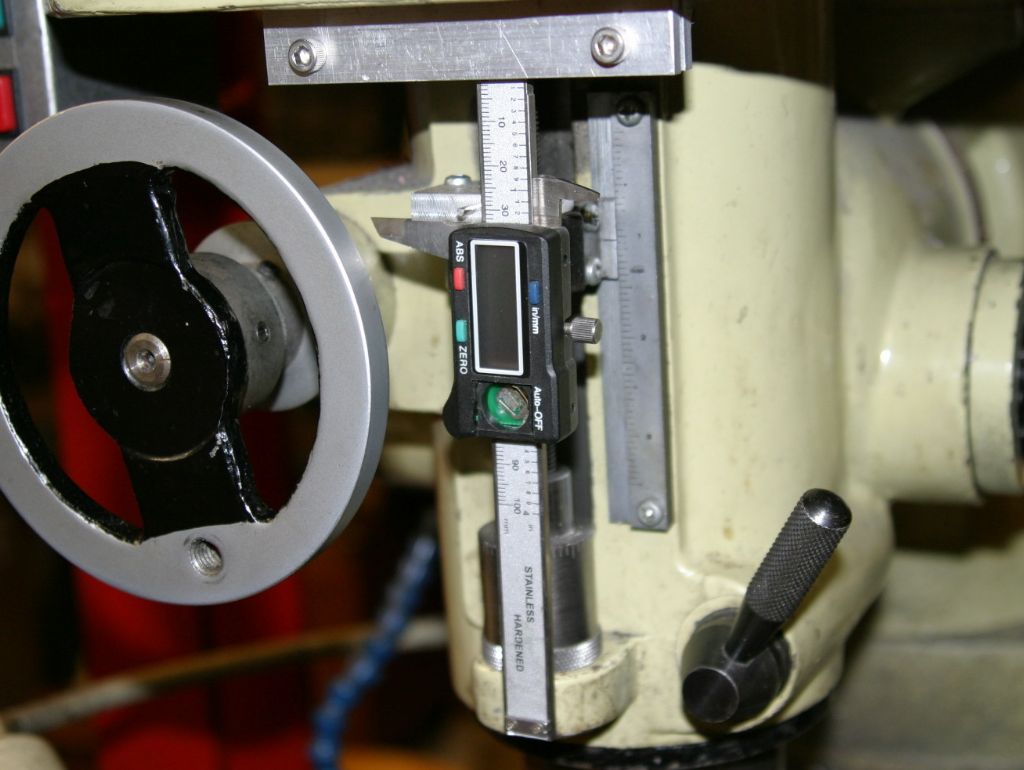
Setup for finishing the bores in the big and little end. Basically the same as for before except note the screw jack under the rod at the little end to counter any potential turning moment from the drilling pressure. The little end was drilled in stages then finished to .500" with a machine reamer. The big end was drilled out to 1/2" then opened up by plunging through with successively larger end mills finishing with a 3/4" one which resulted in the hole being .755" dia. which worked out as the plans call for it to be .756", why not .750" I have no idea. Each side has a .826" diameter x .050" deep recess cut around the hole for the flanges of the big end bearings. This was machined using one tooth of a 5/16" end mill in the boring head as a cutter to produce a flat bottom to the recess with the depth being controlled with my homebrew DRO on the quill. My homebrew DRO on the quill. A 4" digital caliper with the jaw moved down the scale by a pin in the existing depth indicator connected to the quill. Works well except that the readout is a little awkward to read as it is vertical but I made it long before digital readout bars were available with horizontal displays. The con rods finished, little end bushings pressed in and waiting for the split big end bearing shells.
The big end bearing shells, the next job. Bronze is called for and I think I have some, if I can't find it brass will have to do. |
| 27/01/2021 00:46:37 |
|
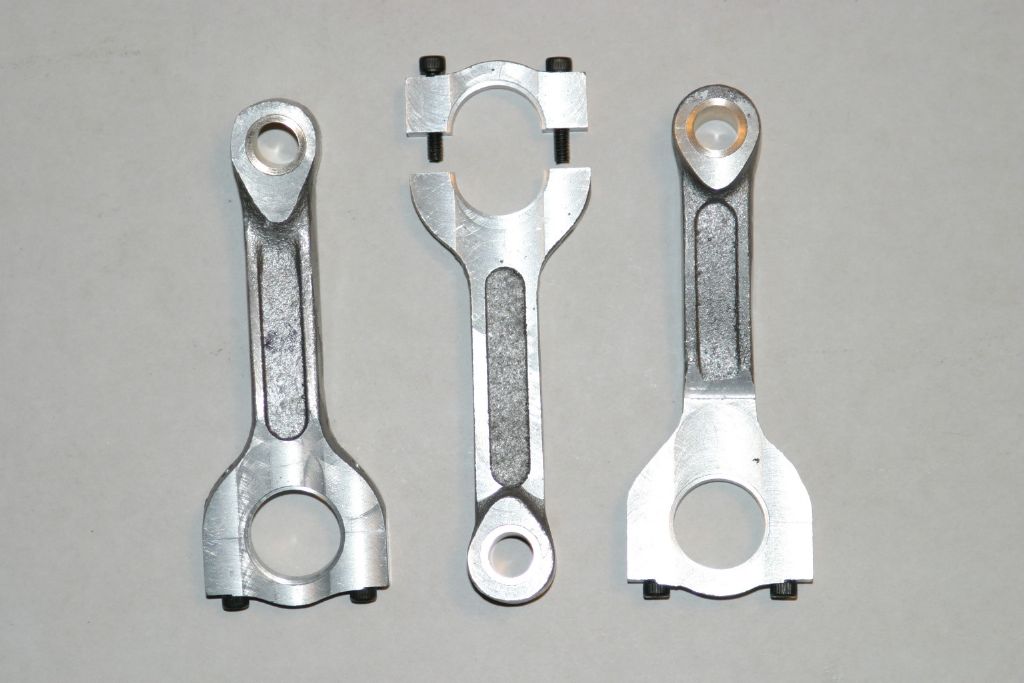
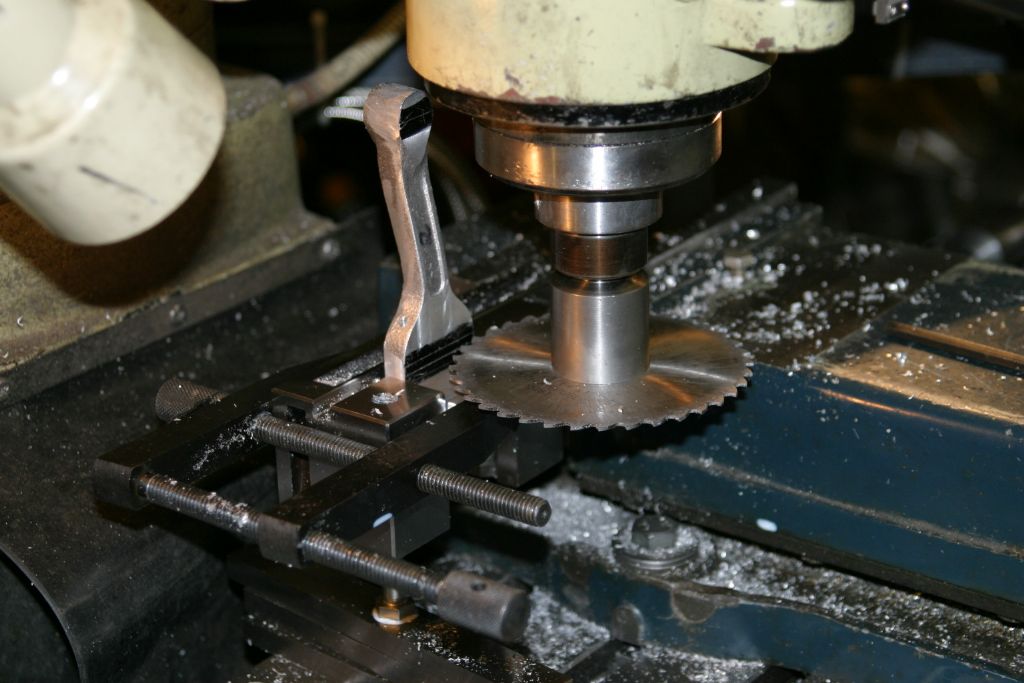
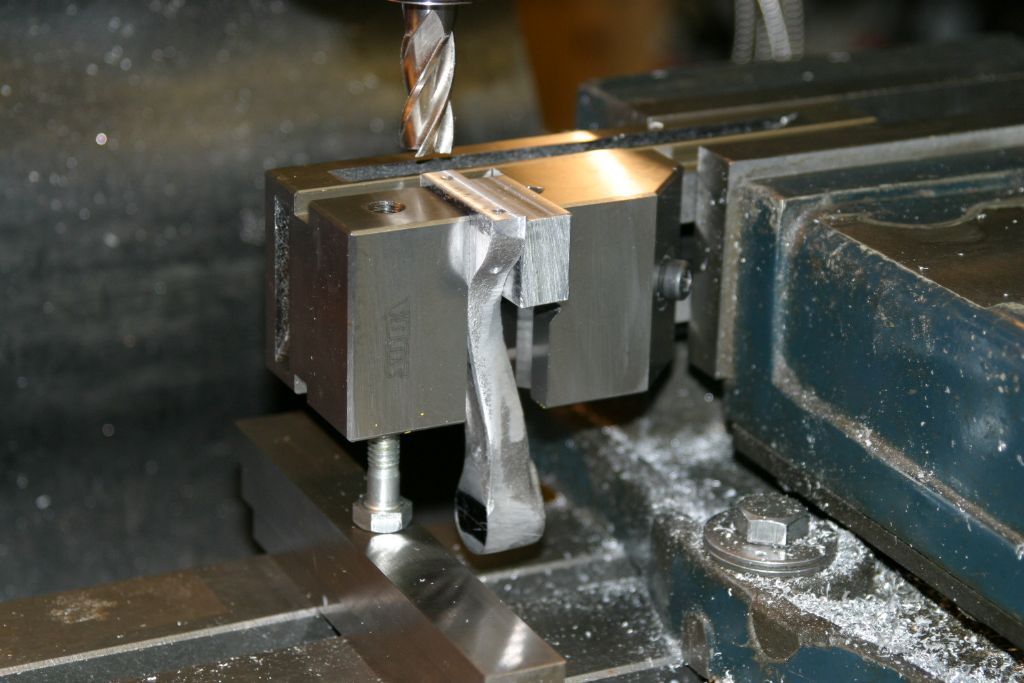
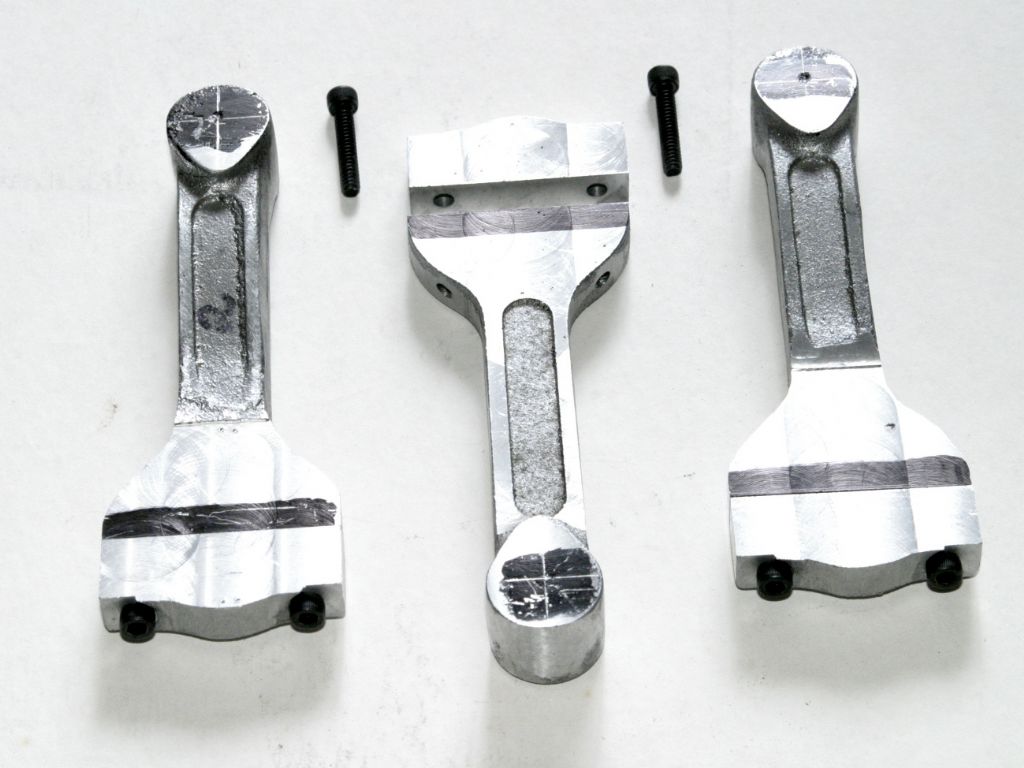
Setup for splitting the big ends with a 4" 3/64" slitting saw. The clamp was added for extra security as only about 1/4" of the bottom of the rod is against the bottom face of the vice. Once cut off the bottom part in the vice was milled down with an end mill to the plan dimension of .460 from the screw seats. Milling the other end of the rod to bring this face to the required 3.200" from the centre of the little end by milling down to the previously marked out line. Prior to milling, the cut face from the slitting saw was adjusted to be parallel to the the mill table with a dial indicator. The packing was needed to get around the offset in the two outer rods but although not needed for the straight centre rod was still used to save moving the vice jaw. The three rods finished to this stage. Now to figure out the setup to drill/bore/ream the holes for the big and small end bushes. They are .756" and .500" diameter respectively.
|
| Thread: Stuart Beam Engine |
| 25/01/2021 18:23:19 |
Martyn My Stuart Beam has split main beam bearings and it is at least 30-40 years old. I got it part built 25+ years ago. The drawings (parts, #90048 and GA, #90047) that came with it show split bearings held together with hex cap screws. I have changed them to studs and nuts to be more prototypical as Jeff says. Perhaps the solid ones in the picture are replacements for ones that got lost, or didn't bother splitting them ( or for non rectifiable mistakes during machining?). John edit: Jason beat me to it! Edited By John Purdy on 25/01/2021 18:26:47 |
| Thread: Three Cylinder Steam Aero Engine |
| 25/01/2021 03:18:08 |
NDIY When Jason asked if I had two vices I was thinking of two milling vices, (which I don't have) mounted side by side on the table, hence the stack of 1,2,3 blocks and clamp to hold the rods horizontally. It was only later I thought about using the 2" precision vice "vice in vice" allowing me to hold the rods vertically and avoid the offset.
|
| 24/01/2021 00:52:48 |
|
Setup for finishing the big ends to thickness of .336" and skimming the face of the little end to clean up and be parallel to the big end. The amount off each side of the big end was adjusted so that centreline of the big and little end were coincident on the centre straight rod and the offset of .366" was maintained on the two outer offset rods. The setup in the picture was adjusted for the straight and the other side of the offset rods by turning the upper 1,2,3 block the same as the lower, and using packing under the clamp as required. It's just obvious in the picture but I had to extend the fixed jaw of the vice with a stack of three 3/8"x3/4" parallels so that the centre hole in the 1,2,3 blocks lined up with the mill table slot for the clamping rod. Setup for facing the bottom of the big end and drilling for the two 6-32 fixing bolts. The facing was done with a 11/32" end mill and the holes drilled tapping size #36, 1.060" apart. The holes were then opened up to clearance size (#28) down to almost the parting line for separating the two halves of the big end. The holes were then tapped 6-32 down as far as possible hopefully ensuring the screws will line up once the lower end is cut off. |
| 18/01/2021 01:25:44 |
Jason I don't have two vices but I have used a tool makers clamp as you suggest in the past and is a definite possibility. I have cleaned up the width of the big ends, as they were tapered as cast, and at the same time adjusted them so the centre of the big end and the little end are in line. They can now be held securely in the vice horizontally to face them to set the thickness and offset, holding the little end with a tool makers clamp as you suggest. To drill for the big end bolts the only way I can see to do it at the moment is to hold then vertically clamped to an angle plate. |
| 16/01/2021 21:07:41 |
Yes I think there will have to be made some special shims (or gauge blocks?) and or jigs for the machining of the con rods. Have to sit down and have a good think how the best way to go is! |
| 15/01/2021 23:58:16 |
|
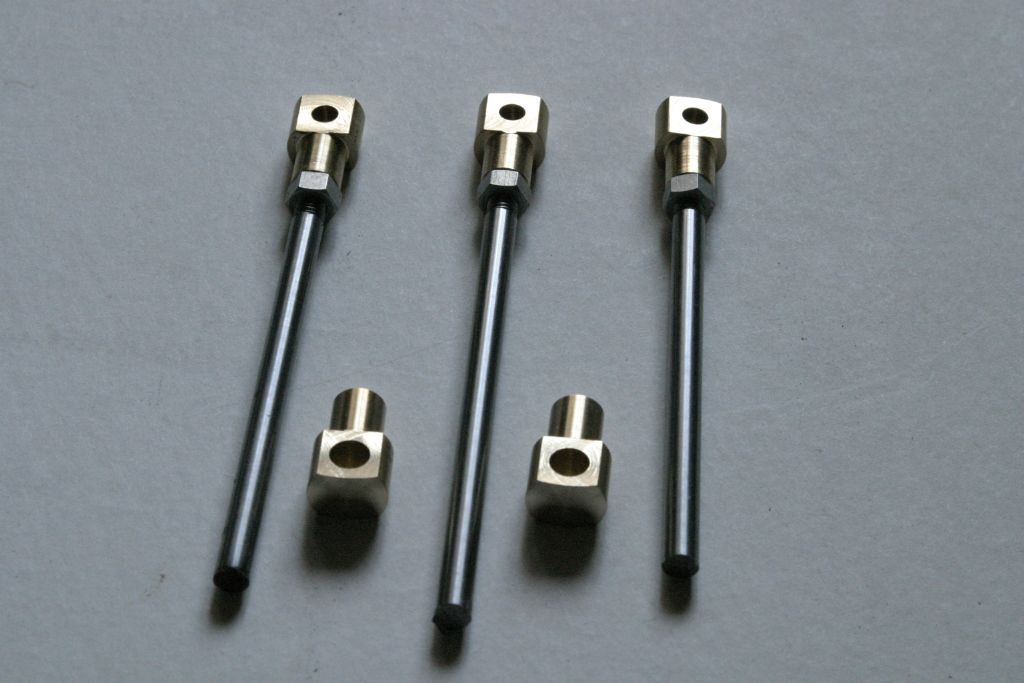
The straight shank of the valve rod ends were turned on the end of some 1/2" brass rod and tapped 12-28. Held in a 5C collet in a collet block in the mill, the flats were milled and the hole drilled and reamed, 3 at 3/16" for the valve wrist pins and 2 at 1/4" for the pins in the "eccentric". Returned to the lathe they were cut off slightly over length. The valve rods themselves are 7/32" dia. and are threaded 12-28 at each end. At this stage only one end is threaded as the final length will be determined when assembled. Held in the ER collet chuck the heads were all skimmed to to a length of .431" and then, using the Radford/GHT spherical turning tool set to a radius of 3/4", the ends were radiused. Next on the agenda are the connecting rods. The centre one is straight but the two outer ones are offset since the cylinders are all in the same plane. Holding the centre one for machining should be no problem, but the fact that the little end is considerably wider than the big end will complicate things. Not sure how I will go about it for the two offset ones. The centreline offset of these two works out to be .366" and as again the little end is wider than the big end the distance from the face of the big end to the little end on one side is .239"and the other .523.
|
| 14/01/2021 18:27:07 |
Jason - I do have a piece of 2" round of uncertain parentage that I could use, hadn't thought of that. Rik - Thanks for the offer but as you say the shipping charges are prohibitive. I used to get a fair bit of stuff from the UK up until about 10 years ago but since then the shipping has increased to the point that is is now two to three times the cost of the goods. Don't think it will ever be flying, too small for a real aircraft and too big for a model! Besides which I'd have to design and make a flash steam boiler. John Edited By John Purdy on 14/01/2021 18:31:04 |
Want the latest issue of Model Engineer or Model Engineers' Workshop? Use our magazine locator links to find your nearest stockist!
Sign up to our newsletter and get a free digital issue.
You can unsubscribe at anytime. View our privacy policy at www.mortons.co.uk/privacy
- hemingway ball turner
04/07/2025 14:40:26 - *Oct 2023: FORUM MIGRATION TIMELINE*
05/10/2023 07:57:11 - Making ER11 collet chuck
05/10/2023 07:56:24 - What did you do today? 2023
05/10/2023 07:25:01 - Orrery
05/10/2023 06:00:41 - Wera hand-tools
05/10/2023 05:47:07 - New member
05/10/2023 04:40:11 - Problems with external pot on at1 vfd
05/10/2023 00:06:32 - Drain plug
04/10/2023 23:36:17 - digi phase converter for 10 machines.....
04/10/2023 23:13:48 - More Latest Posts...
- View All Topics
- Reeves** - Rebuilt Royal Scot by Martin Evans
by John Broughton
£300.00 - BRITANNIA 5" GAUGE James Perrier
by Jon Seabright 1
£2,500.00 - Drill Grinder - for restoration
by Nigel Graham 2
£0.00 - WARCO WM18 MILLING MACHINE
by Alex Chudley
£1,200.00 - MYFORD SUPER 7 LATHE
by Alex Chudley
£2,000.00 - More "For Sale" Ads...
- D1-3 backplate
by Michael Horley
Price Not Specified - fixed steady for a Colchester bantam mark1 800
by George Jervis
Price Not Specified - lbsc pansy
by JACK SIDEBOTHAM
Price Not Specified - Pratt Burnerd multifit chuck key.
by Tim Riome
Price Not Specified - BANDSAW BLADE WELDER
by HUGH
Price Not Specified - More "Wanted" Ads...
Do you want to contact the Model Engineer and Model Engineers' Workshop team?
You can contact us by phone, mail or email about the magazines including becoming a contributor, submitting reader's letters or making queries about articles. You can also get in touch about this website, advertising or other general issues.
Click THIS LINK for full contact details.
For subscription issues please see THIS LINK.
Model Engineer Magazine
- Percival Marshall
- M.E. History
- LittleLEC
- M.E. Clock
ME Workshop
- An Adcock
- & Shipley
- Horizontal
- Mill
Subscribe Now
- Great savings
- Delivered to your door
Pre-order your copy!
- Delivered to your doorstep!
- Free UK delivery!


 Register
 Log-in


