Member postings for Colin Heseltine
Here is a list of all the postings Colin Heseltine has made in our forums. Click on a thread name to jump to the thread.
| Thread: Building 1/4Scale Redwing Hit and Miss Engine |
| 03/03/2023 14:19:33 |
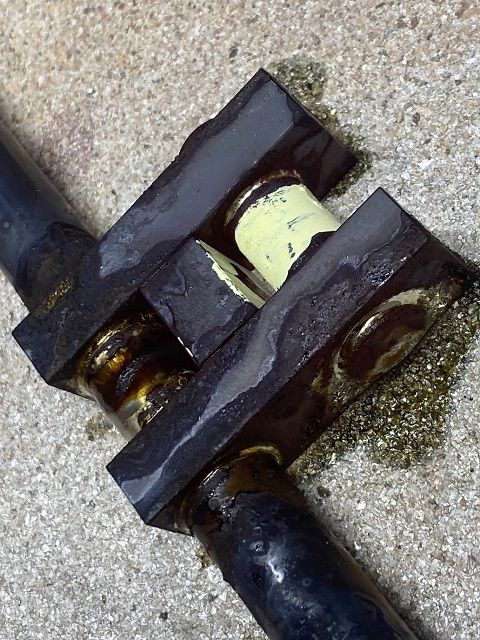
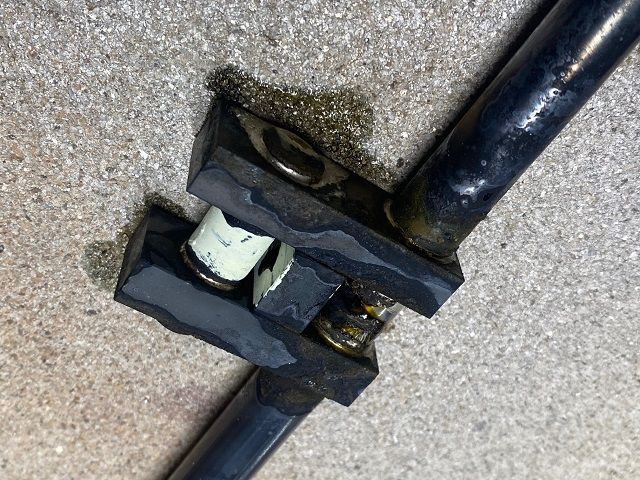
Pictures after overnight in Citric acid and clean up with brass brush and some 1200 wet and dry. Next job to clean up webs and remove central waste portion. |
| Thread: Moore & Wright depth gauge - information, please! |
| 02/03/2023 20:06:10 |
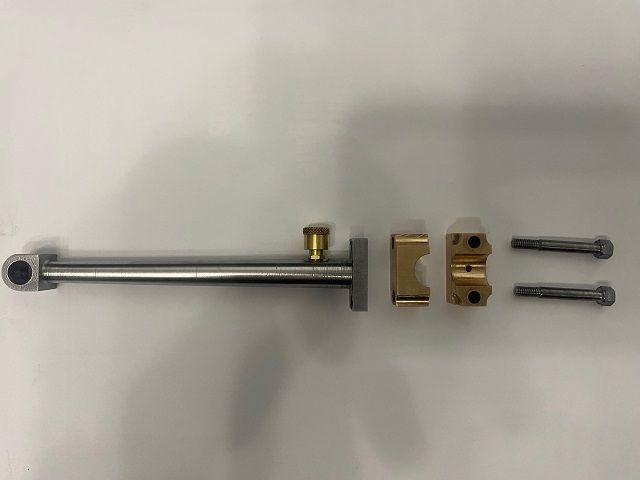
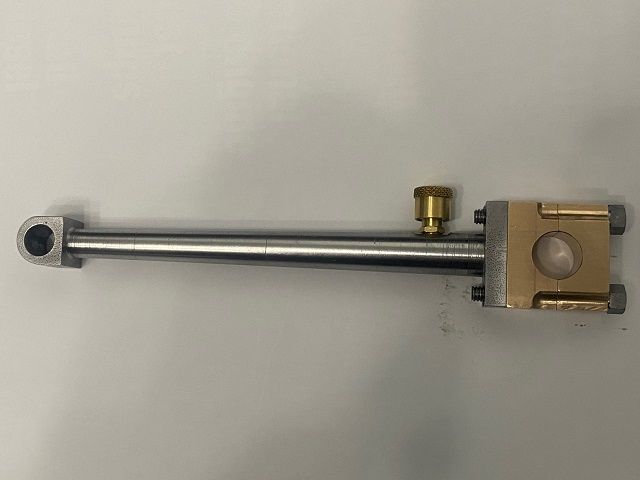
Also note that when you insert the depth rod required give it a little twist as it meets the mounting surface. If you look closely at the mounting surface it has two grooves which will act to clean the mating faces. Colin |
| Thread: Building 1/4Scale Redwing Hit and Miss Engine |
| 02/03/2023 19:36:16 |
Jason, Thank you. I’m hoping it is all okay. Will leave in pickle overnight. Hopefully it will not need too much cleaning and isn’t warped. It’s my first proper attempt at silver soldering so reasonably pleased so far. |
| 02/03/2023 15:54:20 |
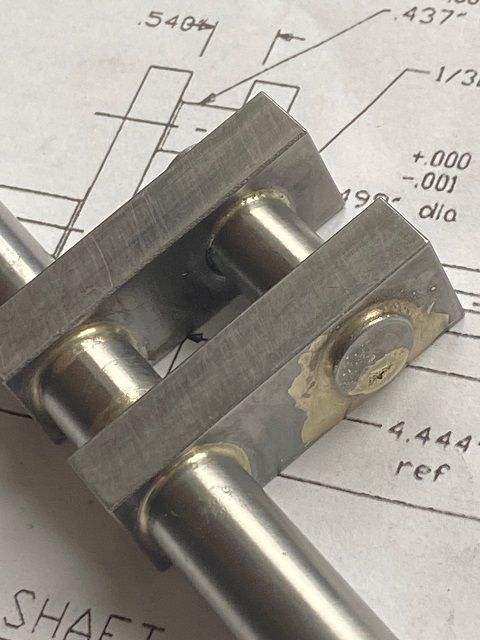
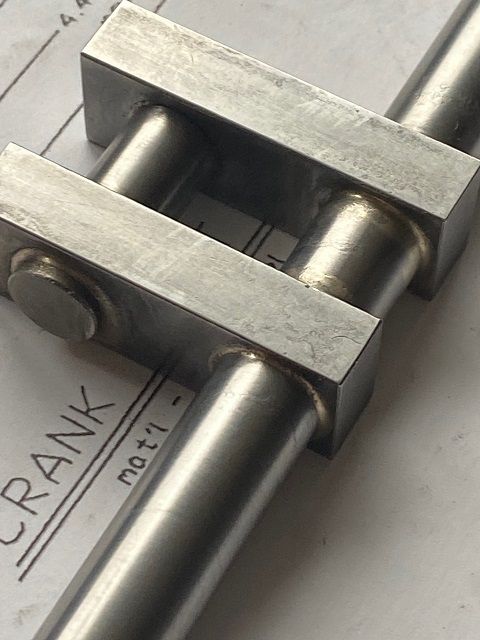
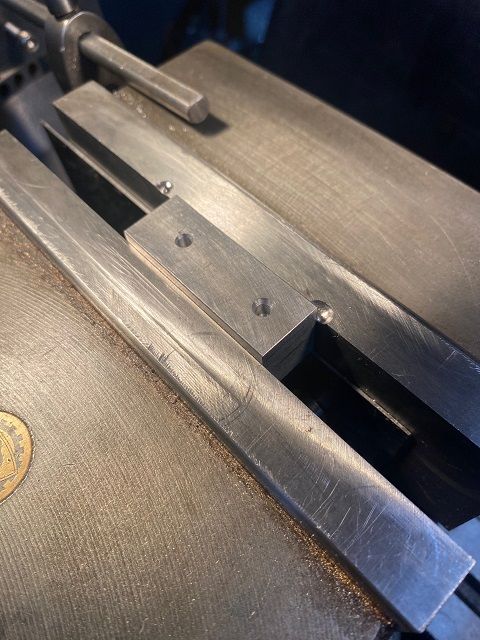
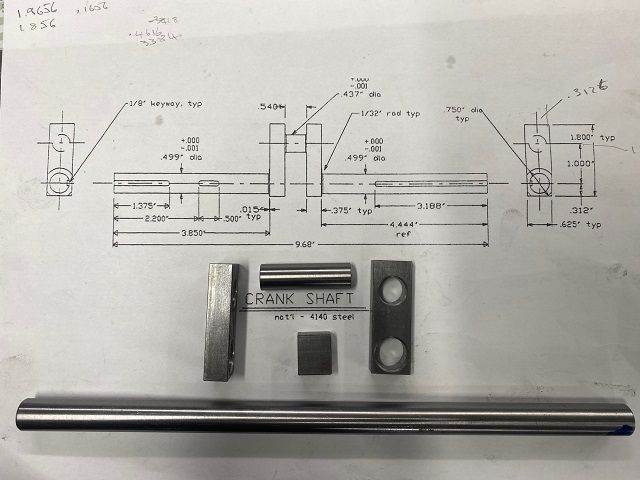
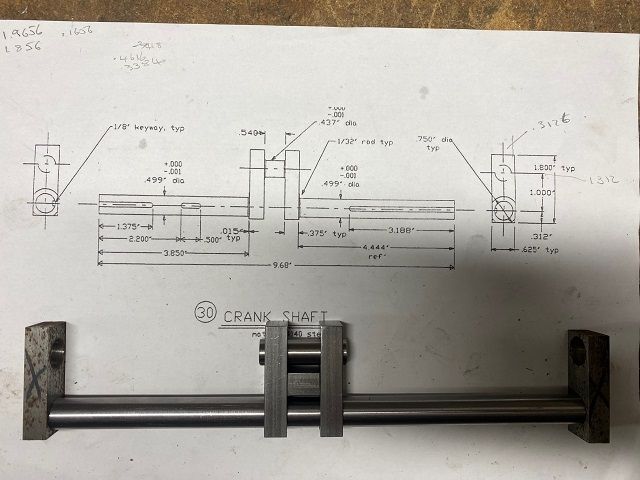
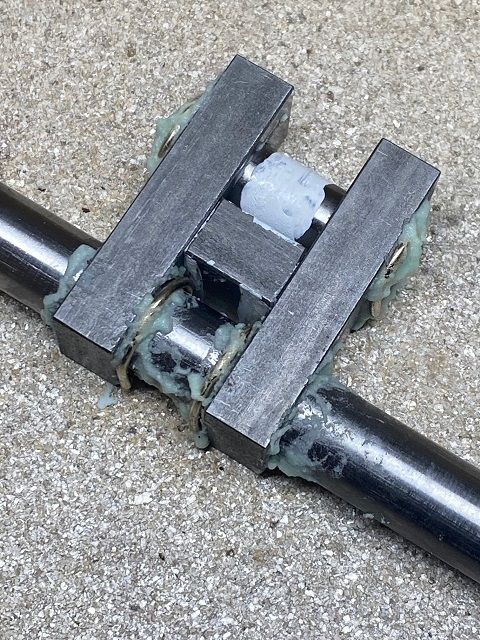
Decided I now had to bite the bullet an attempt to make the crankshaft. Two pieces of steel 0.625” x 0.375” by 2” long were cut and then super glued together. Into the mill and squared off and faced to length. Crank and big end centres marked with centre drill then drilled through in increasing sizes till just short of the required 7/16” and ½” diameters. Both holes reamed. Crankshaft form PGMS cut to length and centred, big end cut around 0.125” over length. I also decided to make a spaced block from same material as the crank webs 0.540” thick. This used to ensure the two webs could be pressed against each other and keep correct spacing. I had a spare pair of webs which had come with the engine so I reamed out the 1/”2 diameter hole and used these as supports for the outer ends of the crank shaft. Now to the silver soldering. I first rang Graham Corry from Alyn Foundry and had a chat to him about silver soldering and then reviewed a video he had sent me a few pages back. I set up the hearth on my wooden bench in the garage and put some heat bricks around the outside for extra protection. Cleaned all parts with acetone. Using HT5 flux I pre-fluxed the inside of the webs and slid them on the crank and big end. Slid them along to close to final position I then painted the made centre of big end with Tippex to prevent solder adhering here. Little more flux in all the countersink areas. Then cut 2 off 1” and 2 off 1.5” length of 1.5mm silver solder. These were then curled up into ‘C’ section shape and one put on each outer end of the big end and the larger one on the inside of each crank webs on the actual crankshaft. This was followed by bit more flux on each to hold in place. Final check that the webs were in correct position and tight against the spacer, correct length of crank sticking out, ensuring the spare webs were on the ends of the shafts and all was ready. Fitted the big burner to the torch and started by preheating the ends of the shaft and gradually moving towards the centre. I had turned the light off above me and could slowly see the colour changing. The flux was bubbling and changing so I now concentrated on the webs, big end and the inner section of the crank and suddenly it happened. The solder melted and did its stuff much to my amazement. I though I could see one slight gap so dabbed fluxed rod on it, looked okay so turned off heat and went and had lunch. After lunch all was cool, looked reasonable so into jar of citric acid now for overnight and have proper look tomorrow. |
| 02/03/2023 15:52:54 |
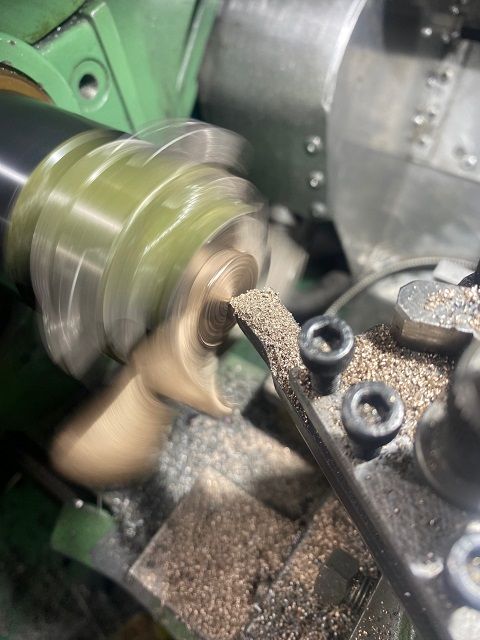
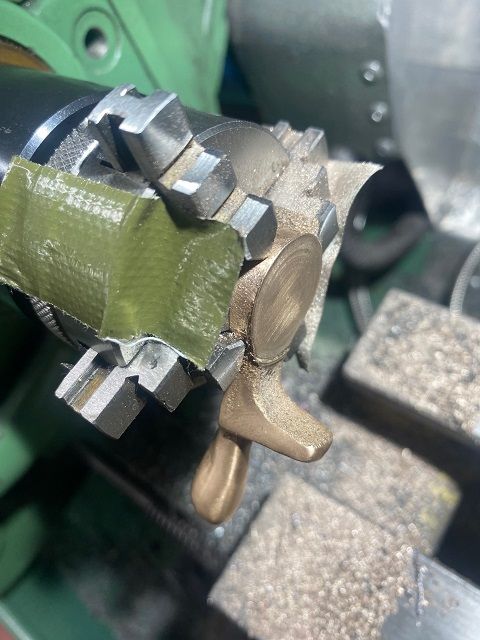
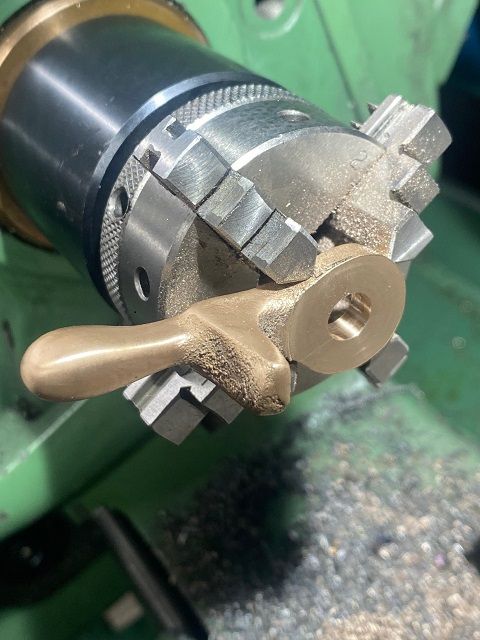
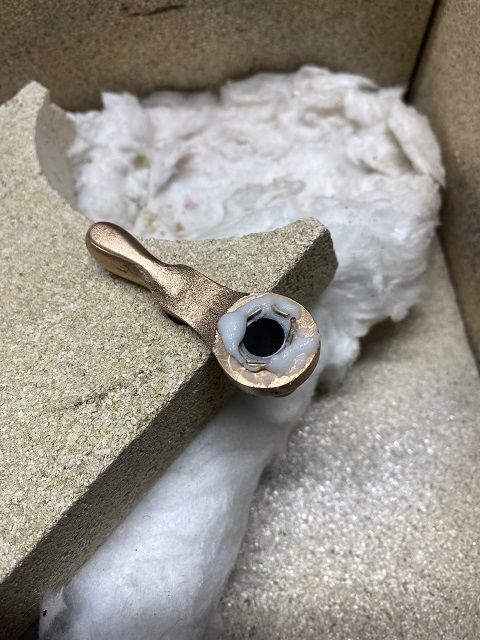
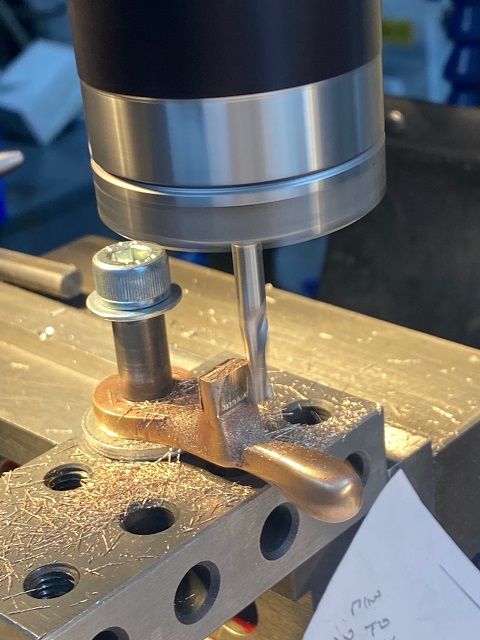
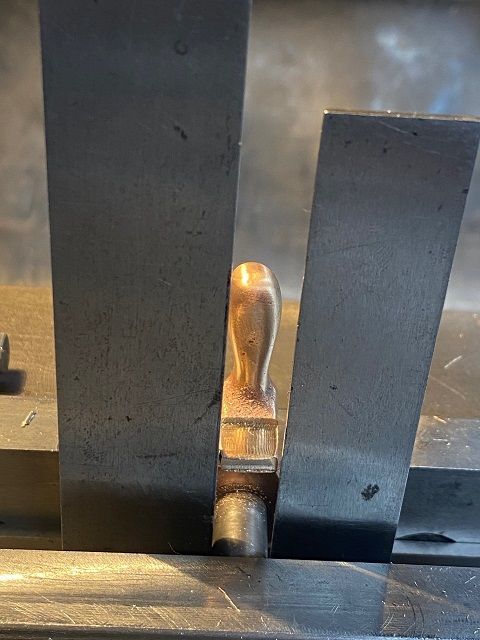
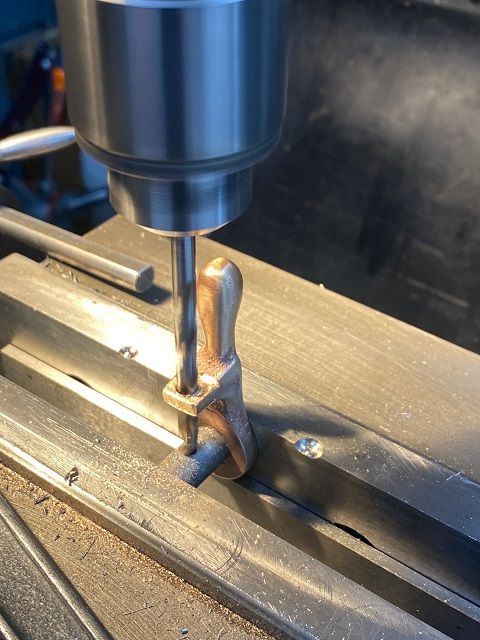
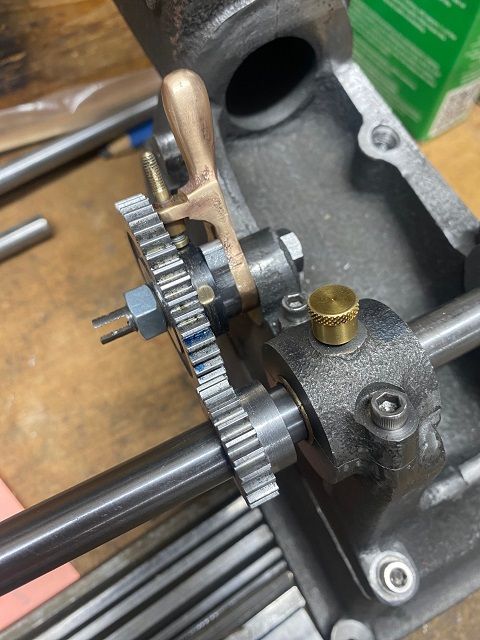
Moved onto Timing Lever. This is a small brass casting which is quite awkward to hold. First it was cleaned up with a file and sharp edges removed. Could not hold it my standard 3 or 4 jaw chucks used on the Myford, but I have a Myford spindle adaptor to be able to fit my M14 x1 threaded chucks from the Cowells lathe. The best option I found was the self centering 4 jaw but I still needed something to space it away from the chuck to leave face clear to machine. Found a suitable Joey block. I needed to leave this in place whilst facing so couple of pieces of tank tape to hold in place. This was faced on both sides to 0.188” thickness. If anyone else does this can I suggest you face both sides to a larger diameter than I did. The rear face which mates against the casting was held clear by 15 thou or so and had to be filed and also the inside face needs taking right up to the bottom of the stick out for the timing stud. If you don’t do this you will find as I did that the cam will not rotate. Again, a bit more filing. I started drilling the casting with the Joey block in place and removed it just before the drill broke through. Hole then reamed. The thin steel sleeve is then silver soldered into the casting. Bit dubious about this but it appears to be held okay but need a bit more tidying than I had hoped. With the sleeve silver soldered in it was then possible to fix to a 3-2-1 block and clean up the top and sides of the boss on the casting through which the small insulation bush and contact stud are mounted.
Aligned ready to drill and ream using two squares.
The oilite bush was shortened and then pressed into the timing gear. The insulation collar which is a firm press fit on the boss on the timing gear was next. I found I had some 1.004” diameter nylon/plastic bar and this was quickly made and the edge drilled for the ignition stud. Pressed this on the gear with the two holes aligned and then tapped the ignition stud into place. This passes through the collar and the boss on gear and is in contact with the oilite bush. I still had the soft jaws in the big lathe so returned gear to soft-chuck and then skimmed the proud edges of the ignition stud. The cam came next. I had to thin a piece of steel down to the required 0.188” t hen left it setup in the vice whilst marked out the cam. The centre was then bored out. The steel then removed and excess cut off. Then used mill to bring down to within 1/16” of scribed line. Then used the die filer for its first proper job and shaped the cam. Back to the mill and centred on piece of bar then drilled and tapped 4-40 UNC for locking screw. This fits directly on the oilite bush.
Edited By Colin Heseltine on 02/03/2023 16:01:50 Edited By Colin Heseltine on 02/03/2023 16:05:22 Edited By Colin Heseltine on 02/03/2023 16:08:58 |
| 26/02/2023 19:21:40 |
The ignition lever sleeve is silver soldered which I've done. But the crank will be built up rather than using casting. So the crank shafts and big end will be silver soldered into the webs. The ones I was given with the engine are both built up but just pinned and the shafts have all moved in the webs. I still have to drill the timing shaft locking screw and it looks as though my plans have missed the crank pulley locking screw. I also found an error for the timing screw. The dimple for the locking bolt was shown to close to the bolt head. I have done the insulation sleeve for the ignition stud and fitted that and the stud and also done the contact stud and its bushing. Need to make nuts and source spring. Colin
|
| 26/02/2023 10:22:43 |
Ian, A quick question. Looking at the plans am I correct in saying that the 0.250" brass ignition stud is pressed through the insulation collar and through the hole in the gear such that it just presses on the oilite bush and so completes the connection. Thanks, Colin Edited By Colin Heseltine on 26/02/2023 10:40:35 |
| 25/02/2023 21:18:27 |
Wow Ian, You are going along way quicker than me. I still have to make a crank, do all of cylinder head, carb and exhaust, and machine the flywheels and governor. I have the material but not too sure how my silver soldering will go. I have not really done any in the past. The odd couple of bits have not turned out brilliant. Couple of quick points: 1) I cannot see a locking screw for the timing shaft, 2) Have you used a locking screw on the crankshaft pulley, there is not one shown on my drawings. Colin |
| 24/02/2023 16:28:24 |
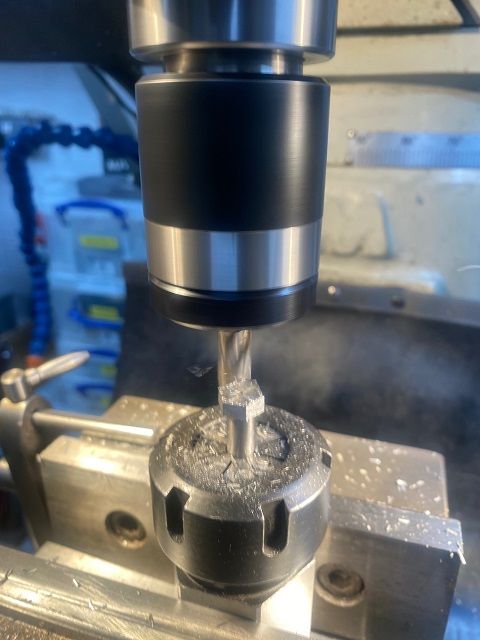
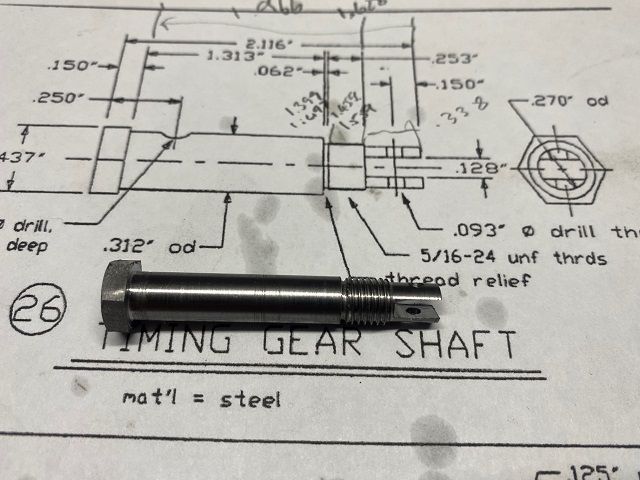
Now moved onto the Timing Gear Shaft. Did not have any hex bar so started with chuck of 5/8” diameter bar. Because I had around 2.5” sticking out of the chuck I had centred the bar and was using the half centre in the tailstock. All appeared well until I check the diameter and found 2 thou small in diameter at the tailstock end. Could not see why and cheated with a file to finish off to size and then polished shaft. I do not posses a grooving tool and used hacksaw blade in a parting tool to provide the thread relief before using 5/16”-24 unf die for the thread. Parted the bar off and took to the mill to put the hex head on the end using ER32 hex collet block. This went well so changed to square collet block to put the slot and hole in the end. Set it all up and used 0.125” slot mill to put the slot in. Had done around four slow passes, when CRUNCH. Turned off mill and could not initially see what had happened. Then realised I did not have two little “D” shapes on end of the bar. The bar had rotated in collet chuck. Not surprising when I checked and found I had only done it up by hand, I had forgotten to clamp up. Start all over again. But I though it might pay to check why the Myford was cutting tapered first. I know last year I had turned a test bar and all was good from the levelled point of view. So out with 2MT test bar and put this between spindle and tailstock centre. The tailstock appeared to be out by around 1.5 though offset to front of lathe so I corrected this and also checked/adjusted all gibs then started again. It still appeared to be cutting tapered when the tailstock was in use, pulled tailstock out and all would turn okay and parallel. I have absolutely no idea what to do about this or what the problem may be. Any way second gear shaft produced in about half the time. As I write this I have just realised I have missed one tiny detail and that is a small dimple is required on the shaft.
|
| 24/02/2023 16:27:22 |
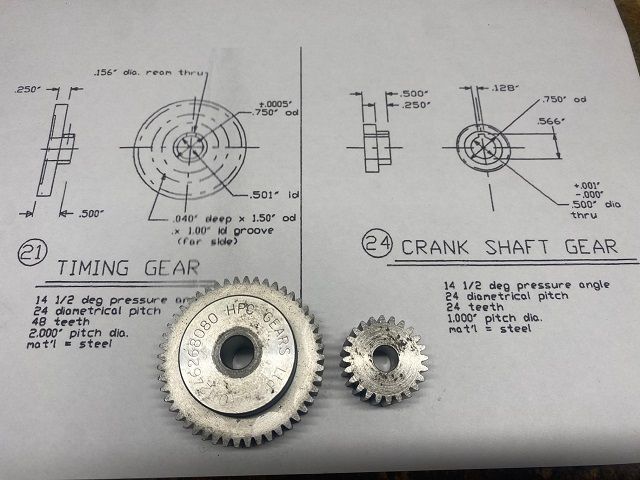
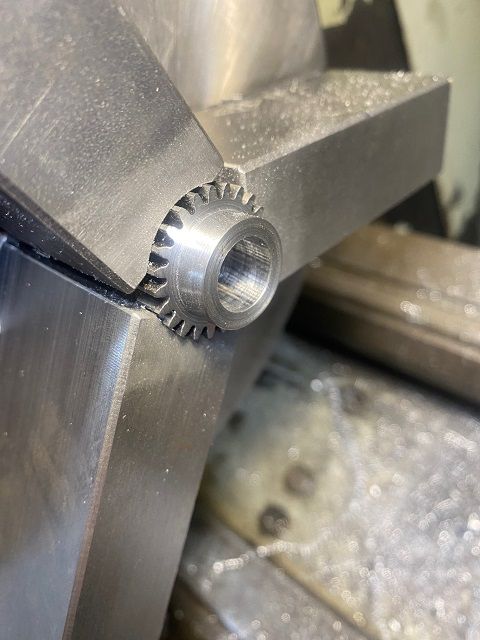
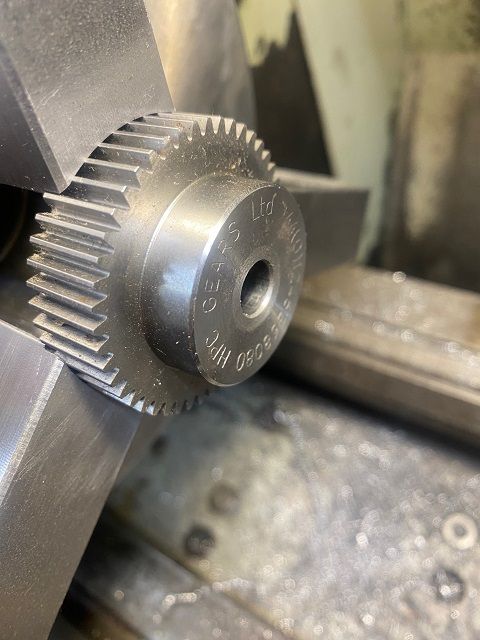
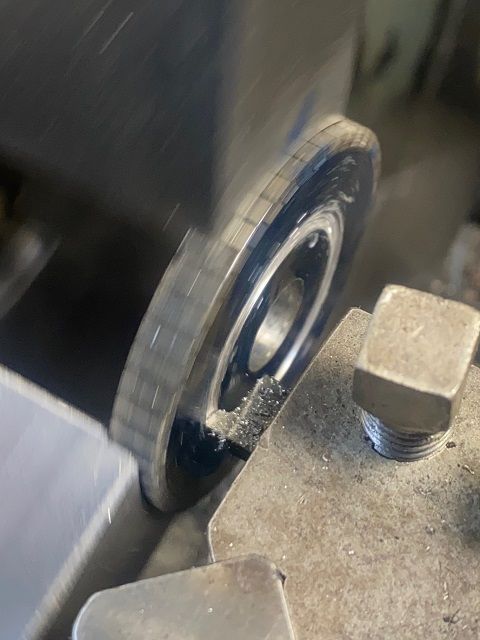
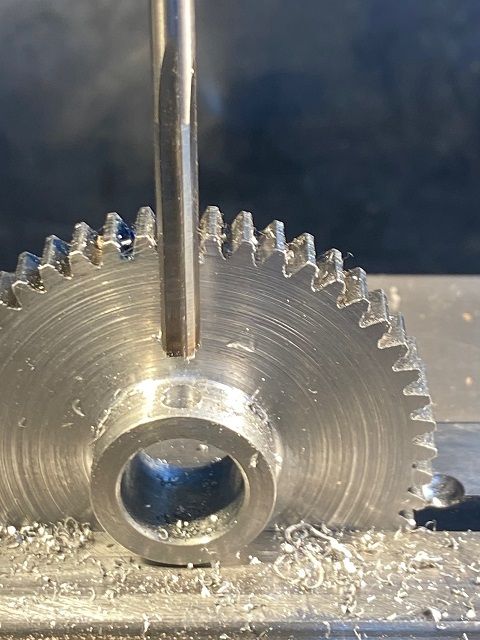
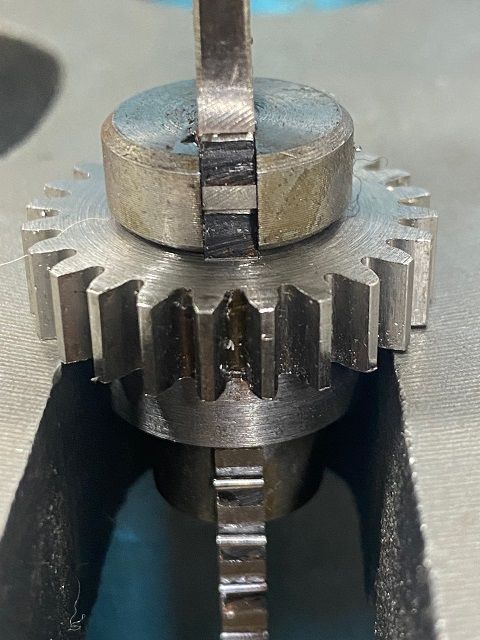
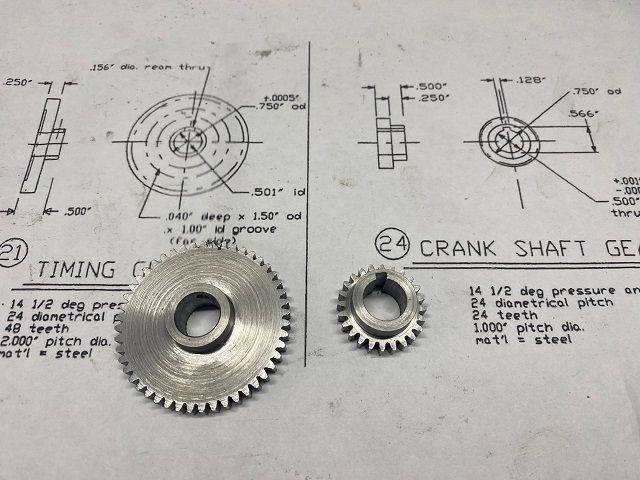
Went in to Rotagrip in Birmingham and collected the set of soft jaws for my new Elliot chuck and also picked up a set of small Imperial Broaches. I thought I had bought Metric broaches from them previously so happily collected the Imperial ones. Till I arrived home and found I already had an identical set. I had bought the gears ready made from HPC but I knew they would want quite a bit of machining to bring them to correct thickness and have the correct bosses on them. What I started with can be seen below. Fitted the jaws in chuck and found a suitable diameter bar on which to clamp the jaws to be able to bore them to hold the small gear. Bored 3/16” deep and a tight 1” diameter. Put gear in jaws and tapped down then did a quick sanity check with a drill blank in tailstock and checked it passed into the bore in gear. Faced off lot of material off down to 1/2” thick, then machined 0.750” OD boss on front which took the gears down to 1/4” . Drilled out to 15/32” then reamed to 1/2”. Another steel bar to clamp the jaws on and then bored out to 2” dia for the camshaft gear. This gear came with a boss but this all needed to be machined off and the gear again bought to ½” thick. Machined a 0.750” OD boss on front which took the gears down to 1/4” wide. Drilled out to 15/32” then reamed to 1/2”. The timing gear required a 40thou deep recess in the back face of the gear and I really struggled with this, both to pick up the position and then to machine it. I made a trepanning tool of sorts with which I was able to start a groove but then tried various tools until I had a reasonable looking groove with sharp edges. I’m afraid positioning was carried out using a 6” rule. Timing gear was then moved over to the mill and clamped in vice, ½” dia drill blank put through the bore and this was used to get centre of bore to drill and then ream to 0.156” for the ignition stud. The crank gear was set up on the arbour press and the keyway broached. The keyway set comes with a single shim but this was not enough to get the required depth and had to make a further 20thou shim to get to correct depth.
|
| Thread: Colchester Triumph 2000 - Saddle Feedtrip |
| 19/02/2023 16:11:15 |
Up to now I have stared at the DRO as coming up to a shoulder, but this means have have not got your eyes on the job. Hopefully with the micrometer bedstop I will actually be able to watch what the tool is doing. I'm sure manually knocking the lever out saves stress on the mechanism. Colin |
| 19/02/2023 15:32:08 |
Hey It works. Tried with lathe running slowly and feedtrip knob turned fully anti-clockwise, kept hand on feed lever (just in case) and let it feed to stop. It halted quite happily. Turned feedtrip knob fully clockwise and tried again. Saddle hit the stop and lever dropped out correctly. The saddle bounced back about 1/8" from the stop. We just need to sort out the feed on Toms lathe now. Colin |
| 19/02/2023 14:18:56 |
It good to know they still have some spares for the older machines. We put a brass shear pin in to play safe. I guess i'll have to go and test mine Colin |
| 19/02/2023 10:11:15 |
Stewart many thanks. We did a test on Toms whilst testing screw cutting (without lathe tool in post) and yes it jammed and sheared the shearpin. Useful hints. Colin |
| Thread: Building 1/4Scale Redwing Hit and Miss Engine |
| 18/02/2023 21:29:39 |
|
The hole tapped nice and cleanly. The problem was now how to line up casting when turned over to open up hole on other side. Having used vice stop I knew I was okay in X axis. Used 2.6mm drill blank in small drill chuck and gently moved Y axis until pin would enter the hole. Once happy with this I drilled it out to 0.125". The casting was still a little long at each end so set up on parallel with end overhanging right hand end of vice. Put 2.6mm drill blank into the tapped hole and used laser centre find to locate middle of the pin. Could now mill off the extra material. Repeated this exercise for the opposite end. The over to die Filer to radius the ends, followed by a quick polish. Again this was another job which seemed to take forever to do. Edited By Colin Heseltine on 18/02/2023 21:35:31 |
| 18/02/2023 21:29:27 |
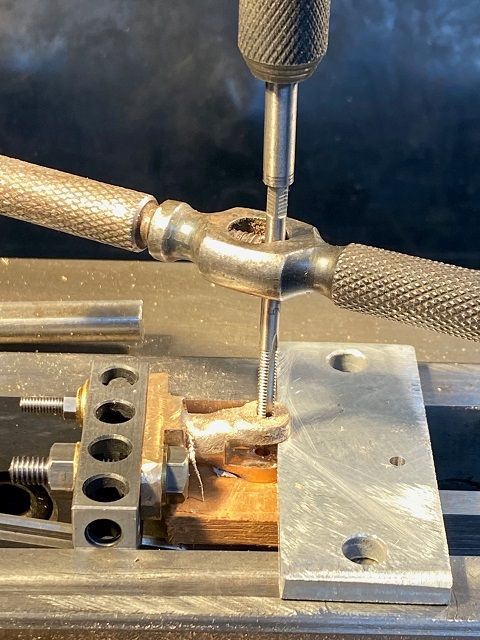
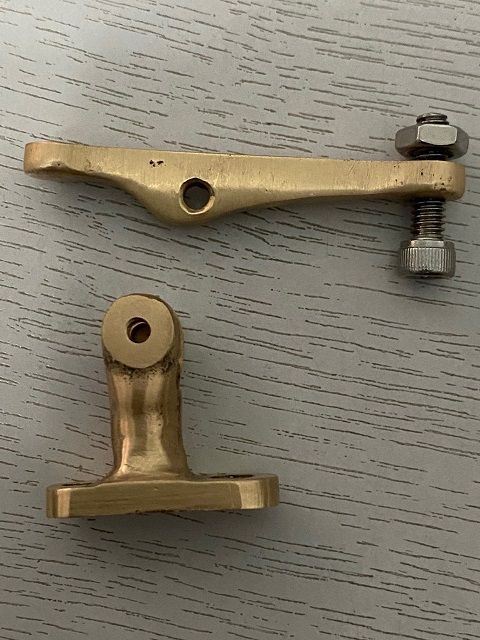
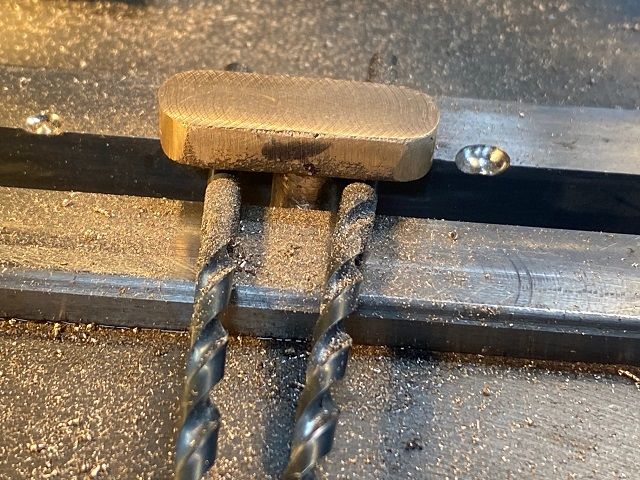
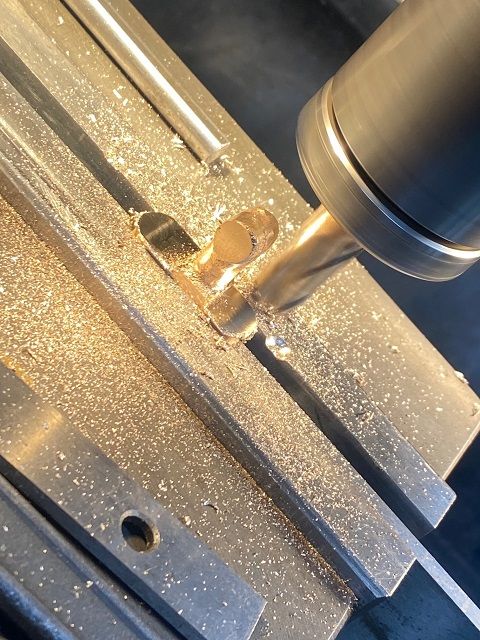
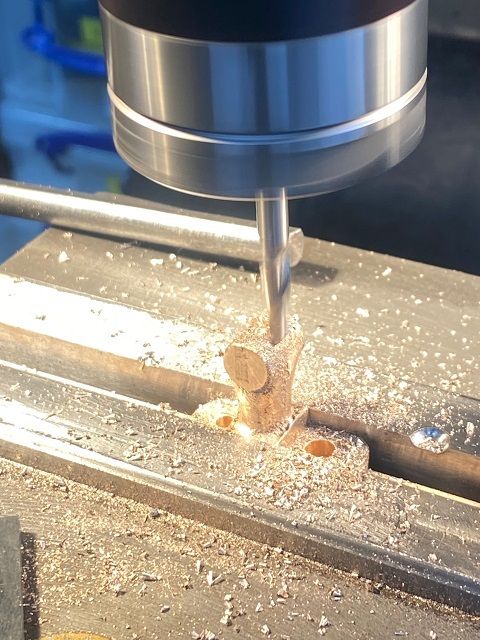
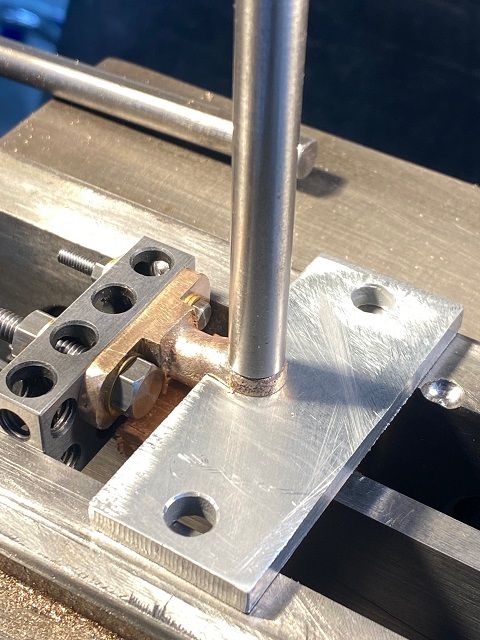
Still waiting for soft jaws for chuck to machine the gears to size and material for crank arrived late today. So yesterday started on the rocker arm and rocker arm bracket. These are both small brass castings. Started with the arm and filed the sides down to 0.185" and as parallel as I could. Then able to just grip in vice with the two pads resting on the jaws. A very delicate skim was taken across the top face to bring the pads to the required 0.150" . Rocker arm then turned onto its side and the two pads rested on a freshly made MDF parallel. The machined top face was against the rear fixed jaw of the vice. Not enough space to get ordinary edge finder in so reverted to laser edge finder to pick up rear jaw and each end of the arm. Pivot point located and drilled and then reamed 0.125". Plan calls for 0.128" reamer but do not have this size. The casting then flipped onto its back, the center of the pad on the longer end of the arm found using a drill blank and then drilled and tapped 8-32UNC. No pictures of this procedure. Now moved on to the rocker arm bracket. This calls for rocker pivot to be 0.780" up from the bottom edge and the bottom flange to be 0.125" thick. There was no way on earth to machine the base to this dimension by removing material from the bottom. A quick blast on the linisher to remove the casting sprue and clean the bottom up and then a quick check on surface plate. I could only afford to take the absolute minimum off to clean up. The casting was set upside down on couple of 4mm dia drills and bottom cleaned off. Ended up removing 15 thou to get flat face and even then the top was below drawing dimension by about 4 thou. With bottom cleaned up the piece was turned its side and rested on a wide parallel and 12thou taken of the side, casting then flipped over and 12thou taken off the other side. With the bottom and sides cleaned up the casting was set the right way up and rested on parallel. Used my tallest parallel and then took the two flanges down to the required 0.125" thickness. Luckily the parallel I used just gave me about 6 thou clearance above the vice jaws. Back out of the vice and cleaned up the edges then back into the vice in same way but now on MDF parallel again. Picked up the sides of the boss with laser edge finder, half it to get centre then drilled the two fixing holes. The plans call for No. 1 and No. 30 drill for these holes but not having number drills elected for the next nearest size up. Whilst set up I then cut the deep slot for the rocker using 3/16" ( 0.1875" )slot mill. The slot needed to be 0.190" and rather than go straight across I decided to plunge the end mill down to just short of the full depth and then repeat across the slot. Then offset the Y axis 1 thou in each direction to bring to width. I think in retrospect I would have been better using a smaller diameter slot mill as have slight witness marks from plunging in. Oh well, live and learn. The downside to doing the slot first is the lack of support in the casting for first drilling the full way through and then tapping the one flange. I slept overnight and thought about how to do this. In the end I was able to use a very small 1-2-3 block and fix the casting to it. The hole spacing only just worked. One M5 and one M3 bolt. Polished a piece of 5mmm thick aluminium to make a spacer for the gap, then used a combination of a piece of wood (so I could drill through it) and a Starrett adjustable parallel to support the casting. The aluminium strip also supported the casting. Checked it was all level by resting a parallel on top of the machined faces of the casting and using digital angle gauge. Edge finder used to locate back of 1-2-3 block and then set DRO to be zero in X axis for base of bracket. Used 11/32" drill blank to locate center of boss then drilled through 2.6mm to be able to tap 5-40 UNC. Edited By Colin Heseltine on 18/02/2023 21:34:39 Edited By Colin Heseltine on 18/02/2023 21:58:24 |
| Thread: Help to identify make of rotary table and unusual lever. |
| 17/02/2023 22:20:45 |
Keith, I am intrigued by your comment regarding W20 collets fitting the RT. I have the large Hauser RT that you have shown in the photocopied page above. Do the collets fit directly in the central bore. If so how are they pulled tight. Colin |
| Thread: Colchester Triumph 2000 - Saddle Feedtrip |
| 12/02/2023 14:52:18 |
I think we will get the bottom plate of Toms saddle and check the thread. Its that or drain remainder of oil from mine and stick the endoscope camera through the drain plug hole and take a look. Would like to start with the least pressure on the trip before test mine. Colin |
| 11/02/2023 16:44:23 |
Need to pick a few brains on these machines. I have the short bed version and my mate Tom has the long bed version and we have both just managed to source bedstops and the 5 position turret stop. In his case with the saddle moving towards the chuck and then hitting the bedstop the feed does not trip out and when testing it in screw cutting mode sheared the leadscrew shear pin. There is a knurled knob on the right hand side of the saddle which is supposed to adjust the trip out pressure. In his case this just keeps rotating. Looking at the drawings in the manual we think that possibly a small pin has sheared (was already broken). I have not tested mine under power as yet but manually rotating the chuck the saddle pulled up to the stop but again did not drop out. The knob on my lathe does three complete revolutions from what should be lightest to firmest trip out pressure. What the manual does not say is which way to turn the knob to increase the trip pressure, so I do not know whether lathe is set to hardest or softest setting. The other question is should this trip out work for both screw cutting and standard turning. The manual is not very helpful. Neither of us want to break anything so is there an easy way we can check what is happening without breaking gears etc. Any help much appreciated. Colin |
| Thread: Building 1/4Scale Redwing Hit and Miss Engine |
| 28/01/2023 19:32:47 |
Found length of 5/16” rod and then over to Myford 7 and turned this down to 0.164 for length of .3125” and used 8-32 die to put thread on. Gradually slid rod out of collet chuck and turned to 0.168” for 0.875”. Then relieved last 1/16” of shaft and then put a 25thou deep .20” diameter step (to form washer under the head), then parted off .250” ( ¼" ) further along the bar (to machine as nut). Repeated to produce second bolt. Decided that trying to see what I was doing milling the nut on the big mill was going to be a problem so I would retreat to the warm office and use the Cowells vertical mill. Fitted the indexing head which uses a gear for the indexing and fitted 5/16” 4 flute end mill. After 1/2 hour or so I had two ¼” AF bolt heads (4BA it appears). I had forgotten to drill the oil hole in the base of the big end so quickly put in vice on the Cowells and drilled it out to 2.2mm dia. I have left the bolt threads long in case I decide to fit a lock nut. I cannot believe how long it took me to do the big end, it seemed like a full day. Not sure what's next, crank or gears. Colin Edited By Colin Heseltine on 28/01/2023 19:37:39 Edited By Colin Heseltine on 28/01/2023 19:57:50 Edited By Colin Heseltine on 28/01/2023 19:58:44 |
Want the latest issue of Model Engineer or Model Engineers' Workshop? Use our magazine locator links to find your nearest stockist!
Sign up to our newsletter and get a free digital issue.
You can unsubscribe at anytime. View our privacy policy at www.mortons.co.uk/privacy
- *Oct 2023: FORUM MIGRATION TIMELINE*
05/10/2023 07:57:11 - Making ER11 collet chuck
05/10/2023 07:56:24 - What did you do today? 2023
05/10/2023 07:25:01 - Orrery
05/10/2023 06:00:41 - Wera hand-tools
05/10/2023 05:47:07 - New member
05/10/2023 04:40:11 - Problems with external pot on at1 vfd
05/10/2023 00:06:32 - Drain plug
04/10/2023 23:36:17 - digi phase converter for 10 machines.....
04/10/2023 23:13:48 - Winter Storage Of Locomotives
04/10/2023 21:02:11 - More Latest Posts...
- View All Topics
- Reeves** - Rebuilt Royal Scot by Martin Evans
by John Broughton
£300.00 - BRITANNIA 5" GAUGE James Perrier
by Jon Seabright 1
£2,500.00 - Drill Grinder - for restoration
by Nigel Graham 2
£0.00 - WARCO WM18 MILLING MACHINE
by Alex Chudley
£1,200.00 - MYFORD SUPER 7 LATHE
by Alex Chudley
£2,000.00 - More "For Sale" Ads...
- D1-3 backplate
by Michael Horley
Price Not Specified - fixed steady for a Colchester bantam mark1 800
by George Jervis
Price Not Specified - lbsc pansy
by JACK SIDEBOTHAM
Price Not Specified - Pratt Burnerd multifit chuck key.
by Tim Riome
Price Not Specified - BANDSAW BLADE WELDER
by HUGH
Price Not Specified - More "Wanted" Ads...
Do you want to contact the Model Engineer and Model Engineers' Workshop team?
You can contact us by phone, mail or email about the magazines including becoming a contributor, submitting reader's letters or making queries about articles. You can also get in touch about this website, advertising or other general issues.
Click THIS LINK for full contact details.
For subscription issues please see THIS LINK.
Model Engineer Magazine
- Percival Marshall
- M.E. History
- LittleLEC
- M.E. Clock
ME Workshop
- An Adcock
- & Shipley
- Horizontal
- Mill
Subscribe Now
- Great savings
- Delivered to your door
Pre-order your copy!
- Delivered to your doorstep!
- Free UK delivery!


 Register
 Log-in


