Member postings for Graham Meek
Here is a list of all the postings Graham Meek has made in our forums. Click on a thread name to jump to the thread.
| Thread: Turn Of The Screw |
| 20/11/2021 12:38:31 |
I agree with Tony as regards the boring after cutting the groove. However, I don't think you will be successful making the cut in one pass at 1 mm depth. I would be more inclined to put a circular, semi-circular section groove in at the greasing point. Grease will flow around the pin and eventually out the ends of the bush taking debris with it. A helical groove gives a direct exit to the outside, unless it is a figure of 8 pattern and kept within the ends of the bush. Regards Gray, |
| Thread: Unimat 3 Restoration |
| 14/11/2021 16:17:33 |
|
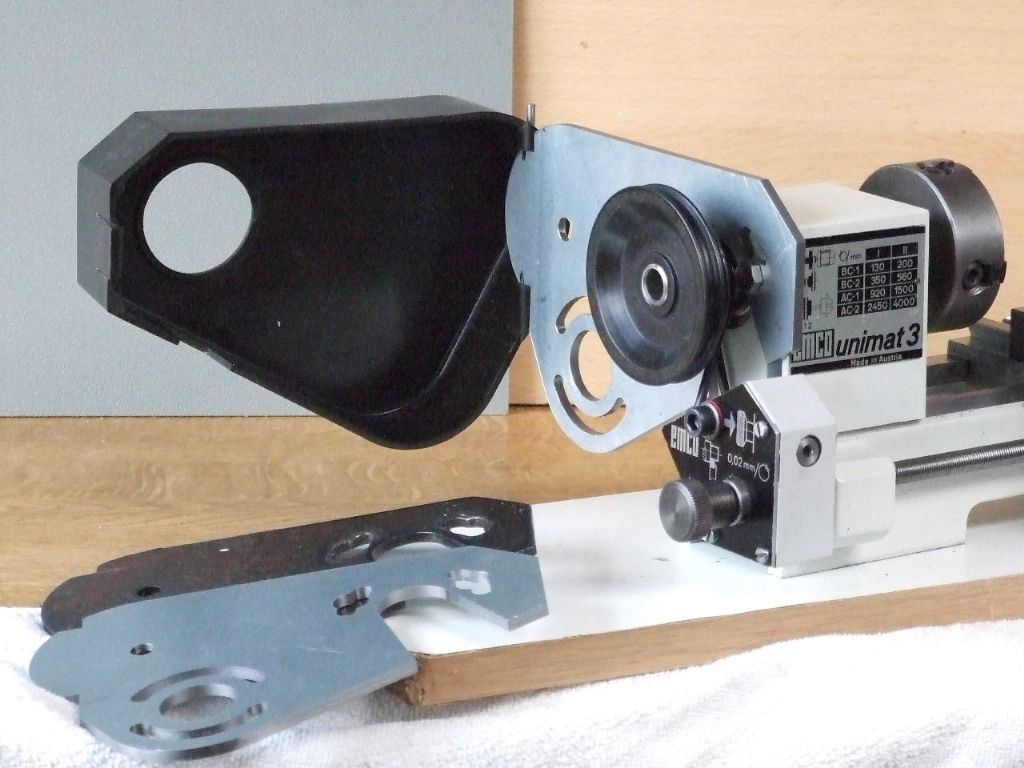
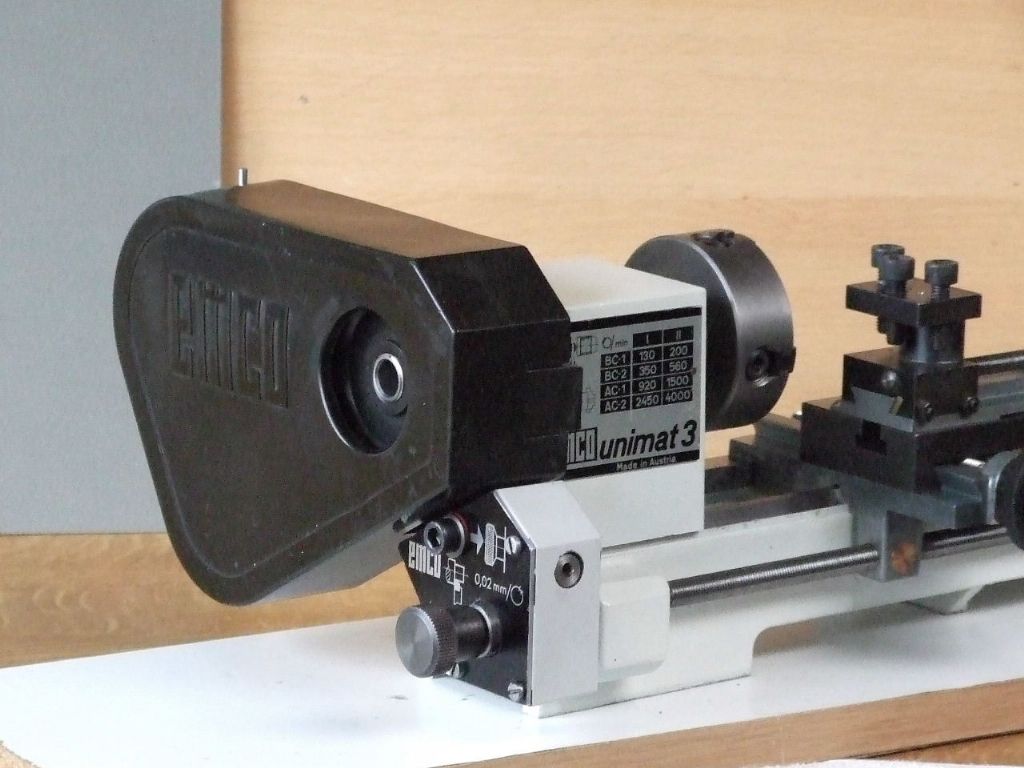
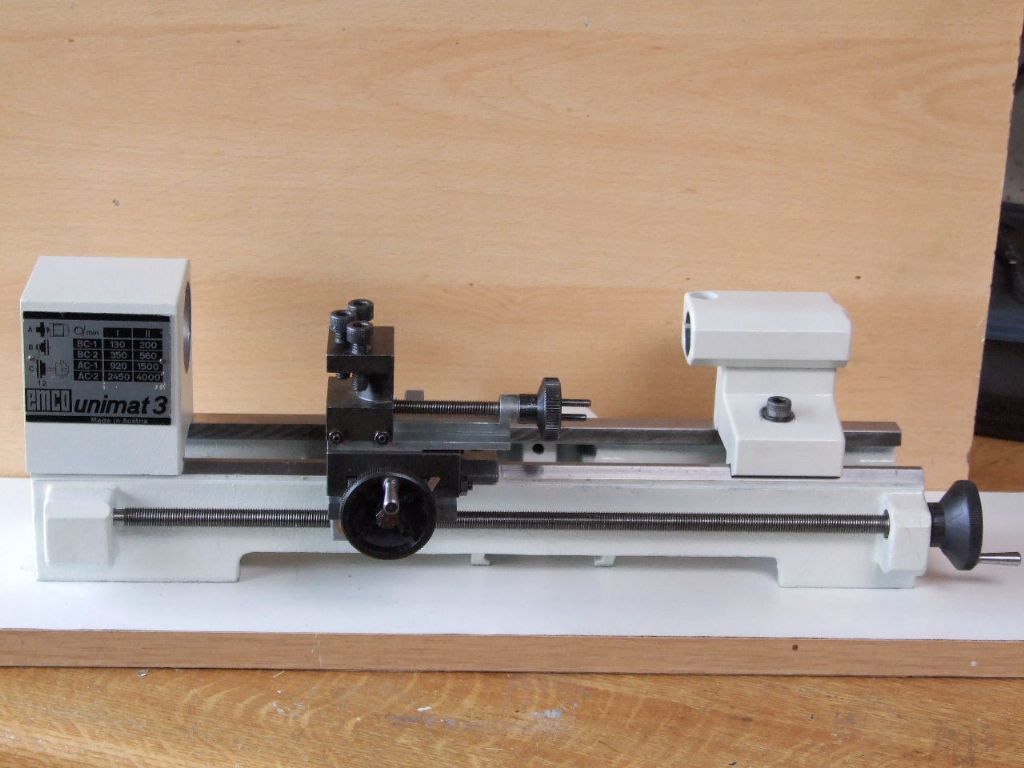
This last week saw the pair of new backplates finished. The new spindles for the idler pulleys were finished this morning after the photo-shoot. I did have some good fortune midweek in that the missing Power feed housing turned up. My lathe donor had finished cleaning out his shed and came across this part. The euphoria was short lived however when I discovered one of the previous owners had taken a twist drill to the Wormwheel bore. Why they had done this is beyond me and it is probably the reason why I had all the other parts. The hole left after the drilling was anything but round, and off centre. Luckily there was about 6 mm of the original 8 mm bore remaining. This allowed me to clock this to get onto the original centre. The hole was then bored out to 9.5 mm and a Phos Bronze bush made to salvage the unit. Lastly the cover in-situ to make sure everything fits as it should. This week I hope to get a start made on the mounting board and the Motor pulleys. Regards Gray, |
| Thread: Run out on bar |
| 12/11/2021 11:09:28 |
Putting any bar in the chuck without first establishing if that bar is straight, or not, will not prove the chuck to be sound. Further like all things in engineering the Chuck is made to a set of standards. Manufacturers give "Run-out" figures for their chucks and one of those is for a stated size bar, (usually ground, and not bright drawn), at a stated distance from the chuck jaws. Thus putting a new chuck on a machine is not going to solve any run-out problems, unless a) the bar is known to be straight, and b) the test is not done to the manufacturers specification. Even then with a 3 jaw chuck the run-out is likely to be about 0.03mm or 0.001" about an 25mm or 1" from the jaws, unless the chuck is a Precision grade chuck. Lastly the bar above has been machined in-situ, the lathe is doing what it is supposed to do. That is turn a true cylinder. This has no bearing on the accuracy of the chuck I am afraid. Regards Gray, |
| Thread: Unimat 3 Restoration |
| 07/11/2021 13:45:18 |
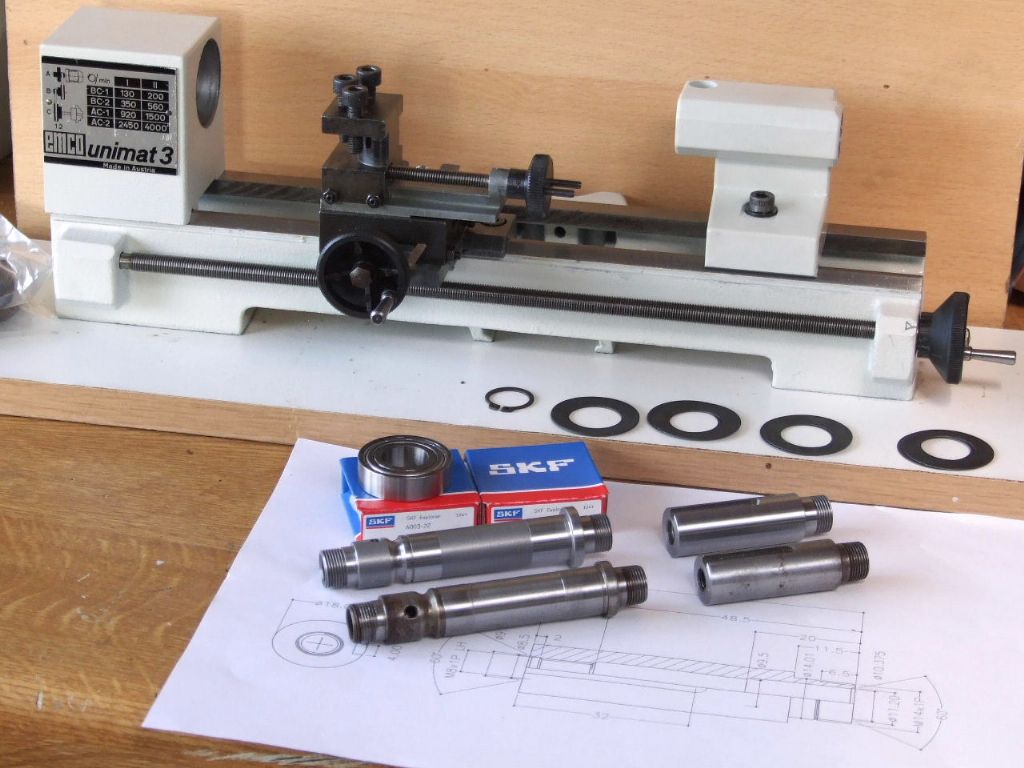
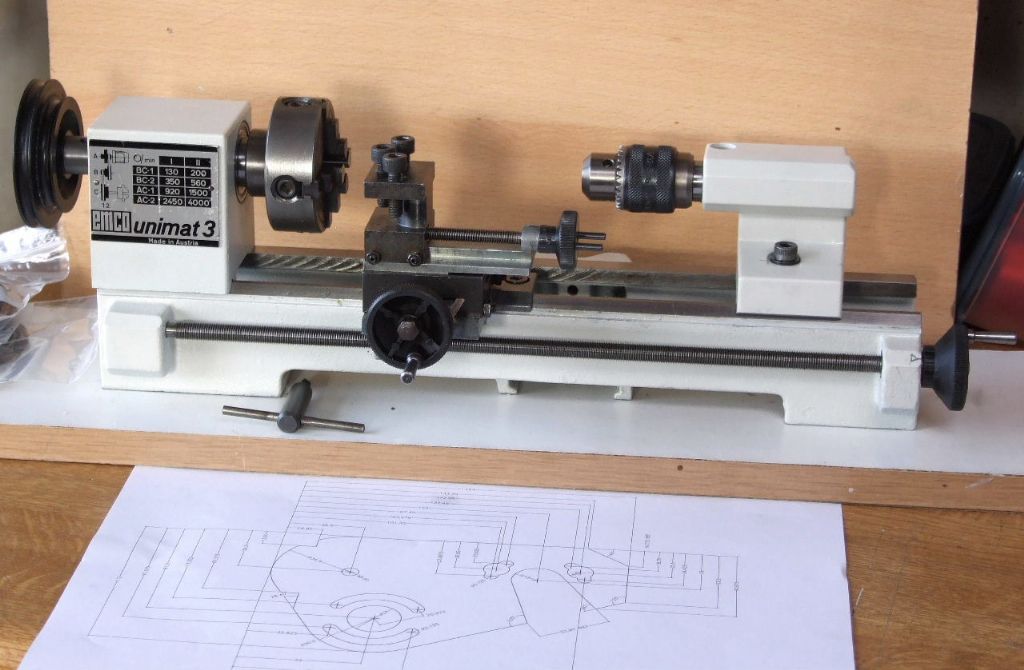
With the Sun shining into the workshop I was able to take a couple of photographs The shot above shows the old and new parts together prior to fitting onto the lathe. Now it is beginning to look more like a lathe. The drawing in the foreground is the project for this week. When received the lathe came with a GEC 1/8 HP Induction motor, which was full of Brass swarf. The motor weighs more than the lathe and the original Motor mounting plate had been severely chopped about. While the motor fitted in its allotted place the overhanging weight attached to the Headstock was not considered a good idea. Hence the new DC drive is more compact, less weight and is more powerful. Regards Gray,
|
| 05/11/2021 17:50:44 |
Hi John, and Jason, Please excuse my tardy reply, the past two days have been a bit hectic. Thanks for the info on the Tommy bars and the additional clarity on the Power feed attachment. I was convinced it was on a slight angle, that is my memory for you. It is interesting that you made a rotary table out of the drive. Many years ago I made a dividing head using the same items. With its 40:1 ratio it was ideal, I may still have the original paper drawing of the main body. I will try and look it out. Today I finished grinding the new Spindle and Tailstock barrel. The manufacture of which has been a bit of a trial in that the M14x1 gauge I made years ago left my threads oversize and I had to pick-up each thread and re-screw cut to size. The Moral here is to use the 3 wire system first, not last. The gauge is now in the scrap bin. Hopefully I will have some more photographs over the next few days. Regards Gray, |
| 03/11/2021 21:05:34 |
Hi John and Jason, That is a very kind offer which I might have to take you up on. The man at Emco, Austria, did say he would have to go down to the basement and dig out the original drawings. As these are not on the current computer system in PDF format. If he cannot find them I will get back to you. Of what I remember from my Unimat days the belt drive shaft to the gearbox is at a slight angle. As regards the spindle change, I currently want to keep it standard. I have an ESX 25 collet attachment on the Compact 5 which suits my needs. I do need to make the Tommy bars for the 3-jawed chuck as these were not in the box, so if anyone to tell me the standard length of these I would be grateful. Regards Gray, |
| 03/11/2021 17:31:22 |
Hi John, I shall be sticking with the circlip arrangement as I have the parts for the Power Feed attachment, but currently no housing. The feed attachment needs the pulley groove in the original spindle. Hopefully Emco Austria will come up with a drawing for this part, so that I can make a new housing. Otherwise I shall be adding a variable DC drive to a home designed housing. Regards Gray, |
| 03/11/2021 16:28:19 |
Hi John, I have acquired quite a bit of "shop soiled" original Emco tooling to go with this lathe, so I will be sticking with the standard spindle. I shall however be making the Spindle and Tailstock barrel from something a little more exotic. Which I hope will be more durable than the standard material. Regards Gray, |
| 03/11/2021 13:04:57 |
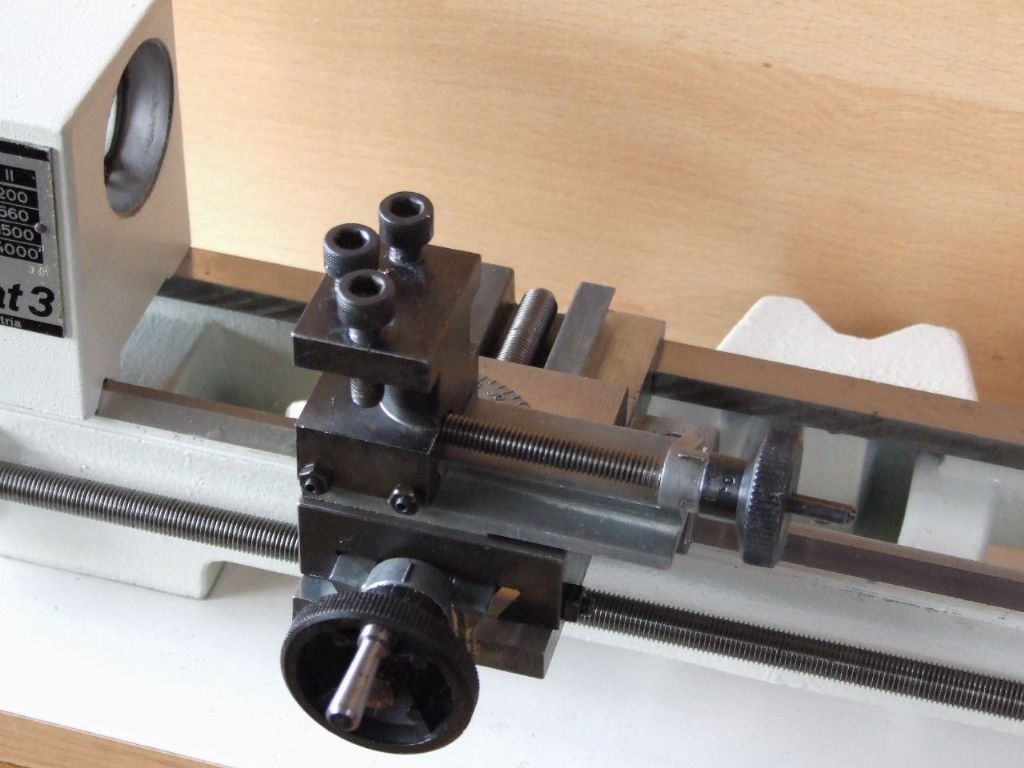
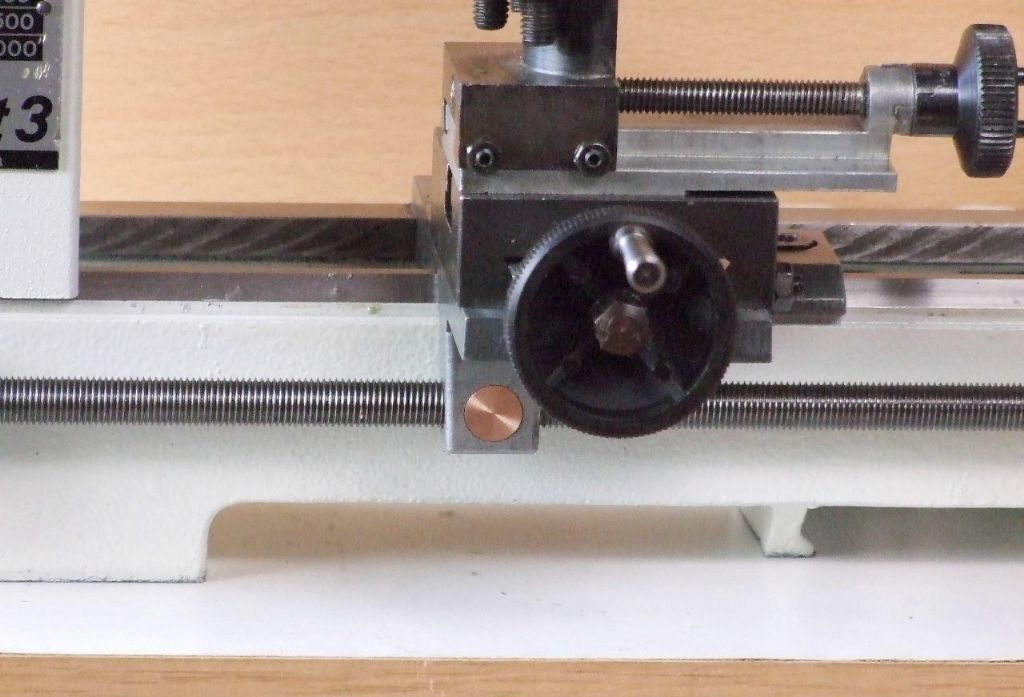
On Monday the parts went to the Paint Shop, (aka the Summer House). This being warmer than workshop. I will be first to admit I am no good at paint spraying, but I am pleased with my efforts. I have also taken a photograph of the Cross-slide and Top-slide. The Brass Gib on the cross-slide is easy to spot. Lastly yesterday was spent on a salvage scheme for the Longitudinal feed nut. The original die-cast nut had worn quite considerably with 0,25 mm backlash. The new Phos Bronze Cylindrical nut has reduced the backlash to 0.05mm. Which is not bad considering it is the original feedscrew. Tomorrow hopefully I will make a start on the new Spindle and Tailstock Barrel. Regards Gray, |
| 30/10/2021 10:32:40 |
Hi Dave, This is where my memory plays tricks with me. I was convinced Emco called it a Taper Turning attachment, but on checking the Parts List it is indeed referred to as the Top Slide. Which is what I would normally call this part of the lathe. Although it is referred to in other circles as the Compound Slide. Sorry for building up your hopes on a Taper Turning attachment. Regards Gray, |
| 29/10/2021 18:20:41 |
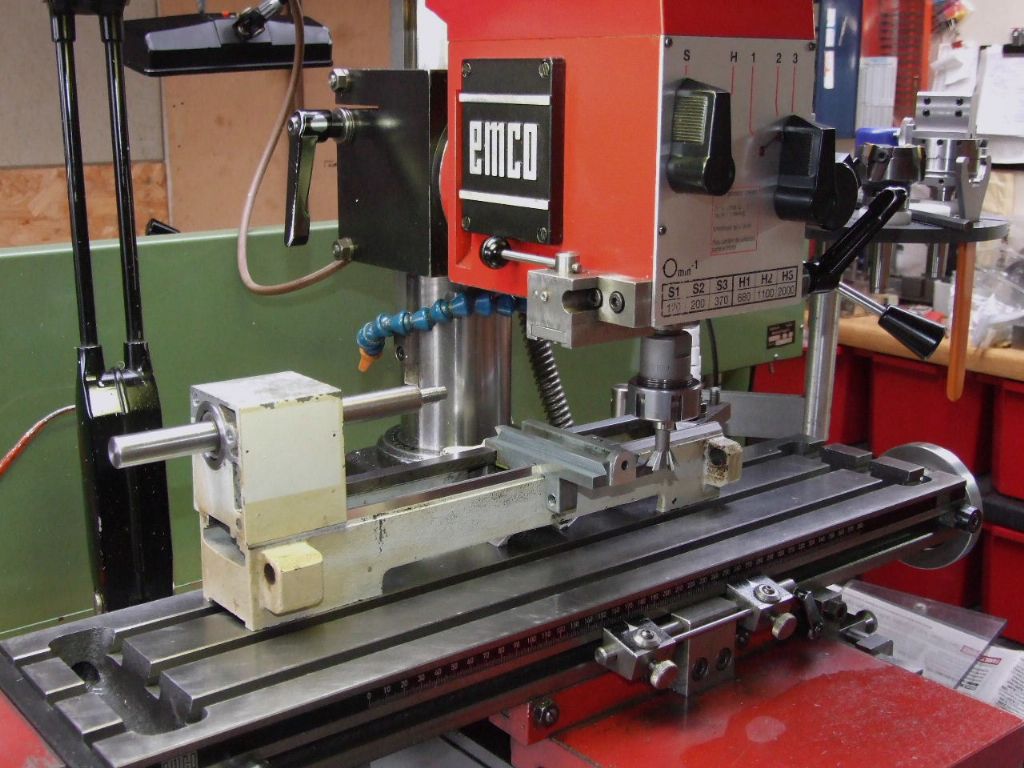
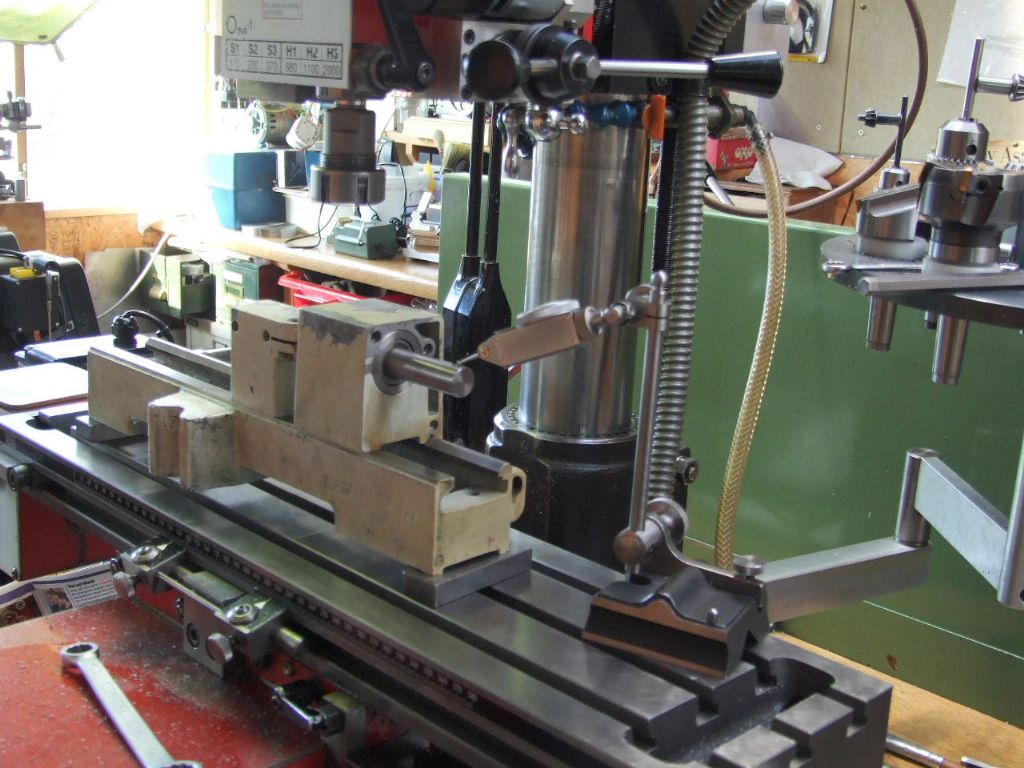
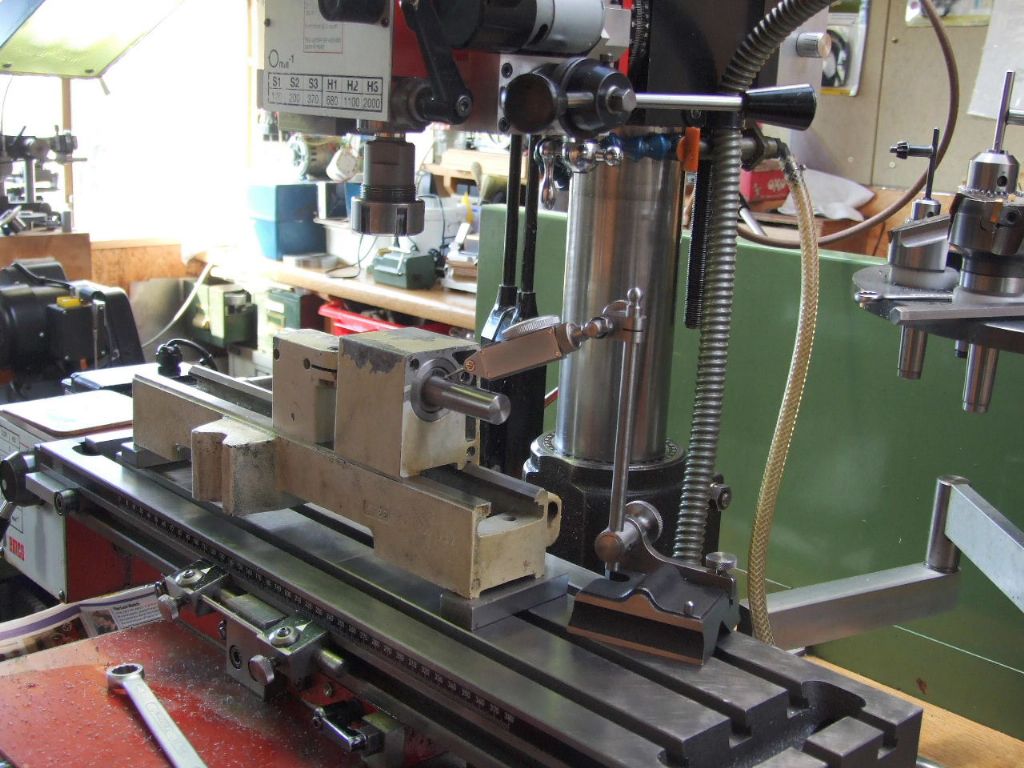
Thanks Howard, You will probably be right on that score. Having set the Taper Turning slide up on the mill this morning to skim the Master dovetail. I found whilst clocking the flat of the slideway that the slide had suffered some damage. In that the handle end was dipping away by about 0.15 mm. Where the slideway was bolted to a slave cross-slide in the machine vice there was no deflection. Using a small screw jack off the bottom face of the machine vice I was able to rectify the error. Just to be on the safe side I machined 0.025 mm off these faces as well. It is not an easy part to rectify as the feedscrew is fixed in relationship to the dovetails. Luckily my 0.05 mm off the dovetail did not affect this alignment. The damage was not restricted to the slideway. When I assembled the feedscrew the handwheel end was running out by about 0.15. A few judicial taps with the nylon mallet in the Maximat lathe chuck soon had this part running true. All is now well with the slideways and I shall be moving on to make a new spindle and tailstock barrel. Apart from both parts being extremely rusty the threads to take the chucks have worn a lot. Regards Gray, Edited By Graham Meek on 29/10/2021 18:24:17 Edited By Graham Meek on 29/10/2021 18:24:48 |
| 28/10/2021 18:24:44 |
I have made Brass Gibs today and have so far fitted the cross-slide only. The cross-slide feels silky smooth now. However the taper turning attachment is going to need a bit more work. Holding the slide up to the light the Master dovetail on the toolpost is not matching that on the slideway. Regards Gray, |
| 28/10/2021 10:58:23 |
Hi Dave, I have been pondering over what to use for the new Gib strips. One of the previous owners had overtightened the adjusting screw and split the Moulded Glass reinforced plastic Gibs. My first thoughts were for steel, as the Taper Turning main body is made of steel. Tufnol also came to mind, but given you have had a good experience with Brass I might opt for this material. Regards Gray, |
| 27/10/2021 20:43:29 |
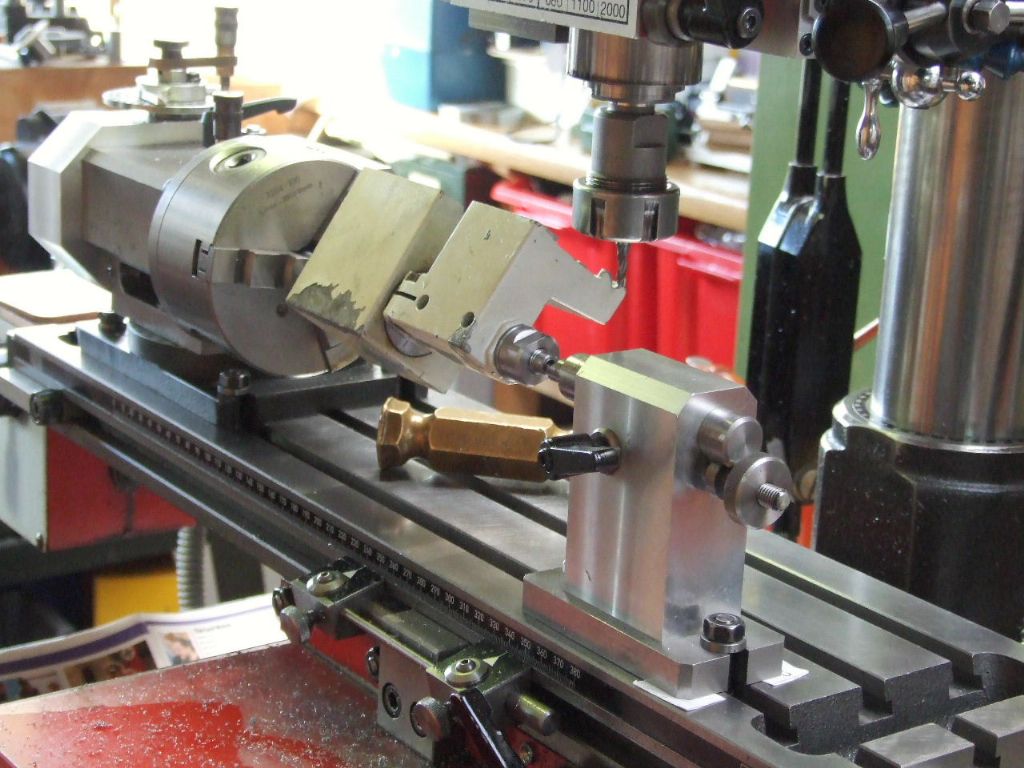
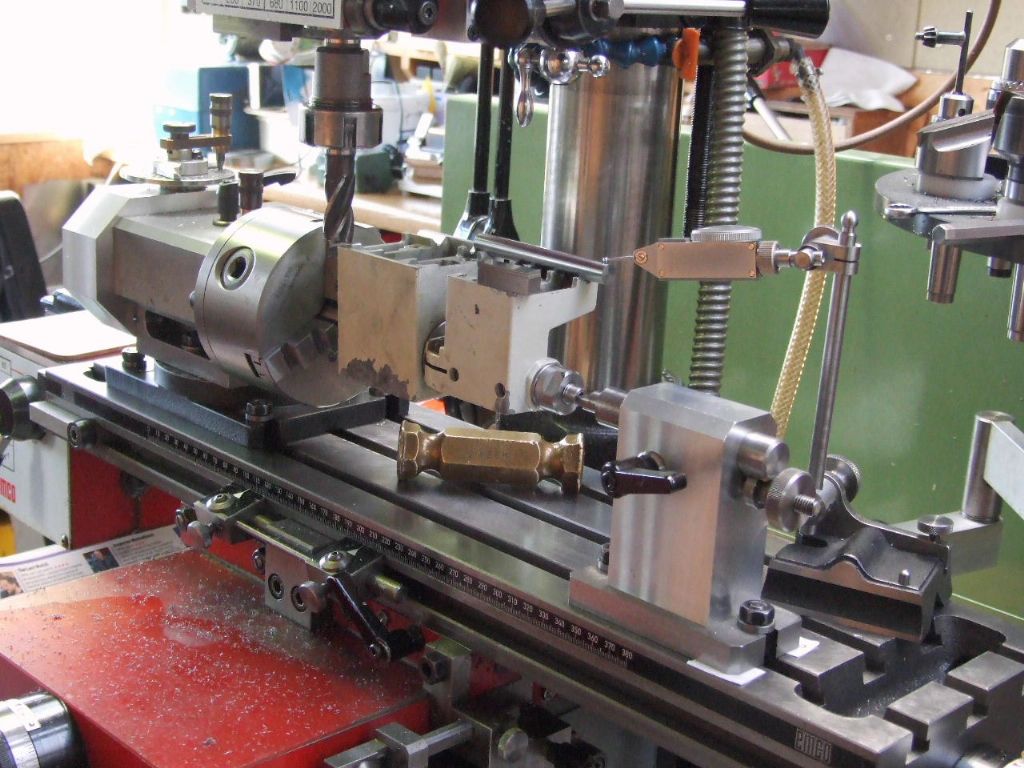
Well after much prevaricating I decided to set the lathe up with a slight cant. It amounted to a quarter of one division on my 0.01 mm clock. Running a further check over a hardened dowel pin on the un-worn portion of the Master dovetail on the cross-slide showed on error. Thus I concluded I must have hit on the original factory setting, first time round. While the machine was on the milling table I also cleaned up the front face of handwheel boss. Just in case I need a flat face to reference off at a later date and also to remove the wear. Swarf at sometime had been trapped there and produced anything but a good running surface. Regards Gray, |
| 27/10/2021 10:51:16 |
Hi Dave, The Vee's on the tailstock were the worst, but only required 0.08 mm off each face. The Flat required more due to the geometry, but this was in the region of 0.125/0.15 mm. Hard to say exactly as the "touch on" with the cutter would have accounted for something. Even though the cutter still initially left signs of the Felt Tip marker ink. I have started on the carriage and the new machined faces fit on the bed is as I would expect. The dovetails for the cross-slide will be next. Over 6 mm rollers there is 0.05 mm taper from the unworn part nearest the handle to the end nearest the motor. In essence it should have a slight cant towards the headstock, so that the machine faces concave. However the machine is also used for milling and this would make the X and Y axis not square to one another. I know I am splitting hairs as the cant will be in the order of 0.01 mm over 100 mm. This is the point where it can be put right, but which is right?, so I am still pondering on this one. Regards Gray, |
| 26/10/2021 16:41:03 |
I had a visitor to the workshop recently come bearing gifts. In the form of a much used Unimat 3 less original motor. The visitor said he had been given the machine some years ago and only came across it while clearing out the garden shed. If I could make use of it, then it was mine otherwise it was heading for the skip. After removing layers of swarf which had congealed with oil and formed a shellac work was started on stripping the machine. While everything was red with rust the bedways were in good order with some slight staining. Clearly the oil on the bedways had done its job in protecting them. After running a clock over the working surfaces of the Bed there as no more than 0.01 mm maximum wear. The tailstock working surfaces and the carriage working surfaces were not so good. while there was only about 0.05 mm wear the surface seemed to be filled with abrasive. Thus yesterday I made a start on machining the faces back to new. The Vee ways can present problems. Thus I opted for using the Dividing Head to guarantee an exact 90 degrees. Which also made machining the flat easy. Having the Headstock with an undamaged surface it was easy to establish what height the flat was relative to a roller in the Vee way. Machining the two items on a common mandrel ensured that alignment would be maintained. Before the parts were removed from the mandrel a check was done on the Bed to ensure the mandrel was true or parallel to the bedways. The last operation on the Headstock was to put Helicoil inserts in the tapped holes which hold the motor mounting plate, apart from painting. More to follow. Regards Gray, Edited By Graham Meek on 26/10/2021 16:44:17 |
| Thread: Clock Stand with a difference |
| 16/10/2021 19:41:52 |
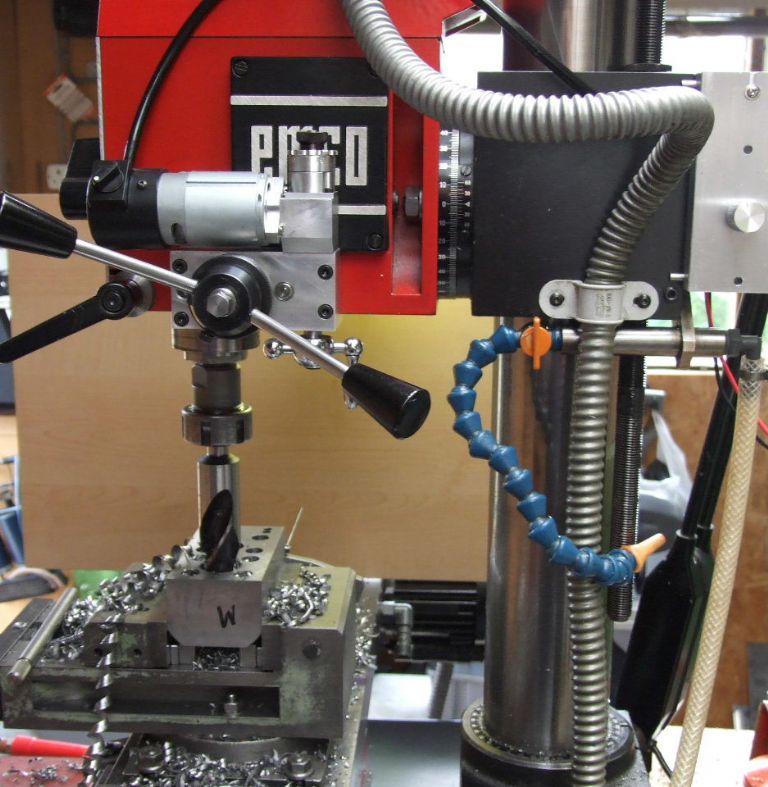
Thanks Howard & Martin for the kind words, I used the Clock Stand Column the other day to check out the Geometry of the FB2 Main Column. Using a clock in the collet holder and traversing over the Clock Stand Column using the Z-Axis. I have always known there was an error but without something truly perpendicular it has not been possible to check this before. I had thought the error was quite a bit larger than I eventually measured, but at 0,02 mm, (in the Y-Axis Plane) over the entire Z-Axis travel I am happy with that. In the X-Axis Plane it is possible to adjust for a zero reading. It will be easier once I have installed the drive mechanism to traverse the Slider on the Clock Stand. Then any clock can be held in the Slider and traversed vertically over the item being checked. I have ear-marked the Emco Angle plates as the first items to get this treatment and to finally be rectified. Regards Gray,
|
| 16/10/2021 16:25:39 |
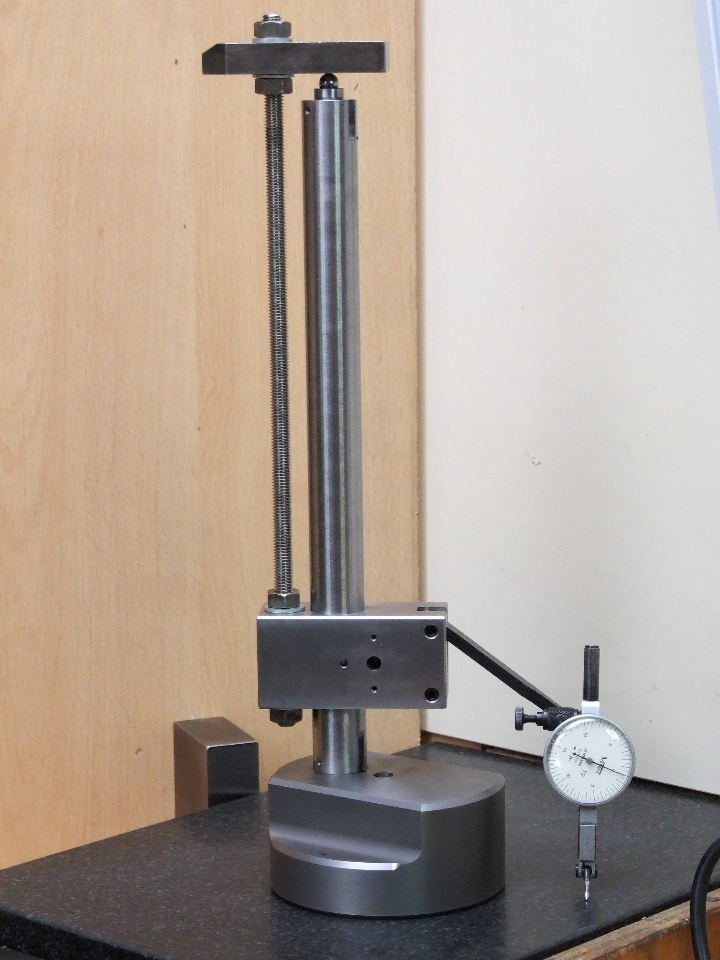
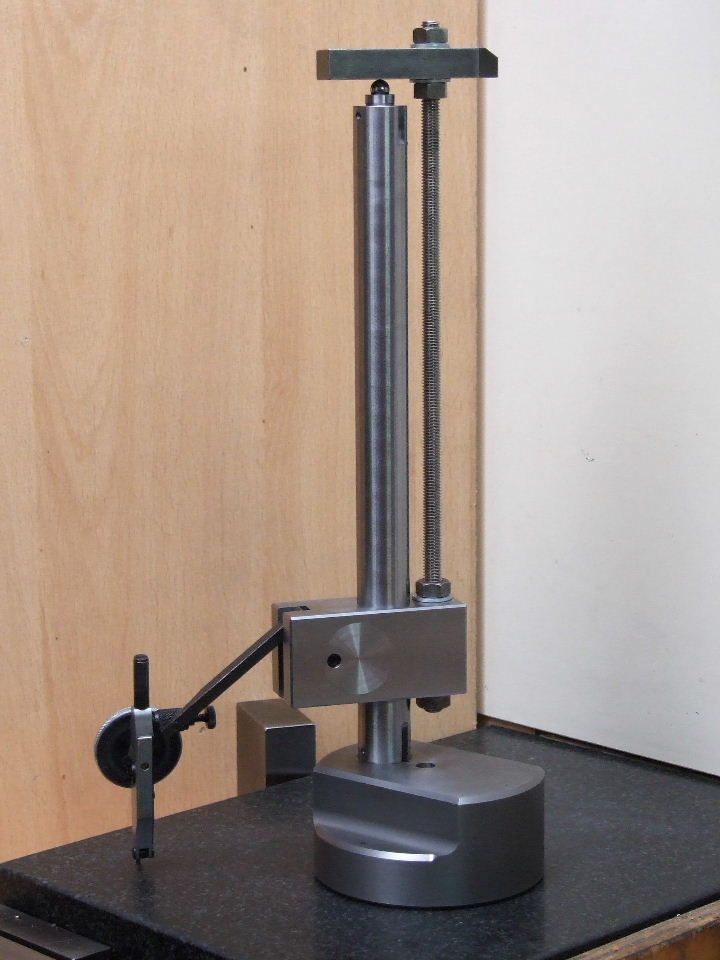
I have managed to finish the Slider today, so took the opportunity to do a second check for Perpendicularity. Since posting on here last John Slater drew my attention to "Monday Night Meatloaf 116 P2" on YouTube. Tom Lipton is making a similar dedicated device and has a novel way of checking the perpendicularity. I had watched this sometime ago but forgot all about it in the interim, so I must thank John for refreshing my memory and saving me some work. Rather than make something as Tom does in his video, I have used a piece of M8 Studding (Allthreads) and one of my Milling clamps to give the same results. Note the Ball bearing to give point contact at the top of the Column. In this initial set-up I had an light reading, (error), of 0.005 mm at what will be the front of the Clock Stand. This I expected as my first tests before showed a slight lean on the Column of this magnitude towards the centre of the Clock Stand. The clock is sweeping a 200 mm diameter circle and the location points in the FB2 shots were about this distance apart. Rotating the Clock Stand through 180 degrees and repeating the check showed a similar error but this time it was only 0.003 mm. I know from the report that came with my surface plate that it has a slight hump. Thus when it comes to chasing these sort of errors there comes a time when it has to be accepted that this is good enough for the workshop concerned and any further work is meaning less. One thing this check does show is that the first set-up using the FB2 Mill is a sound one. Regards Gray, |
| Thread: EMCO FB2 Head Unit |
| 10/10/2021 11:23:38 |
|
To help avoid changing tanged Morse taper twist drill shanks and to get more of a working envelope. I use a selection of Black Smiths drills, as shown above. That is not to say I don't use standard MT Twist drills, especially if the size falls between my Black Smiths drill range. While I have toyed with the idea of converting these to Drawbar use it would present problems when using them on the Maximat Lathe. Unless I made a screw in Tang, not that this machine has provision in the socket for a tang. The extra length is needed to eject the drill. Keeping Morse taper shanks free from "Dings" and clean, I use a Lint Free Wipe before inserting any tooling in the Morse taper sockets, is the easiest way to prevent drills spinning. Provided also the socket is free of oil, burr free and clean, there will be no chance of the taper moving. Unless the drill happens to grab due to the wrong cutting angles or over exuberance on the feed. Regards Gray, |
| Thread: Clock Stand with a difference |
| 05/10/2021 18:11:33 |
Posted by MadMike on 05/10/2021 15:31:15:
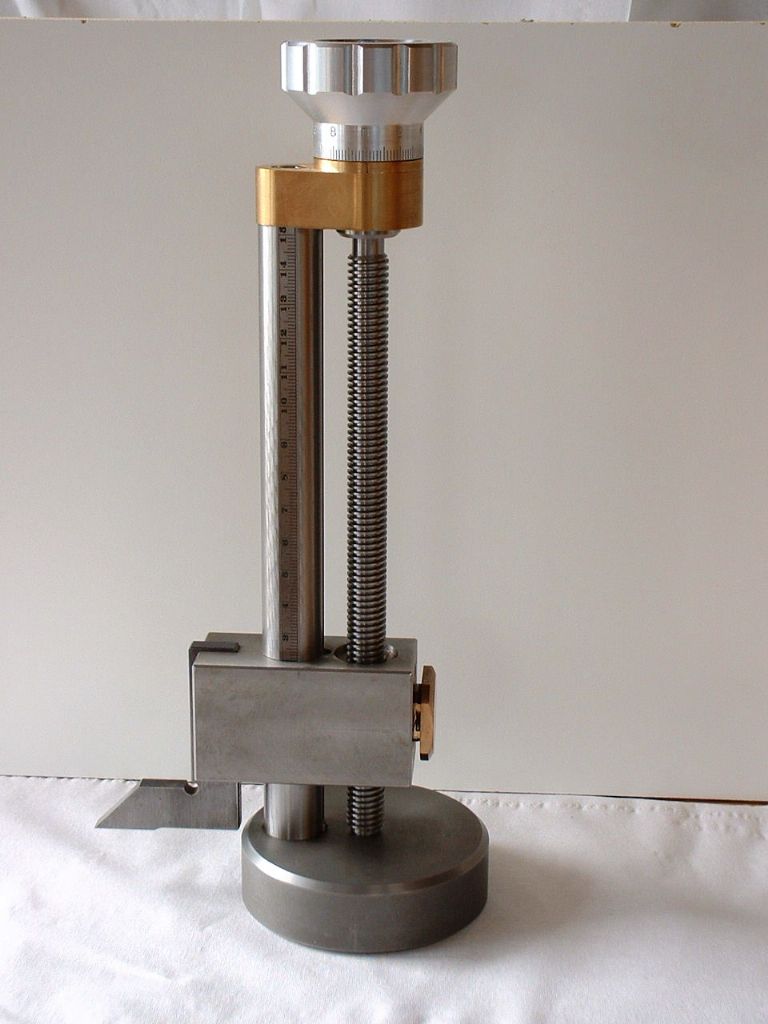
Lots of great solutions here but why not simply buy and use a height gauge to hold the clock/DTI? Or did I just scan the topic too quickly and miss something fundamental. If all you really want to do is make the stand that you described as a test of your own competence etc then I can understand the initial questions, however if you want to simply get on with with other machining then buy a ready made height gauge with a DRO fitted. The opening line is that this is a Clock stand with a difference. The difference being is that this Clock Stand will traverse a DTI vertically and check to see if a machine element, or a machined face on a component is dead square to a reference surface. Such machines are an "arm and a leg" to buy, and are a dedicated item, not dual purpose. This design was initially a good Clock Stand, the facility to check a Vertical was an optional extra I thought would be good to have in the home workshop. Also I did say the DRO, to make it into a height gauge was another afterthought. I have a Height gauge that I designed, and it has served me well for over 40 years, so really I don't really need a Digital version, but I am always open to try something new. Lastly, while a commercial Height Gauge is going to be pretty close to a true Vertical, those I have looked at give no accuracy guarantee for perpendicularity, and in 40+ years in industry I have never seen one used for this purpose. The one designed here will. Regards Gray, |
Want the latest issue of Model Engineer or Model Engineers' Workshop? Use our magazine locator links to find your nearest stockist!
Sign up to our newsletter and get a free digital issue.
You can unsubscribe at anytime. View our privacy policy at www.mortons.co.uk/privacy
- *Oct 2023: FORUM MIGRATION TIMELINE*
05/10/2023 07:57:11 - Making ER11 collet chuck
05/10/2023 07:56:24 - What did you do today? 2023
05/10/2023 07:25:01 - Orrery
05/10/2023 06:00:41 - Wera hand-tools
05/10/2023 05:47:07 - New member
05/10/2023 04:40:11 - Problems with external pot on at1 vfd
05/10/2023 00:06:32 - Drain plug
04/10/2023 23:36:17 - digi phase converter for 10 machines.....
04/10/2023 23:13:48 - Winter Storage Of Locomotives
04/10/2023 21:02:11 - More Latest Posts...
- View All Topics
- Reeves** - Rebuilt Royal Scot by Martin Evans
by John Broughton
£300.00 - BRITANNIA 5" GAUGE James Perrier
by Jon Seabright 1
£2,500.00 - Drill Grinder - for restoration
by Nigel Graham 2
£0.00 - WARCO WM18 MILLING MACHINE
by Alex Chudley
£1,200.00 - MYFORD SUPER 7 LATHE
by Alex Chudley
£2,000.00 - More "For Sale" Ads...
- D1-3 backplate
by Michael Horley
Price Not Specified - fixed steady for a Colchester bantam mark1 800
by George Jervis
Price Not Specified - lbsc pansy
by JACK SIDEBOTHAM
Price Not Specified - Pratt Burnerd multifit chuck key.
by Tim Riome
Price Not Specified - BANDSAW BLADE WELDER
by HUGH
Price Not Specified - More "Wanted" Ads...
Do you want to contact the Model Engineer and Model Engineers' Workshop team?
You can contact us by phone, mail or email about the magazines including becoming a contributor, submitting reader's letters or making queries about articles. You can also get in touch about this website, advertising or other general issues.
Click THIS LINK for full contact details.
For subscription issues please see THIS LINK.
Model Engineer Magazine
- Percival Marshall
- M.E. History
- LittleLEC
- M.E. Clock
ME Workshop
- An Adcock
- & Shipley
- Horizontal
- Mill
Subscribe Now
- Great savings
- Delivered to your door
Pre-order your copy!
- Delivered to your doorstep!
- Free UK delivery!


 Register
 Log-in


