Member postings for Joseph Noci 1
Here is a list of all the postings Joseph Noci 1 has made in our forums. Click on a thread name to jump to the thread.
| Thread: Ideas on how to make up a G-Clamp Swivel Foot |
| 19/09/2021 08:41:25 |
Surely the foot is simple - I would think the ball on the screw end is more problematic since it was asked how to make that as well- for those without ball-turning jigs..
Edited By Joseph Noci 1 on 19/09/2021 08:42:11 |
| Thread: CNC Lathe Scratch Build |
| 17/09/2021 08:36:58 |
Thank You Pete. This is not most folk's cup of tea and it is good to receive some comment! Not this forum's idea of 'Model Engineering', and I am considered somewhat anal and excessively fastidious by some.... On top of that, this project has been, and still is, a challenge. It's scope grew beyond my intentions and the basic capability of most of my machines and challenged me to the point of almost giving up - a few times...Here in Namibia there are NO other folk dabbling in this stuff at all, so cannot even go see someone and lament over a cup of tea, or a barrel of beer! Thanks for the encouragement. Joe |
| 16/09/2021 16:26:41 |
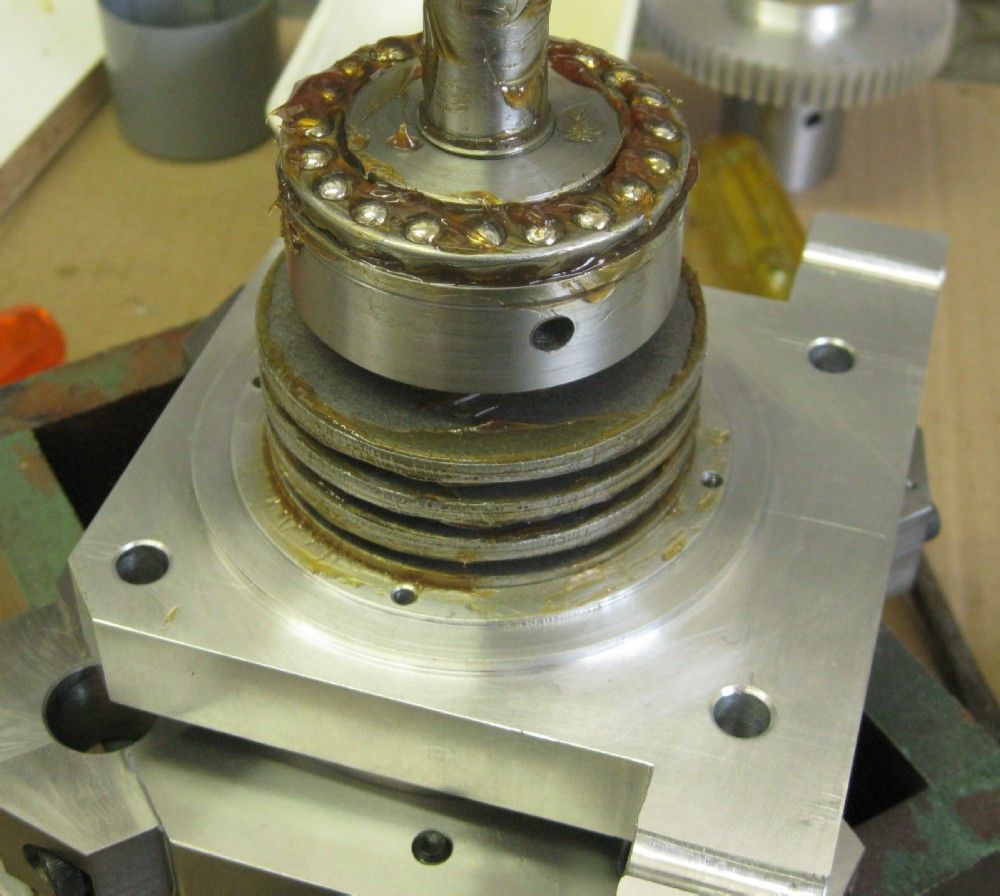
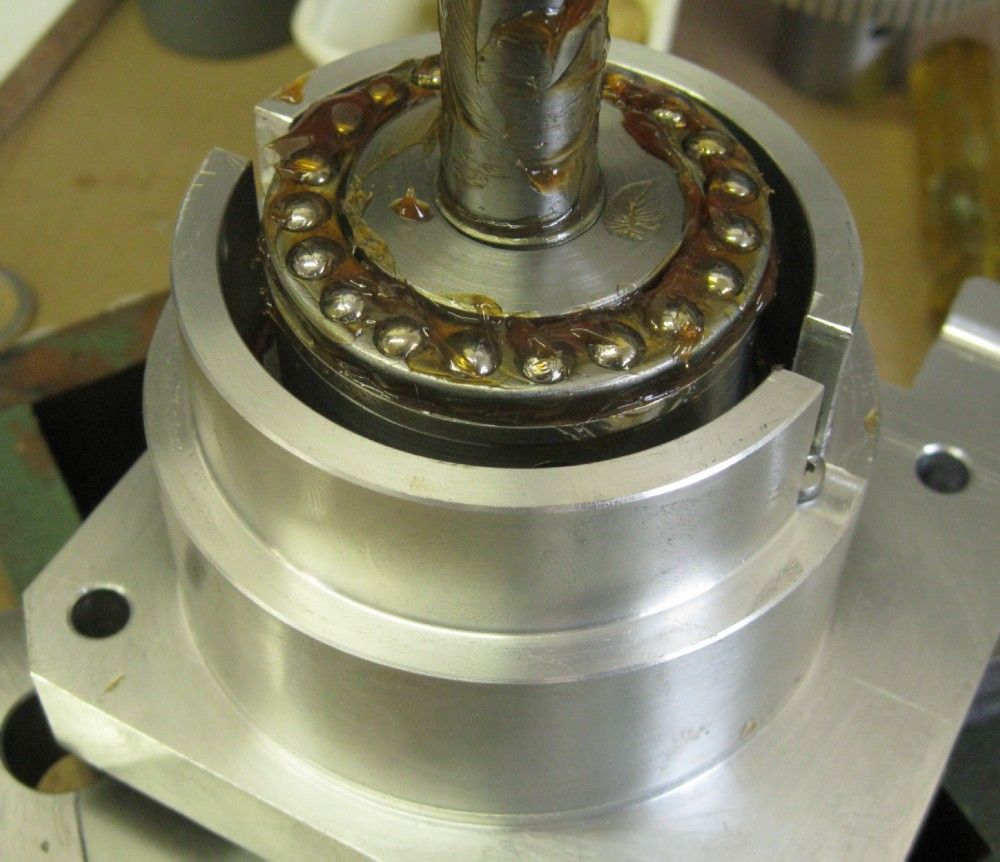
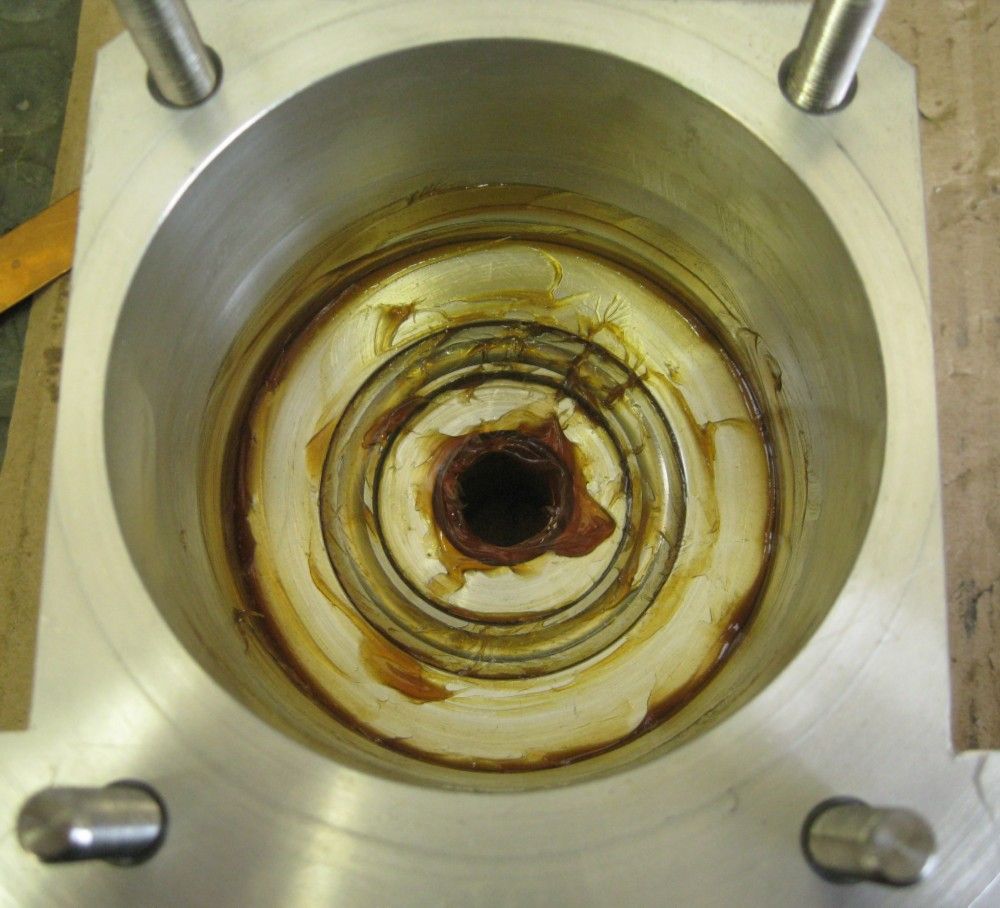
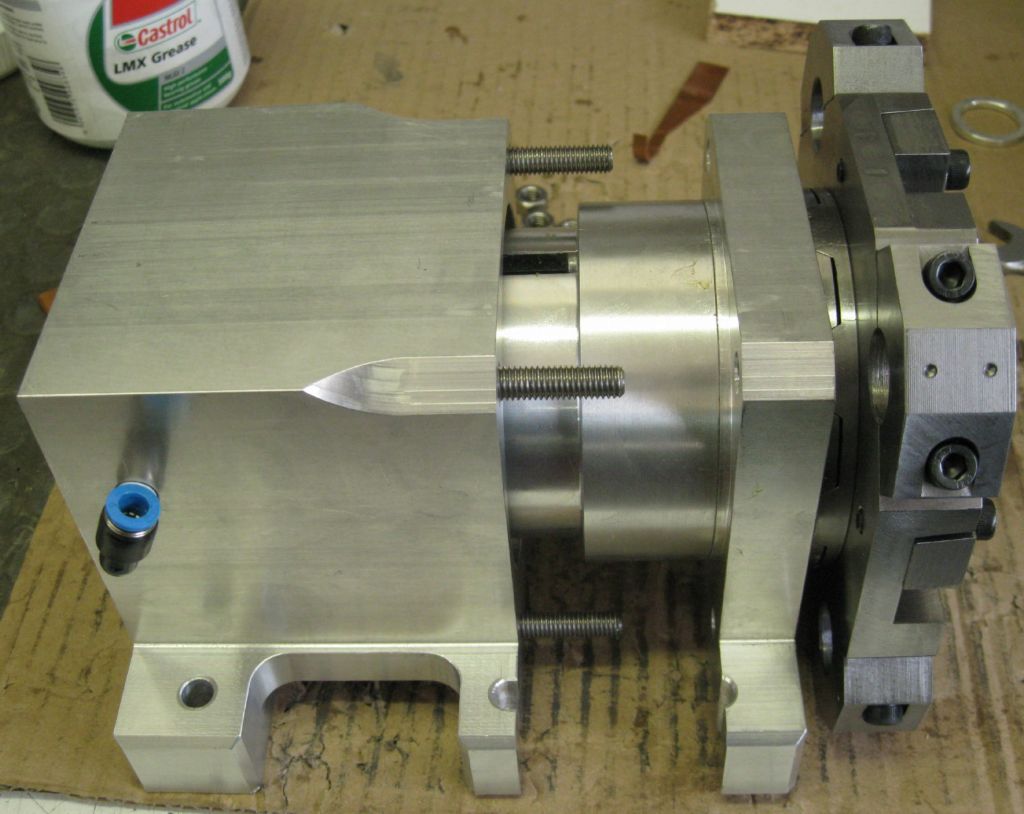
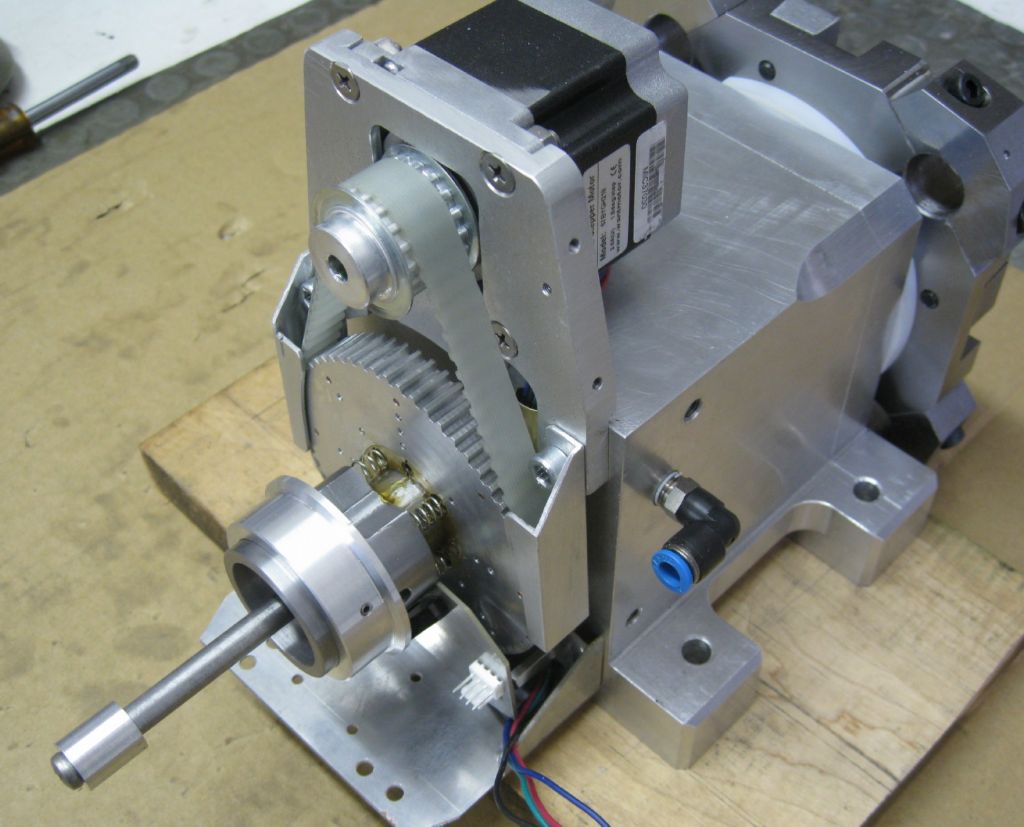
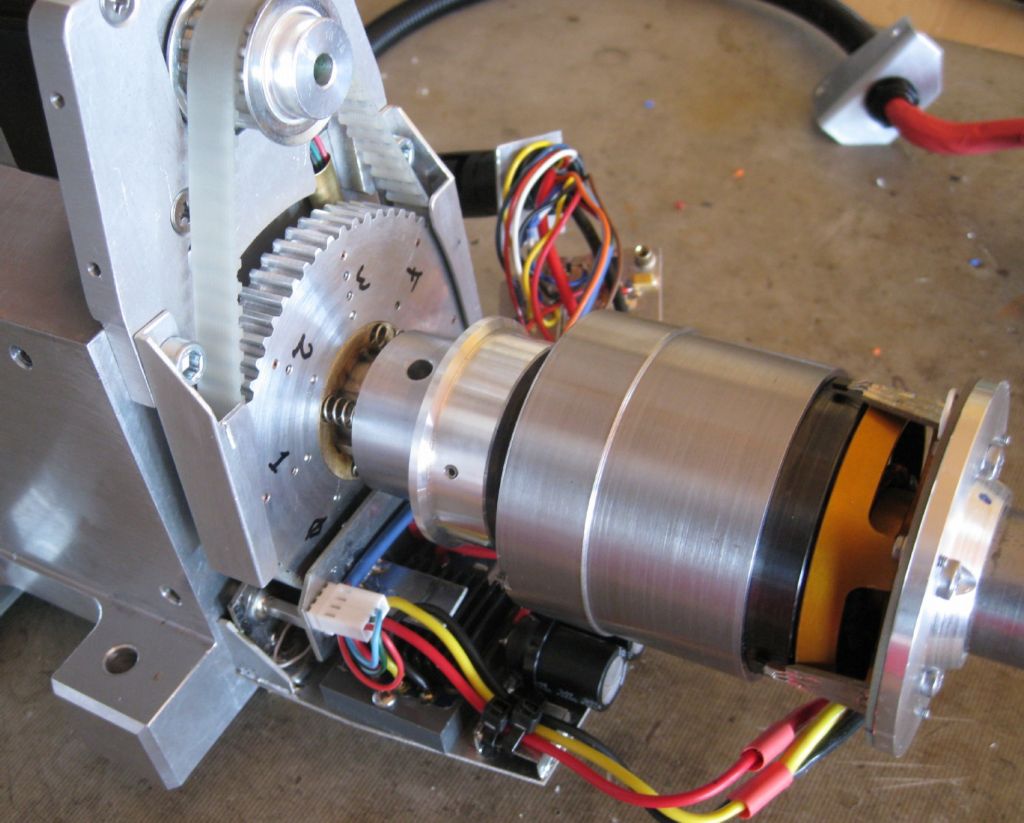
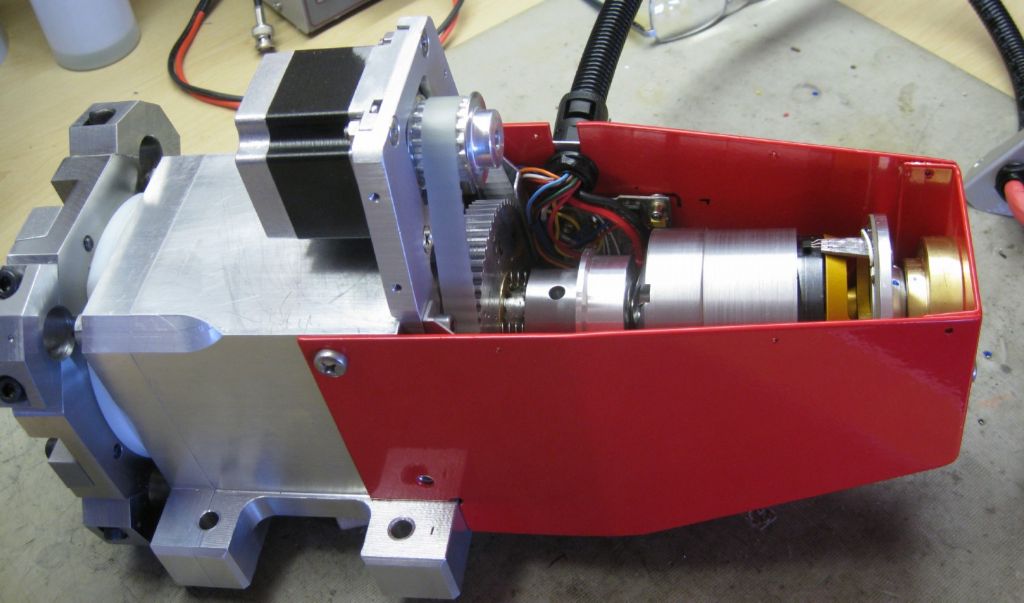
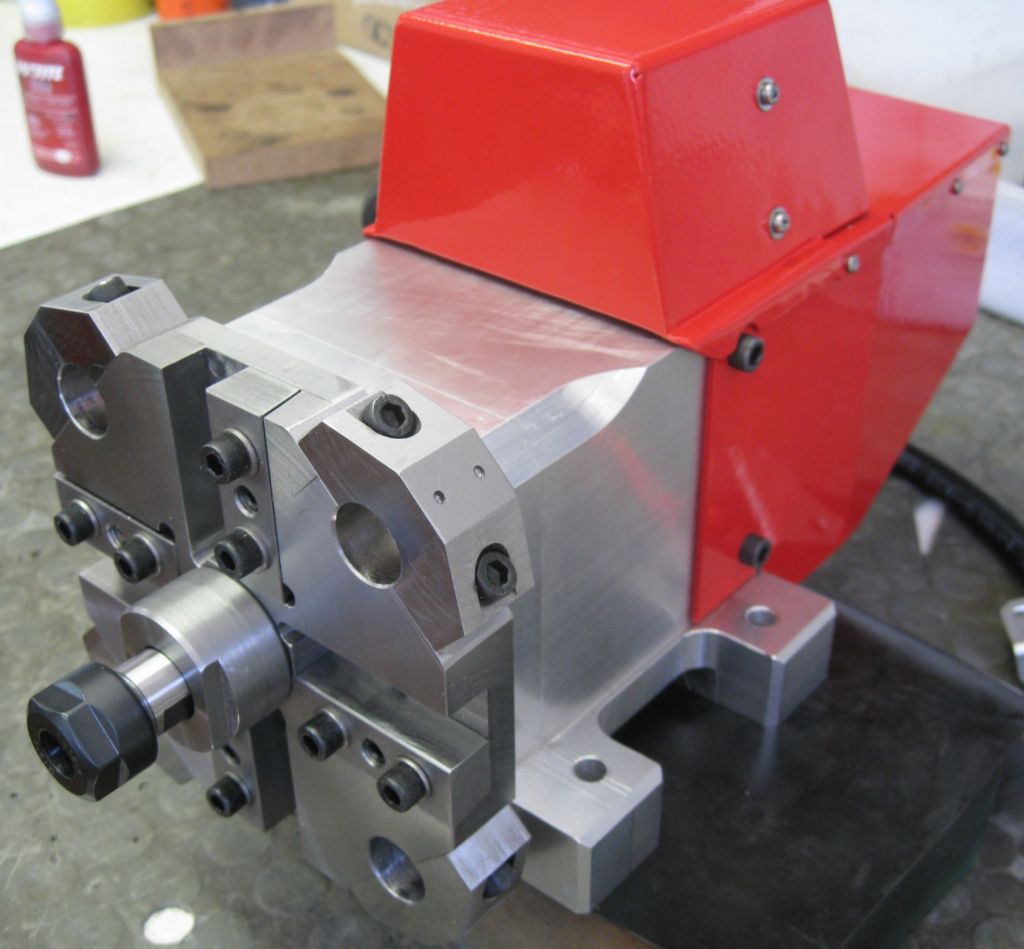
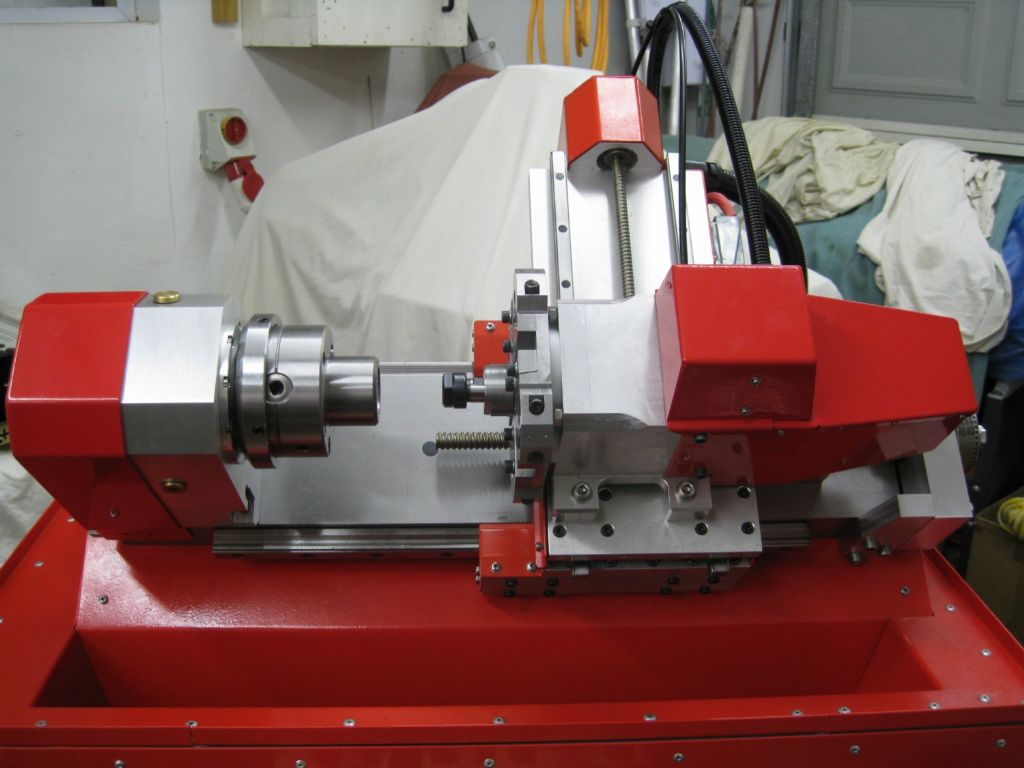
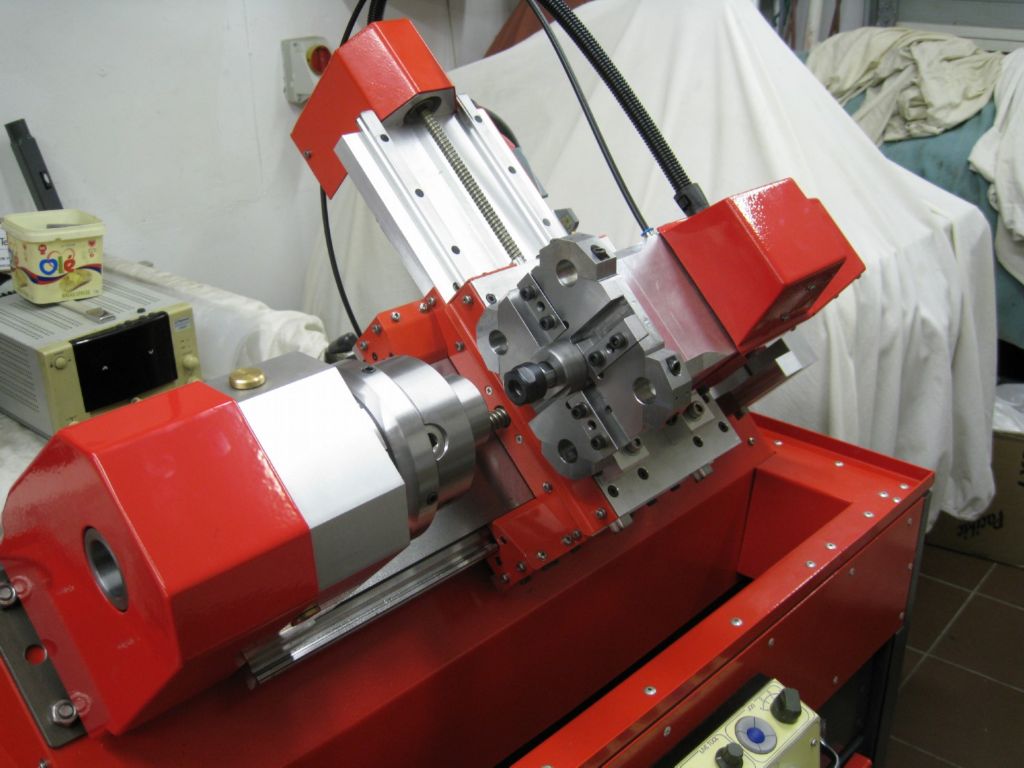
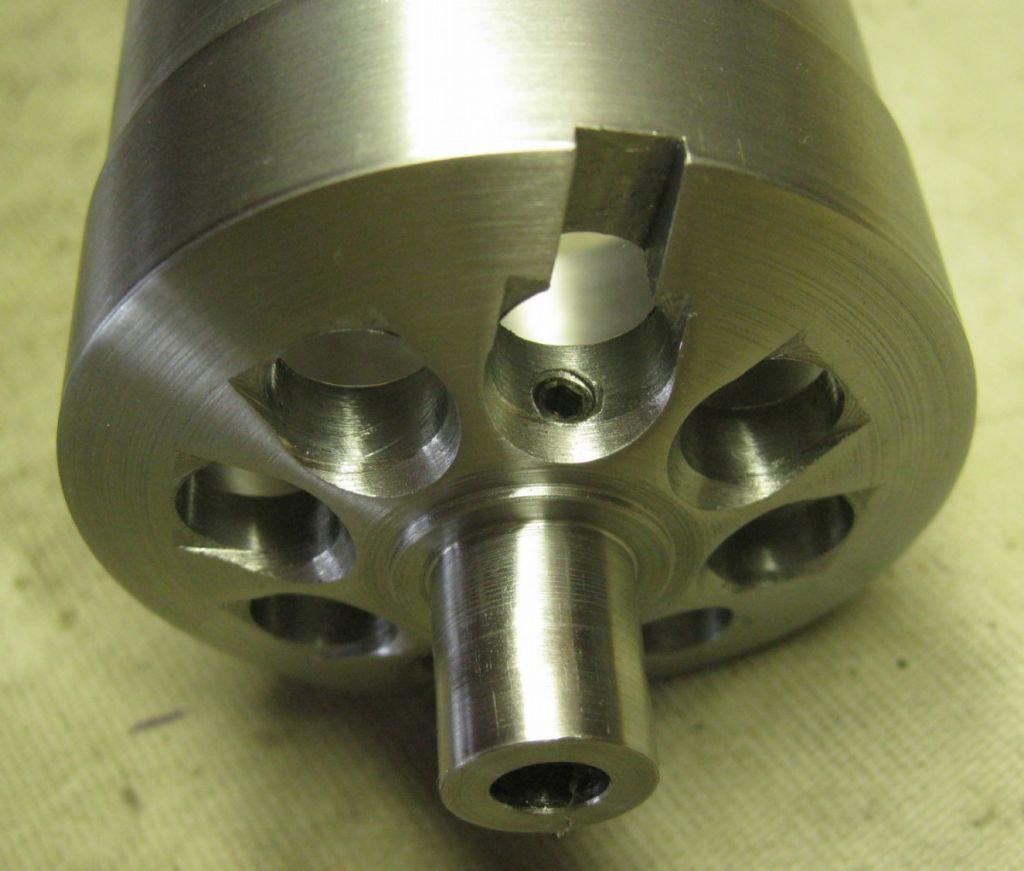
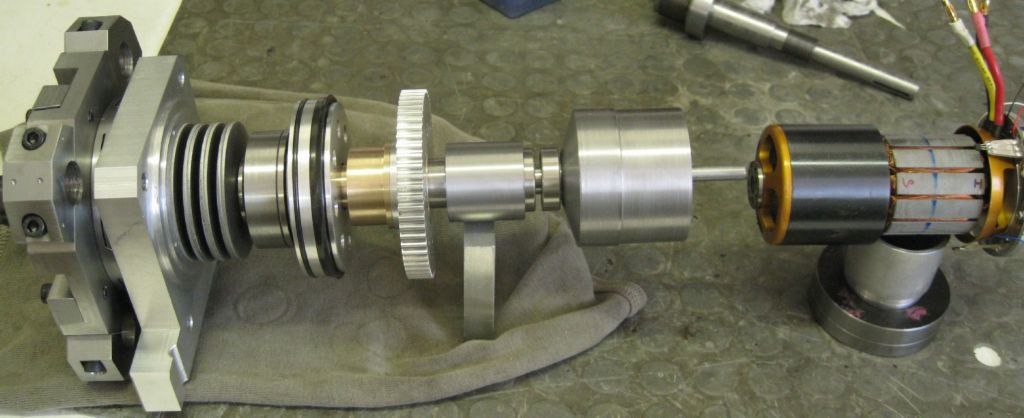
The ATC is 'complete' - all parts are done and the thing is assembled. I have tested it using a Nucleo with some test code - The Hirth coupling disengages @ 105psi and the stepper turns the tool plate just fine. The live spindle drive also works very well, so all in all I am happy. View of the Bellville springs under preload. Piston travel limiter installed. Piston fitted into the cylinder body. Mating all parts together Live spindle drive shaft installed Spindle motor and drive electronics fitted Main cover fitted All covers on, ready to fit to lathe Views on the lathe
Now the big deal is to get LinuxCNC to talk to the ATC, so I am bum on chair and head buried in the mess of LinuxCNC, HAL and that cryptic world! Last post on this lathe will hopefully be a video of it working.. Joe
|
| Thread: Multimeter recommendations |
| 08/09/2021 07:56:08 |
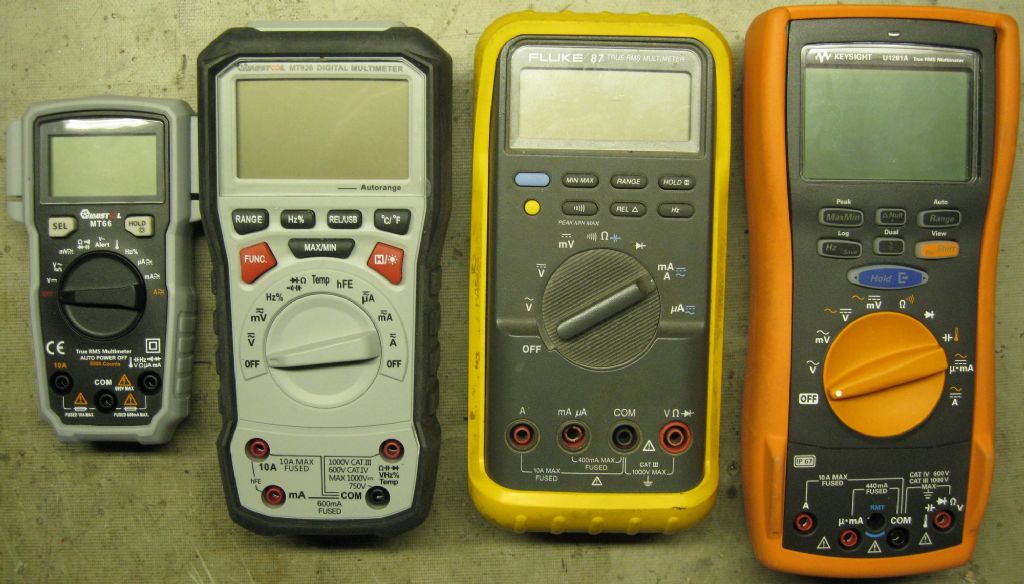
All the meters I have used have separate inputs for current, so must be a real lapse in focus to measure volts with the meter set so.. I think the 'cheap' meters are still pretty good value for money, if the intended use is around the house, shop and car. WRT safety, even the cheapies don't appear too bad - certainly the high current ranges - 10amps plus etc, may be a bit suspect - pcb tracks are in some cases a little narrow for prolonged use at higher currents. Voltage separation of tracks in the cheapies I have seems quite adequate - nothing less than 6mm gaps that I found. If the use is more professional, then accuracy may be more important, and very specific needs would then dictate a better instrument. The two left meters are MusTool left was $9.00, 2nd from left was $18.00 Both work very well, I use them in the workshop, on 4x4 trips, etc. third from left is the venerable FLuke 87, this one now 26 years old and working as new. Next was my gift to me to replace the Fluke 87, a Keysight 5-1/2 digit meter - Very good at measuring, can record to a PC, etc - was $604.00 (!). However, this was a bad buy -the Keysight display is crappy, not clear, hard to read in day without the backlight on(!!), the knob has a very uncomfortable rotational backlash which results in one not being sure if the required selection in made or not.. I use it for the more exacting tasks - measuring and computing ampere-hours for very low power wildlife tracking collars and so on. The Fluke and the Keysight unit are in the electronics lab all the time, and nine out of ten times I'll go for the Fluke. I could not physically view the Keysight unit when I purchased, went on reviews and made a mistake in purchasing it. I should have gone for the later Flukes (s). So price is not all - The only downside I found to the two cheapies shown here is the display update time is long - maybe 1 to 2 sec, and autorange time is irritatingly long - up to 4 seconds...The Fluke is less than 1 sec, the Keysight not noticeable. Measuring +12V on each unit showed ( left to right) 11.88v , 11.9v, 12.01v, 12,002v Current measurements showed: 0.5amps: left to right - 0.25A , 0.48A, 0.511A, 0.505, 0.5007A 1Amps : 0.98A , 0.97A, 0.99A, 1.0008A 10Amps : 9.77A, 9.89A, 9.98A, 9.9997A So I think The Cheapies are just fine, except for the sub 0.5A anomaly of the left meter..
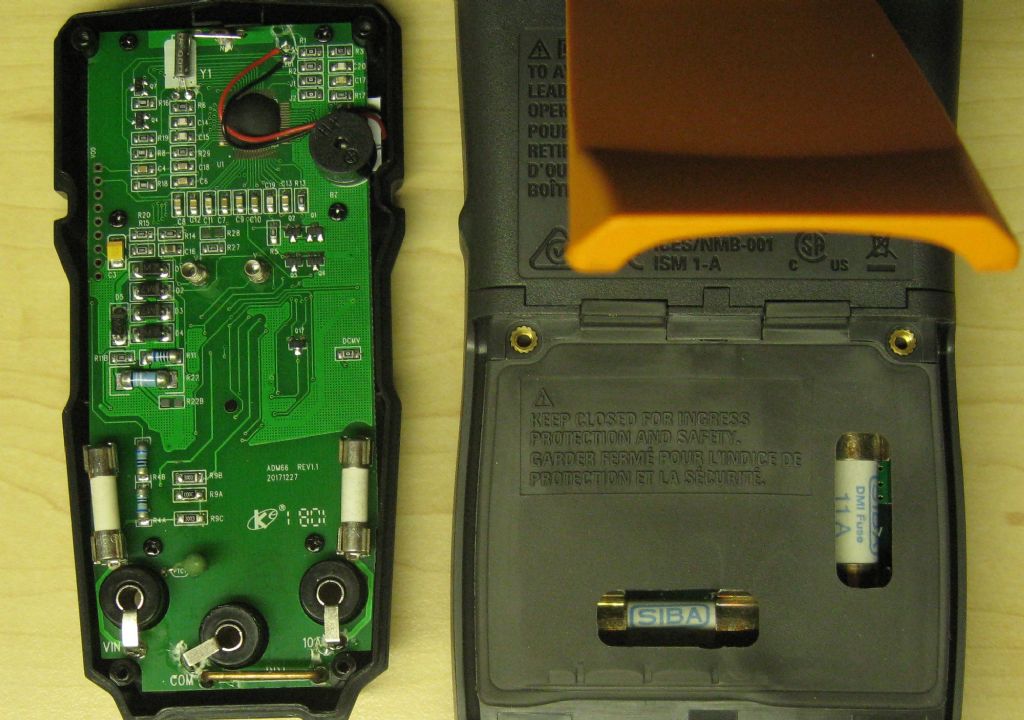
Fuse setup of the cheapest versus the costly meter.. Given the lesson, and what Fluke has done for me over the last 1/3 of a lifetime, I would try find a FLuke... Joe
Edited By Joseph Noci 1 on 08/09/2021 07:58:57 Edited By Joseph Noci 1 on 08/09/2021 08:00:19 |
| Thread: Dynamic Balancing a BLDC motor rotor. |
| 06/09/2021 21:52:38 |
Software is DynamsPro - from Miklos Koncz in Hungary. Joe V51JN |
| 06/09/2021 20:20:51 |
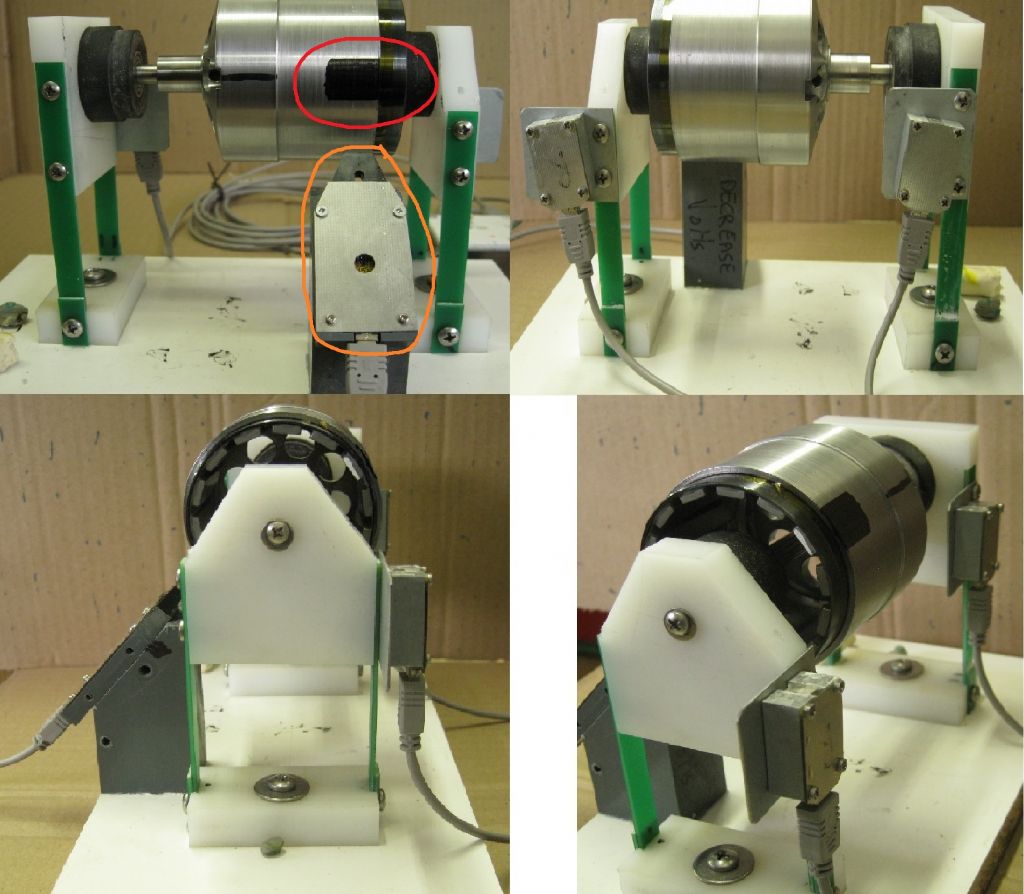
Hello Werner, The RPM sensor is also used to reference the angular position. The RPM sensor is ringed in orange in the image below, the top left part. The Reference mark on the motor rotor is ringed in red in the same image. A reference calibration is done to start - A small mass, maybe 1 gram or less, is attached at the reference mark position ( the one ringed in red) and the rotor is spun up. The accelerometer then detects this imbalance, and it should coincide with the optical detection of the reference mark. Once calibrated, the software knows that the reference mark is 0 degrees. The reference mas is then removed, and when the rotor is spun up again, any imbalance is detected by the accelerometer, and the angle computed with reference to the optical reference mark. Hope that makes sense.. Joe |
| 04/09/2021 15:25:58 |
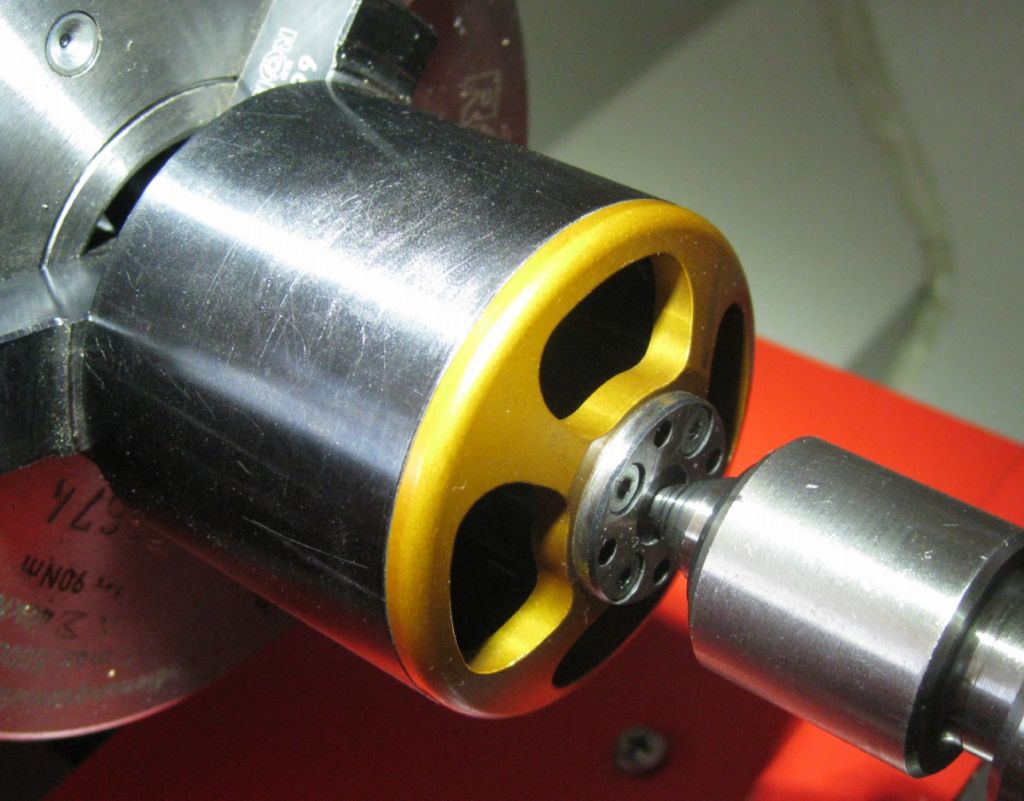
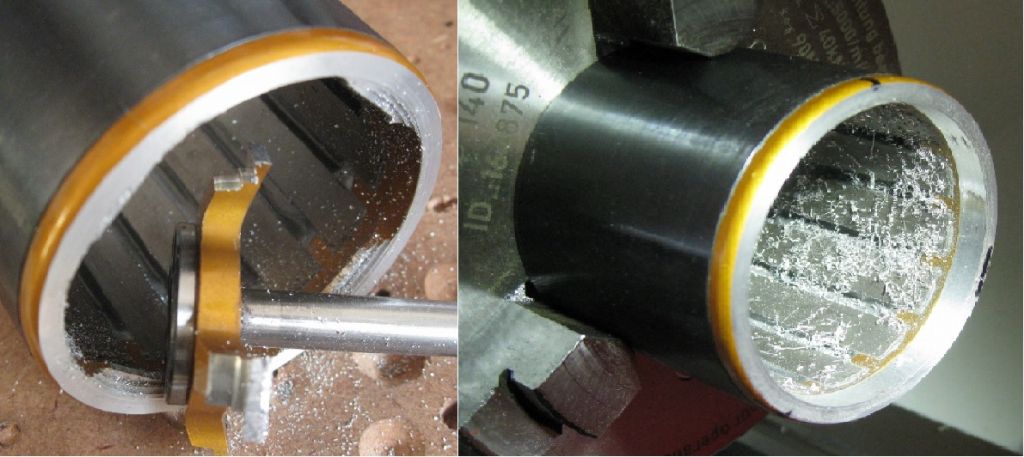
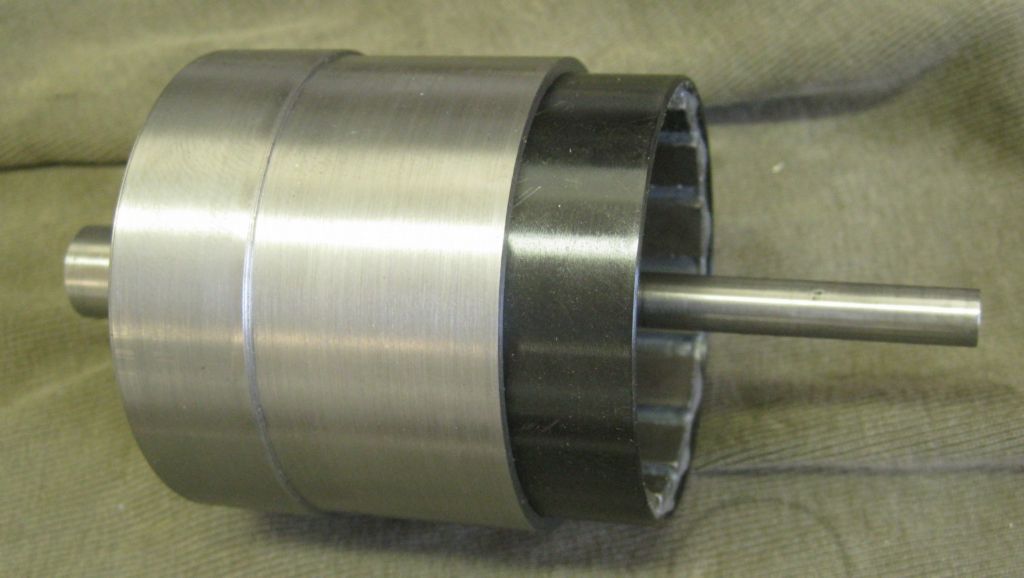
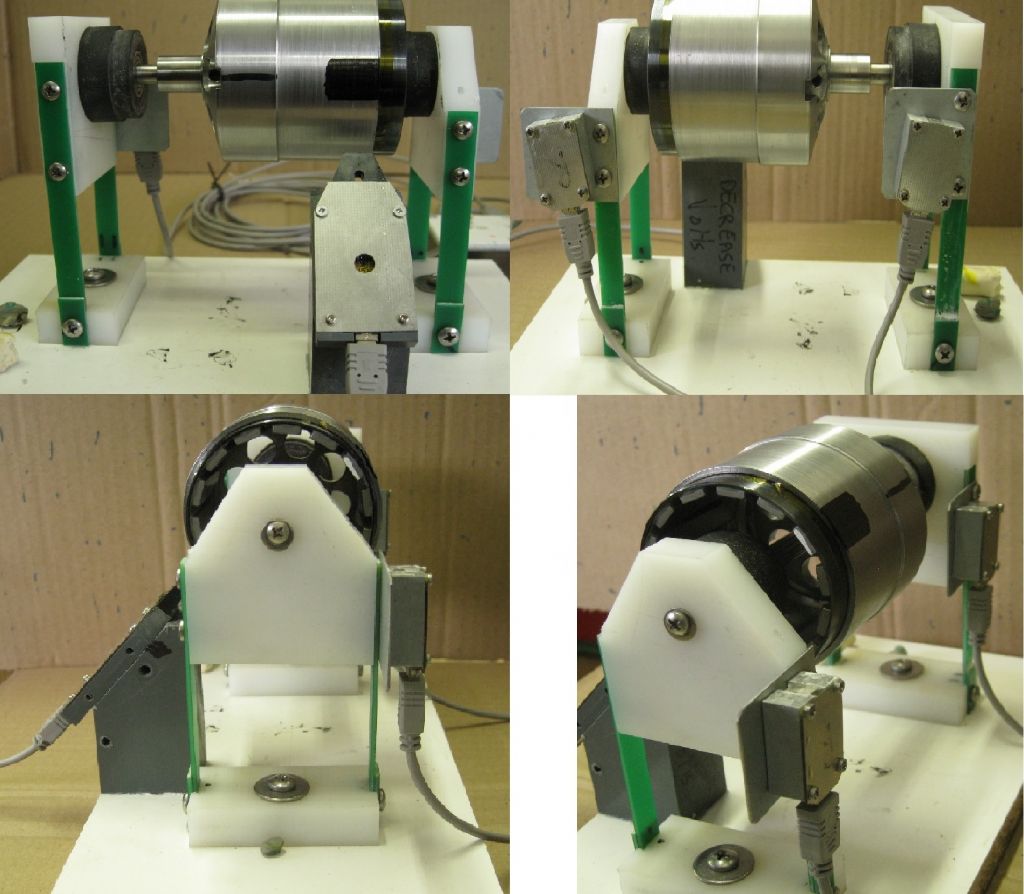
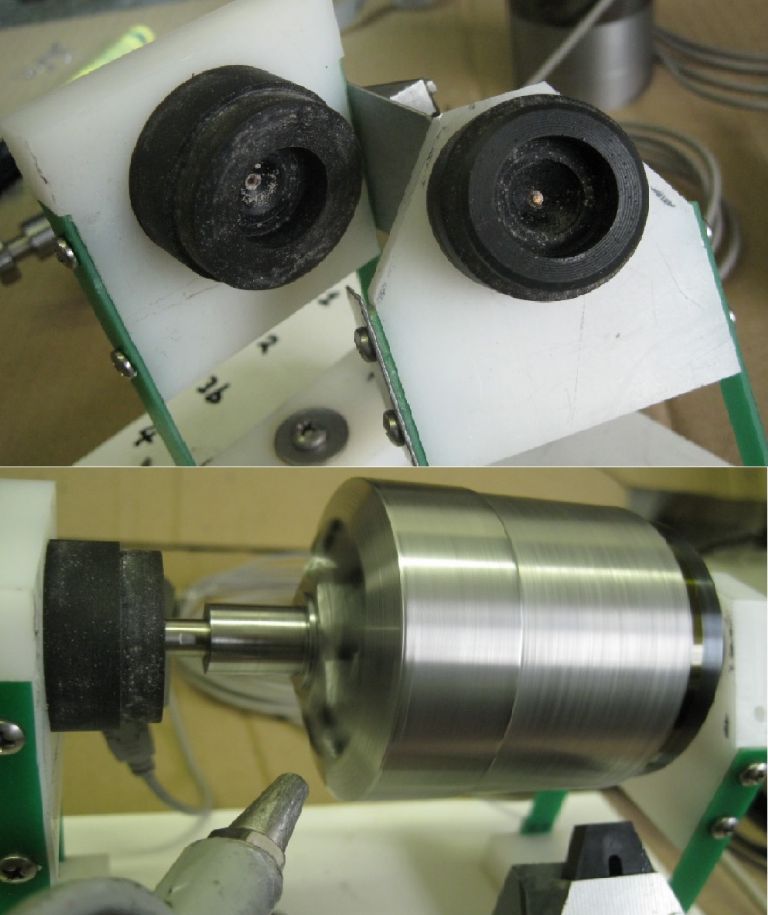
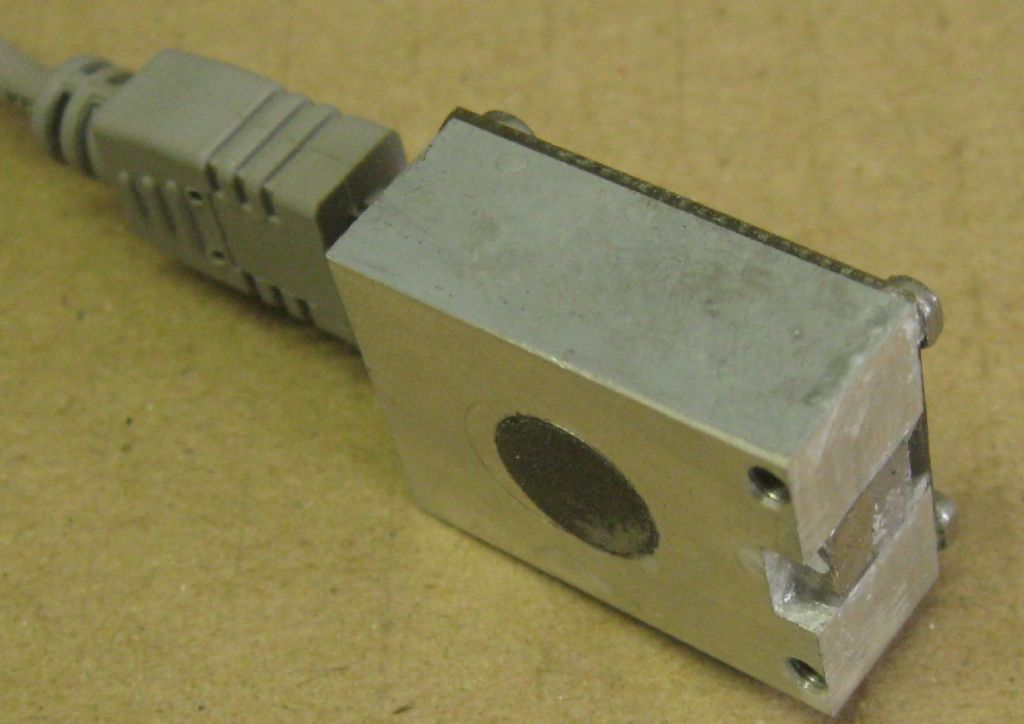
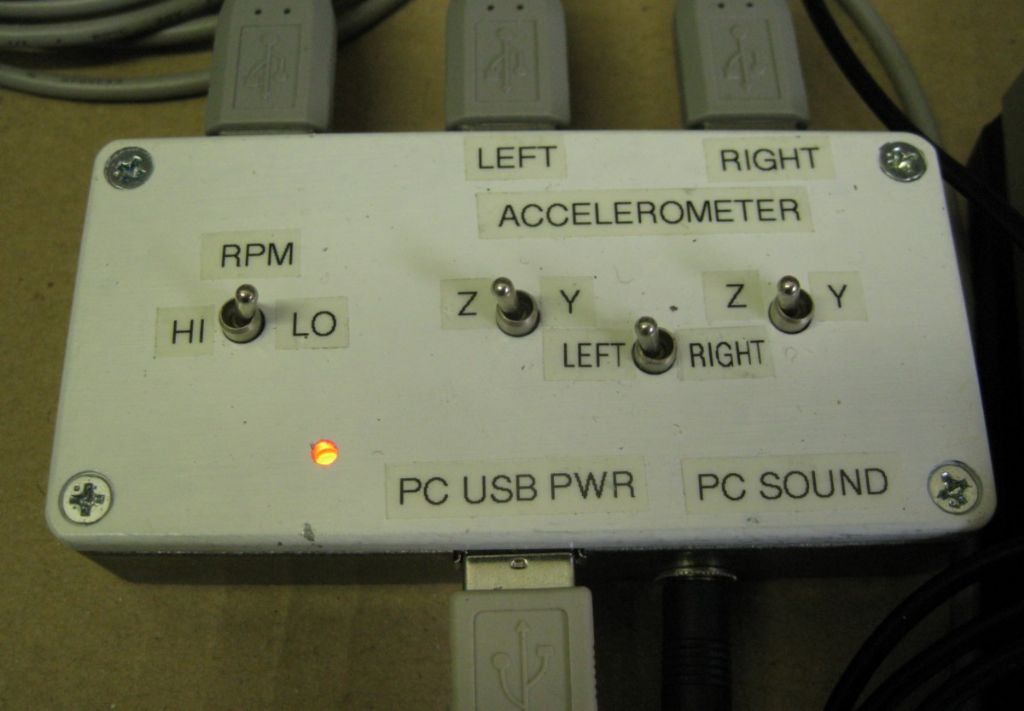
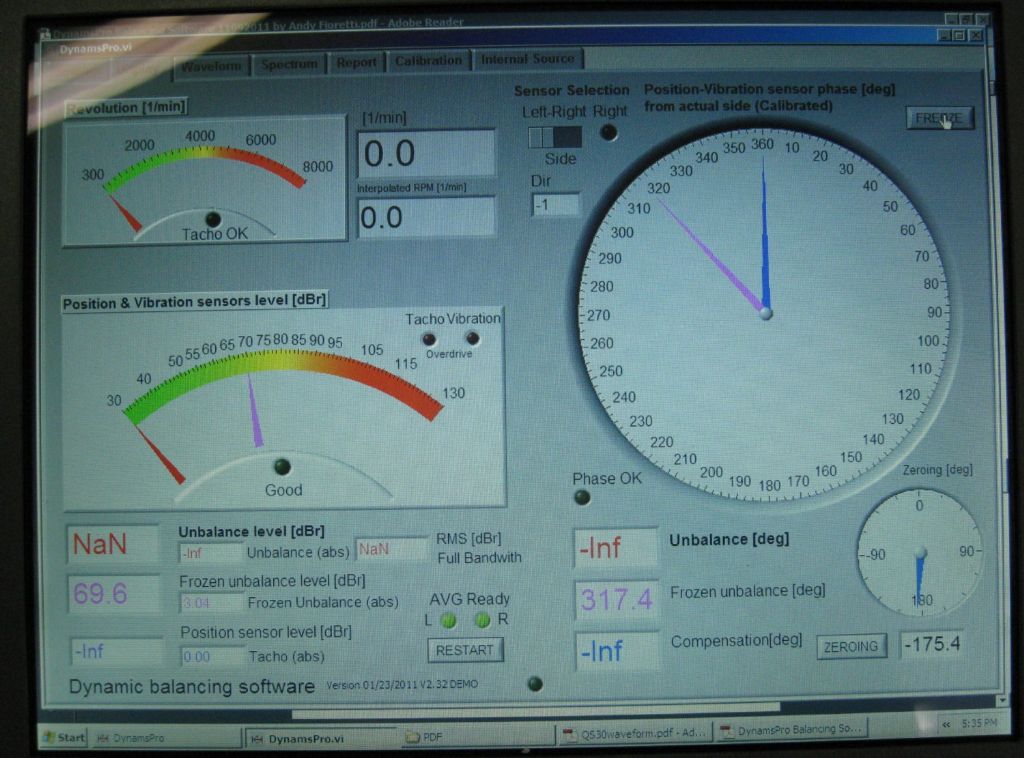
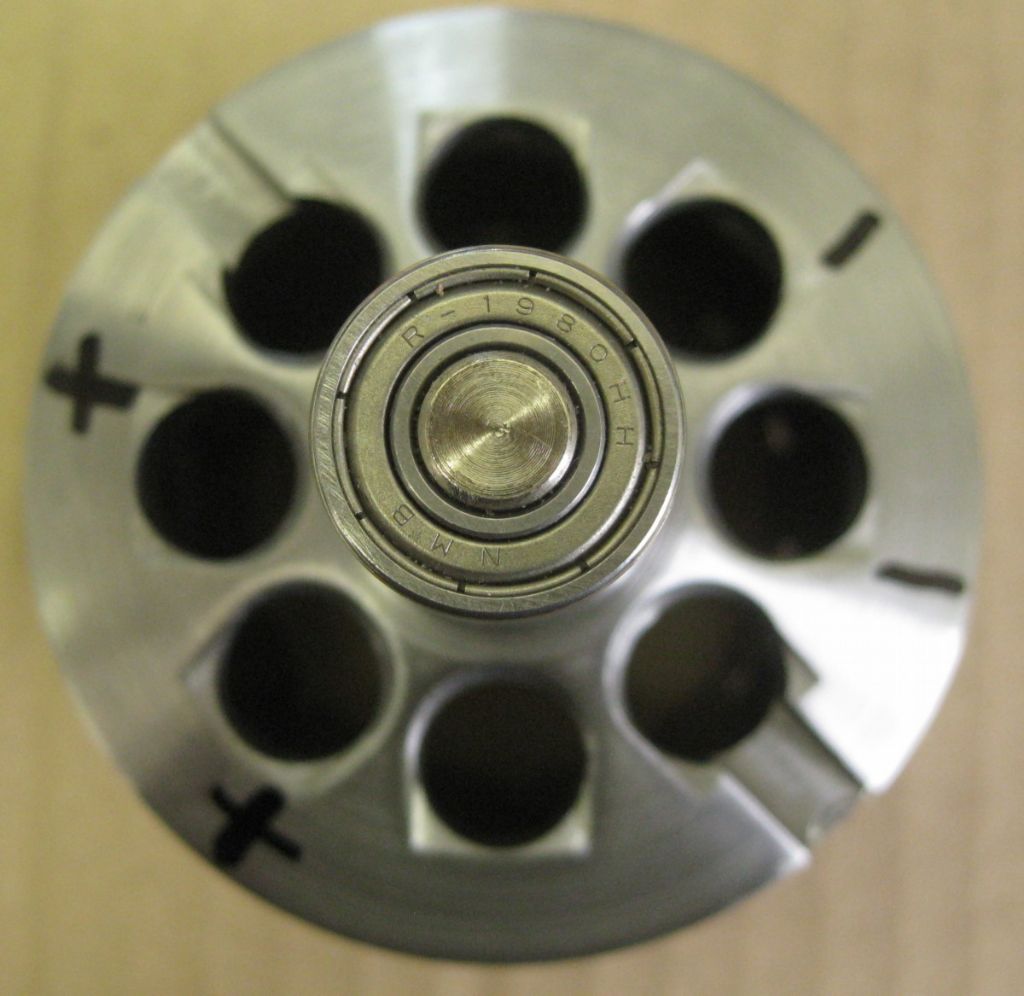
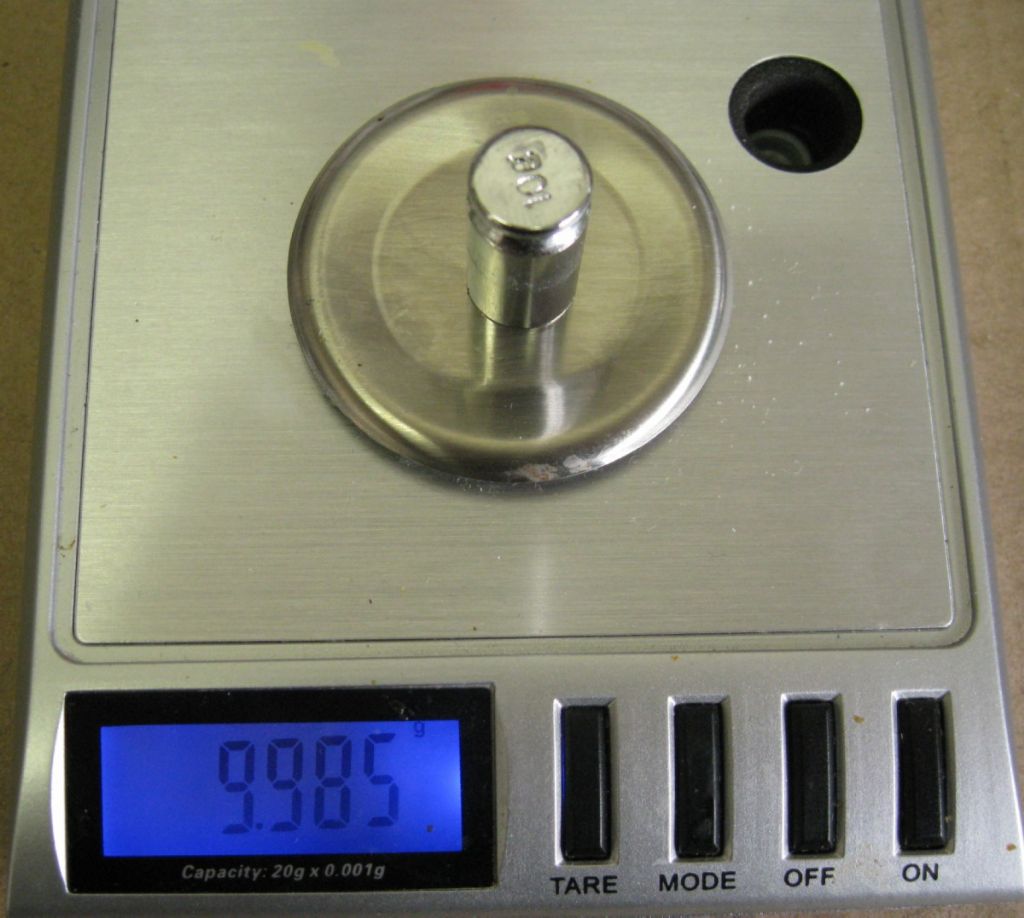
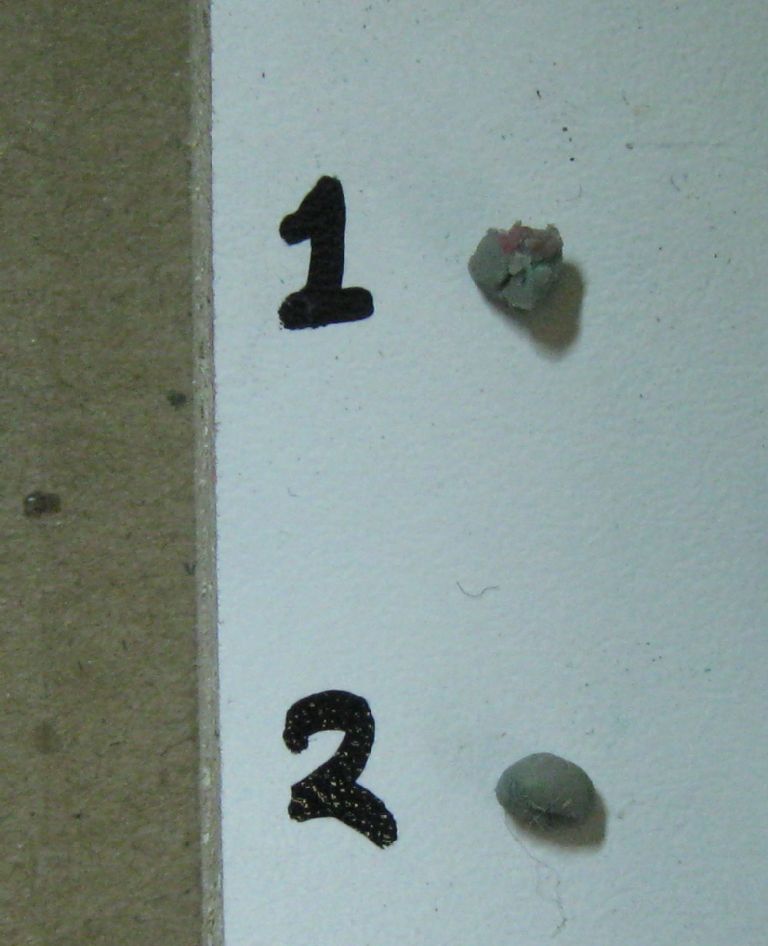
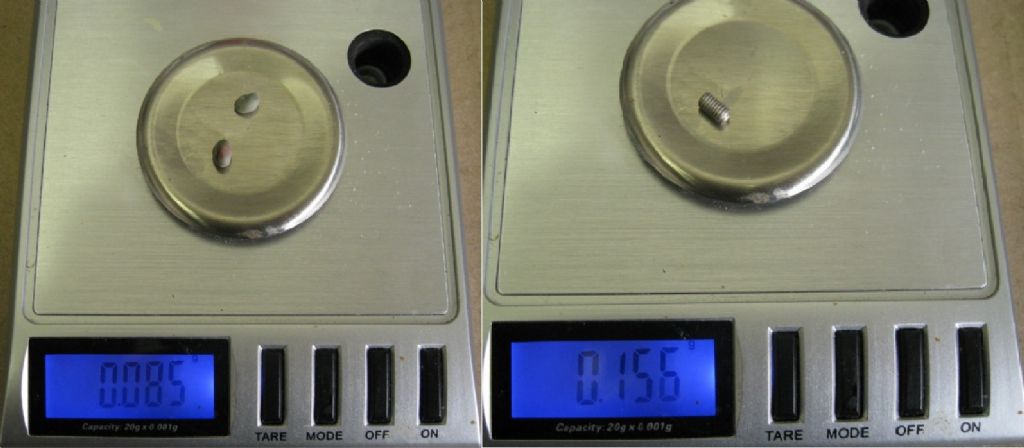
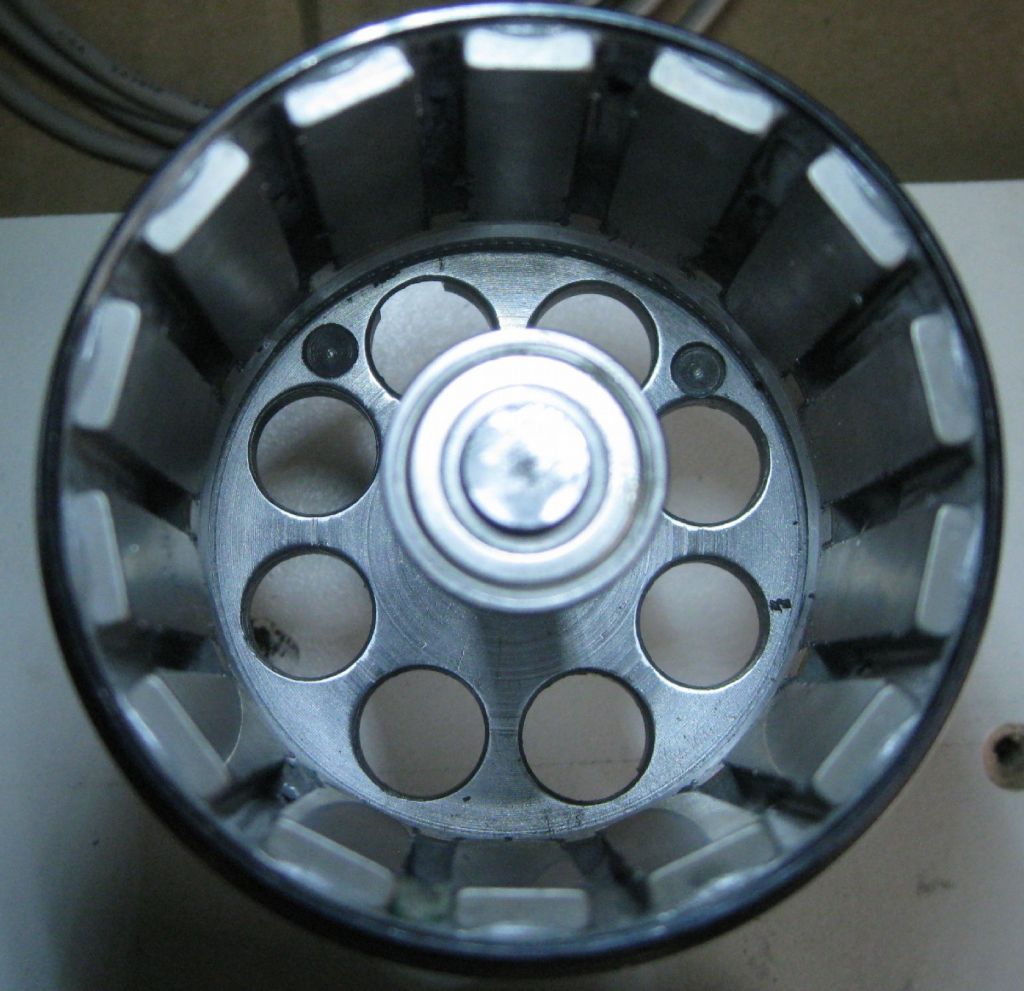
The CNC Lathe I am building has live tooling requiring a drive motor. I used a BLDC motor , with modifications to the motor rotor housing, to be able to fit into/onto the ATC mechanism. The motor is an 'outrunner' where the outer housing, the rotor, spins. I modified this housing to fit into a new housing which has a bearing spigot to take rotational loads in the ATC. These modification require that rotor be balanced again. Very little mass had to be removed, I guess thanks to good setup in the CNC mill during machining. The existing motor rotor bell end was removed and the rotor pressed into the new housing - photo above. The yellow part to be cut off/out- End removed and rotor cleaned up. And pressed into the new Rotor housing. A balance jig allows the rotor to float easily front and back, with accelerometers ( left and right) attached in the same plane. Views below show; TOP LEFT = Front View - the lower right is an optical detector detecting the start of the black line on the rotor. This measures RPM and the jig is calibrated by attaching a weight at the rotor reference position which coincides with that detection edge. The rotor is spun up and the referenced This calculates the zero deg angle for weight placement reference. The test weight is then removed. TOP RIGHT = Rear View, showing the two accelerometers, magnetically attached. Two accelerometers are used, since I need to do two plane dynamic balancing. BOTTOM LEFT and RIGHT = side and side/rear views. The Upper image of below shows the bearing housings on the test jig, the Lower image shows the air spout used to spin the rotor up. One of the accelerometers - magnets on the Z and Y axes allow quick attachments and removal. The accelerometers, RPM sensor, all come to this interface box, where the correct planes can be selected. The signals go from here to the sound card in the PC, and the software does the rest.. Did not realise the camera focused on the bearing instead of the mass positions..The + signs show where the balance weights are added inside the rotor. The - signs show where to remove mass to balance. The two small weights were then removed and weighed. A 10gram scale (0.001g 'resolution..) was used - not accurate, but fine for comparative measurements. The two weights were removed and weighed. To get a feel for how big a hole to drill on the rotor inner to remove similar weight, an M3x5mm grub screw was weighed. The two little tackytape weights seen here: The two weigh near 0.085g, the grub screw 0.156g, so need to remove 1/2 grub screw size, spread over the two balance positions. The two holes are 4mm diameter, 1mm deep each. I started with 3mm x 0.5mm deep. Then 4mm x 0.5mm deep, and repeat deeper till done. This was all repeated for the right side of the housing , while verifying effects to the opposite sides regularly
Edited By Joseph Noci 1 on 04 |
| Thread: CNC Lathe Scratch Build |
| 04/09/2021 14:51:58 |
The motor Rotor/Housing is complete - just finished dynamic balancing of it at 8000RPM - worked out nicely. Have created a separate post on the balancing - this post is becoming a bit of a saga..
Joe |
| Thread: Hole diameters for single point threading |
| 04/09/2021 14:48:38 |
|
Joe |
| Thread: CNC Lathe Scratch Build |
| 01/09/2021 17:01:39 |
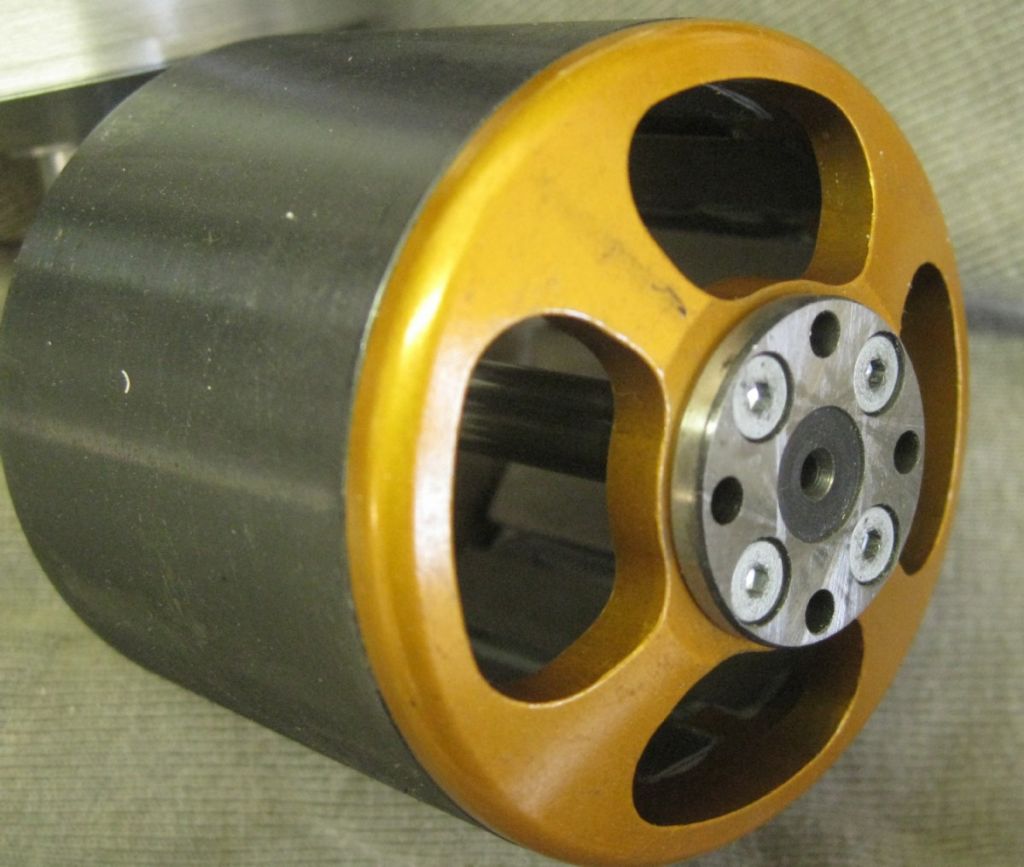
CNC'ed the air cooling holes into the magnet Rotor housing this morning, and fitted the locking grubscrews.
Getting there... |
| 31/08/2021 18:56:46 |
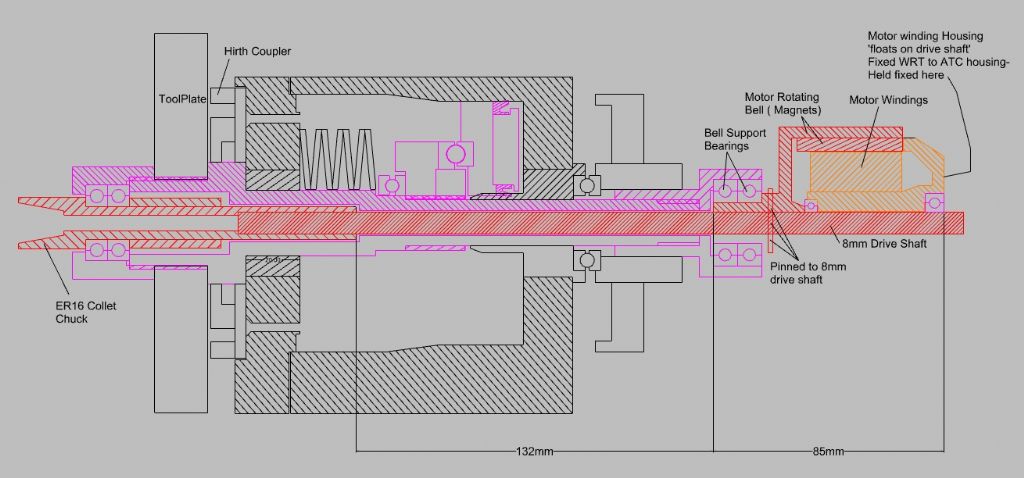
The last two weeks have been have been spread over 'wildlife' issues, with not too much time available to work on the lathe - did manage some over the last two days though.. The ATC's co-axial live spindle requires the remake of a number of items, with design changes - I have made most of the parts and a trial fit shows promise..One of my concerns was the effect of tolerance build-up in the linear mode of the assembly. I ended up with 0.13mm 'elongation' beyond my drawing tolerances, and had allowed for 0.3mm in 'adjustments' so all is well! As a reference for parts, i have included the block diagram again:
This is a trial assembly of the important parts - the motor fitting still in progress
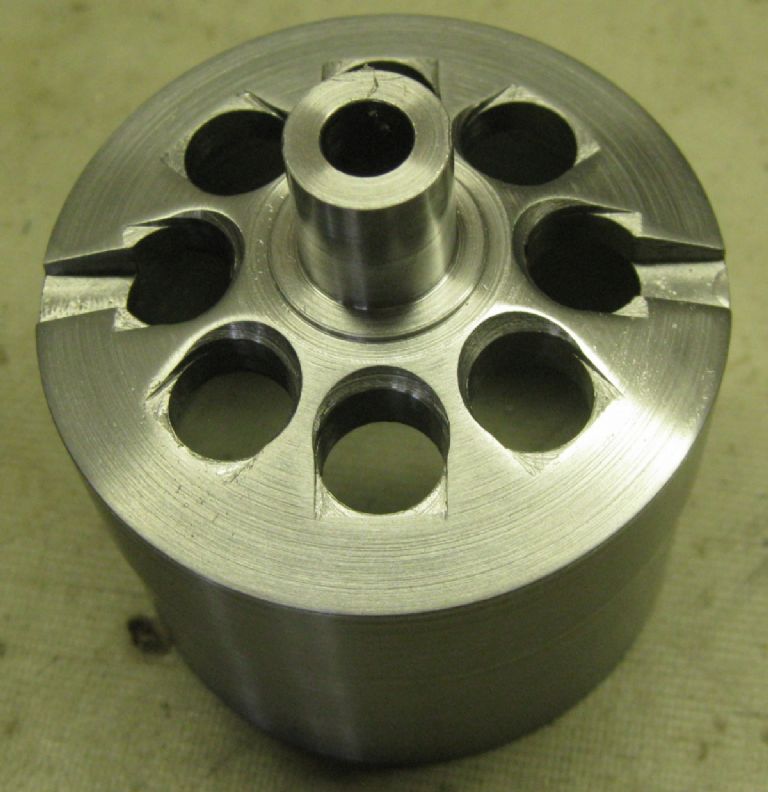
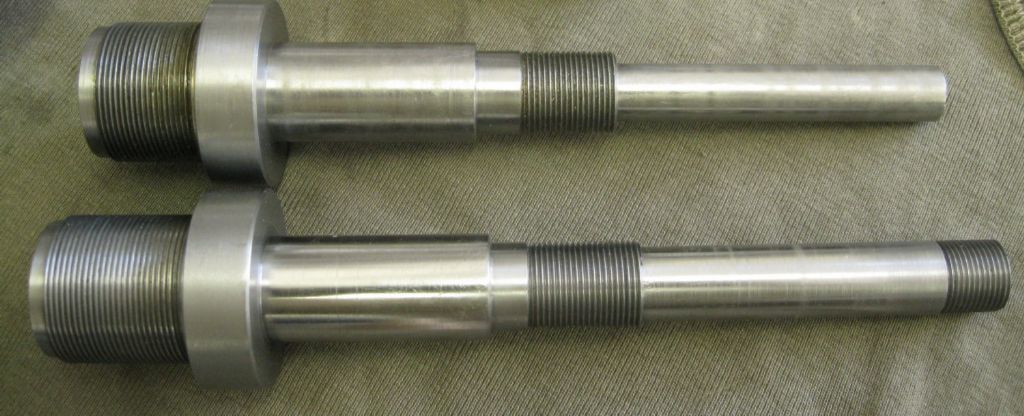
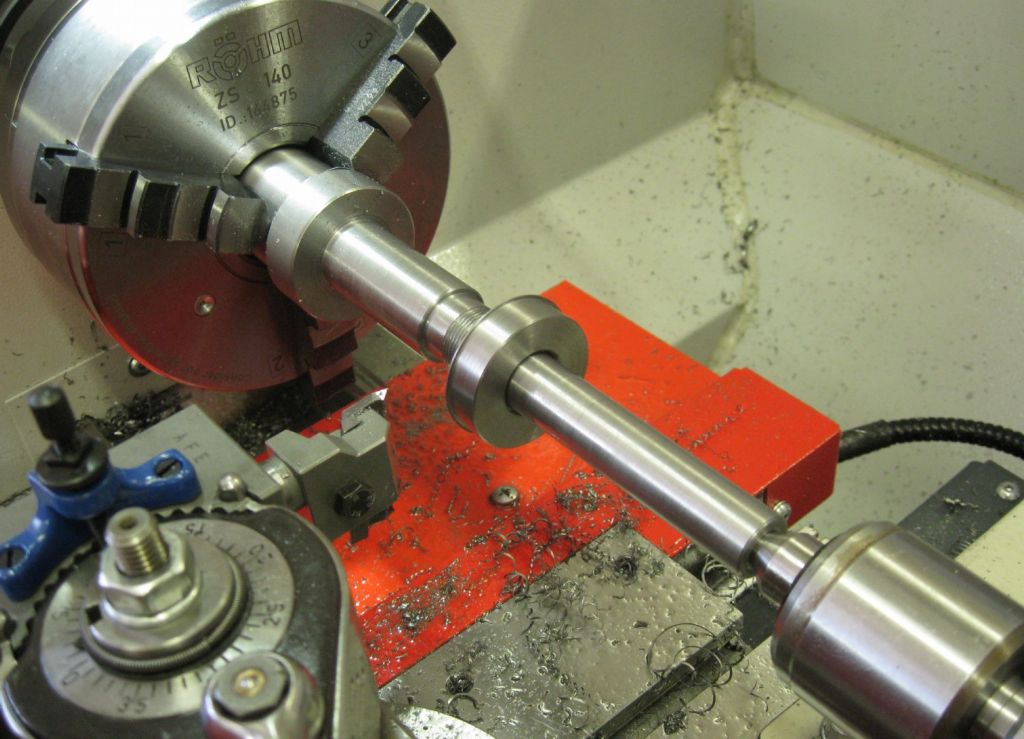
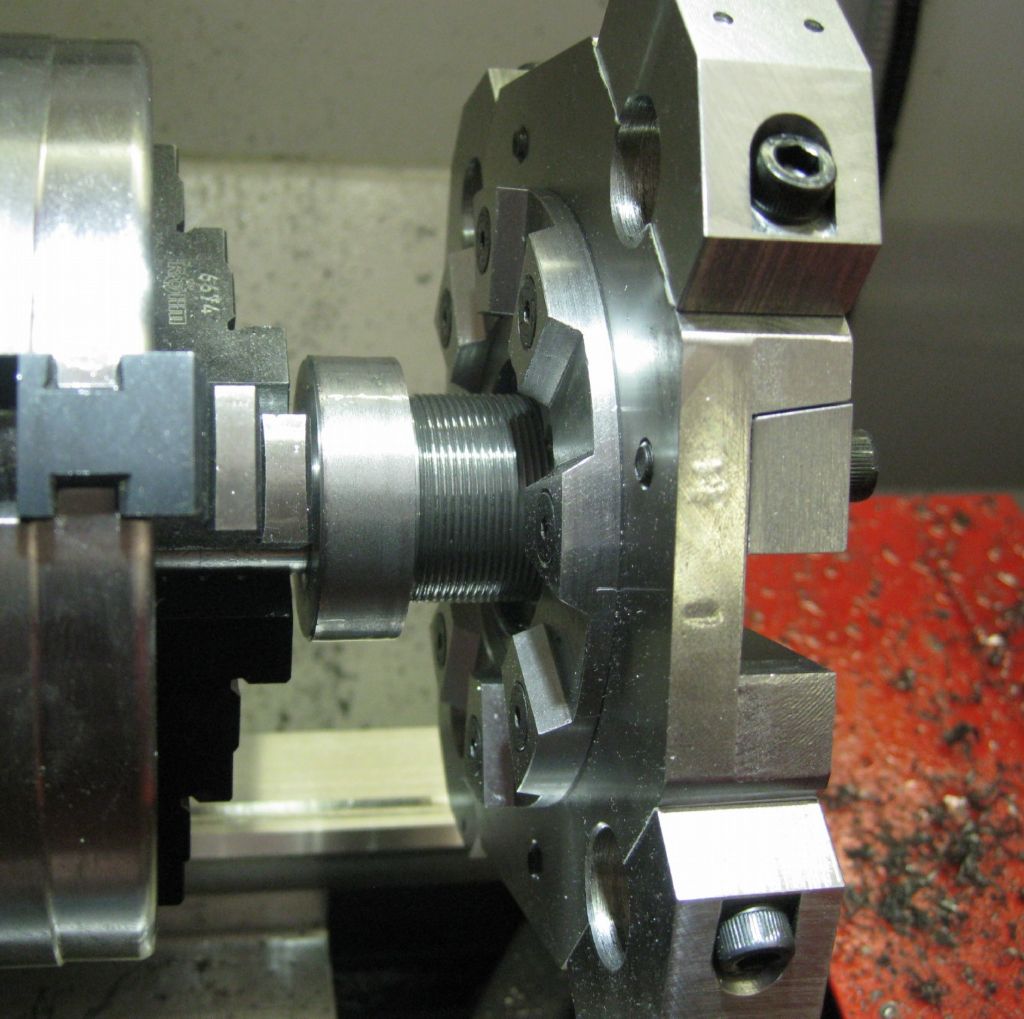
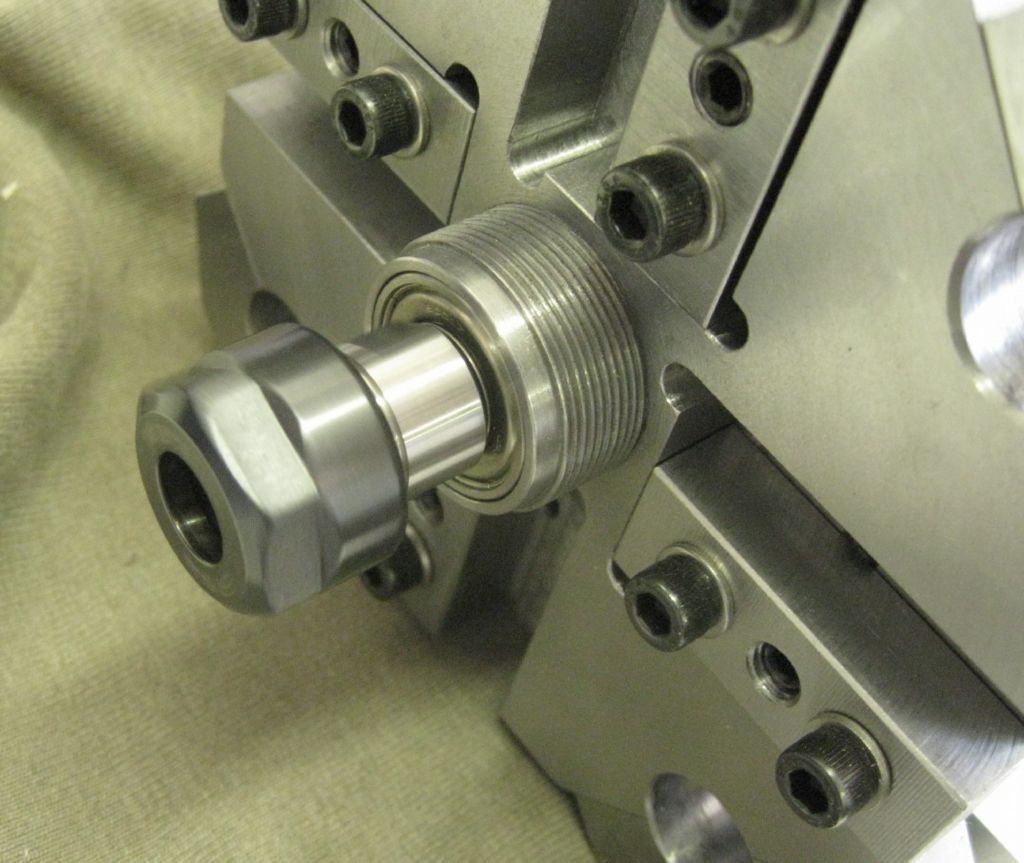
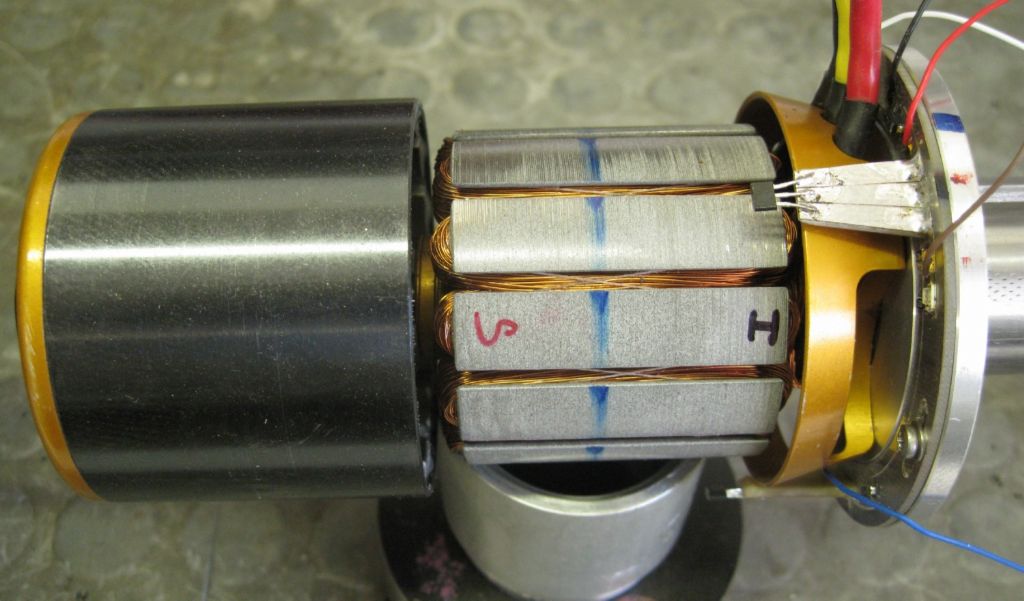
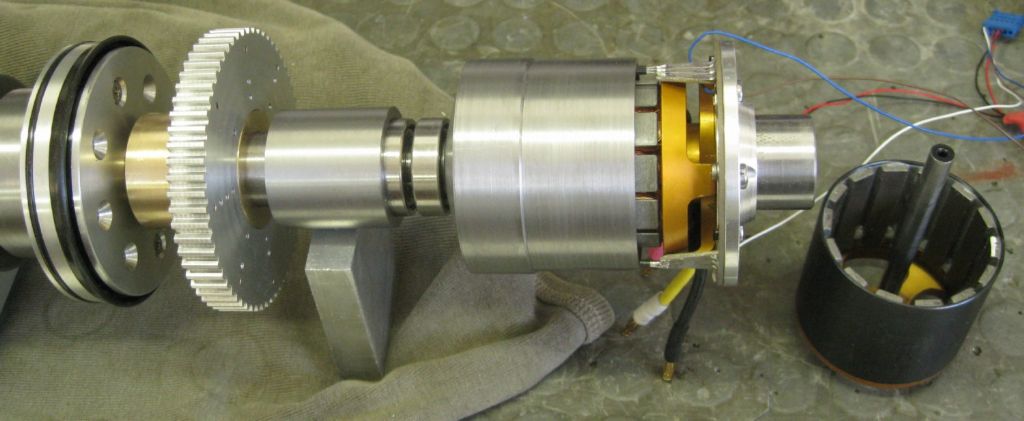
The main new item was a replacement central shaft, with through hole for the live spindle drive shaft - here is the shaft being threaded for the toolplate, central pre-load nuts and motor mount. Toolplate thread test fit: The collet and bearings fitted - test spin by hand..Face pre-load nut still to be made. Spindel dive motor and halls sensors fitted: The left section is the magnetic rotor . The orange part of the rotor will be machined off, as the rotor fits into the new motor housing below: Motor stator inside motor housing Motor Rotor slid into motor housing - own shaft still to be pressed out and the orange part machined off.
As usual, more to come. Joe |
| Thread: automating a coil winder |
| 31/08/2021 12:56:54 |
Andrew, I built a coil winder similar to what you are after - long, long ago.. - I used two stepper motors, one for the coil and one driving an M8 leadscrew carrying the yoke though which the wire is fed. Unlike screwcutting, this application never requires that you need to unhitch the carriage, or rewind to the thread start to restart. You always wind one direction, N turns, then the carriage reverses laying down the next layer of N turns at the same pitch, so much simpler, and quite different from an ELS - The typical ELS systems doing the rounds will in fact not work for this at all - will not allow the reverse pass layer to be wound.. My winder is so old - made it about 20 years ago Simple LCD with up/dn buttons to set number or turns per layer, number of turns total and wire thickness. I won't offer you my solution... - no Arduino back then and I used an Intel 8051 uP, and wrote the thing in assembler... Are you arduino and/or software adept? Joe |
| Thread: Small dc brushed motors |
| 23/08/2021 11:04:24 |
Posted by Bob Mc on 23/08/2021 08:08:04:
Hi All... am in the process of making an r/c boat, I need to find out which motor to use, I have already used a '400' type motor but have no idea what this means ... I will require a larger motor for the next build so need to know volts/amps/rpm/mechanical size etc.... is there a chart for all this? will be grateful for any information....Bob. Edited By Bob Mc on 23/08/2021 08:09:09 Hi Bob. The term '400 type motor' ( called Speed 400 back then..) dates back a while, and very loosely referred to a motor around near 38mm long, a 500 motor was near 55 or 56mm long, etc. The old 400 DC motors were around 100watts max or so, 10 to 12 amps typically. If I recall, the Speed 400 was around 30mm in diameter. Are you set on a DC motor? Do you already have the DC PWM RC speed controller? If so that would set some limits on the motor amps/volts choice I guess. If you are not set on DC, the RC brushless DC motors are a good option. Much more efficient and more power in smaller packages compared to the somewhat dated construction of the cheap Speed series DC motors. A visit to your local RC hobby shop will deliver.. Eg:
Joe |
| Thread: CNC Lathe Scratch Build |
| 17/08/2021 11:10:16 |
Thanks for the reminder John! I guess once the lathe is together I will be able to evaluate better what might be needed and may just reach out to you again.. Joe |
| 17/08/2021 07:04:23 |
Hello John. Now that is neat, and the diagram is worth a thousand words. All the other posters 'hinted' at the concept but though I seem to be 'good' at what I am doing here, sometimes 'concepts' remain simply that in my head! Thanks for the info. John, I seem to recall we conversed some time ago - maybe on the making/grinding of a shop made dovetail cutter?? Or maybe I am just blowing smoke again..The photo of the grinder seems to have triggered that memory. Joe |
| 16/08/2021 21:21:42 |
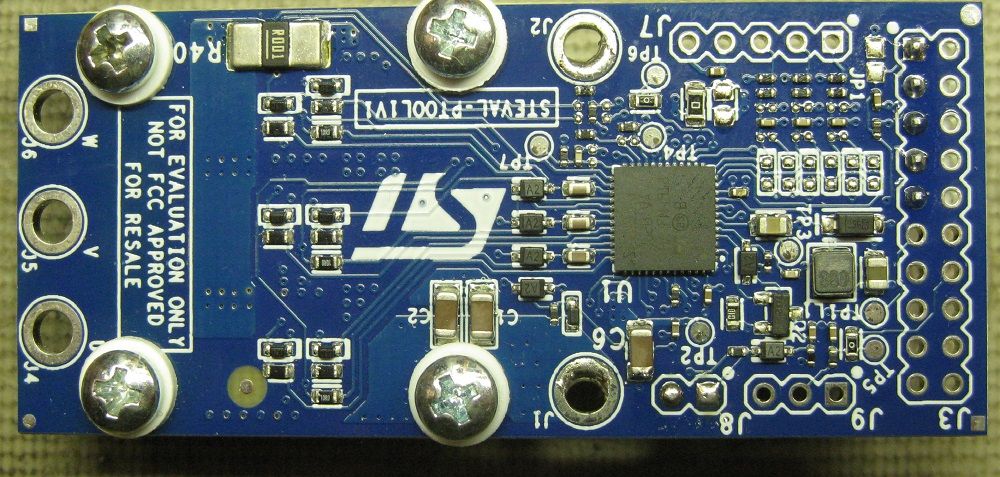
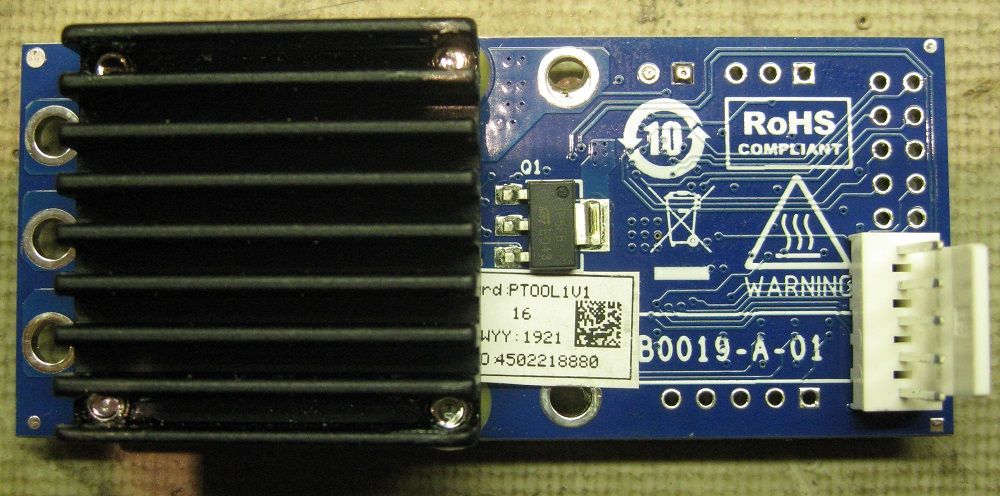
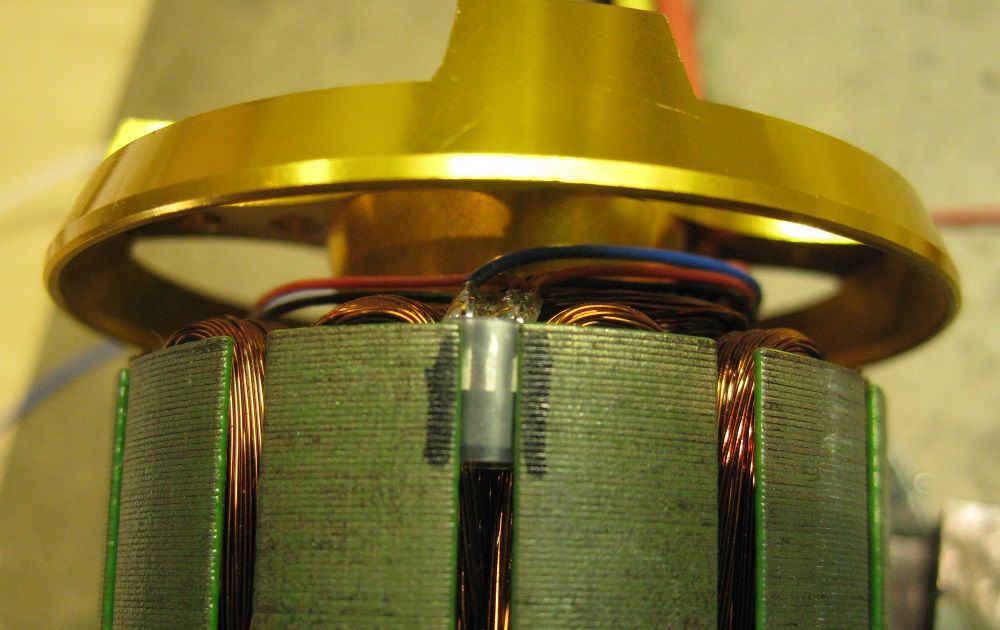
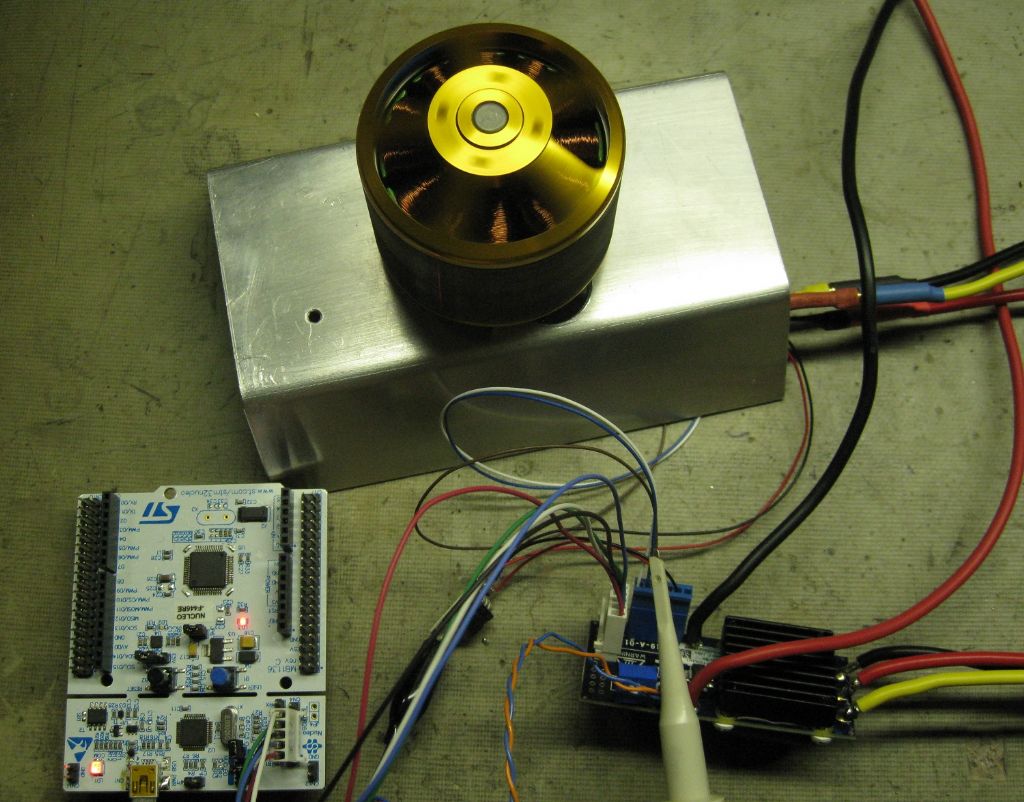
So many diversions on this project.. Waiting for materials to arrive also delays things! The Bellville springs arrived - I installed and did a spring-load test which was fine. So now I wait for the steel shafting to arrive so I can make the need ATC main shaft with the through hole for the live spindle drive shaft. And while on that subject, I started on the BLDC speed controller for the live spindle drive. This is based on a small development board from ST - the board is about 70mmx30mmx12mm and can take a 45v supply and deliver up to 16amps to the motor. Managed, with my Good Wife's help, to get a sensored, FOC control software suite running, and the motor runs so sweetly. A leather gloved hand was used to load the motor in tests... At 500RPM, with 40VDC supply and 12amps the motor speed slows by 40rpm. Releasing the load ( take my hand away..) and the speed momentarily jumps by 70RPM and settles back at 500rpm - the jumps lasts about 300ms. At 2000RPM, its a little hairier...40VDC and 14amps, the motor speed drops by 30RPM, and jumps by 45RPM when releasing the load - takes 380ms to settle. The PID is nice and tight.. Tests are very quick and time spaced - 40V/14A is over 1/2KW, so the glove, motor casing etc heats up fast when applying load by friction! A few additions to the code still - a ON/OF control for the motor, so failure detection ( hall sensor failure, motor stalled, etc) so the LinuxCNC can know to not run the milling cutter into a workpiece while not spinning.. The controller underside: Heatsink side: One of three hall sensors fitted - 120Mechanical degrees apart, which works out to one sensor spaced four motor slots apart in the 12slot motor. The motor is 14poles, ie, 7pole pairs, so the 120 mechanical degrees equates to 17.1 electrical degrees. Sensors will be epoxied in place next. Test setup...The Nucleo processor board lower left is just being used for the programmer part of it, to load the code into the BLDC controller. The project certainly covers all bases! Joe Edited By Joseph Noci 1 on 16/08/2021 21:23:52 |
| Thread: Hole diameters for single point threading |
| 13/08/2021 08:09:26 |
Thanks to all for the comments and advice. The cutter I am using is an 16IR-A60 carbide insert. The tip radius appears very small under the microscope - maybe 0.1mm ? Low slop was a poor descriptor to use for what I am trying to achieve and strength is not the concern, but good coaxial alignment is the main aim. I will make one or two test rings and thread for best fit...
Thanks chaps! Joe |
| 12/08/2021 21:40:27 |
I have tried to find methods of defining the hole size for a particular thread to be single point cut in the lathe. This appears to always be based on thread engagement, which is influenced by the material being threaded, and the focus is strongly on tap life. So the hole is larger for aluminium than for a tough steel, etc. However, tap longevity is not really directly applicable to single point threading, so does this engagement issue still apply unmodified?. I am internal threading a mating part that screws onto a M1.25 threaded stub, 34.5mm OD. The OD is the OD of the thread on that stub. The mating thread will be in EN8. The thread section on the stub is 30mm long. There is not a great load on the thread when assembled, but slop needs to be as low as possible. I would presume that I should therefore try to get as high a thread engagement as is possible. 80%? More maybe? I would assume that 80% or more should be easily achieved when single point threading? So do I just use 'ordinary' tapping tables and select 80% or better? Most tables don't list a 34mmxM1.25 size, but there calculators that do the job - So one could just faff about till the part threads on in a good enough fashion but I don't particularly like that approach - some science (or engineering) is applicable! What engagement should I start with for the 'best' fit possible, including a little faffing? Joe
|
| Thread: What Type/Gauge wire is best for soldering onto Arduino shields |
| 08/08/2021 17:45:33 |
If its for signals rather than power, I use 22 or 24AWG 7 to 9 strands PVC insulation 'hookup' wire. 1mm I feel is far too large and in-flexible. Nothing more frustrating than trying to debug the project where wires break off because they are too stiff at the solder joint. Same reason I would not propose ethernet wire - they have only 4 or 5 thickish copper strands and break easily at the solder joint after some flexing. If you are sure of your wiring, and the board won't be manipulated, then I suppose stiffer wiring is OK, but that's tempting Murphy.. Duncan, here in Namibia, 'phone cable is single solid strand - I would not recommend that! Joe |
| Thread: Problems in bending sheet aluminium to a 90 deg angle |
| 08/08/2021 12:16:56 |
If you have not machined flats on the edges of the angle, ie, the edges now holding down on the bend-sheet then you are going to get a large bend radius on the material and that radius is rather uncontrolled. Makes it difficult to work out any bend allowance and setback.. In addition, your setup won't easily allow for sheet thickness compensation - I suppose the big holes around the capscrews will have enough slop to move the angle about a bit to aid that. Put those flats on and elongate the capscrew holes and use a thick (6mm?) steel washer under the capscrew head.. But I guess your bend job is already done! Joe |
Want the latest issue of Model Engineer or Model Engineers' Workshop? Use our magazine locator links to find your nearest stockist!
Sign up to our newsletter and get a free digital issue.
You can unsubscribe at anytime. View our privacy policy at www.mortons.co.uk/privacy
- *Oct 2023: FORUM MIGRATION TIMELINE*
05/10/2023 07:57:11 - Making ER11 collet chuck
05/10/2023 07:56:24 - What did you do today? 2023
05/10/2023 07:25:01 - Orrery
05/10/2023 06:00:41 - Wera hand-tools
05/10/2023 05:47:07 - New member
05/10/2023 04:40:11 - Problems with external pot on at1 vfd
05/10/2023 00:06:32 - Drain plug
04/10/2023 23:36:17 - digi phase converter for 10 machines.....
04/10/2023 23:13:48 - Winter Storage Of Locomotives
04/10/2023 21:02:11 - More Latest Posts...
- View All Topics
- Reeves** - Rebuilt Royal Scot by Martin Evans
by John Broughton
£300.00 - BRITANNIA 5" GAUGE James Perrier
by Jon Seabright 1
£2,500.00 - Drill Grinder - for restoration
by Nigel Graham 2
£0.00 - WARCO WM18 MILLING MACHINE
by Alex Chudley
£1,200.00 - MYFORD SUPER 7 LATHE
by Alex Chudley
£2,000.00 - More "For Sale" Ads...
- D1-3 backplate
by Michael Horley
Price Not Specified - fixed steady for a Colchester bantam mark1 800
by George Jervis
Price Not Specified - lbsc pansy
by JACK SIDEBOTHAM
Price Not Specified - Pratt Burnerd multifit chuck key.
by Tim Riome
Price Not Specified - BANDSAW BLADE WELDER
by HUGH
Price Not Specified - More "Wanted" Ads...
Do you want to contact the Model Engineer and Model Engineers' Workshop team?
You can contact us by phone, mail or email about the magazines including becoming a contributor, submitting reader's letters or making queries about articles. You can also get in touch about this website, advertising or other general issues.
Click THIS LINK for full contact details.
For subscription issues please see THIS LINK.
Model Engineer Magazine
- Percival Marshall
- M.E. History
- LittleLEC
- M.E. Clock
ME Workshop
- An Adcock
- & Shipley
- Horizontal
- Mill
Subscribe Now
- Great savings
- Delivered to your door
Pre-order your copy!
- Delivered to your doorstep!
- Free UK delivery!


 Register
 Log-in


