Member postings for Chris Veitch
Here is a list of all the postings Chris Veitch has made in our forums. Click on a thread name to jump to the thread.
| Thread: Cowells 90ME 14x1.5 backplate question |
| 05/02/2022 08:19:31 |
Posted by Andy Carlson on 03/02/2022 13:27:26:
Posted by michael potts on 03/02/2022 11:23:29:
Most Cowells have a number stamped into the end of the bed... but I have come across at least one proveably early Cowells example that has no stamped bed number. AFAIK the Perris made lathes did not have a stamped bed number but I haven't asked many people so I could be wrong. Still an excellent article though. Sorry, I'm going on a bit... It's a bit of a pet subject of mine. Not at all - this archaeology is fascinating to me, especially as I’ve only come into contact with a Cowells very recently (obviously). Can you tell me where exactly the serial number is usually to be found? I’ve had a look for one on mine in the hope that it would tell me a little more about it but couldn’t find one. |
| 30/01/2022 22:41:00 |
Posted by Andy Carlson on 30/01/2022 22:33:43:
Hi Chris, Hope you enjoy your new (to you) Cowells. I also have a Cowells with the M14 x 1.5 spindle. Mine had a decent assortment of chucks when I bought it but I've since made an ER16 collet holder. My lathe is set up for thread cutting so I did most of the thread using an internal single point tool and then used an M14 x 1.5 plug tap (from Tracy Tools) to finish the thread off. If you want to make a backplate and have no thread cutting setup (yet) then a second cut tap would be a better bet. Out of interest, which 3 jaw do you have? I have the Pratt Burnerd tommy bar one. Mine is threaded for the spindle - there is no backplate, so I'm guessing you have the Toyo style one with the scroll gear around the outside? Did yours come with any other chucks or the faceplate or is the 3 jaw the only one you have at the mo? Thanks Andy - it's certainly a beautifully made machine and makes my Unit 3 look distinctly crude. Yes, I think I have a Toyo - it's the one with the scroll gear and is marked "3001 TML (UC)". I also acquired a 4-jaw with the lathe which seems little used and in very good condition - not sure of the brand. I do have the facilities to cut the thread as I also have a Warco Chinese 7x10, but I've never actually used it - or any other lathe - for thread cutting.
|
| 30/01/2022 22:24:48 |
Posted by DiodeDick on 30/01/2022 21:48:32:
Yes, they were 14mm x 1.5p, but changed to 1mm pitch to enable the use of Unimat accessories. I bought a 14x 1.5p tap. Turned a backplate from round bar and fitted a Unimat 3 jaw to that. The end-mill holder in my photos uses a similar backplate for the same reason. Dick Thanks for that. I'd seen it suggested elsewhere but the opinion seemed to be that a tap wasn't accurate enough and it would need to be cut on the lathe - which I'm not confident with as I've never actually done any screw cutting. However if your method worked OK I'd be happy to give at try - it's not going to cost the earth. |
| 30/01/2022 20:44:00 |
I've recently bought an older Cowells 90ME with the older 14x1.5mm spindle. It's a great machine (I've wanted one for years) and appears to in excellent condition and been very well cared for. However the 3-jaw chuck is came with isn't terribly accurate, I suspect due to jaw wear - it looks to me as though one jaw isn't closing right up. The chuck itself runs true with only about 0.05mm eccentricity when measured on the chuck body, but I'm not sure that this means much. Obviously the 14x1.5mm spindle is a problem with obtaining chucks, but it did occur to me that I have a chuck with a good backplate - this is a 3-screw plate (obviously?) of about 37mm diameter. Can anyone tell me if there are any decent 3-jaw chucks available which might fit this backplate? Better still, has anyone experience of fitting one to a Cowells 90? Thanks in advance, Chris
Edited By Chris Veitch on 30/01/2022 20:46:03 |
| Thread: Changing grinder wheels for different size - advice required |
| 10/08/2014 20:22:06 |
I'm hoping to change one of the standard Aluminum Oxide wheels on my bog-standard B&Q bench grinder for a Silicon Carbide wheel for grinding carbide tools. However the originals are 150 x 16mm on a 1/2" spindle whereas the only Silicon Carbide I can find are 150 x 20mm, although there's plenty of room within the housing for a thicker wheel. Are there any risks associated in substituting a larger wheel of this size? (Or any other advice on the subject for that matter) Regards, Chris |
| Thread: Centering Mini Lathe tailstock - advice required |
| 09/08/2014 08:35:59 |
Thanks for the tips, gents - I've now managed to get it reasonably correct. I initially tried the DTI in the chuck method and then reckoned that I must have set up it up incorrectly because it couldn't be THAT far out. I then tried it with centres - only one is supplied with the machine (thanks, Warco) and I had to just taper turn a bit of scrap for a second one and leave it in the 3-jaw (and don't get me on about the quality of the taper slide...). Anyway this revealed that it really WAS that far out and a bit of gentle adjustment with the steel rule method seems to have sorted things out. Now all I need to do is find some Warco-coloured paint to match the bits which came off the poorly-finished tailstock when tapping it over, and yes, I did use a block of wood! Chris Edited By Chris Veitch on 09/08/2014 08:36:15 |
| 08/08/2014 19:13:57 |
I have a fairly newly-acquired Warco Mini Lathe and the tailstock appears to be slightly off centre as delivered. I've seen descriptions of balancing a piece of thin sheet between centres to determine alignment, bit other than this there doesn't seem to be much in the way of advice on how to achieve correct lateral alignment. Coming from a Unimat with a fixed tailstock I'm a bit green to this so would appreciate any tips or advice. Regards, Chris Veitch |
| Thread: Warco mini lathe handwheel fettling? |
| 31/12/2013 10:23:19 |
Posted by frank brown on 30/12/2013 22:36:37:
can you insert a thin (and narrow) shim between the shaft and the collar , aligned with the rubbing edge. I think that tightening the grub screw will lever the collar the other way if the shim does not run from the back to the front (knob end)? Frank I don't know, Frank - but I'll give it a try. Edited By Chris Veitch on 31/12/2013 10:23:48 |
| 15/12/2013 16:00:02 |
Posted by Bazyle on 15/12/2013 15:52:15:
Do the nuts bear on a sleeve and the index collar run on that or is the index like a big washer in the set up? So will the set up will go together without the index? If so you can just skim a bit off it in your own lathe. Otherwise anyway you need to make a sleeve and bore out the index to fit over it. If you are feeling clever you can build in a ball thrust bearing while you are at it. Don't be afraid to take the slide apart and drill & tap an extra hole to use for a lock. While you are there if the gib has dimples for each screw research how to do it better - there is stuff on the net about that poor practice. No, there's no sleeve - the index is like a big washer. Therefore it's possible to think things are going OK when tightening the index and then to foul it all up by slightly over-tightening the nuts, which obviously have a much greater force than the little grub on the index can hold if you overdo it. I take your point about sleeving it and it's definitely a job for the future, although I'm not too confident about boring the stainless collar accurately. My only previous experience of cutting stainless is with a plasma cutter, and that definitely wasn't in the spare bedroom... I'd agree that a lock is a useful addition - once I get things working satisfactorily it will be one of my first mods. And yes, the gib strip has already been out and it has dimples - I'll investigate. |
| 15/12/2013 15:20:21 |
No, I can definitely live with 0.07mm and probably a bit more. My current concern is the binding on the compound slide screw but a bit of further investigation reveals that this is due to the index wheel (correct term? - the stainless collar on which the index divisions are marked) binding against the bracket. It's secured with an M3 grub screw which isn't midway along the collar, and the collar itself isn't a good fit on the plain machined section of the screw. Consequently everything runs OK when the collar is loose, but when the grub is tightened it exerts and uneven pressure on a loose fit and pulls over and binds at that point, giving a very uneven action. My workaround for the moment it so leave the collar loose and carefully set the locknuts, which gives a bit more backlash but the motion is now smooth. Unfortunately the Warco doesn't give the option to lock in this axis, other than over-tightening the gib screws. A long term option would be to bush the collar and maybe secure with a pin rather than a screw, but it looks like fairly tough stainless and there's plenty more to do yet... |
| 15/12/2013 14:42:01 |
Thanks for the ideas so far, guys. I can see I'm for an Interesting Journey with this machine - although I still think they're great value for less that £500. An hour or so's fiddling this afternoon has the backlash down to a reasonable 0.07mm although the compound slide screw action is still very uneven. I suspect this might be to do with the way I've remounted the "bracket" (as it's know in the Warco parts list - it's the component which forms the end bearing for the compound slide screw) onto the end of the slide - it's attached by a couple of M3 cap nuts to a fairly small area on the end of the slide, so I'm dubious about its squareness. I guess there's some clever trick to tightening the screws holding this correctly - which I haven't got, and it seems to be throwing up some eccentricity in the screw which wasn't there before. |
| 15/12/2013 10:17:01 |
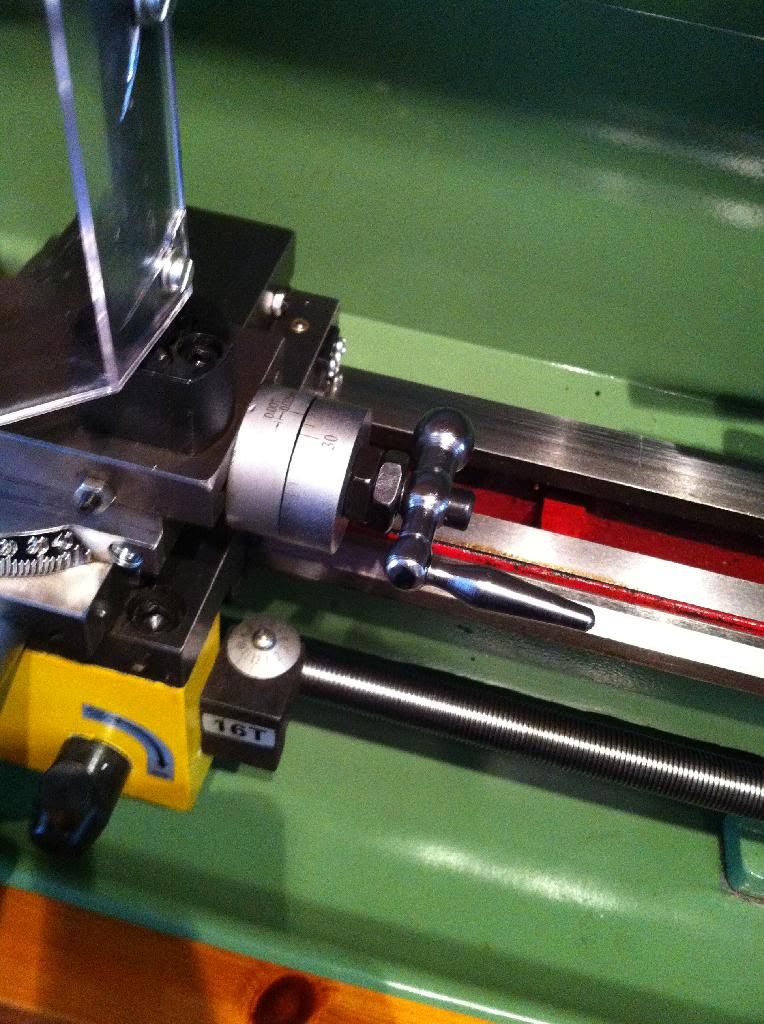
I wasn't sure whether to post this in Beginner's Questions as I've just bought the lathe and I'm just moving up form a Unimat so I am a beginner in model engineering terms, but since it doesn't really seem to be a beginner's issue it's going in here. Can someone please let me know if it's considered bad form...? My new Warco Mini Lathe has all the rough edges common to the breed, but the compound slide (not even sure if it's the right term) hand wheel is particularly rough. It has around 0.6mm backlash as delivered and is secured with the two fairly rough lock nuts shown in the photo below.
I have the David Fenner mini lathe book and I've read the ARC guide on stripping and refining it, but neither seem to show such an arrangement. Does anyone have any tips or references on refining this arrangement? Curiously, the very similar cross slide hand wheel has very little play in it and is well assembled. In addition to that, the hand wheel isn't drilled at 90 degrees but that could be redrilled and bushed. I'd also be interested to know if there is a possibility of converting these fixed dials to indexed? Edited By Chris Veitch on 15/12/2013 10:18:48 Edited By John Stevenson on 15/12/2013 10:37:09 |
| Thread: Tailstock arbor for Warco Mini Lathe |
| 13/12/2013 15:35:34 |
Thanks for that, Jason - sounds like a reasonable plan. Presumably you mean the short bit of studding is to give the screw something to push the arbor off with when it's fully retracted? |
| 13/12/2013 10:57:43 |
I've recently bought a Warco mini lathe after having used a Unimat 3 for many years. I ordered a B16-MT2 tang arbor for the tailstock chuck without realising that the tailstock screw will interfere with the tang and the arbor really needs to be hollow - currently the only way to use the chuck is to wind the tailstock about 2 inches out before inserting the chuck, which makes the tailstock screw action almost completely redundant. So, what sort of arbor should I have ordered? I've seen hollow arbors threaded for a drawbar but that isn't necessary in this case although I guess one might work if the tapped hole is oversize by a large enough amount. I haven't seen anything that looks like it's specifically designed for this purpose - or have I just not been looking hard enough? Thanks in advance, Chris |
Magazine Locator
Want the latest issue of Model Engineer or Model Engineers' Workshop? Use our magazine locator links to find your nearest stockist!
Sign up to our Newsletter
Sign up to our newsletter and get a free digital issue.
You can unsubscribe at anytime. View our privacy policy at www.mortons.co.uk/privacy
Latest Forum Posts
- *Oct 2023: FORUM MIGRATION TIMELINE*
05/10/2023 07:57:11 - Making ER11 collet chuck
05/10/2023 07:56:24 - What did you do today? 2023
05/10/2023 07:25:01 - Orrery
05/10/2023 06:00:41 - Wera hand-tools
05/10/2023 05:47:07 - New member
05/10/2023 04:40:11 - Problems with external pot on at1 vfd
05/10/2023 00:06:32 - Drain plug
04/10/2023 23:36:17 - digi phase converter for 10 machines.....
04/10/2023 23:13:48 - Winter Storage Of Locomotives
04/10/2023 21:02:11 - More Latest Posts...
- View All Topics
Support Our Partners


Shopping Partners
Subscription Offer

Latest "For Sale" Ads
- Reeves** - Rebuilt Royal Scot by Martin Evans
by John Broughton
£300.00 - BRITANNIA 5" GAUGE James Perrier
by Jon Seabright 1
£2,500.00 - Drill Grinder - for restoration
by Nigel Graham 2
£0.00 - WARCO WM18 MILLING MACHINE
by Alex Chudley
£1,200.00 - MYFORD SUPER 7 LATHE
by Alex Chudley
£2,000.00 - More "For Sale" Ads...
Latest "Wanted" Ads
- D1-3 backplate
by Michael Horley
Price Not Specified - fixed steady for a Colchester bantam mark1 800
by George Jervis
Price Not Specified - lbsc pansy
by JACK SIDEBOTHAM
Price Not Specified - Pratt Burnerd multifit chuck key.
by Tim Riome
Price Not Specified - BANDSAW BLADE WELDER
by HUGH
Price Not Specified - More "Wanted" Ads...
Get In Touch!
Do you want to contact the Model Engineer and Model Engineers' Workshop team?
You can contact us by phone, mail or email about the magazines including becoming a contributor, submitting reader's letters or making queries about articles. You can also get in touch about this website, advertising or other general issues.
Click THIS LINK for full contact details.
For subscription issues please see THIS LINK.
Digital Back Issues


Donate

 Register
 Log-in
Model Engineer Magazine
- Percival Marshall
- M.E. History
- LittleLEC
- M.E. Clock

ME Workshop
- An Adcock
- & Shipley
- Horizontal
- Mill

Subscribe Now
- Great savings
- Delivered to your door

Pre-order your copy!
- Delivered to your doorstep!
- Free UK delivery!