Member postings for Pete Gilbert 1
Here is a list of all the postings Pete Gilbert 1 has made in our forums. Click on a thread name to jump to the thread.
| Thread: My Toyo ML1 |
| 07/02/2015 22:30:18 |
Yes, the thread is not so important, because it doesn't specifically align the prop. The critical areas of the prop adapter are the reamed bore for the motor shaft, the taper and the plain section and step before the thread. Those absolutely must be machined at the same time to maintain concentricity between the motor and alignment the propeller's own central bore. It will be preferable for me to get the final saw slit prety central too. I may have to make up a similarly M6 threaded chunk of scrap to mount on the toolpost and run a fine circular saw in the lathe chuck. Also, if I am forced to make my own female taper section, that will be critical too. Mind you, I'm using plastic propellers that are mostly injection molded. So I do have to pre-balance check them off the plane as well, then see if there's any vibration once mounted. It's all fun in the end. If it's wrong, I launch the plane, the prop vibrates like all hell and then either the motor burns out, the speed controller fails, or the prop shatters. Hehe! But seriously, it's never nromally that bad. I recently had to knock up a different type of adapter at work due to my cheap Chinese one being visibly wobbly, and all is well now, with a vibration free flight . |
| 07/02/2015 18:44:02 |
Posted by elixir oliver on 07/02/2015 10:39:30:
Pete, I got the reply from Axminster about the T-slot nut for SIEG C0. From your earlier posting, this seems to be just a waste, isn't it? Perhaps better to get it made.
the parts number 110.
Cheers That's the right part Oliver, but yes, it's pretty basic and will only take a few minutes to turn up from a short piece of 16mm bar. If I was going to make a spare for my tool post, it would go like this. Clamp bar in chuck. Face off end, Center drill to suit thread (M5) Drill 4.2mm to approx 16mm deep Start the M5 tap a few turns in by holding it in the drill chuck and gently turning the chucked workpiece by hand. (you have to leave the tailstock free to slide and apply light pressure towards the work) Use tapping grease. Then release the tap from the drill chuck without disturbing it in the work. Slip a tap handle onto the tap and add a few more turns to the thread so that it can be finished later and will self align. Remove the tap. Turn the 10mm diameter Form the 7mm 'waist' Start the part off Withdraw the part off tool and deburr sharp edges. BEWARE OF GETTING TOO CLOSE TO THE LATHE CHUCK WITH A HAND TOOL!!! IT WIIIIIIIILLLLLL BITE !!!!!! Part off. Form flats to clear inside your T slot.. |
| 07/02/2015 18:25:06 |
Posted by Michael Gilligan on 02/02/2015 06:50:48:
Pete, Remember that, although collets are very convenient, there are other ways of achieving concentricity:
MichaelG. Edited By Michael Gilligan on 02/02/2015 06:52:42 Just re-read that and wanted to say that I have no way, at the moment, to cut threads on this lathe, so I'll have to thread my propeller adapter collets manually with a die. Hmm , no. Actually I will be forming the body of the collet and drill/reaming the centre bore, but not parting it off to the correct length immediately, so that I can turn it around and use the per-pated large diameter to hold on while die cutting the thread with the die holder backed up against the tool post for stability.
This is a prop adpter collet, the thread is M6 on this one. The 'top hat' thing has the matching 'female' taper to compress the collet and the split part of the collet will have a reamed internal bore to fit whatever motor shaft.
Sorry, just thinking out loud there. |
| 02/02/2015 21:21:10 |
Posted by elixir oliver on 26/01/2015 03:01:55:
As this is my first lathe, my limited understanding is trying to get original spareparts. But after reading this post, it seems I could use toolpost from other lathe.
Check out this "Info" page I just found on the Home Model Engine Machinist website. |
| 02/02/2015 21:07:06 |
Posted by Michael Gilligan on 02/02/2015 06:50:48:
Posted by Pete Gilbert 1 on 01/02/2015 23:34:34:
I shall have to correct it before I go much further, as one of my tight tolerance requirements for this lathe is turning parts for propeller adapters for my RC planes. And with a prop rotating at 10000 rpm or more, any imbalances must be minimised. Hmm, I really need a collet holder for increased accuracy. . Pete, Remember that, although collets are very convenient, there are other ways of achieving concentricity:
One or more of these methods can be adopted/adapted to suit almost any small turning job. For some inspiration; have a look around this 'Adventures in Watchmaking' site. MichaelG. Edited By Michael Gilligan on 02/02/2015 06:52:42 I agree with everything you've said except the shellac stuff. I've never heard of that till now. But it's verrrry interesting and I've found this thread on homemodelenginemachinist.com And now that I've seen it, I agree with that too! Thanks for opening my eyes Michael. I owe you one! Edited By Pete Gilbert 1 on 02/02/2015 21:21:57 |
| 02/02/2015 20:55:32 |
Posted by elixir oliver on 02/02/2015 08:33:03:
I always like RC planes, but as a kid they were the luxury in toys world. Owning one was like having a Bentley. But, I grow up, thats good news. I watched 'Hector and the search for Happiness' last night and they were a snip of them playing RC aeroplane. Guess if the bug bit, it will be on. Well, I'll fix the lathe first whilst find out more about this forum's hobby. Australia is quite windy, when it's mad.. it's around 30km/h all day. but of course, not all the time Not sure where in Aus you're located, but Andrew Newton is an epic maker and flier down in Victoria, where it always seems to be windy! He doesn't seem to do scale planes or much balsa wood stuff. Foam rules!! |
| 02/02/2015 20:49:46 |
Aluminium can be hardened/toughened and a deep anodized layer will be harder still, but it isn't steel after all is said and done. Edited By Pete Gilbert 1 on 02/02/2015 20:56:20 |
| 01/02/2015 23:34:34 |
Heh, those are way too expensive for aluminium parts. In my humble opinion. Why can't they just make 'em in mild steel? It'll last longer than the ally for starters and it should be cheaper as they won't need anidozing. At Adaero Precision, we make our own work holding fixtures and vice jaws for milling , when normal plain or step vice jaws aren't suitable and special chucks and collets for turning. And I often complain when a fixture gets made in ally. Yes it's easier to machine, and we do install helicoil inserts to the threads, but the clamping faces don't last too long and we have to make another. But yes, if all you need is a basic tool post, a made up one is super simple. in the near future, I intend to buy or make up a mini sliding vice for small milling jobs. I may even take my saddle to work and drill/ream a few dowel holes for positioning accuracy. Looking at the pic of my tool post, it's dimensions in that view are as follows: 40 x 40 mm and 35mm across The cut out starts at 16mm from the base is 16mm high (under the screws) and 10mm deep. Presumably for 10mm tool steel. At the back is an 8mm through hole, 26mm up from the base, 6mm in from the back edge and paralell to the cutout. This has two short screws for clamping round shank boring bars or maybe as cigarrette holder or whatever. Hope that helps Oliver The central hole for the 'T' slot bolt is by no means a close fit on the bolt and no precision should be imagined when adjusting the post by this means.
- - - Unfortunately I just measured the eccentricity of my main chuck centering (with a dial micrometer borrowed from work) and found an average 0.15mm run out at the workpiece! It's the chuck and not the spindle, so I need to think how I'm going to sort it out. I knew it was out from the first time got it home and turned something, but now I know just how bad it is. I shall have to correct it before I go much further, as one of my tight tolerance requirements for this lathe is turning parts for propeller adapters for my RC planes. And with a prop rotating at 10000 rpm or more, any imbalances must be minimised. Hmm, I really need a collet holder for increased accuracy. |
| 31/01/2015 19:06:47 |
Oliver, that thing inside the tailstock is a brass bush/thrust washer and that's all there is to it. It stays on one side of the circlip and stops movement in one direction and the handwheel does the other. Nice and simple, and even if we break the circlip I'm sure it'll be a stock size.
Separated. The handwheel turns this coarse left hand thread.
Here's my recommendation for your stuck chuck. (let's not forget that this is a micro lathe and the casr iron parts could be damaged by heavy handed hammering Soak the drill chuck and tailstock slider in whatever easing oil you have overnight at the very least. And, if you feel like it, apply a flame to the slider to heat it up, not to red hot, but hot enough so that water evaporates instantly. Then, re-assemble your tailstock without the handwheel. Use a couple of M6 nuts and lock them together on the thread at the back. Then, wind back a bit of pressure, as if to pull the slider away from the chuck with your 10mm spanner, then put a 17 or 16mm spanner behind the chuck. Use that to lever against the chuck and tap it with a hammer at the same time. You could also try a brass drift and a few good hefty taps at the back of the chuck. If that doesn't work realitively easily, you'll need to make up something that looks like a ball joint splitter out of steel, which will apply more pressure as it's also a wedge shape which you will have to tap in to the join before tapping it sideways. Once again, beware ot damaging the cast iron tailstock body. ------------- And this is my original toolpost.
There's an M5 machine screw through from the top and the heavy sleeved 'T' slot thingy measures just under 7mm at the 'neck' and has flats machined to 14mm wide on the 16mm flange. The 7mm 'neck' is 5mm long, so it's actually 2mm clear of the saddle once locked by the screw. The fat part of this one is just under 10mm to suit the hole in the post. I'm certain that the proxxon one will be close to these sizes, and if slightly bigger, any alterations shouldn't be a problem since you've found a friendly machinist.
|
| 29/01/2015 20:36:58 |
Yes, it's a self ejecting type, but I had to 'encourage' mine because it was a bit tight. So I used an open end 13mm spanner placed over the back of the chuck taper and then angled it towards the lathe chuck so that it pushed the little chuck away from the tailstock. I then gave it an enthusiastic thump with the heel of my hand and it popped out. From then on it has worked well. We shouldn't be hammering this little chuck into it's taper by the way, just a quick slide in to wedge it into the taper is enough. Although mine takes a 7mm drill of, I would use very light drilling pressure to avoid stalling the spindle. Yes, your handwheel is almost fubared, with a domestic electric drill badly by the looks of it. It definitely needs to be bored and sleeved, then a fresh M6 can be tapped through. ((LOL! Forget "Through A Glass Darkly" Let's hope someone publishes "With A Domestic Electric Drill, Badly" !! )) Here's a toolpost fron Axminster Tools that wil probably suit as it's for the Proxxon. I think that's the current, rebranded, updated, (haha
I'd really like to have a quick release tool post and tool holders. Maybe later as I'm really skint after xmas.. |
| 28/01/2015 09:18:19 |
Good to hear that Oliver. The lack of density of the rust probably indicates that it wasn't in damp conditions for too long and, obviously the good quality of the metal. The paint on the ML1 seems to be like a Hammerite finish. So any rust that appears to show through is probably just due to the 'spots' that occur as the paint dries.
Both my chuck keys have 12 teeth, a 15mm diameter and a just under 4mm dia pilot (nose). They do look quite different, but both work in the lathe chuck. I'm guessing that the one on the left is the original. I can't imagine that Toyo Sakai would not have followed standard available specs for this sort of thing.
|
| 27/01/2015 13:35:29 |
Posted by elixir oliver on 26/01/2015 10:52:12:
Both of he the handwheel for the carriage has no threading. As shown on picture one of the wheel is placed on the carriage. I am also wondering what sort of Chuck key I could use, since it is also missing. Apart from that, it runs quite silent and smooth.
Curse you for saying it's quite silent! Mine isn't. I have two chuck keys and although they look different they both seem to work the main chuck and the drill chuck ok. The handwheels have no M6 internal thread? In that case I would bore them out to around 9 or 10mm, reduce the face that touches the carriage by 2mm and make up a top hat sleeve with a 2mm brim plus M6 internal and press them into the 9/10mm bore, with the 2mm brim replacing the material that was removed. If you don't currently have access to another lathe, I'd be happy to make 'em for you. We have a small hand press at work, so I can make them a friction fit and press them in. Problem solved mate. Drop me a PM if you need to. |
| 27/01/2015 12:30:51 |
I think 0000 grade steel wool should be ok. You can add oil to it to reduce it's effectiveness, even engine oil. We use it at work for deburring and polishing precision aluminium parts, so there's no need to worry about your steel bed guides. In fact the steel in the wire wool is probably the same hardness as the steel you're going to clean, so it shouldn't really be able to affect it. All genuine Scotch Brite, also used at my workplace, has alminium oxide as it's abrasive and only the industrial graded white coloured one is graded as being the same as 0000 wire wool. All scouring pads let go of their abrasive during use, but cheap scouring pads are unregulated and shed their abrasive onto your workpiece rapidly. So you MUST clean off all that grit before you even think of reassembilng your lathe. Edited By Pete Gilbert 1 on 27/01/2015 12:31:47 |
| Thread: What did you do today? (2014) |
| 04/08/2014 18:31:31 |
Posted by Clive Hartland on 03/08/2014 15:41:25:
Hi lads, thank you for your responses to my post. The Rosetta probe has been in space 10 years and only now is nearing the comet 67P/ C-G. It will stand off at a certain distance to carry out scientific measurements and take photos of the comet. later a topographical map will be worked on to configure a landing site. I have been surprised at how little is being made of this in the media, almost silent and it is the ESA website that is giving snippets of information almost daily. They have claimed intellectual rights to the information even though it has been paid for by the EU and its peoples. One reason was that certain researchers and scientists were seizing on the info. put out and extrapolating it as if it were their own research! This is a magnificent scientific achievement that has been 10 years in the making and some of the detail that will emerge will give some idea of how Comets formed when the alleged 'Big Bang' happened. My posts were only to make you all aware of what was happening at this time and allow you to, how can I say, 'Join In' Clive This sort of stuff does fade in the public eye quite rapidly these days. I mean, Rosetta was news 3 years before the first iPhone, and Apple have produced a new generation of it every year since then. |
| 04/08/2014 18:12:02 |
I'm not getting involved in THIS part of the thread!! |
| 01/08/2014 16:48:27 |
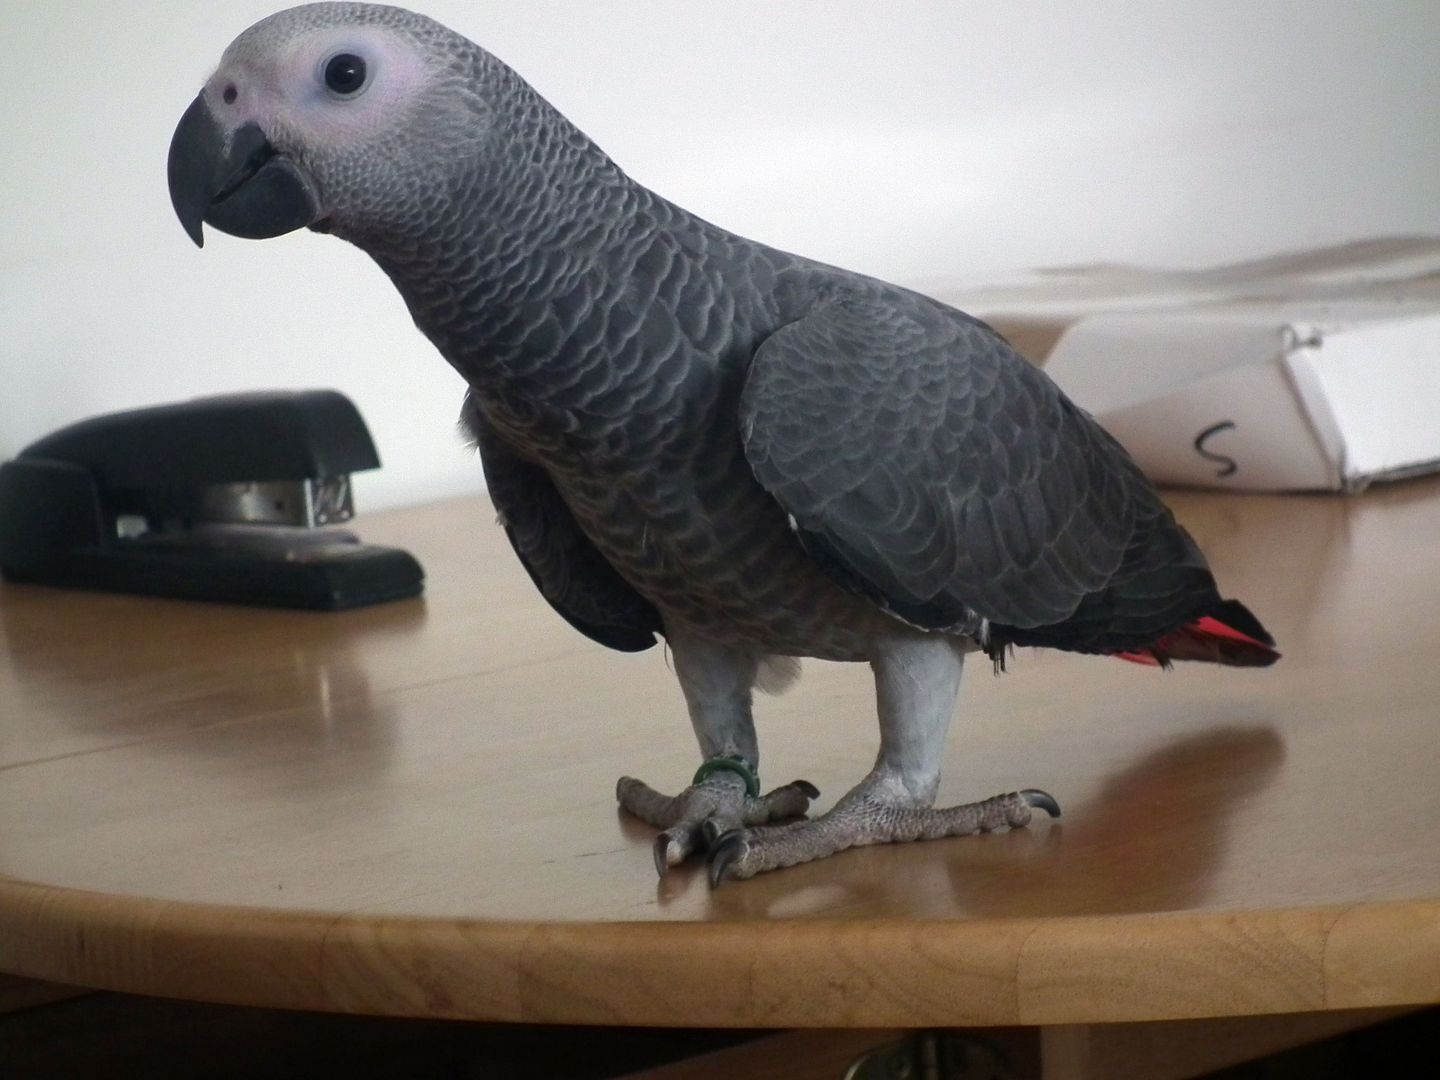
Posted by Bogstandard2 on 31/07/2014 17:22:42:
No Neil, a 14 week old African grey, who won't normally start to talk until 6 months old, but he is already muttering and whistling certain sounds, he seems to be very intelligent, and should attain the intelligence of a four year old child very quickly, so more intelligent than me now that my mind is slowly disappearing..
John
Bless 'im, he's awesome! And very cute at 14 weeks. I love the enquiring eye of a parrot, you can see their smart mind sizing stuff up and looking for something to eat or play with. They love interaction too and learn from it so much more quickly than a dog/cat/your mate down the pub. |
| Thread: Small pillar / bench drill for model making |
| 27/07/2014 16:17:41 |
Posted by Michael Gilligan on 27/07/2014 15:42:48:
Whilst searching for [and failing to find] anything of a quality comparable to J&S that I mentioned in my first post; I happened across this delightful little "sensitive drilling table" ... What a brilliant idea !! MichaelG.
Expensive as a hobby tool, but yes, very neat. We have a small 'tapping drill' type stand at work that has the same action as that for the table, and a double cone drive for the chuck. It releases the drive as the table rises and the tap meets a set depth then drives the opposite way to screw the tap back out of the new thread as the table is lowered.
Edited By Pete Gilbert 1 on 27/07/2014 16:21:05 Edited By Pete Gilbert 1 on 27/07/2014 16:21:48 |
| Thread: Swarf |
| 27/07/2014 15:29:34 |
Heh, I haven't made enough 'home swarf' to start worrying yet! It's all disappeared up the vacuum cleaner so far. But any greater build up will probably get taken to work and added to the bins there. I like the idea of adding it to food tins and drinks cans, that's excellent. Don't forget that 25% of drink cans are still made from steel.
|
| Thread: Avoiding marks on work.? |
| 27/07/2014 14:41:58 |
Posted by Nigel McBurney 1 on 27/07/2014 11:03:30:
avoid the use of shim,of any material , I once saw at work an operator on the next machine to me get get his finger cut quite badly from a piece of shim used to protect the work ,it was going round in the chuck like a bacon slicer,he never did it again and neither did I
Ouch! Was that unsupervised, or was the guy a setter/operator? Where I work, a setter would be directly responsible for something like that. We don't have operators involved in any part of the set up of any machine, unless they're being trained. |
| 27/07/2014 14:36:21 |
Yeap, softer than the workpiece packing material is good. If you're just working with a bench vice then ally pieces or protectors are good. If you're gripping a finished ally work piece in a bench vice, either use something slightly softer (nylon sheet/block) or use spotlessly clean ally protectors. But in a 3 jaw chuck that can make the work eccentric if you're holding on a finished dimension. Even Coke cans will vary in thickness. Basically, try to using hard lathe jaws on a finished surface if you can avoid it. I know that home engineering brings cost into play significantly more than at the workplace. But your precious work needs precision and stability at all times, if it's being turned or machined so you're better off pre machining some soft (mild steel) jaws (or collet if you can't match the work diameter) and ensuring a smooth precise gripping face that will do the gripping. A shiny surface in the jaws isn't slippery, it actually means that you've maximised the contact available for gripping the work. Perfect jaws shouldn't mark the work. Reduce pressure in the jaws and take lighter cuts. So, if you HAVE to use what you've got, make the jaw faces as perfect as you can, or make up precision thickness packing pieces. Edited By Pete Gilbert 1 on 27/07/2014 14:49:23 |


Magazine Locator
Want the latest issue of Model Engineer or Model Engineers' Workshop? Use our magazine locator links to find your nearest stockist!
Sign up to our Newsletter
Sign up to our newsletter and get a free digital issue.
You can unsubscribe at anytime. View our privacy policy at www.mortons.co.uk/privacy
Latest Forum Posts
- *Oct 2023: FORUM MIGRATION TIMELINE*
05/10/2023 07:57:11 - Making ER11 collet chuck
05/10/2023 07:56:24 - What did you do today? 2023
05/10/2023 07:25:01 - Orrery
05/10/2023 06:00:41 - Wera hand-tools
05/10/2023 05:47:07 - New member
05/10/2023 04:40:11 - Problems with external pot on at1 vfd
05/10/2023 00:06:32 - Drain plug
04/10/2023 23:36:17 - digi phase converter for 10 machines.....
04/10/2023 23:13:48 - Winter Storage Of Locomotives
04/10/2023 21:02:11 - More Latest Posts...
- View All Topics
Support Our Partners


Shopping Partners
Subscription Offer

Latest "For Sale" Ads
- Reeves** - Rebuilt Royal Scot by Martin Evans
by John Broughton
£300.00 - BRITANNIA 5" GAUGE James Perrier
by Jon Seabright 1
£2,500.00 - Drill Grinder - for restoration
by Nigel Graham 2
£0.00 - WARCO WM18 MILLING MACHINE
by Alex Chudley
£1,200.00 - MYFORD SUPER 7 LATHE
by Alex Chudley
£2,000.00 - More "For Sale" Ads...
Latest "Wanted" Ads
- D1-3 backplate
by Michael Horley
Price Not Specified - fixed steady for a Colchester bantam mark1 800
by George Jervis
Price Not Specified - lbsc pansy
by JACK SIDEBOTHAM
Price Not Specified - Pratt Burnerd multifit chuck key.
by Tim Riome
Price Not Specified - BANDSAW BLADE WELDER
by HUGH
Price Not Specified - More "Wanted" Ads...
Get In Touch!
Do you want to contact the Model Engineer and Model Engineers' Workshop team?
You can contact us by phone, mail or email about the magazines including becoming a contributor, submitting reader's letters or making queries about articles. You can also get in touch about this website, advertising or other general issues.
Click THIS LINK for full contact details.
For subscription issues please see THIS LINK.
Digital Back Issues


Donate

 Register
 Log-in
Model Engineer Magazine
- Percival Marshall
- M.E. History
- LittleLEC
- M.E. Clock

ME Workshop
- An Adcock
- & Shipley
- Horizontal
- Mill

Subscribe Now
- Great savings
- Delivered to your door

Pre-order your copy!
- Delivered to your doorstep!
- Free UK delivery!