Forum sponsored by:

drilling mounting holes in mill engine bearing casting
| anderalex | 27/01/2022 20:32:00 |
| 2 forum posts 1 photos | I am making the Kennions Tina steam engine and im struggling with the bearings. I have the build notes by Stan Bray and they go into a lot of detail boring the hole for the crankshaft but when it comes to the mounting holes there is very little info. the drawings state to ream the bearings when they are bolted to the base casting but the write up shows they are bored to size then bolted on.so ,how do i drill the 2 mounting holes so the crank hole is in the center. as there is such little info in the jam packed full of detail write up i feel im missing something very simple. the bored hole is 3/8 and the holes are 1 1/4 either side of center. i have a wm 14 with a 3 axis dro. thanks for looking
|
| JasonB | 28/01/2022 07:02:44 |
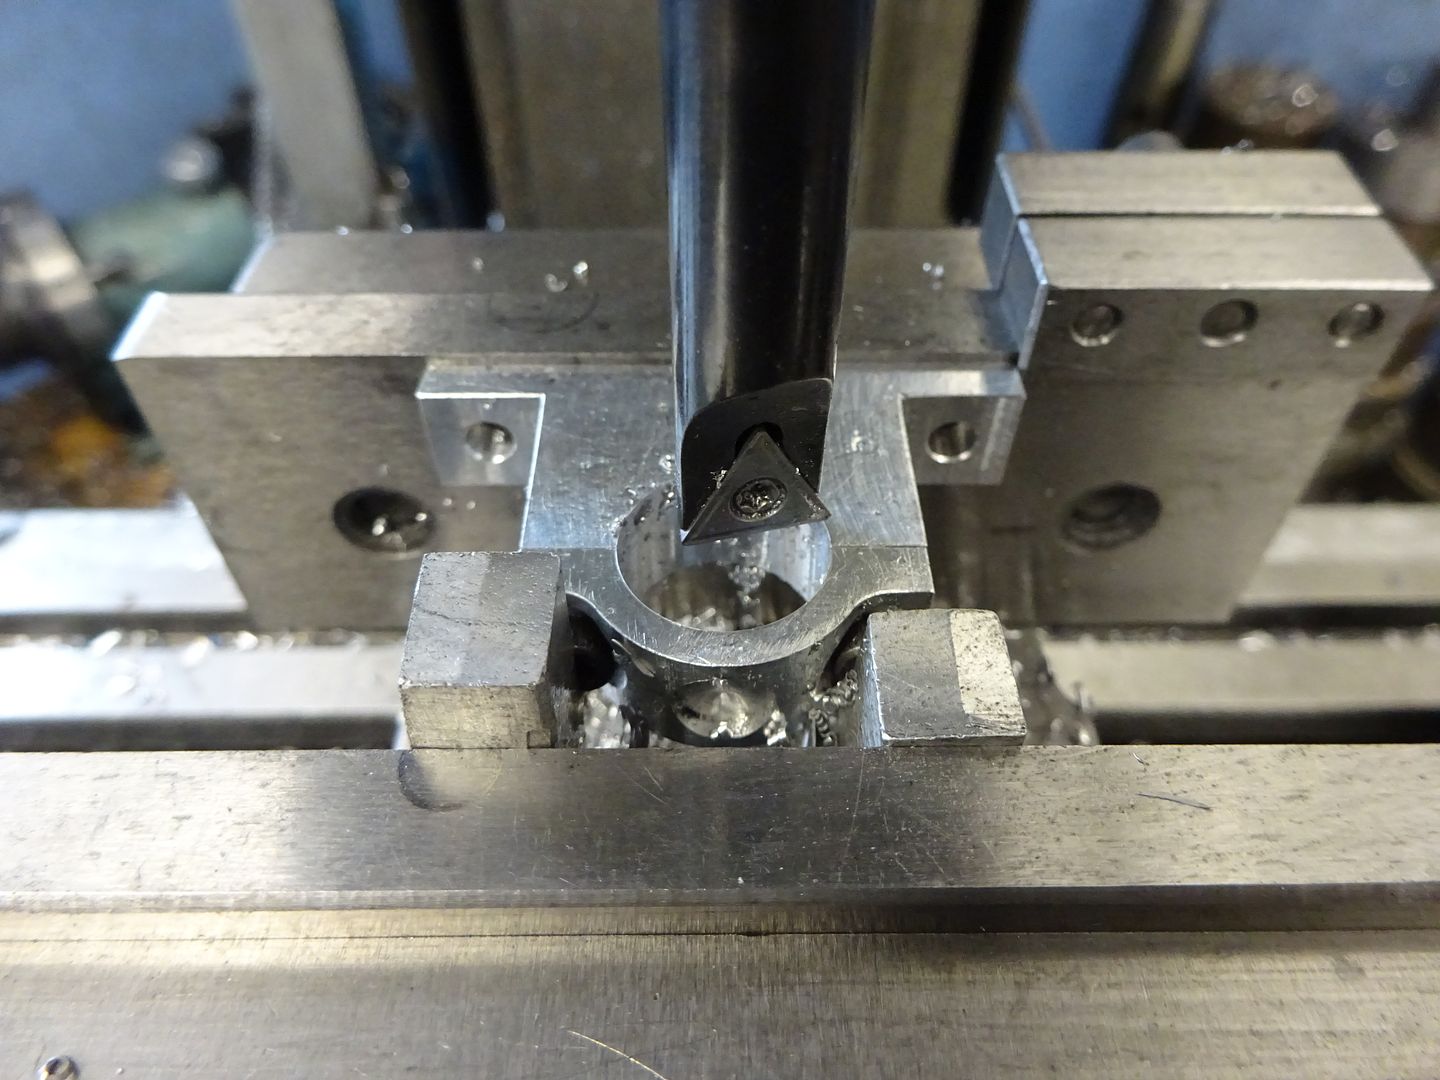
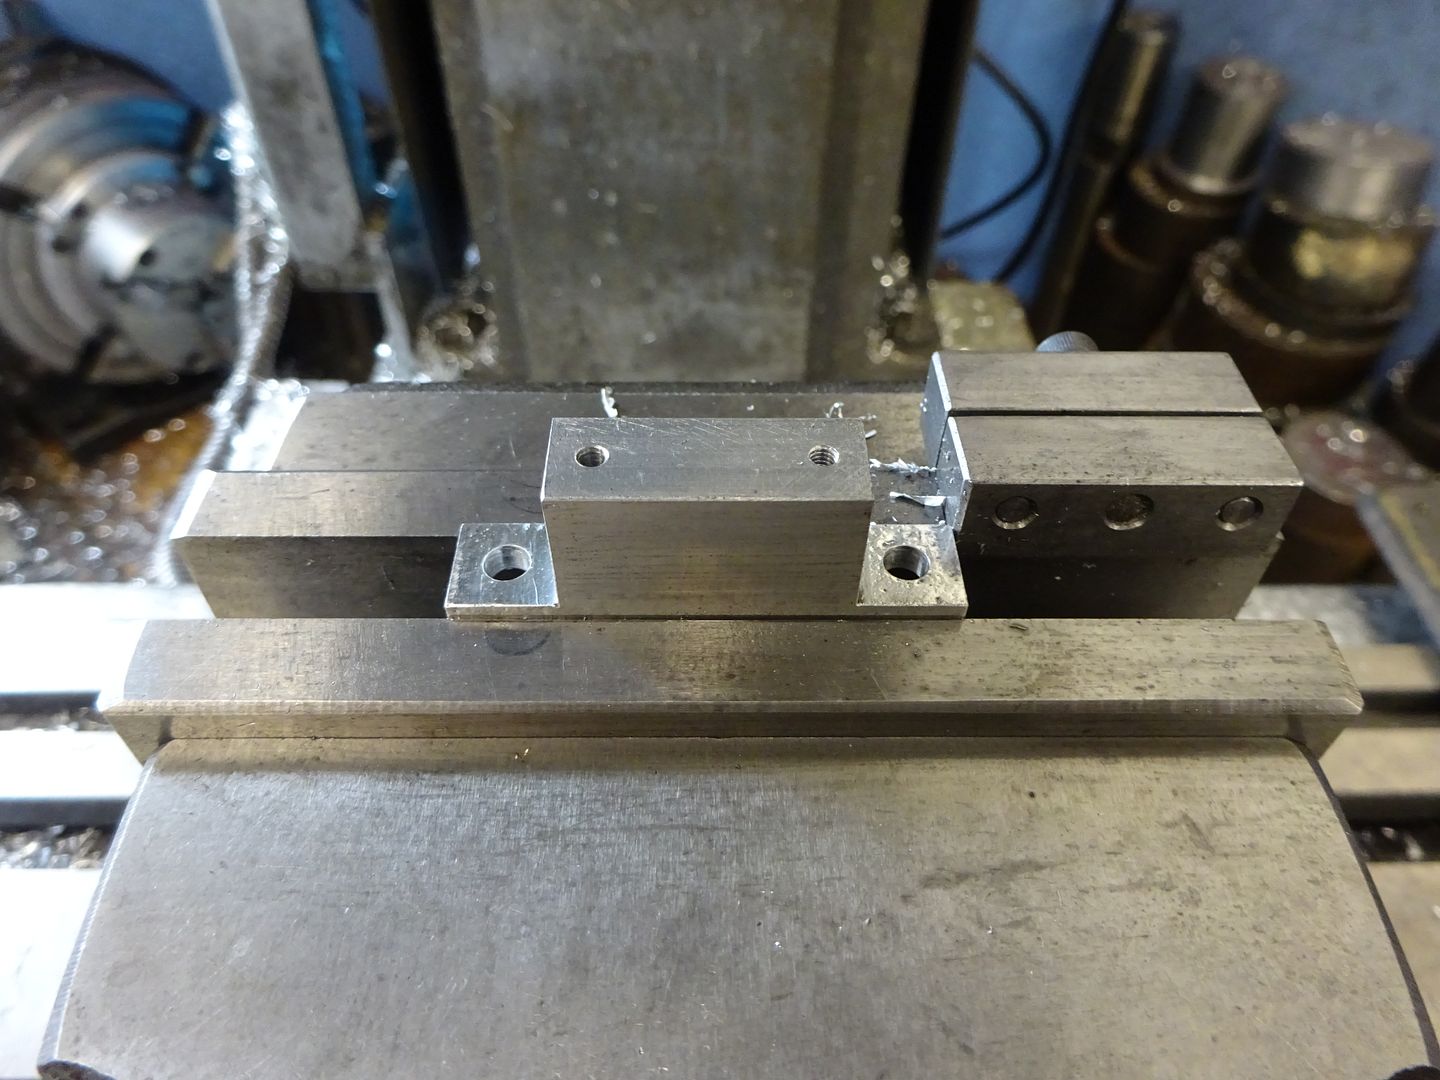
 25215 forum posts 3105 photos 1 articles | I would clean up the bottom face first. Then hold in the vice on some packing and machine the top face, then locate ctr and do the two stud holes for the cap and the two mounting holes in the feet The caps can then be held joint upwards in the vice so the joint face can me milled and clearance holes drilled. You can now screw the two together for boring which I would do by setting the foot of the pedestal against the vice fixed jaw that way both holes will be the same height if you don't disturb the Y axis. Personally I would finish bore or ream depending on size on the mill not once assembled. In all cases with gun metal use sharp tools and
Edited By JasonB on 28/01/2022 07:57:15 |
| Nicholas Farr | 28/01/2022 12:24:32 |
 3988 forum posts 1799 photos | Hi Anderalex, I have just had a read of Stan Bray's article and you can just follow his method of boring the crank shaft bearings or do them the way JasonB has shown. As far as drilling the holes for the caps, I doubt they are critical as long as they don't pretrude into the bores or are too close to the outside edges and can probably be positioned by eye and the tapping size holes could be drilled through the caps and into the bases before separating in Stan Bray's method and then opening the cap holes for the bolt diameters, or by following JasonB's method, but it would be prudent to put identification marks on the caps and bases for pairing them up and orientation. As far as the bolting down holes Stan says they need to be done by careful measuring as it seems impractical for setting up and marking through the base holes, but you may be able to devise a method of your own. Regards Nick. |
| JasonB | 28/01/2022 13:09:29 |
25215 forum posts 3105 photos 1 articles | With regards to the holes in the feet if while you have the casting upside down to flatten the bottom you also take a light cleaning up cut off either end you then then have two points of reference and can locate their centre and set everything else out from that. If you look at that image I posted I'm using one end of the "foot" against a stop so that I only have to find the ctr once and then just swap the two pedestals over. The same stop can be used for the second ops on my list and the boring of the bearing so everything is located equally either side of ctr.
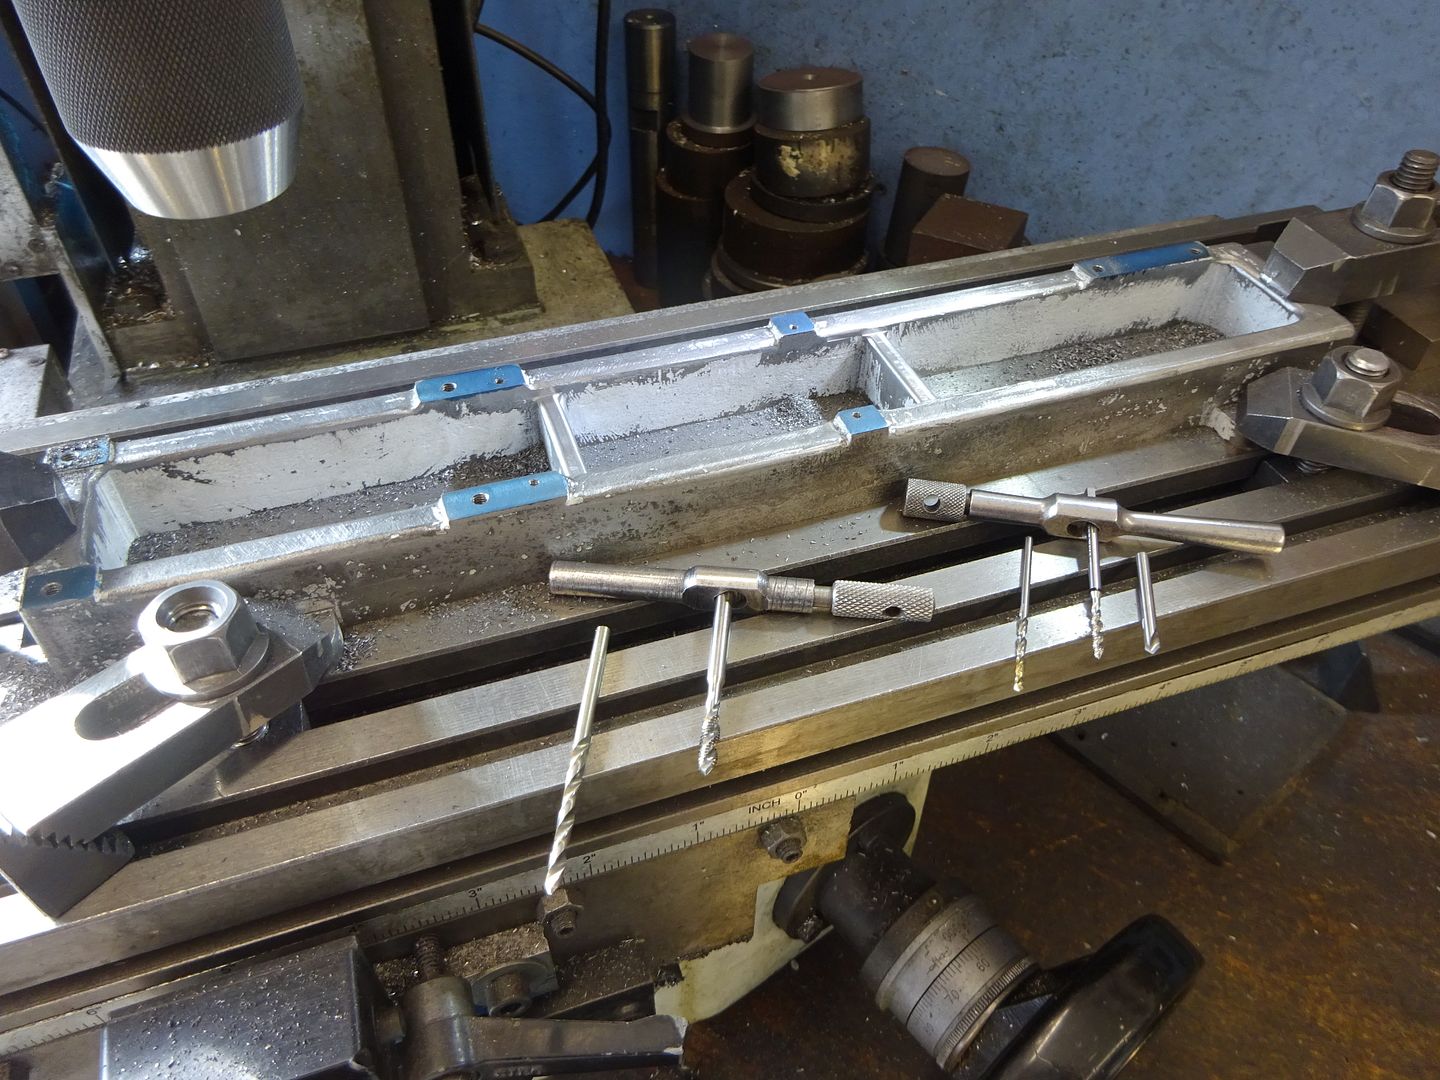
I have not read Stan's build but at the time he was writing many would not have had a mill in the workshop let alone one with a DRO so some of his methods are a bit dated now. These days I would clamp the bed casting down to the mill table, clock it true and establish my datum. Then mill the various bosses flat before drilling the holes for cylinder, cross head guides and bearing mountings all in one setting using the DRO to position them. Its going to be more accurate than marking out, picking up punch marks and spotting through from other items. I would then expect each item to screw on with little chance of not lining up.
Edited By JasonB on 28/01/2022 13:20:42 |
| Chris Gunn | 28/01/2022 13:15:14 |
| 459 forum posts 28 photos | What Jason says, but bear in mind you should drill clearance holes in the castings to bolt down the bearing blocks, and this will give a little wriggle room to align the bearings. Chris Gunn |
| Nicholas Farr | 28/01/2022 13:45:44 |
3988 forum posts 1799 photos | Hi, I do agree with JasonB and would probably do it the same way or in a similar fashion, it's just a matter of using a technique that one is happy with and there are always different approaches to any job. I very often got confused by what I called long winded ways of doing jobs, by people I used to work with, but they got the job done, albeit taking a little longer or with more effort, which is not good when the production manager is breathing down your neck, but our hobby is our own time. Regards Nick.
|
| anderalex | 28/01/2022 19:13:01 |
| 2 forum posts 1 photos | Thats brilliant, thank you very much everyone. Im pretty sure i am over thinking it. Thanks for the pictures JasonB. Some very welcome suggestions. this is my first attempt at a model steam engine with castings. i have made the steves workshop oscilating engine. i think i need to join a club.
|


Please login to post a reply.
Magazine Locator
Want the latest issue of Model Engineer or Model Engineers' Workshop? Use our magazine locator links to find your nearest stockist!
Sign up to our Newsletter
Sign up to our newsletter and get a free digital issue.
You can unsubscribe at anytime. View our privacy policy at www.mortons.co.uk/privacy
Latest Forum Posts
- *Oct 2023: FORUM MIGRATION TIMELINE*
05/10/2023 07:57:11 - Making ER11 collet chuck
05/10/2023 07:56:24 - What did you do today? 2023
05/10/2023 07:25:01 - Orrery
05/10/2023 06:00:41 - Wera hand-tools
05/10/2023 05:47:07 - New member
05/10/2023 04:40:11 - Problems with external pot on at1 vfd
05/10/2023 00:06:32 - Drain plug
04/10/2023 23:36:17 - digi phase converter for 10 machines.....
04/10/2023 23:13:48 - Winter Storage Of Locomotives
04/10/2023 21:02:11 - More Latest Posts...
- View All Topics
Support Our Partners


Shopping Partners
Subscription Offer

Latest "For Sale" Ads
- Reeves** - Rebuilt Royal Scot by Martin Evans
by John Broughton
£300.00 - BRITANNIA 5" GAUGE James Perrier
by Jon Seabright 1
£2,500.00 - Drill Grinder - for restoration
by Nigel Graham 2
£0.00 - WARCO WM18 MILLING MACHINE
by Alex Chudley
£1,200.00 - MYFORD SUPER 7 LATHE
by Alex Chudley
£2,000.00 - More "For Sale" Ads...
Latest "Wanted" Ads
- D1-3 backplate
by Michael Horley
Price Not Specified - fixed steady for a Colchester bantam mark1 800
by George Jervis
Price Not Specified - lbsc pansy
by JACK SIDEBOTHAM
Price Not Specified - Pratt Burnerd multifit chuck key.
by Tim Riome
Price Not Specified - BANDSAW BLADE WELDER
by HUGH
Price Not Specified - More "Wanted" Ads...
Get In Touch!
Do you want to contact the Model Engineer and Model Engineers' Workshop team?
You can contact us by phone, mail or email about the magazines including becoming a contributor, submitting reader's letters or making queries about articles. You can also get in touch about this website, advertising or other general issues.
Click THIS LINK for full contact details.
For subscription issues please see THIS LINK.
Digital Back Issues


Donate

 Register
 Log-in
Model Engineer Magazine
- Percival Marshall
- M.E. History
- LittleLEC
- M.E. Clock

ME Workshop
- An Adcock
- & Shipley
- Horizontal
- Mill

Subscribe Now
- Great savings
- Delivered to your door

Pre-order your copy!
- Delivered to your doorstep!
- Free UK delivery!
All Forum Topics > Beginners questions > drilling mounting holes in mill engine bearing casting