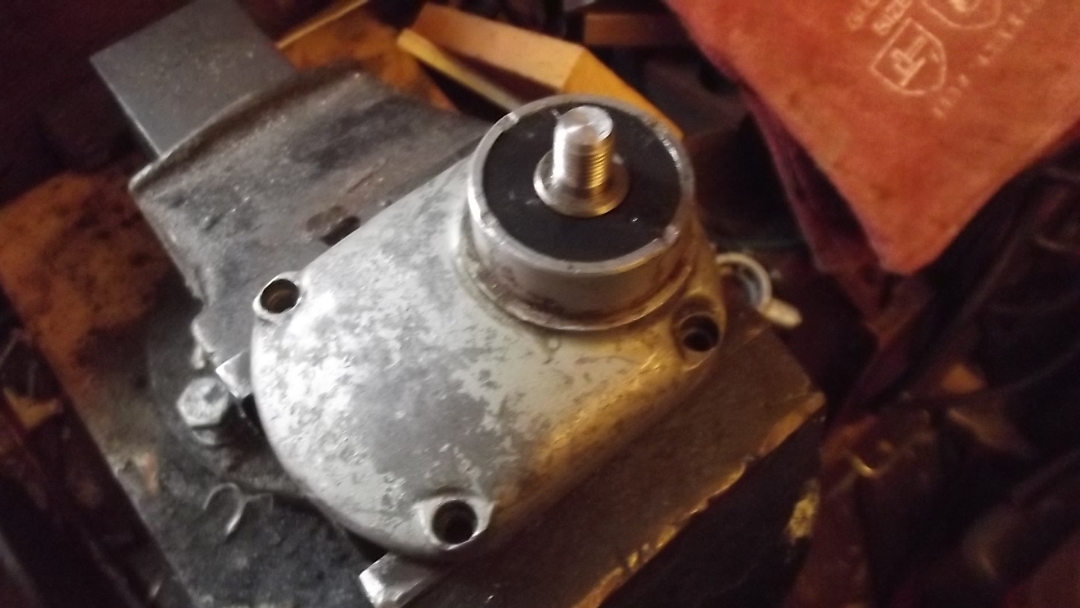
Forum sponsored by:

Bearing removal, Chuck removal, motor cleaning (drill renovation central)
| Rainbows | 30/05/2016 18:59:01 |
| 658 forum posts 236 photos | So in past news I got the bearing in a vice, heard a crack and a second later the outer race and ball bearings went ping and are now in a distant land. Some dremel cutting disks are on order.
Currently I'm trying to get the big gear off so I can get to a and replace the frontmost bearing. Trying to lever it off with a screwdriver has failed despite soaking in penetrative oil and blasting the gear with heat (though not enough to draw the temper). Not sure how to proceed now. |
| Jeff Dayman | 30/05/2016 19:43:00 |
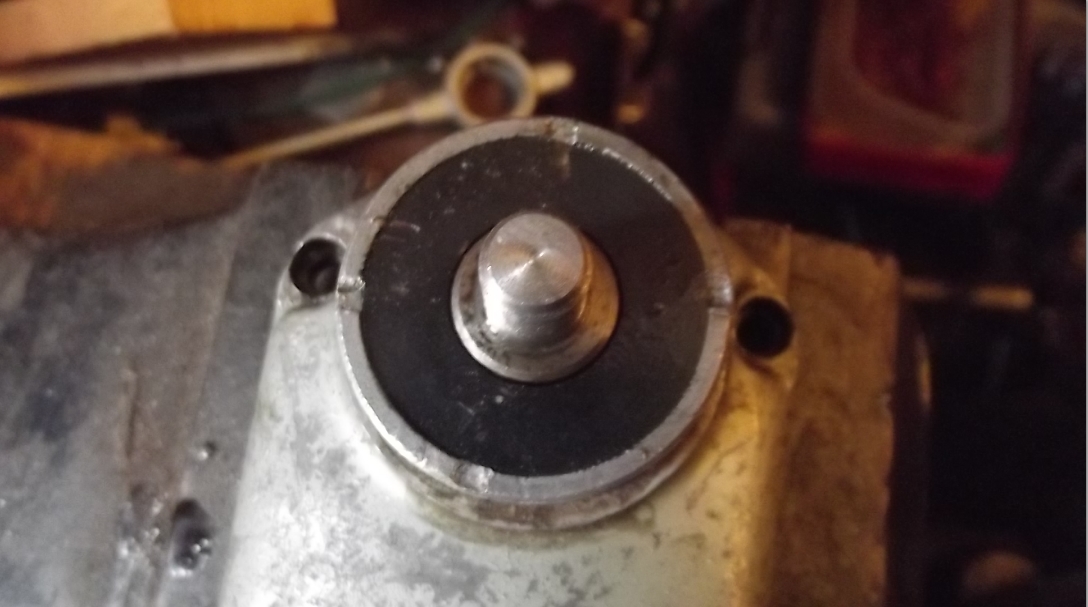
| 2356 forum posts 47 photos | Did you get the chuck off? If so, can we have a photo of the big gear's shaft where the chuck was, and the bearing behind it? If the bearing is exposed I would make a support collar to stand the front drill assy on with big gear upward. I would then push the shaft through the gear, through the front bearing and then out, with an arbour press or hydraulic press. Bear in mind I have not disassembled your particular drill, so I don't know if there are troubles with this approach like hidden pressed in cross-pins, or two front bearings (or bronze bushings), the inner one bigger than the outer one, etc. Take a very close look at the bearing sizes inside vs outside if it looks like there are two bearings in the housing. I have used the press approach on the bull gear shafts of many types of old US made drills though, without wrecking anything. If there are two bearings, and the outer one is larger than the inner one next to the gear, be sure to support the drill housing outside the OD, as well as at the shaft, otherwise you could break out part of the housing as you press out shaft and maybe front bearings go with it. Go easy and look at everything in good light before trying the rough stuff. A works diagram would be ideal of one exists. Look on the web - there's a shocking amount of literature about for even very old tools. Good luck, JD |
| Rainbows | 30/05/2016 20:23:19 |
| 658 forum posts 236 photos | Well I have tried to find stuff about Wolf on the internet before when I got my first drill. Couldn't find much information at all. But then I realised that once in my previous time I discovered there was an indian heir to wolfs dies and fixtures which made copies of old wolf products. A indian company with a website
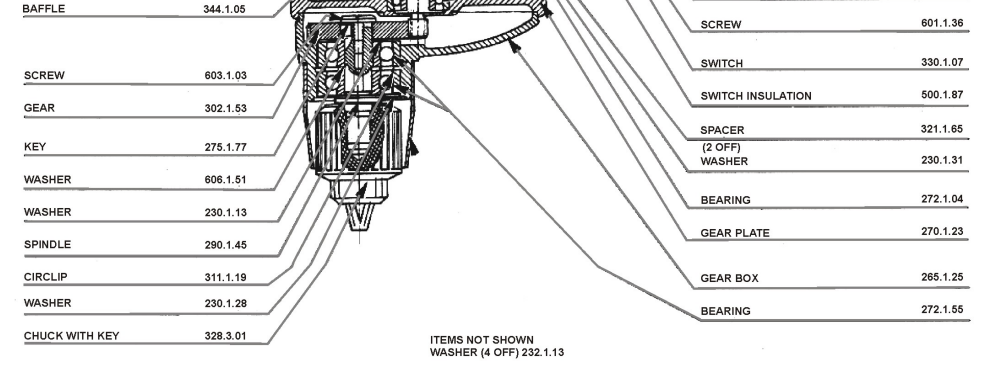
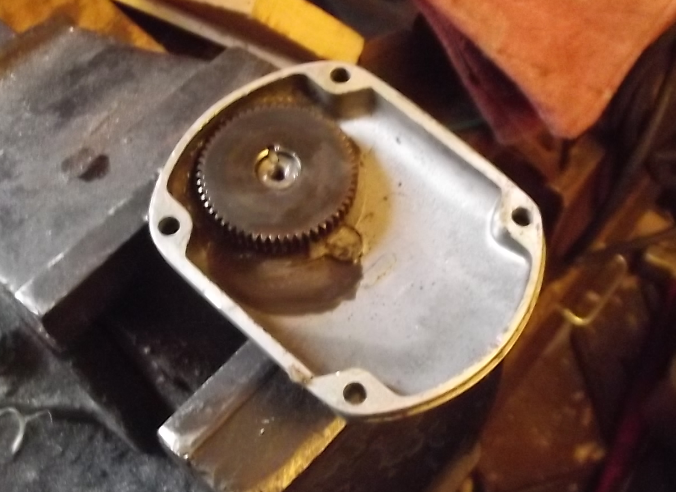
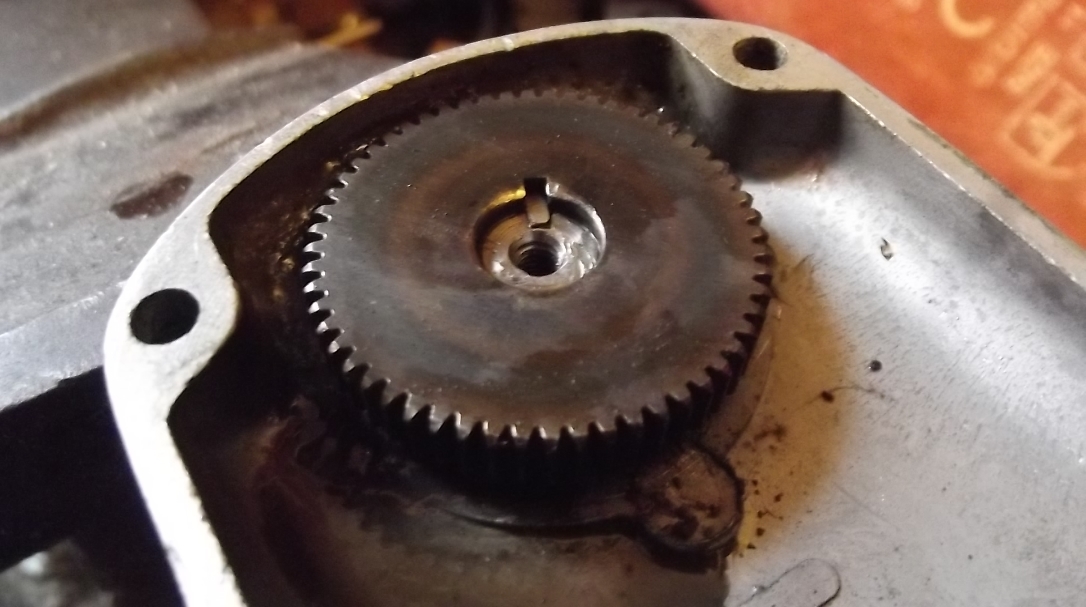
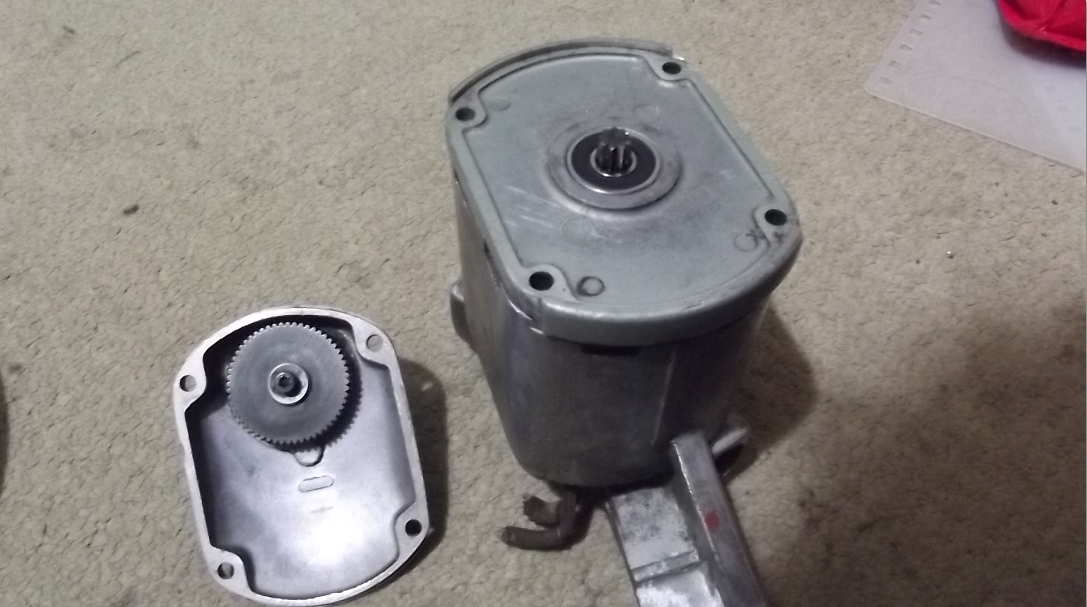
Ok heres the diagram. Two bearings with a circlip inbetween them. The gear appears to be pressed on with a key so atleast there isn't anything suprising there. Maybe instead of all this faff I should go and buy a new one from Ralliwold for £35? Also piccies of the real thing
|
| Jeff Dayman | 30/05/2016 21:25:47 |
| 2356 forum posts 47 photos |
Are the front bearings feeling gritty or binding, of do they have a lot of play? If not, I'd consider leaving them alone. If they do have these problems, see below. Looks to me if you remove the black washer (that would be under the chuck normally) you should be able to see the bearing. If you support the bearing on the outer race or both races in a press, and push on the gear end of the shaft, it should push through the bearing and leave the key and gear behind. Don't be tempted to hammer the shaft, gentle press force with a pushrod with dia close to the shaft diameter is the way to go on this sort of thing. Do be sure the bearing is supported underneath, again with a close fitting spacer ring or socket to support the outer race or both races. After the shaft is out you could try a motorcycle clutch puller to get either the inner or outer bearing out of the aluminum housing, but I'd try warming the assy to 160 - 200 deg C first and see if the bearings will fall out or can be gently hand pushed/pulled out each side. Then you can either leave the circlip and washer between bearings in place or remove them if you need to. Good luck JD
|
| duncan webster | 30/05/2016 23:05:01 |
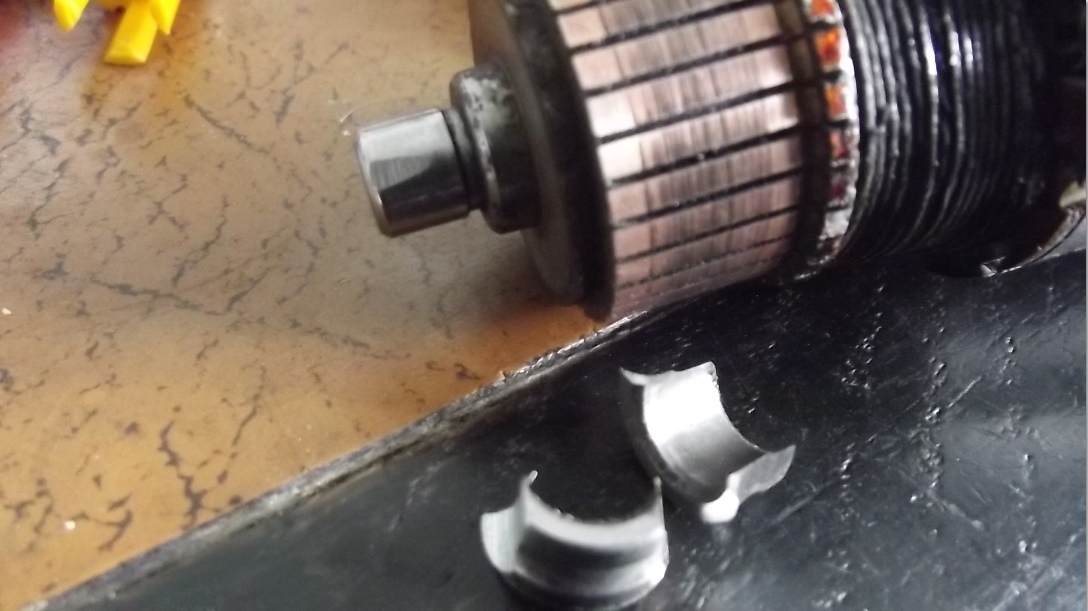
| 5307 forum posts 83 photos | If you can't pull the bearing off then I'd cut through the outer race as Neil suggests then very carefully grind 2 flats on opposite sides of the inner race, As it gets near the shaft the very thin bit will start to blue from the heat, you then go even more carefully, eventually the inner race will come off. Two very small flats (and they will be small if you've been careful) will not matter. As someone above mentioned protect the rest of the shaft from grinding dust, I usually use duct tape wrapped on. |
| Rainbows | 31/05/2016 15:28:07 |
| 658 forum posts 236 photos | Well I'm skipping the front bearings cause I don't trust myself not to do more harm than good getting them out. They seem to be pretty well covered by gears and washers so unlike the other bearings they aren't scratchy.
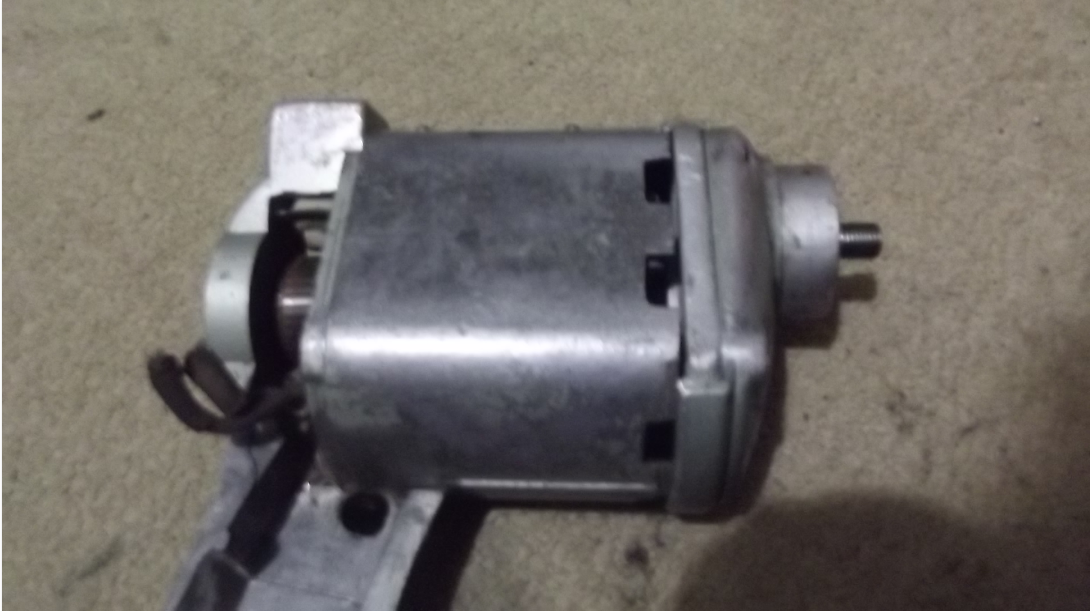
Re: Motor bearing Used bench grinder to cut flats into the bearing (as duncan mentioned). I felt it was a much better idea to do it this way instead of a thin dremel disk as I was going to, much less chance of nicking the commutator ring. First time I got a bit of a flat on the spindle, second time it went a lot better. Didn't cut all the way thorugh the bearing axially incase I hit the commutator but I gripped the weakend bearing loosely in the vice and twisted it out.
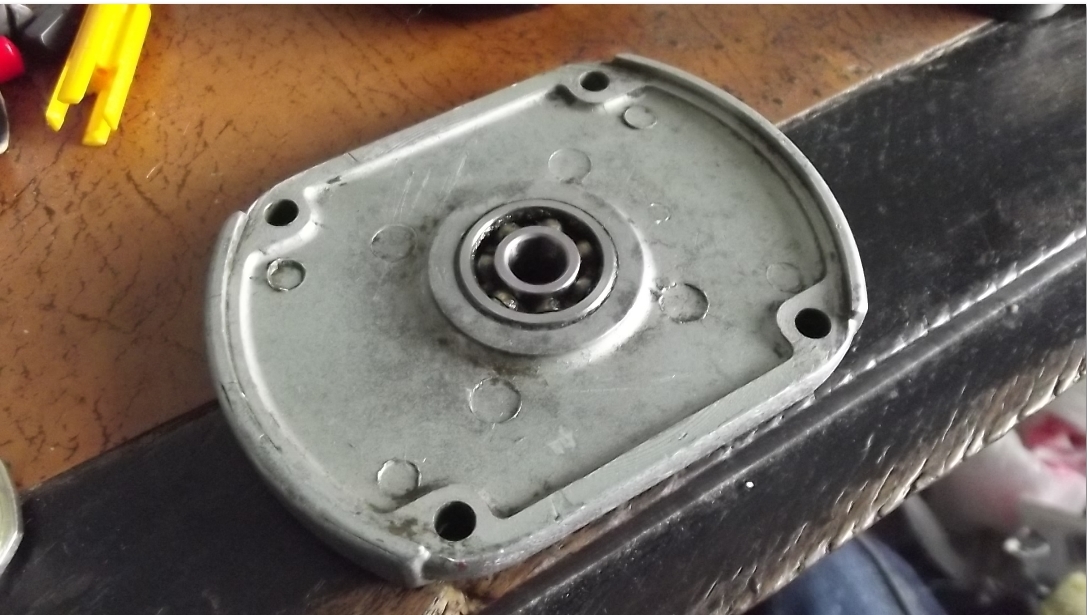
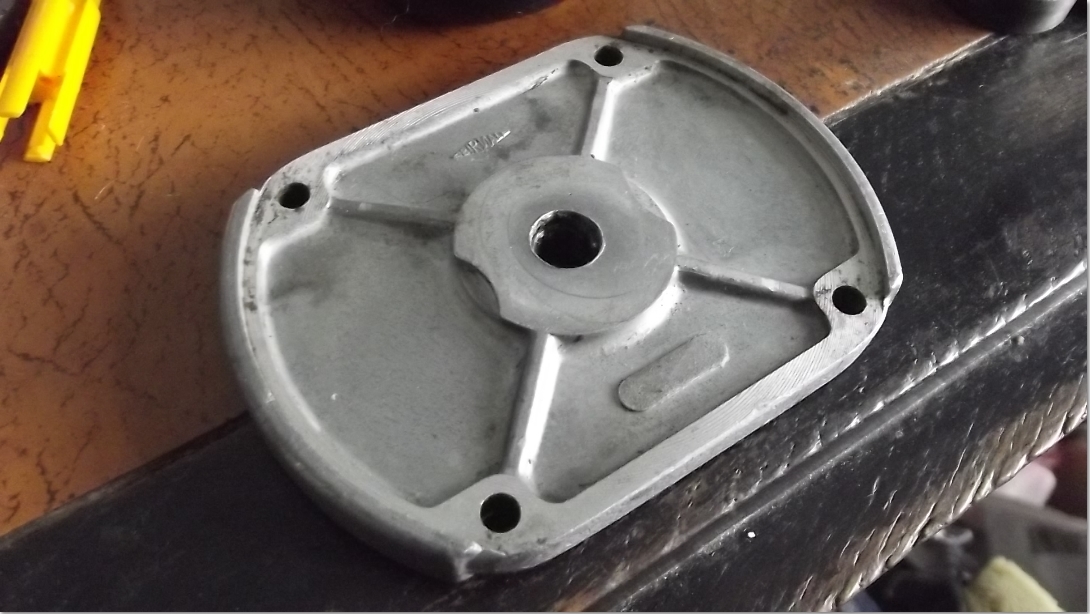
Which leaves only one mechanical component to replace.
Not immediately sure how to push this one out. Bearing is proper knackered so I can't screw it up any further though. I can sort of wiggle a screwdriver through the backhole so could use that to strike it out. Whether or not the inner would seperate from the outer is unknown. Bearing currently soaking in penetrative oil, if no one has a better idea I'm gonna gently heat the aluminium housing to expand it then try and punch the bearing out (only worry I have is shooting the inner race out and leaving the outer body stuck). |
| Rainbows | 25/06/2016 20:07:36 |
| 658 forum posts 236 photos | Project was shelved for a bit due to other more important work but got back to it this afternoon. FAG 608-2RS bearings fitted without issue.
http://www.ebay.co.uk/itm/Carlube-Moly-Grease-Cartridge-Multi-Purpose-Lithium-Molybdenum-CV-Joints-400g-/371616918065
Would that stuff be good for using on the gears? Molybdenum was suggested before but I don't know my grease grades too well so thought there would be no harm in checking. |
| Jeff Dayman | 25/06/2016 21:13:43 |
| 2356 forum posts 47 photos | I'd try warming the alloy housing up to say 200 deg C with a heat gun, before pounding on anything. The bearing may drop out on its' own or may need a very light push after heating the alloy. The expansion of the alloy will be much greater than that of the steel bearing. As to grease, the new bearings will be pre-lubed and you do not need more grease than they come with. If you pack them full they will fail quickly. Ask your bearing supplier if you don't believe me. They will be able to recommend any grease you do need, based on bearing number. JD
|
| Rainbows | 25/06/2016 23:32:35 |
| 658 forum posts 236 photos |
Oh yeah bearing went great. Didn't have a heat gun so gently hit it with a propane blwotorch. Only needed a poke to make it come out. Putting the new one in went pretty easily too. Heated it again and used a plank to get it the last bit in. I meant about greasing the gears though, two spur gears in an aluminium housing (I can see how you could mix the messages, woops :P).
As far as I can tell the best think for gears is oil but while the two shafts are now sealed the casing is just two casting held together by screws so I don't imagine thats a great seal.
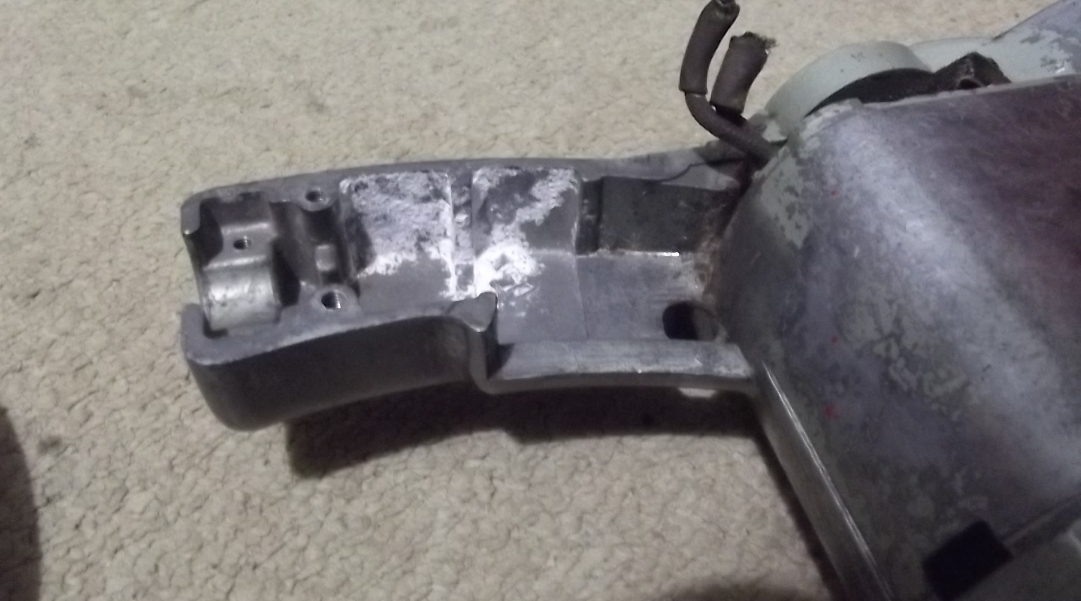
Also last thing, anyone recognise tihs white weirdness? Its kind off like a hard powder stuck to the casing. It was next to the switch. Hope the switch didn't blow up.
|
| Martin Connelly | 26/06/2016 07:47:34 |
 2549 forum posts 235 photos | Looks like heat conducting paste that has dried out. Does the switch have any electronics in it? Martin |
| Rainbows | 26/06/2016 12:48:37 |
| 658 forum posts 236 photos | There was this grey card between the switch and outer casing, probably to stop the contacts touching the aluminium body. As far as I can tell the switch is all mechanical. Maybe its some sort of perished glue. |
| Nicholas Farr | 26/06/2016 15:58:57 |
 3988 forum posts 1799 photos | Hi Rainbows, your white weirdness is most likely caused by moisture trapped between the card and the casting, it's not unusual on die cast. Regards Nick. |
| StephenS | 27/06/2016 05:36:04 |
| 38 forum posts | Hi Rainbows, That grease would do although it is NLGI 2 which is the average grease for car greasing, wheel bearings, etc. It is a thicker grease than I would want to use in CV joints even though the ad for it mentions CV joints. I would prefer a slightly thinner grease and the one I would look for is the CV joint grease that comes in little foil packets. It is a thinner grease than the one you mentioned, and will cost a bit more, but it is also a higher moly content I have been told. There will be others on here who know far more than I do about grease ratings so maybe they will be able to shed more light on this. Cheers, StephenS. |
| StephenS | 27/06/2016 05:48:09 |
| 38 forum posts | I have talked about CV joints above, but I do realise that you want this grease for your drill gearbox. The thinner grease with more moly in it should not dry out as quickly, and the moly should lubricate the gears themselves really well, and it should not leak as long as the gearbox housing joints fit reasonably well. Cheers, StephenS.
|
| Neil Wyatt | 27/06/2016 09:39:25 |
 19226 forum posts 749 photos 86 articles | Assuming the casing is a tin/zinc alloy pressure casting not aluminium (which is likely) en.wikipedia.org/wiki/Wet_storage_stain Neil |
| Rainbows | 27/06/2016 11:42:54 |
| 658 forum posts 236 photos | White rust sounds right. I got a Moore & Wright bearing scraper at a carboot yesterday which was pretty useful for picking out the white stuff. There isn't any sort of pitting underneath so its all good. I will see if I can find any moly grease with NLGI 1 on the packaging for the gears. Only other thing I'm waiting on is for some cap head screws to replace the slotted ones used on the case. One of them had the head tear off and another was on the verge of stripping, high tensile bolts are so much nicer to work with. The other plan to spray paint everything to original colour is abandoned. I'm not sure how it was painted originally and I'm not sure of the colour and the brass name plate is rivetted on so I jsut went hell to it. |
Please login to post a reply.
Magazine Locator
Want the latest issue of Model Engineer or Model Engineers' Workshop? Use our magazine locator links to find your nearest stockist!
Sign up to our Newsletter
Sign up to our newsletter and get a free digital issue.
You can unsubscribe at anytime. View our privacy policy at www.mortons.co.uk/privacy
Latest Forum Posts
- hemingway ball turner
04/07/2025 14:40:26 - *Oct 2023: FORUM MIGRATION TIMELINE*
05/10/2023 07:57:11 - Making ER11 collet chuck
05/10/2023 07:56:24 - What did you do today? 2023
05/10/2023 07:25:01 - Orrery
05/10/2023 06:00:41 - Wera hand-tools
05/10/2023 05:47:07 - New member
05/10/2023 04:40:11 - Problems with external pot on at1 vfd
05/10/2023 00:06:32 - Drain plug
04/10/2023 23:36:17 - digi phase converter for 10 machines.....
04/10/2023 23:13:48 - More Latest Posts...
- View All Topics
Support Our Partners


Shopping Partners
Subscription Offer

Latest "For Sale" Ads
- Reeves** - Rebuilt Royal Scot by Martin Evans
by John Broughton
£300.00 - BRITANNIA 5" GAUGE James Perrier
by Jon Seabright 1
£2,500.00 - Drill Grinder - for restoration
by Nigel Graham 2
£0.00 - WARCO WM18 MILLING MACHINE
by Alex Chudley
£1,200.00 - MYFORD SUPER 7 LATHE
by Alex Chudley
£2,000.00 - More "For Sale" Ads...
Latest "Wanted" Ads
- D1-3 backplate
by Michael Horley
Price Not Specified - fixed steady for a Colchester bantam mark1 800
by George Jervis
Price Not Specified - lbsc pansy
by JACK SIDEBOTHAM
Price Not Specified - Pratt Burnerd multifit chuck key.
by Tim Riome
Price Not Specified - BANDSAW BLADE WELDER
by HUGH
Price Not Specified - More "Wanted" Ads...
Get In Touch!
Do you want to contact the Model Engineer and Model Engineers' Workshop team?
You can contact us by phone, mail or email about the magazines including becoming a contributor, submitting reader's letters or making queries about articles. You can also get in touch about this website, advertising or other general issues.
Click THIS LINK for full contact details.
For subscription issues please see THIS LINK.
Digital Back Issues


Donate

 Register
 Log-in
Model Engineer Magazine
- Percival Marshall
- M.E. History
- LittleLEC
- M.E. Clock

ME Workshop
- An Adcock
- & Shipley
- Horizontal
- Mill

Subscribe Now
- Great savings
- Delivered to your door

Pre-order your copy!
- Delivered to your doorstep!
- Free UK delivery!
All Forum Topics > General Questions > Bearing removal, Chuck removal, motor cleaning (drill renovation central)