Member postings for Andrew Johnston
Here is a list of all the postings Andrew Johnston has made in our forums. Click on a thread name to jump to the thread.
| Thread: New To CAD? No, but.... |
| 14/05/2022 09:26:08 |
Posted by David Jupp on 14/05/2022 08:04:07:
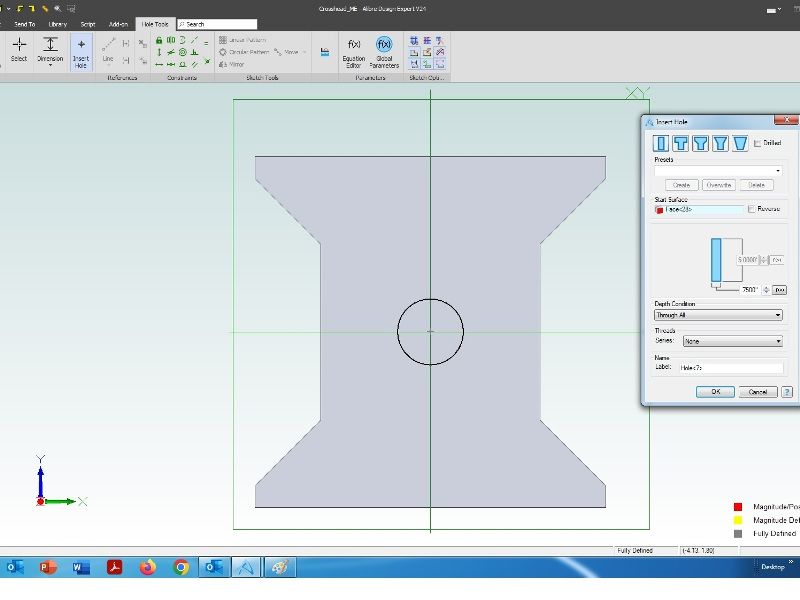
...the enclosed area in the sketch that defines the solid or hole... As per my example. If a hollow tube, or shape, is inherently part of the design then I tend to implement it using sketches. But for smaller holes, especially if countersunk, counterbored, or threaded, I use the 'hole' function. The 'hole' function also allows one to take account of the drill point; useful when checking whether a blind hole will unintentionally break through or not. Andrew |
| Thread: Minimum depth of cut possible with carbide tooling on S7 |
| 13/05/2022 14:07:26 |
Best to sit down and put on the seat belt before looking at prices for CBN inserts. Andrew |
| Thread: 3 phase query - for a charity project in Africa |
| 13/05/2022 10:51:29 |
When one is dirt poor needs must. The heating elements are a non-starter due to power requirements. Best option is to try running the fan motor with a Steinmetz connection and see what happens. Andrew |
| Thread: Minimum depth of cut possible with carbide tooling on S7 |
| 13/05/2022 10:42:09 |
How is an "excellent" finish defined? I'm generally happy with an Ra value in the range 1 to 3 um. I rarely take cuts of less than a few thou, and only use CCGT inserts for aluminium and plastic. The finish one gets with CCMT inserts at low DOC depends on the material, insert nose radius and feedrate. I normally use 0.4mm radius inserts, with 0.8mm radius for roughing, and 0.2mm radius if I need a sharper internal corner. I almost never drop below 4 thou/rev feedrate for finishing. Some low carbon steels, like EN1A, brass and austenitic stainless steels (303 and 316) seem fine with low DOC. But EN3, for instance, goes to pot and tends to tear with low DOC. There is no definitive answer and never will be; experimentation is needed. Just because a particular combination works at one point doesn't mean it will work again in the future; there are too many ill defined parameters. Andrew |
| Thread: Re-boring Grind Wheels |
| 13/05/2022 08:12:00 |
If the wheels are that bad from new then bin them. It would make me wonder what else was wrong with the wheel. It's a grinding wheel; so if you try drilling the bore it will equally grind the drill rendering it useless. For an 8" wheel £11 is very cheap. Personally I wouldn't touch them with a bargepole. I buy my grinding wheels from professional suppliers and reputable makes. At recommended speeds the periphery of a grinding wheel is doing about 60mph. Being hit in the face with a rock doing 60mph just to save a few quid doesn't seem like a good deal to me. Andrew |
| Thread: Milling Table Flatness - What is acceptable |
| 11/05/2022 21:08:49 |
Posted by Pete Rimmer on 11/05/2022 20:14:29:
....Checkig anything else before this basic check is quite pointless. Exactly. As SOD says making meaningful measurements is much more difficult than it seems. Often what is thought to be measured isn't anything of the sort. Andrew |
| Thread: New To CAD? No, but.... |
| 11/05/2022 21:04:08 |
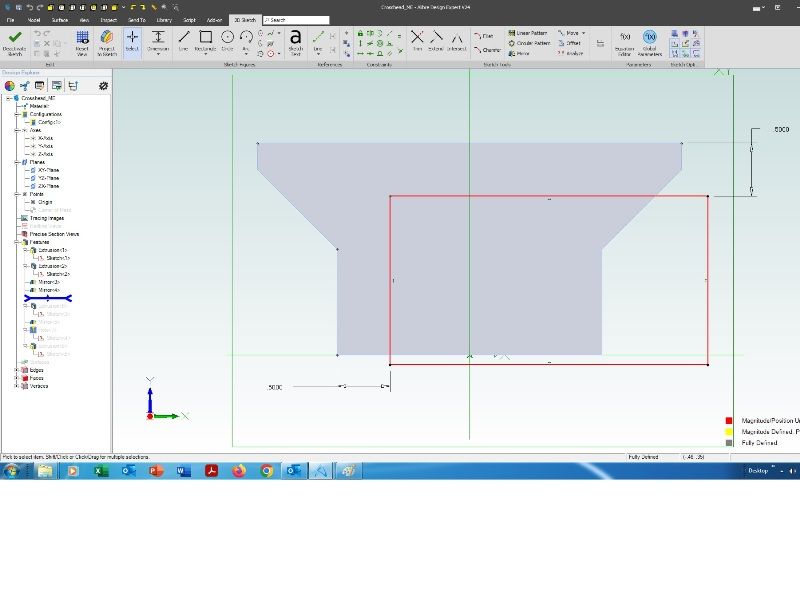
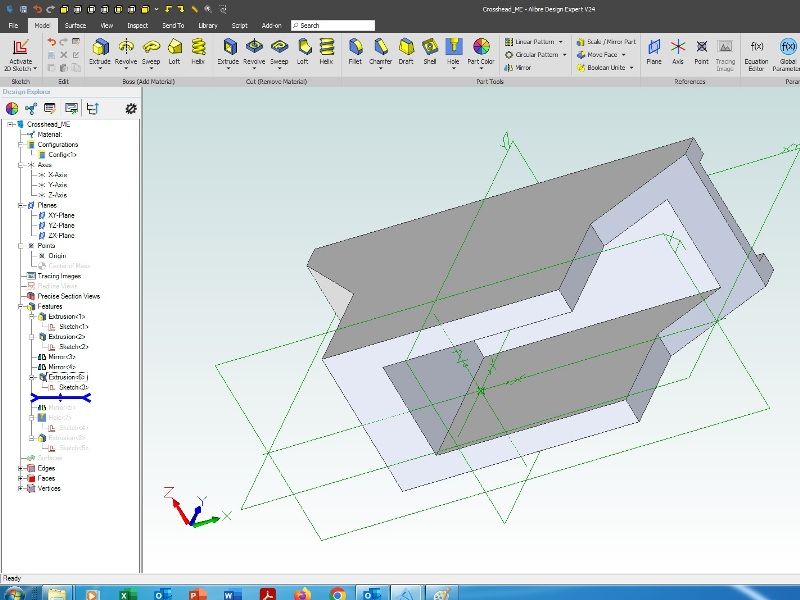
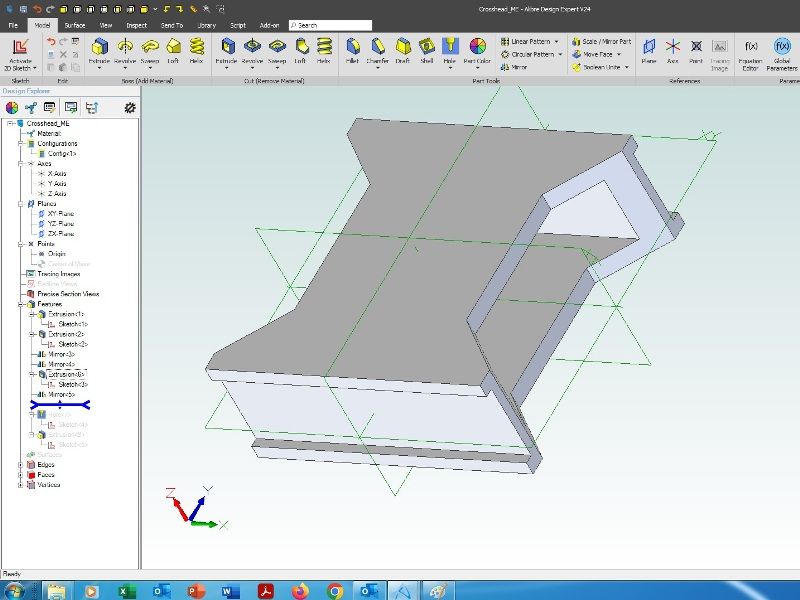
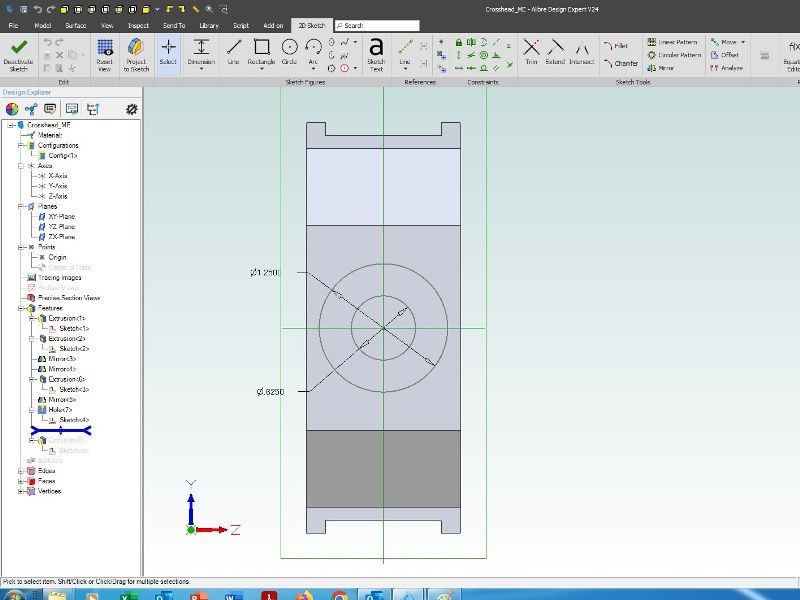
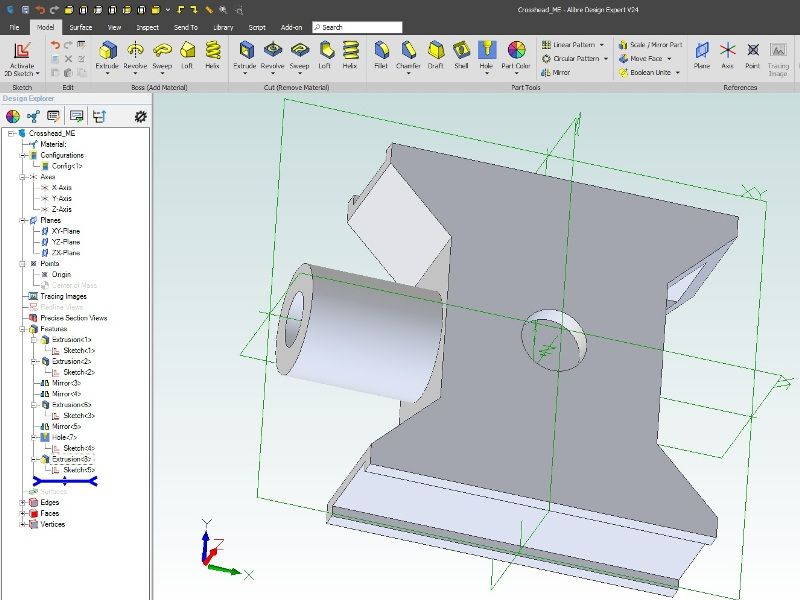
Crosshead CAD - Part 2 Sketch for the cutout for the connecting rod on the XY plane, only two dimensions needed: Extrude cut to depth midplane, so equi-spaced around the XY plane: Mirror everything in the ZX plane: Add hole for the little end pin. Dimension of the hole is in the submenu, no dimensions are needed in the associated sketch, just constrain the point to be on the Z-axis: Sketch on the end face of the part for the piston rod boss. Only diameter dimensions are needed, both circles are constrained to be on the X-axis: Extrude to length: For each feature only one dimension is needed, which ripples through the part if changed. Careful placement of the original sketch avoids the need for many dimensions and construction lines. Andrew Edited By Andrew Johnston on 11/05/2022 21:04:46 |
| 11/05/2022 20:55:32 |
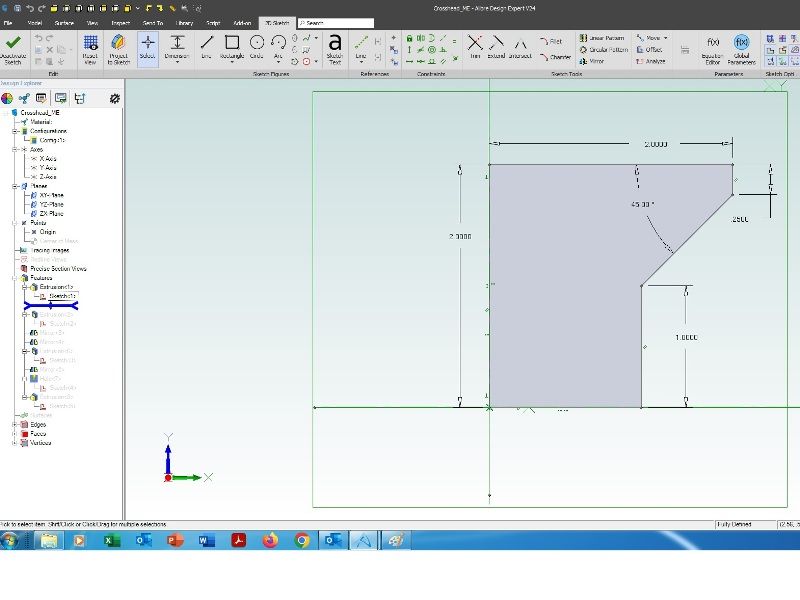
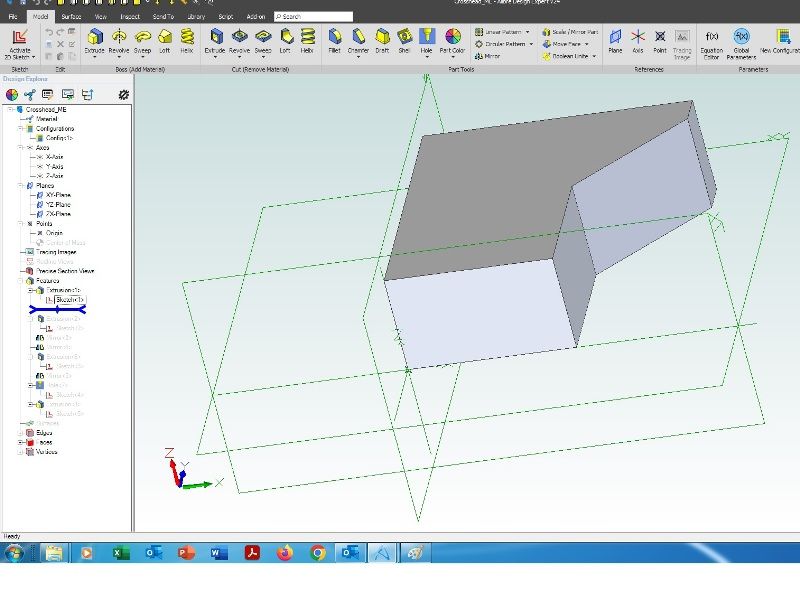
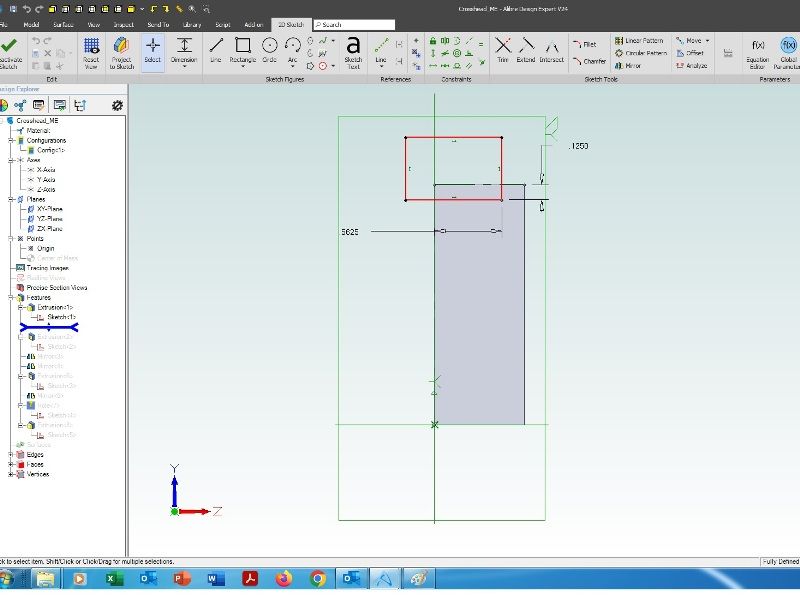
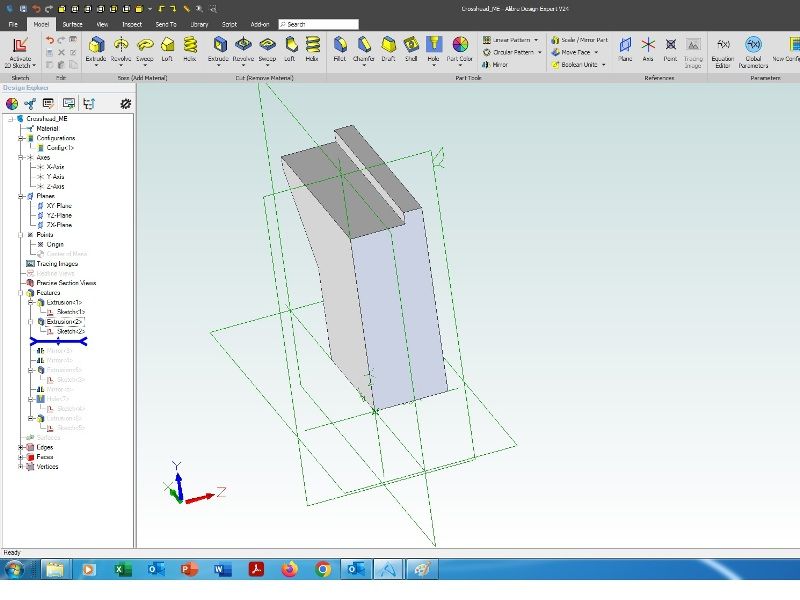
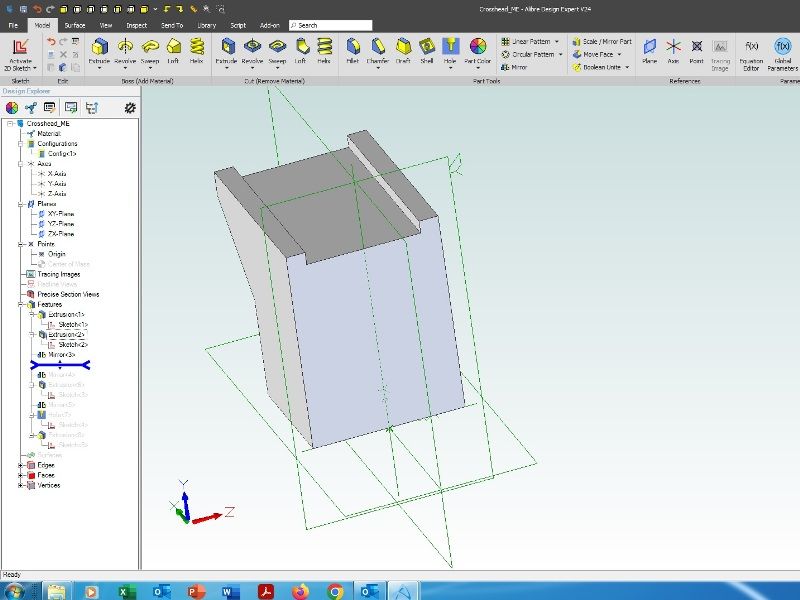
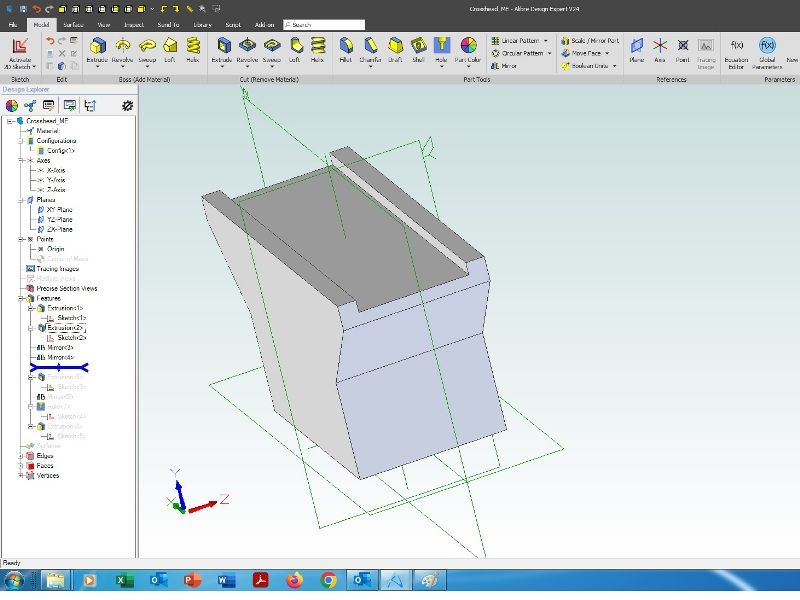
Crosshead CAD - Part 1 First sketch on the XY plane, with dimensions: Line at bottom is constrained to be on the X-axis and on the left to be on the Y-axis. Extrude the sketch on the Z-axis: Sketch on the end face of the model for the slidebar cutout, only two dimensions needed: Extrude cut through all: Mirror everything in the XY plane: Mirror everything in the YZ plane: TBC |
| Thread: .dwg and .dxf files |
| 11/05/2022 20:46:28 |
When I had parts laser cut the DXF I sent was a 2D drawing with border and dimensions. Why not ask them what they want? Andrew |
| Thread: Fusion 360 CAM Milling |
| 11/05/2022 19:43:35 |
It's always difficult to interpret CAM options across packages, but of those shown I think the relevant ones are scallop, spiral and radial. I take scallop to mean that the package chooses a variable stepover to maintain a constant scallop height, giving a consistant surface roughness. Spiral creates a spiral path around the object, although it is not clear if the spiral constants are fixed. Radial creates a series of radial paths starting from the centre. To some extent what path is chosen depends upon the purpose of the part and aesthetics. I've used all three methods but mostly tend to use scallop as it gives the most consistent surface finish. I assume the size of cutter is determined by the internal fillet at the bottom? In general it is not a good idea to use a cutter the same size as the fillet as there will be a large engagement with possible chatter and poor finish. I try and use a cutter that is smaller than the fillet or internal corner. Assuming the cutter is carbide I'd be running at 10000rpm and 400/600mm/min feed as per JasonB. One needs to be cautious on feedrate. Remember that, depending upon the cutter geometry, on near flat surfaces only one tooth may be cutting, even on a multi-tooth cutter. Andrew |
| Thread: New To CAD? No, but.... |
| 11/05/2022 12:09:09 |
There seem to be some complicated ways of looking at, and creating, parts being mooted? Considering the crosshead shown earlier one notes that it is has partial symmetry in 3 directions. So I would model it as followings: Draw 1/8 of the crosshead body. Extrude cut the slot for the slidebar and for the cutout for the connecting rod. Mirror everything preceding in one plane Mirror everything preceding in another plane Mirror everything preceding in the third plane Add hole for small end pin Extrude boss for the piston rod - if the hole is flat bottomed it can be extruded as a tube, if drilled extrude a cylinder and add a drilled hole To my mind a T-nut is one indivisible part with one shape. I'm not sure where an assembly comes into it? I'd make the t-nut by extruding the shape of half the t-nut, then mirror and finally add a hole with appropriate thread. The advantage of using mirrors is that if changes are needed then only one domension needs to be changed. Of course for multiple dimensions that are always the same the subsidiary dimensions can be pointed to the original dimension and will update automatically. That does mean that you have to remember which dimension was the original. In my 3D CAD program (Alibre) there are two different areas where constraints apply. One, in sketches where they control features in 2D. Two, in assemblies where they control positioning of parts in 3D. If anyone doesn't understand my part modelling descriptions above I'll implement them and post screenshots. Andrew |
| Thread: Injectors |
| 08/05/2022 18:31:40 |
Posted by SillyOldDuffer on 08/05/2022 18:21:01:
Strange that Imperial fan-boys are nowhere to be seen...
May be they're waitng for **** to rush in where angels fear to tread? Andrew |
| Thread: New To CAD? No, but.... |
| 07/05/2022 10:11:23 |
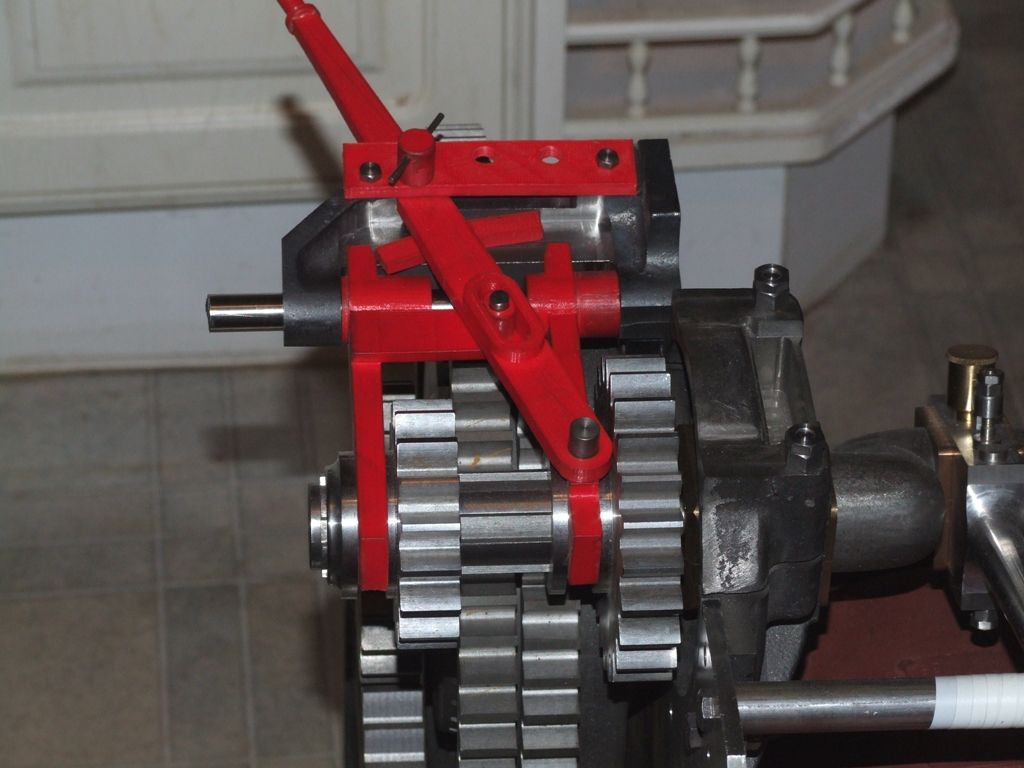
Posted by Nigel Graham 2 on 07/05/2022 08:38:36:. The computer makes 3D images feasible, and in a far faster way, that is all.It's a mistake to think that 3D CAD is simply a faster way to produce drawings. In the 'good' old days models were often made to determine function and check for interferences. I recall seeing a photo of a tenth scale model of a ship engine room, in Model Engineer I think, to determine pipe runs and lengths. All done on the computer now. Complex curves can also be created which would be difficult, or impossible, to dimension on a 2D drawing. Professionally 2D drawings are less common, 3D models can contain tolerance and machining information for use by CNC machine shops. Having said the above I still use 2D drawings in the workshop, at least for manual machining, and have been known to use 3D printed models to check functionality: Ironically the 3D printed gear change mechanism worked a darn sight better than the ones made in metal. Andrew |
| 06/05/2022 11:28:53 |
I started with drawing boards and different width pencils, followed by a set of Rotring pens. In the late 80s I started using a DOS based 2D package at home rather than rely on the useless draughtsman and his drawing board at my place of work. Later I moved onto a windows based 2D package. The DOS package was lightning fast, but the windows package was slow and awkward as it had no snaps. In the mid 2000s I moved onto 3D CAD. I must be odd because I had no problems. Of course any package has it's quirks but to me 3D is natural and easy. All parts are inherently 3D, and thinking in 3D should be simple for any engineer. A 3D CAD package simply automates what I do in my head, with the added bonus of easy production of 2D drawings. Assemblies are where 3D CAD really comes into it's own. One can check alignment of features, like holes, across parts and also check for correct operation and spot interferences. I'd rather find all these things out on the computer before I spend time making parts. I expect to make parts once, and I expect them to fit when made. Note to SoD: A Tiger Moth is not an easy aeroplane to fly, no brakes, little steering and ineffectual ailerons. Andrew Edit: For simple things like bolts or studs, and one off fixtures, I just make a quick paper sketch Edited By Andrew Johnston on 06/05/2022 11:31:52 |
| Thread: Hobby Cnc |
| 04/05/2022 12:07:37 |
Posted by James Mitchell 3 on 03/05/2022 23:35:56:
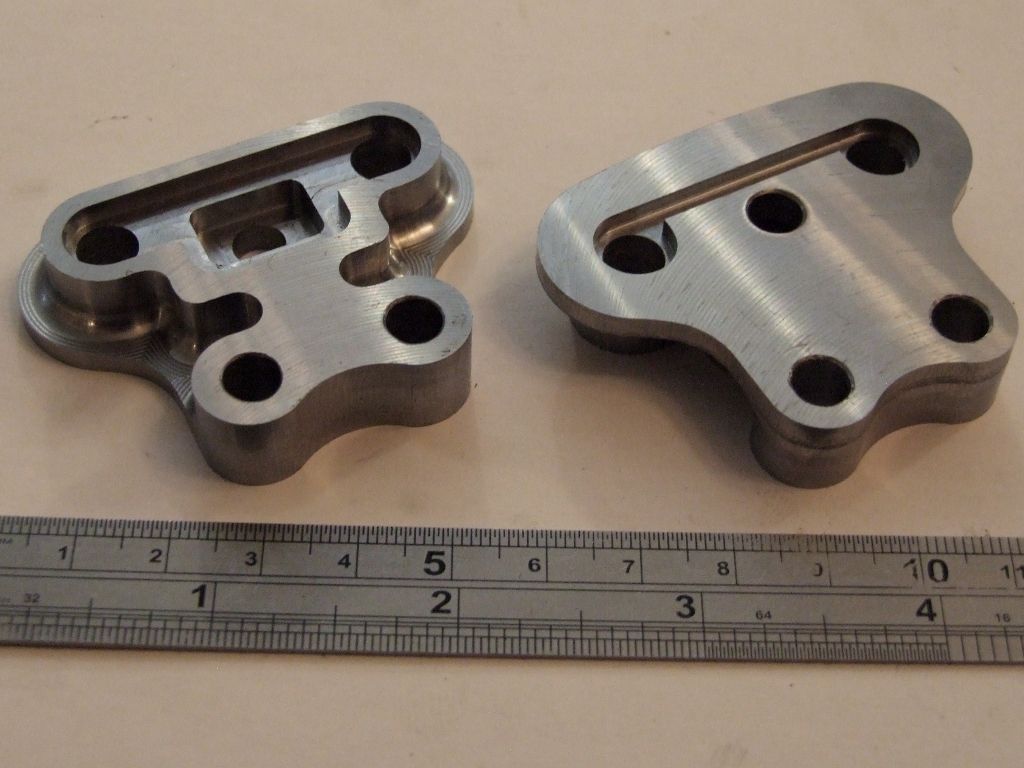
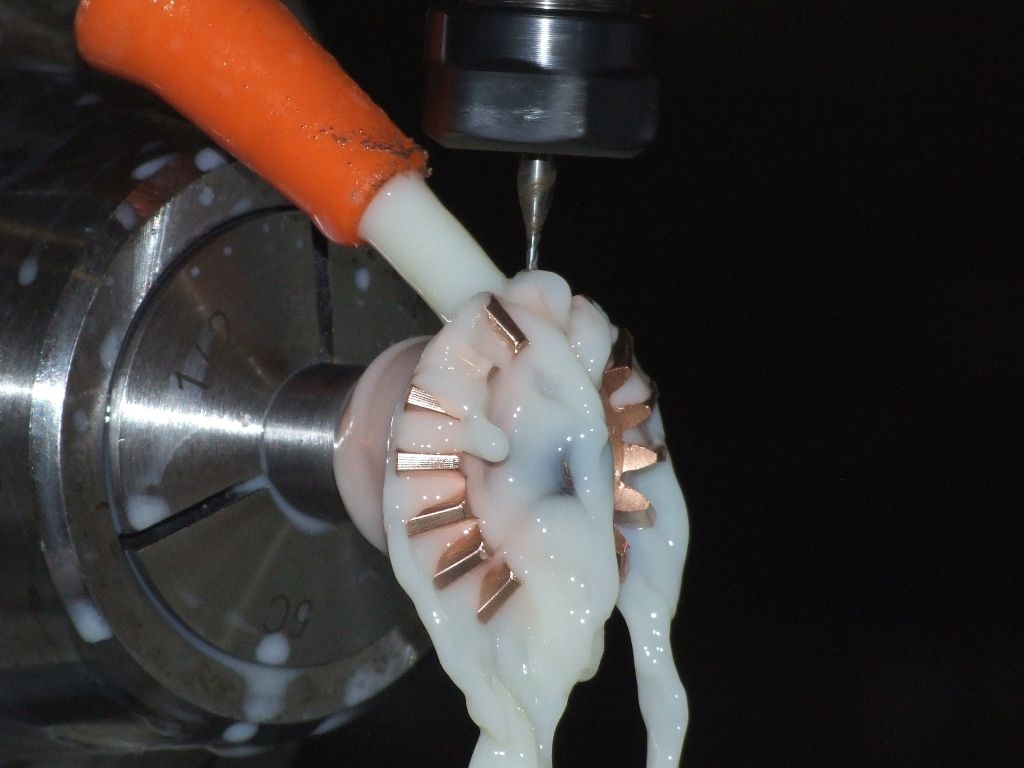
...any suggestions? To make any sensible suggestions we need far more information. For starters: What maximum size of workpiece do you want to cut? What sort of machining - 2.5D, 3D or full 4-axis? How much space is available? Budget? What sort of steel, ordinary mild steel, or tool steels and stainless steel? I have a Tormach 1100 which will happily cut steel, like these brackets in hot rolled steel: By hobby standards the Tormach is a fairly large machine at 450kg, and is the same horsepower as my Bridgeport. That not withstanding I find the Tormach works better running small cutters at high spindle speeds rather than running large cutters at slower speeds. A high maximum spindle speed is important, 5100rpm on the Tormach. Even that is a bit slow for really small cutters. I have added a high speed spindle for use with small cutters, like this 1mm ballnose cutter, running at 24000rpm: Andrew |
| Thread: making spindle bearings |
| 02/05/2022 10:34:40 |
Posted by jamie creighton 1 on 02/05/2022 10:19:27:
...whats the best way forward please? Not possible to say without knowing a number for the tolerance you want to achieve. Andrew |
| Thread: What type of Collet are these please? |
| 30/04/2022 21:39:00 |
Posted by B Tulley on 30/04/2022 16:17:02:
...about half a dozen, ranging from 3/16" up to 1"... Thanks, I've got a pretty good range of imperial round collets, but am looking for smaller hexagon and square. Although I sold my 3/4" collets I kept what seems to be a shop made adaptor so one can use 3/4" collets in a 1-1/4" machine. As to the sizing there is nothing on the collet that says it is for a 3/4" or 1-1/4" machine. But as Baz says it simply relates to the largest round bar that can be accomodated. So the larger collets can't be for a 3/4" machine. It would be useful to see a 1" capacity collet with sizes. I can then compare with one of my collets. Andrew |
| 30/04/2022 15:34:14 |
Posted by B Tulley on 30/04/2022 15:11:15:
...does this mean they are only really of use on a Britan... Most likely yes; superficially the collets look like the DIN6343 standard, but don't match any of the standard sizes. At least that is the case for my collets for the 1-1/4" Britan. If indeed they are for the Britan they have some value. The Britan is useless without collets and the 3/4" version seems to be rarer than the 1-1/4" version. What shapes/sizes are available? Andrew |
| Thread: Looking for a non-magnetic, strong, easily glued material |
| 30/04/2022 12:34:44 |
Posted by Jouke van der Veen on 30/04/2022 12:03:52:
...magnetic permeability is an isotropic property... Electrical steels are often anisotropic. The permeabiliry varies with direction according to the grain structure and how the material is processed. Andrew |
| 30/04/2022 11:46:46 |
Posted by Donald MacDonald 1 on 30/04/2022 11:18:37:
...but you'd make excellent Chimps! Only because you've made monkeys of us with your "carefully considered", but inaccurate, initial requirements. Andrew |
Want the latest issue of Model Engineer or Model Engineers' Workshop? Use our magazine locator links to find your nearest stockist!
Sign up to our newsletter and get a free digital issue.
You can unsubscribe at anytime. View our privacy policy at www.mortons.co.uk/privacy
- *Oct 2023: FORUM MIGRATION TIMELINE*
05/10/2023 07:57:11 - Making ER11 collet chuck
05/10/2023 07:56:24 - What did you do today? 2023
05/10/2023 07:25:01 - Orrery
05/10/2023 06:00:41 - Wera hand-tools
05/10/2023 05:47:07 - New member
05/10/2023 04:40:11 - Problems with external pot on at1 vfd
05/10/2023 00:06:32 - Drain plug
04/10/2023 23:36:17 - digi phase converter for 10 machines.....
04/10/2023 23:13:48 - Winter Storage Of Locomotives
04/10/2023 21:02:11 - More Latest Posts...
- View All Topics
- Reeves** - Rebuilt Royal Scot by Martin Evans
by John Broughton
£300.00 - BRITANNIA 5" GAUGE James Perrier
by Jon Seabright 1
£2,500.00 - Drill Grinder - for restoration
by Nigel Graham 2
£0.00 - WARCO WM18 MILLING MACHINE
by Alex Chudley
£1,200.00 - MYFORD SUPER 7 LATHE
by Alex Chudley
£2,000.00 - More "For Sale" Ads...
- D1-3 backplate
by Michael Horley
Price Not Specified - fixed steady for a Colchester bantam mark1 800
by George Jervis
Price Not Specified - lbsc pansy
by JACK SIDEBOTHAM
Price Not Specified - Pratt Burnerd multifit chuck key.
by Tim Riome
Price Not Specified - BANDSAW BLADE WELDER
by HUGH
Price Not Specified - More "Wanted" Ads...
Do you want to contact the Model Engineer and Model Engineers' Workshop team?
You can contact us by phone, mail or email about the magazines including becoming a contributor, submitting reader's letters or making queries about articles. You can also get in touch about this website, advertising or other general issues.
Click THIS LINK for full contact details.
For subscription issues please see THIS LINK.
Model Engineer Magazine
- Percival Marshall
- M.E. History
- LittleLEC
- M.E. Clock
ME Workshop
- An Adcock
- & Shipley
- Horizontal
- Mill
Subscribe Now
- Great savings
- Delivered to your door
Pre-order your copy!
- Delivered to your doorstep!
- Free UK delivery!


 Register
 Log-in


