Member postings for Colin Heseltine
Here is a list of all the postings Colin Heseltine has made in our forums. Click on a thread name to jump to the thread.
| Thread: Building 1/4Scale Redwing Hit and Miss Engine |
| 28/01/2023 19:32:29 |
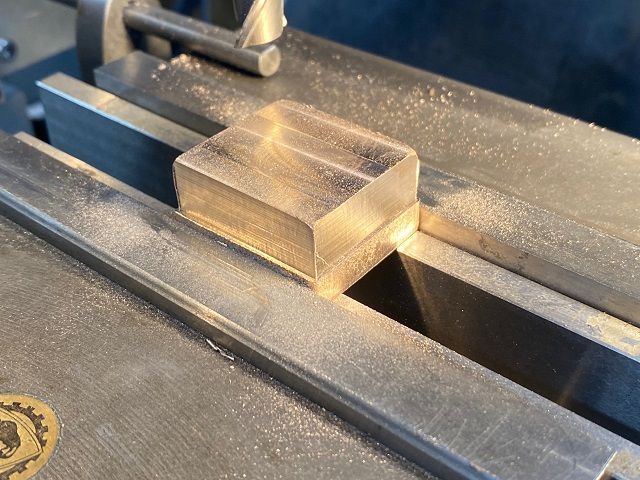
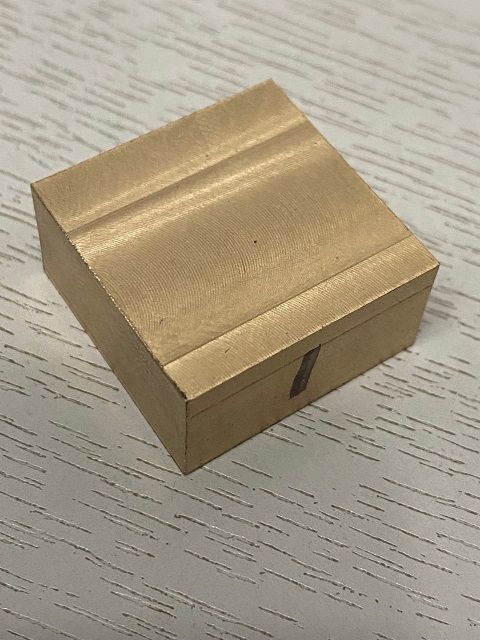
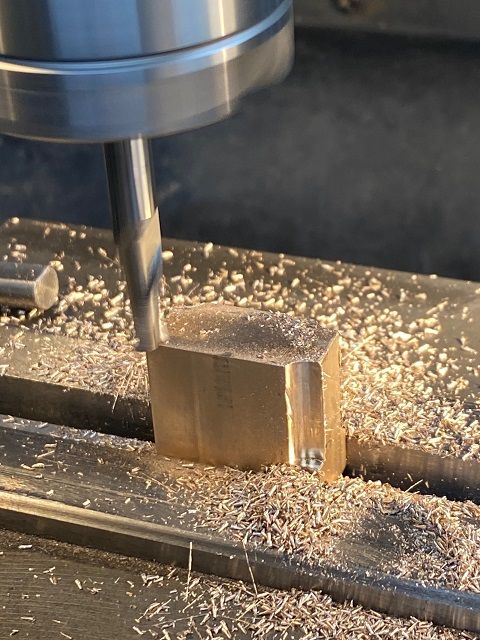
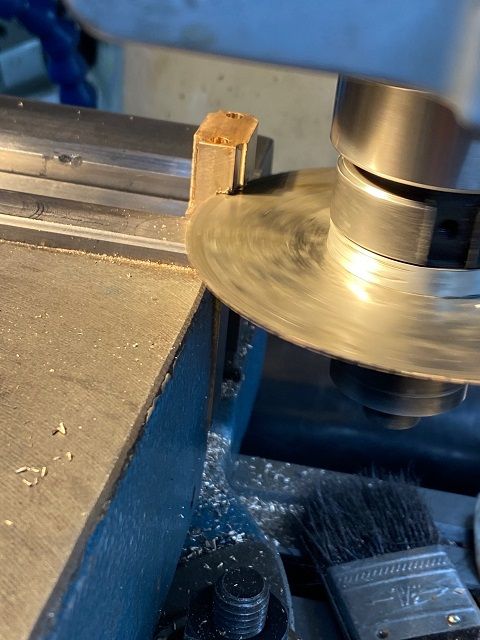
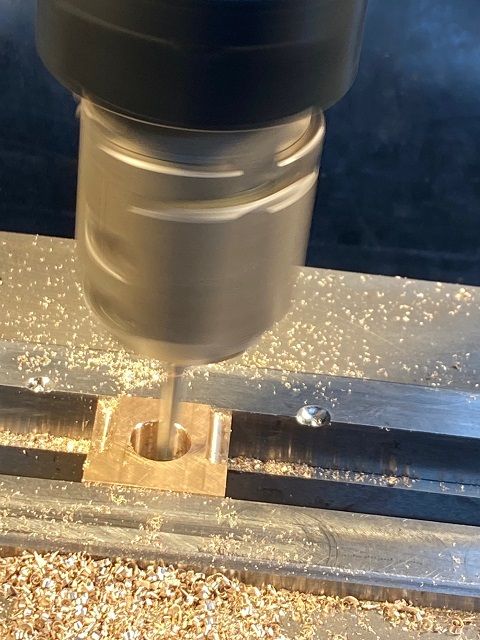
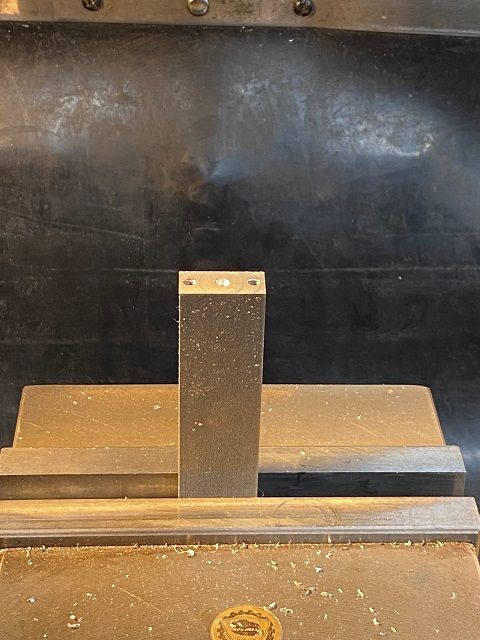
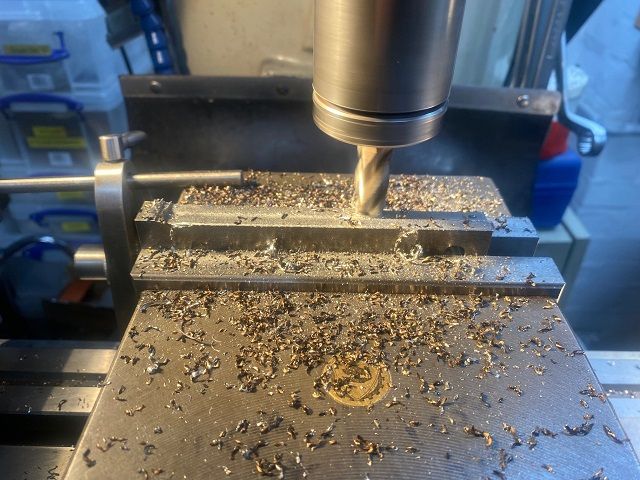
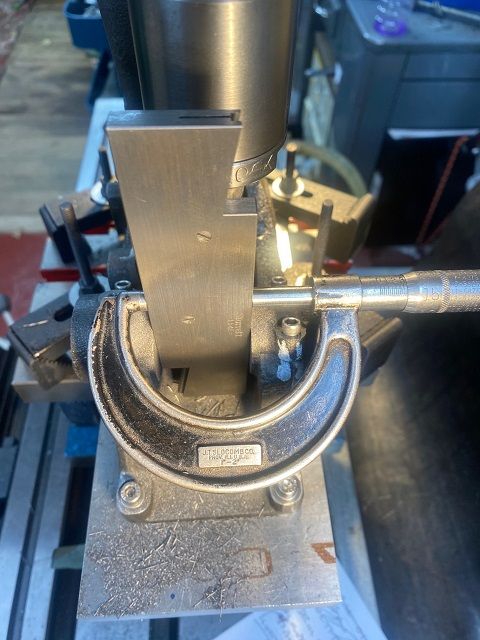
Big End comes as a brass casting approx. 1.25” x1.25” x 0.75” which needs to be brought down to 1” x 1” x ½”. I decided to try the Joe Pieczynski (Joe Pie on Youtube) method of doing this. So into the vice on tall parallels and grip on the widest bit at the bottom of the casting draught. The top is then cleaned off till (took the various blemishes off) and then go round all four sides, one after the other as low as can get to top of the vice. The piece is then turned over an put on parallels and the back face machines down to size. Then put in vice with large face on rear and one of the short machined edges resting on a single parallel at the rear face of the vice and then the size is cleaned up. This is repeated on other three sides, bringing down to size required. Ended up with block to size as pictured. Block set on parallels and centre finder used to find edges and then halved to get middle of piece for both X and Y. It was now easy to get the corner location for each flute and use ¼” diameter 2 flute endmill to produce this. Produced the radius at the bottom by switching to ¼” diameter ball end mill and went down each flute in turn. This is where my brain and hand eye coordination completely vanished. L L. I grabbed the lever on the power feed to the knee and pulled the damn thing the wrong way. Hence the two ugly notches on rear top edge of my nice vice which can be seen in later picture. Good job the wife was out and did not hear my Anglo Saxon language. Changed to a spot drill and marked location of two big end bolts and then run 11/16” drill through. Turned the big end block through 90 degrees and set vertically on parallel on right hand edge of vice. I did not have a 1/16” fine tooth slitting saw and had to use a 1/32” medium tooth one. I had never tried slitting anything off like this before so ran at about 150rpm and wound the handles slowly. It cut well and very smoothly. All edges now cleaned up and looked for two 11/16” pins to locate both halves together. Went through my fathers old stock and out of over 150 pins managed to find one. It was 1.5” long so it was quickly chopped in half. Big end put on narrow parallels and then drilled out in steps to 3/8”. Then bored out to .4375” ( 7/16" ) Edited By Colin Heseltine on 28/01/2023 19:34:35 Edited By Colin Heseltine on 28/01/2023 19:36:09 Edited By Colin Heseltine on 28/01/2023 19:36:58 |
| 24/01/2023 11:48:38 |
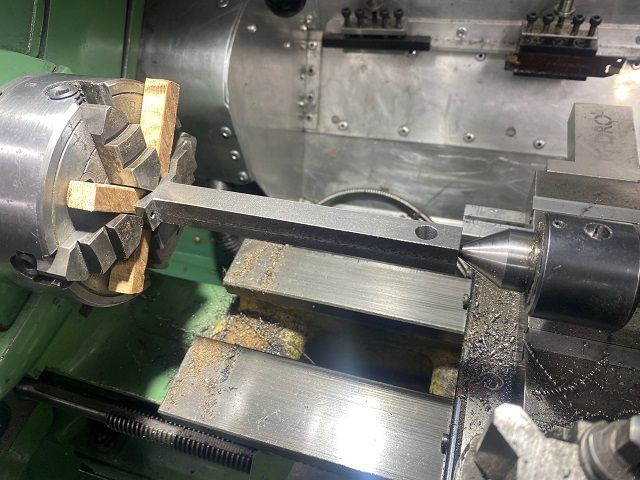
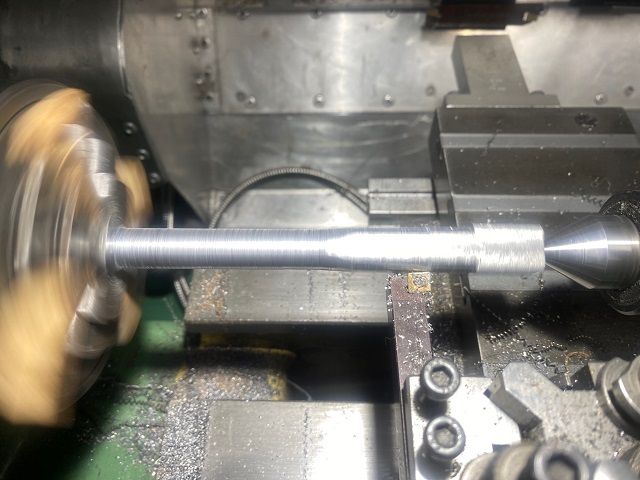
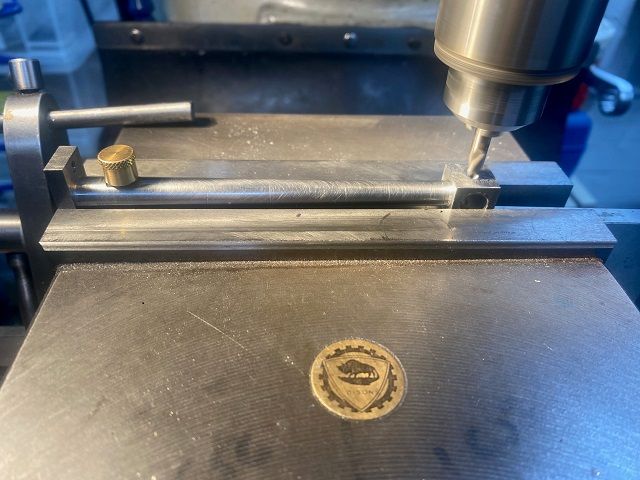
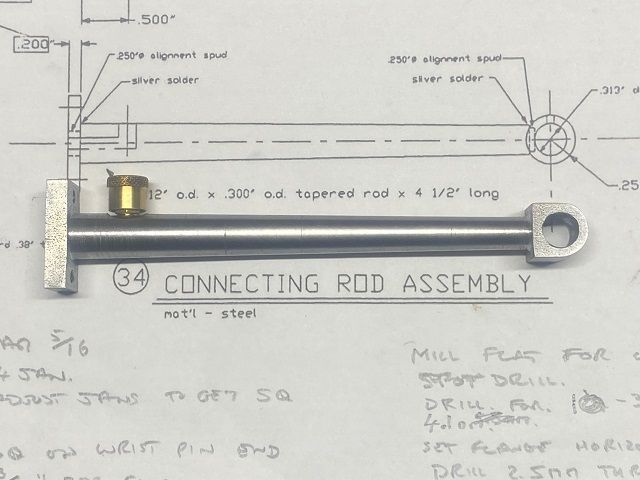
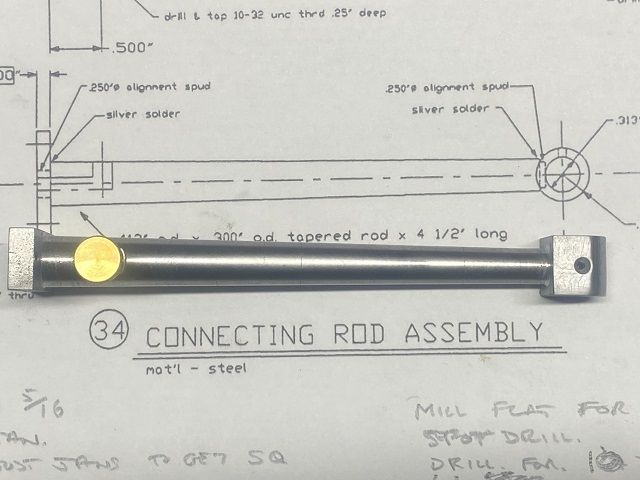
Conrod blank now looks a little more like a conrod. It is now put back in the lathe. The big end fitting back between the previously set jaws. A wooden spider was made to hold it off the back of the chuck (centre in the spindle is no use now). Jaws tightened and DTI used to check conrod is centred. Then spent several happy hours setting the topslide to give 3/8” per foot taper and then swapping lathe tools around to turn the taper. This was a right pain in the ass. Finished off by turning the material away from the tailstock end to leave a ½” cube with the little end in its centre. The tapered shaft was then cleaned up with a file and polished. Conrod then back to mill to put a 3/8” flat 0.7” from left hand end ready to drill 4.1mm and tap 10-32 UNF for the oiler, this was followed by a 0.062” oiler hole for the wrist pin. This was then countersunk slightly using a centre drill.
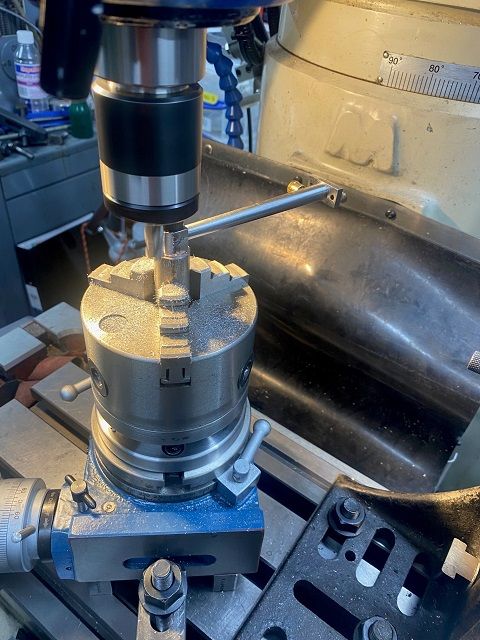
Last task was to round off the little end. Did not want to remove the vice or angle plate with the jig plate on it. There was not enough space for the 6” rotary table. I then remembered a Vertex 4” RT I had bought 10 plus years ago and never taken out of the box. This just fitted on a pair of parallels and clamped down diagonally across the table. Luckily the chuck mount off the 6” RT fitted on the 4” RT. Chuck mount centred under spindle and DRO zeroised. Found ¾” dia offcut from scrap bin, chucked it up in 3 jaw then drilled and tapped it M8. Chuck then moved to RT still with spigot in jaws. An M8 allen bolt with a short plain section used to hold conrod on the spigot. Then carefully radiused the end taking quite light cuts. Rightly or wrongly I kept left hand lightly on unsupported end of conrod in case the bolt did not hold. Bolt held but the chuck wanted to unscrew and had to be tapped firmly back into place. Quite pleased with end result. Now onto the big end bearing itself. |
| 24/01/2023 11:47:30 |
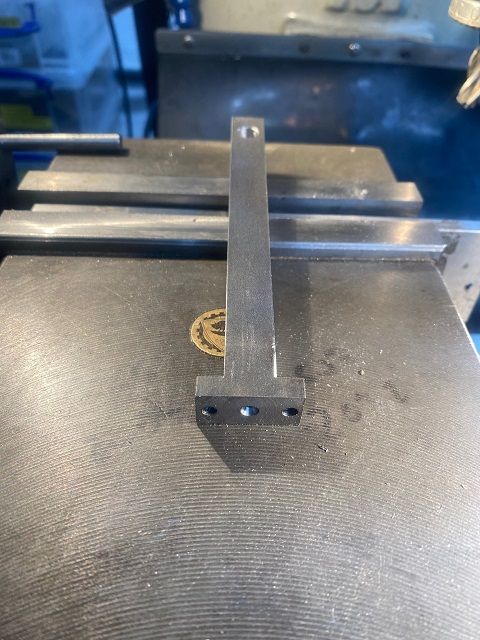
I was given two fabricated crankshafts with the engine and having looked at them both I think I will have to start afresh. In both cases the main shafts are slightly loose in the webs and can be seen to move as can the cross-drilled pins, supposedly locking the webs to the main shafts. Chucking one end in a collet chuck and running the lathe slowly the free end prescribes a circle. Whilst waiting for silver solder and HT5 flux for the new crankshaft I decided to make the conrod. With some kits the conrod is a brass casting and in some cases if no casting it can be made from a single piece of steel or fabricated from three parts silver soldered together. I decided to follow the single piece of steel option. Started with a 5.125” x 1” x 0.5” piece of BMS. This was set up in the vice in a vertical position and edge finder used to locate centres in both X and Y axis’s. The top was squared off taking light cuts due to the large amount of stickout above the vice. The end was centred and whilst setup a 2.5mm hole was drilled down through the centre for distance of 0.75”. This is the feed hole for the oiler. Two holes were also drilled 3.5mm on 0.75” centres and these were tapped 8-32. These are for the two bolts holding the brass main bearing to the conrod. The piece of steel was then turned end to end and set up vertical again. Again the top was squared off taking light cuts due to the large amount of stickout above the vice. This end was then centred. The conrod blank was then moved over to Myford 7 lathe. The 4 jaw chuck was fitted and centres put in tailstock and headstock spindle. The conrod blank was held between centres and the jaws closed on the ends and sides. Jaws 1 and 2 then released ½ turn and blank removed (this will make setting up after the next step a bit easier). Conrod blank moved back to mill and setup with 1” side resting on pair of parallels and the drilled and tapped end aligned with left hand end of vice. The DRO is set so that absolute zero for X axis is left hand end of vice and for Y axis is rear face of vice. The hole for the gudgeon pin (wrist pin) was drilled 7.7mm and then reamed 5/16” at a position on the centre line 4.638” from left hand end. A quick tidy up of the corners and then turned through 90 degrees to rest on a parallel. 5/8” dia endmill then used to trim the material by 0.250”. The drilled and tapped end finish dimension is 0.20” so took end mill to 0.21” leaving rest to be turned off in the lathe. When one side completed steel is turned over and the second side machined similarly. |
| Thread: Dropbox Message - Real or Trick? |
| 21/01/2023 21:22:37 |
Dropbox is a real thing. I have used it for the last 7 or 8 years at the least. It is a method of storing/and or sharing files via the internet. Files are stored in the "cloud" and if wished can be shared with other users. Can be quite useful to share large files with a colleague/business/friends. Colin |
| Thread: Building 1/4Scale Redwing Hit and Miss Engine |
| 16/01/2023 21:01:35 |
I guess the 1/2 mm move would look nicer. I fettled the castings once the mains were tightened down with a dremel so the castings matched. You may be able to do this. I had to play with the caps to get the best match prior to fettling. U have come to a halt as have been doing a welding job for a colleague for last few days. I have managed to get a new buzz coil off eBay. Will have a go at Conrod next. |
| Thread: Excel Die Filer |
| 04/01/2023 16:26:51 |
Another set of castings has gone to another owner. I have one complete set left and one spare arm.
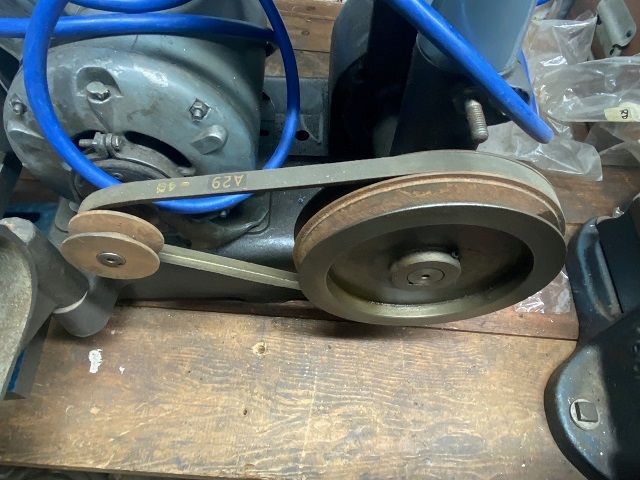
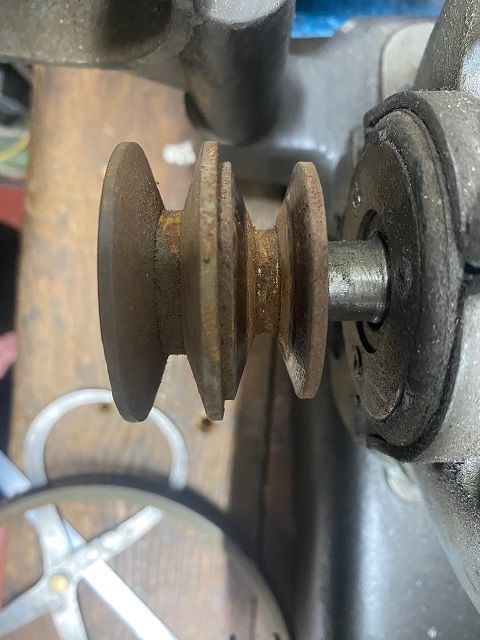
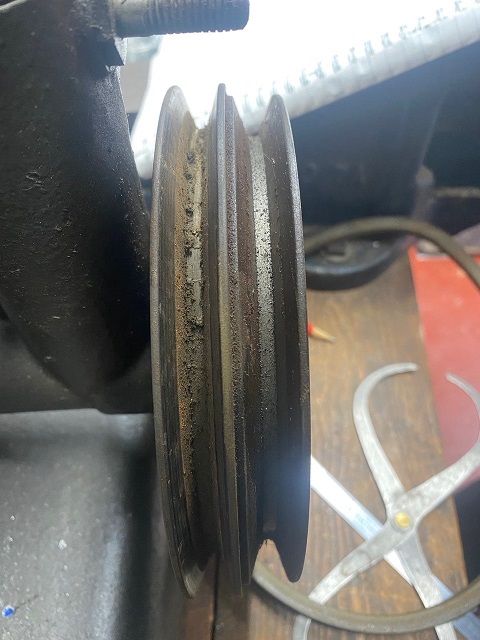
I have added photos below for Dave W who has had the most recent set . My machine has high and low speed pulleys. Measuring across the bottom of the groove the motor pulley has 20mm and 28mm pulleys and the drive pulley hs 148mm and 156mm pulleys. The 20 & 156 being one pair. The belt has identification of A29 - 49. Colin |
| Thread: Building 1/4Scale Redwing Hit and Miss Engine |
| 02/01/2023 17:16:11 |
Ian, Hope you have fun building this engine. What size lathe and mill do you have? Whose castings are they. Having looked at the two used fabricated cranks I was given when bought the engine I will have to scrap them both and build a new crank. The ones I have were pressed in and pinned but the shafts are loose in the webs and the locking pins can be seen to move. Following discussions on Model Engine Builder I am going to fabricate again but will silver solder rather than pin. I see you have the one piece brass/bronze conrod. I do not have a casting for this so will use the brass bearing block and cut the rest out of a 1/2" thick steel block I also need to source a pulley. I have a couple of small steel flywheels so make look to see whether one of these will suffice. While I wait for silver solder and HT5 flux I will have a little break as have a TIG welding job for a friend which will take several days. Solar panel mounts for his garage roof. Colin |
| 28/12/2022 18:03:33 |
Spot drilled the centre and then worked up from ¼” drill to 3/8”.
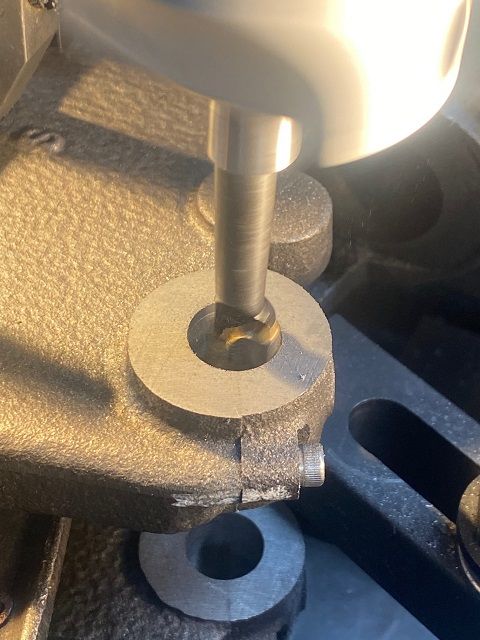
At this point fitted long centre drill and spotted the middle of lower bearing. I drilled the upper bore at one size and then drilled the lower bore at the size below until had both bores up to 19/32”.
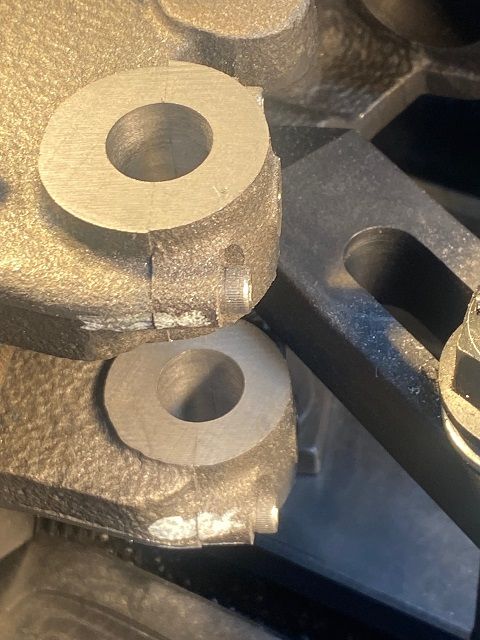
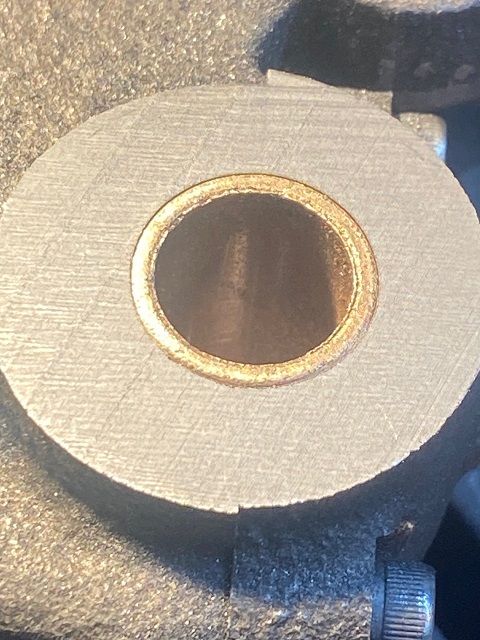
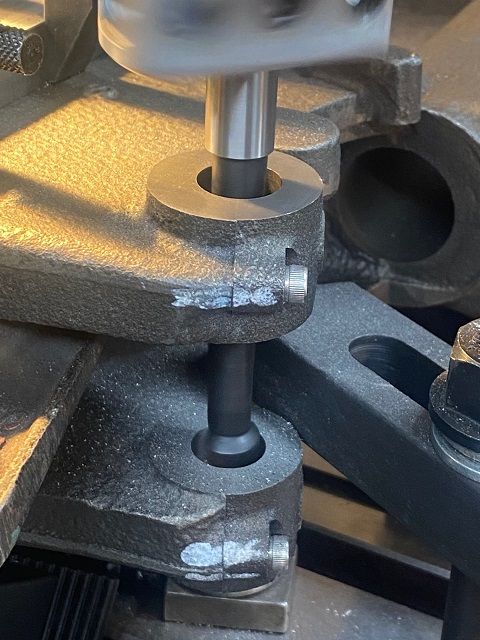
On the top bore I went up in size very slowly and the last few thou had about 6 passes at each setting. Had clean piece of paper under the hole so I could see the material being removed. The Oilite bushes were nominally .625” but they were actually .6261.” I managed to get to dead size and with a firm push from my thumb the bearing went in the hole. Extremely happy, just needed to repeat on the lower bearing. I changed to the longer bar for the lower bore, but did not fully push it fully home. I just had enough length for the tip to finish cutting and partially exit the bore and still leave about 1/8" clearance between the boring head and casting. The auto stop on the down feed worked very well. The longer bar was a little more flexible and I was doing 6 to 8 passes for each size adjustment. Eventually second bearing also pushed in.
With the bores done, moved onto the reamed hole for the timing gear. This went okay. When I came to the slot for the push rod, the boss on the casting did not appear to be quite where it should have been and the tapped screw holes would have been right on the edge of the casting. I elected to put them in the centre of the casting which put them out of place by 110thou. Looking at the length of the latch-out bar I do no think I will have a problem. Lets hope this is not “famous last words”. I also drilled and tapped for the spark plug. This is exactly as per dimensions on drawings, but the boss on the casting is a tad high. I then removed the casting from the jig plate and turned it over and remounted it, located and then drilled/tapped the 1/16” x 27 NPT hole for the fuel outlet union. Removed from jig plate, did some fettling around the bearing caps, and then assembled the bits so far. The engine castings, as said before, had been started and I had been given a fabricated crankshaft. When fitted in the bearings and all done up, I could turn it but not very easily. Did I have a problem with my boring or was it the crank. Only one way to find out, remove the crank and replace it with a ½” diameter length of straight bar. This turned nicely. I will have an attempt to see if crank will straighten, otherwise will have to make a new one. What to do next?? Colin
|
| 28/12/2022 18:03:10 |
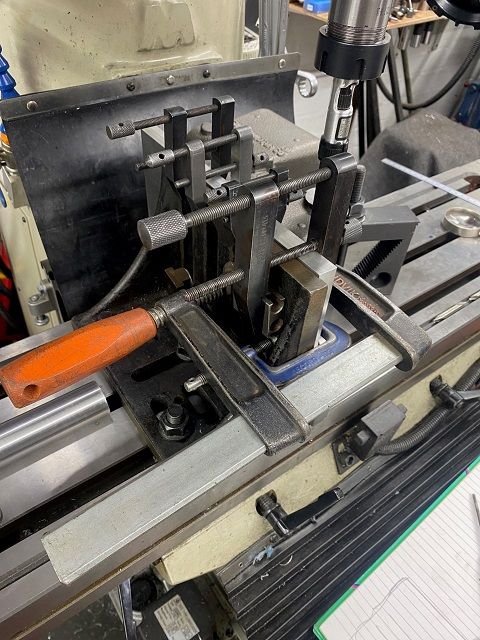
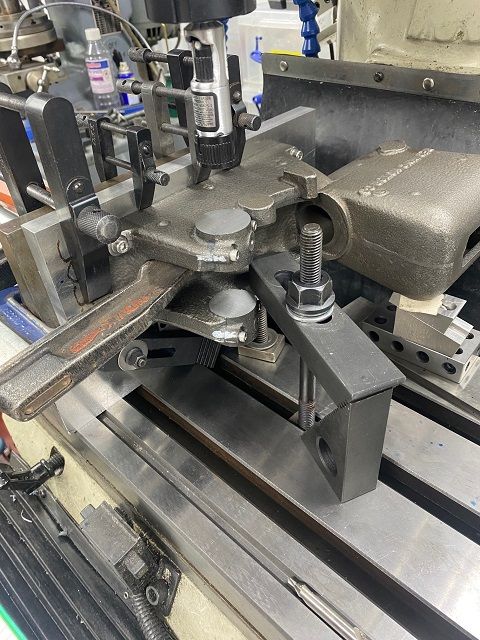
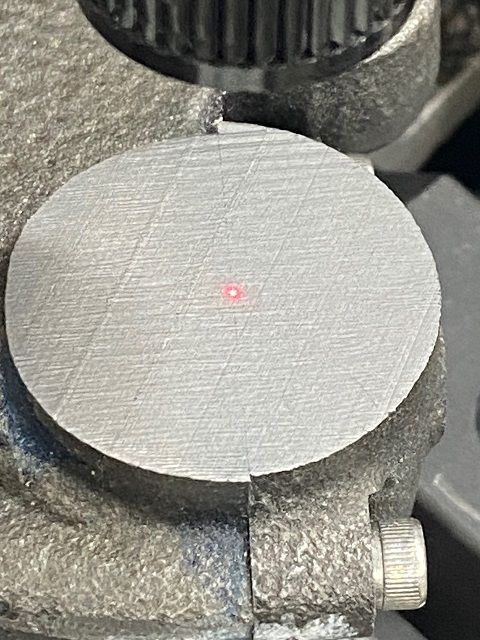
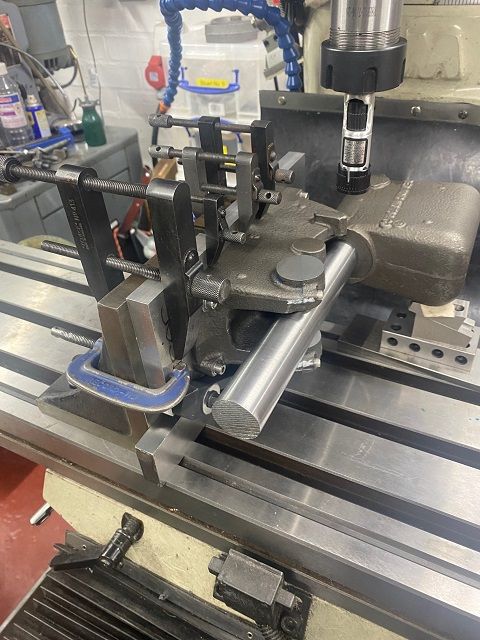
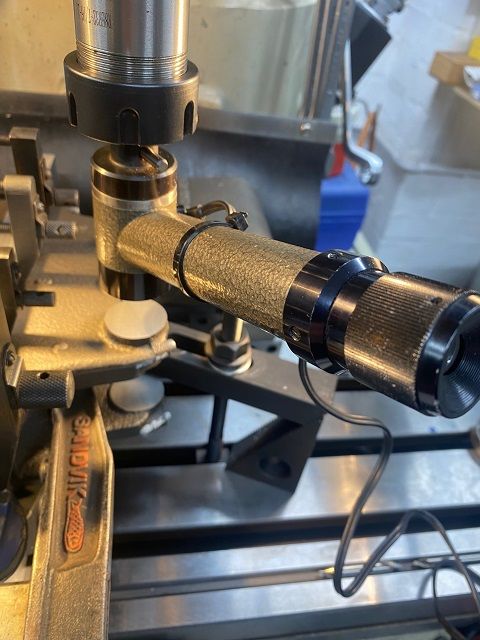
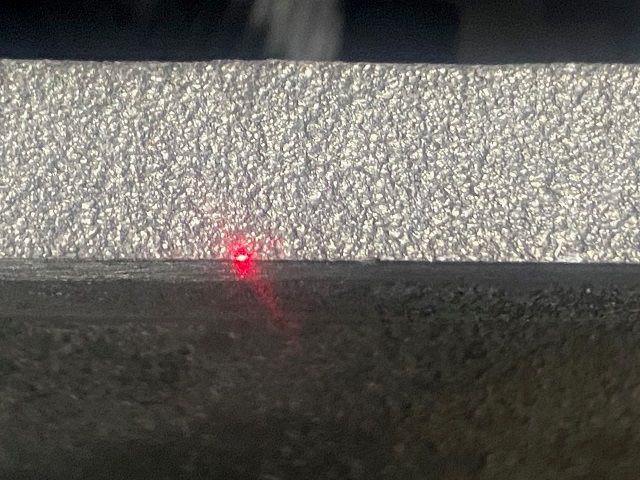
Wanted to complete all machining of main casting before Christmas as we were to have family stopping over. I set my angle plate up on table and checked face was at 90 degrees to X axis and the face was vertical. It took a long time to work out how to fix the jig plate to the angle plate. In the end I had a thick parallel resting on table bed and two small 1-2-3 blocks on top of this. The edge of the jig plate rested on the two 1-2-3 blocks. Was then able to use clamps on the top edge of the jig plate onto the angle plate. Tapped down onto the 1-2-3 blocks and then could insert threaded rods in the gaps under the jig plate and through the slots in the angle plate. I just had room to clamp the lower edge with standard table clamps. It was solid. Zeroed the DRO X-axis on the line between the jig plate and main casting and the Y-axis on the cylinder head face. Moved to what should be the bearing centre on the split line. Fitted laser centre and checked I was on the correct location. Perfectly aligned.
Whilst laser was still fitted did a sanity check on 1.25” bar fitted in the bore. This was parallel to Y-axis. Note in this picture the lower clamps can be seen As a further check I fitted the optical centre and this picked up the bearing joint line perfectly. Now happy to start boring out the bearings. |
| Thread: Privacy Glass in cars |
| 09/12/2022 12:44:52 |
Many years ago I was driving home from work in my Caterham 7. I had just crossed a set of traffic lights with other traffic when a guy in car going the opposite direction turned his head to look at my car. He looked for a little too long!! The cars in front of him had stopped for the traffic lights. He rammed the car in front of him. Problem was the five cars behind him who were not watching the road properly either. Ended up with a 6/7 car pileup with all cars travelling at about 15 to 20 mph. Colin |
| Thread: Myford 254 retracting top slide |
| 08/12/2022 16:35:16 |
The advert describes it as a geared and retracting top slide. Colin |
| Thread: Privacy Glass in cars |
| 08/12/2022 16:08:09 |
I like the extra security for what is either on the rear seat or in the footwell. This particularly applied when was working as could have several laptops and other electronic gear in the back of the car. Colin |
| Thread: Building 1/4Scale Redwing Hit and Miss Engine |
| 05/12/2022 21:19:18 |
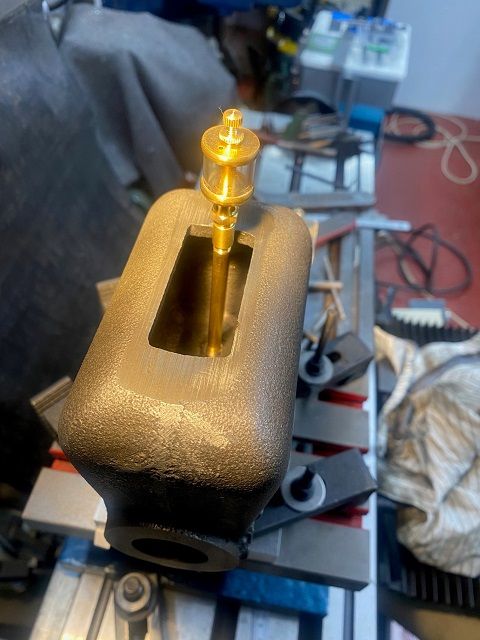
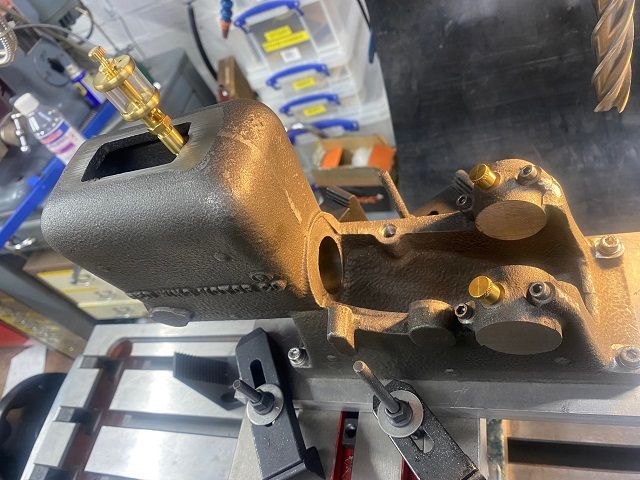
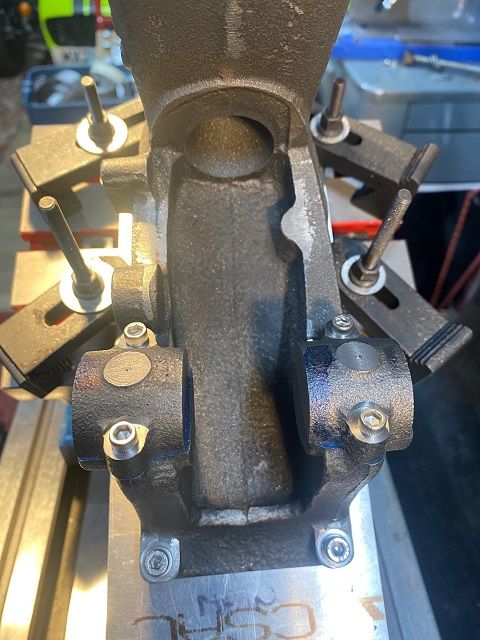
Before putting the assembly back into the horizontal position I decided to do the main bearing oilers. Drilled into top of bearing caps going far enough that when bored out the drilled hole would be visible and then tapped 10-32 UNF for the oilers/greasers. Removed the rear cap and scribed a faint line on the bearing centre line to aid with location of fuel filler. With this completed the assembly was rotated to the horizontal. Picked the scribed line up with laser and moved 2.5 " back and 1" in to locate the filler. This did not quite locate in the casting correctly so amended position slightly. Drilled pilot and then ran 6.3mm drill through the casting into fresh air. Could not get the tap to start so milled a small 3/8" dia. counterbore to give level surface and then tapped hole 1/16" NPT. Next up was the cylinder oiler. This needs a 3/8" recess milling in the top of the casting 3.250" from the rear of the casting. 3/8" endmill did this. Luckily my recent haul of carbide end-mills provided a long cutter which could be held in ER32 collet chuck and nestled into the recess and cut a flat on the cylinder top in the bottom of the water jacket. This was followed by a long centre drill and then drilled 3/32" through to the bore. Amazingly I had a suitable long drill. A 5.6mm drill then used to put 11/32" hole ready to be tapped 1/4-40 UNF. I found a long tap holder my father had made 20 plus years ago and carefully tapped hole with a bit of lubrication. Test fitted the drip oiler and all okay. Now came to the bit I had been dreading, machining the gap between the main bearing boss and then reducing the mains down to 1" width. Before doing this I cleaned off the marking blue and lightly stoned the surface. Put a couple of spots of Loctite on the surface, but the caps set in place before I had the screws located. Tapped them free, cleaned them up, use a much tinier drop of Loctite and held the caps up until the screws were all started. The Loctite would ensure the caps did not move whilst being machined. Used a long 3/4" 4 flute end mill which meant I had to move .313" off the centre line to give the required 1.375". I crept up to this very slowly taking around 15 thou of each side in turn. I used a set of Starrett sliding parallels to measure the gap and miked them whilst in place. Ended up at 1.3755". Used same endmill do do the outside edges and in this case 2.065" on DRO gave me the 1" required width. Fitted oilers and finished for the day. Hopefully oilite bearings will turn up in next couple of days.
Edited By Colin Heseltine on 05/12/2022 21:25:06 |
| Thread: Something for 9yr old to make |
| 04/12/2022 21:23:14 |
Those Power-UP models look quite good. As a kid I used to use the Jetex solid fuel rocket motors on various planes, gliders and rockets. I remember having a glider with jet assisted takeoff. I used to make rocket planes which would be hooked onto the washing line, and when rocket was lit would fly up the garden. Still have several of the engines and I think some of the solid fuel pellets. I will have to dig them out and see if they will still work. Colin |
| Thread: Building 1/4Scale Redwing Hit and Miss Engine |
| 04/12/2022 20:05:21 |
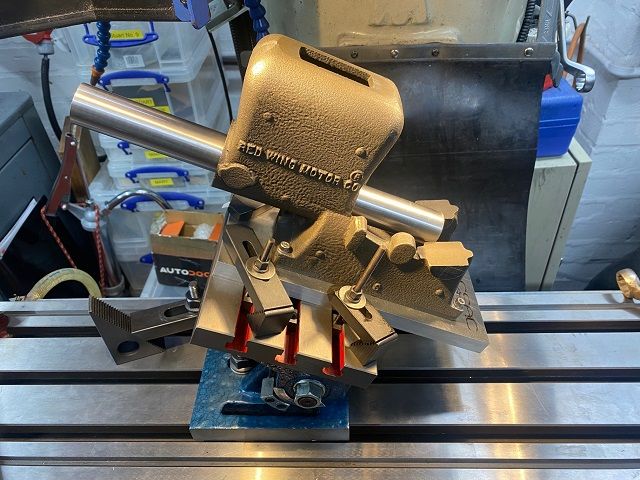
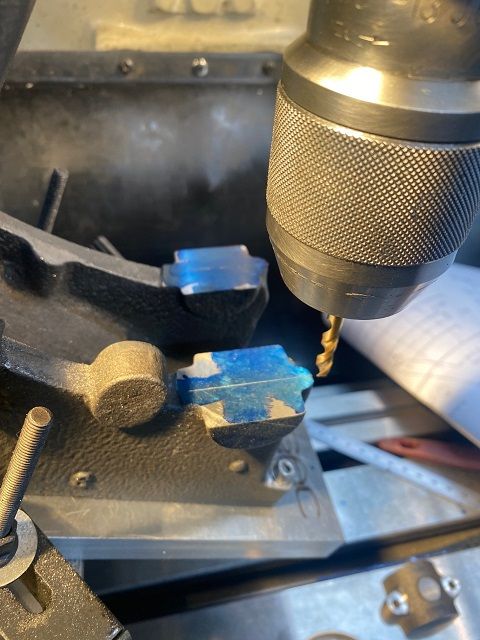
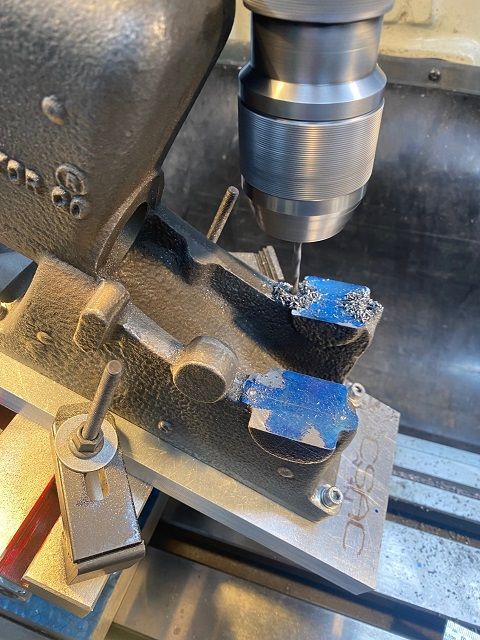
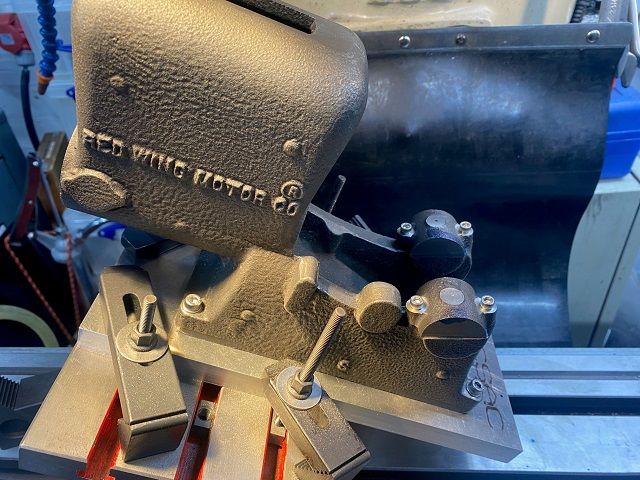
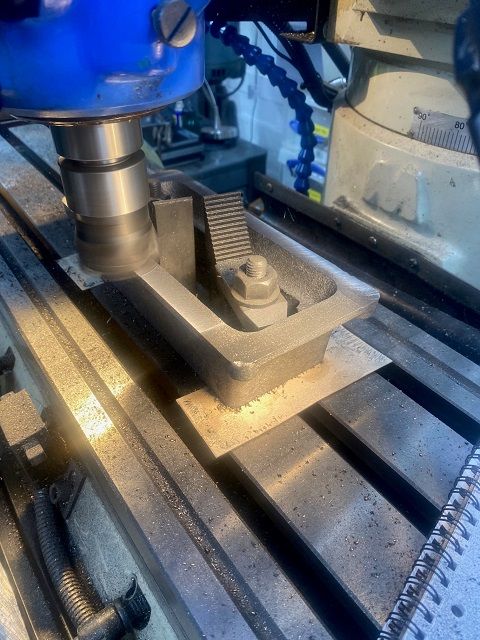
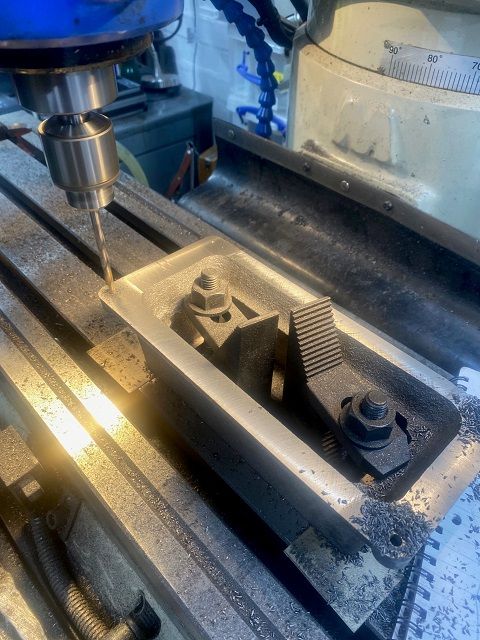
I needed to ensure the jig plate was square to the bore so mounted casting with 12" PGMS bar in the bore onto the jig plate (jig plate mounted on piece of 12mm MDF to protect the table) and eventually got it all square. Removed the casting and squared up the plate with large end mill. Next exercise was to fit the adjustable angle plate to the table and get it square. Ran Verdict gauge back and forth along 'Y' axis to get this correct. Set the top of the angle plate horizontal and checked the top surface along 'Y' axis and found this not to be level. Then spent at least an hour getting jig plate level and square. In the end I needed a 6mm wide strip of paper along the rear edge of the jig pate parallel to the 'X' axis. This took a number of attempts to get correct. When happy with this set the angle to 25 degrees. Used a 50mm six insert facemill to machine the main bearing faces. Because of the 25 degree angle care is needed to ensure the casting does not hit the quill. I had to remove the safety guard as this was in the way. Took three passes to remove 15 thou. In order to check the positions for the main bearing caps I first blued up the bearing surface and then fitted one of my large (but relatively small diameter) drill chucks with a cobalt stub drill. I moved the requisite distance from the centre line (1.219" I could now try and work out the positions for the bearing caps. When I was thought I was correct I used a 4.3mm drill through the hole in the cap to mark location in the blue marking ink. Repeated this for both bearings. Then using a laser centre finder I played around until I was happy that both bearings looked good in relation to the bosses on the end of the casting, the diameter of the bosses on the side, and the location marks I had initially scribed on the casting. These can just be seen in the photo above. I zeroed the 'X' axis DRO on the bearing centre line and then drilled the 4 off 3.5mm holes 0.687" either side of the main bearing centre line. The holes were drilled 0.5" deep and then tapped 8-32 UNC. The caps were then shuffled around to get the best looking fit. Next step to face the sides of the bearings.
|
| Thread: Dormer 108 Drill Grinder |
| 24/11/2022 22:03:18 |
There was one recently on Ebay, Trouble is the guy wanted £1000 which I could certainly not justify. Colin |
| Thread: Building 1/4Scale Redwing Hit and Miss Engine |
| 24/11/2022 21:37:21 |
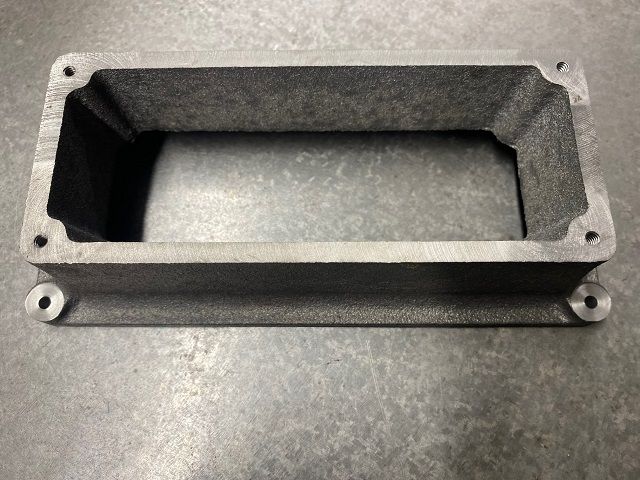
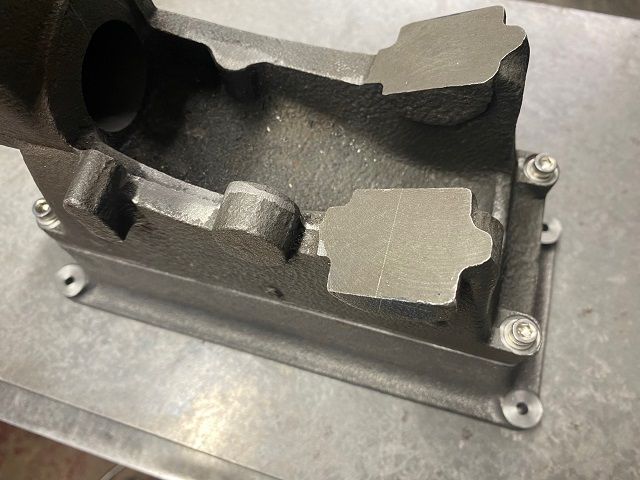
Then used 5/8" end mill to counterbore the tops of the base casting mounting holes. Assembled main casting to base casting to check all holes etc. aligned. Happy so far.
|
| 24/11/2022 21:36:30 |
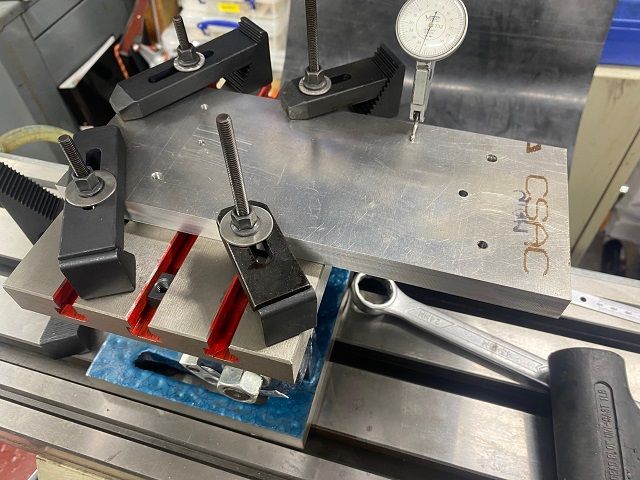
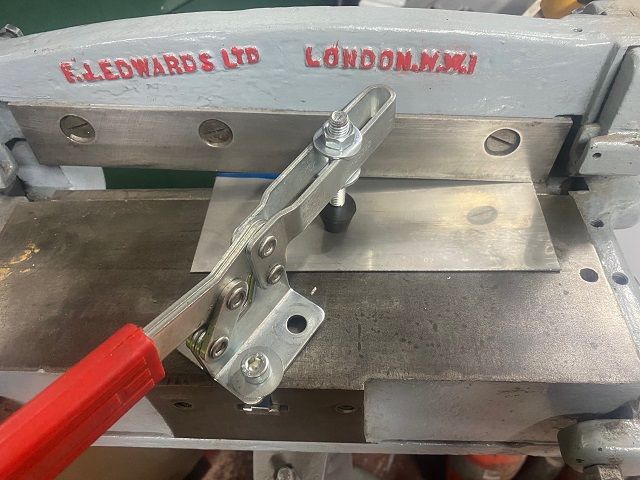
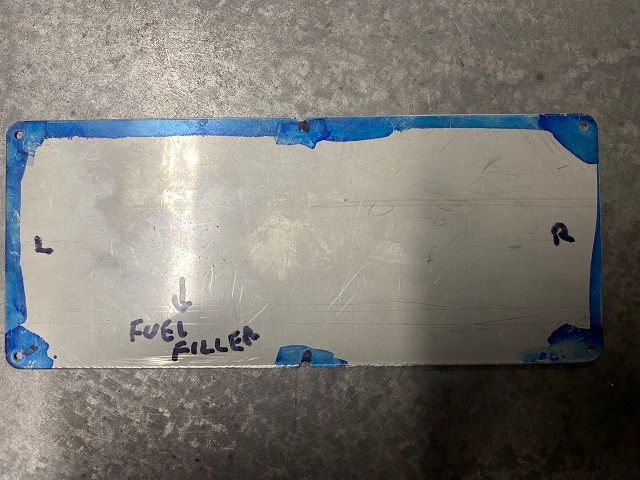
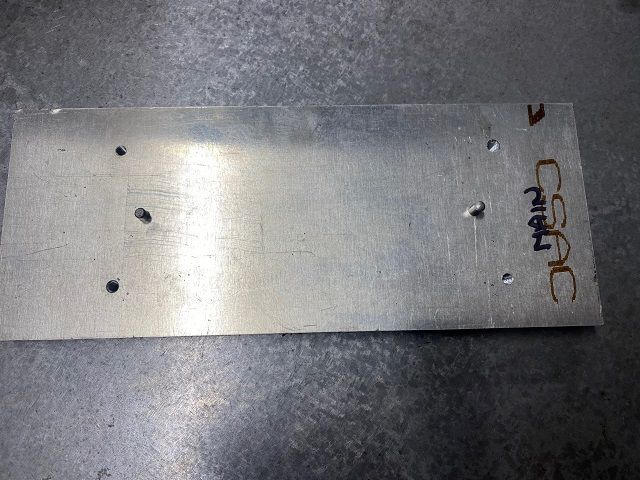
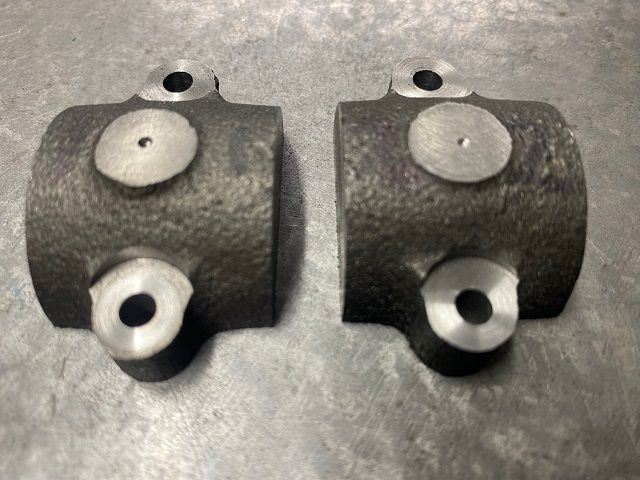
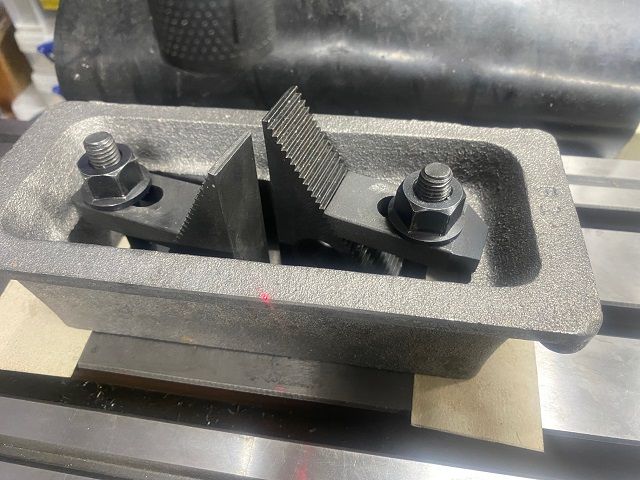
I mentioned earlier about the 0.8mm stainless steel sheet. mI was not sure how well this would cut and drill. I was able to use the small guillotine and it cut very cleanly and then radiused the corner using radius cutter in the flypress. The middle recesses were files out. Having had fun drilling stainless sheet with some work jobs in the pas I was a bit worried about drilling this material. I had planned to put small pilot/dimple in and then use punch in flypress, but did not have a small 2.3mm punch. I laid the sheet in the recess in the base as a support and used a 1.5mm cobalt drill at around 2500rpm. This went through easily. Then used 2.3mm Dormer drill in Proxxon mill at high speed to increase the holes size . Very happy with the result. I had a piece of Tooling aluminum plate to use as a mounting jig for the engine. This was drilled and tapped to match the holes in the engine casting and also had the two reamed dowel holes put in. Because I cannot guarantee 100% that the locating dowels in the engine base are perfectly parallel to the cylinder bore I will mount the engine to the base, square it up using bar inserted into the cylinder bore and then machine the edges of the plate. As I needed to remove the machine vice to machine the base casting and then machine the main casting I decided to machine the main bearing castings first. These had been partially machined and drilled when I purchased the castings. For some reason the holes had not been drilled at the requisite diameters. Mounted the first one in vice and located first hole using blank drill rod. Zero'd the DRO and then moved to second hole. This was correct distance away but fractionally offset. Drilled out to correct dimension 13/64" and then rest to first hole and repeated. Then used end-mill to counterbore the top. Slight mistake here in that I misread micrometer and took 25thou too much off. Not a huge problem but need to make the rest all the same depth. Skimmed top of cap for oiler location. Repeated this for second cap. Removed the vice from mill and mounted the base casting upside down on two pieces of thin card. Clamped down and then squared it up. Did not want to use Verdict gauge so I used laser centering device. I could easily see as ran the laser down the edge of the casting. I then went to do a double check with a Verdict gauge, which went well till I lifted the Verdict off the casting and power fed the table along the X axis. I had forgotten to remove the laser centre and ended up with a two piece centre as it met the hold down clamps. Doh!!!. How else to do a double check?? Used a standard rotating edge finder and checked each end of casting. I stopped testing when both ends were within 1.5 thou of each other. Used the edge finder to then center both Axis's. Used carbide insert tipped facemill and cleaned up the bottom face. Drilled the four 13/64" holes for the feet, then turned the base over and reclamped in order to drill tap the mounting holes for main casting and also counterbore the holes just drilled in the feet.
Edited By Colin Heseltine on 24/11/2022 21:37:01 |
| Thread: Dormer 108 Drill Grinder |
| 23/11/2022 10:31:45 |
Lucky man having one of these machines. I used one several months ago and would like to get obtain one for myself. Colin |
| Thread: What Did you do Today 2022 |
| 20/11/2022 15:34:14 |
Helped move a Colchester Triumph 2000 long bed lathe across a warehouse ready for collection this week to go to my mates house. Yesterday went to collect 50 off Clarkson end and slot mills, all either resharpened or new. Whilst there I was offered a further collection of 230 off, end/slot mills and drills. About 180 of these were new Tungsten carbide end/slot or drills, the rest being HSS. These were up to 18mm dia long series tungsten carbide mills. Decided to have the lot and split them with my mate. Having looked at prices of tungsten end/slot mills, I had a very very very good deal. Now need to sort all my milling cutters Colin |
Want the latest issue of Model Engineer or Model Engineers' Workshop? Use our magazine locator links to find your nearest stockist!
Sign up to our newsletter and get a free digital issue.
You can unsubscribe at anytime. View our privacy policy at www.mortons.co.uk/privacy
- *Oct 2023: FORUM MIGRATION TIMELINE*
05/10/2023 07:57:11 - Making ER11 collet chuck
05/10/2023 07:56:24 - What did you do today? 2023
05/10/2023 07:25:01 - Orrery
05/10/2023 06:00:41 - Wera hand-tools
05/10/2023 05:47:07 - New member
05/10/2023 04:40:11 - Problems with external pot on at1 vfd
05/10/2023 00:06:32 - Drain plug
04/10/2023 23:36:17 - digi phase converter for 10 machines.....
04/10/2023 23:13:48 - Winter Storage Of Locomotives
04/10/2023 21:02:11 - More Latest Posts...
- View All Topics
- Reeves** - Rebuilt Royal Scot by Martin Evans
by John Broughton
£300.00 - BRITANNIA 5" GAUGE James Perrier
by Jon Seabright 1
£2,500.00 - Drill Grinder - for restoration
by Nigel Graham 2
£0.00 - WARCO WM18 MILLING MACHINE
by Alex Chudley
£1,200.00 - MYFORD SUPER 7 LATHE
by Alex Chudley
£2,000.00 - More "For Sale" Ads...
- D1-3 backplate
by Michael Horley
Price Not Specified - fixed steady for a Colchester bantam mark1 800
by George Jervis
Price Not Specified - lbsc pansy
by JACK SIDEBOTHAM
Price Not Specified - Pratt Burnerd multifit chuck key.
by Tim Riome
Price Not Specified - BANDSAW BLADE WELDER
by HUGH
Price Not Specified - More "Wanted" Ads...
Do you want to contact the Model Engineer and Model Engineers' Workshop team?
You can contact us by phone, mail or email about the magazines including becoming a contributor, submitting reader's letters or making queries about articles. You can also get in touch about this website, advertising or other general issues.
Click THIS LINK for full contact details.
For subscription issues please see THIS LINK.
Model Engineer Magazine
- Percival Marshall
- M.E. History
- LittleLEC
- M.E. Clock
ME Workshop
- An Adcock
- & Shipley
- Horizontal
- Mill
Subscribe Now
- Great savings
- Delivered to your door
Pre-order your copy!
- Delivered to your doorstep!
- Free UK delivery!
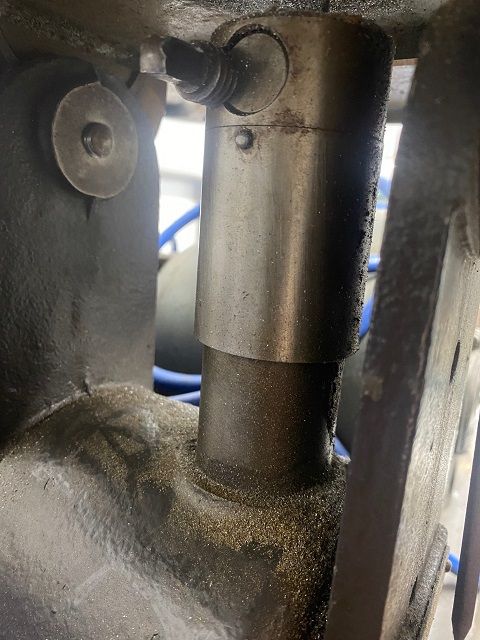
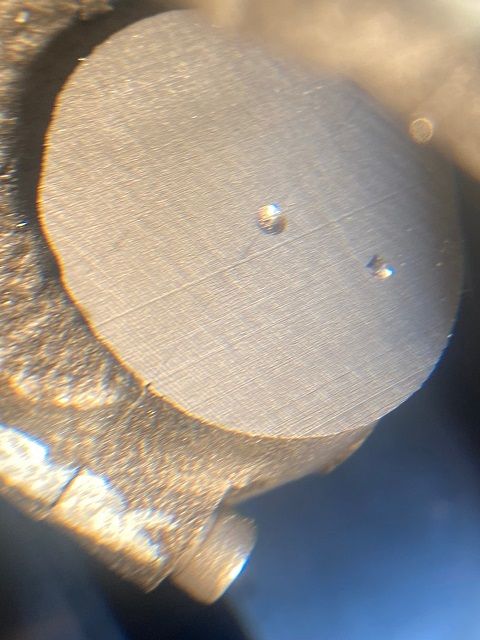
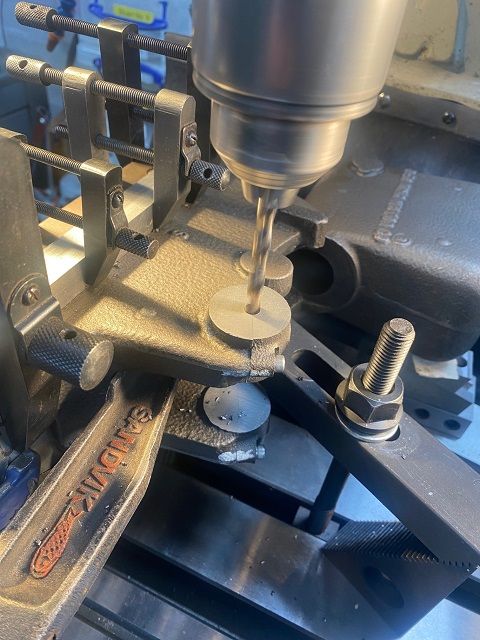
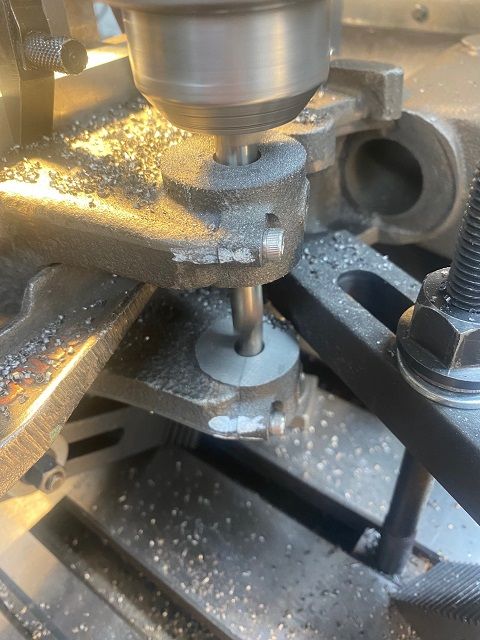
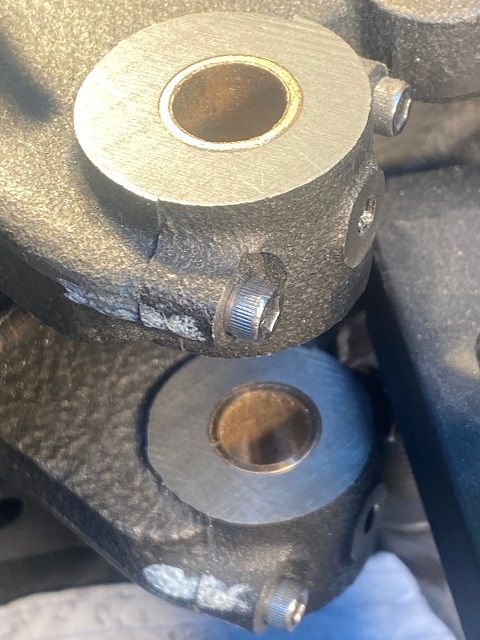
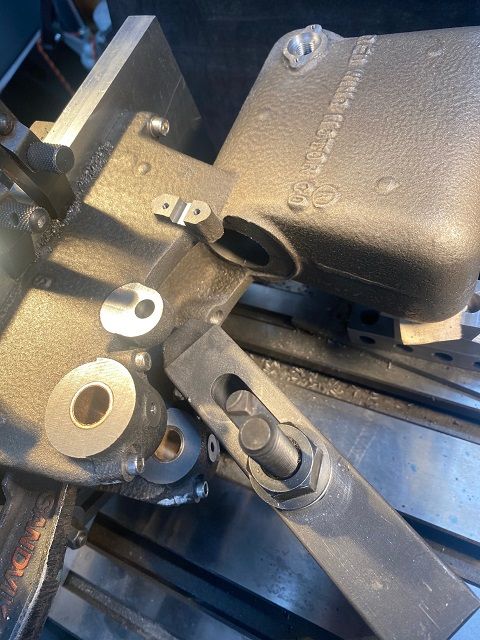
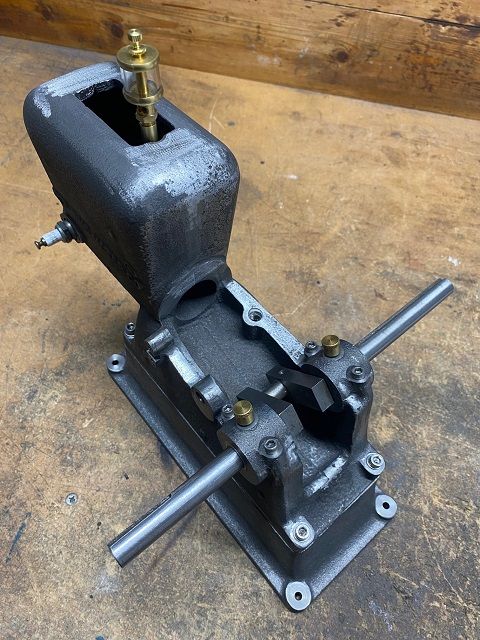
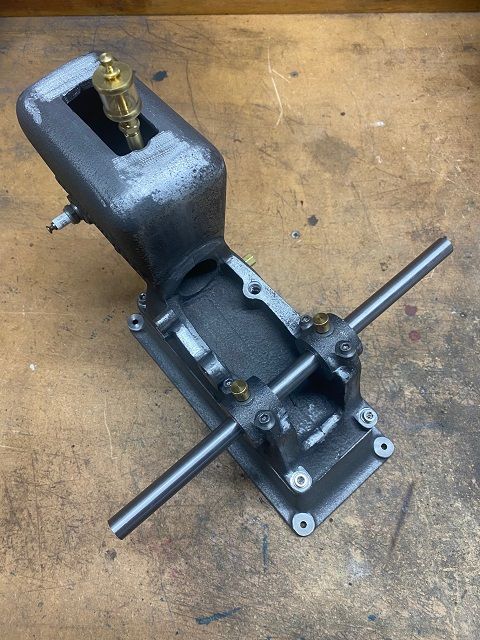
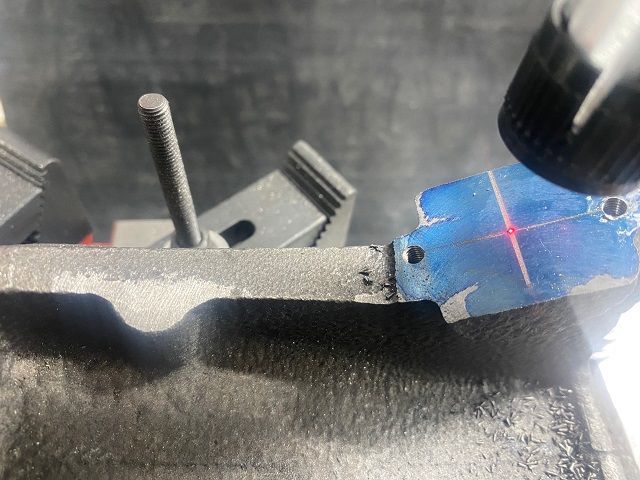
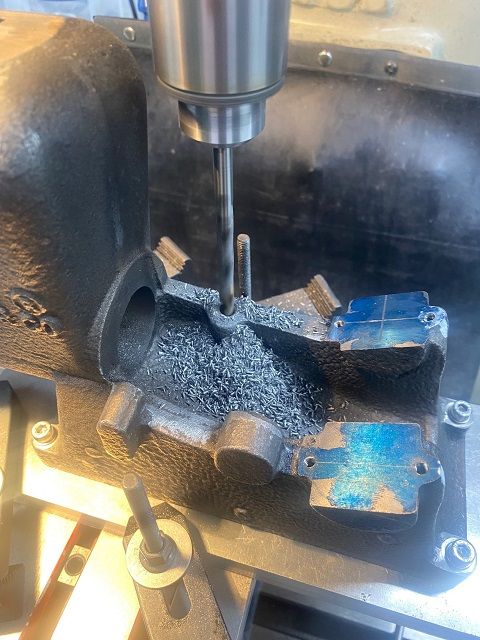
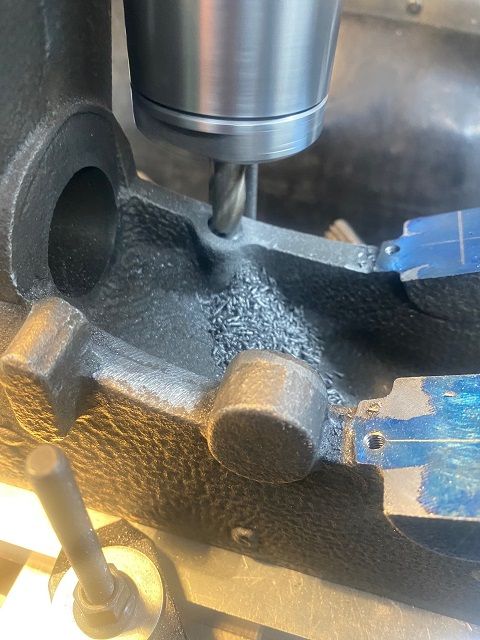
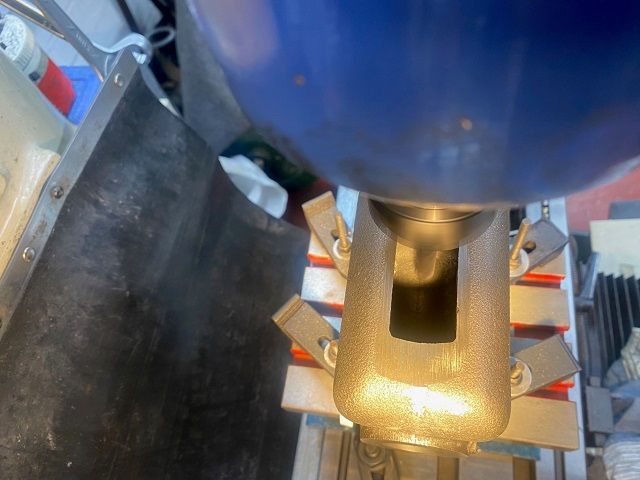
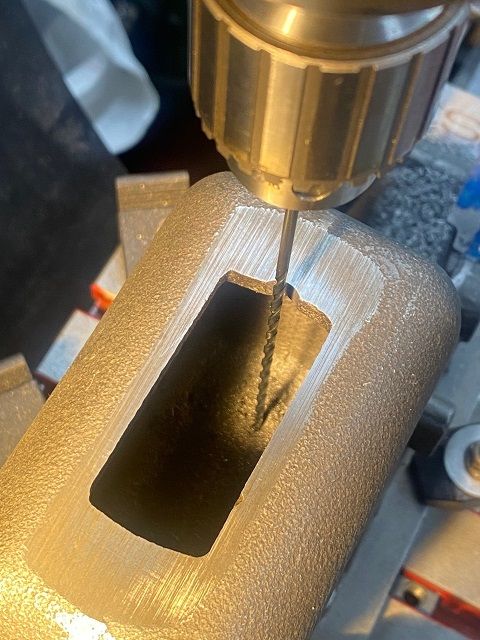
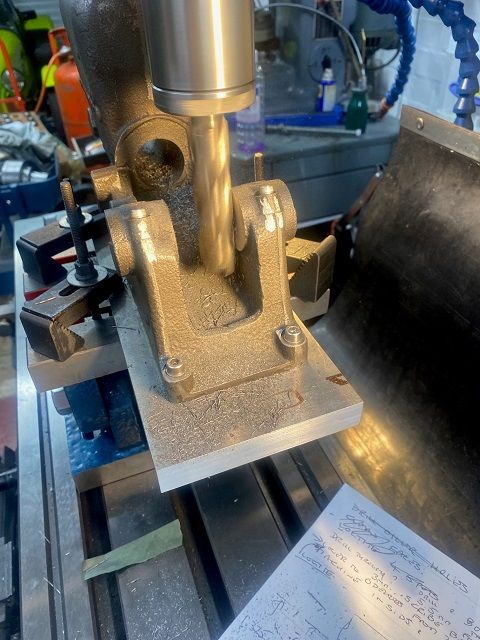
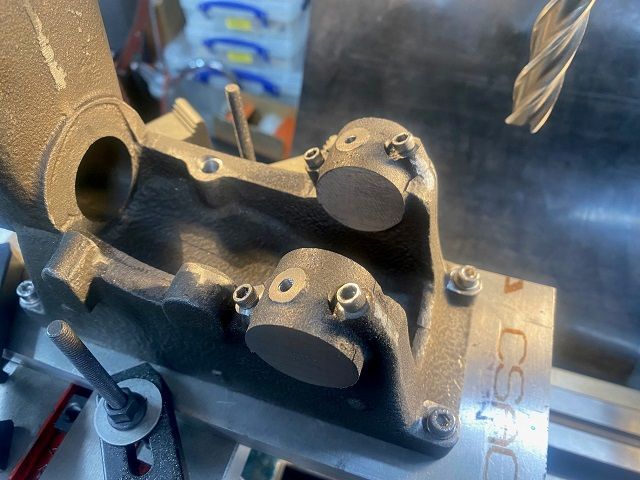
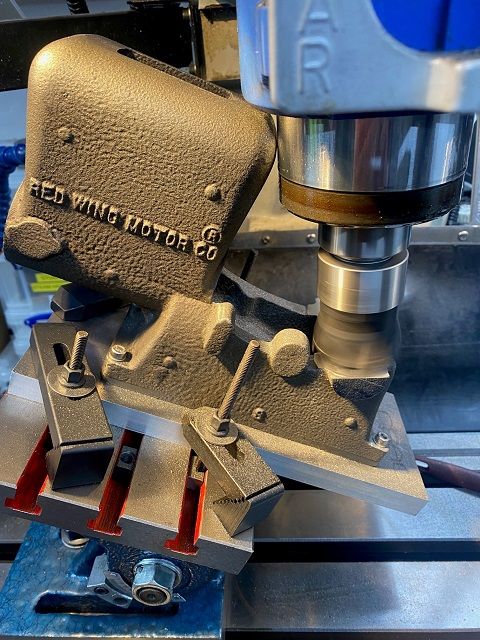
 and very gently held the quill down so as to use the drill tip as a scriber and moved the 'X' axis so as to leave a scribed line. Repeated this for the second bearing.


 Register
 Log-in


