Member postings for Ramon Wilson
Here is a list of all the postings Ramon Wilson has made in our forums. Click on a thread name to jump to the thread.
| Thread: Stuart Twin Victoria (Princess Royal) Mill Engine |
| 02/09/2022 08:46:59 |
It was your comment "....to do for no real benefit apart from it would be more prototypical that lead to mine.
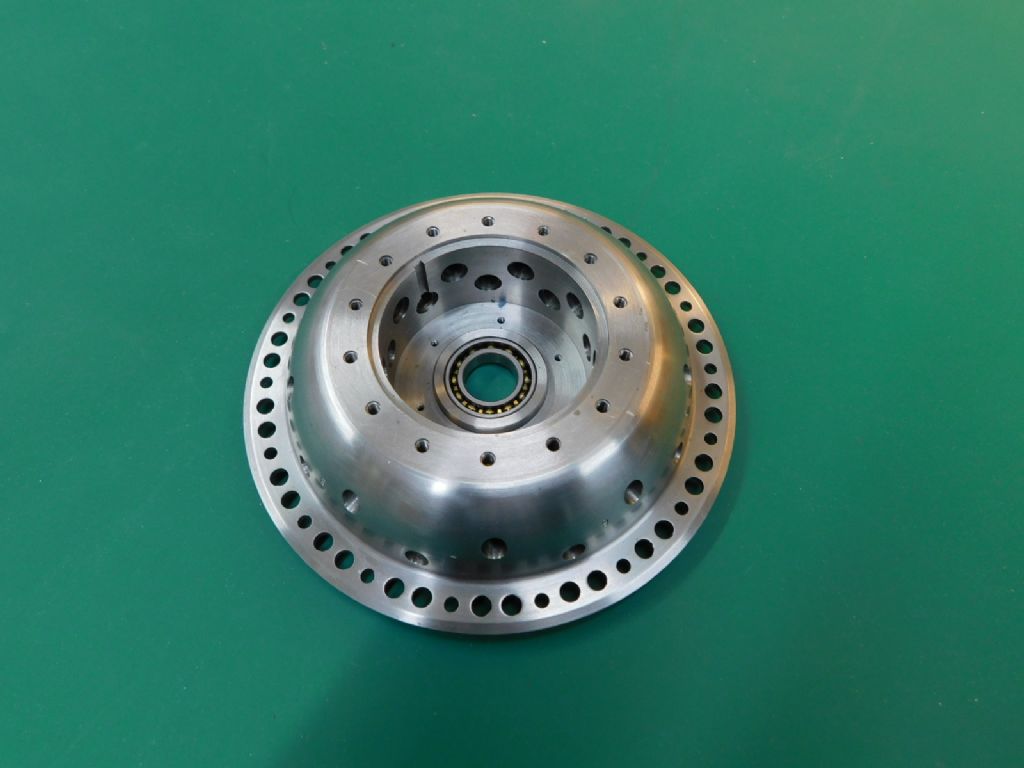
Sorry for any confusion Doc - it was Paul's comment on tapers and your response in how it could be done but I still think you have the broaching idea a bit awry I was being facile I suppose - a broach is designed to cut a parallel sot in a parallel hole, not a tapered slot. The only way it could be done to my mind would be to use the broach taper itself - not the right way at all but a flippant remark on my part I'm afraid. If you cut a tapered slot in the guide and tilt the object it might be possible but that's not how it it's designed to work, the taper increasing the cut of the broach as depth increases dependant on the angle - just not how its done and besides the fact that broaches are expensive items and easily broken which I would think trying to do so might lead to. Getting a broach stuck is a happy situation too. Doc, I've offered my thoughts based on a fair bit of work experience, certainly did enough broaching in my time to comment for sure. I've only ever made one broach at home and that was for the Bentley prop washer - the pressure to get that through was inordinate so my money's still with saving yours and using the topslide as a slotter I make no apologies for posting this image again - done on the lathe in a few minutes using a slotting head. Unfortunately it will not fit on an ML7 otherwise I would loan it to you.
Good luck - R |
| 02/09/2022 07:58:05 |
Posted by Dr_GMJN on 02/09/2022 07:38:04:
Yeah two 3mm parallel keys, fixed with gun screw(s) is still the plan. I was just wondering how you’d hold the workpiece for a tapered bore, but it might end up being too tricky to do for no real benefit apart from it would be more prototypical. That's just it Doc - it would not be prototypical, far from it, but I shall say no more on the matter. Hope it all works out for you however you go about it |
| 02/09/2022 07:40:50 |
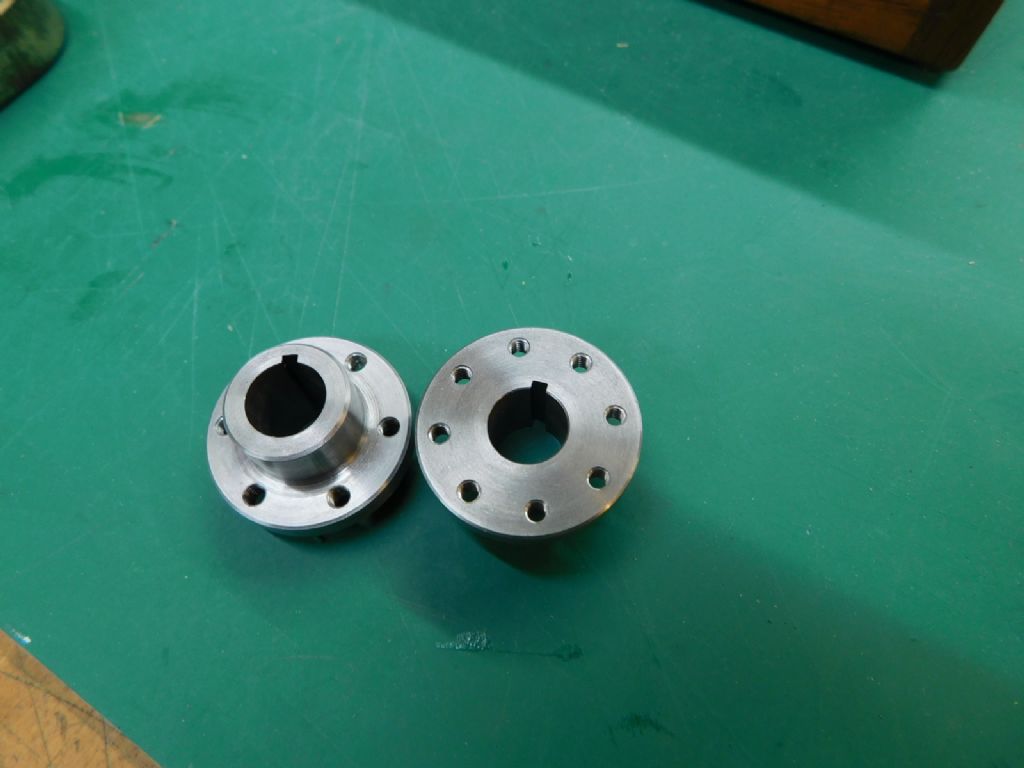
The broach is designed to go in vertical 'guided by the guide' would you believe and designed to be pushed right through. The hole has to be in line with the broach not angled over. The depth of cut on each pass is the taper on the broach with each successive cut increased by inserting shims behind the broach in the guide until the required depth is reached or the broach 'bottoms' out on the shoulder (not recommended) Other than stopping halfway along the length of the broach I cant see how a tapered slot can be achieved nor why one would want one but then we've been there before haven't we. The broach would have to be tapped back out and the subsequent tooth marks removed. (That may lead to a broken tooth or two too) I thought it was two keys at 120 ?
If you are going to broach then yes, getting the two to match the shaft slots is as good as making the broach guide with two slots which is how I did the four on the Corliss flywheel Edited By Ramon Wilson on 02/09/2022 07:59:54 |
| 01/09/2022 19:25:21 |
Doc, a drill press, unless its a very stout one, is not a suitable drive for broaching, the force required is quite considerable. The standard Maarlco broaching press is a pretty sturdy affair in comparison along with low gearing and a long strong lever. Though the keys are wider I broached my Corliss wheel using such when I was working, I had nothing at home that would cope for sure. I have a small home made flypress that I use when it suits and though that does give a lot of force its over small movement for broaching useing a commercial broach I think the modification shown earlier where the topslide is used for slotting looks to be a well worth diversion to take - after all it will always be there for other use in future. Slotting on the lathe with such is much easier than using the saddle.
Just my view - R |
| 31/08/2022 12:26:20 |
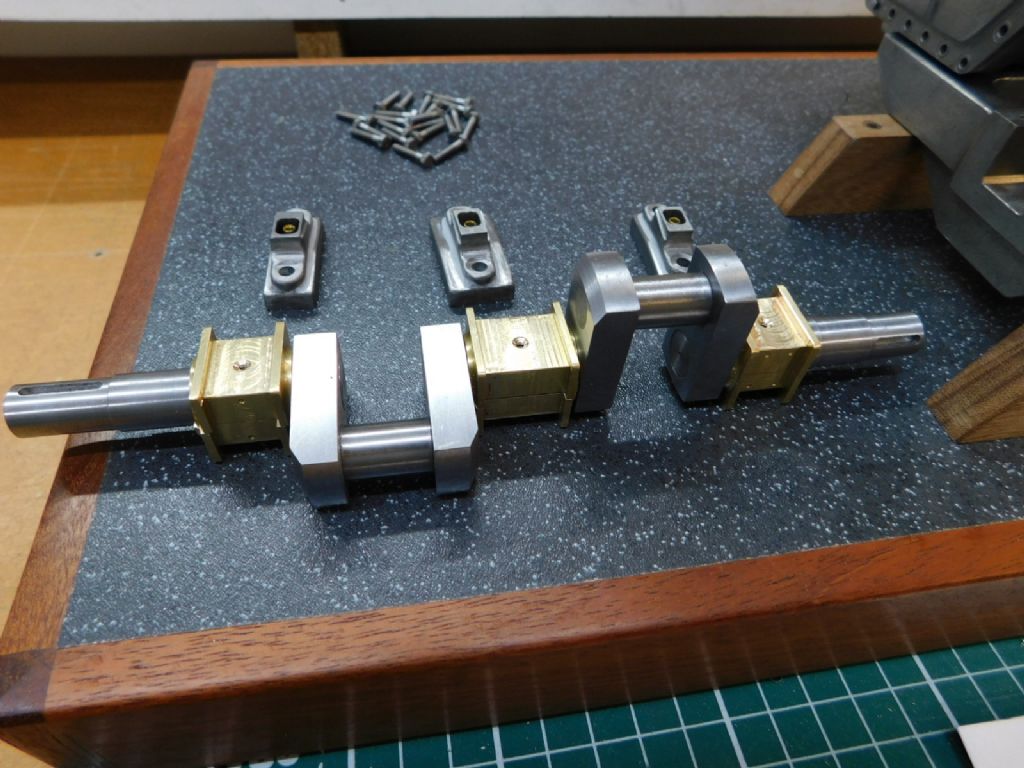
I am beginning to think you are being a bit pedantic Jason, surely not? No way does Doc have to buy a series of reamers in 0.1mm increments - whatever for. I would assume though he might have the odd couple near what is required but if not then make the holes to a pre-machined plug gauge to any size you desire and then make the shaft to suit. When I refer to 'polishing' down to size it's taking that last couple of tenths not thou's off to get that fit - of the respective part - just right. Obviously it would be measured down to size, but that last final bit is probably, more likely than not, too much to ask for an old lathe to cope with - it's called 'fitting' don't you know There was a fair amount of it on this shaft - finished between centres until the bearings, the centre bearing already split, were just able to fit just right. Obviously it would be some machinist indeed to make the centre bearing fit the shaft using the shaft as a gauge.
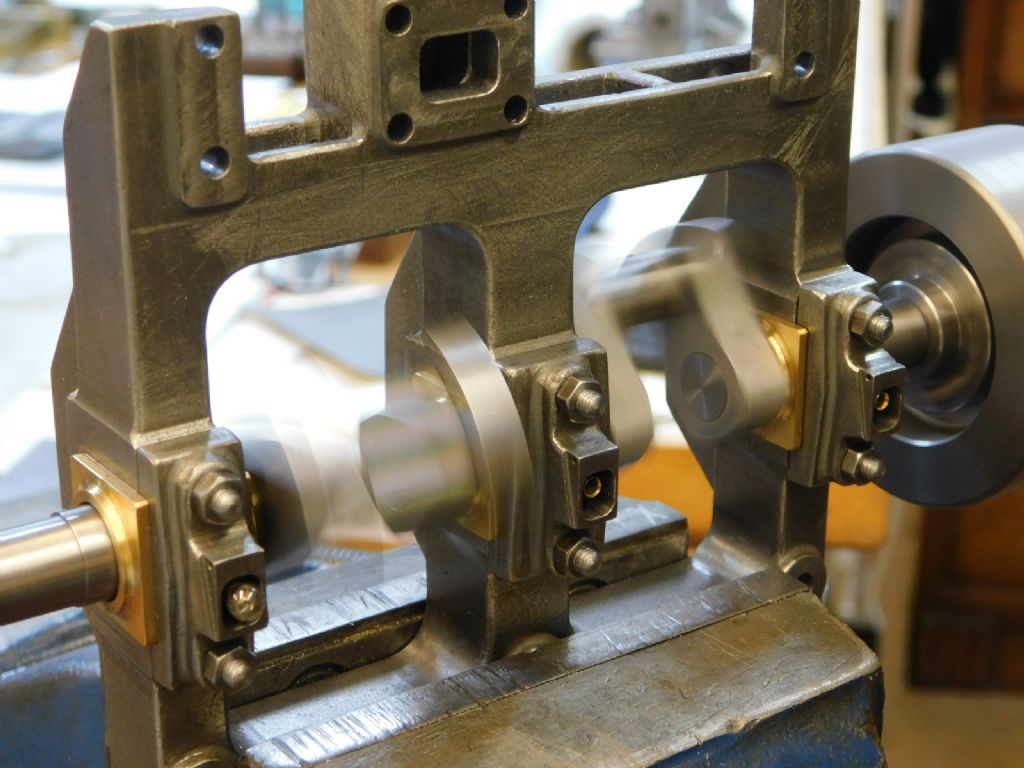
I should point out that even then, once fitting the bearings to the bedplate and clamping up the keeps, the bearings/shaft required further 'polishing' until a good running fit was reached (This is being spun between fingers and thumb BTW no external drive) No doubt, now its been painted and awaiting assembly that will require doing again - which is why I have advised before - build it up, including painting as you go along, to eliminate any tight spots before moving on to the next stage and ensuring all remains in good running order throughout the build. It's advise, not dictat. Doc makes the decisions R
Edited By Ramon Wilson on 31/08/2022 12:30:54 Edited By Ramon Wilson on 31/08/2022 12:31:44 |
| 31/08/2022 10:39:12 |
Well if a reamed hole isn't accurate enough for this purpose Jason I don't know what is ??? Using a such a long item, the shaft, as a plug gauge with it's potential, of wringing a much smaller part held in a chuck runs a good risk of moving the part in the chuck but I offer my thoughts based on my own experience. As I commented right from the outset - make the hole in the bearing first and machine the outside to suit then use the bearing to size the shaft to a running fit. No ones mentioned it as yet but once the bearing is split and the solder faces cleaned the diameter is reduced slightly anyway. One way the bearing is finished and the shaft is reduced until it slips on with a good running fit usually by 'polishing' with a fine file, emery or wet and dry paper. Much easier I would suggest than doing the reverse in a hole with its potential of tapering/bell mouthing over such a short length. In an ideal world both would have probably been made by two different people to tolerances that would ensure the perfect fit. I can't speak for anyone else but It makes perfect sense to me to be able to measure the shaft diameter easily and potentially more accurately than it does a hole, especially around 12mm or less
We will have to agree to differ I'm afraid Edited By Ramon Wilson on 31/08/2022 10:42:36 |
| 31/08/2022 07:46:48 |
I can see your logic Doc about making another shaft if things go awry, but if you'll forgive me for saying so that is an amateurish way of approach. That is not to be offensive but to say that as a machinist who has the opportunity to control the method that really is the wrong way to go about it - in my mind. I'm not trying to change your's however, if you are happy to do so then by all means continue but it's not the way most would go about it. If you machine the adjoining parts first and ream or bore the holes then you have a 'standard' to make the shaft too. As Hopper says too it's much easier to measure accurately the shaft diameter than a small hole. I have to say that considering 'what part I'm going to muck up - and the easiest way to replace it is not something I consider in my approach to a job, rather how each job/operation can make the next easier and more accurate but as always its down to choice.
Whatever way you approach it I hope it goes well for you - the main thing is to enjoy the process which I'm sure you will |
| 30/08/2022 22:46:07 |
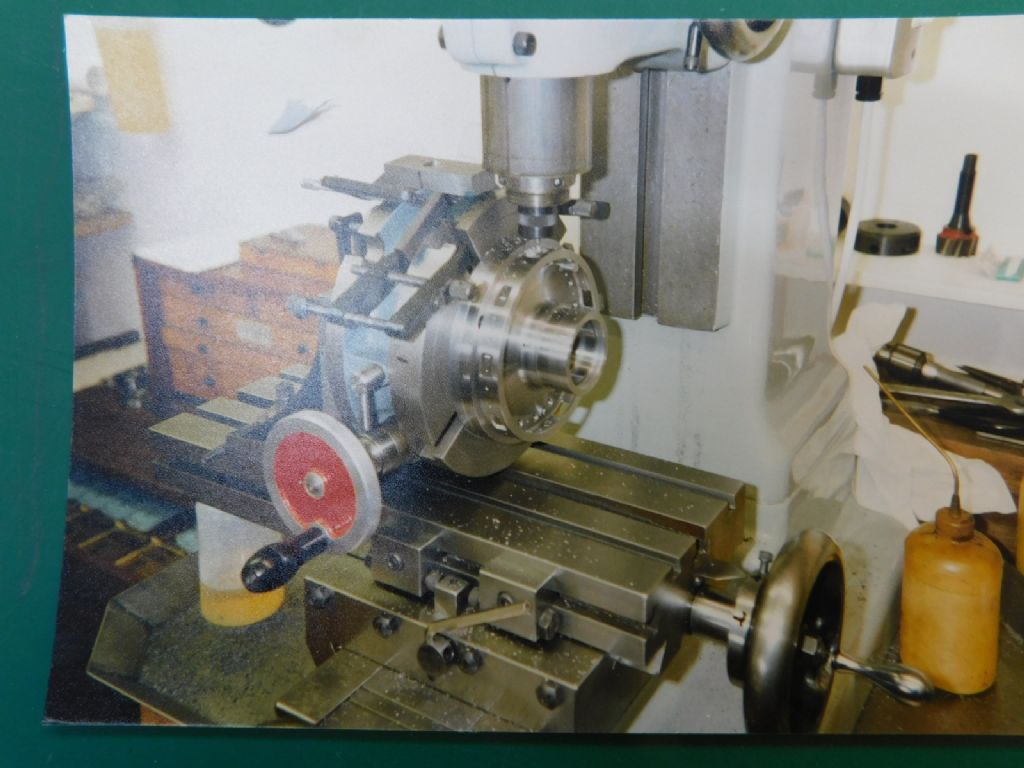
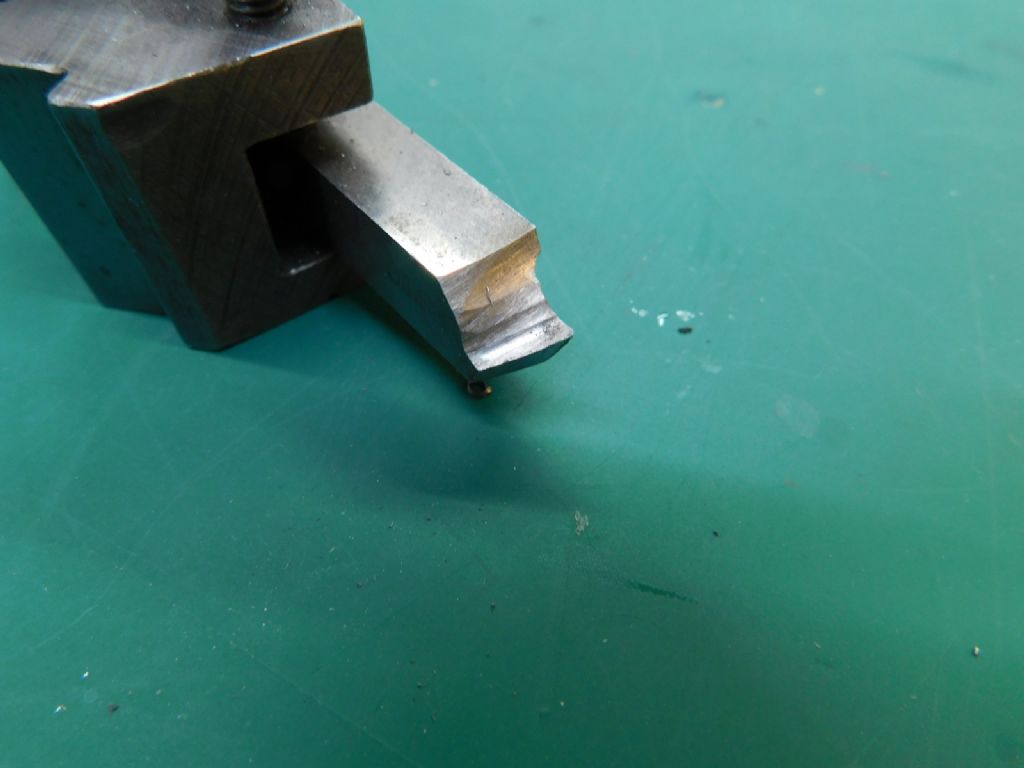
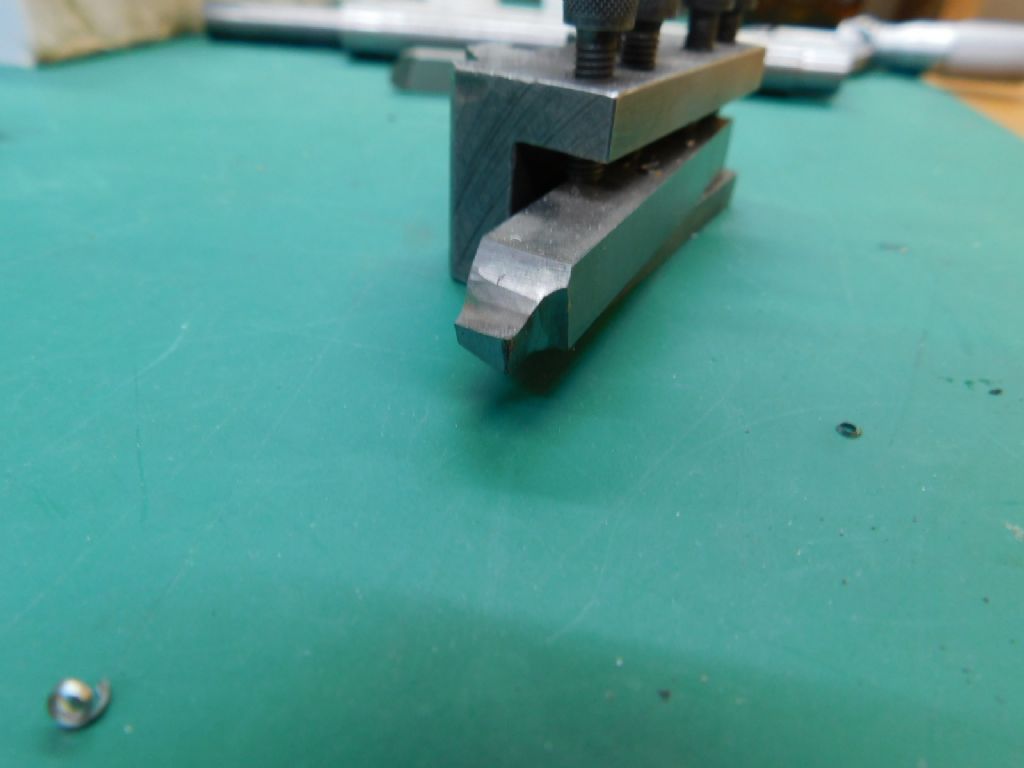
Well that's your choice of course but it's much, much easier to measure a shaft to the tolerances required than it is the bores to fit the shaft - just my thought. I oversaw, programmed and ran a 20 tool Haas machining centre for about my last three years of work but those Bentley parts pre date that considerably. I found this photograph (ha remember those?) of an op on the rear bearing housing only the other day This goes way back further than I first thought - not only is the old original table in use but there's no DRO either. It was this op that lead me to fitting dead stops to the rotary table and some to the Y axis when I replaced the table. (Note the jury rigged dead stops on the R/T) Crumbs, now that is history! I also took a couple of pics again - as you can see this HSS tool is very close to it's 'sell by' date It does have a fair back rake on
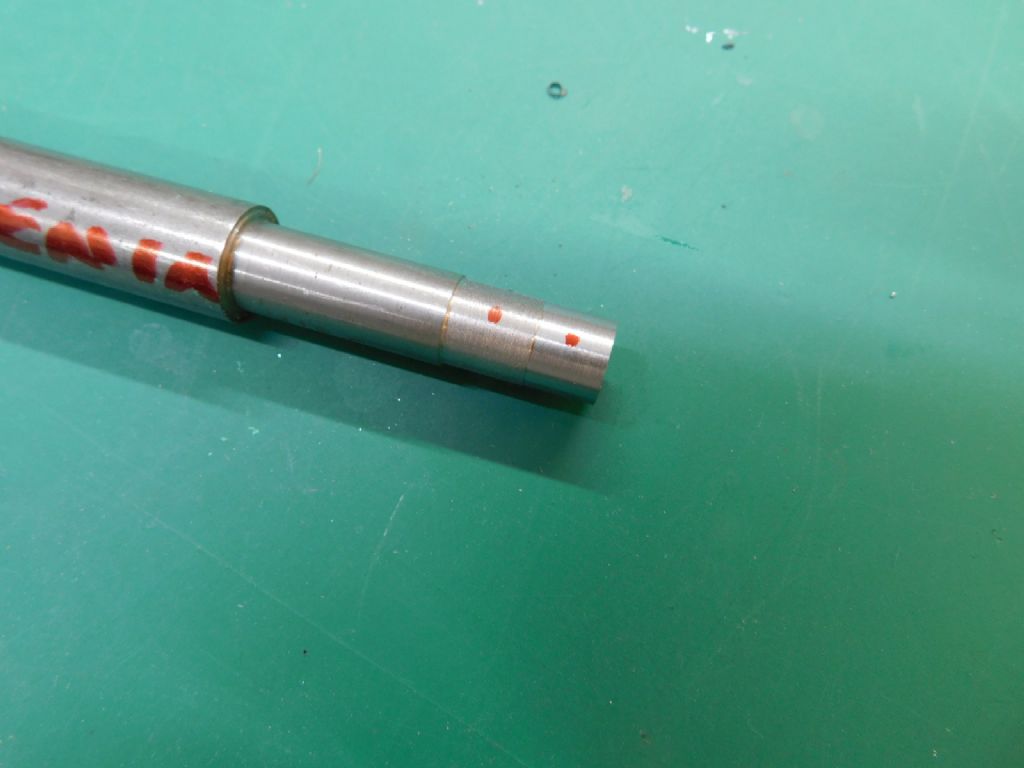
I literally just tweaked that small radius on the front corner on the bench grinder and cut this scrap piece of 1/2 dia En1a with no coolant at about 600 rpm The dots are the fresh turned areas the shiny part about a 1- 2 thou cut. As machined, no emery or wet or dry paper. Good luck with the shaft - R Edited By Ramon Wilson on 30/08/2022 22:48:30 |
| Thread: time to hang up my tools |
| 30/08/2022 22:17:16 |
I hope all goes well and it works out for you Geoff. Though I have no real health issues that affects me greatly I have decided to dispose of my workshop too in the near future, age and diminishing desire to machine metal the main reason. With you down in Hampshire and Brian in Yorkshire that hopefully leaves me some catchment area over here in East Anglia I wish you the very best for the future years Regards - Tug |
| Thread: Stuart Twin Victoria (Princess Royal) Mill Engine |
| 30/08/2022 16:06:51 |
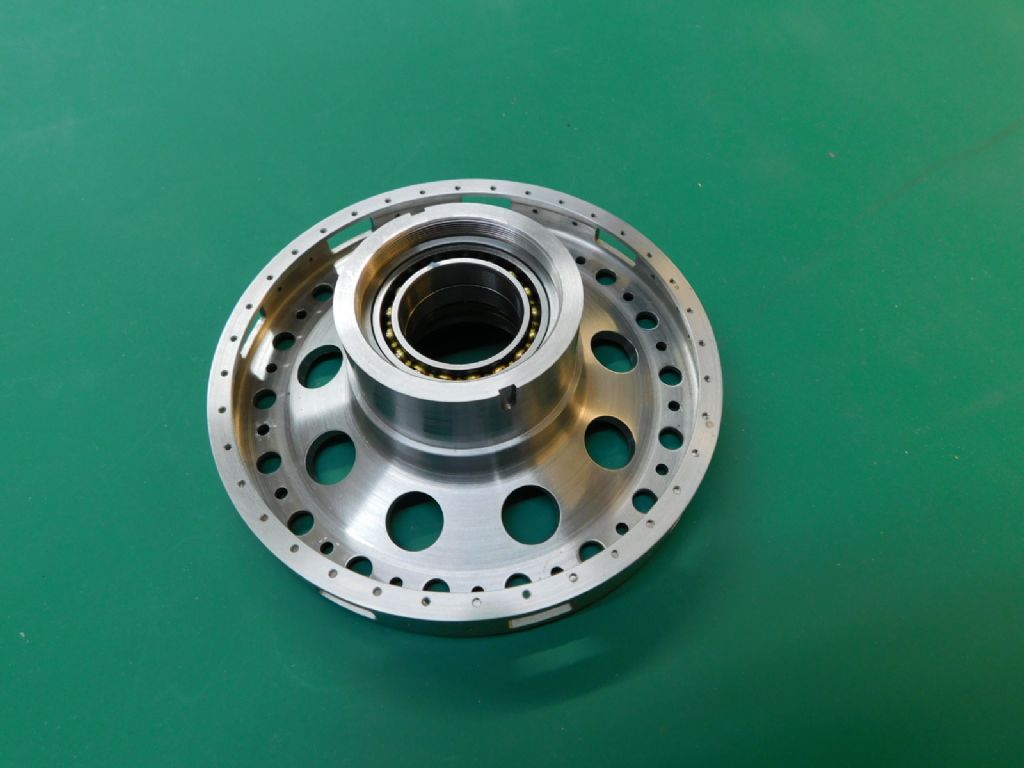
Looks like you are on the way in the right direction Doc. First off you have the perfect set up for determining the length of turned surfaces. Slip gauges are the perfect means for that - their non calibration is of no importance - what they are is far better than any other means as previously described. As your image shows is exactly how I would have suggested - just wasn't aware you had any slips to use. Personally speaking if you are going to size the holes by reaming through your flywheel, eccentrics and webs etc then it would be a good idea to make them first so you can fine turn/polish the relevant diameters to suit rather than the other way and getting the holes to suit the shaft. As said, I would do it all from the tailstock end turning the shaft as necessary. Rough the shaft out first to within .5mm on diameters and leaving .5mm or so to come off on the varying lengths. Then fine turn each section to close limits making a note of each setting on final cuts. I should have included brass - I think I did say so before that 'brass' is fine. Well lubricated En1a, in combination with cast iron or with any of the soft bronzes eg gunmetal, half hard brass, manganese bronze etc makes for a good if not ideal running surface situation. Incidentally, the pinkish coloured, drawn bronze should ideally be used with hardened surfaces as it can pick up and gall with soft steel. I don't have flood coolant but do use a brush to apply some if required, much less messy and perfectly adequate at the cutting levels done at home. If you have it of course by all means use it. I made one of those solenoid pumps that was advertised in ME years ago. I can't remember the last time that was turned on - the treacle tin and brush at hand at all times. The part, 'far from space age', was the front bearing and gear housing from the Bentley engine I was building. All of the steel case parts were made from En1a and turned using HSS. The nine cylinder heads were also En1a the machining of which using mainly home made cutters was described on here several years ago.
Here's the rear housing, all of it now residing in New Zealand I think I may have said on here before but when it comes to grinding lathe tools I have to be one of the laziest around. Only occasionally and really 'when needs must' do I rough out a new tool. Consequently the shapes of tooling are about as far removed from text book idealism as you could imagine. That said however they all work for the most part because the only area I pay attention to is that which actually does the cutting. I took a very old and well abused tool out today tweaked the end on the grinder and cut some En1a to a fine finish without any issues I did take pics but all were hopelessly blurred
Best - R
Edit - Personally I would keep the centre drill as is - that could be very useful in years to come. Just get a new 1/8 diameter one from Arc and save the long version for when a standard won't do - very useful when you need it Edited By Ramon Wilson on 30/08/2022 16:12:07 |
| 30/08/2022 12:55:45 |
Posted by JasonB on 30/08/2022 09:45:33:
Many a woodworker or blade smith will use a belt and they can get very obsessed with sharpness. The Sorby is quite a popular one though I just have a Clarke. Not quite in the same arena I would say Jason but as said each to his own. I certainly use the sander for chisels and the odd kitchen knife but wouldn't have given it a thought to use it for lathe tooling. That said and following your suggestion I have just tried to improve a tool using the belt sander. I used a tapered nose tool as suggested to Doc previously. Setting the table to an approximate angle it does work quite well I agree but, there is a distinct rounding of the cutting edge as the belt relaxes from the cutting pressure - small, minute even but definitely distinct. Not exactly convinced it's a viable method to recommend (certainly for me) at this stage but I haven't tried it out as yet - obviously the proof will be in the eating Edited By Ramon Wilson on 30/08/2022 12:56:37 |
| 30/08/2022 09:18:59 |
On a general basis I would say my belt sander, just ahead of the bandsaw are the most used tools in my workshop but I don't ever recall even thinking about using the belt sander on a cutting tool. Never saw it done at work and have never felt need to do it myself My small 5" Slibette bench grinder is perfect for finishing tools Maybe I'll give it a try though Each to his own eh
Edited By Ramon Wilson on 30/08/2022 09:20:24 |
| 30/08/2022 08:17:53 |
I didn't realise you were using a belt sander to finish your tool. That's not an ideal way to get a good cutting edge as the belt is soft and flexes in comparison to a grinding wheel. If you look at your image you can see that the faces aren't uniform as such - that front cutting edge is poor for instance. One thing you haven't mentioned is the off hand grinder you have and the wheel condition - trying to grind a decent tool edge on a very coarse wheel is not ideal for instance. Hopper, if Sparey says 30 degrees then so be it but the 15degrees already suggested will make a big difference too. As already said it is only the very tip of the tool that does the cutting - just the depth of cut in other words - so the tool's basic shape once ground only needs refining at the point plus a bit - that is the area where you need to pay attention to the shape Doc, not the whole tool. It's easy to become fixated on producing the ideal tool shapes and angles to the descriptions in books - certainly did myself when first starting out and that was fraught with difficulty not least as the grinder I had was a Black and Decked geared one - no real power and phenomenally noisy. I replaced it quickly with a small 5" diameter wheel one that though on the small size did me well for many years - grinding a tool from solid was a slow affair but it is still in my workshop and used to do the fine 'tweaking' after grinding the basic shape out on an 8" |
| 29/08/2022 22:43:57 |
Doc as I mentioned in my previous post En1a is a good steel combination in a running fit in bronze (or cast iron) It's much easier to machine than En3 or GCQ (General Cutting Quality) which is probably what you have and which will be difficult to machine to a good finish. If the tool is right it will give you an extremely fine finish straight off the tool with fine cuts and can be polished up with fine grit (240) emery or wet and dry paper. The tool you have ground is fundamentally a reasonable basic shape but it's the tip that does the work and that needs to be improved as I see it. The rake on the top is too obtuse for steel so increase that back towards you and back towards the tailstock - a good 10-15 degrees and the tip needs a nice radius - I do mine not by rotating the tool itself against the wheel but rather by dragging the tool at the right (as in more or less correct) front and side back off angles around the corner of the wheel allowing the radius to form by the corner of the wheel. If you are struggling to perceive this then I'll take some pics for you tomorrow.
Re material this was made from En1a and done entirely with hand ground tools - yes it's been emeried but as you have already found the finish has to be there if tool marks aren't to be evident. No form tools were used on this, the radius created by a series of flats and scraping the high points between them
Best - R |
| 29/08/2022 17:50:14 |
Just checked - the small Titex centre drill is marked 'Titex Plus K1111 0.5'
|
| 29/08/2022 17:16:15 |
Doc, things have moved on so much since I used carbide on a daily basis at work so I can't express an up to date opinion. I can say though that much heavy roughing was carried out using carbides but when a fine finish was called for to an accurate dimension HSS was always used. I know things have changed since the advent of 'CNC everything' but the old principles are just as viable today as they were then. My shaft for the Corliss shown previously was done using hand ground tools and likewise the marine engine double throw one. The quality of steel plays a part too but En1a freecutting is an ideal material for shafts running in bronze on which a mirror finish is possible from simply ground tools - worth persevering perhaps? The Titex centre drills I have are 3mm diameter with a .5mm tip - both broken regrettably but they are available. Best - R Edited By Ramon Wilson on 29/08/2022 17:17:16 |
| Thread: Telescopic Gauges - Technique? |
| 29/08/2022 17:04:47 |
Sorry for the omission SM. Shallow depth bores are difficult at best. When boring out the bearing housings on the IC engines that very situation arises Though I 'size' the hole with a accurately turned plug gauge I do use the tele-gauges to get me close. In this case I try to hold the gauge as carefully as possible across the diameter of the bore with it just loose then gently nip up. i.e. no rocking though centre. This can sometimes give a false reading due to potential movement, albeit very slight, on the tightening action but several readings will get you pretty close. I had a set of Moore and Wright gauges and later bought the double sided versions - Draper I think. They were as someone said a bit hit and miss and 'draggy' but an hour or so taking them apart and stoning all sliding surfaces transformed their use. I sold the M&W ones on.
Best - Tug |
| 29/08/2022 09:53:06 |
I do as others have said rocking the lightly nipped up gauge across the diameter once to set the guage. I always tighten it slightly before measuring. When measuring I support one end of the gauge on the micrometer anvil then rock the gauge slightly as the mic is closed to feel for contact as it passes over centre so to speak. Always repeat several times to get a mean but never rock across the bore and back to set it - just the once only Neil's tip of using a bearing is a good one - not heard that before - but a good way to establish to yourself you are getting the right kind of feel and measurement skills from an exact known source.
Tug |
| Thread: Stuart Twin Victoria (Princess Royal) Mill Engine |
| 29/08/2022 09:43:01 |
Hi Hopper, fine idea as shown for the purpose shown but a shaft with fixed crank webs on each end is a slightly different matter don't you think It's not essential to leave them in - though many full size engines have them left in some don't. My thought is basic, once you machine them off - IF - you need to put it between centres again it's a bit late in the day to say 'I wished I hadn't done that. - money and choice again. Doc, the Titex centre drill I was thinking of was about 3mm dia or less with a very tiny point, probably less than a mm, single ended about 20mm long. I've looked but can't find it so far - personally don't think its worth it just use the smallest standard size with just enough depth to support the shaft if needed.
|
| 28/08/2022 23:21:07 |
What is the outer diameter of that Doc? The smallest standard centre drill is usually 1/8th diameter (I'm not certain if they are available in metric sizes but would have thought so - perhaps Jason knows) There are smaller versions available - single ended though and quite tiny in fact but are expensive for what they are and easily damaged. The brand was 'Titex' if I recall correctly. Regards - R |
Want the latest issue of Model Engineer or Model Engineers' Workshop? Use our magazine locator links to find your nearest stockist!
Sign up to our newsletter and get a free digital issue.
You can unsubscribe at anytime. View our privacy policy at www.mortons.co.uk/privacy
- *Oct 2023: FORUM MIGRATION TIMELINE*
05/10/2023 07:57:11 - Making ER11 collet chuck
05/10/2023 07:56:24 - What did you do today? 2023
05/10/2023 07:25:01 - Orrery
05/10/2023 06:00:41 - Wera hand-tools
05/10/2023 05:47:07 - New member
05/10/2023 04:40:11 - Problems with external pot on at1 vfd
05/10/2023 00:06:32 - Drain plug
04/10/2023 23:36:17 - digi phase converter for 10 machines.....
04/10/2023 23:13:48 - Winter Storage Of Locomotives
04/10/2023 21:02:11 - More Latest Posts...
- View All Topics
- Reeves** - Rebuilt Royal Scot by Martin Evans
by John Broughton
£300.00 - BRITANNIA 5" GAUGE James Perrier
by Jon Seabright 1
£2,500.00 - Drill Grinder - for restoration
by Nigel Graham 2
£0.00 - WARCO WM18 MILLING MACHINE
by Alex Chudley
£1,200.00 - MYFORD SUPER 7 LATHE
by Alex Chudley
£2,000.00 - More "For Sale" Ads...
- D1-3 backplate
by Michael Horley
Price Not Specified - fixed steady for a Colchester bantam mark1 800
by George Jervis
Price Not Specified - lbsc pansy
by JACK SIDEBOTHAM
Price Not Specified - Pratt Burnerd multifit chuck key.
by Tim Riome
Price Not Specified - BANDSAW BLADE WELDER
by HUGH
Price Not Specified - More "Wanted" Ads...
Do you want to contact the Model Engineer and Model Engineers' Workshop team?
You can contact us by phone, mail or email about the magazines including becoming a contributor, submitting reader's letters or making queries about articles. You can also get in touch about this website, advertising or other general issues.
Click THIS LINK for full contact details.
For subscription issues please see THIS LINK.
Model Engineer Magazine
- Percival Marshall
- M.E. History
- LittleLEC
- M.E. Clock
ME Workshop
- An Adcock
- & Shipley
- Horizontal
- Mill
Subscribe Now
- Great savings
- Delivered to your door
Pre-order your copy!
- Delivered to your doorstep!
- Free UK delivery!


 Register
 Log-in


