Member postings for Gordon B
Here is a list of all the postings Gordon B has made in our forums. Click on a thread name to jump to the thread.
| Thread: Sieg SX2.7L tramming advice? |
| 20/05/2023 11:24:45 |
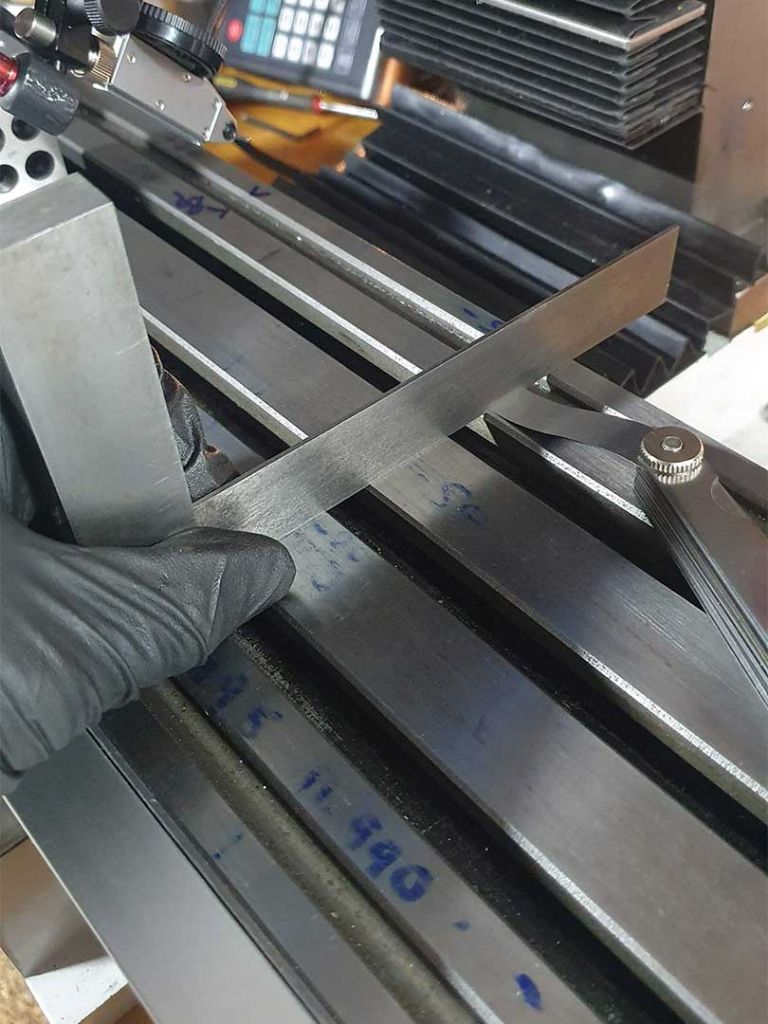
Think I've worked out what was "tricking me"; when checking the tramming side-to-side I had a 123 block on one of the table's rails (between tee slots). However, when checking the front-to-back tramming a 123 spans the rails across the tee slots. That wouldn't be a problem... if it weren't for the fact the table isn't actually flat. I realised the blocks could tip slightly (messing up any readings I was taking) so checked the table, and I can fit a 0.038mm shim under a straight edge near the rear of the table. Not great. In an attempt to work around it, I bolted another 123 across the table (for consistency) and measured a 123 block sitting on top. I've ended up with 5 thou (0.127mm) of shims on the right side of column; which pleasing was pretty much exactly what I'd calculated should work based on the initial measurements. I needed a tiny bit of shimming at the front, but I don't currently have anything thinner than 1 thou, so I've compromised slightly with a single 1 thou (0.025mm) shim at the front left, and not put anything on the right front as it upsets things. Checking against a 123 block it looks as though the column tilts to the right by 0.014mm for 100mm of vertical travel, and leans backwards by 0.011mm over 100mm. That doesn't feel too bad. Sweeping a DTI over the table surface (a sweep diameter of around 130mm) shows the head tilts to the right by about 0.01mm (reading at 3 o'clock position of 0, and -0.01mm at 9 o'clock). That's so close to the measured column tilt that I'm going to assume it means the head is aligned with the column, and it's down to the column tilt. The 6 o'clock reading at the front of the table is -0.02mm; which would be consistent with a bit of backwards lean in the column. Unsurprisingly the 12 o'clock reading is way off at -0.07mm, but based on the shim test showing that part of the table is about 0.04mm low it maybe means the column and head are now pretty well trammed. At least... I think. I may be fooling myself. Not really sure what to do about the table though. Short of having the table ground (or attempting scraping it); neither of which kit or skill I posses. The vise I have will be bolted down using the tee slot nearer the front of the table, so maybe it won't affect things. |
| 19/05/2023 21:24:32 |
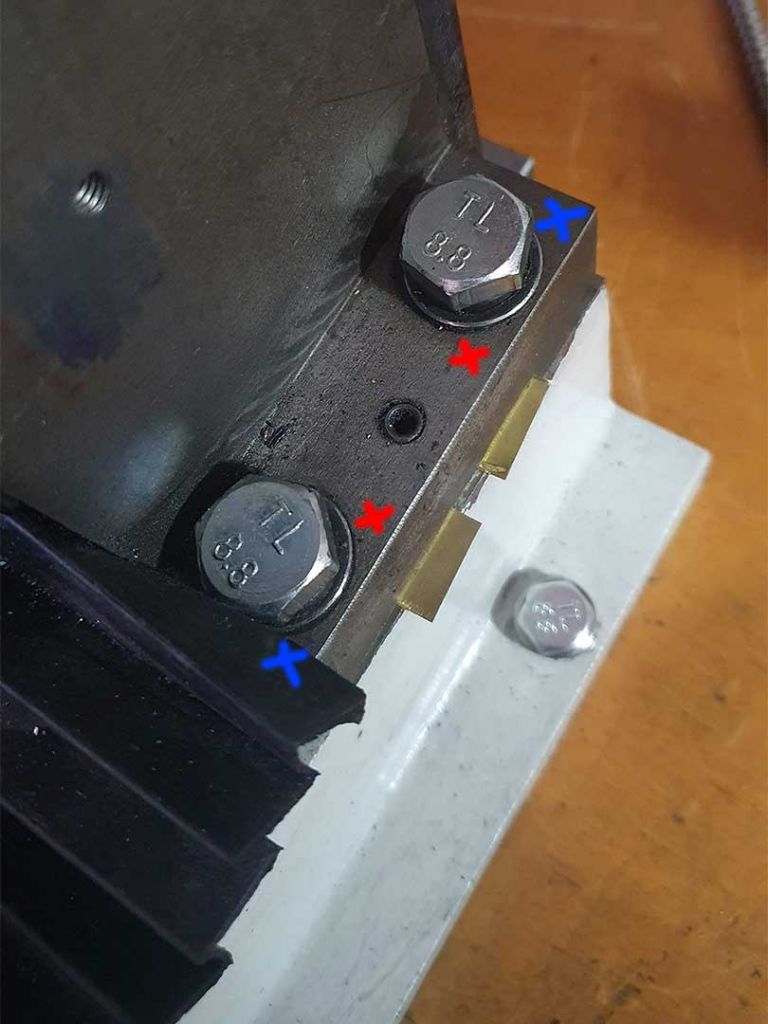
Mixed results with shims this evening. I suspect the machining of the top of the mill's base and the bottom of the column are maybe not that great, as small movements of the position of shims has an effect on the tramming. With a couple of shims on the right side of the column I got the left/right tramming (as far as I can work out) pretty much perfect; I get about 0.02mm of movement on a DTI over 70mm of column travel (DTI on 123 block), but that error is consistent and opposite when I rotate the DTI and 123 block 180 degrees. In other orientations I get slightly different errors, but again consistent and opposite. I assume therefore that the column is vertical and I'm measuring the "out of squareness" of the 123 block. Nod on the column has proved more tricky, with results changing quite a bit due to the placement of shims. I'm wondering if it might ultimately be better to drill and tap some holes in the base of the column to fit grub screws and use them instead of shims. I could fit 2 grub screws on each side, in the area of the red X marks. There's probably not quite enough space to put them in the locations shown by the blue X marks. Obviously the area of a grub screw is much smaller than a shim, but they would then be applying force at consistent locations. Is this a good idea, or should I just keep persevering with the shims? |
| 16/05/2023 21:28:42 |
Many thanks both. I've dug out some brass shim stock (assuming that will be OK), and will try to attack the mill with a torque wrench in the next few days. I spent a bit of time adjusting the wedged gibs and got the X and Y axes to a good point (just a little drag, but still moving smoothly). I also managed to get the Z axis gib wedge sufficiently tight, but only by removing the bottom gib screw. Removing the wedge I see it's 180mm long (the same height as the head); so there's not a lot of adjustment with the gib screws fitted. Interestingly I see Arc's spare part (https://www.arceurotrade.co.uk/Catalogue/Machine-Spares/SX27-Mill-Spares-All/SX27-Mill-Spares/SX271-68-Z-Axis-Gib) is 240mm long; so that does reinforce Jason's earlier comment about them needing to be trimmed down to fit. Looks as though the one I have needs about 10mm taken off the bottom and I think it'll snug up with both gib screws fitted. |
| 16/05/2023 15:56:29 |
Maybe partly answering my own question; from a bit of searching it seems that the technique is to tighten all four bolts holding the column (perhaps using a torque wrench for repeatability) take measurements, loosen the bolts to insert shims, tighten it back down again and repeat until happy/bored/insanity sets in. I've also seen suggestions of drilling and tapping holes next to the bolt holes (for grub screws) and using grub screws for adjustment instead of shims. Sounds like an interesting idea but then I guess you don't have as much surface contact between the column foot and the mill base. |
| 16/05/2023 14:49:18 |
Lots on recently so I've only just got back to looking at the mill. Following Martin's advice, I put a 123 block on the table and ran an indicator down the side by lowering and raising the whole head on the column (i.e. not extending the spindle). After running the indicator with block to the right of the spindle, I rotated the spindle 180 degrees, and also rotated the block around so that I was running on exactly the same surface (but with the block obviously now to the left of the spindle). I got a pretty repeatable 0.1mm change over 100mm of vertical movement; where the dial indicator is moving to the left as the head drops - I take that to mean the column is tilted slightly to the right (clockwise if looking from the front of the mill). Trying to improve it by changing the torque on the bolts holding the column to the mill base seems to be a bit hit and miss (either no change or too much change). If anyone has advice for doing this on the SX2.7 I'd be grateful. |
| 02/05/2023 09:20:45 |
Posted by old mart on 30/04/2023 21:26:49:
You should set the gibs so that the movement is slightly restricted but not tight throughout the full travel. The blocks can be checked against each other sitting on the mill bed, if they are not square you will see a gap when they are one way round. Keep bringing them together and with a decent steel rule or straight edge you can also check the lengths, by using a torch looking for any light showing. I bought a pair of 246 blocks which caused problems until I chanced to see a gap at the top when the bottoms were sitting together on the surface plate. They were reground for free, but now they are square, but slightly different sizes. As they improved for free, I did not say anything and knowing them now I can compensate. Gibs; yes, that's what I would have thought would happen (I've not had a machine with tapered gibs before). However, even if I remove the bottom gib screw and wind the top screw way down (I assume massively overtightening the gib) the column still moves with no noticeable extra drag. Seems a bit odd. I'll check the 123 blocks for squareness when I next get into the garage. |
| 30/04/2023 21:06:59 |
Posted by JasonB on 30/04/2023 06:53:51:
Yes the bellows to plate will need it's two small screws undoing so it can be slid down the column to access the bottom gib adjuster. Got it - thanks. Fiddly to get to. It's slightly disconcerting that if I remove that bottom screw and then wind the top screw in (so it pushes the wedge gib a long way down) I can still raise and lower the column. I would have expected that at some point it would have locked the column movement? I've put it back together, albeit with the wedge gib a little lower than it was before. I'm still seeing around 0.08mm deviation with 100mm vertical column travel though. Tomorrow I'll try Martin Connelly's advice of running a DTI against a vertical surface; though I don't know that my 123 blocks are particularly square. I spent a bit more time today sweeping a DTI over the table and gently tightening and loosening the 4 column head bolts. Mostly I just ended up chasing my tail, and ended up with worse results than what I had yesterday
|
| 29/04/2023 22:06:48 |
Definitely was a big fly cutting diameter; around 130mm total. I was going to say that I couldn't see a second gib screw, but checking the manual the parts diagram indicates there is one present - but I think it's hidden under a plate on the bottom of the head, so I'll take a look tomorrow. You're right about locking an axis having an effect; I swept a DTI around the table with and without the vertical axis locked, and it measurably causes the head to twist slightly. However, just moderately locking the axis results in a pretty good reading; around 0.01mm over 130mm across the length of the table, and 0.006mm across the width. I'll take that. I tried to check the spindle for squareness but I'm not sure that my cheap 123 blocks are that square. Regardless, the worst I saw was under 0.03mm of deviation over the 70mm spindle stroke. Again if I read the inspection report correctly that's within the claimed tolerance so I can't complain. |
| 29/04/2023 15:38:16 |
Jason - I think tightening the gib has helped. I removed the gib screw for the vertical axis and confirmed that the head does make contact with the gib wedge. I then tightened it until I can just feel a little drag when raising and lowering the head on the column. With a DTI mounted on the table and a rod in the spindle I raised and lowered the head again. Rotating the spindle 180 degrees and repeating measurement was pretty consistent; so I assume the rod is straight. That gave me a reading of just under 0.08mm over 100mm of column travel. My earlier measurement of 0.1mm over 43mm would equate to 0.23mm over 100mm; so it's certainly improved. If I read the inspection record for the mill correctly, it claims 0.10mm over 100mm; so I'm within the claimed spec. Whether that's "good enough" for a home mill I've no idea. Putting the DTI on the spindle then sweeping it around the table indicates the front to back height discrepancy is under 0.01mm over a sweep diameter of 130mm. Given that the inspection record claims 0.03mm over 100mm I can't complain. From that same test I appear to now have about 0.03mm discrepancy (over the same 130mm diameter) from the left to the right. Again that's within the claimed spec (0.03mm over 100mm), but I might risk torqueing the column bolts to see if I can reduce it a bit, then I'll check the spindle squareness. Overall though, I guess that's starting to look acceptable for a budget home mill. I don't really know what is "good" for this class of machine. Is there a general rule of thumb for how well trammed a machine needs to be to achieve a good fly cut finish (for a certain diameter of fly cutter sweep)? |
| 28/04/2023 21:32:09 |
Good point - I haven't checked if that gib needs snugging up. I'll look at it in the morning; many thanks. That rod isn't actually running particularly true, but it was clearer for the photos. I ended up taking measurements on the rod for the tool that holds the two clocks; which is much closer to true. I did also repeat the measurements after rotating the spindle by 180 degrees; which I assume would have reversed the error if it were actually down to the rod being bent? |
| 28/04/2023 19:31:40 |
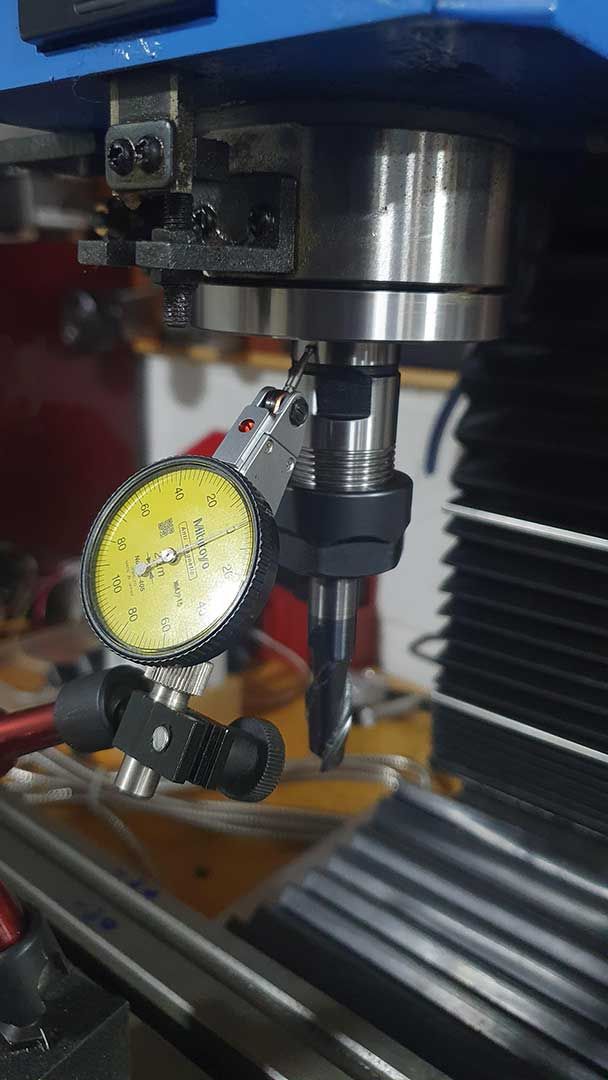
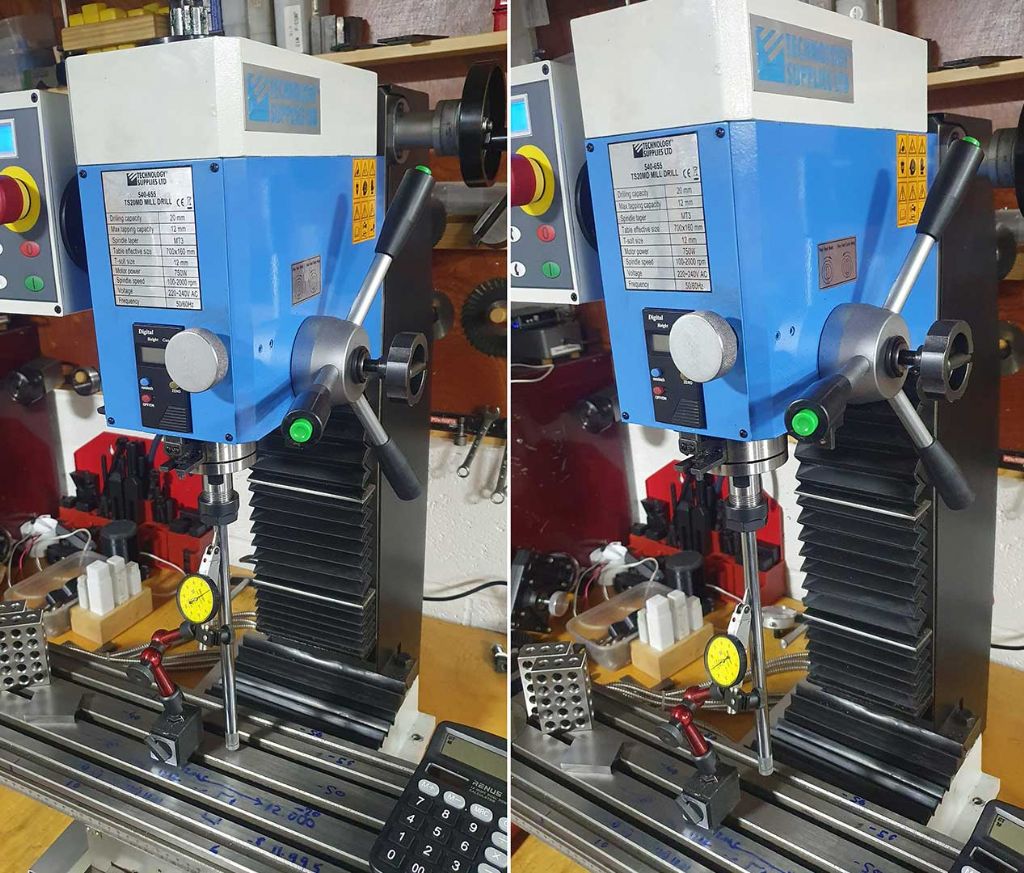
I've recently acquired a Sieg SX2.7L clone, which I believe was built in 2019. The first job I ended up needing it for was fly cutting, with a large diameter (approx 13cm / 5" I first checked the spindle runout with a DTI touching an MT3 ER collet mounted in the spindle (see image below). This showed 0.004mm of runout, so I'm assuming this is not of concern.
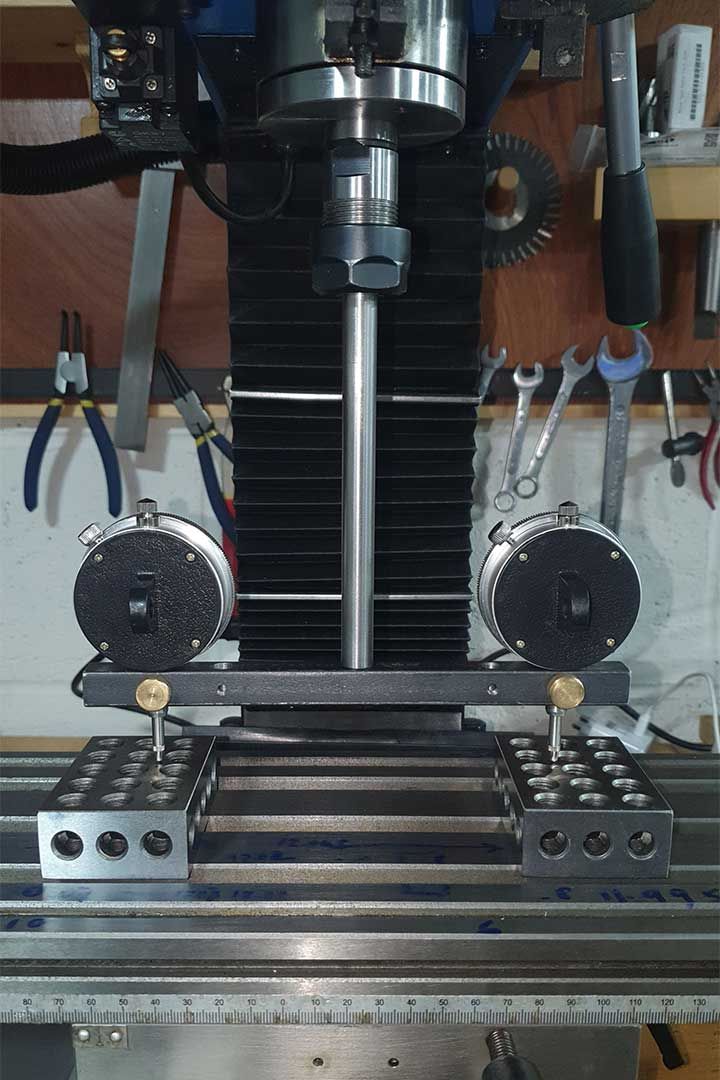
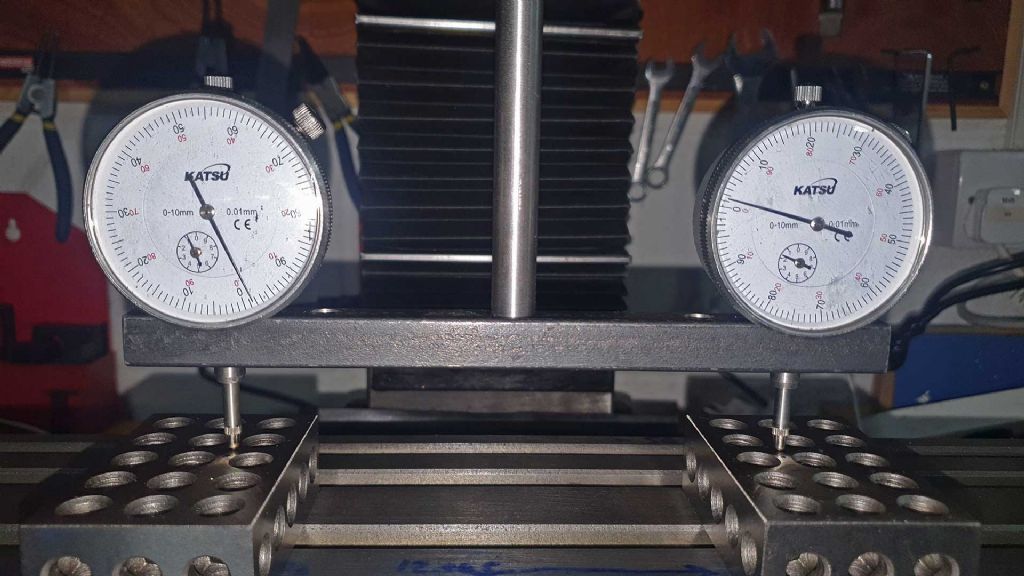
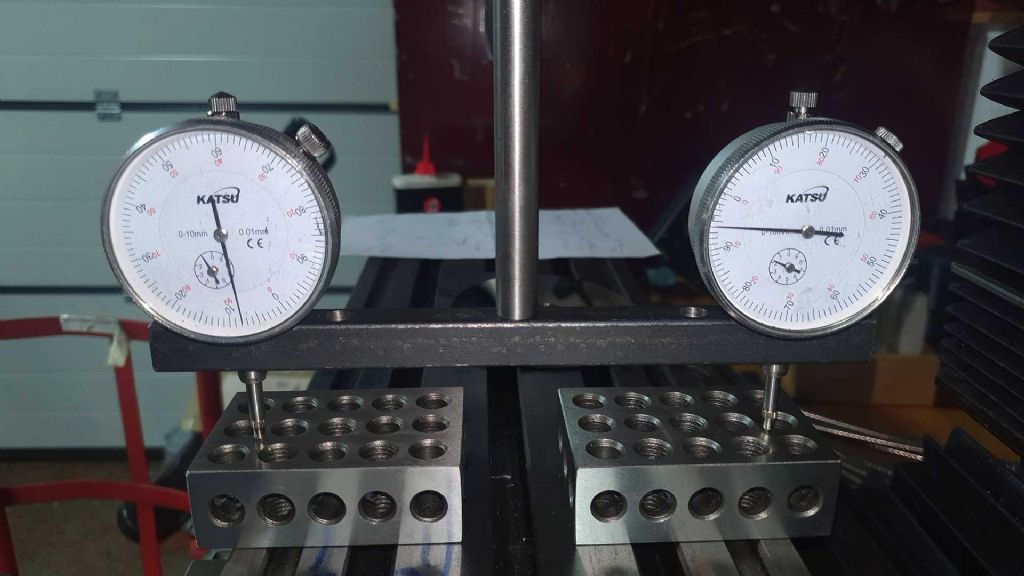
Next I clocked the spindle across the length of table. Two indicators approx 150mm (6"
Turning the spindle 180 degrees shows around 0.015mm of deviation. As the left side of the table is low, right side high; I assume this means the column is tilted slightly to the right.
I then took the same measurement across the width of table. That appears to show that the front of the table is high and the rear is low (by approx 0.06mm to 0.08mm). I assume this means the column is also tilted forward.
However, I next swept a rod in the spindle along a DTI by raising the mill head up the column. As the head rose, the DTI reading dropped (rod moving away from the DTI) by 0.1mm over a distance of about 43mm of vertical travel.
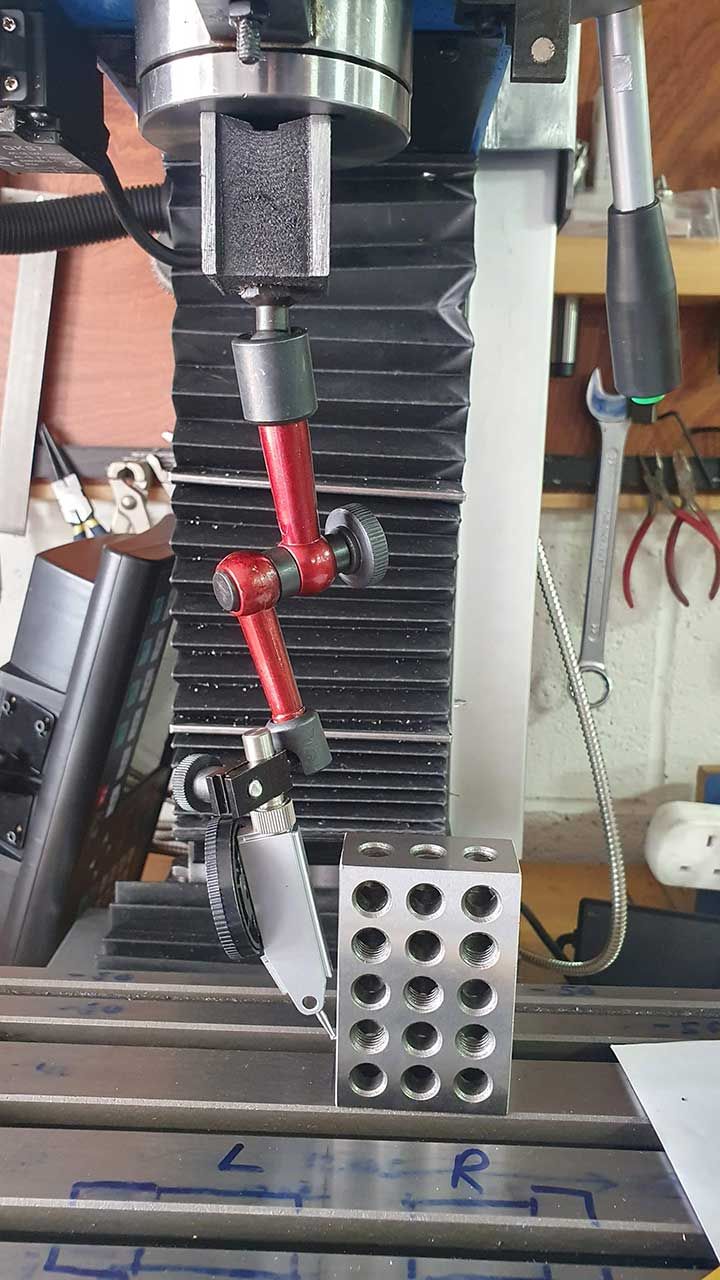
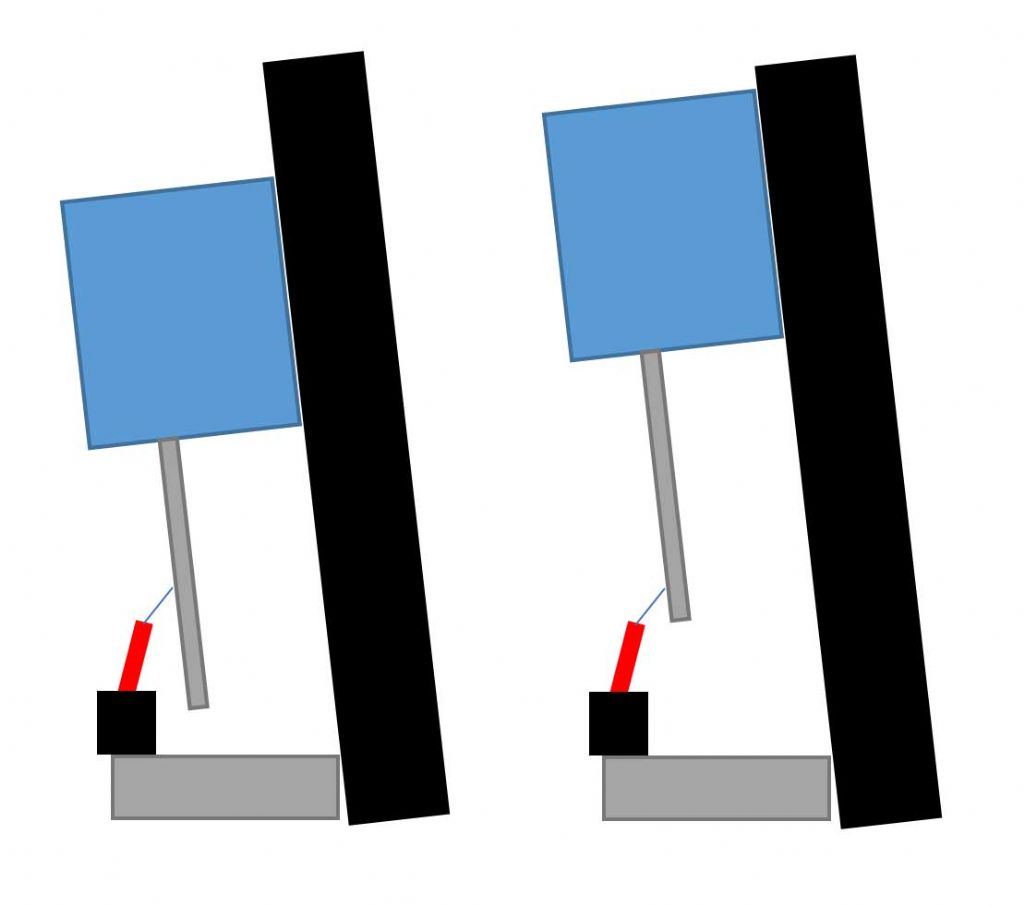
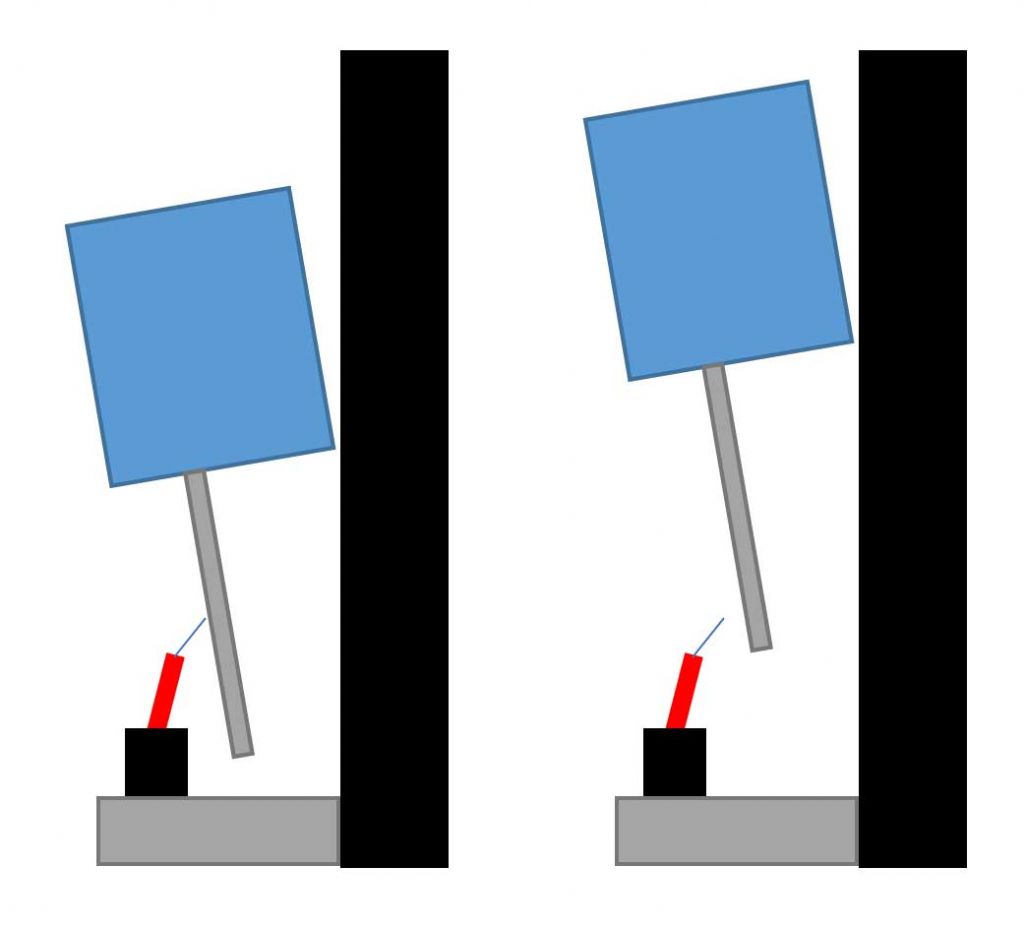
If I understand correctly, if just the column were out of square this reading would not change (see below for a very out of square column, with the head moving up, but the rod-to-DTI distance remaining constant). However, it would change if the head were nodded forward on the column; e.g. for a very out of square head, with the rod-to-DTI distance increasing as the head moves up the column. I repeated this test with the DTI to the side of the rod, and it showed essentially no change when the head was raised up the column; so I assume this means the head is not tilted left/right, and the 0.015mm deviation across the length of the table must be down to the column alignment. Assuming I'm taking the above measurements correctly (do tell me if I'm not), it looks as though the main/first issue is the nod on the head. How do I (can I?) correct the head nod on this machine? BTW for all tests so far the spindle has been fully raised; I'll check it once the head/column looks OK. |
Want the latest issue of Model Engineer or Model Engineers' Workshop? Use our magazine locator links to find your nearest stockist!
Sign up to our newsletter and get a free digital issue.
You can unsubscribe at anytime. View our privacy policy at www.mortons.co.uk/privacy
- *Oct 2023: FORUM MIGRATION TIMELINE*
05/10/2023 07:57:11 - Making ER11 collet chuck
05/10/2023 07:56:24 - What did you do today? 2023
05/10/2023 07:25:01 - Orrery
05/10/2023 06:00:41 - Wera hand-tools
05/10/2023 05:47:07 - New member
05/10/2023 04:40:11 - Problems with external pot on at1 vfd
05/10/2023 00:06:32 - Drain plug
04/10/2023 23:36:17 - digi phase converter for 10 machines.....
04/10/2023 23:13:48 - Winter Storage Of Locomotives
04/10/2023 21:02:11 - More Latest Posts...
- View All Topics
- Reeves** - Rebuilt Royal Scot by Martin Evans
by John Broughton
£300.00 - BRITANNIA 5" GAUGE James Perrier
by Jon Seabright 1
£2,500.00 - Drill Grinder - for restoration
by Nigel Graham 2
£0.00 - WARCO WM18 MILLING MACHINE
by Alex Chudley
£1,200.00 - MYFORD SUPER 7 LATHE
by Alex Chudley
£2,000.00 - More "For Sale" Ads...
- D1-3 backplate
by Michael Horley
Price Not Specified - fixed steady for a Colchester bantam mark1 800
by George Jervis
Price Not Specified - lbsc pansy
by JACK SIDEBOTHAM
Price Not Specified - Pratt Burnerd multifit chuck key.
by Tim Riome
Price Not Specified - BANDSAW BLADE WELDER
by HUGH
Price Not Specified - More "Wanted" Ads...
Do you want to contact the Model Engineer and Model Engineers' Workshop team?
You can contact us by phone, mail or email about the magazines including becoming a contributor, submitting reader's letters or making queries about articles. You can also get in touch about this website, advertising or other general issues.
Click THIS LINK for full contact details.
For subscription issues please see THIS LINK.
Model Engineer Magazine
- Percival Marshall
- M.E. History
- LittleLEC
- M.E. Clock
ME Workshop
- An Adcock
- & Shipley
- Horizontal
- Mill
Subscribe Now
- Great savings
- Delivered to your door
Pre-order your copy!
- Delivered to your doorstep!
- Free UK delivery!
 . I noticed that the cutter was taking more material on the trailing edge; which I understand would indicate the machine is slightly out of tram.


 Register
 Log-in


