Member postings for Jon Halland
Here is a list of all the postings Jon Halland has made in our forums. Click on a thread name to jump to the thread.
| Thread: Meddings Dril Tru - What to do? |
| 08/08/2023 09:46:37 |
Thanks Robin, thats great info. |
| Thread: How to test a Myford ML7 spindle? |
| 20/10/2022 13:53:30 |
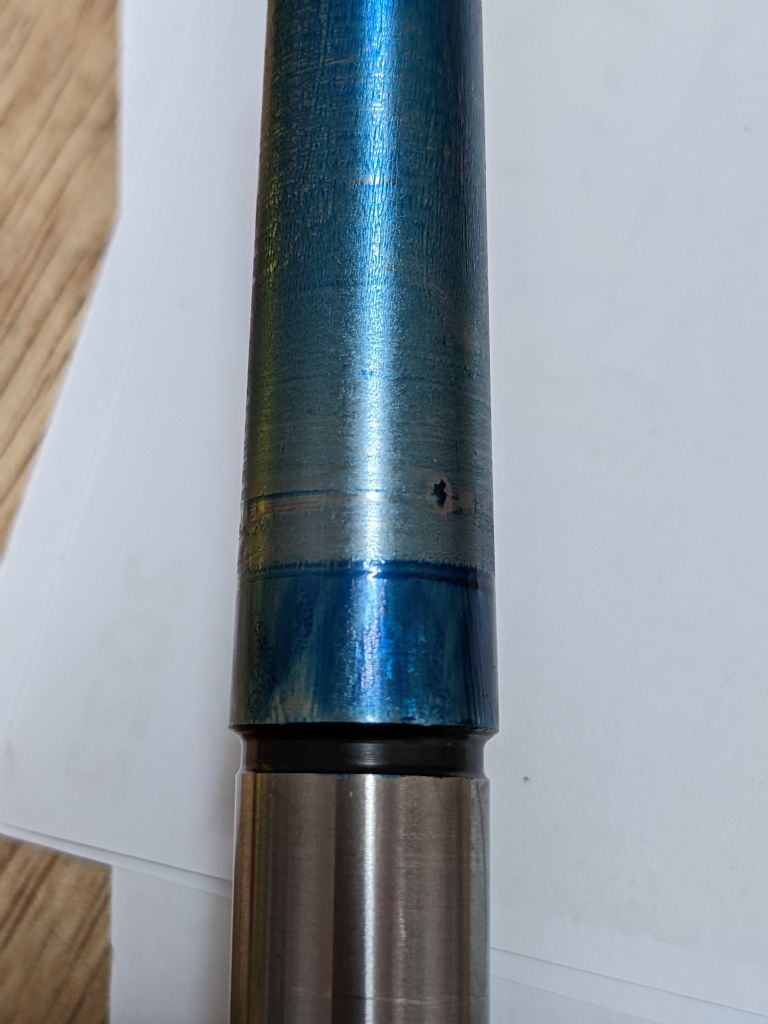
Sorry for the late reply... the spell of decent weather prompted a garden and shed clean up, but today is proper miserable, so I'm doing a bit in the workshop. I made a blue test on the spindle taper using the test bar, see pic. The big blob is a very accurate impression of the dent in the spindle taper and also show that there is still some high rim to be polished out. I will post another pic when I get it sorted. Dave: thanks for your reply, knuckle union gave a lot of references to some trash metal band and implements to connect to someone's ribs. Knuckle Clamp is a more peace full term. I have a DI and a DTI and 2 old Eclipse magnetic stands the one is 1/2'' to 1/4'' and the other 12mm to 10mm (but with a 9.5mm bar, so not a great fit that twists a bit when tightened). The DTI has it's own knuckle clamp 11/32'' to 1/4''. It would be nice to have just one setup with interchange ability - future project! peak4: great thread, thanks for bringing it to my attention. |
| 13/10/2022 20:18:06 |
I did a gentle clean of the spindle taper with fine emery cloth and a straight round plastic pencil to hold it down. I slowly turned the spindle 5-6 revs and lightly moving the pencil back and forward on the taper. After two treatments the runout was down to just under 2 thou at 6''. A third go did not improve the result. I will test with micrometer blue when I have found some pictures online as a reference of poor/good fit. Measurements of runout at 0-8'' in 1'' step were: 0.5 / 0.6 / 0.9 / 1.2 /1.5 / 1.6 / 1.8 / 2 / 2.2 thou, readings on a 0.0005'' resolution DTI. The taper could probably do with a reamer clean up. Howard, thanks for the good points to be aware of. The gib screw are set fairly tightly for these tests, when I use two hands and try to twist the saddle in the horizontal plane I get just under 0.5 thou movement. To test if the test bar is bent I have run the DTI along it mounted in the spindle MT2 and the 4 jaw chuck. I have not seen increase/decrease/increase pattern on the dial, only a steady increase, so along with the consistent increasing runout measurements, my take is that the bar is fairly straight. David, thanks for your reply, I'm still playing around with the 4 jaw chuck. I will get back when I'm happy with my measurements. Great pics, thanks. Do you know if the swivel clamp that connects the 2 rods on the last pic of the DTI has a specific name? Jon |
| 06/10/2022 21:37:48 |
Duncan: I do have a set of collets and a milling slide with a T slot plate, so just need some end flute cutting bits...... Hopper: just read some of your older posts on cleaning up tapers - thank you for your many knowable replies.
|
| 06/10/2022 13:21:41 |
Thanks for your great replies, specially to Hopper for the very thorough reply and manual pics. I was in the workshop this morning and can confirm your suspicion that the MT2 fit is the first to work on. When looking closer at female MT2 on the spindle I can see lots of wear marks and with a nail feel nicks on the edge. So I took a fine emery cloth and just cleaned up the edge a bit and repeated the runout test at 6'' with the test bar at 0, 90, 180, 270 deg. The runout was reduced to 4 thou and always with the spindle in the same position, so there is a high spot to be removed. I can also see very fine scratches on the polished male taper on the test bar on the last 10mm (fat end) that connects the to the spindle. The spindle taper could do with a clean up, its an old non hardend type. I have fine emery cloth, 1200 and 2000 vet and dry paper and Autosol, is this OK to try with or a no-go? Or is it possible to get a male MT2 shaped polishing thing to use by hand? I do not have a MT2 reamer and would not be confident to use one on the spindle until after the lathe is proper setup and tailstock aligned.
|
| 05/10/2022 23:19:30 |
I have now finished cleaning up the ML7 and starting to put it back together. Currently its final placement is not decided, so this is just standing on the workbench. This is my first lathe and I'm trying to learn how to test and set this oldie up. Testing the bed: I've measured the width of the front bed that the carriage align to. Left from 0'' to 12'' in 1'' steps, all measurements using a 2'' micrometer are in the range 1.748''-1.749''. So max 0.001'' difference/wear, I guess that is fine? Headstock Alignment: I got a new MT2 test bar (spec 0.001'' ) to do headstock alignment, mounted the carriage/apron tightly but still movable, using a dial indicator (0.0005'' resolution) I adjusted the headstock and tightened it down. With 0 and the start of the test bar I got 0.0015'' at 6''. But when turning the spindle I got 0.007'' run out - not good! Test bar test: I marked the spindle and test bar and noted the spindle position, then moved the carriage with the dial indicator so I could turn the test bar 180 deg and repeat the test. Result 0.0075'' run out with the spindle in the same position. So the test bar is straight and within spec, which indicate the headstock spindle/bearings has 0.007'' run out. I've shimmed and tightened the bearings to snug but turnable by hand. How do I progress and test the spindle and bearings?
Edited By Jon Halland on 05/10/2022 23:20:23 |
| Thread: Myford ML7 motor and switch rewiring |
| 05/10/2022 20:04:38 |
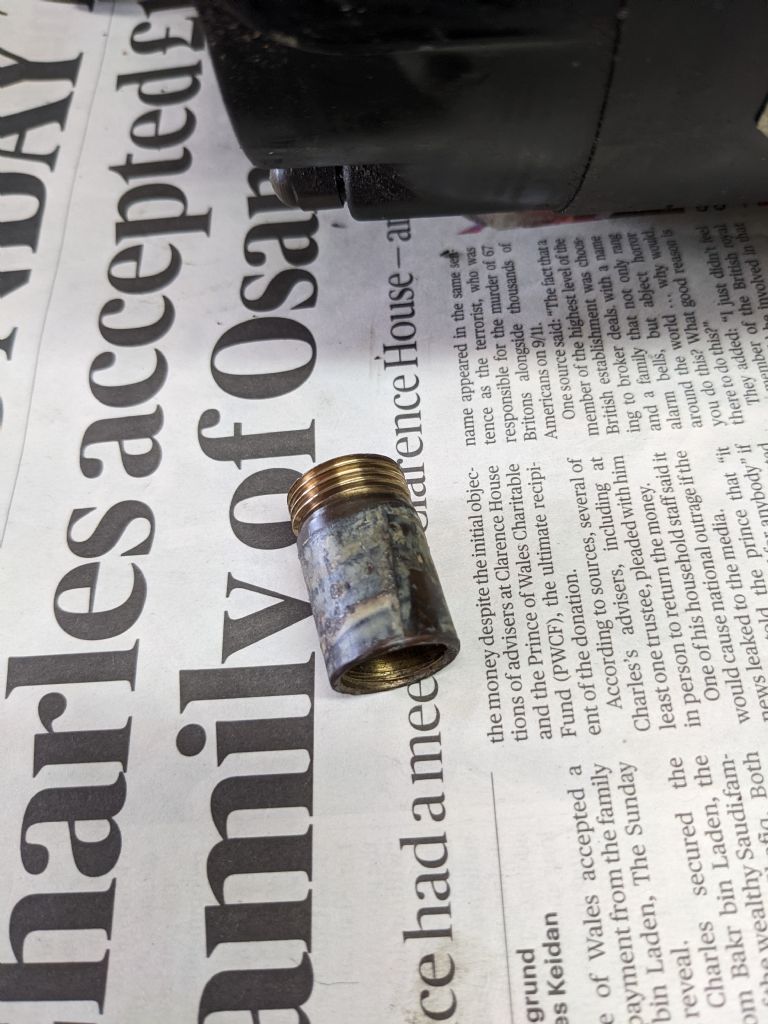
I ended up using the original now very shiny brass glands with some 16mm pvc coated flexible conduit. New 5-core cable on the switch/engine, so switch and motor casing now has earth connection. Power plug/switch with a PG11 (easy fit for the hole in switch casing and the cable).
|
| 22/08/2022 16:41:10 |
Thannks for your suggestions. I did not manage to get further with this during the weekend. Another option could be to file the female thread in the motor housing down and use a PG11 gland with a nut on the inside. I just got some, one to be used on the switch power lead. |
| 18/08/2022 20:29:55 |
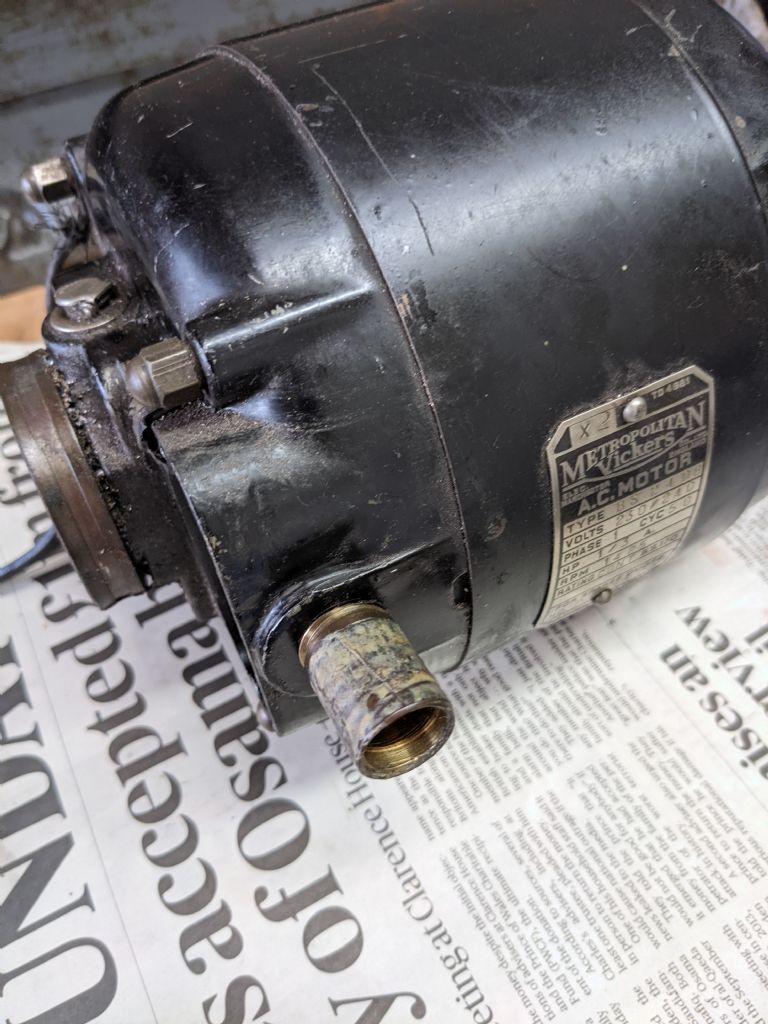
I'm going to rewire the Myford ML7 motor and Fwd/Rev switch. The motor is a Metropolitan Vickers with a 3/4'' BS Conduit gland (16 TPI thread that screw into the casing) and a flexible metal conduit is screwed into the gland. The conduit (16mm outer diameter) is knackered and too short, so either needs to be replaced or substituted with something else. My preferred solution would be to replace the 4 single wires that currently go to the engine in the flexible metal conduit with a 4+ground cable, so I can ground the switch and motor casing. This would also be able to bend more sharply as the cable come straight out the back. Is it possible to get a cable gland that tighten onto the cable instead of the flexible conduit screw in and has a 3/4'' BS Conduit thread? Alternatively is it be possible to get a sharp bend that has 3/4'' BS Conduit and use flexible metal conduit? Thanks.
|
| Thread: Myford ML7 cross slide screw repair |
| 04/08/2022 11:59:03 |
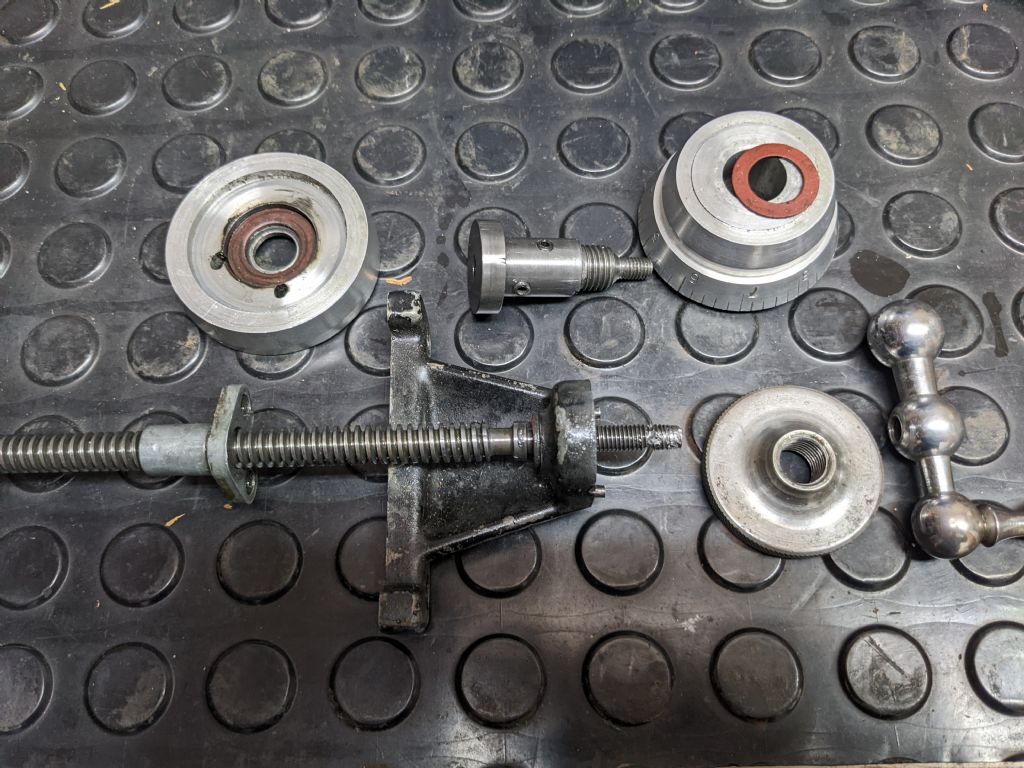
Thanks for the all replies. My primary concern is to get the lathe cleaned up and back running, think exploded view - just a lot less organized. Hence back to original dial fitting which is simple, in it's time very cost effective and not bad design engineering imo. It solves: Adding a dial and fixing it. Adding a handle and fixing it. Locking the cross feed screw in place and setting its tightness using the dial and locking it all with the handle. All this for just 3 components (washer, dial, handle). The drawbacks in this solution are: a handle on a thread (can unscrew) that relies on the soft metal of the dial to 'bite' and fix the whole thing, so limited lifespan. I would like to have an adjustable dial working but the current version is not my kind of engineering: The back plate with the marker is loose and the small holes to hold it are elongated so it can move about a mark. This is part due to poor drilling and it being part of the tightening of the whole screw/dial/handle system. The stud with the 2 set screws is threaded and the set screws forced into the cross feed screw, so to screw the handle on as the last bit the feed screw has to be grabbed with a pair of plies on the other side of the bracket and tightened a lot, not to unscrew in use - all force through the set screws. This is probably what caused most of the damage to the thread. A future project could be to use the marker and dial plates and make a better solution.
|
| 04/08/2022 08:01:52 |
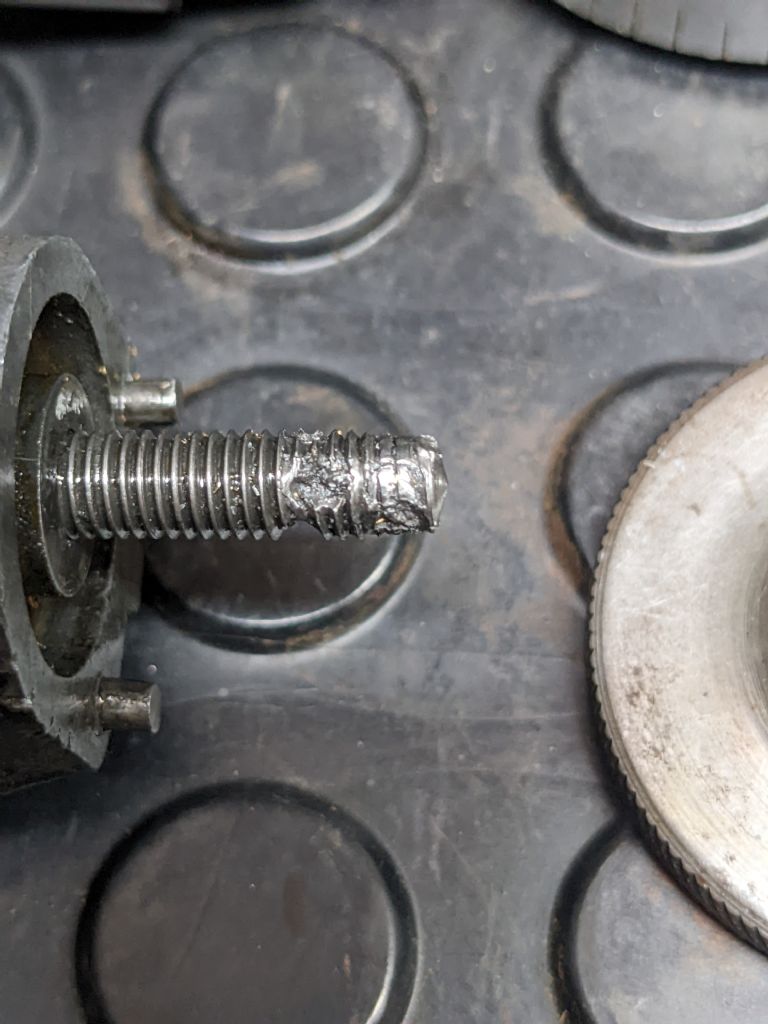
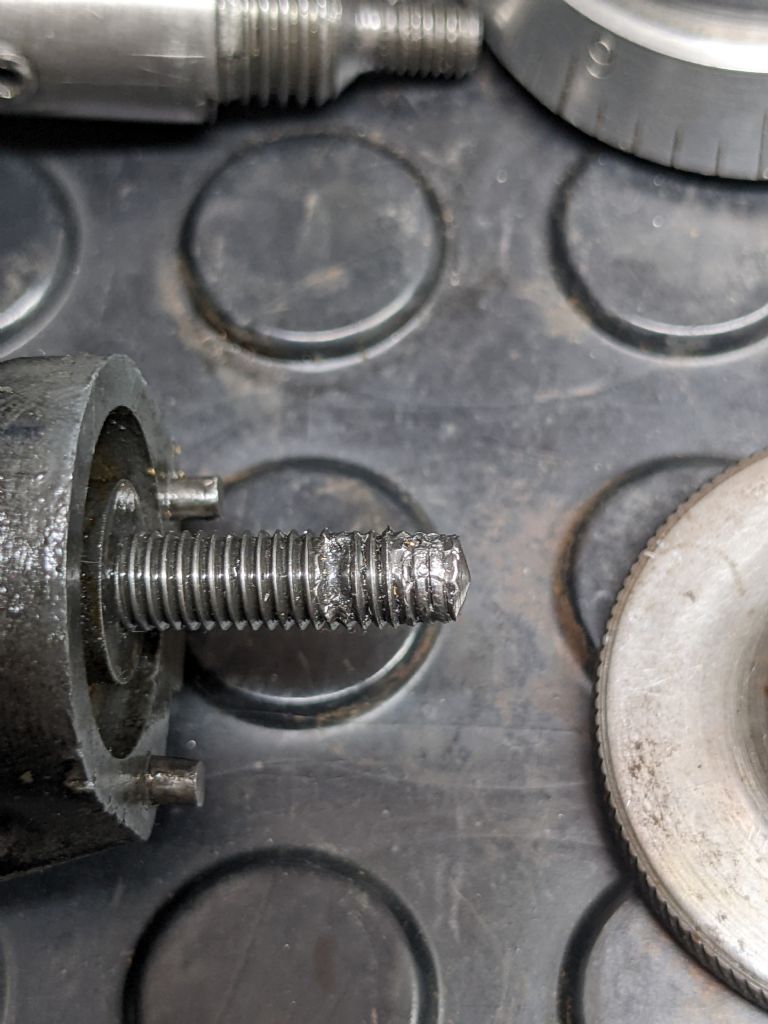
Hi All, My "new" 1950 Myford ML7 came with a home made larger scale for the cross slide, see pic. The engineering is not great and was quite destructive to the handle thread. I do have the original scale and would like to use it. I'm not sure if this is possible with the state of the handle thread. I've cleaned up lots of bolts with files and using dies from the screw end, but this looks pretty damaged here, so very difficult to get a correct start. I guess the best way would be to use some sort of clamping die and unscrew/cut the thread. The thread is 1/4'' BSF. Is such a die available? Is the thread so bad that it's not likely to succeed? Thanks.
|
| Thread: Milling attachment ID and info |
| 18/07/2022 17:31:08 |
Thank yoy all for helping to ID this on A future project to work on, but for now it will be light machine spray oil and a cloth for storage. |
| 15/07/2022 17:55:40 |
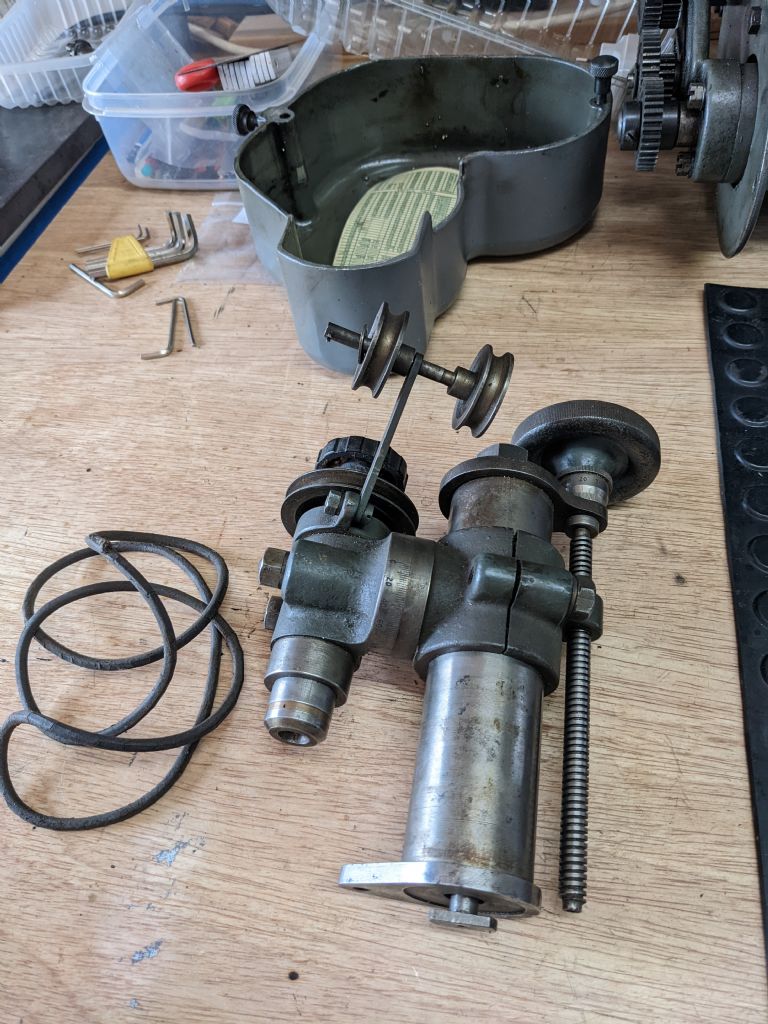
This came with a ML7, the previous owner had never used it. Any ID ? Thanks
|
| Thread: Meddings Dril Tru - What to do? |
| 20/06/2022 08:34:30 |
Sad end for a drill. The body is now a heavy and sturdy base for my work light (came on a lousy tripod that was always in the way and easily got knocked over). Stand will be for the bench grinder and other useable parts are being sold. Thanks for your replies. |
| Thread: Welding on an old Startrite Motor |
| 20/06/2022 08:18:09 |
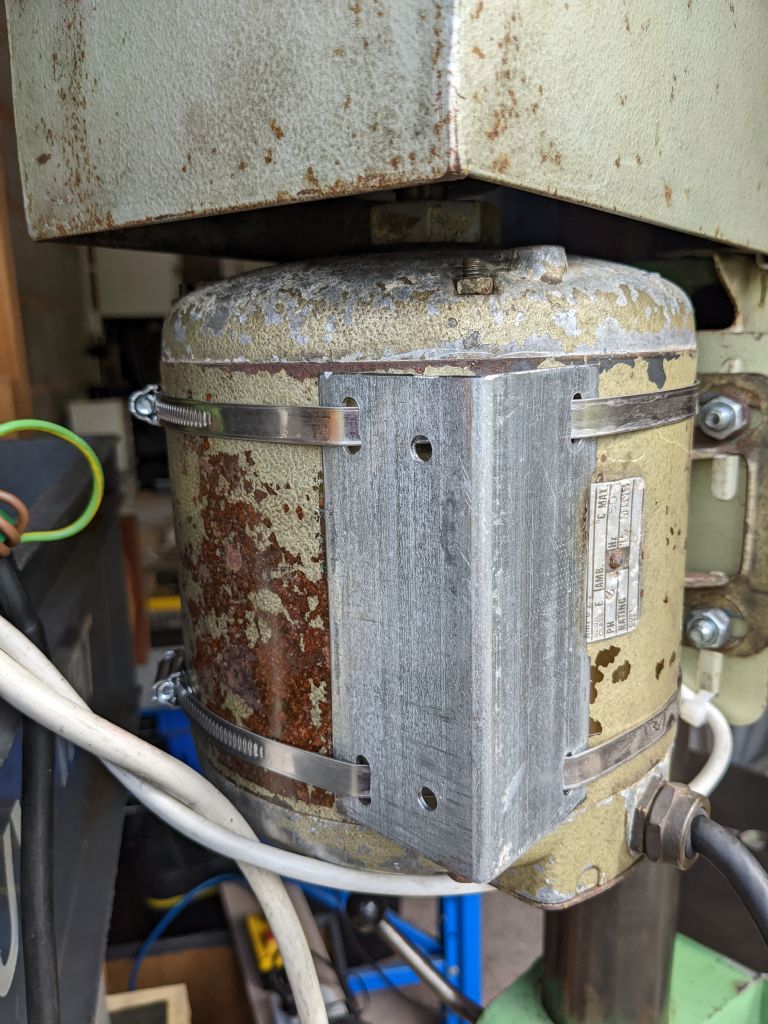
Hi all, I finally got around to this job. In the meantime I thought about using a couple of large hose clips, so went ahead and tried it. It is very solid when the clips are tighten up and just need a plate to mount the VFD on then and bolt onto the bracket. Should it ever come lose it will get 4 tack welds to sort it.
|
| Thread: Meddings Dril Tru - What to do? |
| 28/04/2022 19:09:37 |
Hi All, thanks for your replies. I'm not keen to spend ~£130 on a pulley for this 'pig' of a machine (other threads have been misused and the casting for the depth stop has been knocked off). I have been looking at generic 5 step pulleys online. Amazon and ebay have lots available for type A belts (w 13mm / d 8mm) but none for type SPZ (w 10mm / d 8mm) - the slightly larger version used for imperial Vee or 3V belts. Needless to say this machine came with a type A belt on the Vee groves. Does anyone know where to get a generic 5 step SPZ pulley? This is starting to look like a longer term project to either find a used pulley in good nick or bump into someone that can sleeve the original.....or maybe the little common sense voice in my head telling me to sell the good bits and use the stand for the bench grinder wins. |
| 14/04/2022 16:38:51 |
Hi AJAX, Thanks for your reply. I just had another look at the threaded cover bar hole in the cast base: the upper 8-9mm has brute force 3/8 x 16 (UNC or BSW) 'thread' and the rest in finer, so no doubt you are right that originally it was a full 3/8x20 BSF. I tried with the lock handle which is 3/8x20 BSF but that now fits worse than a 3/8 UNC. And still it came with a M10x1.5 jammed into the first thread....arghhh. My reason for trimming the axle was to make it fit a new 22mm bore pulley and use the key and set screw to hold it in place. Meddings are very helpfull, but many parts are not available. The spindle pulley is available at £100.75+VAT+Shipping. I am in Aldridge, West Midlands.
|
| 14/04/2022 12:17:38 |
I've contacted Meddings, but still to get a price on a new pulley. Another option could be to get 5 step pulley with a 22 mm bore, which seem available, and then trim the axle and adjust the key to fit. |
| 04/04/2022 17:39:49 |
Good suggestion Adrian, just checked but the motor shaft is smaller, 5/8''. |
| 04/04/2022 10:35:23 |
Hi All, thank you for the replys. I managed to find a bag of old UNC bolts this weekend and a 3/8 fit nicely, so most likely a 3/8 BSW. Easy to get some threaded bar to fix that. I also did six measurements on the shaft 22.11/15/17/20/24/29, so that is 7/8'' (which is 22.23mm). Would it be possible to get a resonable fit with a new pulley on the shaft without machining it? Jon |
Want the latest issue of Model Engineer or Model Engineers' Workshop? Use our magazine locator links to find your nearest stockist!
Sign up to our newsletter and get a free digital issue.
You can unsubscribe at anytime. View our privacy policy at www.mortons.co.uk/privacy
- *Oct 2023: FORUM MIGRATION TIMELINE*
05/10/2023 07:57:11 - Making ER11 collet chuck
05/10/2023 07:56:24 - What did you do today? 2023
05/10/2023 07:25:01 - Orrery
05/10/2023 06:00:41 - Wera hand-tools
05/10/2023 05:47:07 - New member
05/10/2023 04:40:11 - Problems with external pot on at1 vfd
05/10/2023 00:06:32 - Drain plug
04/10/2023 23:36:17 - digi phase converter for 10 machines.....
04/10/2023 23:13:48 - Winter Storage Of Locomotives
04/10/2023 21:02:11 - More Latest Posts...
- View All Topics
- Reeves** - Rebuilt Royal Scot by Martin Evans
by John Broughton
£300.00 - BRITANNIA 5" GAUGE James Perrier
by Jon Seabright 1
£2,500.00 - Drill Grinder - for restoration
by Nigel Graham 2
£0.00 - WARCO WM18 MILLING MACHINE
by Alex Chudley
£1,200.00 - MYFORD SUPER 7 LATHE
by Alex Chudley
£2,000.00 - More "For Sale" Ads...
- D1-3 backplate
by Michael Horley
Price Not Specified - fixed steady for a Colchester bantam mark1 800
by George Jervis
Price Not Specified - lbsc pansy
by JACK SIDEBOTHAM
Price Not Specified - Pratt Burnerd multifit chuck key.
by Tim Riome
Price Not Specified - BANDSAW BLADE WELDER
by HUGH
Price Not Specified - More "Wanted" Ads...
Do you want to contact the Model Engineer and Model Engineers' Workshop team?
You can contact us by phone, mail or email about the magazines including becoming a contributor, submitting reader's letters or making queries about articles. You can also get in touch about this website, advertising or other general issues.
Click THIS LINK for full contact details.
For subscription issues please see THIS LINK.
Model Engineer Magazine
- Percival Marshall
- M.E. History
- LittleLEC
- M.E. Clock
ME Workshop
- An Adcock
- & Shipley
- Horizontal
- Mill
Subscribe Now
- Great savings
- Delivered to your door
Pre-order your copy!
- Delivered to your doorstep!
- Free UK delivery!


 Register
 Log-in


