Member postings for Nir Somthing
Here is a list of all the postings Nir Somthing has made in our forums. Click on a thread name to jump to the thread.
| Thread: Quality Problems With the Sieg sx2.7 |
| 18/10/2020 19:09:16 |
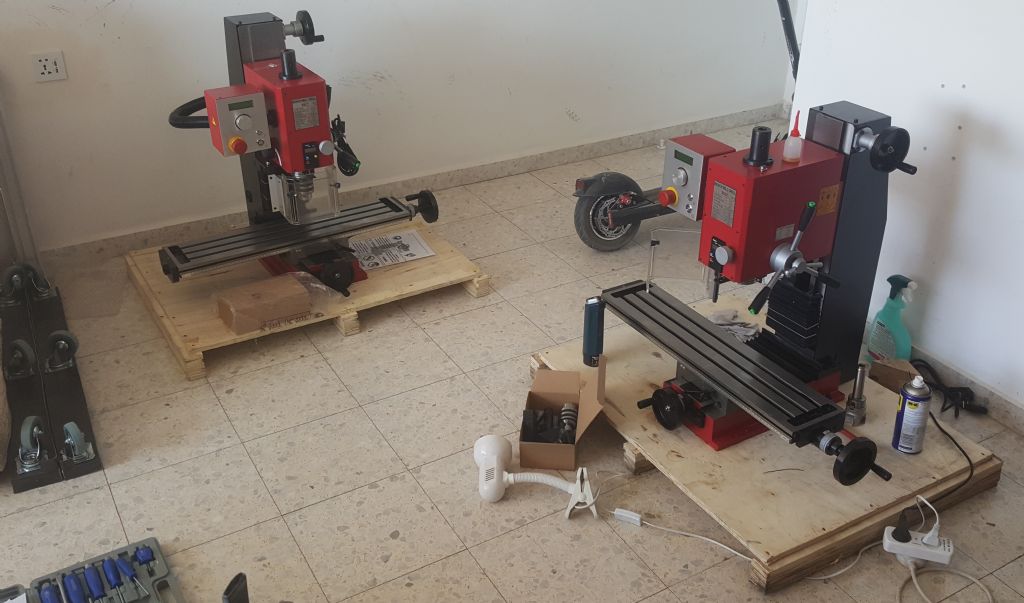
New updates! Ok, so as you know I couldn’t accept the deviation in the column of the head so I payed the seller another 150 USD to ship me the first mill again (since I believed that the fact that I didn’t touched the gibs could have caused the errors) he agreed to let me check them at the same time (which was a nightmare – a lot of tests and numbers) to choose the least worst option for me. So, after I played with the gibs the accuracy on both x and y axis did improve (for example: right to left height relative to the spindle across the entire table changed to 0.28 mm instead of 0.42 mm) but the head moved even more! 0.3mm when locked and again if the gib was all the way in - I lost movement of the head at the top – same scenario. (So even if I tought I might just replace the column if the seller allows such a thing – it was no longer an option). So, realizing I have to stick with one of them, I thought maybe I’ll just take the table which is more flat, and adjust the spindle relative to it (ignoring side movements of the head) so I knew that the second mill should be flat and the first has about 0.05 mm deviation along the y axis. But being me, I decided to check again, and for my surprise, I found out that it was exactly the opposite! The first was accurate and the second was flat! For a moment I thought I may have Alzheimer, then I thought it might be because of heat cycles, but after checking for a few moments I found that when I look the x axis the entire table bends! (more significantly around the lock) How much? Exactly 0.05mm! So both tables are flat when they are not locked, but when you lock them both table bend upward in the middle! Such that, at the end of the table the gap appear – how could they not check something like that before manufacturing 100,000 units?!? So If I have a vise on top it will tilt! I know this is hard to believe but I am not joking: https://youtu.be/M3DXUQretLY So, to summarize my thoughts, the table bends when locked (0.05 mm), the head moves sideways when locked (0.2 mm) and the spindle is not parallel to the head (0.1)! In otherward nothing here stands as it should! So I decided to comment my opinion on the matter so that newcomers will have an idea of what to accept the Sieg is cheap relative to other options and you get all the features one can whish for – silent step motor, tapping mode, led screen, low speeds and high torque but you will never get out accuracy in any parameter! So long as you make sure that your quill is normal to the table and you use a DRO you can get accurate results with in that plane. But once you have to change height for different tool all measurement will shift. If I knew that, I would have gone with the WABECO it only cost 80 % more (look at the German site not the international one) it has standard motor (torque comes with speed), no dedicated tapping feature and the lowest speed is 140 rpm and no screen, but! It is accurate! It comes with a test report and the maximum error one can get is 0.05 mm which is perfect considering the price and weight. – Shame I didn’t found anything like that online at the time. About the gib problem in the z axis, Pioter complained about it as well but he only had one mill to look at, **LINK** I looked at both mills and they poses the exact same problem. As I see it, it is a well known problem, and very much not a dud. Hope this helps to someone, it surely would have helped me. Nir |
| 02/10/2020 10:02:58 |
Posted by Nir Somthing on 01/10/2020 18:17:16:
Fun fact, the WABECO F1210 is almost identical to the Sieg SX2.7L in any term. Weight less by 10 kg and yet manages to come to your door at an accuracy of 0.01mm. In my opinion, there is not much of a relation to changes in temperature and much more of a relation to simply - price. I must correct myself. WABECO sends with the table a test report. and the accuracy is considered good when below 0.05 mm on a certain length (200 - 300 mm depending on the test), not 0.01 mm this is only promised to the spindle on the German site (.de). (On the international site (.com) they also promise it to the table flatness but if you look at the test report you know that it is not correct (for F1200 & F1210)). So based on my results lets say that the Sieg is accurate in the order of 0.2 mm. You get only 4 time more precision and you pay 3 times over. And you get a standard motor - not brushless. So I think it is smarter to stay with the Sieg since I already bought it, and maybe JasonB is correct. Maybe using a DRO in a single plane - most of the time - will be all what I need. (Plus the Sieg looks cooler |
| 01/10/2020 18:17:16 |
Fun fact, the WABECO F1210 is almost identical to the Sieg SX2.7L in any term. Weight less by 10 kg and yet manages to come to your door at an accuracy of 0.01mm. In my opinion, there is not much of a relation to changes in temperature and much more of a relation to simply - price. |
| 01/10/2020 17:50:34 |
Dave, Thank you for your kind words, as I said weight is the problem for me, more than price. And for the moment it seems that the supplier will tell me anything just to get rid of me... Ketan Swali, I already saw all Blondiehacks videos on youtube she is awesome! However her results look too good and are one of the reasons I expected much more accuracy from this machine. Most Chinese mini mills have a head that is connected to a rotating face connected in turn to the column. In such configurations you can adjust both the base and the head. And this is exactly why I tried to stay away from them. I believed that 0.02mm is what to be expected from a machine like that (at the beginning). And I wanted a fix head so it will not move with time by vibrations. Now I know that this was a dream. So in principle it would have been easier to have this option to play with the head. My main point is that now, after inspecting two machines. I realize that the machine comes accurate within only 0.1/2 mm which is in my believe - terrible. I can deal with a head that is not normal to the table, by adjusting the column base. However the fact that the second mill column is not parallel is a major problem that can be solved only by disassembling and machining and so on... Before I bought this mill I told my supplier I had ~0.5 mm deviations in my old setup. He told me I would not have any problems like that in the future and that I should expect to see at least one order of accuracy above what I have. But this is not correct. Being able to mill is nice, but I never really bought it for that purpose. I needed accurate positioning of holes. Using my DRO I can generate a set of coordinates. Then I can just cut my material with a band saw and sand it a little and make holes. I didn't dream of paying so much money for the same order of accuracy. Ketan Swali, this WABECO is looking very promising, I accidently have one of their drill stands from my grand father and it is very old J at least I thinks it is theirs. But 7,000 plus shipping plus TAX is a big no go. I am a Hobbyist I don’t earn money from this. Neil, if this is truly a fact that temperature can affect the accuracy so much. (I know it would in the order of tens of microns but not more than that). Then why are they not using a smarter assembly? As I said, If I had an extra flat surface between the head and the column – all I had to do is measure alignment – then insert a shim – recheck and so on – problem solved. And the argument about a play is not relevant – for that you take a heavy duty mill. Martin, I completely agree. JasonB, taking the gibs out has zero effect on the accuracy whatsoever. The gib is simple their to match between two flat surfaces, It is meant to be used as a bearing surface. And in the case of wear one can tight it up to get better movement and less play. In the first mill I didn’t touched the gibs and I had 0.4mm difference between left to right across the entire table. And I presume it is because of the table own weight on the right side and the fact that the gib was loose. The gib is not a calibration means. I never known that I need to pay so much for accuracy – here my lake of experience come into play, I saw on YouTube people showing accuracy of 0.01/2 mm on cheap Chinese mini mills and believed it to be standard. Boy, I thought having this toy in my collection will make my life easier... Nir
|
| 01/10/2020 09:03:26 |
BTW, I asked my dealer to ask Sieg if it is possible to pay them up to twice the item price and in return get a proper calibrated mill. He claims this idea is not an option. And that he buy the mills as they are... |
| 01/10/2020 08:08:08 |
Ok, so to summaries, after adjusting the gib on all axes, when I lock the y axis I can see the dial moves 0.01mm which is perfect, when I do the same on the x axis the dial moves 0.05mm which is also great. But since on the z axis, as I said, I lowered the gib all the way in, and when I lock the head it moves 0.27 mm and I cannot move the head all the way up – it is obvious that my z column needs machining to make it parallel. So for me, it is easier to adjust the column in the first mill than machine the column. So I decided to call the dealer and ask him to ship back the first mill which I checked without touching the gibs (I pay for shipping) or send a third and I will pay extra. Apparently he is not on my side. He tries to convince me to release the gib so I get full motion in my z axis and have even a bigger of play. By doing so I ignore the purpose of the gib completely! What’s the point of having one if I cannot lock it properly? I understand that many of you think that the z axis is not as important as the x and y axis. But having a gib which is spaced by about 0.3mm (After I move it back up again) is just ridicules! If someone here agree with me - please share your comment so that I can show him that not only I think that way, If you think otherwise please explain way. Thank You, Nir |
| 30/09/2020 09:40:51 |
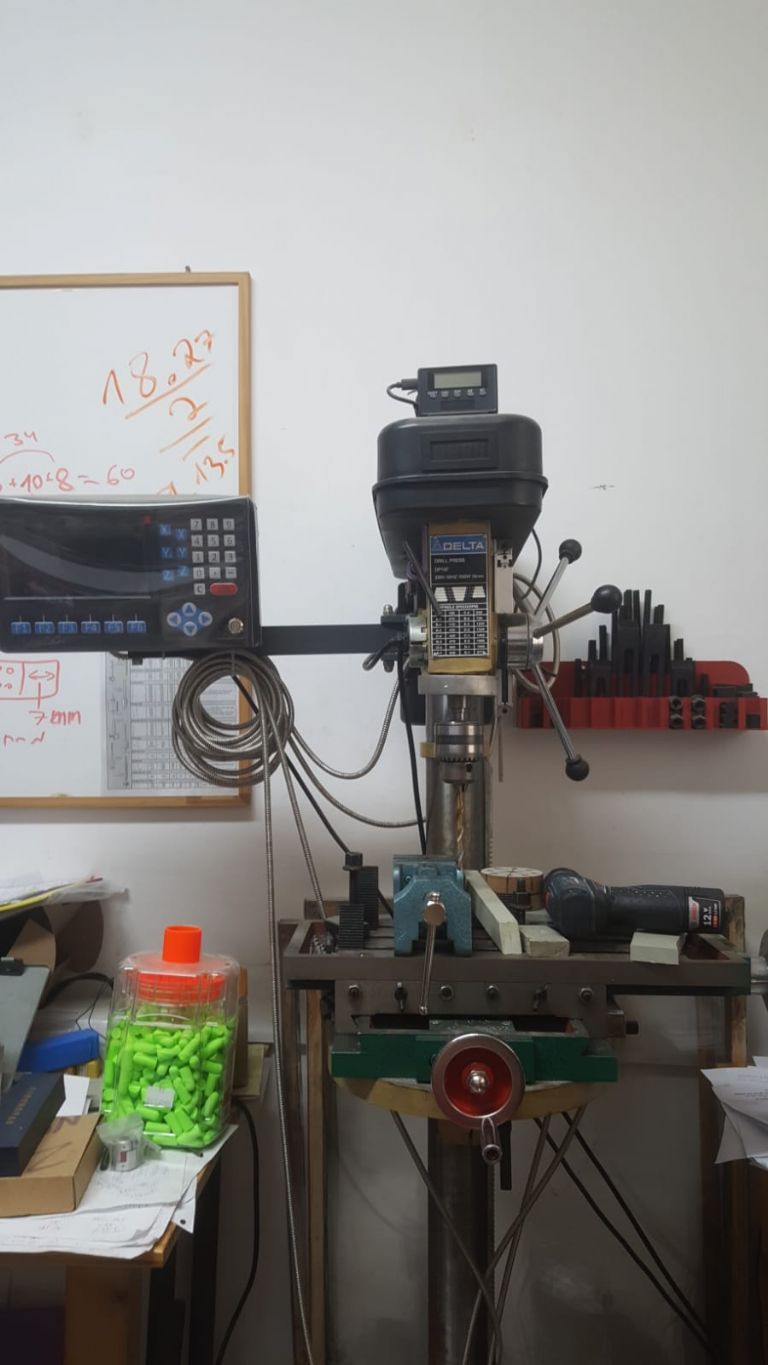
MichaelG, Very cool test, shame I didn’t think about it myself! I will indeed try this one out! Dave, thank you for your long and interesting post, I might do it out of curiosity once but not on a regular basis It is extremely accurate and it never let me down! I had to opportunity to get an old heavy duty mill from the university for free once and it even still worked, but as I said, If I try to put it in my apartment it will right-away go through the floor of mine and another 5 along the way… Here, living in a private house is only a dream… For me weight and size is even more of a problem than cost… ChrisH, Indeed, when I bought the DRO I bought it in parts, so for a change, I didn’t pay any TAX, and it is indeed the expensive one, 1 micron resolution. But I bought it to serve a mill in the future in mind, the press drill is only temporary, I don’t have space so I am supposed to get rid of it and replace it with the Sieg. |
| 29/09/2020 07:21:43 |
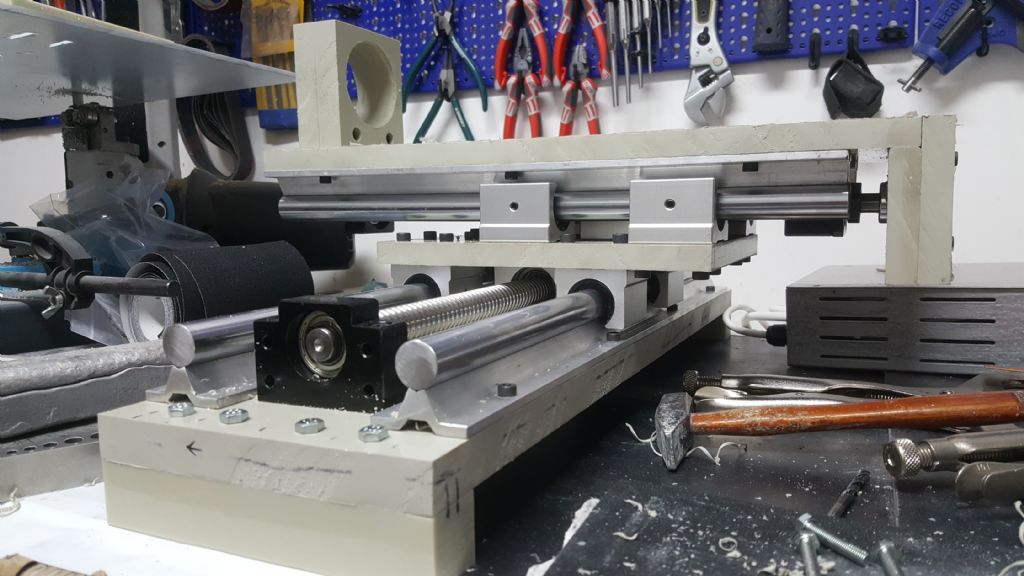
Dave, thank you comment this is exactly the point. "I wonder if there's a misunderstanding about how accuracy is achieved with these hobby tools? It's not done by dialing in dimensions and expecting the cutter to be spot on under all circumstances across the full range of travel. Rather the operator becomes skilled in getting the best out of the machine, allowing for shortcomings rather than expecting them to be eliminated by the manufacturer. Even if the Seig passed all the DTI tests, it's too lightly built to be highly accurate - even monster machines bend slightly when cutting." We "material engineers" normally speak in microns and below. My press drill (modified) was in the range of 0.1-0.3 mm, and I believed that if I spent x8 more money I don't only get better dedicated quill and rigid column but also improve on the accuracy. According to videos I have seen online they always talk in terms of 0.001" or 0.02 mm so I believed that I will improve my accuracy it 1-2 orders. In terms of what I want to build, my first project is to finally finish a CNC machine out of Aluminum (or from polypropylene and then cnc the Aluminum). when I built the model, many times I had two different parts with holes and I hoped that they will match but they didn’t, so I always had to choose a few holes and widen them up. I used a DRO and an edge finder and the deviations came from the press drill quill which has an enormous play. In term of what I want to build after words, this is a difficult question, I build with my imagination and my imagination is limited to the tools that I have. The more possibilities the more Ideas come to mind… Now that I will be able to actually mill many ideas will follow, but at the moment I start from the simple things – will it allow me to make 90 degree edge spot on? Will I be able to get holes on a single plate 500mmx160mm spot on? Will I be able to make face mill surfaces spot on? One project that I had in the past involved making a vacuum chamber, If I had a mill I could have made many parts myself… especially the tunnels for the Teflon strips. |
| 28/09/2020 17:42:53 |
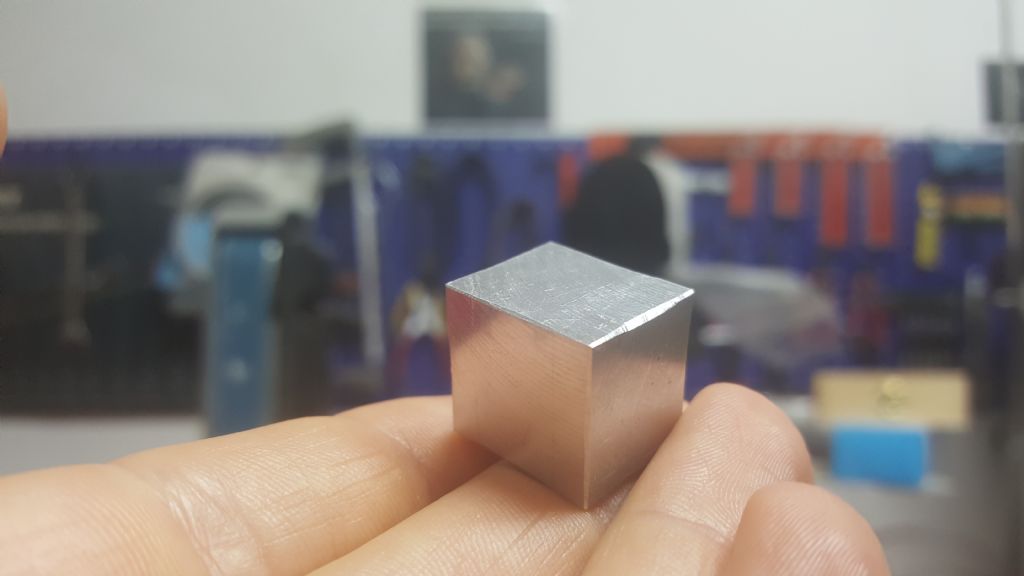
ChrisB & SillyOldDuffer, I thought about your comments about cutting a metal or squaring something, and I honestly don't think this is the way to go, for one, when squaring properly, if my face cutter is tilted 10 degree to the front and I rotate the piece on its axis, it will still turnout to be perfect. even the sides! so long as my x axis is spot on - and ~0.03 mm is spot on. Also, I don't have a big enough stock of material. And My point is that when times comes and I will have a project that will need this few hundreds of accuracy all problems will arise... Will it cut metal? I don't see why not, I already squared a small aluminum piece of 20 mm thick to 18.6x17.4x15.6, but this won't help me judge my mill at all, first of all I don't have a proper grounded granite table and a height gauge, and my machined square and caliper will only give good results as my vise, which is a cheap Wilton vise with an accuracy of doubtedly 0.001". I plan to buy a Kurt 4" vise, and a granite table and so on, but only after I know my mill worth it. ***By squaring I assumed you meant making a cube:
Anyway does someone has an idea from from what I advised earlier? Thank You. |
| 27/09/2020 15:08:24 |
*** I forgot to mention that:
|
| 27/09/2020 15:00:48 |
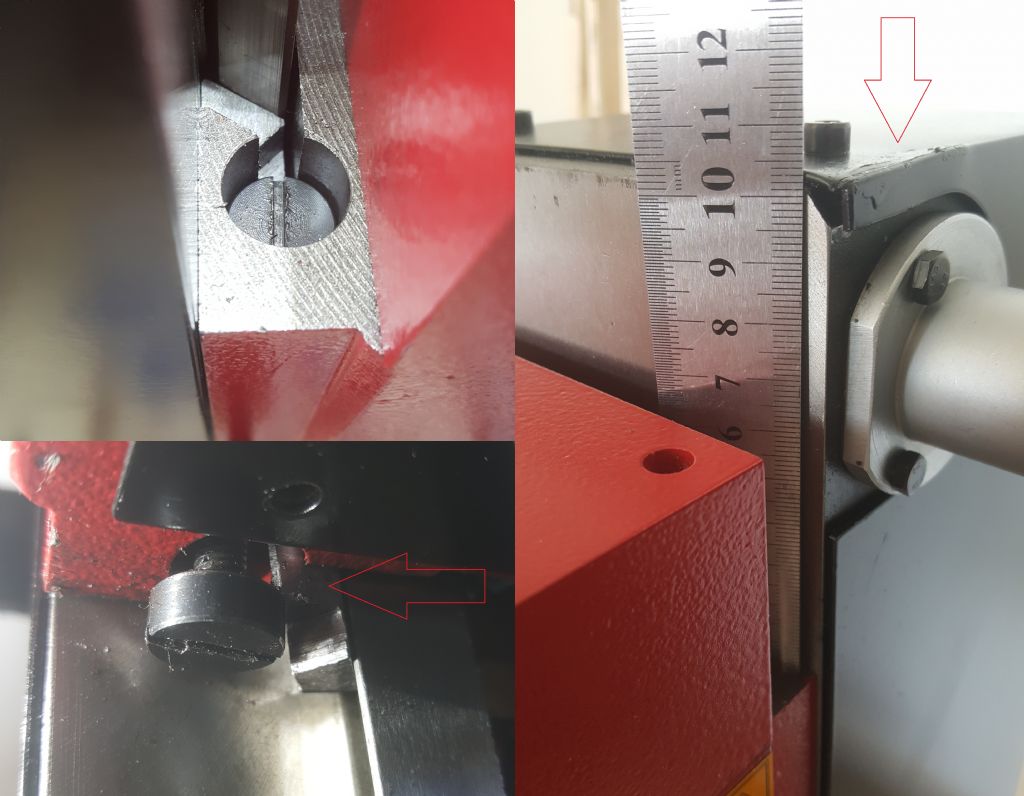
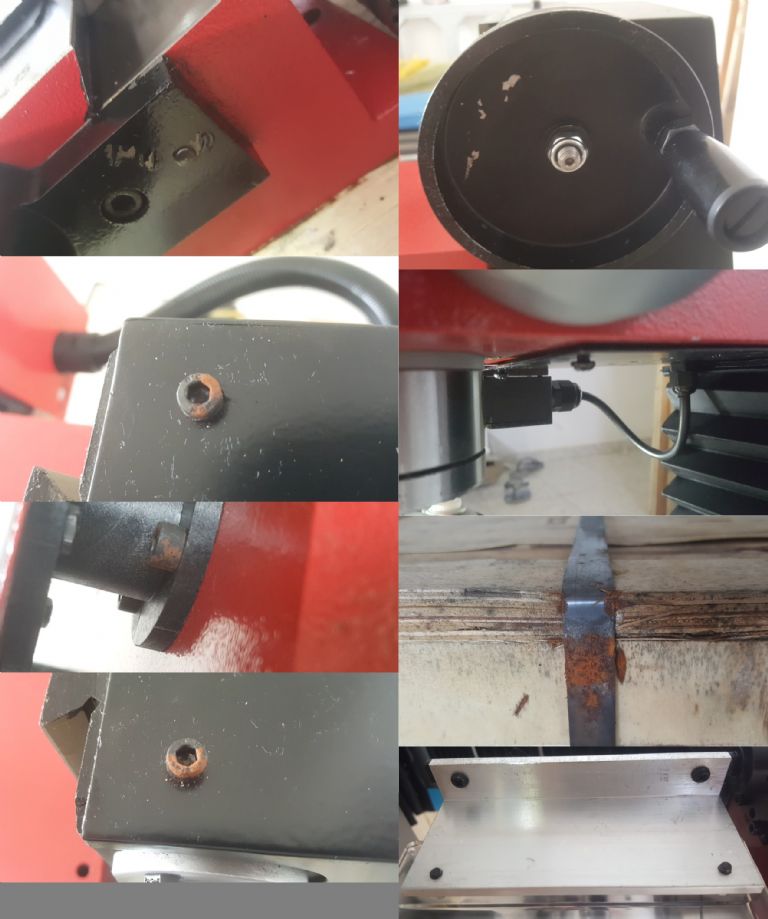
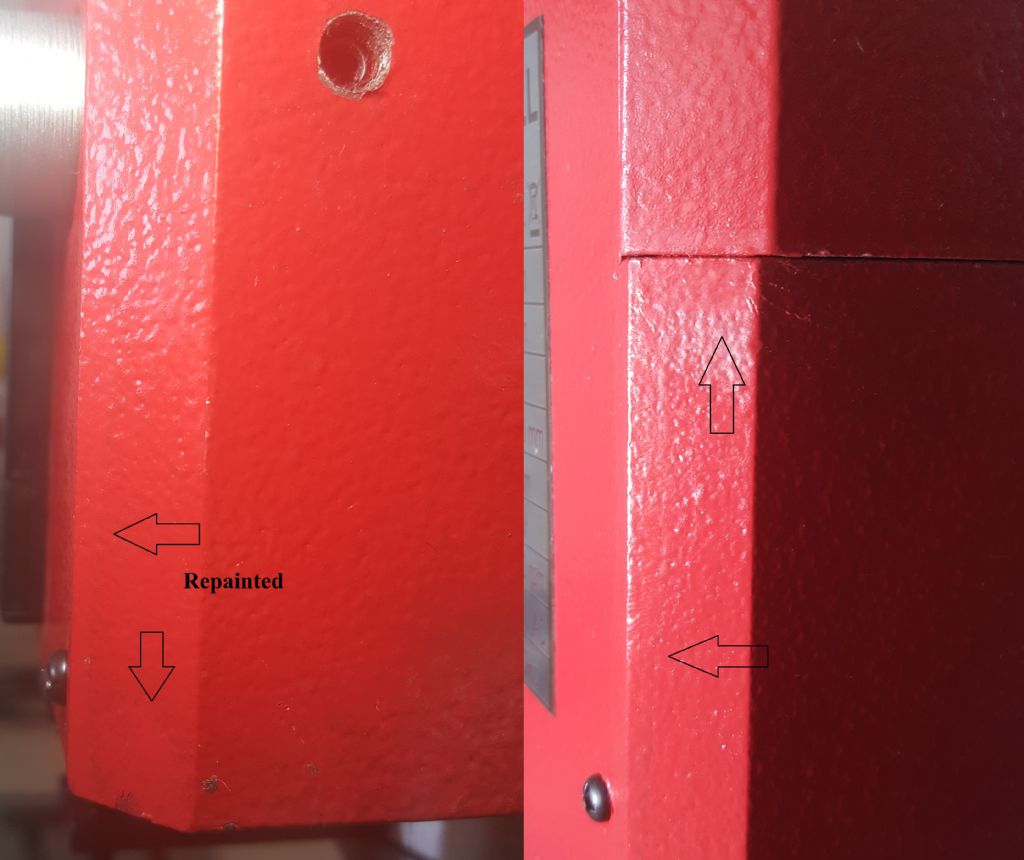
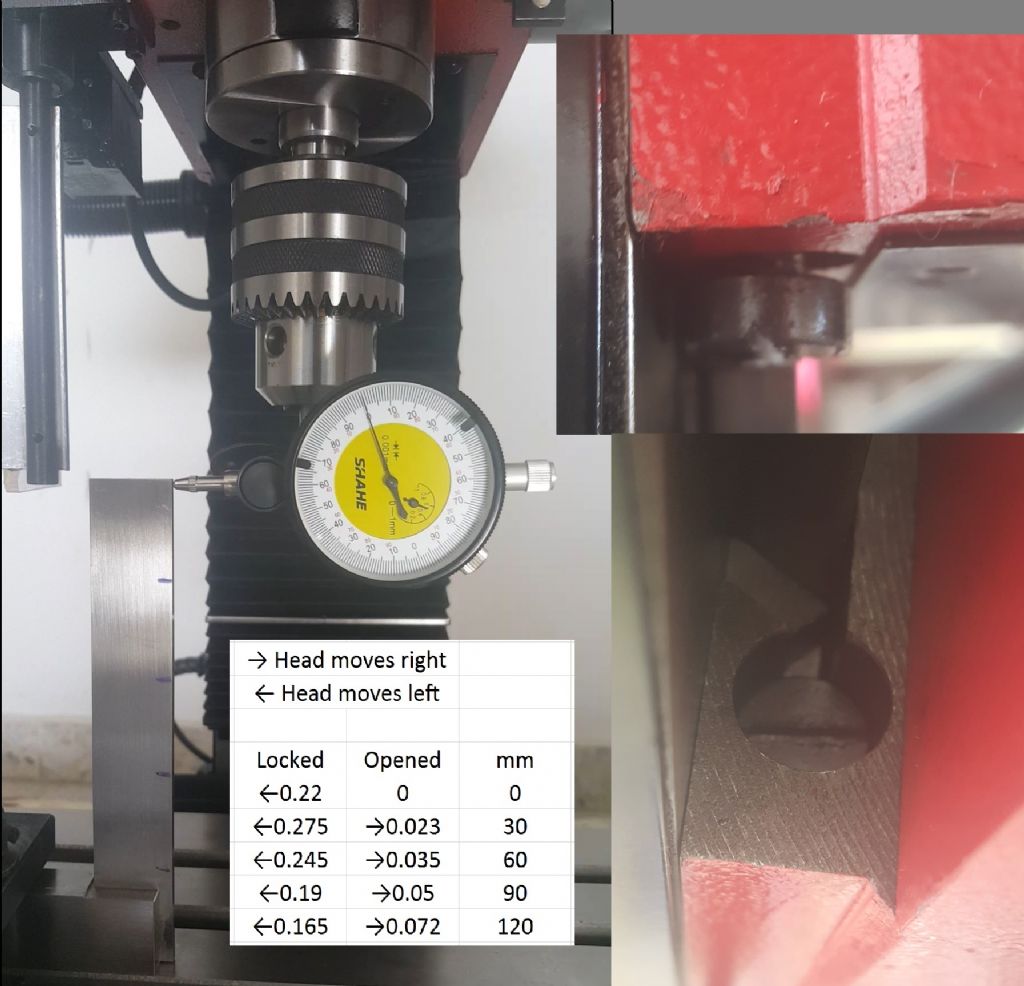
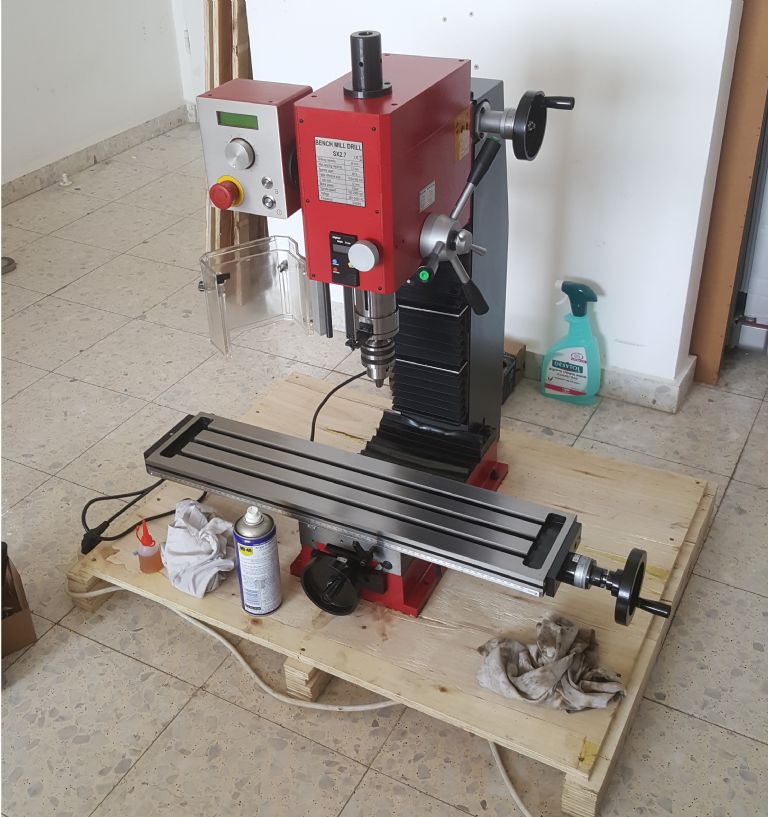
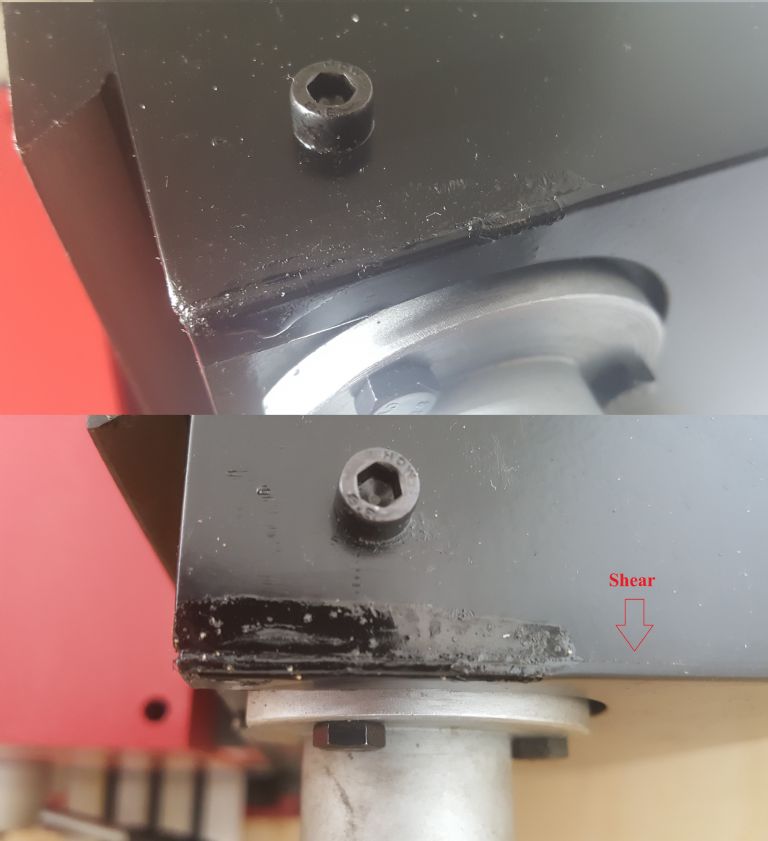
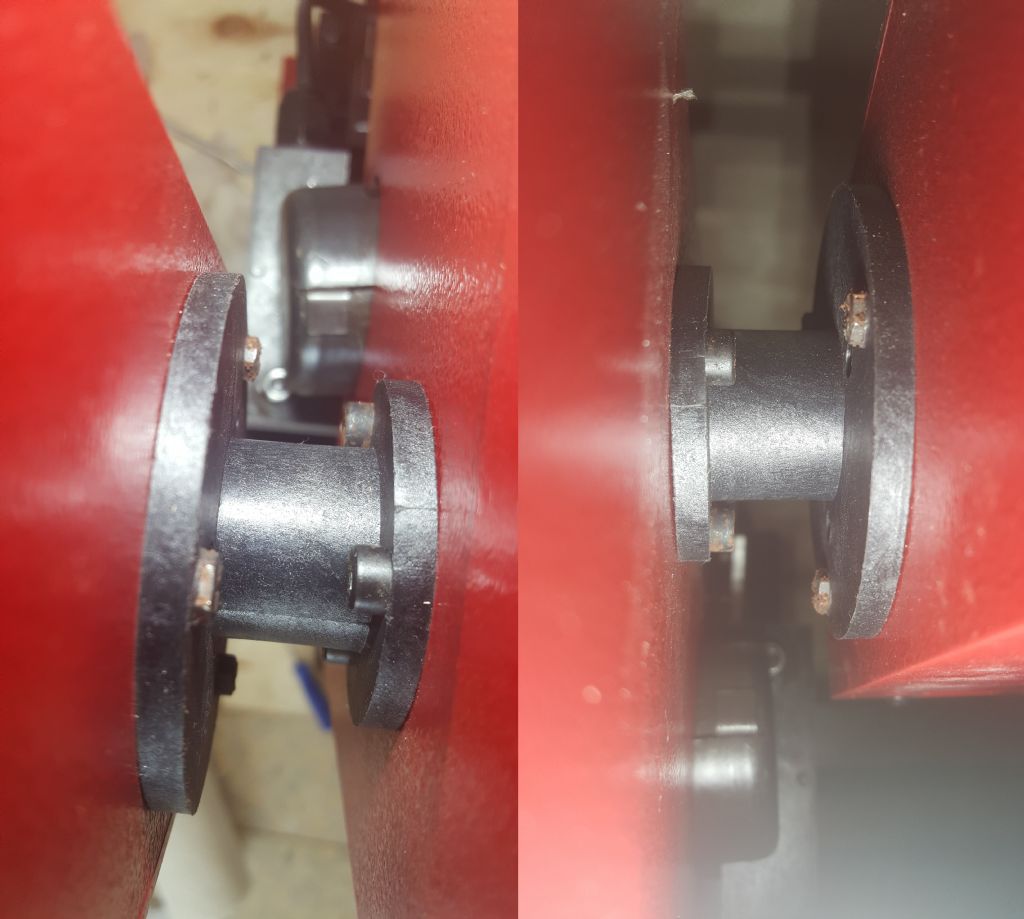
Ok, So I noticed from the previous results of the head movement (that I shared here), that the maximum deviation is in the middle of the column. So I thought maybe I will adjust the gib at that height and see what the results will be. I found out that even if I take the gib all the way down such that the counter screw only holds by one turn (obviously if I will lock it tight I will damage it’s thread) that the head still move by 0.27 mm (it was 0.275mm before) and that now I cannot move the head all the way up by 10 cm, in the picture you can also see the cover shear that I talked about covered in paint. I found someone else here in this forum that also talked about this problem, Piotr, luckily I can still get (hopefully) service from my dealer. Dave Halford, the old style gib is somewhat flexible compared to the new style, however it’s purpose is the same. there is not much of a different between them, so long as all the parts are properly machined. As I see it, and please tell me if I am wrong, the gib’s only job is to lower the play between the column (bed) and the head (saddle?) of the mill and the more you tight it up the harder it will become to move the head and the wear of all parts involved will increase. In my case since the column (bed) has a trapezoidal shape (wider in the top, thinner in the bottom) both styles will not have helped. The way you adjust the new style (if you want to tighten it up) is by releasing the bolt at the top half a turn, then releasing the bolt at the bottom half a turn, and then locking the top bolt against the bottom one full turn. If there was only on bolt at the top then when the head was moved upwards the gib will have tighten itself while moving downwards and the head would not move. I also decided to share with you a few more pictures from the first mill I got, so that others may take it into account before buying. The shipping Is by the sea, so obviously high humidity and a lot of salt, you can see in the picture the rust on the box metal strips, and there was no silica gel bag inside. So no wonder the paint peeled off and the screws got rusted, it will probably affect the electronics in the long run. Vic, thank you, I totally agree, which method would you have used? I learned it from the internet… About the mill, it is 100% Sieg fault. The dealer ordered 12 machines (There is a sticker on the box) and when he shipped me the first mill it was after waiting for it to arrive, so it was sent to me directly from the harbor not from his store, and the number embedded on the base was 90415 and after he sent me a replacement, the mill was stamp with the number 90414, so there is no chance he did it. I think that, as SillyOldDuffer mentioned, Sieg don’t put the machines for Quality Assurance (even if I have a triangle piece of paper that says so) when a dealer orders a full container. Maybe they are counting on the name of the brand? Or maybe they haven’t renewed the manufacturing line after producing 100k machines? I have no idea, but I am truly disappointed. I can tell however that the new mill was painted twice, it is very hard to see depending on your monitor, but they have repainted the front with a slightly different tone, the camera doesn't catch it but the eye certainly does… Thank You, Nir |
| 26/09/2020 18:10:55 |
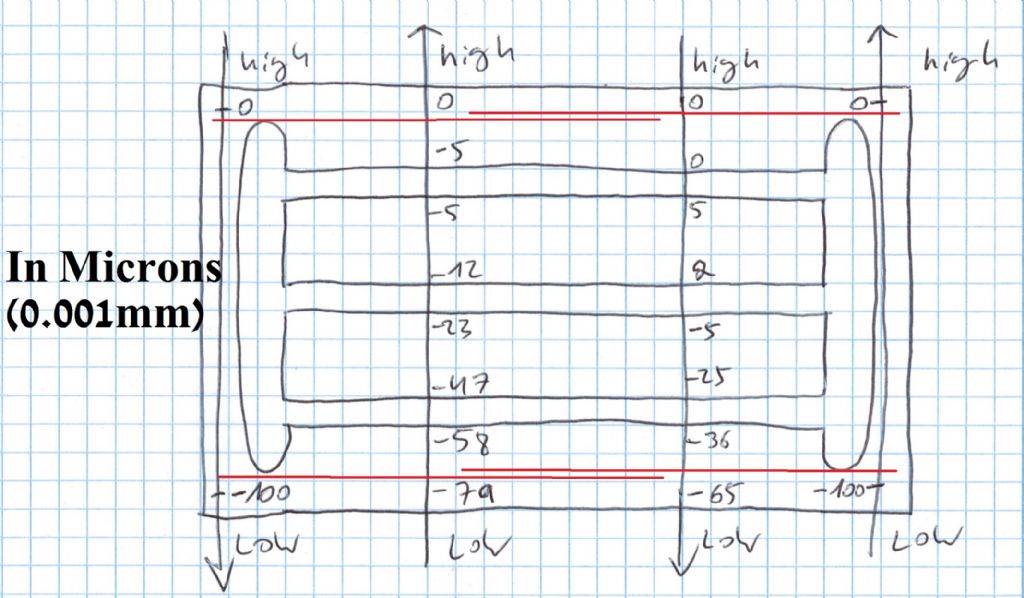
The red lines indicate the measurement in the x axis that where in the range of 0.03 mm*** |
| 26/09/2020 18:09:22 |
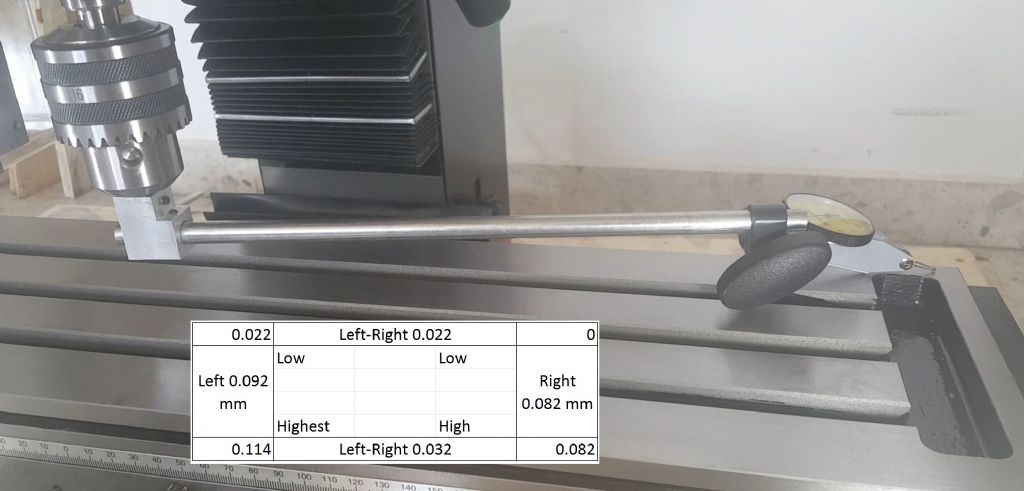
The last measure I can think of is of the height of the table relative to the head. The results in the x direction make no sense, it is probably because of the weight of the table itself, but since it is only 0.03 mm on all four measurements I consider it great, I will probably won't use the entire table length anyway.... The results in the y direction are indicating that I should shim the column at the base to get better alignment, but the problem is that if I do that the spindle will not be align even more, note that the high side of the table is the low side when measured via the spindle. https://youtu.be/GqFT1BLS4JA Bottom line, and thank you for bearing with me all the way: I can leave it this way and ignore the fact that I have a play in the head of 0.2 mm which I can not fix since the gib will not go any further and if it did I will lose even more travel of the head (at the top) and I will have to live with the fact that the quill is not parallel to the head. or I can pay and have the previous mill checked by a professional since I didn't touch the gibs at the time, and I probably should have. So than I have a certificate of the accuracy of the machine and a peace of mind. I would really like to have an "experienced machine tool fitter" as Ketan Swali suggested, but I am not sure if there is one in Israel - I need to check it. One way or another, if he / she are unable to do some serious machining they will not help. Proper tooling and methods may indicate that my tests are not accurate however doubtedly, but adjusting the machine only by hand is something I can do myself and the real problem with the sieg SX2.7 is that you can only adjust the column base - and that's it! (Gibs don't count if you know what you are doing they don't "adjust" anything just reduce the play) Lastly I would like to know, what you consider as accurate? does 0.1 mm in the z direction over 120 mm counts Good/fair/terrible(My opinion
|
| 26/09/2020 14:15:17 |
The following measurement I did maybe 10 time, I locked the right angle tool that I made to the chuck and after each measurement I removed the tool and attached it again in a slightly different direction, to make sure my readings have nothing to do with the chuck, the video shows just one test. But the results are the average and the deviation is within 0.006 mm (not 0.002 mm). I may add that not all measurements are terrible but they add up and in the end I can have serious deviations... What's the point of having an accurate DRO to within 0.01mm (mins seppoesd to be 0.001mm) If every time I change the height of the head my last coordinates changes? https://youtu.be/pLJrq6BVlao |
| 26/09/2020 12:43:05 |
Ketan Swali, My Dealer offered to replace or take it as you mentioned and he is on my side, I came to this forum to find more professional view on the matter. And take the best option, thank you for your detailed post. Oldiron & Dave Halford, as I mentioned I ordered a ER collet more than a month ago and it still didn't came. However Your claim regarding this specific test is not accurate. It doesn't matter if the check deviated, I move the head and lock the chuck and quill so there is no movement of the dial relative to the head. The right angle is new from iGAGING and it is supposed to have squareness of 0.0003" and straightness of 0.0006". Here is another video to describe this mills problem: https://youtu.be/keOWpspUurw
|
| 26/09/2020 11:18:16 |
Hi Dave, I will never dream of disassembling a new mill, as I said I only disassembled the gibs cleaned them added little engine oil by hand and then locked them in place such that I have decent movement of the table. My worries is that since me head moves at an angle, every time I change a tool I will have to change the hight, that is since an edge finder and a center drill and a normal drill all have different heights and my quill can only move 70mm. I cannot buy a good old mill and renew it. I live in a apartment in a building, here you can only have a load of 150 kg/meter – so only a Sieg SX2.7, maybe SX3… Your argument of cutting metal is interesting, however I can only do it tomorrow since it makes a lot of noise and to day is “shabbat”… Anyway I didn't fully understand you when you said: Again thank you all for your help, I really do appreciate it! Nir
|
| 26/09/2020 10:49:07 |
| 26/09/2020 10:35:43 |
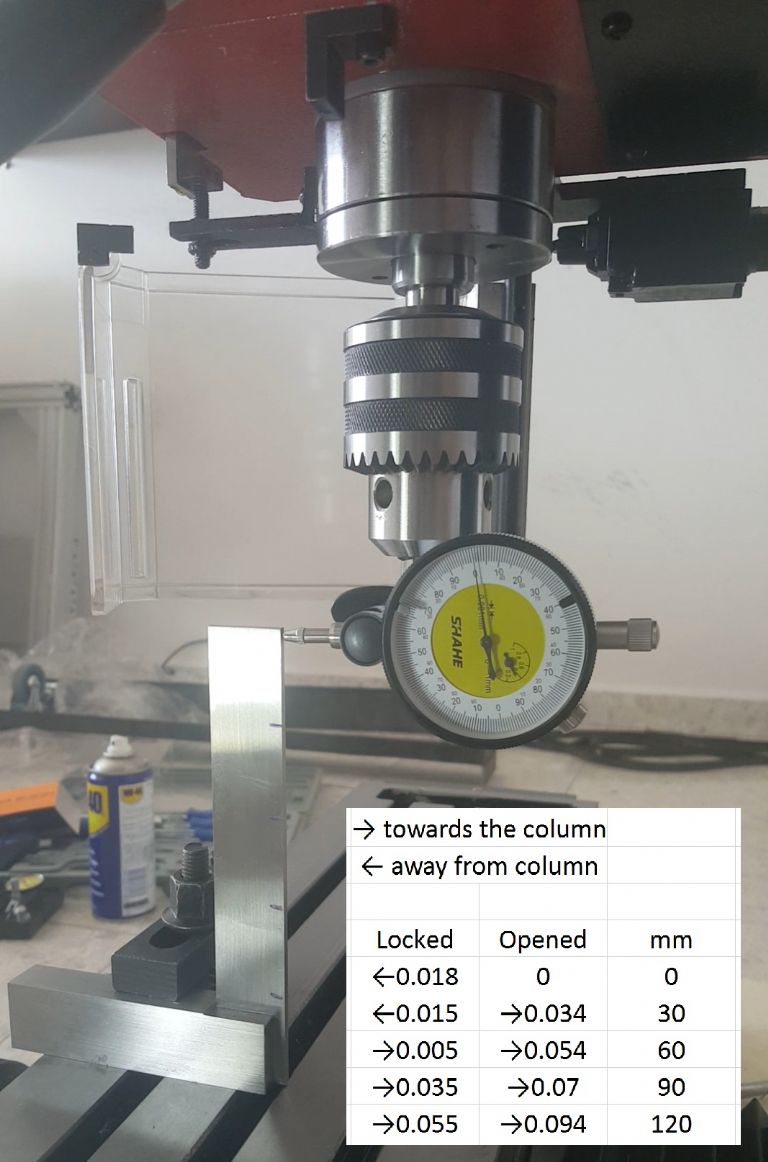
Ok, since I made the videos for the first mill and they are no longer relevant I will make new videos one by one for the new mill, not neseserly in the proper order, since I already know the main proble. Neil regarding your comment, you are absolutly right, and if I knew it when I did my tests on the first mill I may have seen completly diffrent results. However in the tests I do now I took care of such problems. You can not lock a gib all the way in otherwise you apply to much force on the handwheel. As I mentioned the gib in the z axis is all the way in and I still have a play at the bottom and I cannot go all the way up, in the video I just made you can see the dial move about its center when I am at the top becuae I apply force on the handwheels, and when I am at the bottom, the needle is stationary. Pleas see the following table of my test results and the following video (I made the test twice, test deviation is 0.005 mm). https://youtu.be/hMxjHjwnRdI I will try and make all the rest of the videos today Thank You |
| 26/09/2020 08:16:56 |
JasonB, I didn’t took the machine apart, I check it still in its box, I added some wood blocks underneath to reduce the movement of the mill, I am sure it will change when I pace it on a proper table, but I don’t buy the claim that it will change completely, it will move probably but no more than a few hundreds (~0.02 mm). I only cleaned it truly and removed the gibs, cleaned them, applied little engine oil to them by hand and locked it until I had proper resistance on the handles. Which gave about 0.05mm movement in the x and y. But as I mentioned, I have the real problem in the z axis, as I described earlier. When I said 100% true, I meant that I didn’t made the parallels myself, I bought them, and they are supposed to be within a 0.01mm accuracy. My intension is to have the ability to make two part with a few holes at certain location, and not worry that the holes will be aligned, I am tired of making bigger holes to account for deviation of my old press drill. I have no idea what I will do with it in the future but milling accurate parts could help me a lot. For my work real 0.1 mm will be perfect but over ~50cm. Error adds up as you already know, and I expected this machine to be a lot more accurate. The serial number on the first mill I got was 90415 and the one on the new mill is 90414. Since everyone seem to not trust my measurements, I have an idea, I can ask the seller to check the first machine that I already returned, by a professional, it will cost me around 200 USD. And if he confirms that the machine is inaccurate, we know the problem is with the machine. If he confirms otherwise, we know that I am the problem, and I can ask him to return the machine to me – but then I will be sure I got a good mill. As for your videos, I did the same tests, except that I used the chuck since the ER collet that I ordered a month ago is still on its way… And buying it here is not an option. I am afraid from the rust since I know that it may shorten the life of the circuitry. The paint is just cosmetics – but it indicates the “quality assurance” Note I have a different panel and a feed lock handle. Nir |
| 26/09/2020 06:17:27 |
JasonB, When I say right side, I mean to say deviation of the right side of the table - that is the y axis When I say right-left I mean to say deviation of the table from right to left – that is the x axis I am sorry in advance if I describe things in a somewhat non-conventional manner. Nir |
Want the latest issue of Model Engineer or Model Engineers' Workshop? Use our magazine locator links to find your nearest stockist!
Sign up to our newsletter and get a free digital issue.
You can unsubscribe at anytime. View our privacy policy at www.mortons.co.uk/privacy
- hemingway ball turner
04/07/2025 14:40:26 - *Oct 2023: FORUM MIGRATION TIMELINE*
05/10/2023 07:57:11 - Making ER11 collet chuck
05/10/2023 07:56:24 - What did you do today? 2023
05/10/2023 07:25:01 - Orrery
05/10/2023 06:00:41 - Wera hand-tools
05/10/2023 05:47:07 - New member
05/10/2023 04:40:11 - Problems with external pot on at1 vfd
05/10/2023 00:06:32 - Drain plug
04/10/2023 23:36:17 - digi phase converter for 10 machines.....
04/10/2023 23:13:48 - More Latest Posts...
- View All Topics
- Reeves** - Rebuilt Royal Scot by Martin Evans
by John Broughton
£300.00 - BRITANNIA 5" GAUGE James Perrier
by Jon Seabright 1
£2,500.00 - Drill Grinder - for restoration
by Nigel Graham 2
£0.00 - WARCO WM18 MILLING MACHINE
by Alex Chudley
£1,200.00 - MYFORD SUPER 7 LATHE
by Alex Chudley
£2,000.00 - More "For Sale" Ads...
- D1-3 backplate
by Michael Horley
Price Not Specified - fixed steady for a Colchester bantam mark1 800
by George Jervis
Price Not Specified - lbsc pansy
by JACK SIDEBOTHAM
Price Not Specified - Pratt Burnerd multifit chuck key.
by Tim Riome
Price Not Specified - BANDSAW BLADE WELDER
by HUGH
Price Not Specified - More "Wanted" Ads...
Do you want to contact the Model Engineer and Model Engineers' Workshop team?
You can contact us by phone, mail or email about the magazines including becoming a contributor, submitting reader's letters or making queries about articles. You can also get in touch about this website, advertising or other general issues.
Click THIS LINK for full contact details.
For subscription issues please see THIS LINK.
Model Engineer Magazine
- Percival Marshall
- M.E. History
- LittleLEC
- M.E. Clock
ME Workshop
- An Adcock
- & Shipley
- Horizontal
- Mill
Subscribe Now
- Great savings
- Delivered to your door
Pre-order your copy!
- Delivered to your doorstep!
- Free UK delivery!



 Register
 Log-in


