Member postings for Jelly
Here is a list of all the postings Jelly has made in our forums. Click on a thread name to jump to the thread.
| Thread: New Toy - Migatronic KME 550 |
| 14/06/2023 23:01:37 |
So transwave were ultimately unable to help me, as the design of RPC I have is one which their parent company acted as distributor for until they went bust, at which point the began manufacturing in house. They did go to a lot of trouble trying to help, but alas it was not that simple.
I have however now made some progress towards getting this running again... Good news:
Bad News:
Unknowns:
Edited By Jelly on 14/06/2023 23:18:26 |
| Thread: Quick change tooling for the mill? |
| 14/06/2023 19:54:03 |
Posted by Stuart Bridger on 14/06/2023 18:31:18:
I would certainly lose the race in swapping my drill chuck for miling chuck. I certainly couldn't do it in 20-30 seconds! I suspect it's individual to each machine and user, the ergonomics of reaching the drawbar and whether you have a spindle brake to work with will make a huge difference. I'm used to machines having the drawbar nut exposed at the top/back of the spindle at all times with a long hex to ensure its accessible when the quill is down, a la Bridgeport.... But on a VMC it looks like it's buried inside the head and sinks with the quill, so I wouldn't manage to change holders as quick as that either with that arrangement.
Surprised no-one has developed a modification to the top cover to accommodate the same sort of drawbar as the Bridgeport for ease of use, given that the VMC seems to be a well liked and popular mill for its size. Drilling a hole in the top cover, making two strategic cuts in the cover to separate a 90° segment at the front right corner, then attaching that corner permanently with two screws, would allow a long, always accessible drawbar to poke through the cover, without interfering with the guarding of the belts. Not nearly as neat as the quick change spindle nose though! Edited By Jelly on 14/06/2023 20:03:48 |
| 14/06/2023 17:51:15 |
The holder system will add about 15μm of run out, on top of the 10μm that you'd expect from a "normal precision" ER Collet or endmill holder. Cumulatively that 25μm (about 1 thou) will be enough to cause issues when running small endmills (below about 3mm carbide, 2mm has) and maybe cause vibration when power-feeding through a marginal cut which is towards the top end of the cutters capabilities. Beyond that, they're very clear that it's limited to light milling cuts at moderate speeds, but don't define what those limits really are, so you probably need to feel that out over time to understand the limitations... You wouldn't for instance want to go straight in for a 5mm DOC, 50% stepover in tool steel with a carbide endmill, but that might be harder than you push your machine anyway. . If you're happy with those compromises and they don't negatively effect your work, it will most likely be fine. . Personally I struggle to see how it offers enough benefit over changing out tooling on a full shank to justify several hundred quid of outlay, as I only find it takes 15-20 seconds to swap a tool, but everyone's setup is different and you know what matters to you. |
| Thread: Kuroda UPB-3S Boring and Facing Head |
| 12/06/2023 00:05:32 |
I have to say I am quite envious of the comparatively low-profile of your Kuroda compared to my Boneham & Turner which takes up a significant amount of the daylight between my spindle and table. My experience of the commonly available insert boring bars is that they have geometry designed for lathe work, and the additional stick-out and reduced clamping surface in a boring head inevitably results in vibration under "proper" cutting conditions or poor surface finish from low surface speed, making it a fools errand no matter what you try. A friend of mine has had a lot of success using QCMT "Multi-Turn" Drilling, Boring and Turning inserts in a boring head on his CNC machine to finish out holes roughed with a spiral toolpath, which seem to give significantly more back rake compared to the more widely available ISO insert geometries... But unless you find yourself suddenly doing a lot of boring in harder materials it's unlikely to be worth the outlay. For my sins I usually use brazed carbide boring bars unless the hole is quite large where I'd use HSS like yourself, for economy. Edited By Jelly on 12/06/2023 00:12:27 |
| Thread: Household paint. An observation! |
| 07/06/2023 08:27:32 |
I appear to have mis-spelled it, the correct spelling is "KREIDEZEIT". I have bought it from Mike Wye Associates up to now. (You have to request a quote online, then they'll confirm their stock levels and email a pro-forma invoice over, which you can pay via the bank or by card over the phone... It's a bit faffy, but the product is worth it IMO) |
| 06/06/2023 17:58:31 |
I'm fully converted to linseed oil paints for exterior joinery. I was turned on to them by a friend of a friend who does restorative and architectural joinery work for the national trust and the likes. Over several years I have slowly stripped and repainting all the woodwork on the house with "Kregzdeit" brand linseed oil paint and whilst it's odd stuff to work with, it goes on extremely well, smells lovely when you're working with it, and lasts phenomenally well even in harsh applications.
Properly applied it won't blister or crack and has sufficient flex to move with the wood as moisture content changes through the year. Over 4-5 years the exterior surface goes a bit powdery, but you can wipe it down and apply another coat of oil (from the same manufacturer) to bring it back to full gloss with a single coat. Supposedly if that's kept up it will last around 20-25 years before repainting is needed... Certainly in the time I've been using it my father has had to fully prep and repaint the windows on my parents house twice whilst mine just soldier on.
What it isn't however is cheap... Big upfront cost at about £85 per 2.5l can for the initial paint, although the Oil for maintenance is cheaper than repainting with conventional gloss by a country mile. It felt like a gamble going "buy once, cry once" on exterior paint, but does seem to be paying off, would recccomend. Edited By Jelly on 06/06/2023 18:00:06 |
| Thread: Equipment for brazing? |
| 06/06/2023 12:29:30 |
Posted by JasonB on 06/06/2023 07:21:11:
I don't know how well someone could mig braze that but I would not want to try. The other thing to think about if you did go for the welding or mig brazing option depending on what you want to make is how well does the filler material flow. Weld will just produce a fillet and what I have seen of mig brazing it again seems to form a fillet and not flow like the filler rod has in my test piece posted earlier. So if you want to fabricate say a cylinder for a model steam engine and solder on a block to form the port faces will you be able to seal that to the curved cylinder wall so you don't get air/steam passing between ports, certainly not with weld and I think unlikely with tig brazing. This is a fair point about MIG and TIG brazing, whilst they preserve the option to join dissimilar metals, they do use a different approach to joint design, which is more closely aligned to welding; although for TIG brazing it certainly is possible to do conventional capillary-action brazing of small parts, (much in the same way you can with carbon-arc if you're a masochist). In your example shown above, making the part using one of those processes would ideally have a joint with a wider fillet (toe-length 80%-100% the thickness of the base material), and owing to the size would almost certainly need to be done with a small TIG torch (definitely a No. 9 with a small cup, possibly an MR70 micro torch would be a better option for someone working on items of that size all the time). I would however fully expect the TIG Brazed example to take a fraction of the time required, and require no pickling or further clean-up. . The point about the choice of joining process dictating joint design then carries over into the cylinder example, where a welded approach would be to use a weldment with individual joints at each port welded from the inside (or both sides depending on thickness and shape) then machine as a second op if the surface finish of the ID was critical... Which is far more economical (and again faster) on a larger item, but challenging to downright impossible as you get down to very small assemblies like your 24mm bore example. . Very small items are generally the one place that brazing (and in your shoes I would go for pre-placed powdered braze in a furnace rather than use a torch because I'm much too ham-fisted for such small parts) can achieve things that conventional welding processes can't. If we ever get to the point of laser welding machines being affordable at a consumer price point, I would expect the scope of the advantage brazing has there to diminish somewhat further, but there's a way to go yet. |
| Thread: How did these work theory or practice? |
| 06/06/2023 11:36:10 |
Posted by noel shelley on 05/06/2023 20:21:03:
A little !The key with wood gasification is the feed stock, using wood chippings, if not very dry will cause the production of moisture and tar that has to be filtered out before combustion. The experiments I know of had big problems with clogged filter bagsand were deemed a failure ! Those conducting the tests seemed to have litte understanding of basic combustion and the heat loss due to moisture.Being a green experiment, tax funded success was not vital and nothing NEW was going to be found. Such units are commercially available today but they are aimed at places where there is a dry and readily available feedstock, nut shells Etc. The "gas" was used to fuel a diesel generator. Noel Edited By noel shelley on 05/06/2023 20:28:30 There is a long tradition of people mis-selling gasifer and pyrolysis technology for the treatment of MSW (Municipal Solid Waste) and other material streams with excessive heterogeneity, as a result of which very reputable companies (who should know better) end up loosing their shirts as a result to the tune of hundreds of millions (or 1.3 billion in the case of air products). There's a particularly savage review paper by an engineer at Loughborough Uni which highlights some of the more egregious and dangerous failures by developers of such projects to study the vast literature on the subject derived from the town gas era, followed by an exchange of short communications with a researcher who objected to the paper in which the author of the review proceeds to pull the objectors mathematical treatment of experimental results apart... It's rare you see that kind of thing in the scientific literature, and it gives me great amusement. . At the same time there's a curious German professor (notable for being dressed in a Dinner Jacket and Birkenstock's when I was first introduced to him) who has developed a pyrolysis reactor with an integral screw auger of a particularly complex geometry which mixes the solid char from the process to form an auto-catalytic bed facilitating the correct reaction conditions to allow the moisture in the feedstock to then hydrolyse the tar fraction produced by the initial breakdown of materials. The result is that it condenses a stream of remarkably clean hydrocarbons (which due to the hydrolysis are a mixture of aliphatic hydrocarbons and their oxygenates) out of the hydrogen stream. He has probably been altogether too cautious in approaching the commercialisation of that technology, despite having several successful pilot plants running now. |
| Thread: Equipment for brazing? |
| 05/06/2023 13:32:27 |
Personally I prefer oxy-propane with a Type 5 Welding Shank and a Propane mixer, Adams gas do rent free oxygen at very reasonable prices through a number of different gas suppliers who all sell Propane as well. Much more easily available and somewhat less hazardous than acetylene to handle (and no insurance issues) if you're nervous of it, but also cheaper and better suited to area heating (as required in brazing) due to the softer flame. The only manufacturer I'm aware of still doing manual brazing for production work runs on oxy-propane (piped to each bay, with economisers), and I'm sure they'd have switched to the Venturi-type torches for cost reasons if it was comparable or superior in terms of performance.
However in my opinion, it's extremely rare that brazing is actually a better option than welding, given the choice of process. So in your shoes I'd think an inexpensive inverter welder was a far better use of space and money than a brazing hearth, especially as both MIG and TIG can be used for brazing with suitable wire if you really need it for joining dissimilar metals... Controversial with some forum members I'm sure, and no good at all if you're already committed to a project which requires a "silver soldered" boiler, but it's an additional perspective at least. Edited By Jelly on 05/06/2023 13:39:08 |
| Thread: What did you do today? 2023 |
| 05/06/2023 11:28:21 |
Posted by Nigel Graham 2 on 04/06/2023 00:06:30:
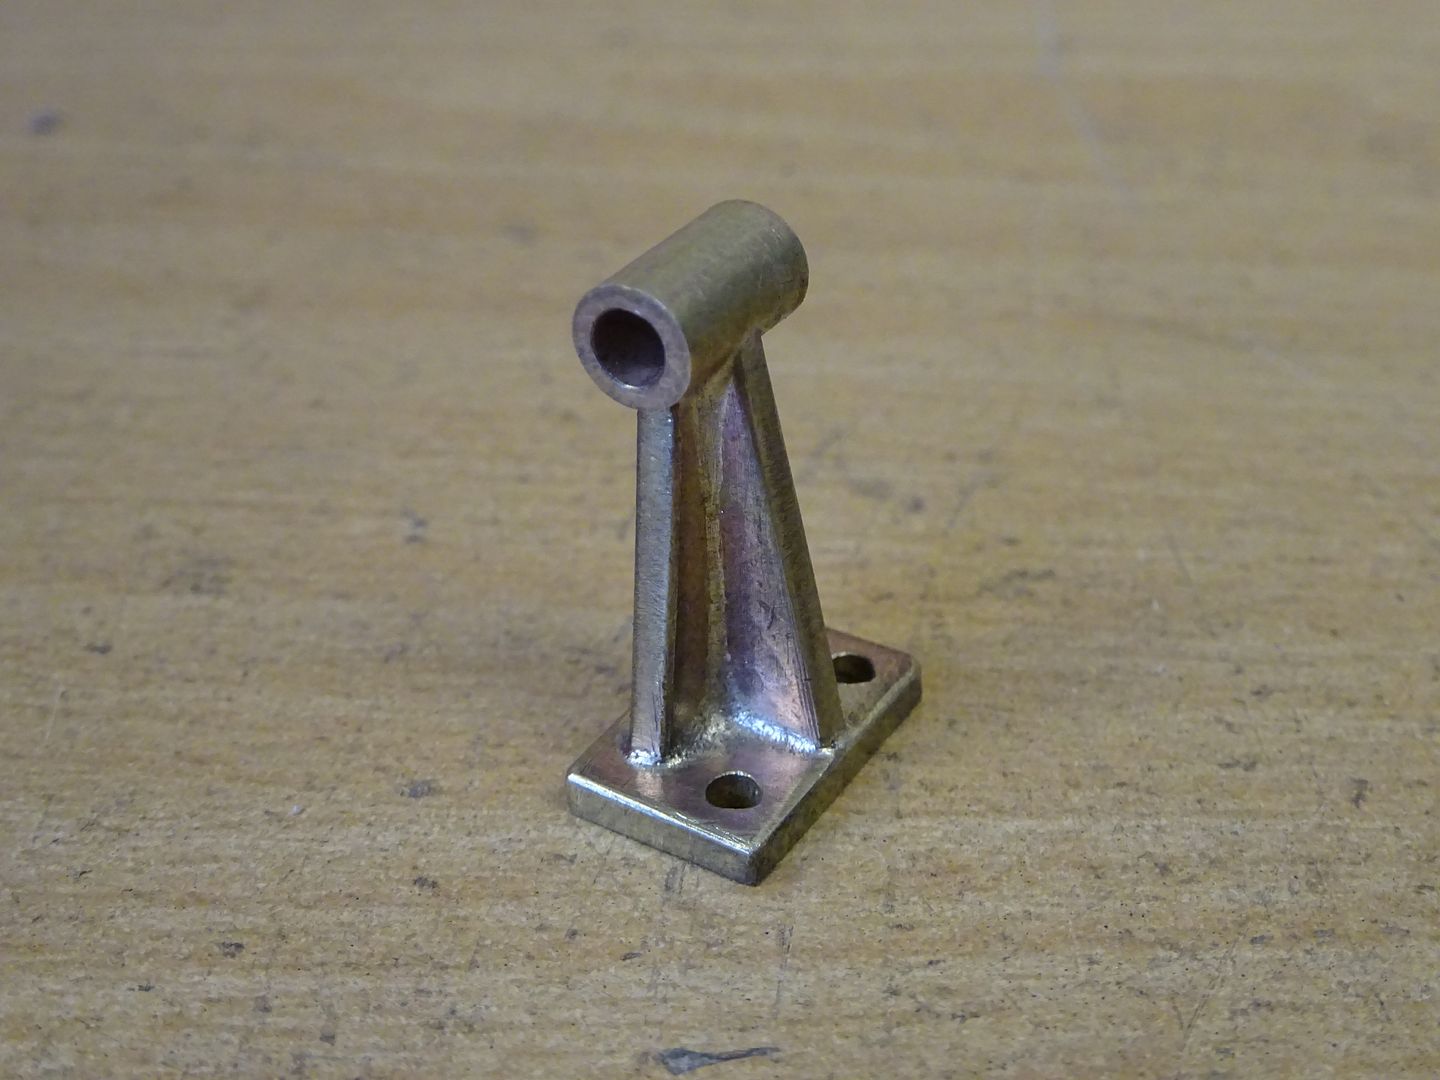
Jelly - I am intrigued. What is it? A filing jig for jewellery work (I seem to be beset by jewlers). There's a 45° and 90° jaw, the tongues are to align rectilinear wire, and the v notches hold hex, D and round wire, along with tubes. The jaws are hardened so a file skates off them, so you can work right down to it without damaging it (although ideally will avoid doing so deliberately to preserve the file).
Got a tiny bit more done on it Friday evening:
If you look closely at the left hand side you can see where I slipped with the file whilst deburring the edges, which is aesthetically rather upsetting, but otherwise the fit is exactly as desired with about 0.01mm clearance between the tongue and the corresponding slot.
If you look closely at the angled face above you will see that I cocked up my measurements when band-sawing the blank apart, so the 6mm reamed hole doesn't quite reach through that part, which I will need to fix before I'm done.
Also got started with the 45° faces, using an angle block for setup and generous helpings of force to secure it, followed by lighter cuts than normal. Set up like that I could only take about a 0.75mm DOC, whereas with the 90° face I was able to take a 5mm DOC roughing pass, with 1mm to clean up, all done with a 10mm Carbide 4-flute End-mill running @ 1440rpm (45m/min surface speed). The 6mm slot was done in a 3 passes with 2mm DOC and a 6mm HSS-CO endmill @ 800 rpm (15m/min), and came out around 0.05mm oversized (which I had already tested and was accounting for to help give me the 0.01mm clearance for the fit). I am going to have to be *much* more gentle making its angled counterpart. Either way, very happy with the mill's performance... Great MRR in a tough material with acceptable surface finish (what you can see, can't actually be felt, so should lap out quickly once the parts are hardened), ideal for my impatient temperament!
Saturday was fully committed to gardening, finally getting the roses I've been growing from cuttings taken from my late grandparents collection when we sold the house planted in the bed outside my kitchen window, and taking out a few overgrown shrubs in preparation for felling some small trees. The previous owners of my house didn't really care for the rather narrow garden which had been (somewhat inadvisably) planted with a vast number of vigorous shrubs and trees. After 3 years trying to take a conservative approach, the conclusion unfortunately most of them are now irretrievably oversized for the available space and need to come out, which will leave two adolescent cherry trees, a mature birch, and a "Strawberry Fruit Tree".
Sunday was a walk round Spurn Head with a mate, the birds weren't particularly active, but the hairy caterpillars were in full swing, and we made up for the lack of bird activity by sitting at the point in glorious sunshine as high tide came in for a spot of ship-watching, marvelling at the Humber Pilots hopping back and forth between vessels whilst I tried to predict which Port the various vessels were destined for based on the cargo and if the Pilots guided them from their boat or actually boarded, whilst my mate looked them up online to judge how well I was doing (I did pretty well, but have also had a reasonable history of working with the various ports on the Humber, Trent and Ouse). I also impulse-bought a chainsaw from a farmer whilst driving over to Spurn, because he had a sign up at the gate, and when I enquired the price was right. It's Sachs-Dolmar in great condition and running nicely, but for the need of a new chain... Which will help with future gardening plans, but is mostly wanted for milling some big birch logs I've had seasoning for the last 4 years, it's over a decade since I last used an "Alaskan mill", so I might need to get one of my forester or arborist pals to give me a refresher before I jump straight in with that... Even assuming my chainsaw trousers still fit, I have no desire to test their effectiveness! Edited By Jelly on 05/06/2023 11:46:32 |
| 01/06/2023 23:45:39 |
Drilled two 5mm holes with a 25 L/D ratio in a piece of ground 100MnCrW4, then opened the top 80mm out to 5.9mm and reamed to 6mm...
. Only to immediately cut into pieces on the bandsaw, and mill matched flats onto the cut face.
. And start making some features...
. All being well, tomorrow evening I will end up with something which looks a bit more like this, and can start worrying about hardening the components.
I am wondering how best to make the angled face and features... Going to have to play about with work-holding to see what's most secure. Once that's done, I will need to bash out two more, which will hopefully be easy once the approach is all worked out. |
| Thread: Workshop shelving |
| 18/05/2023 14:01:36 |
Noel, Not sure where you are in the country, but I have three sets of pressed steel shelving about 1.2m/4' tall, with 4 × 250mm by 1000mm shelves which has been replaced with heavier racking (from a shop fitter who had salvaged them when refitting a McDonald's of all places) and is tucked away under my workbench. Can find some photos if you might be interested. Edited By Jelly on 18/05/2023 14:03:57 |
| Thread: How to relocate a Bridgeport series 1 milling machine..... |
| 12/05/2023 23:25:56 |
Posted by Rooossone on 12/05/2023 22:26:54:
Posted by Fulmen on 12/05/2023 21:18:31:
Well done indeed. This is why small machines fetch such a premium. This is a valuable lesson I have learned today. I will be enlisting the help of Steve for the transport but once at my workshop, I will be using an engine crane to move it into my workshop and into position, I will need to basically replicate what you did with your mill. Thank you for sharing the pictures of your moving techniques. It has given me some more confidence that what I am doing is viable. I will also rely on the advice of Steve as he clearly sounds like he knows what he is doing. We will probably make a plan before anything is even moved based on what needs to be done at the destination. It can be daunting the first time you do it, but if you think through everything that could possibly go wrong and figure out how to eliminate each potential issue, it will go smoothly when you do it. If you have a lingering doubt about something, don't start until you've figured out why and either gone through it enough to be sure it's not an issue, or found an alternative approach.
If you're planning to hoist it up a tiny bit and wheel it on the crane, then sweep, sweep, and sweep again. With that kind of weight on them even little bits of grit can cause the castors to bind up awkwardly, if you have a rough floor finish, consider getting a couple of sheets of hardboard or ply to run on.
Also be aware of any slight slopes, even a slight uphill that's not immediately obvious will be appreciably harder to push nearly a tonne of cast iron up, and anything obviously sloping underfoot could pose a risk of rolling back. If you're dealing with a slope that has a risk of roll-bacl, then Toolstation sell an inexpensive 2T ratcheting come-along, which can be anchored to the ground with a piece of angle iron and two concrete screws, I have Needless to say, pull on a central point as low down as possible (and on the crane not the machine) for stability. Edit: Photos.
It was not ideal or comfortable to have that much extra height under it, but given the available options was far more secure that way as compared to using a thinner less stiff ramp would have been In any case the come-along allowed me to be well outside of the danger zone whenever the machine was being moved and assess its stability before approaching to add rollers or position the skates for the transition off the ramp.
The positive of wheeling it with an engine crane is that as long as the centre of mass is inside the legs, it will be much more stable than trying to push/pull it on skates/rollers. Do be aware that when moving a hoisted load like that, if it does tip forward, whilst the machine stands a much better chance of not falling over, the crane could be kicked out backwards and upwards. You can minimise the risk of that by lifting the load as little as possible to minimise the potential energy involved, and not standing directly behind the crane when you move it if you do have to lift it higher for some reason. Edited By Jelly on 12/05/2023 23:47:59 |
| 12/05/2023 21:36:55 |
Posted by Fulmen on 12/05/2023 21:18:31:
Well done indeed. This is why small machines fetch such a premium. True enough, I feel like it's important to spread the word that it's not actually that difficult if you're well prepared though, even if it does result in more competition for bigger machines in the future. Also, perhaps a controversial opinion, but rigging work is great fun, and an excellent mechanical problem solving challenge. |
| 12/05/2023 21:11:58 |
Photographic follow-up.
Engine Crane:
The trick there was getting a low enough attachment point to avoid hitting the van roof in a very small van, wouldn't have been an issue with a high top. Conversely with a Bridgeport the trick is to get a crane which has enough remaining lift height in the 1 tonne position to get it to clear the van floor, when you're hoisting from the lifting eye on the ram.
Gantry Hoist:
All together a bit more time and effort to set up, but much more secure lifting even at substantial height. Would recommend having two people just for the gantry setup if nothing else.
And finally winching:
All very fast and smooth. Far less effort than previous moves with cranes, despite being the tallest and heaviest of the three (for reference the FNK25 is more than twice the weight of a Bridgeport and about a foot taller).
I don't doubt Steve from Landylift will do a fine job, and if you're not familiar with lifting and rigging it's quite possibly the most sensible option, but it's very do-able as a DIY activity. I would take full advantage of the opportunity to observe how he does all the other bits that aren't operating the Hiab, because it's all that setup which is where the skill (and danger) is.
Edit: Also, if you can pick them up cheap, machine skates and a toe jack are both godsends to have around if you own heavy machinery.
Second Edit: I would categorically not use a hired 3.5T Luton Van as they lack the correct lashing points and have tail lifts which are wholly inadequate for the weight (although will probably lift it, just bend/droop with it) and are narrow with no toe-boards (essential to stop a pallet truck rolling off the back when the lift inevitably droops under the load). A dropside with tail-lift is more suitable from a load securing point of view and usually come with larger steel tail-lifts suitable for the load and pallet truck operations, but are much scarcer in the short term rental market.
Third Edit: 5T and 7T Iveco Luton's or Panel vans or a traditional Cabover 7.5T Luton would be an option for someone with a pre '97 licence, because you can normally request one with a 1000kg tail lift without much trouble, but that avenue of pleasure is not open to me without taking my HGV licence. Edited By Jelly on 12/05/2023 21:31:24 |
| 12/05/2023 20:27:33 |
Posted by Dave S on 12/05/2023 17:15:49:
The late JS of this parish used to move Bridgeports not infrequently. An engine crane, a good enough capacity van are required, along with some spanner’s. I suspect a search here or on the Uk rec models engineering list (googlewill search it ok) will find the details, but iirc it’s off with the ram, off with the table remove knee if required and then sling the bits into the van. Reassembly is the traditional Haynes reverse of taking apart… Dave Hiring a suitable 3 or 5 tonne (for the reach/height capacity) collapsible engine crane will actually allow loading into a van in one piece, load the mill through the side door, and use the back door to put the (ideally folded) engine crane in again for the return trip. . Although if there's a big enough area of flat ground at both ends the hire cost of an aluminium lifting gantry isn't that much more than a engine crane and allows you to use a flatbed transit, which is far easier (and probably a bit safer) from a loading/unloading perspective but perhaps not as quick because of the time rigging a de-rigging the gantry. . Personally I'm fully sold on putting the machine on skates or rollers and using a plant trailer (so you have a lip-free ramp rated for the full 2 - 3.5T and rear legs) in combination with a winch now. Took me about 20 mins setup and 10 mins of winching and adjusting rollers to offload my knee mill on my own last month, would have been slower with a Tirfor if I didn't have the winch on my truck, but just as effortless compared to previous moves.
|
| Thread: Vickers Bl 8 inch Howitzer cannon of 1917 |
| 12/05/2023 14:12:34 |
Posted by Robert Atkinson 2 on 28/05/2022 10:11:04:
Not directly related but the pictures of obturators reminded me of this accident report:
Robert G8RPI From a safety lessons perspective that was a really worthwhile read, particularly the section addressing how the fail-safe design had failed to anticipate an operational practice developed four years later, and the safety reassessment having been predicated on the accident scenario being implausible, based on the correct drills being followed up to that point.
Initially it left me thinking that I'm fortunate to work in an industry which has at this point become extremely thorough in assessing the risk from equipment being operated in unintended states and the potential for a chain of events that lets it happen... But it further rumination left me thinking "If I was the technical representative on that safety study would I really have spotted the potential for such an unusual operational scenario?".
Which got me thinking about the limitations of the somewhat theoretical approach to HAZOP (HAZard and OPerability) studies often taken, in the context of deciding that a specific equipment condition is or is not plausible enough to consider as part of the study. For a complex piece of user maintained equipment (like the L30A1), there's a real need for the design authority or safety study leader to ensure a thorough review of ongoing operational practice, empirically and/or via observation of normal users to has validated existing assumptions that rule out consideration of a risk still hold, and that's a potential gap that could easily happen in my sector or elsewhere... Thankyou. Edited By Jelly on 12/05/2023 14:13:49 |
| Thread: Replacement lathes. Recommendations? |
| 07/05/2023 12:12:53 |
Posted by mgnbuk on 07/05/2023 10:44:04:
There's a good number of machine tool reconditioners out there, and the boxford beds are so small that it would fit the capabilities of many larger grinding shops, without needing to go to someone with a dedicated bed-grinder. I spent 27 years working for a CNC machine tool retrofit / rebuilding company, so do have a bit of prior experience of bed reginders, Jelly. I don't share your optimism regarding finding a company with the machinery, experience or inclination to regrind a Boxford bed for an economical price. The companies my former employer used to use have long gone now. While a Myford can be reground with any surface grinder of sufficient capacity, machining 6 angled faces + 1 flat on a Boxford is a bit more involved - a lot of setting up time at commercial rates. Being soft the Boxford bed could be milled or planed (if you could find anyone with a planer these days ), but still a lot of setup. Then there is the labour to strip and rebuild the machine + replace any other worn or damaged parts & possibly repaint - I would guesstimate be that a reasonable Boxford rebuild would be at least twice the price of buying a Chinese replacement machine like the gearhead Warco. Not certain about the current incarnation of DS&G, but in the care of the previous owner of the name there was little more than a place-holding website. That company was in Halifax, though, and I note the current incarnation are in Preston. Their website doesn't give much away about any in-house machining capabilities. Nigel B.
Nigel B. You hit the nail on the head with finding the right supplier being the key. Perhaps I'm less concerned by it because my previous job was as an R&D Manager, and having complex parts made or remanufactured in small batches or one offs was something that I did regularly with reasonable success. It inevitably involved a lot of ringing round, following leads from one small business owner to another following a chain of affable middle aged men* who know someone who might help. It can be frustrating in a hurry, but is otherwise usually quite an interesting use of an afternoon. *(It was usually men, although I noted with interest that several of the more successful businesses would have me talking to a bloke on the shop floor to confirm they could do it, but see me negotiating with an extremely shrewd woman who was looking after the business side of things). . I know SNA Grinding have several machines more than big enough to do the job no sweat (600×3000mm max capacity), but they just do grinding so it would be on someone else (possibly the technicians, who not normally being paid for the holiday period in many schools may welcome the overtime) to do all the disassembly and refitting, so far from an ideal solution. AMT Machine Tools would probably be in a position to regrind and definitely in a position to mill the beds in house, when I last saw them they were reassembling a Webster and Bennett VBL which had just had the columns come back from being reground. . Price wise, I have to respect you have a greater knowledge of that market than I do, but I do know a community organisation I work with paid about 2.5k for a complete overhaul of a 9×24 surface grinder including bearing replacement, and could dig out the name of the supplier if I go through my old emails. Similarly someone of this parish (I forget who) had discussions with DSG in Preston and found that it would be cheaper to buy a second hand DSG 13" or 17" and have it reconditioned with them than it would be to buy a modern Chester or Warco of equivalent capacity... But the logistics of doing so would have been a challenge for them as a private individual. . In Tristan's shoes I would definitely get recon quotes for comparison, if only to give justification to the school's administration that all options have been considered should he find he needs to push the suggested budget a bit to get something fit for purpose for his students (who are very lucky to have both the facilities and teachers they do). |
| 07/05/2023 08:34:54 |
Posted by larry phelan 1 on 07/05/2023 08:01:07:
Someone mentioned TOS lathes ? I always thought that they were highly regarded although I never recall seeing any small ones, they were all big machines built for serious work That was me, I have heard older engineers describe how they were treated with real suspicion/condescension when they first arrived on the UK & US market... Until people got to using them and the opinions rapidly began to shift. The smallest lathe they made was the S28 Toolroom Lathe, same capacity as a Warco WM280, but fitted with a 4hp motor and weighing in at 1.5 tonnes! Edit: I think I may be wrong and they did some 160mm and 90mm capacity lathes too designed to compete with the Schaublin 102 and 125, but only in very small numbers. In any case, not a serious recommendation for Tristan as they have a nasty habit of equipping their lathes with both huge motors and separate rapid feeds, both a liability around young, cocky teenagers. Edited By Jelly on 07/05/2023 08:50:35 |
| 07/05/2023 01:46:19 |
Posted by mgnbuk on 06/05/2023 16:26:37
I would guess that bed wear would be a issue with a well used '60s Boxford. The Boxford bed top formation (all vees and flats + vertical edges) were gang milled in one operation originally. In the early '80s Boxford did re-machine worn beds but those days are long gone (along with the machines that used to do the job) , so I would guess that machining out bed wear would be a costly excercise now. Nigel B. There's a good number of machine tool reconditioners out there, and the boxford beds are so small that it would fit the capabilities of many larger grinding shops, without needing to go to someone with a dedicated bed-grinder. They don't necessarily advertise themselves all that well though. Off the top of my head DSG now specialise in the rebuild of lathes (not just their own), or AMT Machine Tools (Higham on the Hill) and GD Machinery (Tinsley) will rebuild pretty much anything, and both come up competitive compared to buying new. If it's purely a case of removing bed wear SNA Grinding (Attercliffe) could do the job for a mere fraction of the cost of replacement. It's worth Tristan at least getting prices from several reconditioners for sending the lathes out at the start of the summer holidays to be overhauled, and comparing that to replacement cost, in his specific situation it may well be an economical solution for the department. |


Magazine Locator
Want the latest issue of Model Engineer or Model Engineers' Workshop? Use our magazine locator links to find your nearest stockist!
Sign up to our Newsletter
Sign up to our newsletter and get a free digital issue.
You can unsubscribe at anytime. View our privacy policy at www.mortons.co.uk/privacy
Latest Forum Posts
- *Oct 2023: FORUM MIGRATION TIMELINE*
05/10/2023 07:57:11 - Making ER11 collet chuck
05/10/2023 07:56:24 - What did you do today? 2023
05/10/2023 07:25:01 - Orrery
05/10/2023 06:00:41 - Wera hand-tools
05/10/2023 05:47:07 - New member
05/10/2023 04:40:11 - Problems with external pot on at1 vfd
05/10/2023 00:06:32 - Drain plug
04/10/2023 23:36:17 - digi phase converter for 10 machines.....
04/10/2023 23:13:48 - Winter Storage Of Locomotives
04/10/2023 21:02:11 - More Latest Posts...
- View All Topics
Support Our Partners


Shopping Partners
Subscription Offer

Latest "For Sale" Ads
- Reeves** - Rebuilt Royal Scot by Martin Evans
by John Broughton
£300.00 - BRITANNIA 5" GAUGE James Perrier
by Jon Seabright 1
£2,500.00 - Drill Grinder - for restoration
by Nigel Graham 2
£0.00 - WARCO WM18 MILLING MACHINE
by Alex Chudley
£1,200.00 - MYFORD SUPER 7 LATHE
by Alex Chudley
£2,000.00 - More "For Sale" Ads...
Latest "Wanted" Ads
- D1-3 backplate
by Michael Horley
Price Not Specified - fixed steady for a Colchester bantam mark1 800
by George Jervis
Price Not Specified - lbsc pansy
by JACK SIDEBOTHAM
Price Not Specified - Pratt Burnerd multifit chuck key.
by Tim Riome
Price Not Specified - BANDSAW BLADE WELDER
by HUGH
Price Not Specified - More "Wanted" Ads...
Get In Touch!
Do you want to contact the Model Engineer and Model Engineers' Workshop team?
You can contact us by phone, mail or email about the magazines including becoming a contributor, submitting reader's letters or making queries about articles. You can also get in touch about this website, advertising or other general issues.
Click THIS LINK for full contact details.
For subscription issues please see THIS LINK.
Digital Back Issues


Donate

 Register
 Log-in
Model Engineer Magazine
- Percival Marshall
- M.E. History
- LittleLEC
- M.E. Clock

ME Workshop
- An Adcock
- & Shipley
- Horizontal
- Mill

Subscribe Now
- Great savings
- Delivered to your door

Pre-order your copy!
- Delivered to your doorstep!
- Free UK delivery!