Member postings for Iain Downs
Here is a list of all the postings Iain Downs has made in our forums. Click on a thread name to jump to the thread.
| Thread: What Did You Do Today (2016) |
| 19/06/2016 22:55:50 |
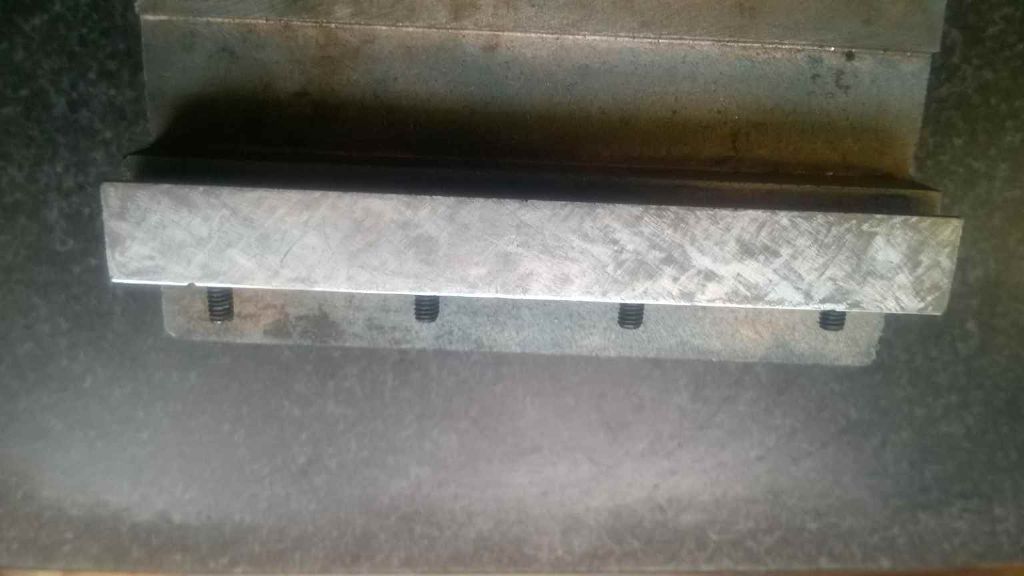
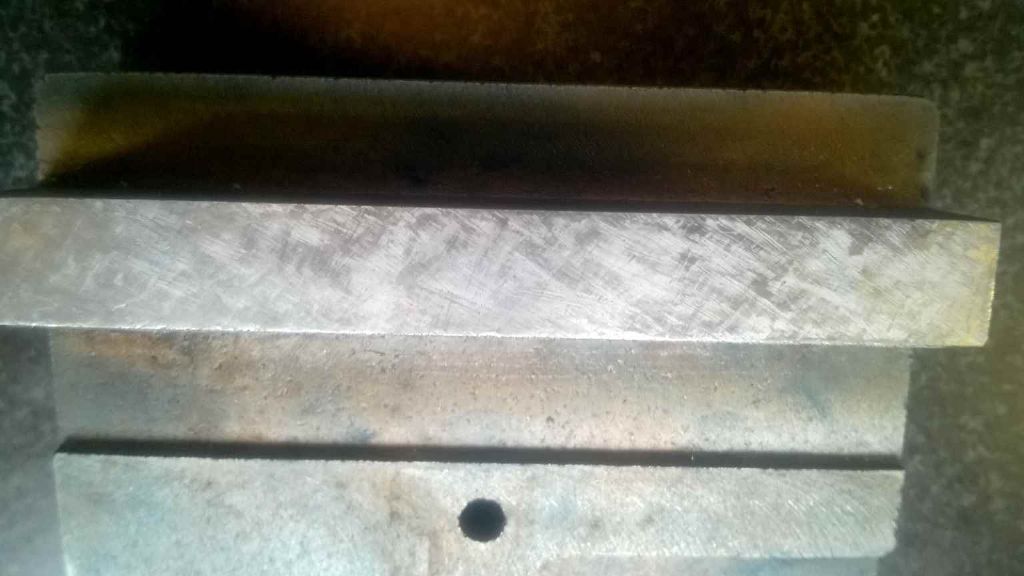
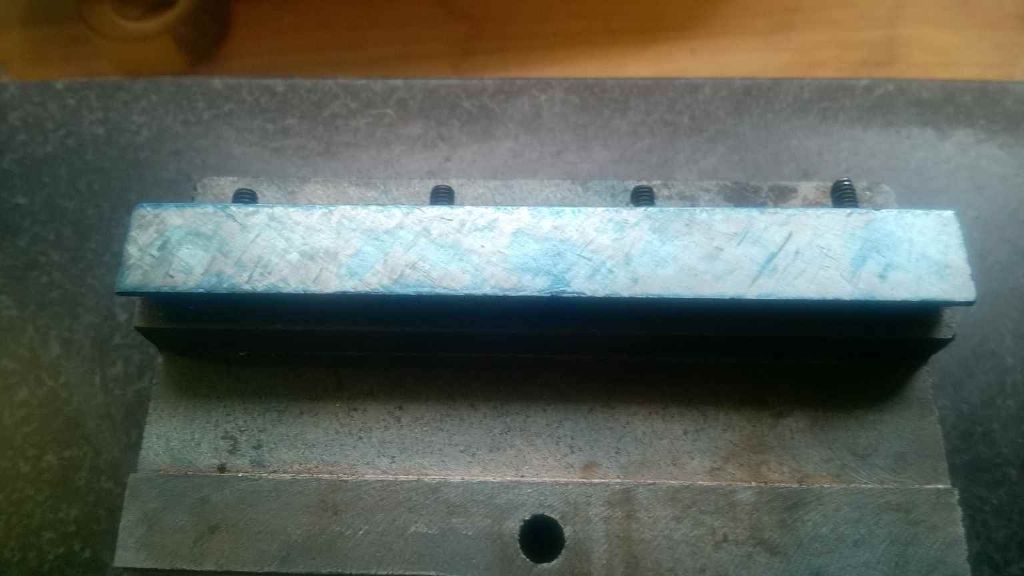
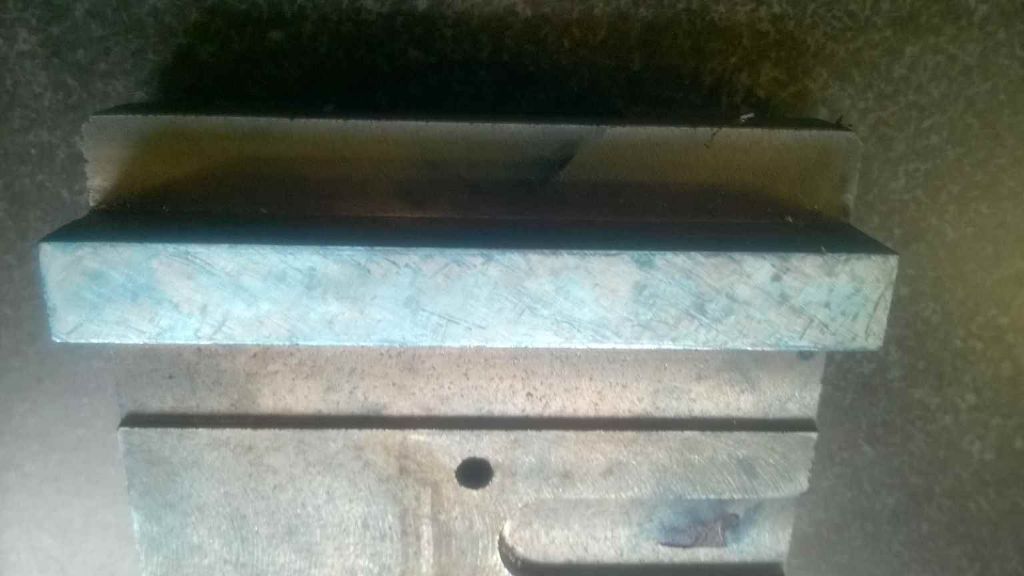
Today I had a go at scraping. On the one hand it was an interesting experience, seeing the scraped area creep across the ways. On the other hand, after an hour and a half or so, I was starting to wonder if I was getting to the point where I was making it worse as much as better! And if applying this level of 'precision' to my micro mill wasn't a case of polishing a, erm waste item.... Still I might have another go later in the week and see if I can get it smoother! |
| 17/06/2016 21:10:00 |
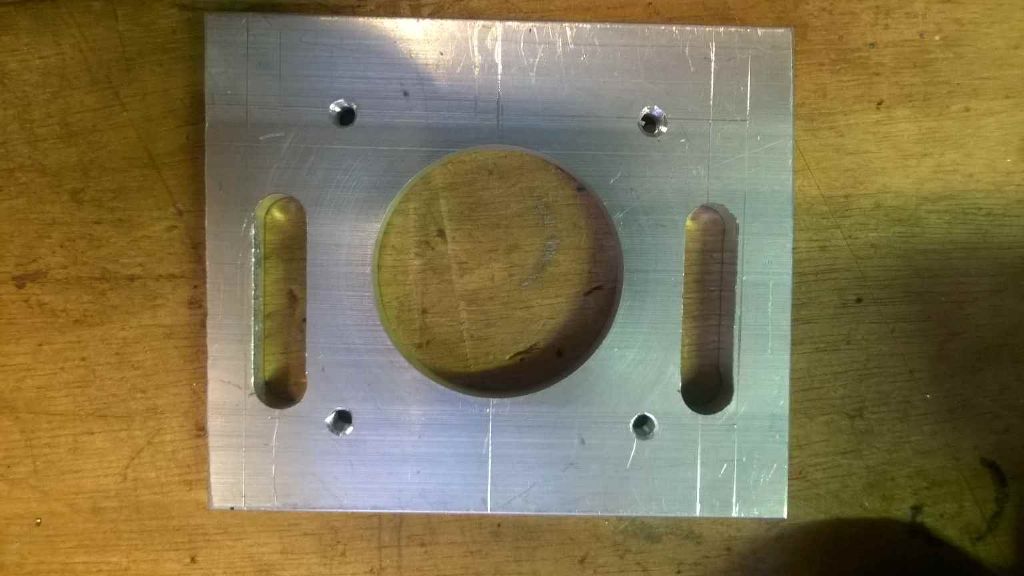
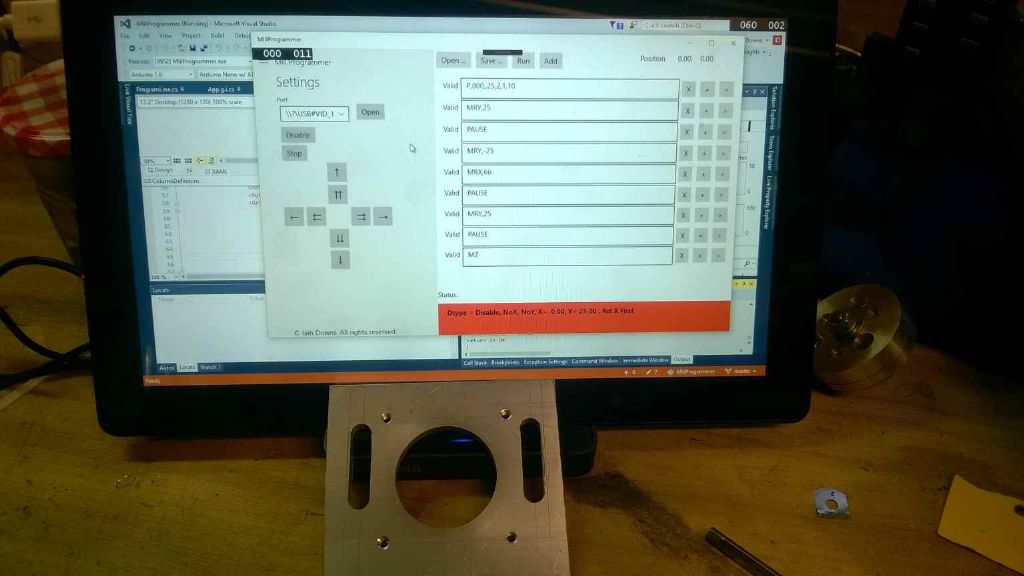
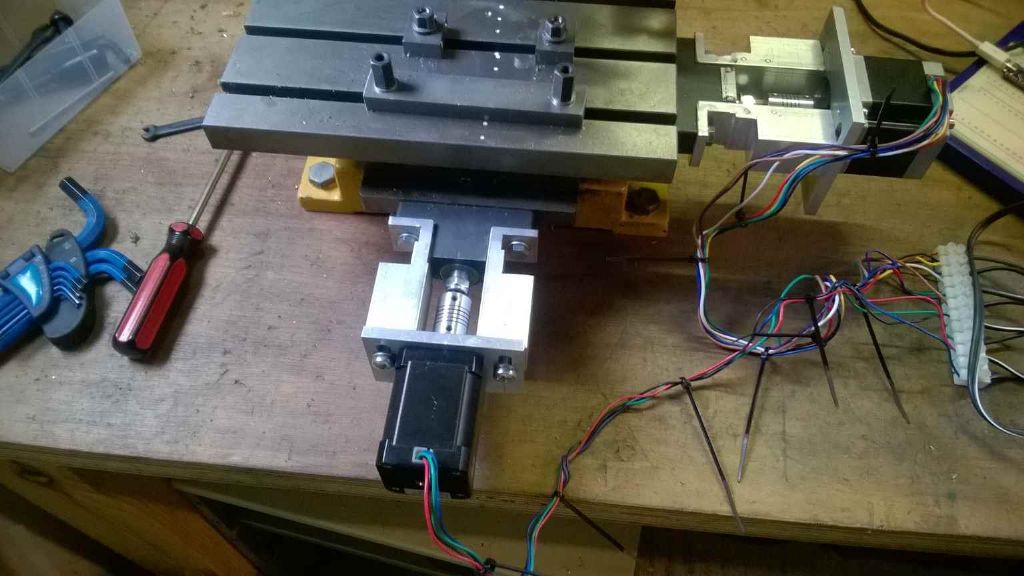
My first CNC milled piece! I've finally got my arduino progam, Windows 10 program and hardware working well enough actually do something with it. This is a plate to replace the NEMA17 motor currently driving the Y axis with a NEMA 23 motor. The mill is only a micro, so there's no auto tool changes, no Z axis control, but this is a damned sight more accurate (and repeatable!) than if I'd done it by counting the turns on the handle! Same plate in front of the tablet with the CNC program on it.
Iain |
| Thread: Crop Circles - poor surface when milling |
| 12/06/2016 18:31:35 |
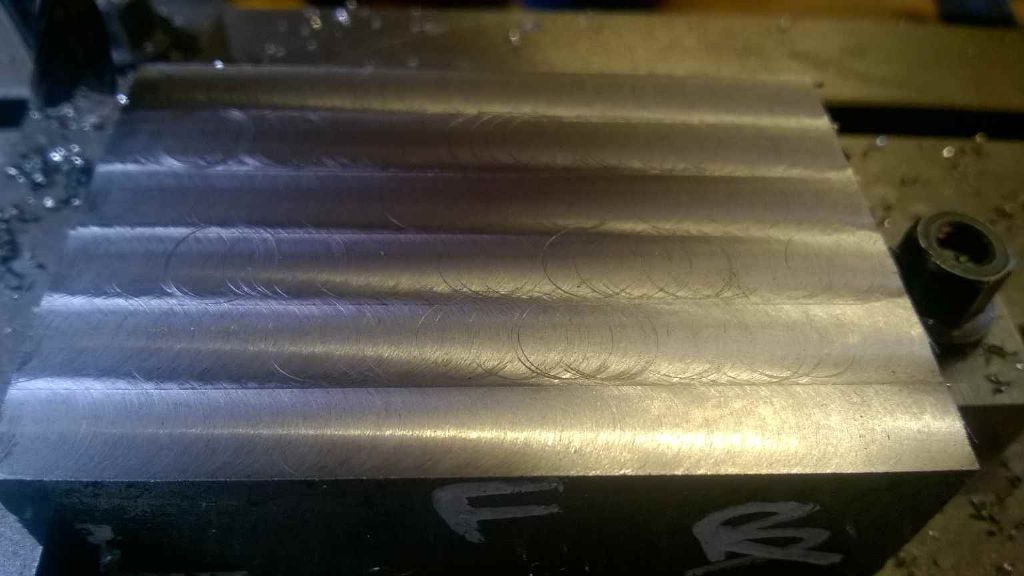
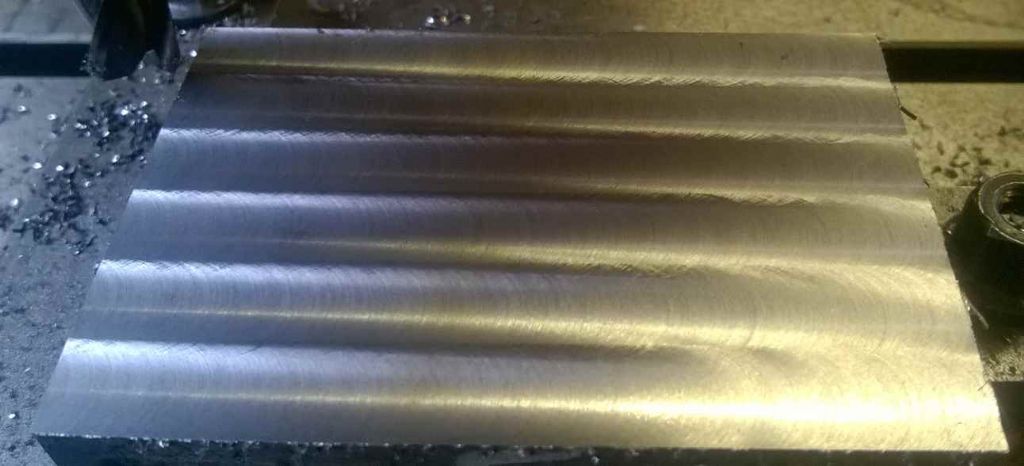
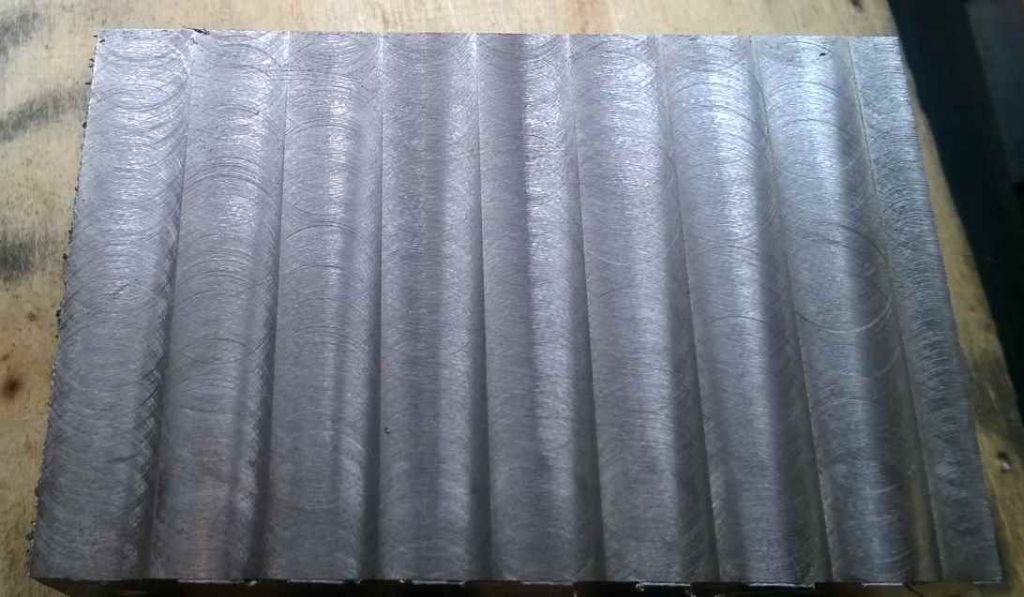
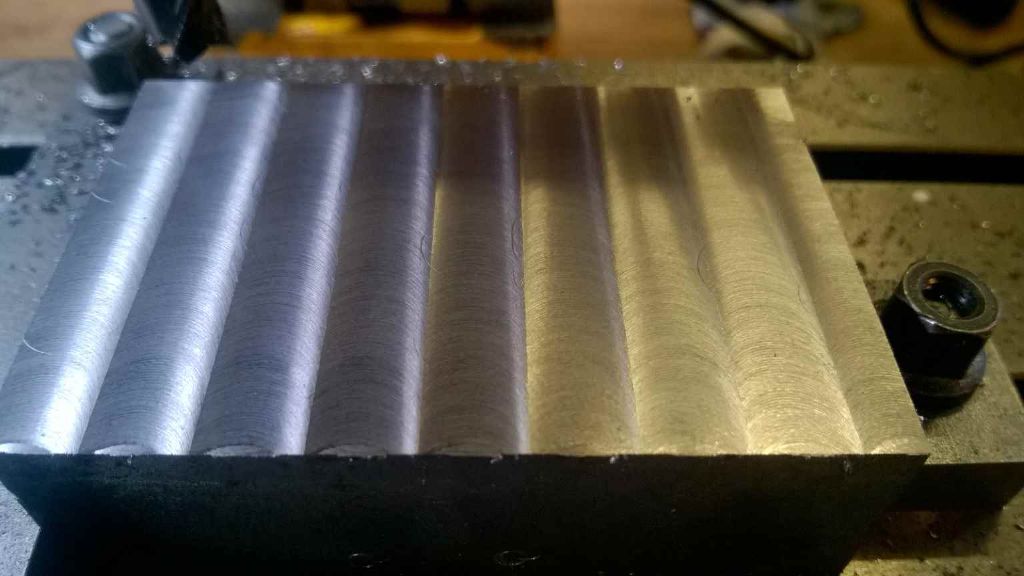
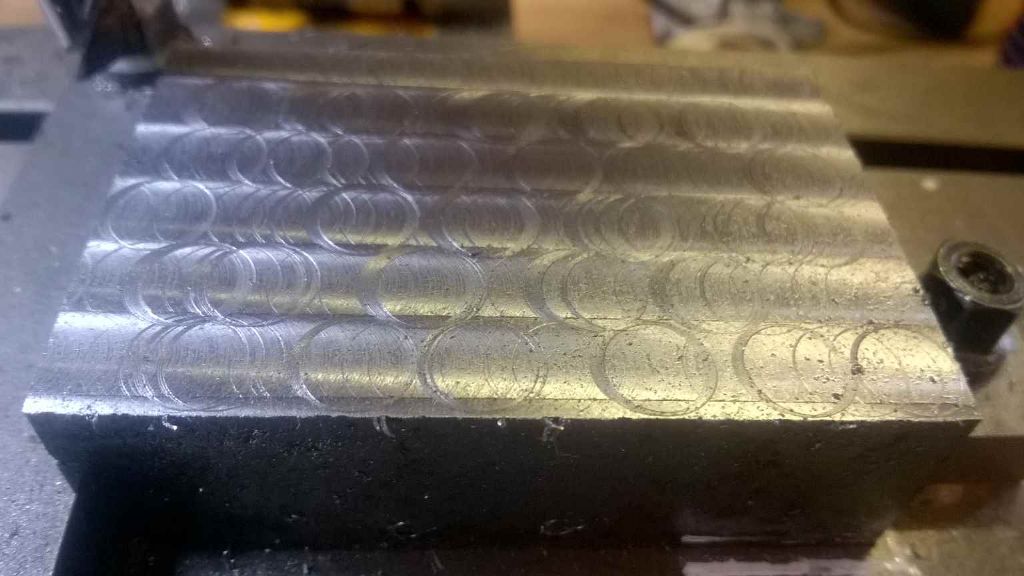
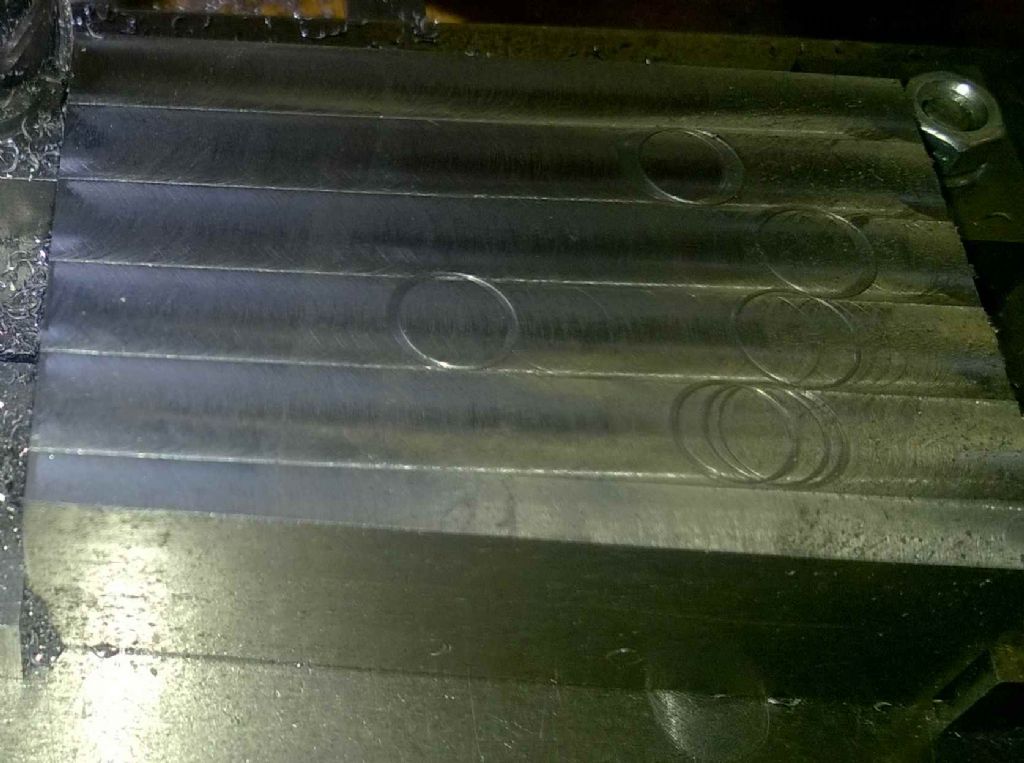
So. I've stripped the mill down and checked and re-assembled. I've found that there is a high spot on the Y axis way (in / out)which explains the binding I've found when adjusting the Y jibs and the way on the back of the table is 0.08 or so higher than the front one.which explains the drop. I've put the machine back together without the 0.1mm feeler gauge. I set the jibs so that they ran smoothly (pushed by hand - no leadscrew connected), but 5 degrees tighter on any jib screw bound them. Here is the result Not great. So I decided to do the opposite of some of the advice here and I slowed the cut down from 2mm/sec to 1mm / sec (60mm/min). With this as the result. I was rather happy with that. It's actually better than the photo makes it look. Finally I tried the other Axis. This is the one which was better before. Not now! It's not quite as ragged as it looks (the left hand edge was started at 2mm ./ sec which is why it's a mess). The Y axis (this one) is driven my a NEMA 17 motor which is struggling at the higher speeds (8 mm / sec for non-cutting moves). I'm also wondering if part of the problem is the way I'm driving the motors. I'm using the 'loop' in the Arduino which may be resulting in some uneven pulses. I may try driving the motor timing from a timer not under a software loop. I'm still keen to understand what the best way of tuning up the table is. I would almost certainly try and scrape the middle bit of the table - the ways on the table proper are not really accessable due to the dovetail.
Iain |
| Thread: Lapping - how to (cheaply) |
| 12/06/2016 14:29:32 |
Hi, Brian.
My surface plate is granite which will be resistant to water - which I presume is what you would be concerned about damaging the plate. It seems easy enough to get wet and dry from amazon - and without paying too much.
AJohn - I'll put a lapping plate on my to do list. I'd work it from my surface plate and not using whitworths approach! life's too short...
Iain |
| 12/06/2016 11:46:25 |
I've had a quick confusion of the subject on the interweb and wanted to check my assumptions and understanding with proper experts. I'm talking about flat lapping here. The proper way requires a lapping table and various sorts of grinding paste and I get how that is done. I suppose I could build one myself with a bit of steel and scraping to get it flat. However, that sounds tedious (albeit a proper piece of metalworking). The other thing I've seen is using a surface table and sandpaper. the idea is to 'stick' the paper to the surface plat with some water and then do the lapping on that. I've had a bit of a go at this, but the outside of the lapped item seemed to get more attention than the inside. The sandpaper (800 grit) happily claimed to have velcro on the back (bought for woodworking), so perhaps this wasn't the best type. Is this a reasonable approach? and if so are there particular types of abrasive paper which would work well?
Iain |
| Thread: Crop Circles - poor surface when milling |
| 12/06/2016 11:29:26 |
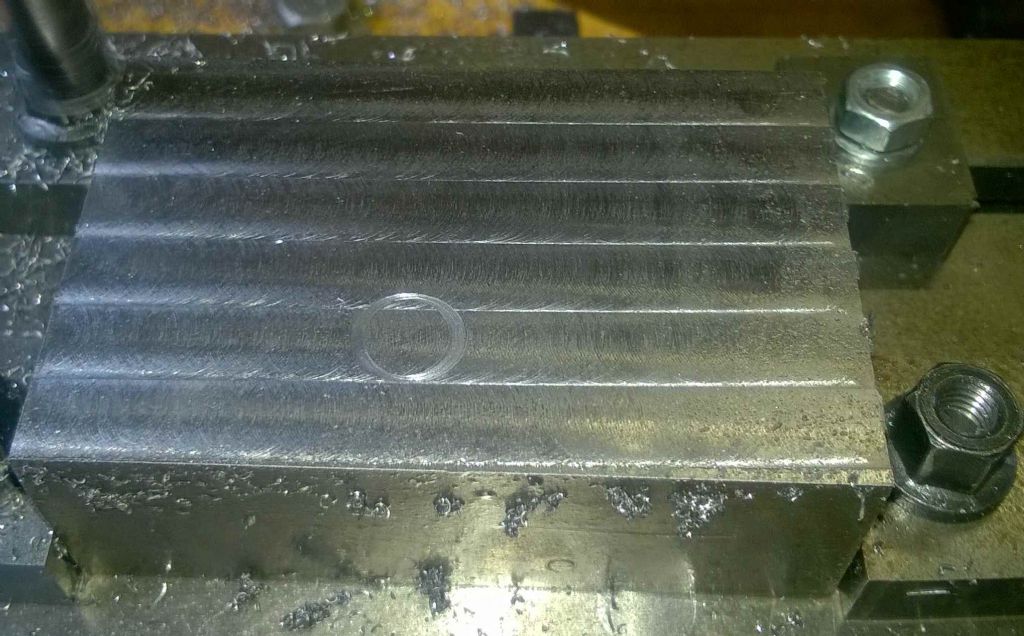
So, I'm now more confused. To recap, I'm trying to tram the mill in order to get a good finish and an accurate cut (I want to be able to make parallel sides!). I believe that the mill table slopes downwards to the front and I've found (surprise) that the column's a bit tilted. I put a 0.1mm feeler gauge under the front way which made the table level within 0.01mm front to back. by dint of bits and bobs of feeler gauge I got the spindle square on to within a tad over a though over a circle with a 105 mm diameter - pretty close to flat front to back and a fall of .04mm on the left.. Which I thought was quite good for a micro mill. I've nothing in the half though region which is what I'd have needed to tune it up more. Then mounted my test block and faced it. 10mm carbide cutter, approx 0.1 depth of cut, 2000rpm and around 4mm / sec feed. Although the picture looks a bit imperfect I was quite pleased. The metal feels smooth with the ridges in the front back direction barely discernable by touch. a dial indicator gives a tick of about .003 / .004 mm when it runs over them. The piece (50mm x 80mm) was level across the short face, but rose about .07 mm to the right, which is more or less consistent with the tramming results Then i tried the same cut (0.1 mm) in the other direction. This was a disaster! Before I panicked entirely, I re-did the face with the original direction and got the good results I had the first time, I 'lapped' it with some 800 abrasive paper on my surface table which removed any visible tick for the ridges. though they are still visible - I ran out of paper before finishing. Now this is where things get wierd. I was going to try and remove the .03 mm tramming error. I replace the dial indicator arrangement and re-checked the tramming. Now it appeared to be out on the left by .03 mm but in the opposite direction. I thought, 'perhaps its where abouts it is on the table' so I moved the table to the far left (reading on right of table) and took a reading. Somewhat to my surprise the table now falls ,2mm to the front and falls .08mm on the left. And this is now consistent. I've moved the table all the way to the left and at all points inbetween I can the same reading (~0.2 and 0.08 mm out), Th table now falls by about 0.03 which is worse than before the movement. I do have a theory for all of this which I wanted to pose to the experts! I think the issue is around the 0.1mm feeler gauge under the ways which I'm using to raise the table. I think that the way is not running smoothly on it which is why the left right cut is so poor. And I think it's moved around a bit which is why the tramming's gone out. How should I properly level the table? I would guess I would either have to get a better shim, or scrape or lap the far way. I'd appreciate any practical advice on how to accomplish any of these tasks!
Iain (P.S. Sorry this is so long!) |
| 07/06/2016 22:38:46 |
CMD10 - a Seig X1 I believe. It's a tiny thing. To get 0.5mm deflection was a pretty solid lean I must admit. The column was bolted down tight enough. Since then I've had a play at tramming it. I've pushed a 0.10 shim (feeler gauge) under the front way and that's leveled the table withing 0.01 mm. I've not tried moving the table in the X direction yet, so I'm not sure if it will stay in place. I also have a feeling that feeler gauge isn't the most professional way to do this. I've also tilted the head by shimming under the front of the column. I thought I'd about got the right lean with .08 mm (or more likely 3 thou - it's an old feeler gauge and the writings worn off), but that's a bit over (after the 0.10 shim went in), so I'll try and find a .05mm feeler and use that. It's rather less frightening than I thought, though no scraping has been involved and no milling has yet taken place! Iain |
| 07/06/2016 18:06:13 |
Yes - I noticed that gently leaning on the machine could shift the dial reading by quarter to have a mm or more. Iain |
| 07/06/2016 07:48:59 |
That would be a nice solution, wouldn't it? I shall look at that when I have a chance.
Iain Edited By Iain Downs on 07/06/2016 07:49:14 |
| 06/06/2016 22:43:19 |
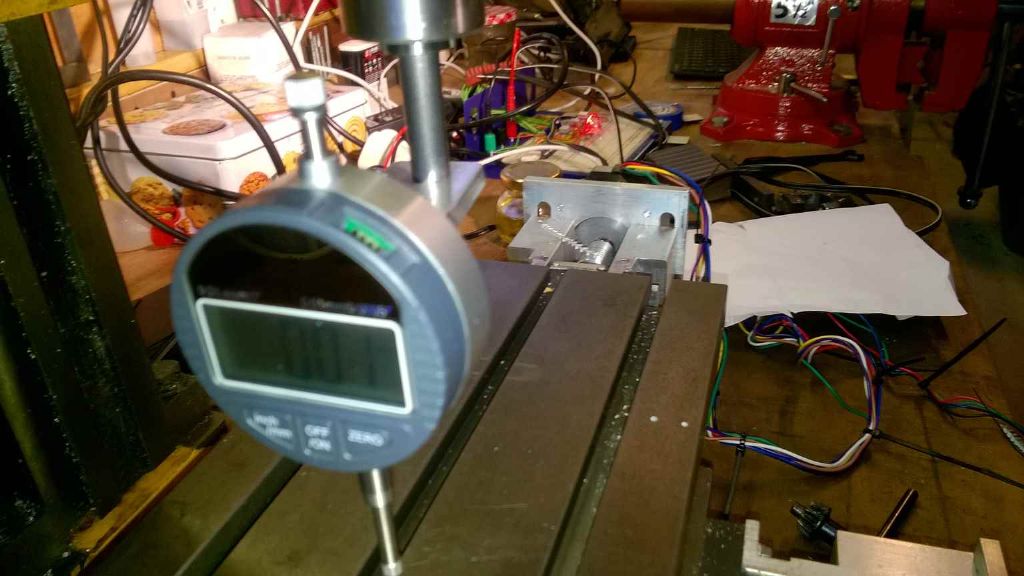
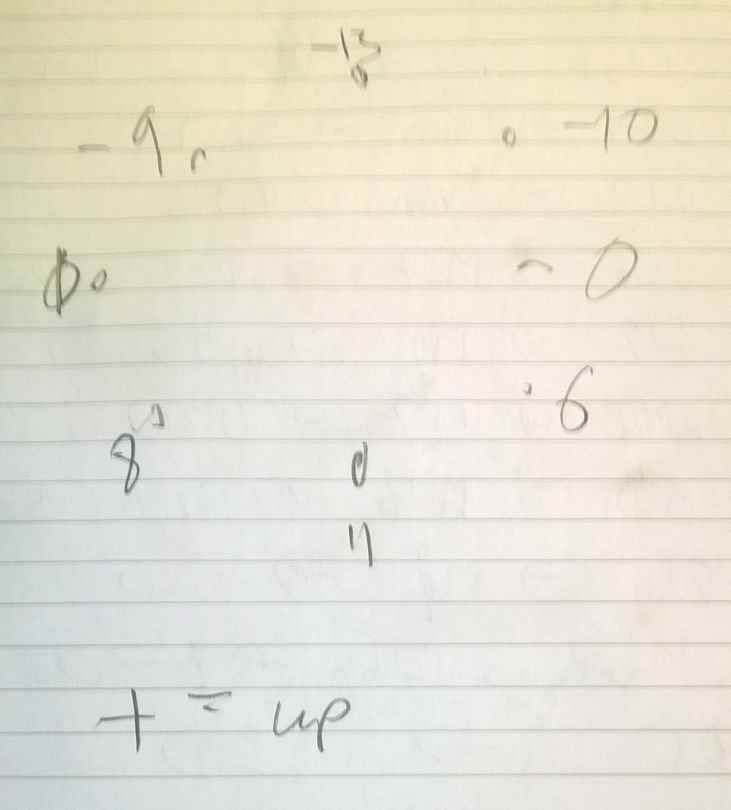
I snuck out. I setup a dial indicator on a stalk attached to a 10 mm rod held in a collet. I swept the indicator round to the 8 cardinal points (more or less - I wasn't bothered about millimetric accuracy). The diameter of the circle is about 12cm and as you can see, left right it's as good as it's going to get. Front back it's about 0.24 mm out with the front of the circle higher than the back (a bigger gap) - the spindle/riser is leaning back. When I measure the fall of the table (by moving the table), I see around 0.13 mm fall over the same distance. So if I corrected the table fall with a shim or scraping the rear way, the tramming would be something like 0.11 mm out front to back (over 120mm). So to fix this I would need to shim the *back* of the riser up by around 0.05mm (2 thou), assuming that the block is about 60mm front to back (not measured this - I'm just trying to establish the principle. Does this make sense? Should I shim or scrape? Frankly, both seem a tad challenging. Where can I get fractional though shims? My feeler gauges go 0.05, 0.10 and so on. Do I really want to scrape this (or the ways...).and are there any tutorials / videos? Also this implies that there will be around a 0.01 rise from the back of the cutter (10mm) to the front which is likely enough to explain the pattern on the 'good' cut. Oh - Andrew, the steel is EN32B from M Machine Metals. Iain |
| 06/06/2016 19:12:19 |
Hi, All. I don't think this is chip welding (but thanks for the description, Michael!). I'm on steel not aluminium with a new carbide cutter and by touch (I've not taken it out of the collet, yet) the edges seem clear and sharp. I have seen this turning aluminium and my original carbide tipped tools have sometimes built up a coating of aluminium on the sharp edge. This doesn't seem to happen with my home ground steel tools. I will do some more investigation (mucking about) later - probably at the weekend. Sadly the day job and family are calling this week so I doubt I will get an I will keep you posted! Iain |
| 05/06/2016 18:06:53 |
Hi, John. I'm not sure I see the same things that you do. I can't see any difference in the alternate cuts. the cuts were made under power with the cutter coming towards, then back then to the right then towards and so on. For a variety of reasons the cutter does not clear the block at the top and I made the cut too short. And the block wasn't square on the table (just lazy on that one). I've fully stripped the machine fairly recently, so I think it's about as good as it can be without fettling. I will try both faster and deeper cuts on this block - it's all part of getting a handle on what the machine can do. as far as fly cutting is concerned, this is a weak and small machine. my one attempt at flycutting mainly had the effect of wearing the cutter flat. I've since learned that this was likely due to this being scrapyard steel with scale on it (no more scrapyard for me!). However, I think it's worth me trying again on this block as a know test piece. Iain |
| 05/06/2016 11:56:40 |
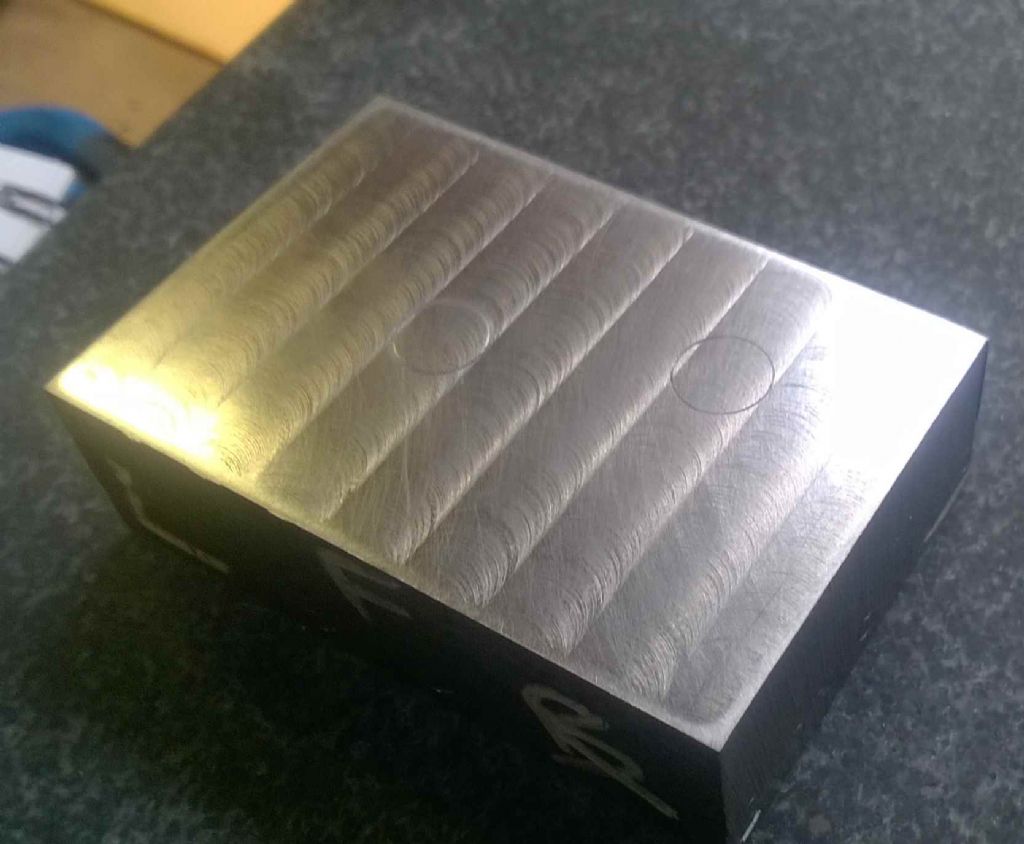
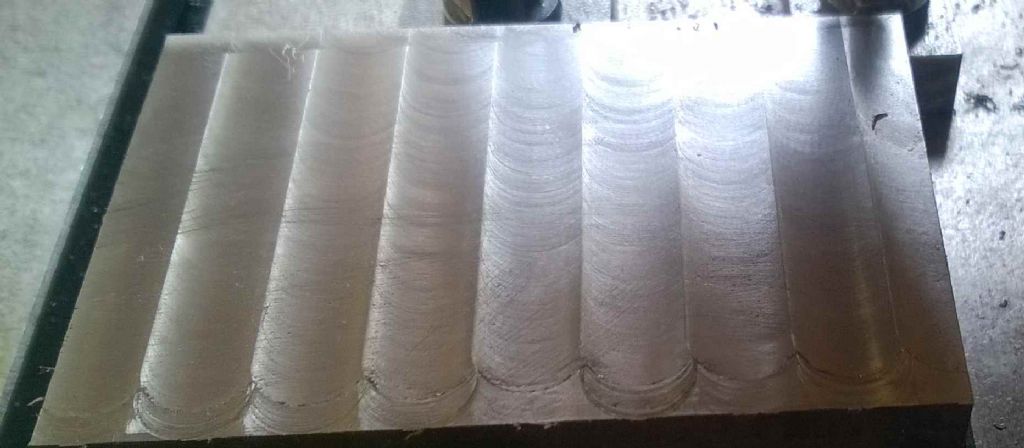
First Prize to Neil, Jason and Dave. The (main) cause is that I'd loosened the Y gibs and not re-tightened them. I'd forgot I;d done it. I tightened up the Y gib and put the speed back up to 2K rpm and this was the result.
Although it looks like I've actually carved semi-circular runnels in the metal (mild steel from m machine metals), it's actually pretty flat. my dial indicators shows a few microns clicker as it passes over the mark. I will take a look at the tramming of the spindle next I think and also a bit more on the levelness of the table. Thanks for all of the help.
Iain |
| Thread: 'Squaring' my mill. |
| 04/06/2016 20:20:03 |
Thanks, martin and RonMc. Which leads me to ask how I would go about scraping the ways. I have a 8x12 (ish) surface plate (barely used) and some scrapers ('cos I thought I ought to have them), but this strikes me as something of a challenge. The ways are long and narrow and with a bit sticking up (down in normal operation) in the middle. They would need to be scraped so that the remain parallel (and flat). I get the basic idea of scraping, but this seems to be graduate level rather than Ordinary level!
Iain |
| Thread: Crop Circles - poor surface when milling |
| 04/06/2016 20:14:17 |
At the moment, my best guess is that the Y gib is a bit loose - I softened it up to try and see why I was having trouble with my CNC conversion and I've not reset it. I shall have a look that tomorrow. The mill has done little other than face this 3 x 2 a dozen times - which is early in life for a carbide mill - at least I hope so at those prices! I've been using paraffin as a cutting fluid. I'm not entirely sure what 'chip welding' is, however google seems to think that a cure with carbide is to speed up. This piece was done at 1000rpm and the other pictures at 2000 rpm. However a previous run at 2K cutting along the X axis was not this bad. I will check the gibs and end mill tomorrow and also try a deeper depth of cut to see if that helps. Mind you I'm trying this out as I want to take about .1 mm off my tailstock which is high, so it's sort of a practice run. But that's another 'how do I...'
Thanks to all.
Iain |
| Thread: 'Squaring' my mill. |
| 04/06/2016 18:45:49 |
But not by shimming the column, I don't think. When I examine the block on a surface table as cut below I see a series of steps. In this case they jump up by about 0.01 mm each pass with the one nearest being ~ .06mm higher than the furthest. The ridges can be felt. Adding .05mm shim under the front end and taking the cuts again results in the front and back being the same height (+/- 0.01mm) and although there are still markings, they are much less pronounced.
If this was the column tilting forward or back, I would expect to see the height consistent from the front to the back, but with each strip ever so slightly angled.. So I think the table is tilted Iain |
| Thread: Crop Circles - poor surface when milling |
| 04/06/2016 18:38:13 |
Interestingly, I've run the cut the other way as per below.
Which is much worse. As far as locking the spindle is concerned (CMD10), I'm not right sure how to do it. there's a hint I saw somewhere about a locking bolt on the bottom right face of the headstock, but if that's the way you lock it, then it's pretty damned stiff and seems to have not much effect on the spindle. The Z axis (the riser) IS locked - that's one I have learned. The ridges are caused (I think) by the table being out. See my other post... |
| Thread: 'Squaring' my mill. |
| 04/06/2016 17:06:39 |
I'm not sure if this is the right term. however, here goes. If I put a dial indicator in my mill spindle, and traverse the table from front to back, i see a drop of about 0.12 mm. If I traverse it left to right then it's pretty much spot on. I'm open to being wrong on this, but I don't think that this is about head tramming, as the head isn't moving. Instead I theorise that the table is effectively at an angle with respect to the base. That is, that the back of the table is just a tad higher than the front. I expect I can sort this by shimming up my work, and am experimenting with this to see if I can get a (nearly) perfectly flat surface. I would expect that the proper fix is most likely to be to reduce the back X jib (the surface on which the table sits, if I have the name wrong). I guess this would need to go down by some 0.08 mm (I've not done the maths). How would I do this? Ideally, an approach that suits my limited equipment (clearly, I can't use the mill...) and even more limited skills. Thanks
Iain |
| Thread: Crop Circles - poor surface when milling |
| 04/06/2016 16:57:05 |
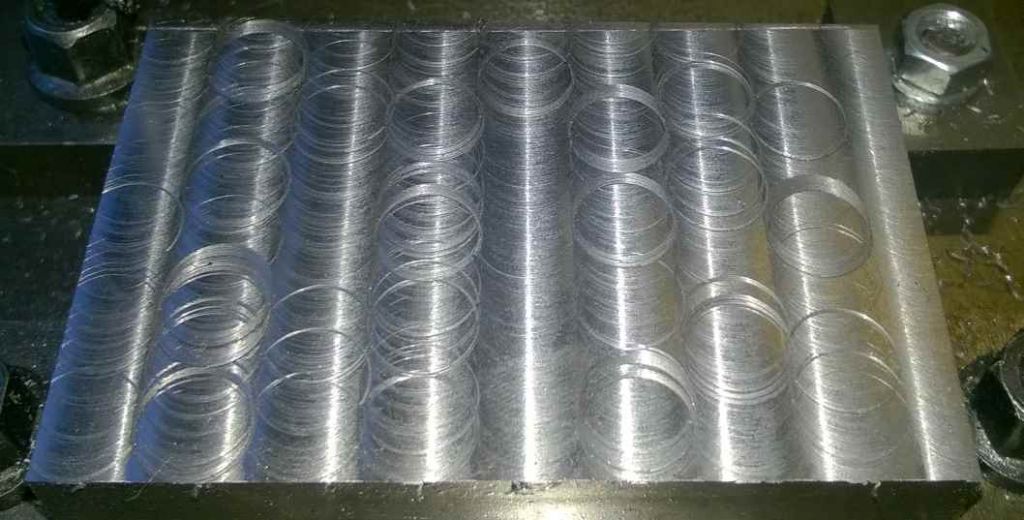
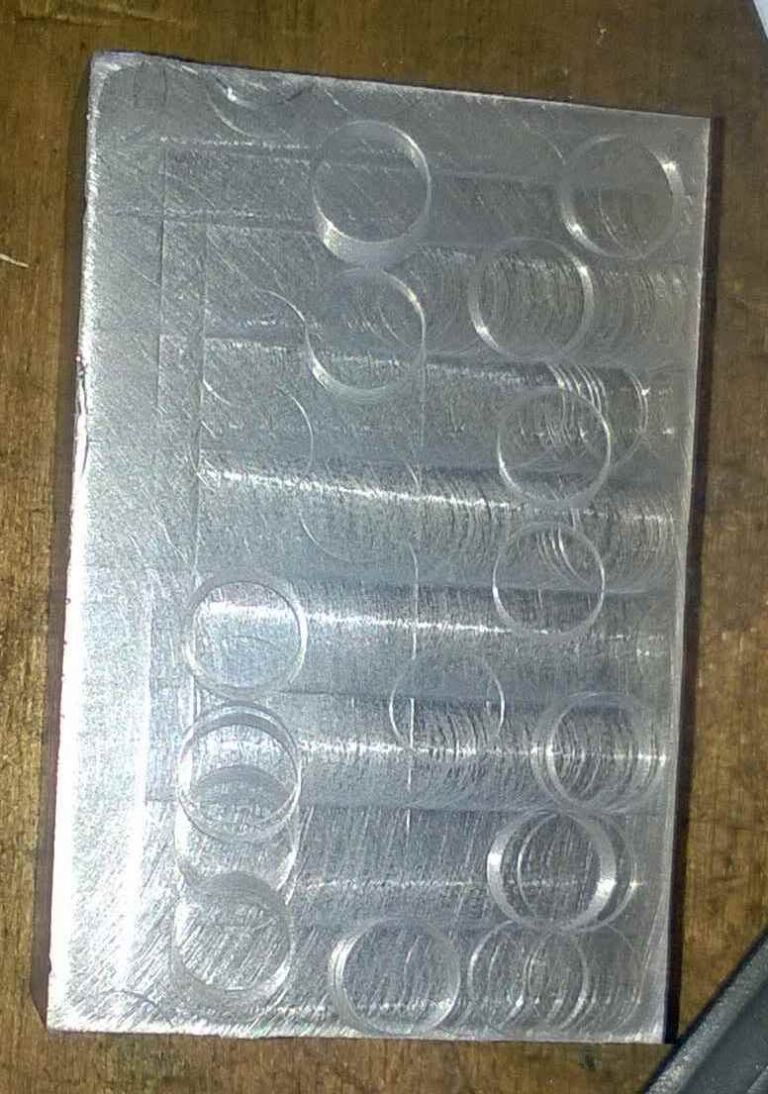
Why do I get 'crop circles' when face milling? Mill is a CMD 10. tool is a 10mm carbide mill from ARC depth of cut about 4 thou / .1mm. The first picture shows the result of a manual cut. The crop circles are plain. I'm in the process of converting the Mill to CNC (of sorts) so the next picture is with the same piece of metal with a power feed (about 4mm / second and whole stop at 100 steps / mm)
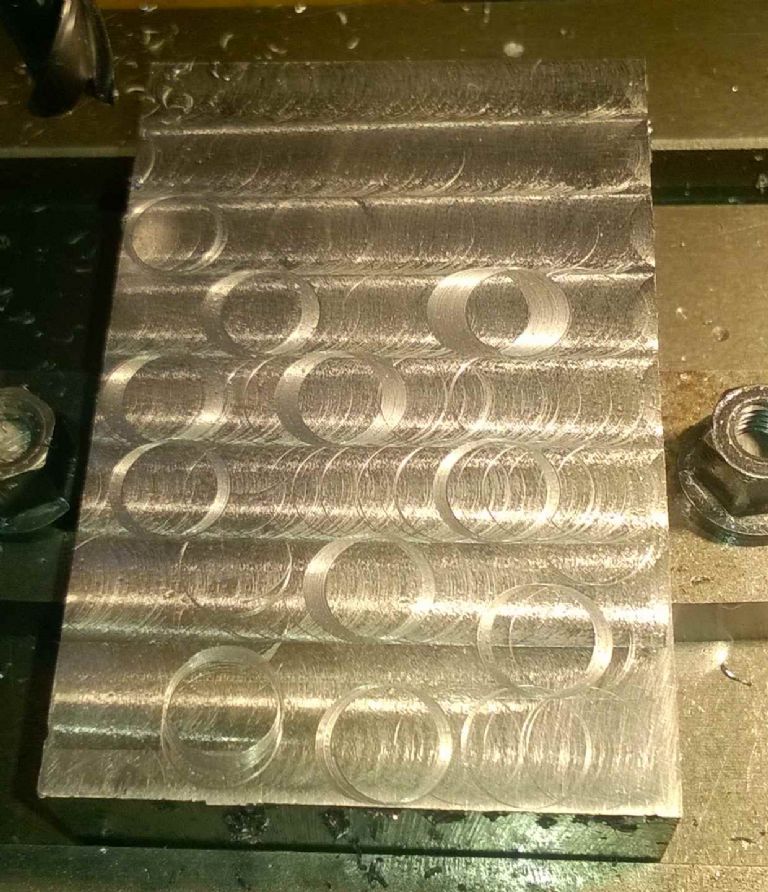
Dissapointing, eh? then I switched to 1/4 step (should be much smoother - and certainly was by sound) and down to 2mm / sec. This one seems much better (the ridges are the subject of my other question). However, here is a second run at the same spec
So what causes the crop circles and how can I adjust the mill to avoid it. I should not that the Z axis is locked, but the spindle is not. Will that make a difference?
Iaiin |
| Thread: The Workshop Progress Thread (2016) |
| 04/06/2016 16:23:45 |
I've been on leave, this week with merry anticipation of loads of swarf making. As you can guess from the first sentence, it didn't work out quite like that. One of my goals was to get my 2 Axis CNC conversion on my little mill finished.. I kind of managed this and it's working sort of, but I made the mistake of deciding to convert my program that drove it to Windows 10 (so I could run if from my phone). Don't ask my why. And don't ask me why I thought that Microsoft for once would have moved versions without totally reworking everything and requiring you to learn it all again. And my arduino code was flawed too Still it's going (of 5 days later than I expected) and I now await the next delay on my project with anticipation (If you're wondering why the motors are different - I started off with a nema 17 then decided I wanted to use NEMA23 - with double ends for manual control. I've not got round to building the brackets for the second NEMA 23 - though I may try that on the Z axis next..) |
Want the latest issue of Model Engineer or Model Engineers' Workshop? Use our magazine locator links to find your nearest stockist!
Sign up to our newsletter and get a free digital issue.
You can unsubscribe at anytime. View our privacy policy at www.mortons.co.uk/privacy
- *Oct 2023: FORUM MIGRATION TIMELINE*
05/10/2023 07:57:11 - Making ER11 collet chuck
05/10/2023 07:56:24 - What did you do today? 2023
05/10/2023 07:25:01 - Orrery
05/10/2023 06:00:41 - Wera hand-tools
05/10/2023 05:47:07 - New member
05/10/2023 04:40:11 - Problems with external pot on at1 vfd
05/10/2023 00:06:32 - Drain plug
04/10/2023 23:36:17 - digi phase converter for 10 machines.....
04/10/2023 23:13:48 - Winter Storage Of Locomotives
04/10/2023 21:02:11 - More Latest Posts...
- View All Topics
- Reeves** - Rebuilt Royal Scot by Martin Evans
by John Broughton
£300.00 - BRITANNIA 5" GAUGE James Perrier
by Jon Seabright 1
£2,500.00 - Drill Grinder - for restoration
by Nigel Graham 2
£0.00 - WARCO WM18 MILLING MACHINE
by Alex Chudley
£1,200.00 - MYFORD SUPER 7 LATHE
by Alex Chudley
£2,000.00 - More "For Sale" Ads...
- D1-3 backplate
by Michael Horley
Price Not Specified - fixed steady for a Colchester bantam mark1 800
by George Jervis
Price Not Specified - lbsc pansy
by JACK SIDEBOTHAM
Price Not Specified - Pratt Burnerd multifit chuck key.
by Tim Riome
Price Not Specified - BANDSAW BLADE WELDER
by HUGH
Price Not Specified - More "Wanted" Ads...
Do you want to contact the Model Engineer and Model Engineers' Workshop team?
You can contact us by phone, mail or email about the magazines including becoming a contributor, submitting reader's letters or making queries about articles. You can also get in touch about this website, advertising or other general issues.
Click THIS LINK for full contact details.
For subscription issues please see THIS LINK.
Model Engineer Magazine
- Percival Marshall
- M.E. History
- LittleLEC
- M.E. Clock
ME Workshop
- An Adcock
- & Shipley
- Horizontal
- Mill
Subscribe Now
- Great savings
- Delivered to your door
Pre-order your copy!
- Delivered to your doorstep!
- Free UK delivery!




 Register
 Log-in


